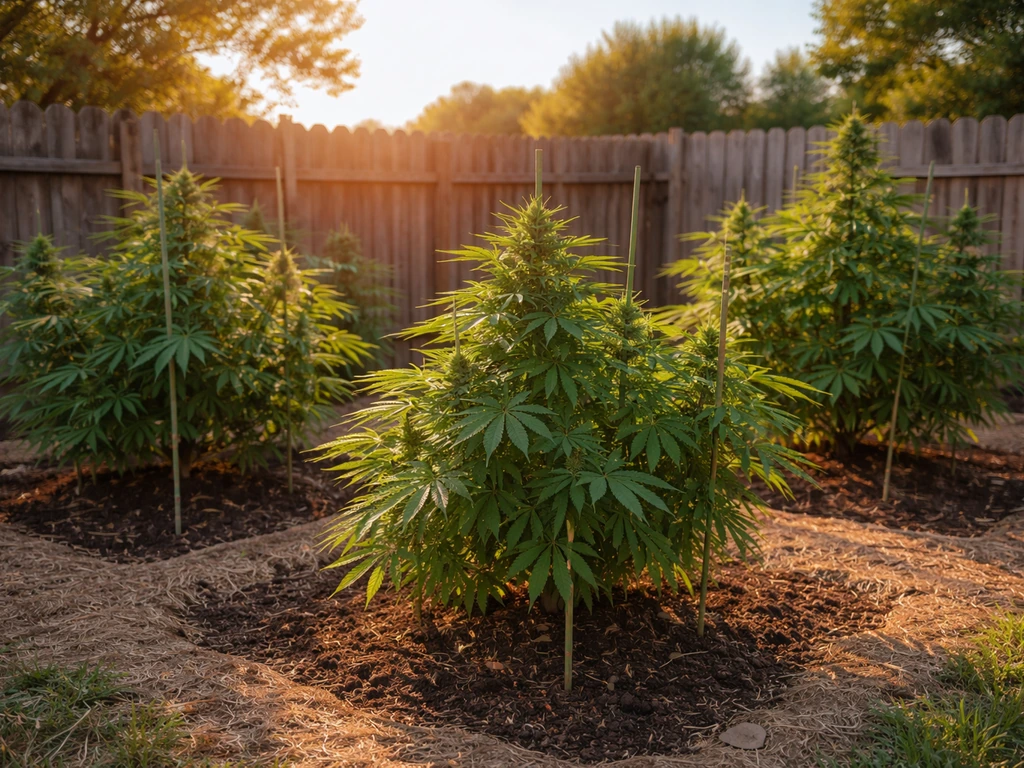
You can grow cannabis from seed outdoors successfully as a complete beginner, but the two things that trip most people up first are legality and timing. Get those right, and the plant does a lot of the heavy lifting on its own. This guide walks you through every stage, from picking the right seed for your climate, to germinating it safely, to harvesting and curing what you've grown, with specific guidance for growers in California, New York, Virginia, Ohio, Oklahoma, and other states where home cultivation has opened up.
How to Grow Weed Seeds Outside: Full Seed-to-Harvest Guide

Marcus Holbrook
12 Jul 2026
Who this guide is for and what it covers
This is a seed-to-harvest outdoor growing guide written for home growers who are starting with cannabis seeds and want to do it correctly the first time. It doesn't matter if you've never grown anything before or if you've done a few indoor grows and want to move outside. The core focus is practical and legal: what you're allowed to grow, how many plants, where they need to be, and then how to actually grow them well in real outdoor conditions. I've made most of the rookie mistakes covered here, and I'll tell you what I'd do differently now.
Whether you're in a long warm season like coastal California, a short humid summer in the Northeast, or an arid climate like Oklahoma, the fundamentals are the same. What changes is your strain choice, your planting calendar, and a few management decisions around water and disease pressure. All of that is covered here. If you're growing in a specific state, there are also more detailed regional guides available for California, New York, Virginia, Ohio, and Oklahoma that go deeper on local rules and conditions. See our guide on how to grow weed outside in Oklahoma for localized planting calendars, strain recommendations, and legal considerations. For a detailed, state-specific walkthrough on timing, strain selection, and legal compliance in Virginia, see our guide on how to grow weed in Virginia. For a step-by-step California-specific guide on timing, strains, and local rules, see how to grow weed outside in CA.
Legality and compliance: check this before you plant a single seed
Cannabis law in the U.S. is genuinely complicated right now. As of mid-2026, the federal government has partially rescheduled marijuana: FDA-approved drug products containing marijuana, and marijuana products subject to a qualifying state medical license, were placed in Schedule III of the Controlled Substances Act in April 2026. But broader rescheduling is still subject to an ongoing administrative hearing that began June 29, 2026. That means for home growers, state and local law is still the practical rulebook. Federal law does not currently authorize personal cultivation at home.
State laws vary enormously in both what's allowed and how it's enforced. Below is a summary of current plant limits in states with active home-grow provisions, followed by a compliance checklist you should work through before your seeds go in the ground.
| State | Who Can Grow | Plant Limit (per person) | Max Plants per Residence | Key Conditions |
|---|---|---|---|---|
| California | Adults 21+ | 6 living plants | 6 per residence | Local jurisdictions may ban outdoor cultivation; indoor cannot be fully banned by localities |
| New York | Adults 21+ | 6 plants (3 mature + 3 immature) | 12 per residence (6 mature + 6 immature) | Must be secured; inaccessible to under-21s; municipalities may add rules but cannot ban home growing |
| Virginia | Adults 21+ | 4 plants per household | 4 per household | Must tag each plant with grower name and ID; civil/criminal penalties for exceeding limits |
| Ohio | Adults 21+ | 6 plants per adult | 12 per residence | Must be in secured/locked area; not visible to public; inaccessible to under-21s (SB 56, effective March 20, 2026) |
| Oklahoma | Registered medical patients only | 6 mature + 6 seedlings | 12 total | Requires active OMMA patient registration; 8 oz at-home harvest possession limit; verify current OMMA rules |
Compliance checklist before you start
- Confirm your state and local law: state limits are a ceiling, not a floor — your city or county may have stricter rules or ban outdoor cultivation entirely (California counties are a clear example of this)
- Verify your eligibility: most states require you to be 21+ for recreational cultivation; Oklahoma requires an active OMMA medical patient registration
- Get landlord or property owner permission in writing if you rent — both California and New York guidance explicitly notes that landlords can prohibit cultivation on their property
- Check visibility requirements: Ohio requires plants to be in a secured, locked area not visible to the public; similar 'not visible from a public space' rules appear in many local ordinances
- In Virginia, tag every plant with your legal name and a form of ID — this is a statutory requirement, not optional
- Keep a simple record: date of germination, strain, number of plants, and plant count relative to your legal limit — this protects you if you're ever questioned
- Never sell home-grown cannabis — no state home-grow law authorizes sales, and the penalties are in a completely different category than personal cultivation
- If you're growing in a state not listed above, check your state's equivalent of an Office of Cannabis Management or Cannabis Control Authority before planting
Key decisions to make before you buy seeds
A lot of new growers jump straight to shopping for seeds without thinking through the decisions that will shape their entire grow. Spending 20 minutes on these questions upfront saves weeks of frustration later.
Photoperiod vs. autoflowering
Photoperiod cannabis plants flower in response to shortening daylength. Most cultivars begin flowering when nights approach 11 to 13 hours, depending on the genetics. Outdoors, this means they naturally transition from vegetative growth to flowering in late summer and typically harvest in September through November. This gives you a long veg season and usually larger plants and heavier yields, but it also means a single annual harvest window and a tight dependency on your frost calendar.
Autoflowering plants flower based on age, not light. They carry genetics originally derived from Cannabis ruderalis, which is day-neutral. Most modern autoflowers are ready to harvest around 8 to 12 weeks from seed, which means you can start them later, finish before a late-season frost, or even run two successive cycles in a long growing season. The tradeoff is that autoflowers are generally harder to train and their yields per plant are lower than mature photoperiod plants, though the gap has narrowed significantly with modern breeding.
For beginners in short-season states like Ohio, Virginia, or New York, autoflowers are often the easier starting point because they remove the timing pressure around frost dates. For growers in California or Oklahoma with long warm seasons and no ambiguity about frost, photoperiod plants can reward the patience with significantly larger harvests.
Feminized vs. regular seeds
Cannabis is predominantly dioecious, meaning plants are either male or female. Female plants produce the flower (bud) you're after. Male plants produce pollen and, if left near females, will trigger seed production rather than sinsemilla (seedless) flower. Regular seed lots produce roughly 50% male plants under standard genetic expectations. Feminized seeds are produced through hormonal or chemical techniques that force female plants to produce pollen, resulting in seeds that grow into female plants more than 95% of the time. Development and validation of genetic markers for sex and cannabinoid chemotype in Cannabis sativa (Toth et al., 2020) describes molecular sex markers that can be used to determine plant sex at the seedling stage. For home growers with a limited plant count under the law, feminized seeds are almost always the better choice, you don't want to spend a quarter of your plant limit on males you'll have to remove.
Container vs. in-ground
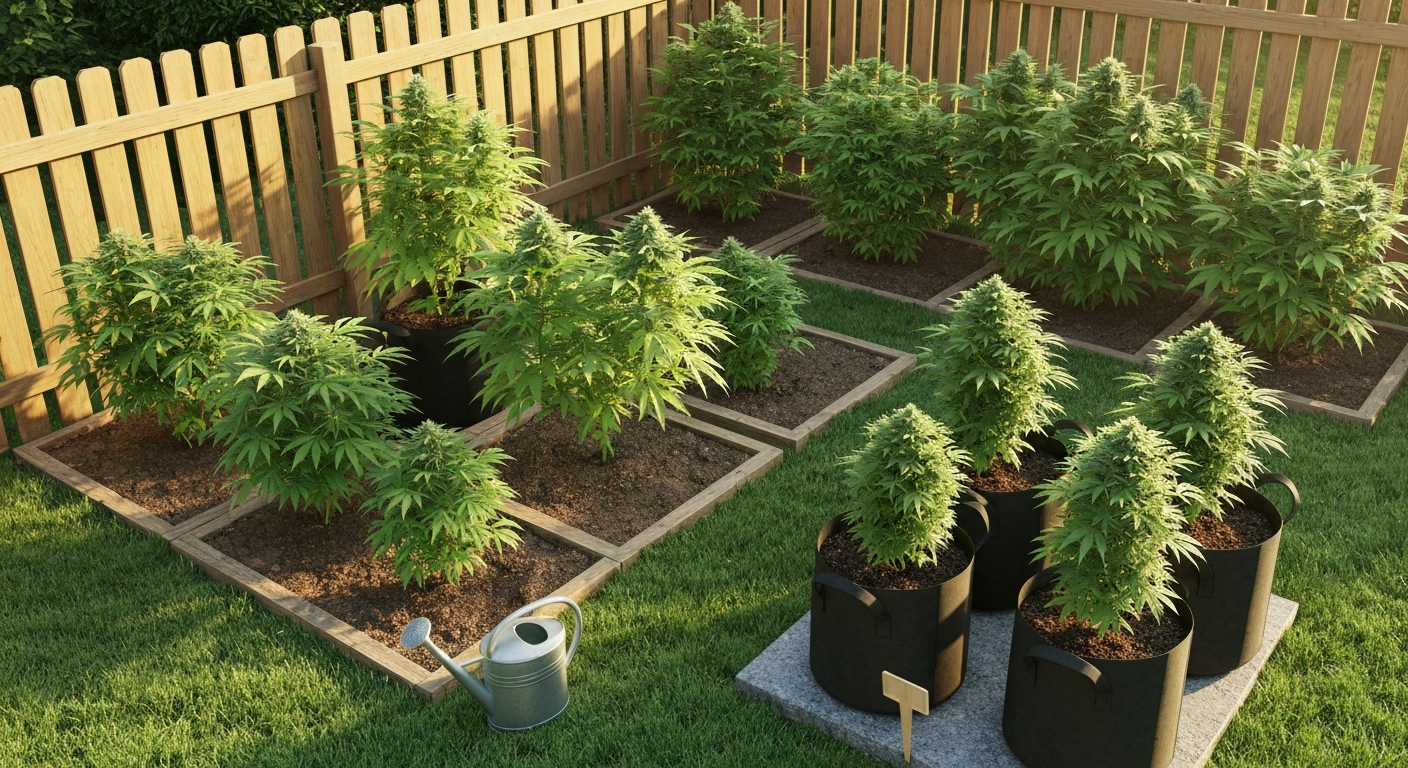
Growing in containers gives you mobility (you can move plants to optimize sun or hide them during a storm), better drainage control, and the ability to use a custom soil mix from day one. The limitation is that container plants are volume-constrained, a 20-gallon pot can support a big plant, but a plant in native ground can grow substantially larger in a good season. In-ground growing requires more soil preparation upfront but generally supports larger root systems, better moisture retention, and higher yields per plant. If your outdoor site has poor native soil or visibility concerns that require flexibility, containers are worth the tradeoff.
Direct sow vs. starting indoors
Direct sowing means germinating and planting your seeds straight into their final outdoor location. Starting indoors means germinating inside and transplanting seedlings once conditions are right. The choice comes down to your frost calendar and site soil temperature. Direct sowing works well when soil temperature is consistently above about 19°C (66°F) and there's no frost risk, conditions that don't arrive until late May or June in many northern states. Starting indoors lets you get a 3 to 6 week head start on the season and gives seedlings a protected environment during their most vulnerable stage. The detailed comparison is covered in a dedicated section below.
Choosing seeds and strains for your climate
The best strain for your garden is the one that finishes before your first fall frost, handles your local humidity and temperature swings, and produces the cannabinoid profile you're looking for. Every other consideration is secondary. I've seen growers chase the most hyped genetics only to watch them rot in the rain or stall out in the first cold snap of October.
Climate matching by region
- Mediterranean climates (coastal and central California): long, dry, warm seasons make this the most forgiving environment for outdoor cannabis. You can run large photoperiod plants to full maturity. Prioritize mildew-resistant genetics if you're near the coast where morning fog is common. Heat-tolerant sativa-dominant genetics thrive here.
- Humid continental (New York, Virginia, Ohio): summer humidity brings botrytis (bud rot) and powdery mildew risk, especially in the final weeks of flower. Choose varieties specifically noted for mildew and botrytis resistance. Early-finishing photoperiod strains (ready by late September) or autoflowers are strong choices.
- Semi-arid (Oklahoma and similar): heat tolerance and drought resistance are the priorities. Irrigation planning matters more here than anywhere. Varieties with good heat stress tolerance and deep root structures perform better. Look for cultivars with breeder notes about high-temperature performance.
- Short northern seasons (upstate NY, northern OH, most of VA): autoflowers are often the most practical choice. Photoperiod strains should be early-finishing varieties (breeders often list 'harvest outdoor: September' as a marker for these).
What to look for on a seed listing
- Outdoor harvest window: listed as a calendar month or range — anything finishing after October is risky in northern states
- Flowering time from seed (for autoflowers) or from flip (for photoperiods): 8–10 weeks for autos is realistic for a fast cycle; 9–11 weeks of flower for photoperiods is a reasonable outdoor estimate
- Disease resistance notes: reputable breeders will flag mildew, botrytis, or pest resistance in cultivar descriptions — treat the absence of this information as a yellow flag in humid climates
- THC/CBD chemotype: decide whether you want a high-THC variety, a balanced THC:CBD ratio, or a high-CBD/low-THC cultivar, and choose seeds accordingly
- Yield range: breeders usually publish this as grams per plant (outdoor) — treat high estimates with healthy skepticism and focus on the lower end of the range as a planning figure
- Genotype x environment stability: some strains perform consistently across diverse conditions; others are highly sensitive to climate variables. Strain reviews from growers in your region are more useful than breeder marketing copy.
Beginner's quick-start 5-step plan
If you want the shortest path to getting seeds in the ground legally and correctly, here it is. This is the stripped-down version, each step is covered in much more detail in the sections that follow.
- Confirm your legal plant limit and any local conditions (visibility, locks, tags) for your specific state and municipality before purchasing anything
- Choose a feminized autoflowering strain suited to your climate (early-finishing, mildew-resistant if you're in a humid region) — this removes the most common beginner complications around timing and male plants
- Germinate using the paper towel method (detailed below) indoors, 2 to 3 weeks after your last average frost date or when outdoor soil temperatures are consistently above 19°C (66°F)
- Transplant or direct-sow into a well-draining, nutrient-rich medium in a site that gets at least 6 to 8 hours of direct sun daily, with access to water
- Water consistently (not excessively), check plants every 2 to 3 days for signs of pests or nutrient issues, and follow the breeder's harvest timeline — harvest when trichomes are milky to amber under a jeweler's loupe
Germination methods: getting your seeds to sprout
Cannabis seeds germinate best at temperatures between roughly 24 and 30°C (75 to 86°F), and most healthy seeds from reputable breeders will sprout within 2 to 5 days when kept moist and warm. The method you use mainly affects how much control you have over the environment and how much handling stress the seedling experiences.
Paper towel method
This is the most common home method and the one I use most often. Dampen two sheets of paper towel (moist but not dripping), place your seeds between them, fold the towel over, and put it on a plate. Slide the plate into a zip-lock bag or cover it with another plate and put it somewhere warm, like the top of a refrigerator or near a heat source. Check every 12 to 24 hours. The taproot usually emerges within 24 to 72 hours. Transfer to soil when the taproot is about 5 to 10 mm long, placing the root downward. The main risk is tearing the taproot during transfer if you're not careful, use tweezers and handle the seed body, not the root.
Water soak method
Drop seeds into a glass of room-temperature water (around 22°C / 72°F). Seeds that float can be gently pressed down. Leave for 14 to 24 hours maximum, more than 24 hours risks drowning the embryo. Once seeds have sunk and a small taproot is visible, transfer to your growing medium. This method works well for seeds with harder shells, as the soak softens them. The downside is it's easy to overdo the soak time, and you still have to transfer a fragile sprouted seed.
Pre-soaked plugs and peat pots
Rockwool plugs, jiffy pellets, and peat pots let you germinate directly in a starter medium that travels with the seedling at transplant, reducing root disturbance. Moisten the plug, push the seed about 5 to 10 mm deep, and keep it in a warm, humid environment (a propagation tray with a dome works well). This is the method with the least physical handling of the germinating seed. The limitation is that peat pots and jiffy pellets can dry out quickly in warm conditions and need consistent monitoring. Rockwool is pH-sensitive and should be pre-soaked in pH 5.5 to 6.0 water before use.
Germination method comparison
| Method | Ease for Beginners | Transplant Stress | Cost | Best For |
|---|---|---|---|---|
| Paper towel | High — easy to monitor | Moderate — careful handling needed | Near zero | Most home growers; fast visual feedback |
| Water soak | High — minimal equipment | Moderate — same transfer step | Near zero | Seeds with hard shells; paired with paper towel after soak |
| Pre-soaked plugs (jiffy/peat) | Medium — needs propagation tray | Low — plug goes directly to pot | Low ($0.50–$1.50 per plug) | Growers who plan to transplant seedlings after 2–3 weeks |
| Rockwool cubes | Medium — pH management needed | Very low | Low | Growers comfortable with basic pH management |
Direct sow vs. starting indoors: which approach is right for your season
Direct sowing cannabis seeds into their outdoor location is the simplest possible approach, and it works well when conditions are right. The problem is that 'when conditions are right' often means a narrow window that many growers in northern states don't hit until June, which can eat significantly into the vegetative season for photoperiod plants. Starting indoors lets you bank 3 to 6 weeks of vegetative growth in a protected environment, then move already-established seedlings outside when the weather cooperates.
When direct sowing works
- Soil temperature is consistently above 19°C (66°F) at 5 cm depth — below this, germination rates drop and seedlings are vulnerable
- No frost risk for at least 4 to 6 weeks after planting
- You're growing autoflowers, where losing 3 weeks to indoor starting doesn't shorten a critical photoperiod window
- Your site has good, prepared soil with adequate drainage — direct-sown seedlings compete with soil structure challenges from day one
- You're in a warm climate (California, Oklahoma) where the season is long enough that a late May or early June direct sow still gives full plant development time
When starting indoors makes more sense
- You're in a short-season state (Ohio, Virginia, New York) and want photoperiod plants to reach significant size before flowering begins
- Your last frost date is after mid-May and you want to maximize vegetative time
- You want higher seedling survival rates — indoor-started seedlings transplanted at 2 to 4 weeks old are more robust than freshly germinated seeds exposed to outdoor temperature swings, pest pressure, and variable moisture
- You're growing in containers and can transition them outdoors incrementally (hardening off over 5 to 7 days)
Planting calendar by region
| Region / State | Last Average Frost | Start Indoors (Photoperiod) | Transplant / Direct Sow Outdoors | Expected Harvest Window |
|---|---|---|---|---|
| Coastal California | January–February (many areas frost-free) | February–March | March–April | October–November |
| Central/Southern California | February–March | March | April–May | October–November |
| Oklahoma | Late March–Mid April | March | Late April–Early May | September–October |
| Virginia (central) | Mid April | Late March–Early April | Late April–Mid May | Late September–October |
| Ohio (central) | Late April–Early May | Early–Mid April | Mid May | Late September–October |
| New York (downstate) | Mid April | Late March | Late April–Early May | Late September–October |
| New York (upstate) | Mid May | Late April | Late May–Early June | September (early finishers only) |
Picking the right outdoor site
The single most important factor in your outdoor site is sunlight. Cannabis grown in full, direct sun consistently outperforms plants in partial shade in both yield and potency. Aim for a minimum of 6 hours of direct sun per day, 8 or more is better. If you're choosing between two spots and one gets more morning sun while the other gets more afternoon sun, choose the one with morning sun in humid climates, as it dries morning dew faster and reduces disease pressure.
Sun, wind, and drainage
South-facing slopes and spots with unobstructed southern exposure maximize light hours. Wind is a two-edged factor: a light breeze strengthens stems and reduces humidity around the canopy, but strong or constant wind stresses plants and damages branches. A site with natural windbreaks (a fence, hedge, or building) on the prevailing wind side while remaining open to the south is ideal. Drainage is non-negotiable, cannabis roots do not tolerate waterlogged soil. Avoid low-lying areas that collect water after rain. If your only available spot has poor drainage, raised beds or containers are the solution, not amended native soil.
Microclimates and heat sinks
Walls, fences, and paved surfaces absorb heat during the day and radiate it at night, creating a microclimate that can be several degrees warmer than the surrounding area. In northern states, placing containers near a south-facing masonry wall can extend your effective growing season by 2 to 3 weeks on either end. In hot climates like Oklahoma or the Central Valley of California, that same heat sink can become a liability in mid-summer, so consider afternoon shade in those environments.
Privacy, security, and access
Privacy is both a legal requirement in several states (Ohio, for example, mandates that plants not be visible from a public space) and a practical security measure. Even in fully legal growing states, mature cannabis plants in plain view attract unwanted attention and theft risk. Natural screening with tall plants or fencing is more durable than tarps or temporary covers. If you're using containers, the ability to move them indoors during extreme weather events or periods of concern is a genuine advantage. Ensure your grow site has reliable water access, hauling water to a remote corner of a large property becomes a real chore by mid-season when plants may need 5 to 10 liters per day in hot weather.
Containers vs. in-ground: site-level tradeoffs
| Factor | Containers | In-Ground |
|---|---|---|
| Mobility | High — can move for sun, weather, security | None |
| Root volume / plant size | Limited by pot size (20–30 gal for large plants) | Effectively unlimited in good soil |
| Drainage control | Excellent — controlled by pot and mix | Dependent on native soil structure |
| Soil quality | Full control from day one | Requires preparation and amendment |
| Watering frequency | Higher — pots dry faster | Lower — ground retains moisture longer |
| Stealth/visibility management | Easier to relocate or conceal | Fixed — plan the location carefully |
| Setup cost | Moderate (pots, quality soil mix) | Low if native soil is workable; higher if heavy amendment needed |
Soil preparation and amendments
Cannabis grows well in a loamy, well-draining soil with a pH between 6.0 and 7.0 for soil grows. Outside of that range, nutrient lockout starts affecting uptake regardless of how much you're feeding. If you're growing in containers, a quality cannabis-specific or all-purpose potting mix amended with 20 to 30% perlite for drainage is a solid starting point. For in-ground growing, take a soil test before you start, most cooperative extension services offer inexpensive tests that give you pH, macronutrient levels, and organic matter content. Amend heavy clay soils with compost and perlite or coarse sand to improve drainage. Sandy soils benefit from added compost and coco coir to improve moisture retention. In both cases, a generous layer of compost worked into the planting hole (20 to 30 cm deep) gives roots immediate access to organic matter and biological activity.
Transplanting, vegetative growth, and flowering care
Transplanting seedlings outdoors
Before moving indoor-started seedlings outside, harden them off over 5 to 7 days. Start by putting them outside in a shaded or partially shaded spot for 2 to 3 hours, then increase sun exposure and outdoor time progressively. Skipping this step and moving seedlings from indoor conditions straight to full sun is a reliable way to cause severe light stress and set back growth by a week or more. I've done it in a hurry before, don't. Transplant into a pre-watered hole, disturb the root ball as little as possible, and water again immediately after.
Watering
The most common beginner mistake with cannabis (and most other plants) is overwatering. Cannabis roots need oxygen, and constantly saturated soil cuts off that oxygen and creates conditions for root rot. The general rule: water when the top 2 to 5 cm of soil is dry, and water thoroughly until you see runoff from container drains. In containers, this often means watering every 1 to 3 days in warm weather. In-ground plants in good soil may need water only every 3 to 5 days depending on temperature and rainfall. During late flower, plants drink more, check more frequently. A simple finger test (push your finger 2 cm into the soil, if it's damp, wait) is all you need to start.
Feeding schedule
During vegetative growth, cannabis needs higher nitrogen relative to phosphorus and potassium. During flowering, the ratio shifts, nitrogen is reduced and phosphorus and potassium are increased to support bud development. A straightforward approach for beginners is a quality organic granular fertilizer worked into the soil at planting (a balanced N-P-K like 4-4-4 or similar), then a top-dressing of a bloom-specific fertilizer (lower N, higher P-K) when flowering begins. If you're using liquid nutrients, follow the manufacturer's feeding schedule at half the recommended dose until you understand how your plants respond, overfeeding is a more common and more damaging problem than underfeeding for beginners. Flush your containers with plain water every 3 to 4 weeks to prevent salt buildup from mineral nutrients.
Training and pruning methods
Training isn't strictly necessary for a first grow, but even basic techniques can meaningfully increase yield from the same plant and the same legal plant count. Here are the main methods used outdoors, in order of complexity.
- Low-stress training (LST): bend and tie branches outward and downward to open the canopy and expose lower growth sites to light. Use soft plant ties or pipe cleaners on branches 3 to 5 mm in diameter. Start during vegetative growth. This is the easiest method and the one I'd recommend for beginners — low risk, meaningful reward.
- Topping: cut the main growing tip (the apical meristem) just above a node, which causes the plant to develop two main colas instead of one. This creates a bushier, more even canopy. Do it during vegetative growth when the plant has 4 to 6 nodes. Don't top autoflowers — their abbreviated timeline means they rarely recover the lost growth before flowering begins.
- SCROG (Screen of Green): stretch a horizontal mesh or trellis above the plants and weave branches through it as they grow, creating an even, flat canopy that maximizes light exposure. More setup than LST but well-suited for maximizing yield from a small plant count. Requires consistent attention during the first half of the vegetative period.
- Defoliation: selectively removing fan leaves that block light to lower bud sites. Use sparingly — removing too many leaves at once stresses the plant. Light defoliation in mid-veg and early flower is generally beneficial; aggressive defoliation just before or during peak flower is risky.
Pest, disease, and environmental troubleshooting
Outdoor plants encounter real-world pressure that indoor grows never face. The key is identifying problems early, when intervention is still easy, rather than late, when the plant is already significantly damaged.
Common pests
- Spider mites: tiny yellow or white speckling on upper leaf surfaces with fine webbing underneath. Thrive in hot, dry conditions. Treat with neem oil spray or insecticidal soap; improve air circulation.
- Aphids: soft-bodied insects clustering on new growth and undersides of leaves; produce sticky honeydew. Remove by hand, use insecticidal soap, or introduce beneficial insects (ladybugs).
- Caterpillars/budworms: physical chew damage and frass (droppings) inside buds. Hand-pick; apply Bacillus thuringiensis (Bt) as a foliar spray — it's organic, effective, and doesn't leave harmful residues.
- Root aphids and fungus gnats: damage roots and stunt growth. Reduce overwatering (which creates the conditions they need), apply beneficial nematodes to soil, and use yellow sticky traps to monitor adult fungus gnats.
Common diseases
- Powdery mildew: white, powdery coating on leaf surfaces. Thrives in high humidity with poor airflow. Treat with potassium bicarbonate spray; prune affected leaves; improve canopy airflow through defoliation and spacing.
- Botrytis (bud rot): gray mold inside dense buds, especially in late flower during cool, wet conditions. Remove and destroy affected material immediately. Prevention (airflow, mildew-resistant strains, early harvesting in a wet season) is far more effective than treatment.
- Root rot (Pythium): yellowing, wilting plants despite adequate water, with brown mushy roots. Caused by overwatering and/or poor drainage. Improve drainage, reduce watering frequency, and apply beneficial microorganisms like Trichoderma or mycorrhizae.
Environmental stress
- Heat stress (above 30–32°C / 86–90°F): leaf curling upward ('taco-ing'), bleached tips on buds. Shade cloth (30–40% block) or moving containers to afternoon shade can help in extreme heat.
- Nutrient deficiency vs. toxicity: yellowing leaves are the most common visible symptom, but the cause varies widely — a nitrogen deficiency looks different from an iron deficiency or pH-induced lockout. Before adding more nutrients, check your soil pH — most deficiency symptoms in cannabis result from pH drift outside the 6.0 to 7.0 range rather than actual nutrient absence.
- Overwatering: drooping, heavy-looking leaves on a well-watered plant. Reduce watering frequency. If the problem is persistent, check drainage and consider repotting into a more porous mix.
Security and stealth considerations
Growing legally doesn't eliminate all risk. Mature cannabis plants are distinctive in appearance, have a strong odor in late flower, and can attract theft. Beyond the legal visibility requirements already mentioned (Ohio, many local ordinances), thinking about stealth is simply practical. Natural screening with tall companion plants (sunflowers, tomatoes, and corn are commonly used) can break up the distinctive silhouette of cannabis at ground level. Tall fencing that meets local code can serve dual purposes. Motion-sensor lighting discourages nighttime access. If you're in a container setup, don't leave plants unattended for extended periods during harvest season, that's when theft risk peaks.
Harvest timing, drying, and curing
Knowing when to harvest
The most reliable way to assess harvest timing is by examining trichomes with a jeweler's loupe (30 to 60x magnification) or a pocket microscope. Trichomes progress from clear (not ready) to cloudy/milky white (peak THC, more cerebral effect) to amber (THC degrading to CBN, more sedating effect). Most growers harvest when 70 to 90% of trichomes are milky with 10 to 30% amber, depending on the effect they're after. At the canopy level, you can also watch pistils (the hair-like structures on buds), harvest is approaching when 70 to 90% have darkened and curled inward. Breeder harvest timelines are useful starting points but plants in your specific conditions may run a week earlier or later.
Drying
After harvest, hang whole branches or individual buds in a dark, well-ventilated room at 15 to 21°C (60 to 70°F) with 45 to 55% relative humidity. Avoid drying in direct sunlight or with forced-air heating, both of which degrade terpenes and cannabinoids and produce harsh-tasting flower. Slow drying (7 to 14 days) consistently produces better results than fast drying. Buds are ready to move to the cure when small stems snap rather than bend.
Curing
Curing is the stage that separates genuinely good cannabis from mediocre flower. Place dried buds loosely in airtight glass jars (mason jars work perfectly) at 15 to 21°C and 58 to 65% humidity. For the first week, open the jars once or twice daily for 10 to 15 minutes (called 'burping') to release moisture and exchange air. After the first week, reduce burping to every few days. A minimum cure of 2 to 4 weeks significantly improves flavor and smoothness. 4 to 8 weeks is better. Properly cured cannabis stored in sealed glass jars in a cool, dark location will remain high quality for 6 to 12 months.
Seasonal calendar: a full outdoor grow at a glance
| Month (Northern Hemisphere) | Activity | Notes |
|---|---|---|
| February–March | Planning, seed sourcing, legal review | Confirm plant limits, landlord permission if renting, order seeds from reputable breeders |
| March–April | Start indoors (photoperiod, northern states); germinate autos for warm climates | Use paper towel or plug method; maintain 24–28°C germination temperature |
| April–May | Harden off indoor seedlings; prepare outdoor site; amend soil | Last frost dates drive timing; harden off over 5–7 days before full outdoor exposure |
| May–June | Transplant outdoors or direct sow; begin training | Start LST when plants have 4–6 nodes; top photoperiods before June in northern states |
| June–August | Vegetative growth; feeding, watering, pest monitoring | Increase water frequency in heat; monitor for pests weekly; apply Bt preventively if caterpillars are present in your area |
| August–September | Flowering begins (photoperiods); continue feeding with bloom formula | Watch for botrytis in humid climates; reduce nitrogen; increase P-K feeding |
| September–October | Final ripening; trichome monitoring; harvest | Autoflowers may be done earlier; harvest window is weather-dependent — don't wait too long in a wet fall |
| October–November | Drying and curing | Maintain 45–55% RH during drying; cure in sealed glass jars; burp daily for first week |
Regional adaptations: quick notes by state
If you're growing in a specific state, the general principles above apply everywhere, but local conditions shape your decisions meaningfully. California growers benefit from one of the best outdoor cannabis climates in the world, but local ordinances vary wildly, your county or city rules may be more restrictive than the state's 6-plant limit, and coastal fog zones demand mildew-resistant strains. California Health & Safety Code §11362.2 allows adults 21 and older to cultivate up to six living cannabis plants per private residence and permits local governments to adopt reasonable regulations, including banning outdoor cultivation on private property, while not fully prohibiting indoor cultivation inside a private residence blank" rel="noopener noreferrer">California Health & Safety Code §11362.2 (personal cultivation limits and local regulation). Growers in New York face shorter seasons upstate and humidity risk downstate during late flower; early-finishing or auto varieties are worth the tradeoff in both cases. Virginia's 4-plant household limit is one of the more restrictive among legal states, which puts a premium on maximizing each plant's performance through training and good strain selection. Ohio's home-grow law only became effective in March 2026, so this is genuinely the first full outdoor season many Ohio growers will be operating legally, the locked-area and not-visible-to-public requirements are worth taking seriously. For a state-focused walkthrough, see our guide on how to grow weed in Ohio. Oklahoma's cultivation remains tied to medical registration, meaning non-patients don't have a home-grow pathway there yet. For each of these states, there are dedicated growing guides in this library that go into much more local detail on timing, regulations, and regional technique. See our detailed guide on how to grow weed outdoors in NY for region-specific timing, strain recommendations, and local legal considerations.
Final thoughts: what actually matters on a first outdoor grow
Every experienced grower I know made mistakes on their first outdoor grow. Plants that got overwatered, seeds that went in too early and stalled in cold soil, a harvest left two weeks too long in a wet October. The good news is that cannabis is genuinely resilient, and the basics, full sun, good drainage, appropriate strain for your climate, and consistent attention, account for the large majority of a successful harvest. Start legal, start simple, and improve from there. The gear and technique can get as sophisticated as you want over time, but none of it matters more than getting those fundamentals right.
FAQ
Is it legal for me to grow cannabis outdoors at home?
Check federal, state and local law first. Many states permit limited home cultivation for adults 21+ but rules vary (plant counts, secure/locked areas, visibility restrictions, tenant/landlord rules, medical program differences). Example state limits (as of 2026 updates): CA — up to six plants per residence (local rules may further restrict or ban outdoor grows); NY — up to six plants per person, 12 per residence with mature/immature distinctions; VA — up to four plants per household with tagging requirements; OH — up to six plants per adult, 12 per residence (secured and not visible to public); OK — medical patient rules allow home cultivation under OMMA limits. Always verify current state statutes, local ordinances and program rules before starting.
Legal & compliance checklist before planting
1) Confirm state law and municipal rules for home cultivation (plant limits, outdoor allowances). 2) Verify age and residency requirements (ID). 3) Get landlord/written permission if renting. 4) Understand visibility and security rules (locked/storage requirements). 5) If medical patient, check program-specific limits/registration. 6) Keep records if required (tags/IDs — e.g., VA tagging rules). 7) Don’t sell or distribute unless licensed. 8) Confirm pesticide and fertilizer regulations for your area. Retain links/screenshots of relevant statutes/municipal pages for proof.
How do I choose seeds and strains (photoperiod vs autoflower, feminized vs regular)?
Decision points: 1) Photoperiod vs autoflower — photoperiod plants flower based on daylength and often yield larger plants but require timing to finish before frost; autoflowers flower by age, enabling faster cycles and less timing sensitivity. 2) Feminized vs regular — feminized seeds minimize male plants (best for beginners), regular seeds can produce males for breeding. 3) Climate fit — choose varieties bred for your region (mildew/Botrytis resistance for humid climates; drought/heat tolerance for arid regions). 4) Desired chemistry/trait stability — consult breeder/third‑party lab data for flower time, THC/CBD ranges, and terpene notes. 5) Maturity window — pick strains that finish well before first local fall frost (photoperiod) or with autoflower time‑to‑harvest compatible with season length.
What germination methods work best and when should I direct‑sow vs start indoors?
Common germination methods: moist paper towel, seed starter plugs, or direct sow. Optimal germination temperatures are ~19–30°C (best near 24–28°C). Direct‑sow when soil temperature and frost‑free dates allow and you want to avoid transplant shock; good for fast‑maturing photoperiod strains or autos in warm regions. Start indoors to get an early vegetative head start (protected seedlings, longer veg) when your outdoor season is short or to control sex for regular seeds. For autos, many growers start indoors in small pots to avoid root restriction but keep low stress to prevent stunting.
How do I select a site — containers vs in‑ground?
Containers pros: mobility, soil control, root-volume management, easier stealth/security, suits renters. Use 10–30+ gallon pots for large photoperiod plants. In‑ground pros: larger root volume, less frequent watering, often higher yields. Site selection criteria: full sun (6–8+ hours), good drainage, air circulation, away from sightlines, protected from prevailing winds, access to water. Choose containers with drainage and use quality potting mix; for in‑ground, amend native soil and ensure pH ~6.0–7.0.
How should I prepare soil and which amendments are commonly used?
Start with a loose, well‑draining mix rich in organic matter. Basic recipe for containers: 40% high‑quality compost/peat or coco coir, 30% aged compost, 20% aeration (perlite/pumice), 10% worm castings. Amend per stage: kelp/seaweed and rock powders for trace minerals, bone meal (early veg phosphorus), fish emulsion for nitrogen, and dolomite lime to stabilize pH if acidic. For in‑ground, incorporate 2–4 inches of compost and 1–2 lbs per cubic yard of balanced organic granular fertilizer; get a soil test (pH, P/K, organic matter) to guide amendments.
Next Article
How to Grow Weed Outside in Oklahoma: Step-by-Step Guide
Step-by-step outdoor cannabis guide for Oklahoma, from strain choice and timing to soil, pests, harvest and curing.