California is genuinely one of the best places in the world to grow cannabis outdoors. Long summers, abundant sun, and warm dry falls give outdoor plants the time and light they need to produce heavy, potent harvests. If you're a beginner, growing outside in CA is actually more forgiving than growing indoors, because the sun does most of the heavy lifting. You need to get the legal side straight first, pick the right strain for your region, dial in your site and soil, then mostly stay out of the plant's way while keeping pests and mold from ruining the back half of the season. This guide walks you through every step in the order you actually need it.
How to Grow Weed Outside in CA: Step-by-Step Guide

Marcus Holbrook
15 Jun 2026
California law and local rules you need to check first
Under California state law (Health and Safety Code §11362.2), adults 21 and older can grow up to 6 cannabis plants at a private residence for personal use. That's the state baseline. The problem is that local governments, meaning your city or county, are fully allowed to layer their own rules on top of that baseline, and many of them do. Some cities effectively ban outdoor home cultivation entirely. Others require setbacks from property lines, mandatory enclosures, locks, permits, or specific odor controls. Before you put a single plant in the ground, look up your city and county ordinance.
The Department of Cannabis Control (DCC) explicitly tells growers to check local requirements because they vary widely across California. This isn't just legal fine print. Local plant-count violations and zoning violations are the most common compliance issues home growers actually face. Napa County, for example, prohibits cultivation that creates odors detectable at neighboring properties. El Dorado County goes as far as to specify a quantified odor dilution threshold. Morro Bay defines a 'locked space' requirement for any outdoor grow. Your county likely has something similar.
Here's a practical compliance checklist to work through before your season starts:
- Search '[your city/county] personal cannabis cultivation ordinance' and read the actual code, not a summary.
- Confirm whether outdoor grows are permitted at all in your jurisdiction.
- Check for setback requirements from property lines, schools, or parks.
- Note any enclosure, screening, or lock requirements.
- Look for odor standards, especially 'not detectable from neighboring property' language.
- Confirm whether a permit or registration is required.
- If you rent, check your lease and local tenant rules.
Once you're confident you're legal at the local level, the rest is gardening. Growing in Virginia outside follows many of the same fundamentals, but you should plan around your state’s climate and any local legal limits how to grow weed outside in VA. Growing in other states has its own layer of rules (Ohio, Virginia, New York, and Oklahoma all have different frameworks), but California's state-level permission for home grows is relatively clear. Growing in other states has its own layer of rules (Ohio, Virginia, New York, and Oklahoma all have different frameworks), but for Oklahoma, see the complete how to grow weed outside in oklahoma guide for local climate and compliance considerations Oklahoma outdoor grow rules and climate considerations. If you’re wondering how to grow weed in Virginia, you’ll need to follow that state’s specific legal rules and climate-focused growing schedule. If you are wondering how to grow weed outdoors in NY, start by checking New York state and local rules before planning your garden setup. Ohio has its own separate rules for home cannabis growing, so check your local requirements before you start planting. Your local ordinance is where the details live.
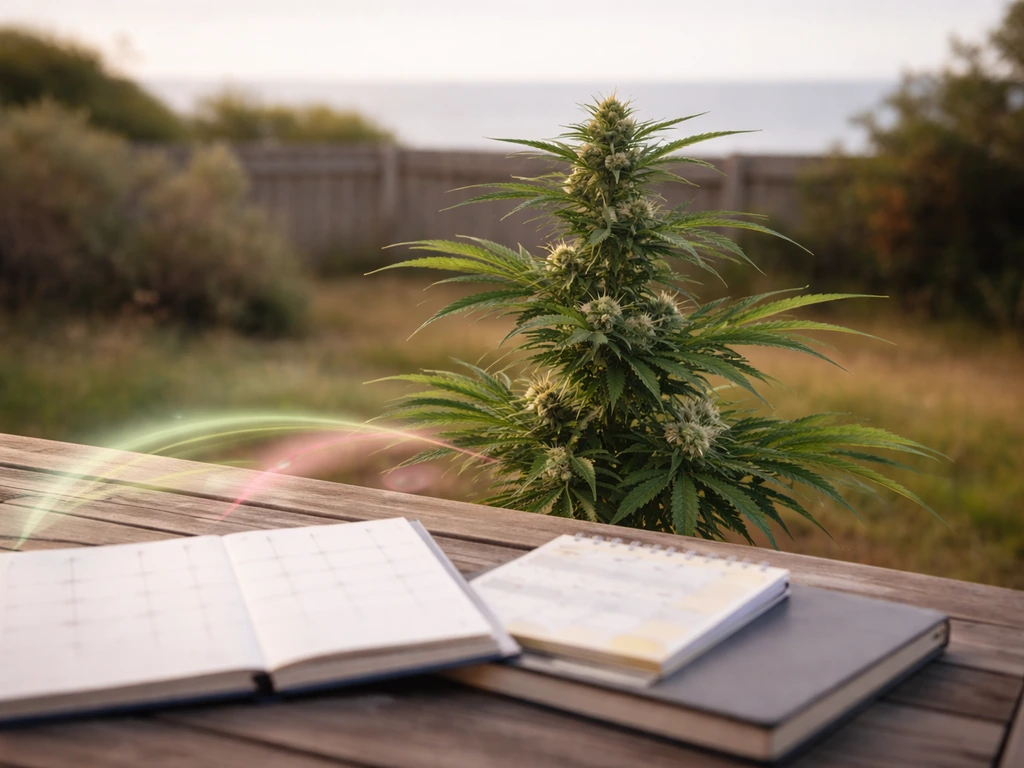
Picking the right strain and planning your harvest window
California's outdoor season runs roughly from late March through November, with the usable window varying by region. Coastal growers in places like San Francisco or Santa Cruz deal with fog, cooler summers, and late-season humidity. Inland growers in the Central Valley or Southern California get long, hot, dry summers with harvest windows that can stretch deep into October. Your strain choice should match your climate zone, not just your taste preferences.
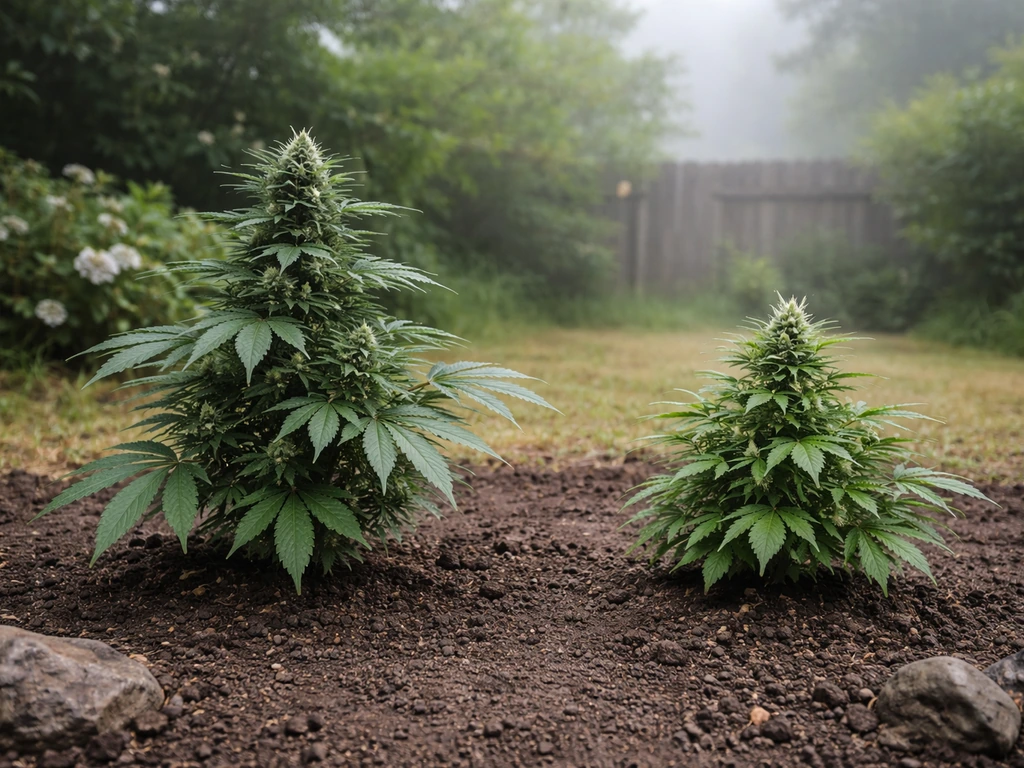
Photoperiod vs autoflower for California outdoor grows
Photoperiod strains (the traditional kind) flower based on the light cycle. In California, they typically start flowering naturally in late July or August when days shorten past roughly 12 to 13 hours of light, and they're usually ready to harvest between late September and early November. These strains can grow very large outdoors if you start them early, and they produce the biggest yields. The tradeoff is that a late-season rain or humidity event right before harvest can cause catastrophic mold.
Autoflowering strains flower based on age, not light. They typically go from seed to harvest in 70 to 90 days regardless of season. In California, you can run two or even three auto cycles in a single outdoor season. Autos stay smaller, which makes them easier to manage and hide, and their fast finish reduces late-season mold exposure. The tradeoff is lower yield potential per plant. For beginners, especially those on the coast or in foggy microclimates, autoflowers are often a smarter starting point.
Strain recommendations by California region
| Region | Challenge | Good strain types | Notes |
|---|---|---|---|
| Coastal (SF, Monterey, Santa Cruz) | Fog, humidity, cool temps | Mold-resistant indicas, fast-finishing autos | Avoid long-flowering sativas; look for strains under 9-week flower time |
| Central Valley (Fresno, Sacramento) | Extreme summer heat (100°F+) | Heat-tolerant sativas, OG Kush lines | Plant in partial afternoon shade or use shade cloth above 105°F |
| Southern CA (LA, San Diego) | Long dry season, mild fall | Most photoperiods work well | Can start earlier and harvest later; great for big sativa-dominant plants |
| Northern CA (Humboldt, Trinity) | Wet falls, mold risk at harvest | Mold-resistant cultivars, early-finishing strains | Target strains that finish by mid-October before fall rains arrive |
Whatever strain you choose, look for the breeder's listed outdoor finish time and count backward from your region's first expected rain or frost date. Give yourself at least a 2-week buffer. Getting caught with plants that need 3 more weeks when your first rain arrives in mid-October is one of the most frustrating experiences in outdoor growing, and one that's completely avoidable.
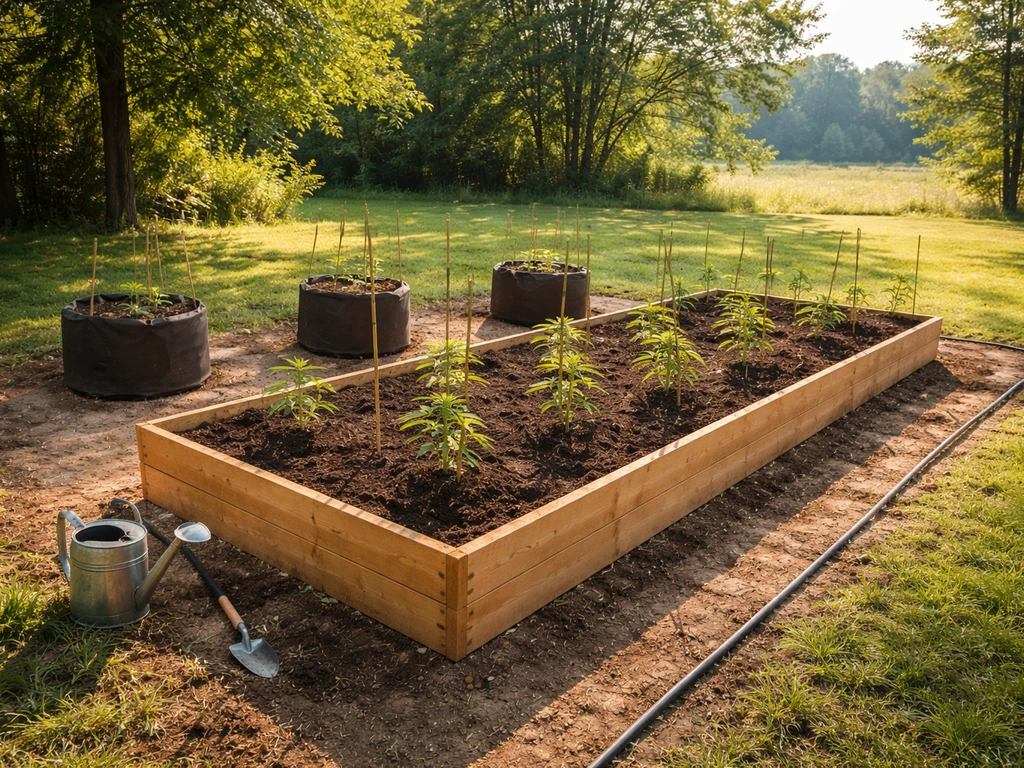
Choosing your grow site: sun, wind, soil, and drainage
Cannabis is a sun-hungry plant. Outdoors, it wants at least 6 hours of direct sunlight daily, and 8 to 10 hours is where you get the best results. This usually means south-facing exposure in the Northern Hemisphere. Spend a day watching how light moves across your yard before committing to a spot. Shade from trees, fences, or buildings that only shows up in the afternoon can significantly cut your yield.
Wind protection
Wind is underrated as a problem. Chronic wind stress stresses plants, slows growth, and physically damages branches once plants get heavy with buds in late summer. At the same time, you need some airflow through and around the canopy to prevent the humidity buildup that leads to mold. The ideal setup is protection from prevailing strong winds (usually by a fence, hedge, or wall to the west or north) while keeping the canopy open enough for air to move through it.
Soil and drainage
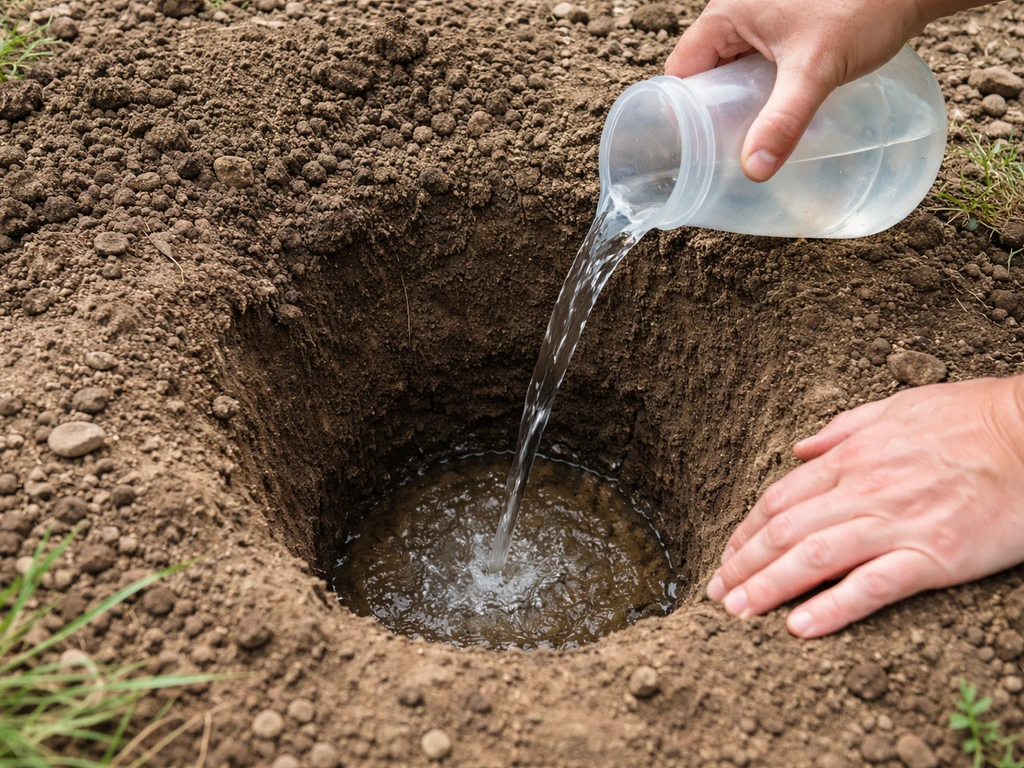
Cannabis roots hate sitting in water. If you're planting directly in the ground, test your native soil drainage by digging a hole about 12 inches deep, filling it with water, and timing how fast it drains. It should drain within an hour. If it takes several hours or sits overnight, you have a drainage problem. Amend heavily with perlite (20 to 30% by volume), compost, and coarse material, or consider raised beds or containers instead. California's heavy clay soils in many regions require real work to fix.
A pH between 6.0 and 7.0 is ideal for outdoor soil grows (aim for 6.2 to 6.8). Cannabis can't properly take up nutrients outside this range even if the nutrients are right there in the soil. Pick up an inexpensive soil pH meter or test kit before you plant, and amend with dolomite lime to raise pH or sulfur to lower it.
Irrigation
Southern and Central California summers are dry. You will need to water consistently, and that means planning a reliable irrigation system before plants get large. A big outdoor plant in peak summer can drink 5 to 10 gallons of water per day in hot weather. A drip line or soaker hose on a timer is the most practical solution. Manual watering works but becomes a serious daily commitment by July. Make sure your water source can handle the demand and that the water pH is in range (ideally 6.0 to 7.0 for soil).
Seeds vs clones, germination, and your transplant schedule
You have two starting options: seeds or clones. Seeds require germination and add a few weeks to your timeline, but they're easier to source legally (many California dispensaries sell seeds), they start disease-free, and feminized seeds nearly eliminate the risk of male plants ruining your crop. Clones are cuttings from established mother plants. They save 2 to 4 weeks of early veg time, but sourcing quality clones from a trusted grower is important because they can carry pests or disease. For beginners, feminized seeds are the lower-risk, more reliable starting point.
Germination basics
The paper towel method works well: place seeds between two moist paper towels on a plate, cover with another plate to retain moisture and darkness, and keep them at 70 to 80°F. Most seeds crack and show a taproot within 24 to 72 hours. Once the taproot is about 1/4 inch long, transfer carefully into a small seedling container (a solo cup or small nursery pot) with lightly moistened seed-starter mix or coco. Keep seedlings under a light source indoors or in a bright warm spot and water sparingly until the first set of true leaves appears.
California outdoor transplant schedule
Timing your outdoor transplant correctly is one of the most impactful decisions you'll make. Transplant too early and you risk cold nights stunting or stressing seedlings. Transplant too late and you lose valuable veg time, leading to smaller plants and smaller yields.
| Region | Start seeds indoors | Safe outdoor transplant | Expected harvest window |
|---|---|---|---|
| Southern CA (LA, San Diego) | Early to mid-March | Early April | Late September to late October |
| Central Valley (Sacramento, Fresno) | Mid-March | Mid to late April | October |
| Northern CA (Humboldt, Bay Area) | Late March to early April | Early to mid-May | Late September to mid-October |
| Coastal CA (SF, Monterey) | Early April | Mid to late May | Late September to October (choose fast strains) |
Before transplanting outdoors, harden off your seedlings or young plants over 7 to 10 days. Start by putting them outside in indirect light for a couple of hours, then gradually increase direct sun exposure each day. Skipping hardening off and going straight from indoor conditions to full California summer sun will cause sun bleaching and stress your plants significantly.
How the light cycle drives flowering outdoors in California
This is the mechanism that controls your entire outdoor season, and it's worth understanding clearly. Photoperiod cannabis plants stay in vegetative growth (building size, roots, and structure) as long as they receive more than roughly 13 to 14 hours of light per day. Once days shorten below that threshold, the plant switches to flower mode and starts building buds. In California, the summer solstice around June 21 is the longest day of the year at about 14.5 hours of daylight. Days shorten gradually after that, and most outdoor plants in California begin showing flowering signs in late July to early August.
This means you have roughly April through late July as your true vegetative growth window for photoperiod plants. The more size your plant builds during that period, the more bud sites it will have in flower. A plant started in March and transplanted outside in April will be dramatically larger and more productive than the same strain transplanted in June. From late July onward, the plant is in flower mode and using its energy for bud production rather than new structural growth. You'll see buds developing through August, September, and into October depending on strain.
One thing to watch for: light pollution from street lights, porch lights, or garden lights hitting your plants during the dark period can confuse photoperiod plants and delay or interrupt flowering. Cannabis needs uninterrupted darkness during its dark period to properly trigger and sustain flowering. Autoflowering varieties are immune to this problem, which is another reason beginners in urban yards sometimes prefer them.
Soil, containers, nutrients, and watering done right
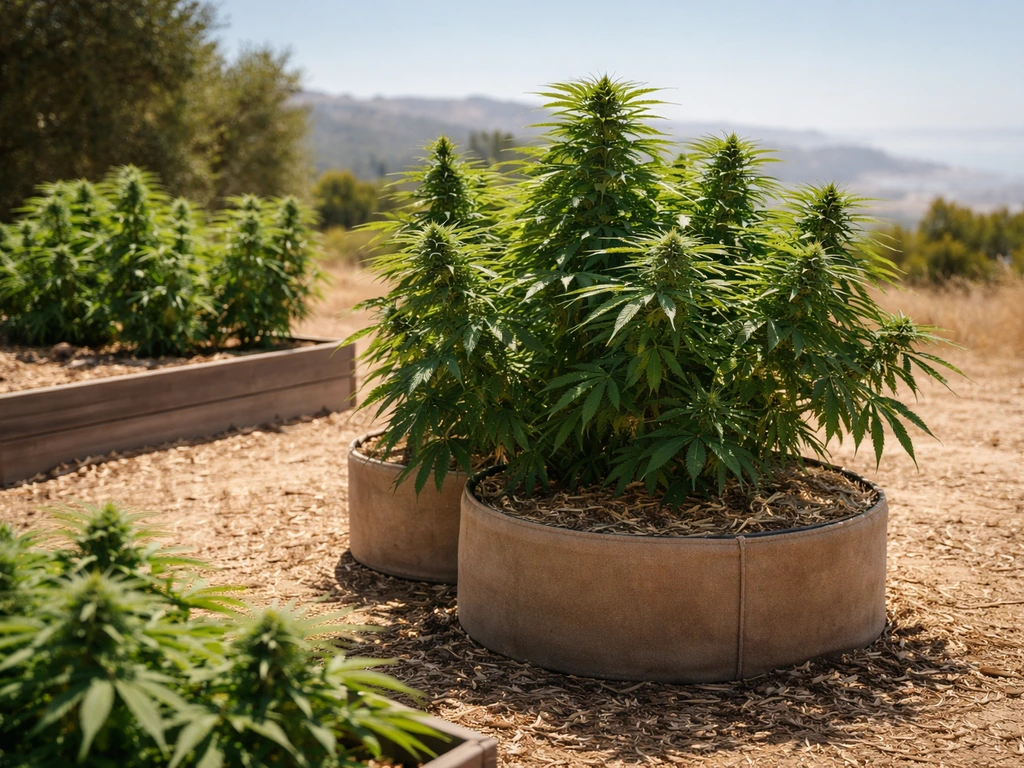
Soil vs containers
Both in-ground and container growing work well outdoors in California, and the right choice depends on your situation. In-ground plants can grow enormous (6 to 10 feet tall is common in a full California season) and require less watering because they access deeper soil moisture. Containers give you control over soil quality, allow you to move plants to adjust for weather or visibility compliance, and are essential if your native soil is poor or poorly draining. For most beginners, a large container (25 to 100 gallons for photoperiod plants) is a great middle ground. A 15 to 20 gallon pot is fine for autoflowers.
Nutrient basics
Cannabis has different nutritional needs in veg versus flower. During vegetative growth, plants want more nitrogen to support leaf and stem development. Once flowering begins, they want less nitrogen and more phosphorus and potassium to support bud development. Overfeeding, especially with nitrogen in flower, is one of the most common beginner mistakes and causes nutrient burn (brown leaf tips) and can actually reduce bud quality.
If you're using a quality pre-amended organic soil (like Fox Farm Ocean Forest or similar), you often don't need to add nutrients for the first 4 to 6 weeks of growth. After that, a simple 3-part nutrient line (grow, bloom, micro) or an organic top-dress schedule is plenty. For outdoor grows in good soil, less is often more. Start at half the recommended dose on any nutrient label and work up only if you see deficiency signs (yellowing leaves are the most common indicator).
Watering schedule and technique
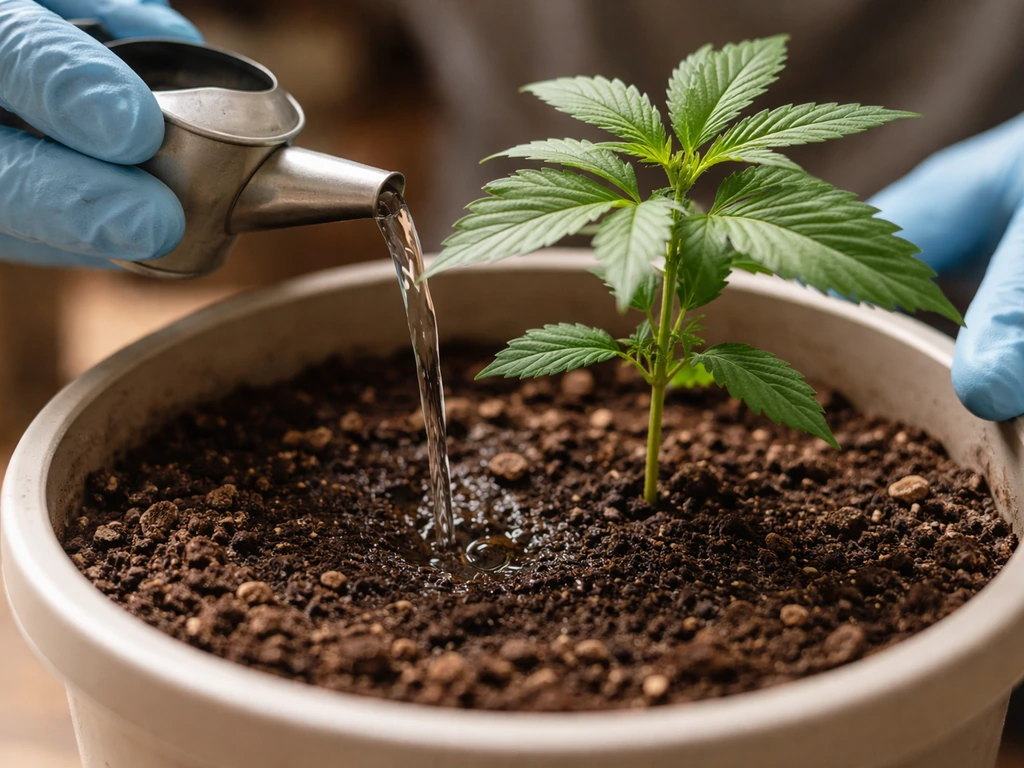
The most common beginner watering mistake is overwatering. Cannabis roots need oxygen, and constantly wet soil suffocates them. The general rule: water when the top 1 to 2 inches of soil are dry, or when a container plant feels noticeably lighter when you lift it. Water thoroughly until you see runoff from the bottom of the container, then don't water again until the soil partially dries. In hot California summers, large plants may need daily or even twice-daily watering, but small plants in spring need much less. Always water at the base of the plant, not on the foliage, to reduce mold risk.
Dealing with pests, mold, and late-season weather problems
The back half of the California outdoor season, roughly August through October, is when most grows succeed or fail. Pests and mold are the two biggest threats, and late-season humidity is what connects them both.
Common pests and how to handle them
- Spider mites: Tiny dots on leaves with fine webbing underneath. Thrive in hot, dry conditions. Treat with neem oil spray or insecticidal soap every 3 to 5 days. Avoid spraying open flowers.
- Aphids: Small soft-bodied insects clustered on new growth. Knock off with water spray, use neem oil, or introduce ladybugs as biological control.
- Caterpillars (budworms): Chew into buds and leave dark frass behind. Inspect buds daily in flower. Use Bacillus thuringiensis (Bt) spray, which is organic and effective.
- Fungus gnats: Larvae damage roots in containers. Let soil dry more between waterings and use sticky traps to monitor adults.
- Thrips: Leave silver streaking on leaves. Treat with spinosad or insecticidal soap.
Stop applying any foliar sprays, including organic ones, once buds are developing. Residue on flowers affects quality and can create conditions for mold. Your best pest prevention is healthy plants with good airflow and regular inspection. Check the undersides of leaves weekly.
Botrytis (bud rot) and late-season mold
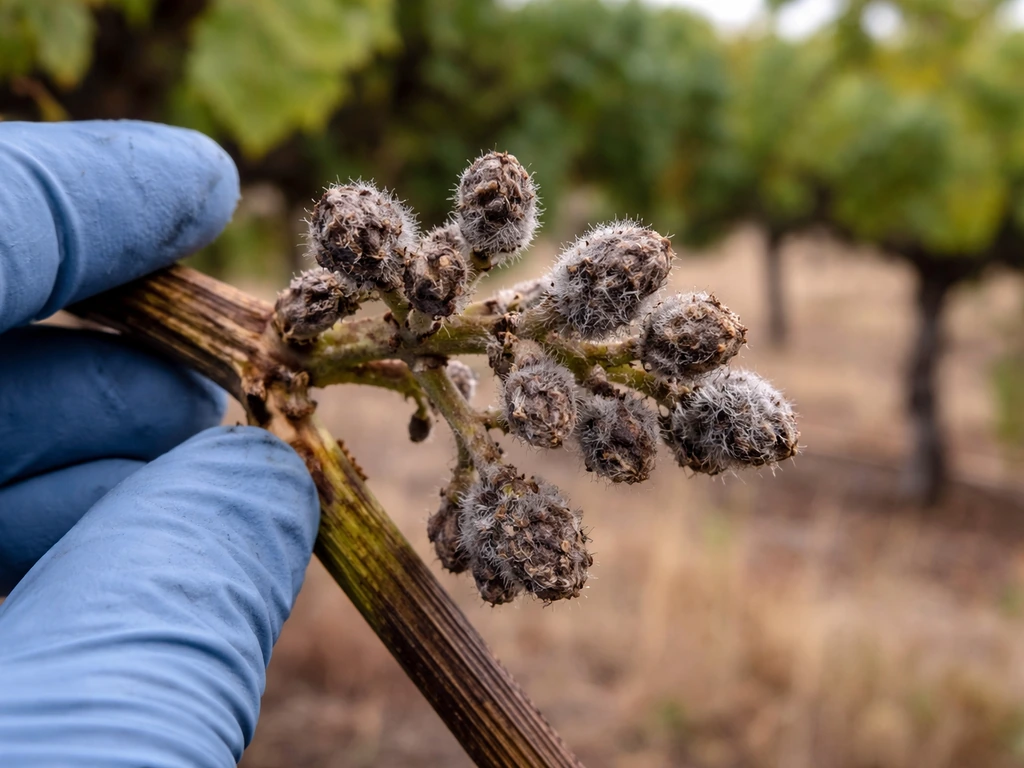
Botrytis cinerea, commonly called bud rot or grey mold, is the single biggest threat to a California outdoor harvest. It typically appears in September and October when nights get cooler and morning humidity rises. It starts inside dense buds and shows up as grey or brown mushy tissue when you pull apart a bud. By the time you see it on the outside, it's already spread internally. Any bud affected by botrytis must be removed immediately and disposed of away from your other plants.
Prevention is everything with botrytis. Strategies that genuinely help:
- Defoliate: Remove large fan leaves that trap moisture inside the canopy, especially in the last 3 to 4 weeks before harvest.
- Lollipopping: Remove lower growth that gets no light and sits close to the soil where humidity is highest.
- Increase airflow: Position a fan near plants if possible during late season. Even a battery-powered clip fan can help.
- Avoid wet foliage at night: If you water in the afternoon, wet leaves going into cool nights is a mold invitation.
- Copper-based fungicides: Can be used as a preventive spray early in flower (not close to harvest). Follow label directions.
- Choose mold-resistant strains: If you're in a humid coastal zone, breed selection is your best long-term tool.
Weather stress and heat management
Central Valley growers regularly see temperatures above 100°F in June and July. Cannabis can handle heat up to about 90°F reasonably well, but sustained temperatures above 95 to 100°F cause heat stress, bleaching, and slowed growth. Use shade cloth (30 to 40% shade rating) during peak afternoon heat if temps regularly exceed 100°F. Increase watering frequency to compensate for faster evaporation. Plants in containers heat up faster than in-ground plants, so container plants are more vulnerable during heat waves.
If an unseasonable rain event arrives before harvest, act quickly. Shake excess water off buds gently, increase airflow immediately, and inspect closely over the following 48 to 72 hours for any sign of botrytis starting. If rain is forecast and your plants are close to harvest (within 1 to 2 weeks), seriously consider harvesting early rather than gambling on the weather.
Harvesting, drying, curing, and storage
Knowing when to harvest
The best way to know when your plant is ready is to look at the trichomes with a jeweler's loupe or pocket microscope (60 to 100x magnification). Trichomes are the tiny crystal-like structures on buds and surrounding leaves. When they're mostly cloudy white with some turning amber, you're in the harvest window. All-clear trichomes means too early. Mostly amber means peak THC has passed and the effect is shifting toward more sedative. For most users, 70 to 90% cloudy with 10 to 20% amber is the sweet spot.
Secondary indicators: most of the white pistil hairs (those orange-brown threads on buds) have darkened and curled in (70 to 80% or more), upper fan leaves start to yellow and die off naturally, and the buds stop visibly swelling. Don't rely on these signs alone, especially the leaf color, since nutrient issues can mimic late-season ripening. Trichome inspection is the most reliable method. blank" rel="noopener noreferrer">Morro Bay, CA — Personal Cannabis Cultivation ordinance (Municode) notes that many local ordinances include odor and visibility requirements for home grows (example: Morro Bay ordinance defines “locked space” for outdoor cultivation and includes a “not detectable by human senses” odor standard from neighboring property/public right-of-way).
How to harvest
- Harvest in the early morning before temperatures rise, when terpene content is highest.
- Use clean, sharp pruning shears or scissors. Dull blades crush stems and slow drying.
- Cut branches in manageable sections (12 to 18 inches works well for hanging).
- Remove large fan leaves immediately. Many growers leave sugar leaves (small leaves embedded in buds) until after drying.
- Inspect each bud section for any signs of mold before hanging. Remove and discard any affected material.
Drying
Hang branches upside down in a dark, well-ventilated space at 60 to 70°F with 45 to 55% relative humidity. A small fan circulating air (not blowing directly on buds) is ideal. Drying too fast (low humidity, high heat) locks in harsh flavor. Drying too slow (high humidity) encourages mold. Most harvests dry in 7 to 14 days. The buds are ready to move to jars when the smaller stems snap cleanly rather than bending, and the outside of the buds feels dry to the touch.
Curing
Curing is where good cannabis becomes great cannabis. Trim your dried buds, place them in wide-mouth glass mason jars, and fill each jar about 75% full. For the first week, open the jars twice a day for 15 to 30 minutes (called 'burping') to release built-up moisture and gases. If buds feel wet or you smell ammonia when you open a jar, leave the lid off for a couple of hours and check for mold. After the first week, burp once daily for the second week, then move to every few days. A minimum 4-week cure significantly improves flavor and smoothness. Eight weeks produces noticeably better results. El Dorado County — Personal Cultivation ordinance (pdf) notes that example county ordinance (El Dorado County) provides personal cultivation rules and emphasizes odor control and compliance with applicable laws; local ordinance PDF can be checked for specifics.
Long-term storage
After curing, store finished cannabis in airtight glass jars in a cool, dark location. The ideal storage environment is 60 to 65°F with 55 to 62% relative humidity. Boveda or Integra Boost humidity packs are inexpensive and help maintain humidity inside jars automatically. Keep jars out of direct light (UV degrades cannabinoids). Properly stored, well-cured cannabis maintains quality for 6 to 12 months, and sometimes longer. Freezing is an option for very long-term storage but requires completely dry flower and careful thawing to avoid trichome damage.
If you follow this guide from start to finish, you'll have a solid foundation for your first California outdoor season. If you're wondering how to grow weed seeds outside, start by germinating properly, then plan your outdoor transplant timing around your weather and daylight. The biggest lessons most outdoor growers learn the hard way are: check your local ordinance before you start, pick a strain that finishes before your fall weather turns wet, and don't skip the curing step. Everything else is iterative. Your second season will be better than your first, and your third will be better than your second. That's just how growing works.
FAQ
Can I use landscape lighting or a porch light near the grow and still grow photoperiod plants outside in CA?
Yes, but only if you can prevent light leaks during the dark period. Photoperiod plants need uninterrupted darkness, so any “nighttime” lighting from timers, motion lights, or nearby windows can interfere even if it seems brief. A simple test is to turn off all yard lights for at least one full night and confirm your plants are completely dark during the entire off cycle.
What should I do if I live in a foggy part of California and my strain finishes late?
If you are in an area with coastal fog and frequent morning humidity, choose a strain that finishes earlier than the calendar forecast suggests. A practical rule is to select an outdoor finish that lands at least 2 to 3 weeks before your typical wettest weeks, then use the buffer you already planned. If your only option is a long-finishing strain, consider autos or container placement to reduce time spent in persistent late-season moisture.
How many extra seeds or seedlings should I start for my first outdoor season in CA?
Plan for a “failed seedling” margin. Outdoor setbacks happen due to cold snaps, pests, or transplant shock, so many growers start more seedlings than they need. If you lose even one of a small run, your final plant count and maturity timing can slip, so staggering germination by about a week can protect your harvest window.
How do I avoid nutrient problems caused by inconsistent watering in containers?
Don’t rely on a general “organic” label for watering decisions. Container soil can dry faster than ground soil, and different potting mixes hold water differently, so you should base frequency on soil dryness (top 1 to 2 inches dry) and container weight. Inconsistent watering often shows up first as nutrient uptake problems, so check drainage and soil moisture before increasing fertilizer.
Can I move my outdoor plants around during the season to manage light, wind, and rain?
Yes, and it is one of the best ways to improve compliance and reduce mold risk in California. With containers you can move plants away from bright street lighting, reposition them to maximize sun hours, and bring them under cover during unexpected rain. Just remember that moving plants can stress them, so handle them gently and move only on calm weather days.
How can I catch bud rot early if it starts inside the buds?
Watch for early signs of botrytis before it becomes visible. In dense buds, look for subtle changes like muted bud structure or small brown/grey specks after humid mornings, especially in late August and September. If you find any suspect section, remove affected material immediately and do not compost it where other plants are.
What’s the best approach when an unexpected rain storm hits close to harvest in CA?
Use a “cover decision” plan before rain hits. If harvest is more than about 1 to 2 weeks away, focus on airflow and inspection, and remove damaged parts when necessary. If harvest is imminent, serious growers often harvest early and finish drying indoors to avoid losing entire flowers to botrytis.
Is it ever okay to spray for pests during late flowering outdoors in California?
Usually, yes, but not during the late flowering window. The most reliable approach is to stop foliar sprays once buds are developing and instead address pests with prevention, inspection, and canopy management. If you are dealing with an active pest outbreak late in flower, avoid experimenting, because residues and stress can both worsen mold risk.
How should I interpret soil pH test results if my plant health doesn’t match what the test says?
Be careful with pH testing accuracy. Soil test kits can be less consistent than meter readings, so take multiple samples from the same depth, mix the sample well, and test again if results don’t match plant behavior. Also, know that amended soil can buffer pH changes, so dramatic swings are not immediate.
How do I get good airflow outdoors without stressing the plants with too much wind?
A common mistake is thinking “more airflow” means blasting plants. Airflow should be indirect, enough to prevent humidity pockets but not so strong that branches sway constantly or leaves get damaged. In practice, use a fan for the area around the canopy, and rely on pruning for structure rather than constant direct wind.
Next Article
How to Grow Weed Outside in VA: Step-by-Step Guide
Step-by-step outdoor cannabis guide for Virginia: strain choice, frost timing, soil setup, care, pests, mold prevention,