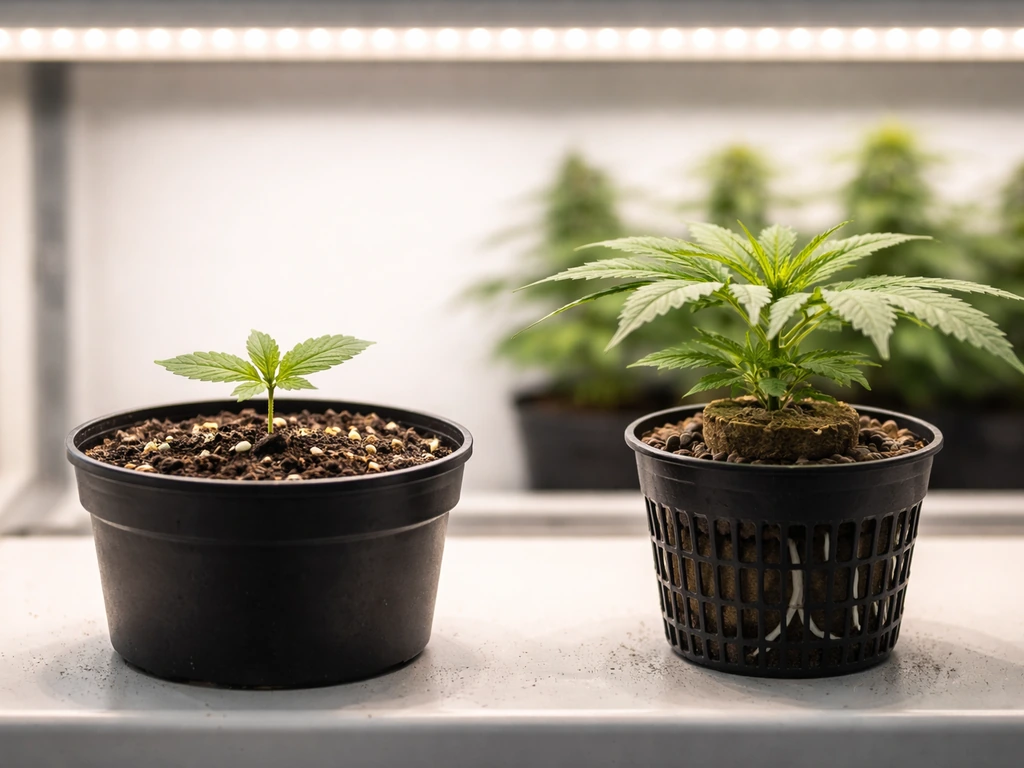
Yes, you can grow cannabis from seed to harvest in roughly 90 days, but the method and strain you choose make all the difference. Fast autoflowering genetics are the most reliable route: many finish in 60–90 days from germination, and a well-dialed indoor setup can put dried, cured flower in your jar inside that window. Aggressive indoor photoperiod schedules and greenhouse or hydroponic grows can also hit or approach the mark, though each comes with trade-offs in yield, complexity, and cost. This guide gives you a concrete plan for all four paths.
How to Grow Weed in 3 Months: Fast Seed-to-Harvest Plan

Marcus Holbrook
13 Jul 2026
Who this guide is for and what 90 days actually looks like
If you have a spare room, a small tent, a greenhouse bay, or even a sunny balcony, this guide is written for you. It doesn't matter whether this is your first grow or your fifth, the 90-day timeline pushes every method close to its limits, so understanding where the pressure points are will save you from the frustrating harvest delays I ran into my first few cycles. Realistically, 90 days gets you to a dry, smokeable harvest with autoflowers or a hydroponic fast-strain indoor run. A traditional photoperiod grow squeezed into 90 days is possible but demands short veg and a strain with a genuinely short flowering period. Each path is covered here with week-by-week milestones so you can pick the one that fits your setup.
Is growing cannabis in 3 months actually realistic?
The honest answer is: it depends on the method. Autoflowers are your safest bet, strains like Royal Queen Seeds' Quick One have been advertised finishing in as little as 8–9 weeks (56–63 days) from germination, and breeders like Mephisto Genetics list many varieties at 65–85 days. In practice, real-world grows on GrowDiaries and grower forums regularly run 10–15 days longer than the breeder minimum, especially in soil, with smaller pots, or in environments with temperature swings. So budget 70–90 days for a fast auto, not 56. Photoperiod grows need 2–4 weeks of veg plus a 7–9 week flowering period, which puts them at 9–13 weeks, tight but achievable with the right strain. Hydroponics can compress veg noticeably but add setup complexity. The caveats that matter most: dry and cure time adds 2–3 weeks after chop, trichome maturity shouldn't be rushed regardless of how fast the plant grew, and first-time growers often lose a week or two to troubleshooting.
Which approaches can actually finish in ~90 days
There are four realistic paths to a 90-day harvest, and each suits a different situation.
- Fast autoflowers (indoors or outdoors): The most accessible 90-day route. Autos flower automatically regardless of light schedule, so you run 18–20 hours of light the whole cycle. Target strains with breeder-stated finish times under 80 days. Real-world seed-to-harvest commonly lands at 70–90 days.
- Aggressive photoperiod indoors: Veg for just 2–3 weeks under 18/6 light, then switch to 12/12 to trigger flowering. Pair this with a strain whose breeder-stated flower time is 7–8 weeks. Total cycle: 9–11 weeks from seed. Yield per plant will be lower, but grams per square metre can stay reasonable at higher plant density.
- Greenhouse with season extension: Using supplemental lighting to push photoperiod plants into flower earlier, or growing autoflowers outdoors in a glazed greenhouse, can yield ripe buds within 90 days depending on your latitude and the season you start. Passive solar heat and humidity control are the main variables to manage.
- Hydroponics (DWC/RDWC/NFT): Roots bathed in oxygenated nutrient solution grow significantly faster than in soil. Combined with fast genetics, hydroponic systems can shave 1–2 weeks off veg time and improve flowering density, making a 90-day finish more predictable — at the cost of higher setup demands and more daily monitoring.
Choosing the right strain for a fast finish
Strain selection is probably the single biggest lever for hitting a 90-day target. Look for three things on any breeder page: total days from seed (not just flower time), real-user harvest reports on GrowDiaries or breeder forums, and whether the stated finish time is from sprout or from flip.
Fast autoflowers to consider
- Quick One (Royal Queen Seeds): One of the fastest autos on the market, with the breeder advertising 8–9 weeks from germination. Compact plant, manageable yields, ideal for first-time growers who want a reliable quick finish.
- 24 Carat (Mephisto Genetics): Breeder-stated 65–75 days from sprout, with grower reports mostly confirming sub-80-day finishes in dialed environments. Better resin production than some ultra-fast varieties.
- Any reputable 'XL Fast' or 'Express' autoflower line: Most major breeders now have dedicated fast-finish lines. Aim for strains listed under 75 days from the breeder and cross-check with at least 10 grow diary entries before committing.
Short-flowering photoperiod strains
For a photoperiod grow to fit inside 90 days, you need a strain with a genuine 7–8 week flower time, not the optimistic '8–10 weeks' that many breeders publish. Look for indica-dominant or indica-leaning hybrids, as these tend to have shorter flower windows than sativa-dominant varieties. Afghan-derived genetics, many Kush lines, and several autoflower-derived fast photoperiod hybrids finish reliably in 7–8 weeks. Avoid any strain where the breeder lists more than 9 weeks of flower time if you are trying to compress the total cycle.
Planning how much you can realistically yield
Yield expectations for a fast cycle are directly tied to how long you let the plant build vegetative biomass before it flowers. Peer-reviewed controlled studies confirm that shorter veg duration reduces per-plant yield, though higher plant density can partially compensate at the square-metre level. For a beginner, a realistic indoor autoflower yield in a 1.2 x 1.2 m tent (roughly 1.44 m²) under a quality LED producing 600–800 µmol·m⁻²·s⁻¹ at canopy is 150–350 g dry weight per cycle, depending on strain, skill, and environment. A single fast auto in a 11-litre pot under a 300 W equivalent LED commonly delivers 30–80 g dry. A compressed photoperiod run with four plants per square metre on a 2-week veg can hit similar total yields per area but with lower individual plant weights. These are not guaranteed numbers, they are realistic planning targets. Your first grow will likely land in the lower half of the range, and that is completely fine.
Indoor vs outdoor vs greenhouse vs hydroponic: comparing your options
Every environment has a different risk profile, cost structure, and speed advantage. The table below gives you a direct comparison, but here is the plain-language version: indoor gives you the most control and is the most reliable for hitting precise timelines; outdoor is the lowest-cost option but is season-dependent and weather-exposed; greenhouse sits in between, offering passive solar and some climate management at moderate cost; hydroponics is the fastest-growing method but requires daily monitoring and a steeper learning curve. For a first 90-day grow, a small indoor tent with autoflowers is the most predictable starting point.
| Method | Typical seed-to-harvest | Yield potential | Upfront cost | Difficulty | Speed advantage | Main risk |
|---|---|---|---|---|---|---|
| Indoor autoflower | 70–90 days | 30–80 g/plant; 150–350 g/m² | Medium ($200–600 for basic tent setup) | Beginner-friendly | Full light schedule control, 18–20 hr days | Light, heat, or humidity misconfiguration |
| Indoor photoperiod (compressed) | 77–98 days (2–3 wk veg + 7–9 wk flower) | 20–60 g/plant at high density | Medium (same as above) | Intermediate | Short veg squeezes timeline, high plant density possible | Low yield per plant, canopy uneven maturation |
| Greenhouse autoflower | 70–95 days | 40–120 g/plant outdoors | Low-medium ($50–300) | Beginner-intermediate | Free solar energy, passive heat extends season | Weather variability, pest pressure, humidity spikes |
| Greenhouse photoperiod (supplemented) | 85–105 days | 60–200 g/plant | Medium ($150–500 incl. supplemental light) | Intermediate | Supplemental light triggers and extends daylength control | Light leak causing re-veg, mold in humid climates |
| Hydroponic indoor (DWC/RDWC) | 60–80 days (autos); 75–95 days (photo) | 50–100+ g/plant; 200–450 g/m² | High ($400–1,200+) | Intermediate-advanced | Fastest root-zone uptake, compresses veg by 1–2 weeks | pH/EC drift, root rot, pump failure |
Equipment and supplies checklist for a 90-day grow
You don't need a lot of gear for a basic autoflower run, but you do need the right gear. Cutting corners on light quality or environment monitoring will cost you weeks and grams. Here is what a complete beginner setup should include:
- Grow tent: 60x60 cm (one plant) or 1.2x1.2 m (2–4 plants) with reflective lining and ducting ports
- LED grow light: A quality full-spectrum LED capable of delivering at least 400–600 µmol·m⁻²·s⁻¹ at canopy during veg and 600–900 µmol·m⁻²·s⁻¹ during flower (check manufacturer PPFD maps, not just wattage claims)
- Inline fan and carbon filter: Sized to turn over the tent volume 30–60 times per hour; essential for odor control
- Circulation fan: Small oscillating fan to prevent hotspots and strengthen stems
- Growing medium: For beginners, a light airy soil or coco coir mix (60/40 coco:perlite is a popular fast-draining option for autos)
- Pots: 7–11 litre fabric pots for autos (larger pots slow down the cycle by encouraging longer veg); 11–15 litre for compressed photoperiod runs
- pH meter and EC/TDS meter: Non-negotiable. pH drift to 6.8+ in soil or below 5.5 in hydro causes nutrient lockout that can set you back two weeks
- pH up/down solutions: Keep both on hand
- Base nutrient line: A three-part or two-part cannabis-specific nutrient system with grow, bloom, and micro (or an equivalent all-in-one auto formula for beginners)
- Calmag supplement: Especially important with coco coir and soft tap water
- Thermometer/hygrometer: At least one digital unit with min/max memory; ideally a wireless sensor inside the canopy
- Timer: For lights, and optionally CO₂ or irrigation pumps
- Drying rack or hang lines: Needed from day 1 of planning — harvest comes fast with autos
- Mason jars or glass cure jars: 500 ml–1 litre jars for the cure stage
- Hygrometer packs (Boveda 62%): For maintaining relative humidity in cure jars
- Loupe or jeweler's loupe (30–60x) or digital microscope: For trichome inspection at harvest
Week-by-week timeline: fast autoflower seed to harvest
This timeline is built around a 70–84 day target, which covers most fast autoflowers grown indoors under 18–20 hours of light. Your specific strain may run shorter or longer, add up to 10 days of buffer for first grows. All timings are from the day the seed germinates or is placed in its final medium.
- Days 1–7 (Seedling): Germinate seed in a damp paper towel or directly in a moist, light seedling mix. Seedling emerges and produces its first set of true leaves. Keep humidity at 65–70% RH, temperature 22–26°C (72–78°F), light at low intensity (150–250 µmol·m⁻²·s⁻¹). No nutrients yet — seedling mix has enough. Water lightly around the stem, not soaking the medium.
- Week 2 (Early Veg): First true fan leaves develop. Begin light feeding (EC 0.4–0.8, pH 6.0–6.5 in soil or 5.8–6.0 in coco/hydro). Raise light to 300–400 µmol·m⁻²·s⁻¹. Temperature 22–26°C, humidity 60–65%. Watch for any yellowing — this early it usually means overwatering, not nutrient deficiency.
- Week 3 (Veg/Pre-flower transition): The auto is building its structure rapidly. You may see the first tiny pistils (white hairs) at the nodes — this is pre-flower, normal and not a problem. Increase feeding to EC 1.2–1.5, pH stable. Light: 400–600 µmol·m⁻²·s⁻¹. Begin low-stress training (LST) now if you want to open the canopy — bend the main stem outward and secure it. Do not top an auto at this stage unless you have grown the specific strain before.
- Week 4 (Flower initiation): Pistils are clearly visible. The plant is switching its energy to bud production. Transition nutrient formula toward bloom (reduce nitrogen, increase phosphorus and potassium). EC 1.4–1.8. Drop humidity to 50–55%. Temperature can stay 22–26°C or drop slightly to 20–24°C at night.
- Weeks 5–6 (Early-mid flower / bud set): Buds are stacking and calyxes are swelling. Trichomes appear on sugar leaves. This is when good light intensity pays off — target 700–900 µmol·m⁻²·s⁻¹ at canopy if your light supports it. Continue bloom feeding at EC 1.6–2.0. Drop humidity to 45–50% to reduce mold risk. Remove large fan leaves blocking bud sites only if necessary.
- Weeks 7–8 (Peak flower / fattening): Buds are dense and resinous. The smell intensifies — your carbon filter is working hard. Increase airflow. Keep EC 1.6–2.0. Watch trichomes with your loupe: at this stage most should still be clear to cloudy/milky.
- Weeks 9–10 (Late flower / ripening): Feed plain pH-adjusted water for the last 5–10 days (a light 'flush' in soil or coco helps clear residual salts and improves taste, though this is debated). Humidity to 40–45%. Reduce light hours to 16 if you want to simulate dusk/ripening signal (optional with autos). Check trichomes daily.
- Days 63–84 (Harvest window): Trichomes are mostly cloudy/milky with 5–20% amber depending on your preference. Clear trichomes mean underripe (lower potency). Mostly amber means THC is degrading to CBN (more sedating effect). Harvest when the ratio matches your target. Chop, wet-trim or dry-trim, and move to drying.
Week-by-week timeline: aggressive photoperiod indoor schedule
This schedule assumes you are working with a short-flowering indica or indica-hybrid strain (breeder-stated 7–8 week flower) and are willing to accept lower per-plant yield in exchange for a faster crop. It is best suited for growers who want larger final yields over multiple plants and are comfortable monitoring a more demanding environment.
- Days 1–7 (Germination and seedling): Same as the autoflower seedling stage. Light at 18/6 schedule. Low humidity 65–70%, temperature 22–26°C.
- Weeks 2–3 (Short veg under 18/6): Push growth aggressively with EC 1.2–1.6, good airflow, and higher light intensity (400–600 µmol·m⁻²·s⁻¹). Keep topping or LST minimal in a 2-week veg — the plant has limited time to recover. If you are running 4+ plants per square metre for a sea of green (SOG) style, let each grow a single dominant cola. If running 2–4 plants with more space, one gentle topping at week 2 (to create a Y shape) is feasible.
- Day 14–21 (Flip to 12/12): Switch your timer to 12 hours on / 12 hours off. This is the trigger for flowering in photoperiod plants. The plant will stretch noticeably for the first 1–2 weeks after flip — anticipate 50–100% height increase and plan your light height accordingly.
- Weeks 4–5 (Stretch and early flower): Pistils appear and buds form at every node. Transition to bloom nutrients: EC 1.6–2.0. Humidity to 50–55%. The stretch is finishing — if your plant is touching the light, raise the fixture or supercrop the stems by gently bending and kinking (not snapping) the upper stem to bring the canopy down.
- Weeks 6–9 (Main flower / bud development): Buds fatten. Feed at EC 1.8–2.2 through mid-flower. Maintain temperature 20–26°C, humidity 45–50%. Begin trichome checks at week 8.
- Weeks 9–11 (Ripening and flush): Final nutrient push, then switch to plain water for the last 5–10 days. Trichome color is your harvest signal — same cloudy/amber ratio applies. A short veg means smaller plants and some canopy unevenness; check individual buds rather than assuming the whole plant is ready simultaneously.
- Days 77–98 (Harvest): Most compressed photoperiod grows with 2–3 week veg and 7–8 week flower strains land in this window. Expect 20–60 g dry per plant at high density, or more from plants with slightly longer veg.
Week-by-week timeline: greenhouse and hydroponic accelerated schedules
Greenhouse autoflower or season-extended photoperiod
A greenhouse grow follows the same plant milestones as an indoor grow but with solar light supplemented by artificial sources when needed. For autoflowers, start seeds indoors under artificial light for the first 2 weeks, then transfer to the greenhouse when nighttime temperatures stay above 15°C (59°F). The greenhouse's passive solar heat and diffused light extend the viable growing season at each end. A well-glazed polytunnel with supplemental LED at 200–400 µmol·m⁻²·s⁻¹ can mimic the 18-hour light schedule autos prefer. Total timeline for a greenhouse auto: 75–95 days from seed to harvest, weather and latitude permitting. For a deeper discussion of how long to grow weed in a greenhouse, see the companion greenhouse timeline article. For photoperiod greenhouse grows, you can use blackout curtains over the structure to manually trigger the 12/12 photoperiod and accelerate flowering by 4–6 weeks compared to a natural outdoor season. See our companion guide on how to grow weed in a greenhouse for step-by-step setup, seasonal tips, and greenhouse-specific timelines.
Hydroponic indoor (DWC example)
In a deep water culture (DWC) system, roots are suspended in aerated, pH-controlled nutrient solution. This dramatically increases nutrient uptake speed during veg, plants can achieve in 10–14 days what takes 2–3 weeks in soil. Week 1: germinate in rockwool cube, transfer to net pot once taproot is visible. EC 0.4–0.6, pH 5.8–6.0, water temperature 18–21°C (64–70°F) to discourage root rot. Weeks 2–3: veg in DWC at EC 1.2–1.6, 18/6 light, 400–600 µmol·m⁻²·s⁻¹. The accelerated veg means you can flip or allow auto-flower initiation a week earlier than equivalent soil grows. Weeks 4–10: flowering follows the same nutrient and light schedule as above, but with tighter daily monitoring of EC, pH, and reservoir temperature. Total seed-to-harvest for a fast auto in DWC: 60–80 days is genuinely achievable with a dialed setup. For photoperiod in DWC with 2-week veg: 75–95 days. The daily monitoring commitment is real, skipping a reservoir check for 48 hours can cause pH drift that sets back growth by a week.
Environmental and lighting targets by growth stage
| Stage | Temperature (day/night) | Relative Humidity | Light schedule | PPFD target | CO₂ notes |
|---|---|---|---|---|---|
| Seedling (Days 1–7) | 22–26°C / 20–24°C (72–78°F / 68–75°F) | 65–70% RH | 18–20 hrs on (autos); 18/6 (photos) | 150–250 µmol·m⁻²·s⁻¹ | Ambient (no enrichment needed) |
| Vegetative (Weeks 2–3) | 22–26°C / 20–24°C | 60–65% RH | 18–20 hrs (autos); 18/6 (photos) | 400–600 µmol·m⁻²·s⁻¹ | Ambient unless running very high-intensity LED (>600 µmol) |
| Early flower (Weeks 4–6) | 20–26°C / 18–22°C | 50–55% RH | 18–20 hrs (autos); 12/12 (photos) | 600–900 µmol·m⁻²·s⁻¹ | CO₂ enrichment (800–1200 ppm) beneficial if PPFD ≥600 µmol and HVAC is controlled |
| Mid-late flower (Weeks 7–10) | 20–24°C / 17–21°C | 40–50% RH | Same as early flower | 700–900 µmol·m⁻²·s⁻¹ | Maintain CO₂ enrichment if using; monitor room CO₂ and stay well below 5,000 ppm OSHA/NIOSH limit |
| Ripening / final week | 18–24°C / 16–20°C | 40–45% RH | Slight reduction optional (16 hrs for autos) | 600–800 µmol·m⁻²·s⁻¹ | No CO₂ enrichment needed; focus on humidity management |
A note on CO₂: supplemental CO₂ enrichment (targeting 800–1,200 ppm inside the grow space) can increase photosynthesis rates meaningfully, but only when PPFD is already above roughly 500–600 µmol·m⁻²·s⁻¹. blank" rel="noopener noreferrer">Gavita Pro 270e LEP Brochure (PPFD recommendations) recommends targeting canopy PPFDs in the 700–1,000 µmol·m⁻²·s⁻¹ range for high‑yield generative (flower) phases and provides fixture PPF specifications used to achieve those canopy PPFDs. Below that threshold, light is the limiting factor and adding CO₂ does little. More importantly, if you are spending time in your grow room, especially during watering and training sessions, you must monitor CO₂ levels. blank" rel="noopener noreferrer">The OSHA Permissible Exposure Limit for CO₂ is 5,000 ppm as an 8-hour time-weighted average. A CO₂ controller with an automatic shutoff interlock when the room is occupied is the safe approach. I made the mistake early on of enriching a poorly ventilated space and felt the headache before I understood why.
Nutrients and feeding basics for fast cycles
Fast cycles demand nutrients that are dialed in from day one, because there is no time to recover from a multi-week deficiency or toxicity. The good news is that the fundamentals are simple once you understand what each stage needs.
What your plants actually need and when
Cannabis uses nitrogen (N), phosphorus (P), and potassium (K) as its primary macronutrients, with calcium and magnesium as critical secondary nutrients. During veg, nitrogen drives leafy green growth, peer-reviewed work from Caplan et al. (HortScience 2017) tested N inputs from 117–585 mg/L in vegetative cannabis and identified cultivar-specific optima in the moderate-to-high range. In practical terms, follow your nutrient manufacturer's veg feeding chart as a starting point and dial back 20–30% for first-time growers who tend to overfeed. During flower, reduce nitrogen and increase phosphorus and potassium to support bud development. Research suggests an optimal flower-stage nitrogen level around 194 ppm N under tested conditions, though your specific strain, medium, and irrigation approach will affect what works best.
EC and pH targets by stage
| Stage | EC target (dS/m) | pH range (soil) | pH range (coco/hydro) | Notes |
|---|---|---|---|---|
| Seedling | 0.4–0.8 | 6.0–6.5 | 5.8–6.0 | Plain water or very mild seedling solution |
| Veg | 1.2–1.7 | 6.0–6.5 | 5.8–6.0 | Nitrogen-forward formula, include calmag |
| Early flower | 1.6–2.0 | 6.0–6.5 | 5.8–6.2 | Transition to bloom formula |
| Mid-late flower | 1.8–2.4 | 6.0–6.5 | 5.8–6.2 | Full bloom formula, monitor runoff EC |
| Flush / ripening | 0.4–0.8 (plain water) | 6.0–6.5 | 5.8–6.0 | Last 5–10 days, watch for early deficiency signs |
Always check the EC and pH of your runoff (or reservoir in hydro) as well as your input water. If runoff EC is significantly higher than input EC (by more than 0.5 dS/m), salts are building up, give a plain water flush feed. If pH drifts out of range, nutrient uptake shuts down for specific elements regardless of how much you are feeding. I have seen magnesium deficiency symptoms appear within 72 hours of a pH excursion in coco, and in a fast grow, 72 hours matters.
Training and canopy management to save time and boost yield
Training is how you maximize the output of a compressed timeline. The goal is to create an even canopy where as many bud sites as possible receive direct high-intensity light. In a fast grow, the techniques you use must match the time you have available.
Low-stress training (LST)
LST is the safest and most time-efficient technique for fast cycles. Starting at week 2–3, gently bend the main stem outward toward the edge of the pot and secure it with a soft tie or pipe cleaner. This opens the center of the plant to light, encourages lower branches to grow upward and catch up to the main cola, and adds no recovery time. Repeat weekly as the plant grows. LST works on both autos and photoperiod plants and is my first recommendation for anyone doing their first 90-day grow.
Topping (photoperiod only, or experienced growers with autos)
Topping removes the growing tip to create two main colas, doubling the top bud sites. It requires 5–7 days of recovery time in photoperiod plants and can set back an auto significantly if done too late (after week 3) or in a stressed plant. For photoperiod grows with a 2–3 week veg, one topping at day 10–14 is feasible. For autos in a 90-day run, LST is generally preferable unless you have grown that specific auto strain enough times to know it handles topping well.
Supercropping
Supercropping, gently crushing and bending a stem until it kinks without breaking, is useful during the first 2 weeks of flower to bring tall branches level with the canopy when you don't have time for a full SCROG setup. The bent site forms a strengthened knuckle within 3–5 days. Use it sparingly and only when a specific branch is overtaking the canopy.
SCROG (Screen of Green)
A SCROG involves weaving branches through a horizontal net positioned 20–30 cm above the canopy, creating a flat, even bud plane. It is highly effective for maximizing yield per square metre but adds 1–2 weeks to the veg phase as you fill the screen before flipping. This makes SCROG most suitable for compressed photoperiod grows where you plan a 3–4 week veg, or for autoflower growers who accept a slightly longer total cycle in exchange for better canopy efficiency.
Harvest, dry, and cure: don't rush the last stage
This is the stage most beginners rush, and it is the one that most affects the final quality of your product. Your plant can be chemically ready at day 70, but poorly dried and cured flower will taste harsh, burn rough, and degrade faster. Budget at least 10–14 days for drying and 2–4 weeks for a basic cure, and yes, that technically extends your 90-day window, so factor it in from the start.
Deciding when to harvest
The most reliable harvest signal is trichome color under magnification. Using a 30–60x loupe or a USB microscope on a sugar leaf or small bract, look at the resin gland heads. Clear trichomes mean the cannabinoids are still developing, harvest now and potency will be lower than the plant's peak. Cloudy or milky-white trichome heads indicate peak THC/CBDA content. Amber heads mean THC is converting to CBN, more sedating, less cerebral effect. Most home growers target a mostly cloudy harvest with 5–20% amber depending on whether they prefer a more energetic or relaxing effect. Pistil color (orange-red = later harvest) is a useful secondary signal but less precise than trichome inspection.
Drying environment and process
Hang whole branches or place trimmed buds on a mesh drying rack in a dark room at 15–21°C (60–70°F) with 45–55% relative humidity and gentle airflow (fan pointed at a wall, not directly at buds). Drying too fast (low humidity, high heat) locks in a harsh hay-like smell. Slow drying at the right conditions allows chlorophyll to break down and terpenes to stabilize. The buds are ready for jars when the smaller stems snap rather than bend, usually 10–14 days. If they are bending after 10 days, continue drying. If they snapped after 5 days, the environment was too dry and your cure will be shorter.
The jar cure
Fill glass mason jars 2/3 full (never pack tight). For the first 2 weeks, open the lids twice a day for 15 minutes ('burping') to release moisture and CO₂ and allow fresh air in. After 2 weeks, once RH inside the jar stabilizes at 58–62% (use a small hygrometer or Boveda 62% pack to confirm), reduce burping to once every 2–3 days. The minimum cure for a noticeable quality improvement is 2 weeks. Four weeks produces significantly better flavor. Eight weeks is a standard target for premium results. You can store and smoke during the cure, just be aware the flavor develops substantially over the first month.
Common problems when you compress the grow cycle
Fast cycles expose problems faster because you have less time to course-correct. Here are the issues that come up most often in compressed grows, and what to do about them.
| Problem | Cause in fast grows | Symptoms | Quick fix |
|---|---|---|---|
| Excessive stretch (photoperiod) | Flipping too early with low-light veg, or tall genetics | Plants double or triple in height in first 2 weeks of flower | Supercrop upper branches; raise light gradually; next time use shorter-statured strains or top before flip |
| Nutrient lockout | pH drift, salt buildup from aggressive feeding, or using high EC too early | Yellowing or browning leaves despite regular feeding | Flush medium with pH-corrected water; check and correct pH; wait 24–48 hrs before resuming nutrients |
| Light stress / bleaching | Light too close to canopy, especially with high-intensity LEDs | White/bleached leaf tips near light, curling upward | Raise light by 5–10 cm; reduce intensity temporarily; measure PPFD at canopy |
| Pests (spider mites, fungus gnats) | Compromised by stress of compressed cycle and high humidity | Webbing under leaves (mites); slow growth, yellow lower leaves (gnats from overwatered soil) | Neem oil or spinosad spray for mites; sticky traps + let medium dry out between waterings for gnats |
| Hermaphroditism | Light leak during 12/12 dark period, heat stress, or genetic predisposition | Small banana-shaped pollen sacs (nanners) among pistils | Remove affected plant or pollen sacs immediately; check tent light seal; review heat events |
| Mold (botrytis / bud rot) | High humidity in late flower, dense buds, poor airflow | Gray fuzzy mold inside dense buds, often near stem | Remove affected material; drop humidity to 40–45%; increase airflow; harvest earlier if spreading rapidly |
Legal, safety, and responsible growing reminders
Before you start any grow, check the specific laws in your jurisdiction. Cannabis cultivation laws vary enormously, by country, by state or province, and in some places by municipality. In many places, home cultivation is fully legal with plant count limits (commonly 2–6 plants per household for personal use). In others, cultivation remains illegal regardless of personal use status. It is your responsibility to know the current rules where you live, and they change, what was illegal two years ago may be permitted now, or vice versa. This guide is educational and makes no endorsement of activities that are unlawful in your location.
- Odor control: A quality carbon filter rated for your tent volume is not optional once plants hit week 4 of flower. Neighbors, landlords, and visitors should not be able to identify what you are growing from outside your space.
- Secure storage: Keep seeds, plants, and harvested material in a locked, inaccessible space. If children or pets share your home, this is a safety requirement, not a suggestion.
- Child and pet safety: Cannabis plants, nutrients, and pH adjustment chemicals are all hazardous to children and animals. Store all chemicals in original labeled containers in a locked cabinet. Keep pets away from the grow space.
- CO₂ enrichment safety: If you use supplemental CO₂, install a CO₂ monitor with an audible alarm and automatic shutoff that activates when the room is occupied. The OSHA/NIOSH CO₂ PEL is 5,000 ppm (8-hour TWA) — elevated CO₂ in a sealed grow room can reach dangerous concentrations quickly.
- Waste disposal: Spent nutrient solution, plant material, and medium should be disposed of discreetly and in accordance with local guidelines. Do not pour high-EC nutrient runoff into storm drains.
- Electrical safety: Grow lights, fans, and timers draw significant current. Use a dedicated circuit where possible, never overload extension cords, and keep water and electricity strictly separated.
Suggested images and captions for this article
The following image placements would strengthen this article's practical value and are recommended at publication:
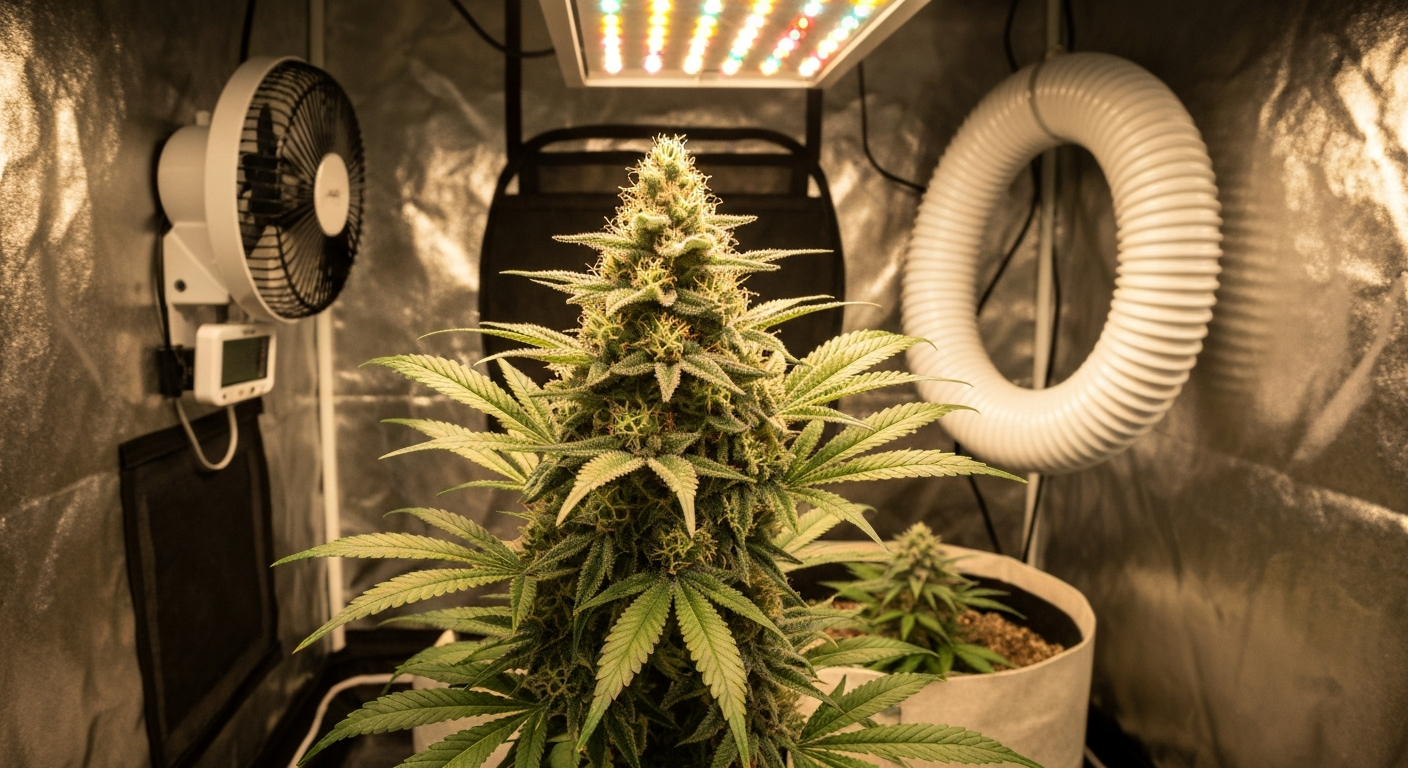
- Hero image (top of article): A healthy autoflower plant in week 7 of an indoor tent grow, with dense trichome-covered buds under LED lighting. Caption: 'A well-managed autoflower in late flower — dense buds, clean canopy, and a 70–84 day harvest window is within reach.'
- Equipment flat lay (equipment checklist section): A top-down photo of all starter equipment laid out — tent, LED, carbon filter, pots, pH/EC meters, nutrients. Caption: 'Everything you need for a basic 90-day indoor grow fits on one table — and most of it gets reused every cycle.'
- Week-by-week growth collage (autoflower timeline section): A four-panel photo showing seedling (day 7), early veg (week 2), bud set (week 6), and harvest-ready (week 10). Caption: 'From sprout to harvest: the four key visual checkpoints of a fast autoflower cycle.'
- LST in action (training section): A top-down photo of an autoflower with stems bent outward and secured with soft ties, showing an open canopy. Caption: 'Low-stress training at week 3 opens the canopy to light without stressing the plant — critical for maximizing autoflower yields.'
- Trichome closeup (harvest section): A macro/microscope image of trichome heads showing a mix of cloudy and early-amber heads. Caption: 'Under magnification: mostly cloudy trichome heads with a small proportion of amber — a common visual target at harvest.'
- Drying rack (dry and cure section): Trimmed buds on a mesh drying rack in a dark space. Caption: 'Slow drying at 15–21°C and 45–55% RH for 10–14 days is where flavor and smoothness are made or lost.'
- Jar cure setup (cure section): Several glass mason jars with buds, small hygrometers visible inside each jar. Caption: 'A basic jar cure setup — glass containers, a small hygrometer in each jar, and regular burping for the first two weeks.'
Your next steps and where to go deeper
A 90-day grow is achievable, but it rewards preparation more than any longer cycle does. Before you drop a seed, spend time with your strain's specific grow reports, understand your local water quality (pH and starting EC of tap water varies enormously and affects feeding from day one), and set up your environment and timers before the plant arrives in it. If you want a quick answer on total cultivation time, see our guide on how many days to grow weed for breakdowns by method and strain. The biggest time losses in fast grows come from reactive problem-solving, catching a pH issue or a light-height problem a week earlier saves more time than any speed-genetics hack.
If you want to dig deeper into the time question from different angles, including how different methods compare in total days, how indoor grows specifically affect timeline, and how greenhouse growing changes the equation, there is more detail in the companion articles covering how long cannabis takes to grow indoors, greenhouse growing timelines, and general seed-to-harvest week counts. See our companion piece on how many weeks to grow weed for a week-by-week breakdown across methods. See the companion article 'how long does a weed plant take to grow indoors' for an indoor-focused breakdown of timelines and stage-by-stage targets. Read our detailed guide on how long to grow weed for breakdowns by method and expected timelines. For growers with even more ambitious timelines, the 60-day grow guide covers whether sub-90-day harvests are possible and what they require. For growers with even more ambitious timelines, see the companion guide how to grow weed in 60 days for step-by-step schedules, strain recommendations, and the trade-offs you should expect. And if you are still working out how much to grow relative to your consumption, the coverage of how much to grow cannabis walks through the yield-planning math in more detail.
The 90-day goal is real. Pick fast genetics, dial your environment before day one, feed conservatively and check your pH every time, and do not rush the dry and cure. Follow those four rules and you will have quality homegrown in your jar before the season changes.
FAQ
Can you reliably grow cannabis from seed to harvest in about 90 days at home?
Yes — but method and genetics matter. Fast autos (breeder‑claimed ~56–80 days) and aggressive photoperiod strategies (very short veg before 12/12) are the two practical approaches. Hydroponics, greenhouses with supplemental light, and high‑intensity indoor lighting speed growth. Expect real‑world variance: many autos finish between ~60–100+ days depending on pot size, environment and grower technique.
Which approach is fastest: autoflower, short‑veg photoperiod, greenhouse, or hydroponic?
Fastest typically = fast autoflowers in an optimized environment (good light, temps, nutrients). Hydroponics speeds vegetative growth vs soil and can shorten time-to-harvest by supporting faster canopy expansion. Greenhouses with light supplementation can approach indoor timelines but depend on season and climate. Short‑veg photoperiod (switching to 12/12 after 2–4 weeks veg) can finish ~11–13 weeks with short‑flowering strains but usually sacrifices per‑plant yield.
What strains or genetics should I choose to hit ~90 days?
Pick proven fast autoflower cultivars (breeder cycle 56–85 days) from reputable breeders (e.g., Mephisto, RQS examples). If using photoperiod plants, choose strains with short flower times (7–8 weeks) and plan a very short veg period. Always review multiple grower logs; breeder minimums are optimistic and real cycles often run longer.
What is a realistic week‑by‑week timeline for a 90‑day autoflower grow?
Typical compressed autoflower timeline: Days 0–7: germination and seedling; Weeks 1–3 (Days 7–21): rapid veg—strong light, warm temps, steady runoff EC; Weeks 3–6 (Days 21–42): floral transition and early budset; Weeks 6–9 (Days 42–63): peak bud development; Weeks 9–13 (Days 63–90+): ripening and harvest window (trichome check). Adjust by strain—some finish earlier, others later.
What environmental and lighting targets should I aim for?
Vegetative PPFD: ~300–600 µmol·m⁻²·s⁻¹ (typical 400–600). Flower PPFD: 600–900+ µmol·m⁻²·s⁻¹ for fast, high‑quality flowering if your HVAC/CO₂ allow. Day/night temps: veg 22–28°C (72–82°F), flower slightly cooler night temps ~18–24°C. RH: seedlings 60–70%, veg 50–70%, flower 40–50% (lower late flower). Use CO₂ only with PPFD ≥500–600 and proper safety controls.
What nutrient/EC targets help a compressed cycle?
Seedlings: low EC ~0.4–0.8. Veg: EC ~1.2–1.8 (adapt to medium). Flower: step up to ~1.6–2.4 EC mid‑flower; late flower may increase slightly depending on runoff and strain. Monitor plant response and adjust N/K ratios—flowering benefits from reduced nitrogen and higher phosphorus/potassium during budset. Follow cultivar‑specific charts and measure runoff EC/pH.
Next Article
How Many Days to Grow Weed: Seed vs Clone Timelines
Seed vs clone timelines for photoperiod and autoflower, with stage days, maturity checks, and how to forecast harvest.