Growing cannabis in a greenhouse gives you the best of both worlds: free sunlight from the sun and enough environmental control to actually hit your targets for temperature, humidity, and airflow. You can run a full season from seed to harvest with lower electricity costs than a pure indoor grow, and better consistency than a fully outdoor setup. The basic plan is this: build or choose a compliant greenhouse with a lock, pick strains suited to your local season length, germinate indoors or in a warm corner of the greenhouse, then manage your environment and light schedule through veg and flower, stay aggressive on humidity and pest control, and finish with a slow dry and cure. If you are trying to estimate how much to grow cannabis for a personal harvest, start by planning your plant count and greenhouse size around the yield per plant you can realistically achieve in your conditions lock, pick strains suited. That's the whole arc. Everything below breaks it down step by step.
How to Grow Weed in a Greenhouse: Step-by-Step Guide

Greenhouse setup basics and legal compliance
Before you build or buy anything, check your local home cultivation laws. Rules vary significantly by state and country, and a greenhouse that's visible from the street can create legal problems even where growing is technically allowed. In Massachusetts, for example, plants cannot be visible from a public place without optical aids, and the grow area must be equipped with a lock or other security device. Oregon limits households to four plants total, regardless of how many adults live there. New York allows up to six plants per adult (three mature, three immature) with a household cap of twelve, and also requires you to take reasonable measures to prevent cannabis odor from becoming a nuisance to neighbors. Nevada allows up to six plants per person and no more than twelve per household. Whatever your jurisdiction, the greenhouse itself counts as your controlled cultivation space, so it must meet whatever security and visibility requirements apply to you.
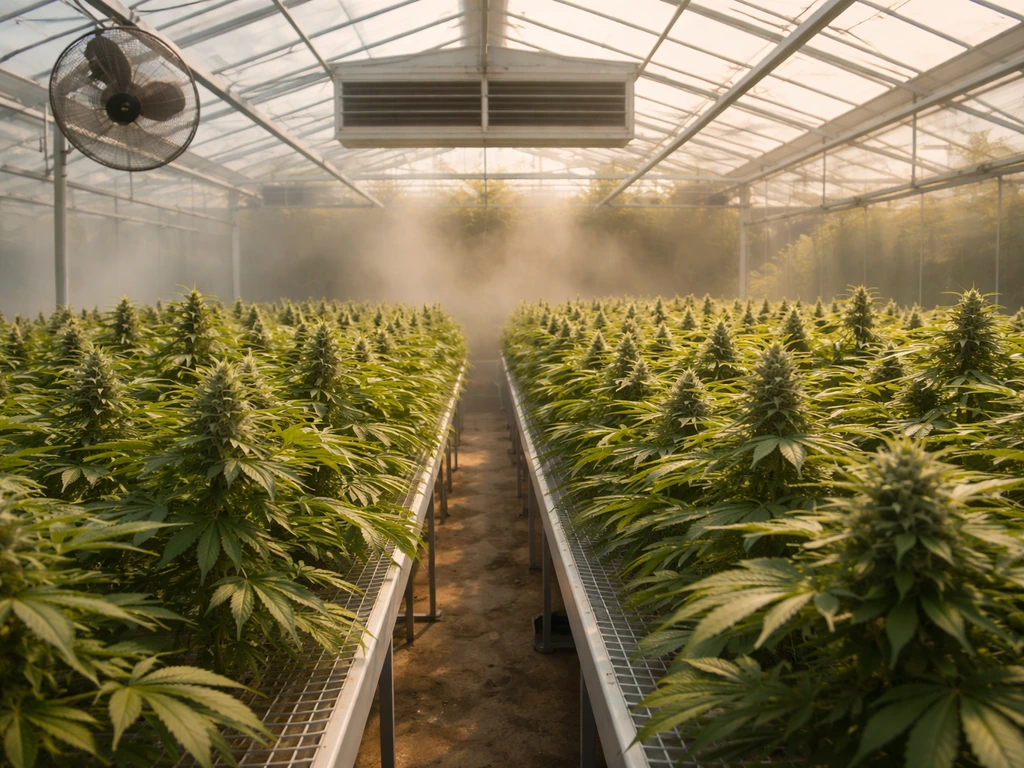
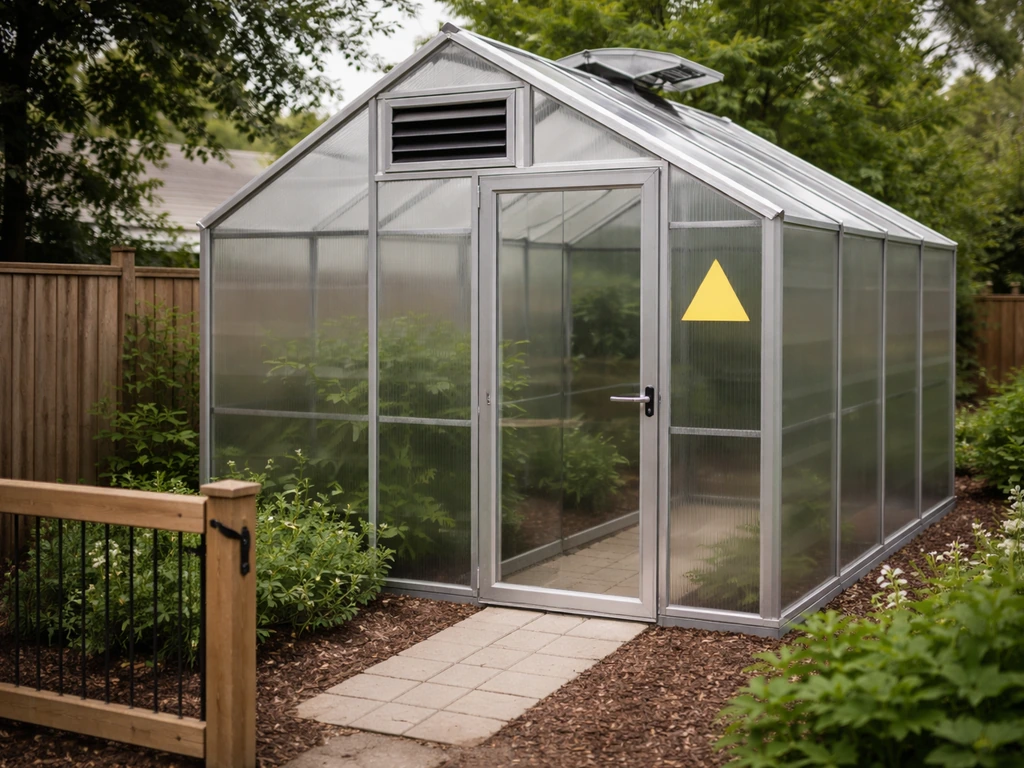
For the physical structure, a polycarbonate or glass-panel greenhouse works well for cannabis. Twin-wall polycarbonate is a popular choice because it insulates better than single-pane glass while still letting in plenty of light. Size your greenhouse to your plant count with room to work around the plants: a 6x8 or 8x12 foot structure is manageable for most home growers. You'll need at minimum a lockable door, side vents or roll-up sides, and roof vents or an exhaust fan. Airflow is not optional for cannabis. Without it, humidity stacks up in the canopy and you get mold. Plan for at least one inline fan exhausting hot air near the roof peak, with passive intake low on the opposite wall. If your budget allows, add an oscillating fan inside at canopy level to break up stagnant air pockets. Install a thermometer and hygrometer combo unit so you can actually see what's happening inside before problems start.
- Lockable door or padlocked entry to meet security requirements in most jurisdictions
- Opaque or privacy screening on sides facing public sightlines if required by local law
- Roof vent or exhaust fan placed high to expel heat and humid air
- Passive intake vent low on the opposite wall for fresh air exchange
- Oscillating clip or floor fan at canopy level for internal air movement
- Thermometer/hygrometer combo (digital units with min/max memory are worth it)
- Shade cloth (30–50%) for summer heat management in warmer climates
- Carbon filter on exhaust if odor control is legally required or neighbor-sensitive
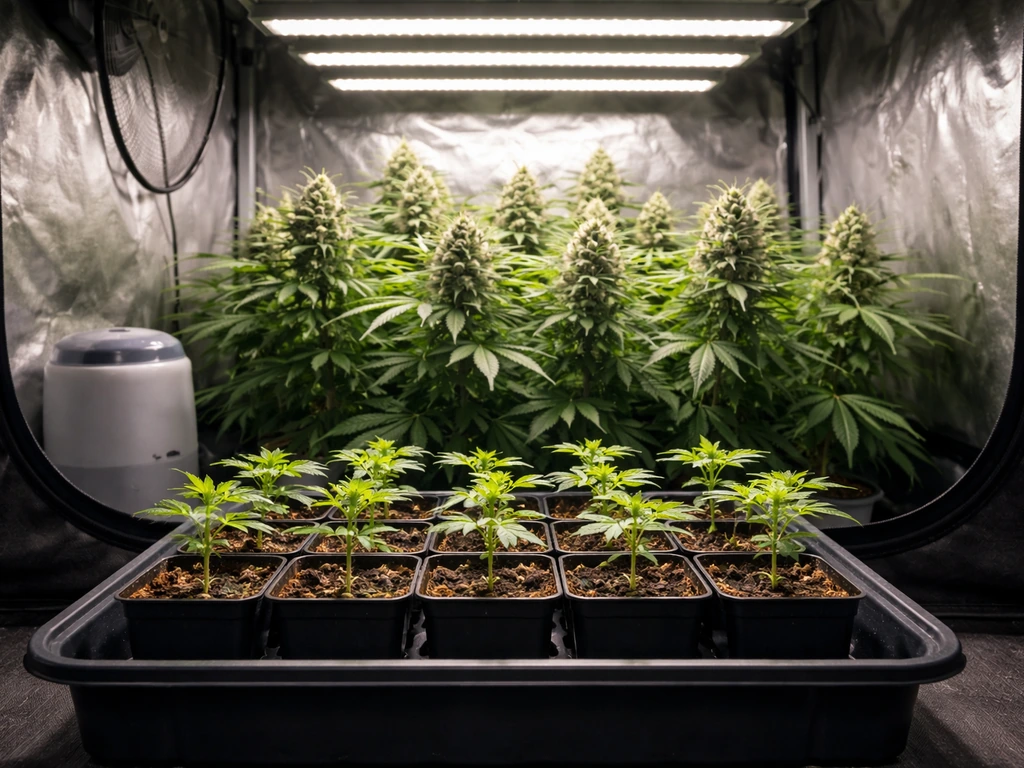
One thing I wish I'd done earlier: line the north-facing wall with white poly or reflective material. It bounces light back into the canopy instead of letting it escape, and it costs almost nothing. If you're in a northern climate or planning a shoulder-season grow, consider adding a small supplemental lighting setup (LED or HID) inside the greenhouse to extend your photoperiod or boost light levels on cloudy days. This is the one area where greenhouse growing overlaps with the indoor approach, and it gives you a lot of scheduling flexibility.
Choosing strains and planning your light and season schedule
Strain selection is probably the most important decision you'll make before planting, because cannabis in a greenhouse lives and dies by the photoperiod (the ratio of light hours to dark hours each day). Photoperiod strains are the standard choice for greenhouse cultivation because you can manipulate when they flower by controlling light. Autoflowering strains flower based on age, not light, which means they're simpler to manage but you give up the ability to extend veg time or dial in a harvest window precisely. For most greenhouse growers, I'd recommend starting with a photoperiod indica-dominant or hybrid strain with a flowering time of 8 to 10 weeks, because these finish before fall humidity peaks that drive bud rot.
In natural light, cannabis starts flowering when days shorten to around 12 hours of light and 12 hours of darkness. In the Northern Hemisphere, that shift typically happens around late July to early August depending on your latitude. If you want plants to veg longer (and get bigger before flower), you can run a supplemental light inside the greenhouse after sunset to keep the total light period above 14 to 16 hours. This prevents early flowering and lets you control the timing. When you're ready to trigger flower, just stop running the supplemental light and let the natural photoperiod do its work. If you want to flower earlier than the natural equinox allows, you can use blackout curtains or tarps to manually block light and force a 12/12 schedule. It's extra labor but it gives you a harvest window that avoids the worst of fall weather.
| Strain Type | Photoperiod Control Needed | Veg Length Flexibility | Best For |
|---|---|---|---|
| Photoperiod (indica/hybrid) | Yes, manage with lights or blackout | High, you set it | Most greenhouse growers, experienced beginners |
| Photoperiod (sativa-dominant) | Yes, and longer flower time (10–14 wks) | High, but risky in short seasons | Warm climates with long seasons |
| Autoflowering | No, flowers by age (~70–90 days total) | Low, limited control | Simplicity, multiple harvests per season |
| Fast-flowering photoperiod | Yes, but shorter flower (6–8 wks) | Moderate | Northern climates, early harvest targets |
Plan your season backward from your target harvest date. If you want to harvest by early October in a northern climate, count back 8 to 10 weeks for flowering, then add 4 to 8 weeks of veg time, plus 1 to 2 weeks for seedling establishment. That puts your germination start somewhere in April to May. If you're in a warmer climate with a longer season, you have more flexibility to start later or run sativa-dominant strains. If the timeline question is important to you, the related topic of how long to grow weed in a greenhouse goes deeper on week-by-week schedules and what affects total grow time. For a week-by-week breakdown of how long the whole greenhouse grow takes, see the guide on how long to grow weed in a greenhouse. If you want the breakdown for timing, see how long to grow weed in a greenhouse for a week-by-week schedule. If you’re growing entirely indoors instead of in a greenhouse, the same week-by-week approach still applies, but the timeline can shift based on your light schedule and strain how long to grow weed in a greenhouse.
Germination to seedling stage in a greenhouse
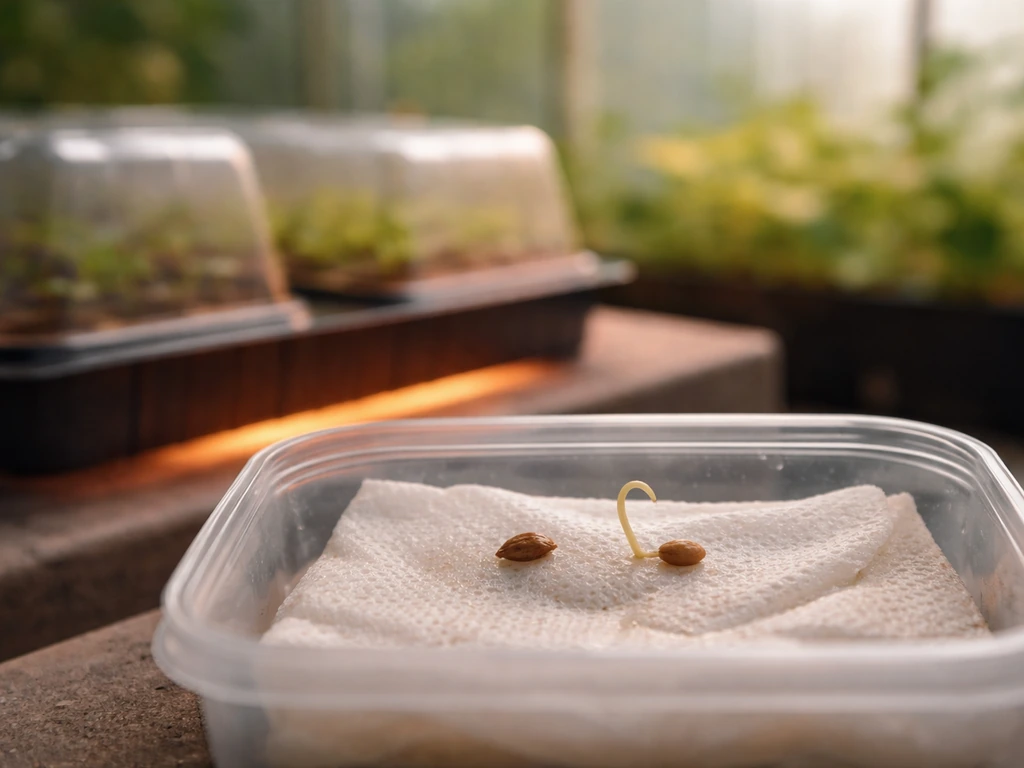
Don't try to germinate seeds directly in the greenhouse if nighttime temps are still dropping below 60°F (15°C). Cannabis seeds want consistent warmth between 70 and 85°F (21 to 29°C) to germinate reliably. I usually start seeds indoors in late April using the paper towel method or directly in small rockwool cubes or seedling plugs, then move them into the greenhouse once they've sprouted and have their first set of true leaves. This usually takes 3 to 7 days for germination and another 7 to 10 days before they're ready to transplant.
For germination, the paper towel method is simple: dampen (not soaking wet) two paper towels, place seeds between them, fold them into a plate or container, and keep them in a warm dark spot. Check every 12 to 24 hours. Once the taproot is 0.5 to 1 cm long, transfer seed to a small container with a light, airy seedling mix. Plant with the taproot pointing down, about half a centimeter deep. Don't overwater at this stage. The seedling needs moist but not waterlogged soil. Water around the seedling, not directly on top of it, and let the medium dry slightly between waterings. Seedlings don't need nutrients yet. Plain, pH-adjusted water (around 6.0 to 6.5 for soil, 5.5 to 6.0 for coco) is all they need for the first two weeks.
When moving seedlings into the greenhouse, acclimate them gradually. If the greenhouse is significantly warmer or brighter than where they germinated, set them in a shaded corner for the first two to three days. Direct, intense sunlight on a young seedling can bleach or stress it fast. Use a humidity dome over seedlings if your greenhouse is dry, aiming for 65 to 80% relative humidity at this stage. Once plants have established roots (usually around week 2 to 3 from germination), they're ready for their first transplant into a larger pot and can handle more direct light.
Vegetative growth: environment targets, feeding, and training
Veg is where the plant builds the structure it'll carry through flower, so your job is to give it ideal conditions and steer its shape. For a greenhouse, that means managing temperature swings, which can be brutal. On a clear summer day, an unventilated greenhouse can hit 110°F or more inside. Cannabis vegging plants prefer 70 to 85°F (21 to 29°C) during the day and tolerate nights down to around 60°F (15°C). If your greenhouse regularly pushes above 90°F, open all vents, run your exhaust fan at full speed, and consider adding shade cloth. Chronic heat stress shows up as leaf curling, slowed growth, and wilting even in well-watered plants.
Relative humidity during veg can run higher than during flower because dense buds aren't present yet. A target of 55 to 70% RH is comfortable for vegetating plants and supports healthy transpiration. Understanding VPD (vapor pressure deficit) helps here: VPD is the difference between the moisture currently in the air and the maximum moisture the air could hold at saturation. Higher VPD (drier air) pushes plants to transpire harder and draw up more water and nutrients. Lower VPD (more humid air) slows that process. During veg, keeping VPD in a moderate range (roughly 0.8 to 1.2 kPa) encourages healthy growth without over-stressing the plant. You don't need to obsess over VPD charts as a beginner, but if you have a thermometer/hygrometer combination, you can reference a basic VPD table to sanity-check your environment.
Watering in veg follows a simple rule: water when the top inch of soil feels dry, and water until you get about 10 to 20% runoff from the bottom of the pot. Then wait. Lift the pot to feel its weight after watering vs. when dry. It sounds basic, but overwatering is the most common beginner mistake and it looks exactly like underwatering (drooping, pale leaves). In a greenhouse, your pots can dry out faster than indoors on hot days, so check daily. If you're using coco coir, it can handle more frequent watering since it drains freely and holds oxygen well.
For nutrients during veg, cannabis wants nitrogen-forward feeding. Most commercially available cannabis nutrient lines (General Hydroponics, Fox Farm, Athena, etc.) have a veg-stage formulation. Start at half the recommended dose for the first feeding and watch how the plant responds over 3 to 5 days before increasing. Signs of overfeeding include dark-clawing leaves and nutrient burn on tips. Signs of deficiency include yellowing from the bottom up (nitrogen), yellow interveinal patches (magnesium or iron), or purple stems (phosphorus in some conditions). Maintain pH in the root zone: 6.0 to 6.8 for soil, 5.5 to 6.2 for coco or hydro. pH drift is the number-one reason nutrient deficiencies appear in otherwise well-fed plants.
Training during veg is how you maximize your yield in a greenhouse. Low-stress training (LST) is the easiest starting point: bend branches outward and down, securing them with soft ties or plant clips to the rim of the pot. This opens up the canopy, lets light reach lower bud sites, and keeps the plant wide rather than tall, which matters for humidity management later. If you're more experienced, topping (cutting the main stem above a node) creates two main colas from one and encourages a bushier, more even canopy. Super cropping (intentionally stressing a branch by pinching and bending it at a 90-degree angle) is another tool to control height and increase yield in experienced hands. Whichever method you use, stop any major training 1 to 2 weeks before flipping to flower so the plant can recover.
Flowering: photoperiod and light management, irrigation, and nutrient timing
Once your plant transitions to flower (either naturally as days shorten, or because you've stopped supplemental lighting or started a manual blackout), your environment targets shift and so does your feeding strategy. The first two weeks of flower (pre-flower stretch) can see plants double in height, so give them room. By week 3 to 4, bud sites are forming and you need to get serious about humidity management.
Target daytime temperatures of 65 to 80°F (18 to 27°C) during flower, with nights slightly cooler, around 60 to 70°F (15 to 21°C). That slight day-night temperature drop (called DIF) can help encourage resin production and improve color in some strains. Relative humidity should come down progressively: aim for 50 to 65% RH in early flower, then drop to 45 to 55% RH in late flower (weeks 5 and beyond), and push for 40 to 50% in the final two weeks before harvest. If your greenhouse can't hit these targets naturally, you need a dehumidifier sized for your space. For a typical 8x10 foot greenhouse with 6 to 8 plants in late flower, a 30-pint dehumidifier is a reasonable starting point, but measure your actual RH and add capacity if needed. This is the single biggest risk factor in greenhouse growing: high humidity in a canopy full of dense buds is how you get Botrytis (bud rot) wipeouts.
Lighting management in flower is straightforward if you're relying on natural photoperiod. The sun handles the 12/12 schedule automatically from late summer onward in northern latitudes. If you're using blackout curtains to force flower earlier in the season, be consistent: the dark period must be truly dark and uninterrupted. Even a few minutes of light during the dark cycle can stress plants, cause hermaphroditism (the plant produces pollen sacs), or push them back into veg. Run your blackout at the same time every day, and check for light leaks at seams and vents.
Nutrient timing in flower shifts toward phosphorus and potassium and away from nitrogen. Most growers do this by switching to a bloom-stage nutrient line around week 2 to 3 of flower. A common framework: weeks 1 to 3, transition nutrients (moderate N, increasing P and K); weeks 4 to 6, peak bloom (low N, high P and K, add cal-mag if running RO water or coco); weeks 7 to harvest minus 1 week, late bloom and flush. A plain-water flush in the final 7 to 14 days before harvest is standard practice for many soil growers to clear residual nutrient salts and improve final flavor. Continue pH discipline throughout: 6.0 to 6.8 for soil, 5.5 to 6.2 for coco or hydro. Watering frequency often increases in flower as plants uptake more water through larger root systems, but let the medium cycle through dry and wet phases rather than keeping it constantly saturated.
Pest and disease prevention, and keeping bud rot out of your greenhouse
Greenhouses concentrate everything: warmth, moisture, CO2, nutrients, plants. Pests and pathogens love that just as much as cannabis does. The two diseases you're most likely to fight in a greenhouse are powdery mildew (Podosphaera macularis), which shows up as white dusty patches on leaves, and gray mold (Botrytis cinerea), better known as bud rot, which destroys flowers from the inside out. Both thrive in humid, stagnant conditions. Your first line of defense is the airflow and humidity control you've already set up. Your second line is sanitation.
Sanitation means keeping your greenhouse clean in a specific, deliberate way. Remove dead leaves and plant debris immediately since they're a food source for mold spores. Don't wear the same clothes you used outdoors or around other plants into the greenhouse without thinking about it. Some serious greenhouse growers keep dedicated greenhouse shoes and a light jacket hung at the door specifically to reduce the introduction of fungal spores and pests. Wash your hands before working with plants. Tools that touch plants should be wiped down with isopropyl alcohol between uses, especially pruning scissors.
Common pest threats include spider mites (tiny, leave webbing on undersides of leaves and bronze stippling on leaf surfaces), fungus gnats (larvae damage roots, adults are annoying), aphids (soft-bodied insects clustering on new growth), thrips (silvery streaks on leaves), and caterpillars in outdoor-adjacent greenhouses. Check the undersides of leaves weekly during veg and early flower. Once pest populations explode in flower, your treatment options get limited fast because you don't want to spray chemicals on buds. Prevention and early intervention are everything.
- Install insect mesh over vents and intake openings to block entry
- Use yellow sticky traps inside the greenhouse to monitor flying pest populations
- Apply beneficial nematodes to soil mix to suppress fungus gnat larvae
- Introduce predatory insects (lacewings, predatory mites) early in the season as biological control
- Spray neem oil or spinosad during veg only, stopping at least 2 to 3 weeks before flowers form
- For powdery mildew in early stages, potassium bicarbonate or diluted hydrogen peroxide sprays can help
- For Botrytis, remove infected bud material immediately with clean scissors, bag and dispose outside the greenhouse
- Defoliate selectively in weeks 3 to 4 of flower to improve airflow through the lower and middle canopy
Bud rot is worth a specific warning because it's silent until it's bad. It starts inside a dense cola, often triggered by moisture trapped between buds. The first sign is usually a single leaf that yellows and dies inside a bud cluster. Pull that leaf gently. If the stem underneath is gray, soft, or crumbles, you have Botrytis. Cut the affected cola section out with sterile scissors, go a few inches below the visible infection, bag it, and get it out of the greenhouse. Check surrounding buds. Reduce RH immediately. If you're hitting bud rot mid-flower and can't control humidity, harvest early rather than lose the whole plant. A slightly early harvest beats a moldy one every time.
Harvest, drying, and curing the right way for greenhouse crops
Harvest timing in a greenhouse follows the same visual cues as any grow: trichome color is the most reliable indicator. Use a jeweler's loupe (30x to 60x) or a digital microscope to examine trichomes on the bud itself, not on sugar leaves. Clear trichomes mean not ready. Milky or cloudy trichomes indicate peak THC. Amber trichomes mean THC is converting to CBN, which produces a more sedative effect. Most growers harvest when trichomes are mostly cloudy with 10 to 30% amber for a balanced effect. Pistils (the tiny hairs on buds) are a rough guide: when 70 to 90% have turned orange or red and curled in, you're in the harvest window. Use both indicators together.
The greenhouse-specific issue at harvest is that your plants have been living in a higher-humidity environment than indoor grows, so the plant material itself holds more moisture. This makes slow, controlled drying even more important. Don't rush it. Cut whole branches or the whole plant and hang them upside down in a dedicated drying space. The ideal drying environment is around 60 to 65°F (15 to 18°C) and 50 to 55% relative humidity with gentle airflow that moves air around the buds without blowing directly on them. At these conditions, a proper dry takes 7 to 14 days. Drying typically takes about 7 to 14 days after harvest, but total time to grow depends on your chosen strain and schedule. Avoid drying inside the greenhouse itself, since it's usually too humid and lacks the airflow control you need. A climate-controlled room indoors, a well-ventilated shed, or even a grow tent with a small dehumidifier works well.
The dry is done when small stems snap cleanly rather than bending. If stems bend, keep drying. If buds feel crispy on the outside but the stem still bends, the outside is dry but moisture is still migrating from the center. Once stems snap, trim (if you haven't wet-trimmed at harvest), and move to jars for curing. Fill wide-mouth mason jars to about 75% capacity. Open (burp) lids twice daily for the first two weeks to release moisture and fresh the air inside. After two weeks, burp once a day for another two weeks. Target RH inside jars of 55 to 65%. You can use small hygrometers that fit inside mason jar lids, or Boveda humidity packs rated at 62% to maintain the cure environment. If your jars read above 70% RH, leave lids off for a few hours to dry things down. Below 55% and buds are overcured and brittle. A minimum cure of 4 weeks produces noticeably better flavor and smoother smoke than uncured or quickly dried cannabis, and 8 weeks or more is worth it for premium results.
One last note: greenhouse growing has a learning curve, and your first run will teach you more than any guide can. The timing variables, the season planning, the humidity battles, they all feel more manageable once you've been through one cycle. If you are specifically aiming for how to grow weed in 60 days, you can use this same greenhouse setup and then tighten the schedule by planning a fast-flowering strain and managing light and humidity from day one. If you're also curious about how total grow time compares across methods, the breakdown of how long to grow weed in a greenhouse goes into that timing in more detail, and understanding how many weeks each stage takes can help you plan future seasons more precisely. Keep notes on what you adjust each run, and each cycle gets cleaner.
FAQ
Is it safe to germinate seeds directly in the greenhouse if the greenhouse stays warm during the day?
Day warmth is not enough, seeds still need stable night temperatures. If nights dip below about 60°F (15°C), germination becomes slower and uneven. A practical approach is to start seeds indoors or use a small warm propagation spot (heat mat plus humidity dome) until you see the first true leaves, then move them into the greenhouse.
How can I tell whether my humidity problem is in veg, in flower, or only during mornings?
Check RH at least twice daily, morning and late afternoon, because greenhouse RH often peaks before vents catch up. If RH is only high at night or right after sunset, you can target ventilation timing or run the exhaust longer during the pre-dawn hours. If RH stays high all day, you likely need more exhaust capacity, better intake paths, or a properly sized dehumidifier.
Do I need CO2 enrichment in a greenhouse to get good yields?
Not for a first grow. Greenhouse yields can be solid using natural CO2, and adding enrichment only makes sense once you have reliable temperature, humidity, and airflow control (and you are actually able to keep plants within the target VPD range). If you do add CO2, you must coordinate it with ventilation, otherwise you waste gas and risk overheating.
What’s the easiest way to prevent light leaks when using blackout curtains or tarps?
Treat seams, zipper areas, and vent openings as the usual leak points. Run the blackout at the same time daily and verify darkness using a simple test, tape a piece of paper over small gaps and use a flashlight at floor level to check for any stray illumination during the dark period.
Can I use autos in a greenhouse, and what changes in management?
You can, but the strategy changes. Autoflowers ignore your photoperiod schedule for timing, so you cannot reliably extend veg to avoid early fall humidity. You must plan around the plant’s age-based flowering window and keep environmental stress low during the transition period because autos have less recovery time if conditions are poor.
How do I avoid fungal issues when I’m pruning or training branches?
After training, avoid creating dense “locks” where buds press tightly together. Also sterilize tools between plants or at minimum between problem and healthy plants, wipe with isopropyl alcohol. Remove leaves that are clearly damaged, and avoid working when plants are wet with condensation, do it after the greenhouse has aired out.
What’s the fastest corrective action if bud rot starts showing up?
Act immediately to stop spread. Remove any infected material below the visible area using sterile scissors, bag it, and take it out of the greenhouse. Then reduce RH quickly, increase airflow, and check surrounding buds closely. If you cannot bring RH down to safer levels, harvesting affected plants earlier can save the rest of the crop.
Should I flush in a greenhouse, and does it matter if I’m using soil or coco?
Flushing is optional and depends on your medium and how stable your pH has been. If you keep pH in range and your plants look healthy, the biggest lever is reducing salt buildup through clean water cycles rather than a long aggressive flush. For coco, many growers focus more on correct feed strength and consistent pH, because salts can still accumulate if watering is inconsistent.
How do I size a dehumidifier so I do not overbuy or underbuy?
Use your measured worst-case RH, not your average. Determine how high RH gets during the highest-risk window (usually early dark cycle into night) and size based on that peak. A common mistake is running a dehumidifier too small so RH only drops briefly, then rebounds when cooling slows airflow and moisture condenses.
Why do drooping and pale leaves both happen from overwatering and underwatering?
In greenhouse growing, the plants often respond similarly because the roots cannot function well in both scenarios. Overwatering reduces oxygen in the root zone and leads to droop, while underwatering dehydrates tissue and also droops. The decision aid is to check pot weight and soil moisture several inches down, then water based on a repeatable threshold rather than by calendar.
What are realistic yield expectations per plant in a greenhouse, and how do I estimate mine?
Yield depends heavily on whether you can hit flower humidity targets and maintain steady temps, not only on strain. A practical method is to run one “baseline” grow with your planned pot size, number of plants, and training style, record RH/temperature issues, then use that as your yield model for the next season. Do not assume indoor yields automatically translate outdoors greenhouse conditions.
When should I start harvesting based on trichomes if my buds are still growing and RH is rising?
Use trichome indicators, but let humidity risk set the urgency. If RH is persistently high late in flower and you are seeing early signs of rot or recurring condensation, harvesting earlier (with mostly cloudy trichomes) can prevent losing the entire crop. A slightly early harvest is often more reliable than waiting until every perfect cue matches.
What’s the best way to decide when the dry is complete?
Do the stem snap test rather than relying only on bud surface feel. If small stems bend, continue drying, moisture is usually still moving from the center. If stems snap cleanly, you are ready to trim and jar, then aim for jar RH in the mid 50s to low 60s to avoid both mold and overly fast overcure.
How Long Does a Weed Plant Take to Grow Indoors? Seed to Harvest
Indoor cannabis timeline from seed or clone to harvest, with ranges, readiness signs, and how to hit your date.