Growing outdoor cannabis step by step comes down to seven things: confirming you're legal, picking the right strain for your climate, starting seeds or clones correctly, dialing in your outdoor environment, feeding at the right stages, managing flowering without surprises, and harvesting and curing properly at the end. If you do all seven reasonably well, you'll pull a solid harvest. Miss a couple and you'll still get buds, but you'll leave a lot on the table. This guide walks you through each stage in order, with specific numbers and actions you can apply right now.
How to Grow Outdoor Weed Step by Step From Seed

Marcus Holbrook
8 Jun 2026
First: Confirm You're Legal and Set Up Safely
Before a single seed goes in the ground, you need to know what the law actually says where you live. Cannabis home-grow rules vary dramatically by state, county, and even municipality, and the consequences of getting this wrong are serious. A few concrete examples: Massachusetts allows up to 6 plants per person for personal use, with no more than 12 plants on a single premises at once. Colorado allows 6 plants per resident aged 21 and over, with a maximum of 3 flowering at any one time, and requires the grow to be in an enclosed, locked space if anyone under 21 lives in the home. blank" rel="noopener noreferrer">Washington state doesn't allow home growing at all unless you're a qualified medical patient with a valid authorization form. And in New Jersey, outdoor cultivation requires the entire grow property to be surrounded by fencing and locked gates at least 8 feet high. Your state's rules are equally specific, so look them up directly before proceeding.
Beyond plant counts, pay attention to visibility and odor rules. Washington's law, for example, explicitly prohibits growing in any location where the plants can be seen or smelled from a public place or a neighboring property. Even in states without a specific odor ordinance, being a discreet neighbor is just good practice. Choose a site that's screened from the street and adjacent yards. A privacy fence, a hedge, or a tucked corner of your property all work.
Pesticide safety is another legal area people overlook. Every jurisdiction that allows home cultivation still expects you to use only registered, properly labeled pesticides if you use any at all. California's Department of Pesticide Regulation has flagged unregistered, foreign-labeled plant-growth products being found at cultivation sites, and Colorado explicitly prohibits using a pesticide in any way that conflicts with its label directions. If the label doesn't mention cannabis, think carefully before using it. Stick to products specifically formulated and registered for use on food or edible crops, or go fully organic.
Finally, plan for waste disposal from day one. Connecticut's guidance, for example, requires that cannabis plant waste be made unusable before disposal by mixing it with other materials like coffee grounds or kitty litter. Check your local rules, but this kind of mix-and-bag approach is a reasonable default almost everywhere.
Choose the Right Strain and Plan Your Grow Site
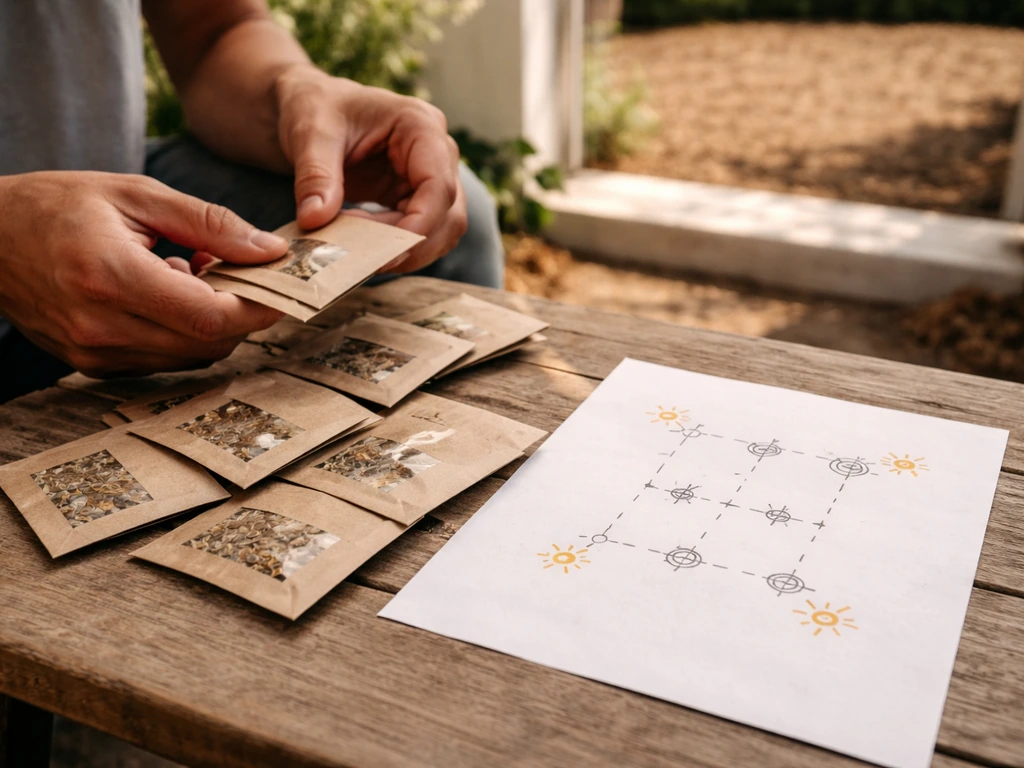
Strain selection and site planning are decisions you make once but live with for the entire season, so they're worth spending real time on. The two main categories you'll encounter are photoperiod strains and autoflowering strains. If you choose photoperiod strains, you’ll want to plan how day length changes will trigger flowering and what that means for your timing outdoors. Photoperiod plants flower based on the natural shortening of days in late summer and early fall. Autoflowering strains flower based on age regardless of light schedule, typically finishing in 70 to 90 days from seed. For most first-time outdoor growers, autoflowers are more forgiving because you're not tied to the sun's seasonal schedule. That said, photoperiod plants can get significantly larger outdoors and often yield more per plant if your season is long enough. If you want to explore the photoperiod approach in depth, the topic of how to grow photoperiod plants outdoors covers that specific workflow in more detail.
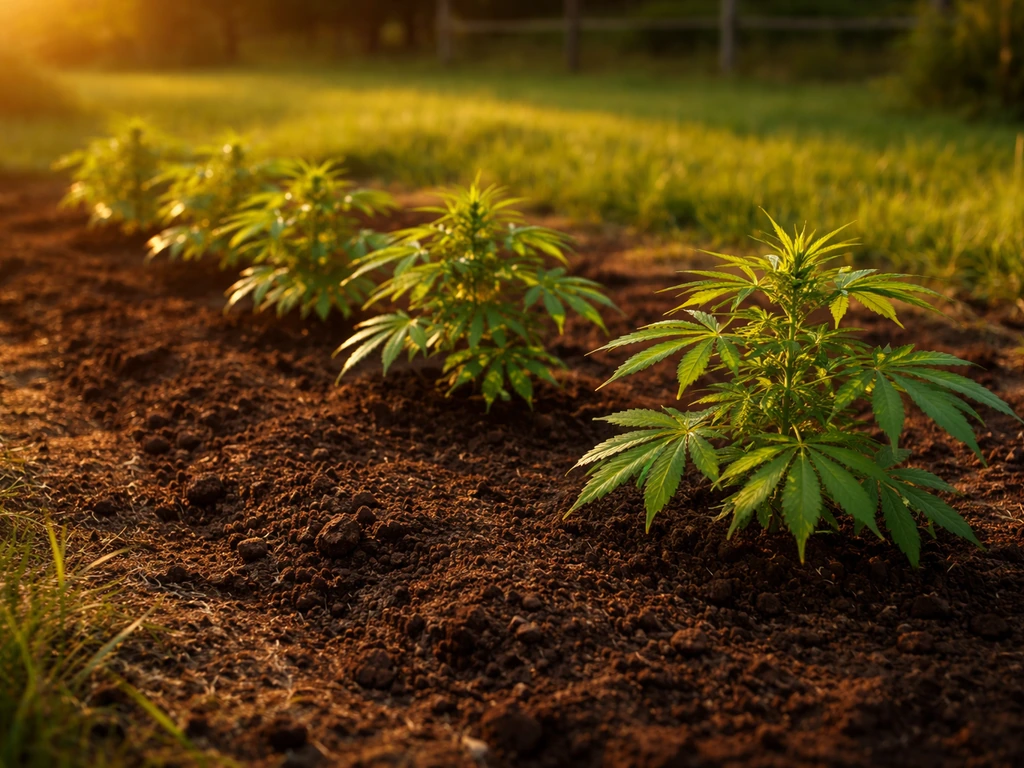
Climate match matters more than almost anything else in strain selection. A thick, dense Indica-dominant strain bred for indoor growing may struggle with humidity and mold in a humid Southern climate. Sativa-dominant strains or hybrid strains bred specifically for outdoor growing tend to have more airy bud structure and better mold resistance in high-humidity environments. If you're in a short-season northern climate, you need a strain with a short flowering time (8 to 9 weeks max) so it finishes before your first frost. In Florida or the Gulf Coast, mold resistance is the first priority.
For your grow site, the single most important factor is sunlight. Cannabis needs a minimum of 6 hours of direct sun per day, but 8 to 10 hours is where you'll see the best results. If you’re wondering about the best way to grow pot outdoors, dialing in your sunlight schedule early is one of the biggest differences between a mediocre and a great outdoor harvest. South-facing spots are ideal in the Northern Hemisphere because they catch the sun's arc across the sky from morning to evening. Avoid spots with full shade after 2 p.m. because that afternoon sun fuels the bulk of photosynthesis and drying out of moisture on leaves.
Airflow is the second major site consideration. Good air movement helps prevent mold and strengthens stems. Don't put plants in a dead corner where air pools. A gentle consistent breeze is an asset. If your only good sunlight spot has poor airflow, spacing plants generously and pruning for open structure helps compensate.
Starting Seeds or Clones and Early Vegetative Setup Outdoors
When to Start
Timing your start to your last frost date is non-negotiable. In most of the continental US, this means starting seeds indoors in late March to early April and transplanting outdoors in May once nighttime temps consistently stay above 50°F (10°C). In warmer climates like Southern California, Texas, or Florida, you can start earlier. In northern states like Montana, Michigan, or Maine, you may be pushing into mid-May or even early June for a safe outdoor transplant.
Starting from Seed
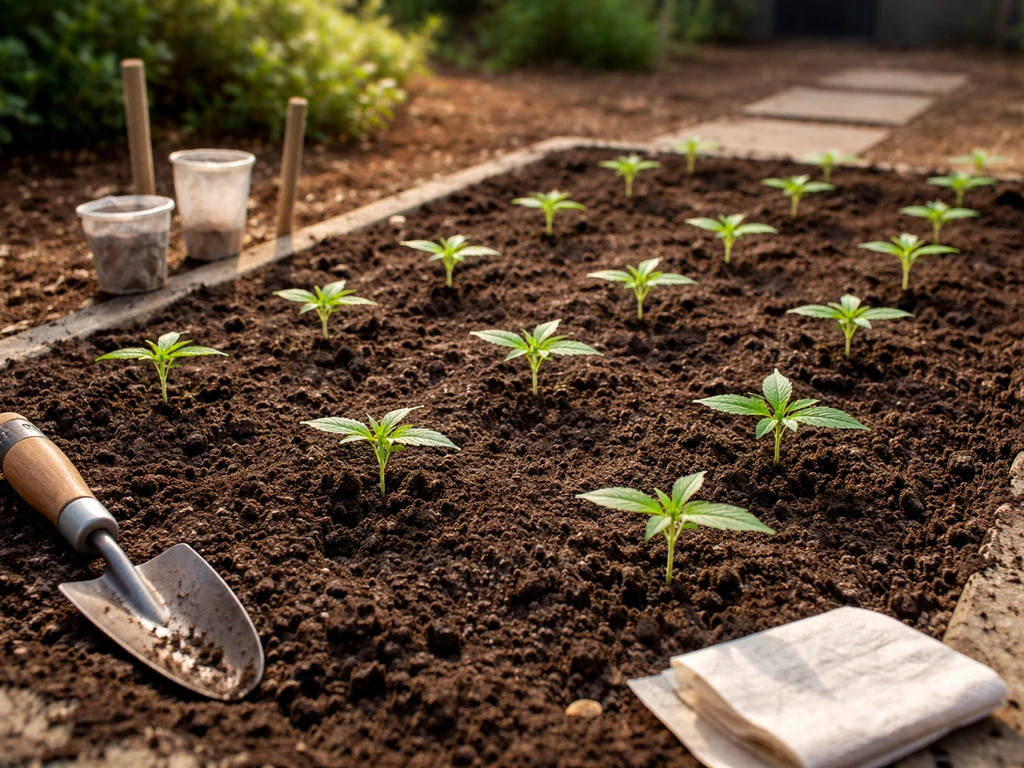
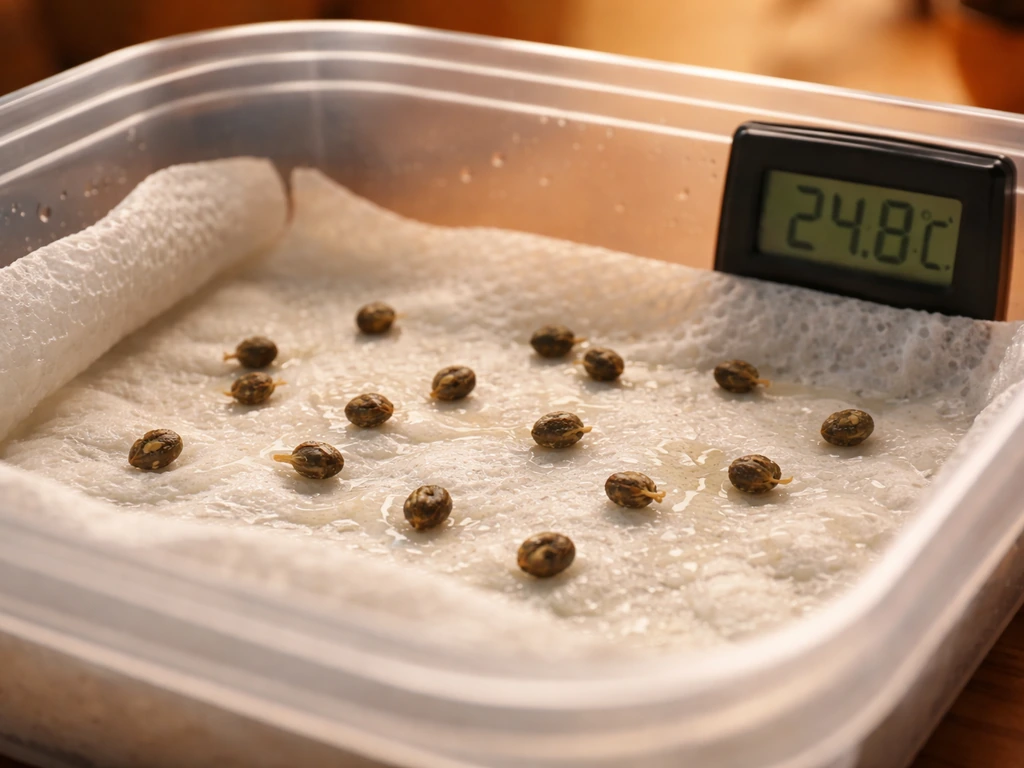
For germination, the paper towel method is simple and reliable. Place seeds between two damp (not soaking) paper towels, put them in a warm spot around 70 to 77°F, and check after 24 to 72 hours. Once the taproot is about a quarter inch long, carefully transfer the seed taproot-down into a small seedling pot with a light seedling mix. Keep it moist but not waterlogged and under light (even a sunny windowsill works at this stage). Once you can start seeds outdoors successfully, you can follow the rest of the steps in this guide to plan your grow around your climate and harvest and cure properly slightly larger container. Seeds can also be germinated directly in a small cup of water for 12 to 24 hours until they sink, then transferred to soil. Either way, once your seedling has its first true leaves and is 2 to 3 inches tall, it's ready for a slightly larger container.
Starting from Clones
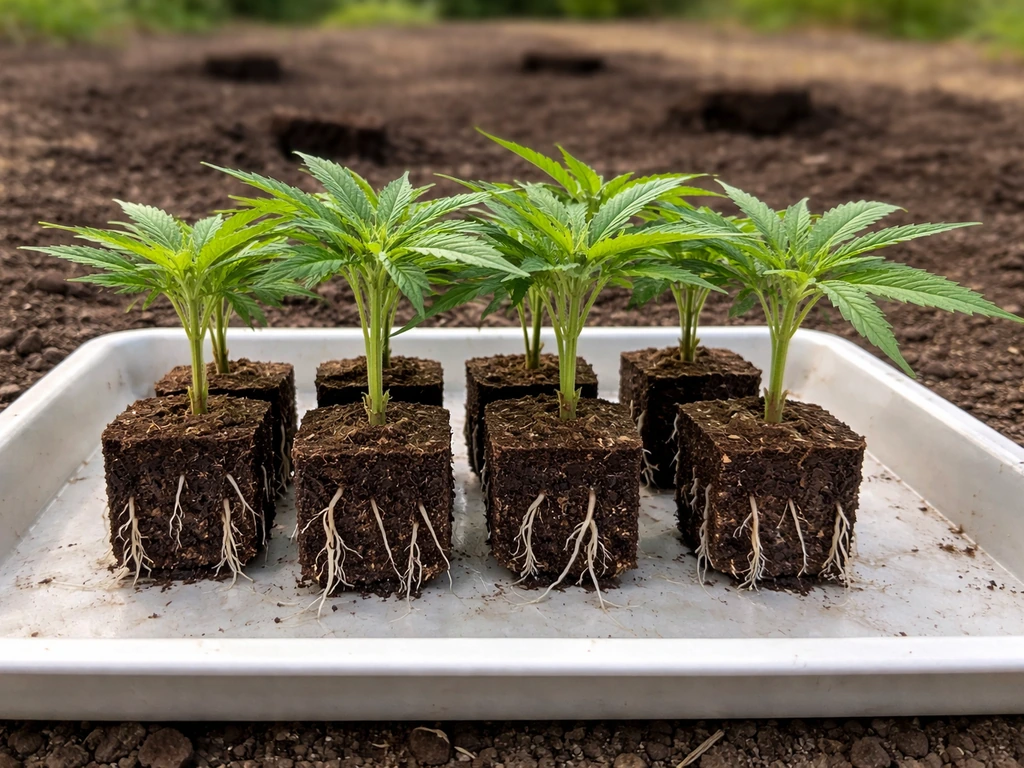
Clones skip the germination phase and give you a head start, but they need to be rooted (visible white roots coming out of the plug or cube) before going outdoors. An unrooted cutting put straight outside under direct sun will almost certainly die. Once rooted, treat a clone like a seedling in terms of hardening off.
Hardening Off: Don't Skip This Step
Hardening off is the process of gradually exposing indoor-started seedlings or clones to outdoor conditions before full-time outdoor placement. University of Maryland Extension describes it as giving transplants time to acclimate to sun, temperature swings, and wind so they don't go into shock. The process takes about 7 to 10 days. Start by putting plants outside in a shaded, sheltered spot for 2 to 3 hours on day one, then bring them back in. Add an hour or two of outdoor time each day, gradually introducing more direct sun and wind. By day 7 to 10, they should be handling full outdoor exposure without wilting or leaf curl. Skipping this and putting a tender indoor seedling into direct mid-day summer sun is one of the most common beginner mistakes, and I've killed plants that way myself.
Containers vs. Ground Planting
You can grow in the ground, in raised beds, or in containers. Ground planting lets roots spread freely and often produces the largest plants, but you're committed to that spot and have less control over soil. Containers give you flexibility to move plants if weather turns bad and make it easier to control soil quality. For outdoor containers, bigger is better: a 10-gallon pot is a reasonable minimum for a full-season photoperiod plant, and many experienced outdoor growers use 20 to 30-gallon fabric pots. Fabric pots specifically help prevent overwatering by allowing air pruning of roots and better drainage.
Outdoor Environmental Optimization
Sunlight
Aim for 8 to 10 hours of direct sunlight per day during the vegetative phase. In the Northern Hemisphere, the summer solstice (around June 21) provides the longest days, and cannabis in veg will thrive with this light abundance. After the solstice, days shorten, and photoperiod plants will begin sensing the shift toward flowering. Autoflowers don't care about day length and will flower on their own schedule regardless.
Soil Quality and pH
Cannabis grows best in well-draining, slightly acidic to neutral soil. The target root-zone pH for soil growing is between 6.0 and 7.0, with the sweet spot being 6.2 to 6.8. Outside this range, nutrient lockout becomes a real problem: your plant may look deficient even when you're feeding it, simply because the pH is preventing nutrient uptake at the root. The University of Delaware Cooperative Extension explains that the optimal soil pH target varies by crop type and soil characteristics, and that soil organic matter can shift the target your plant may look deficient even when you're feeding it, simply because the pH is preventing nutrient uptake at the root.. Test your soil pH before planting using an inexpensive pH meter or test kit. If it's too low (acidic), add garden lime. If it's too high (alkaline), sulfur or acidic organic matter like peat moss brings it down. Amending your soil with compost, worm castings, and perlite before planting gives you a head start on both nutrient availability and drainage.
Watering
Outdoor plants generally need watering every 2 to 4 days depending on heat, container size, and rain. The simplest check: stick your finger 2 inches into the soil. If it's dry at that depth, water thoroughly until runoff comes out the bottom of the container. If it's still moist, wait. Overwatering is more dangerous than underwatering because saturated soil pushes oxygen out of the root zone and roots essentially suffocate. Oregon State University Extension notes this directly: the surface of the soil can look dry while the root zone is still wet, especially with drip systems. Small, frequent waterings that keep the root zone consistently moist (but never soggy) are better than big infrequent floods. Drip irrigation set on a timer is an excellent option for outdoor grows if you travel or have inconsistent schedules.
Spacing and Airflow
Give each plant at least 3 to 4 feet of space on all sides during vegetative growth, and more if you're growing large photoperiod plants that can reach 6 to 8 feet tall outdoors. Crowded plants compete for light, create humidity pockets between canopies, and are significantly more vulnerable to mold and mildew. Good airflow through and around plants is your first line of defense against fungal issues. If plants are getting bushy, remove lower fan leaves and small interior branches (lollipopping) to improve light penetration and air circulation.
Managing Weather and Humidity
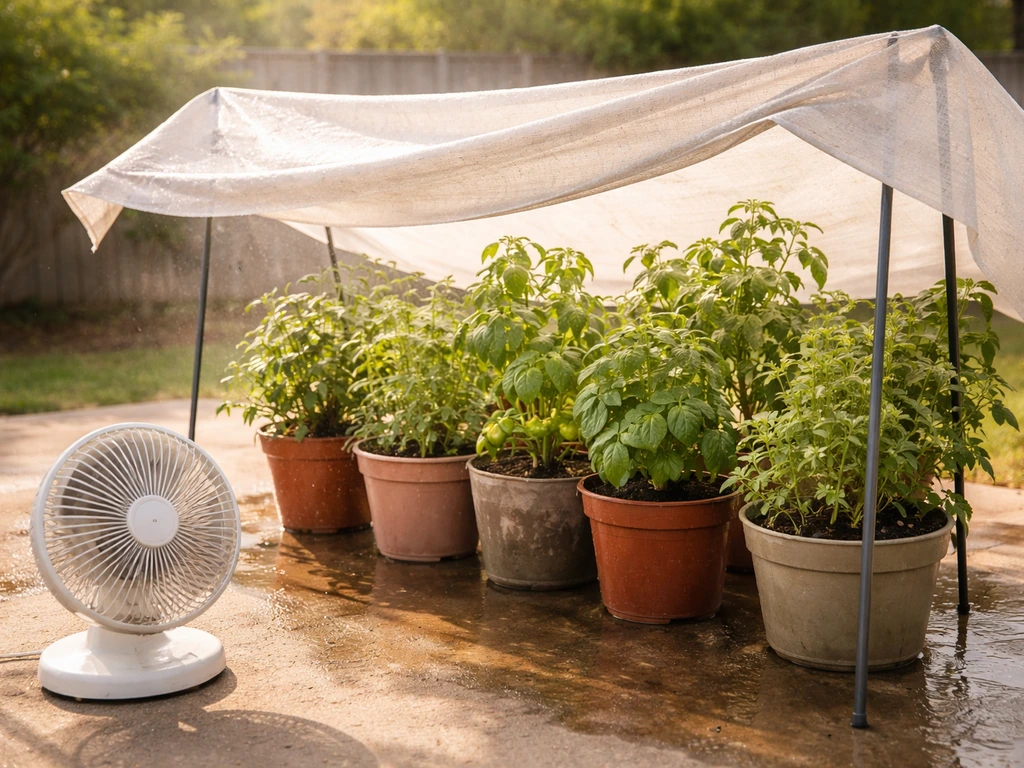
Heat above 85 to 90°F slows growth and can cause heat stress and bleaching in severe cases. If you're in containers, you have the option to move plants to partial shade during peak afternoon heat. For in-ground grows, shade cloth rated at 30% can help during a heat wave without cutting too much light. On the humidity side, flowering cannabis should ideally sit below 50% relative humidity to prevent mold, per Oregon OSHA guidance. Outdoors you can't fully control ambient humidity, but you can reduce leaf wetness by watering at the base (not overhead), training plants for open structure, and harvesting before prolonged wet fall weather hits. If heavy rain is forecast during late flowering, a temporary cover or greenhouse shelter can save your harvest.
Nutrients and Feeding by Stage
Cannabis has different nutritional needs at each stage of its life, and getting this roughly right makes a significant difference in yield and quality. Nitrogen (N), phosphorus (P), and potassium (K) are the big three macronutrients. During veg, plants are hungry for nitrogen to build leaves and stems. During flowering, nitrogen demand drops and phosphorus and potassium become more important for bud development.
| Growth Stage | Primary Nutrient Focus | General Approach | Watch Out For |
|---|---|---|---|
| Seedling (weeks 1-3) | Low N, minimal feeding | Rely on starter soil or seedling mix; no heavy feeding | Nutrient burn from overfeeding |
| Early Veg (weeks 3-6) | Higher N, moderate P and K | Begin a balanced or veg-specific fertilizer at half strength | Lockout if pH is off |
| Late Veg (weeks 6-8) | High N, moderate P and K | Full-strength veg formula, water-soluble or organic granular | Overfeeding leading to dark, clawing leaves |
| Pre-flower / Transition | Reduce N, increase P and K | Switch to bloom formula or add phosphorus supplement | Nitrogen toxicity carrying into flower |
| Early Flower (weeks 1-4 of flower) | Low N, high P and K | Full bloom formula, consider a CalMag supplement | Deficiencies showing as yellowing or spots |
| Late Flower / Ripening (final 2-3 weeks) | Flush or minimal nutrients | Flush with plain pH-adjusted water or reduce feeding | Harsh taste if nutrients aren't cleared before harvest |
If you're growing in amended living soil with compost, worm castings, and organic slow-release fertilizers, your feeding schedule can be much simpler. Good living soil provides much of what the plant needs on its own, and you may only need to supplement with a bloom booster and occasional top-dresses of compost during flowering. For synthetic liquid nutrients, follow the manufacturer's schedule but start at half the recommended dose and work up. It's much easier to add more than to fix nutrient burn.
Calcium and magnesium (CalMag) deficiencies are common outdoors because heavy watering and rain can leach these secondary nutrients from soil. If you see yellowing between leaf veins (interveinal chlorosis) or brown spots mid-leaf, a CalMag supplement is usually the fix.
Managing the Flowering Stage Outdoors
How Photoperiod Flowering Works Outdoors
Photoperiod cannabis plants switch to flowering when the uninterrupted dark period each night becomes long enough to trigger the change, typically around 12 hours of darkness. Oregon State University Extension confirms that day-length (photoperiodism) is what governs flowering timing in most plants, and cannabis is a classic example. Outdoors in the Northern Hemisphere, this shift typically begins around the summer solstice as days start shortening, with most photoperiod plants visibly showing pre-flowers by late July and entering full flower through August and September. Strains with shorter flowering times (8 weeks) will finish in September. Longer-flowering strains (10 to 11 weeks) may push into October. Know your strain's expected flower time and count backward from your first frost date to confirm you have enough season.
One important detail: artificial light near your plants at night can disrupt or delay flowering in photoperiod strains. A porch light, a streetlight, or a motion-activated floodlight shining on your plants during their dark hours can confuse the plant and prevent it from triggering flower. This is why site selection matters. If you're in a light-polluted area, position your plants where they're shielded from nighttime light sources.
Supporting Plants During Flower
Heavy bud development in late flowering puts real stress on branches. Stake main colas as they swell, using bamboo stakes and soft plant ties or velcro tape. For bushier plants, a simple tomato cage installed early in veg keeps the canopy open and provides natural support as flower weight increases. Scrogging (running a horizontal net above the canopy) works well for outdoor plants too, especially if you want to maximize light exposure across the whole canopy.
Pest and Disease Prevention
Outdoors, you're sharing the environment with everything else in your garden, so pest and disease pressure is real and ongoing. The most common problems are spider mites, aphids, caterpillars (especially from moths and loopers), powdery mildew, and bud rot (botrytis). Prevention is far more effective than treatment.
- Inspect plants at least twice a week, checking under leaves for mites, aphid colonies, or caterpillar eggs
- Remove affected leaves immediately and dispose of them away from the grow area
- Use neem oil or insecticidal soap spray (registered and label-compliant) during veg and early flower; stop spraying buds in late flower to avoid residue
- Introduce beneficial insects like ladybugs or lacewings early in the season for ongoing pest pressure management
- Keep relative humidity below 50% during flowering whenever possible, especially in dense canopies
- Remove fan leaves touching the soil and any dead or dying plant matter immediately, as these harbor mold spores
- If you spot early signs of powdery mildew (white powdery patches on leaves), treat immediately with a diluted hydrogen peroxide spray or potassium bicarbonate solution
- Bud rot starts inside dense colas; if you see a single brown, mushy section in a bud, cut it out entirely and check surrounding buds immediately
Mold is the outdoor grower's biggest late-season enemy. The CDC is clear that mold needs moisture to grow, and the key to controlling it is eliminating excess moisture. Outdoors this means managing plant density, encouraging airflow, and not letting water sit on foliage overnight. If you've had heavy rains, gently shake moisture off buds and consider running a fan near the canopy if possible. For growers in high-humidity climates, mold-resistant strain selection at the beginning of the season pays dividends here.
Harvesting and Curing Your Outdoor Crop
How to Know When It's Ready
The most reliable harvest indicator is trichome color, checked with a jeweler's loupe (30x to 60x) or a small digital microscope. Trichomes are the tiny crystal-like structures on buds and sugar leaves. Early harvest: trichomes are clear and glassy (underdeveloped, weak effect). Optimal harvest: most trichomes are milky white/cloudy, with 10 to 30% turning amber. This is the peak potency window for most people. Later harvest: more than 50% amber trichomes means THC is degrading to CBN, producing a heavier, more sedating effect. Pick the ratio that matches your preference.
Secondary signs to confirm readiness: pistil (hair) color has mostly shifted from white to orange/red (70 to 90% of pistils changed), fan leaves are starting to yellow naturally as the plant concludes its life cycle, and buds have stopped visibly swelling and are dense and fragrant.
Harvest Day: What to Do
- Flush plants with plain pH-adjusted water for the final 1 to 2 weeks before cutting if you're using synthetic nutrients
- Harvest in the early morning after a dry night when terpene content is at its peak and before the heat of the day
- Cut main branches and remove large fan leaves immediately
- Wet-trim (trimming before drying) or dry-trim (trimming after drying) based on your humidity: in humid climates, wet-trimming reduces the leaf matter holding moisture and speeds drying; in dry climates, leaving leaves on slows drying and reduces the risk of drying too fast
- Hang branches upside down in a dark, well-ventilated room with temperatures around 60 to 70°F and relative humidity around 45 to 55%
Drying and Curing
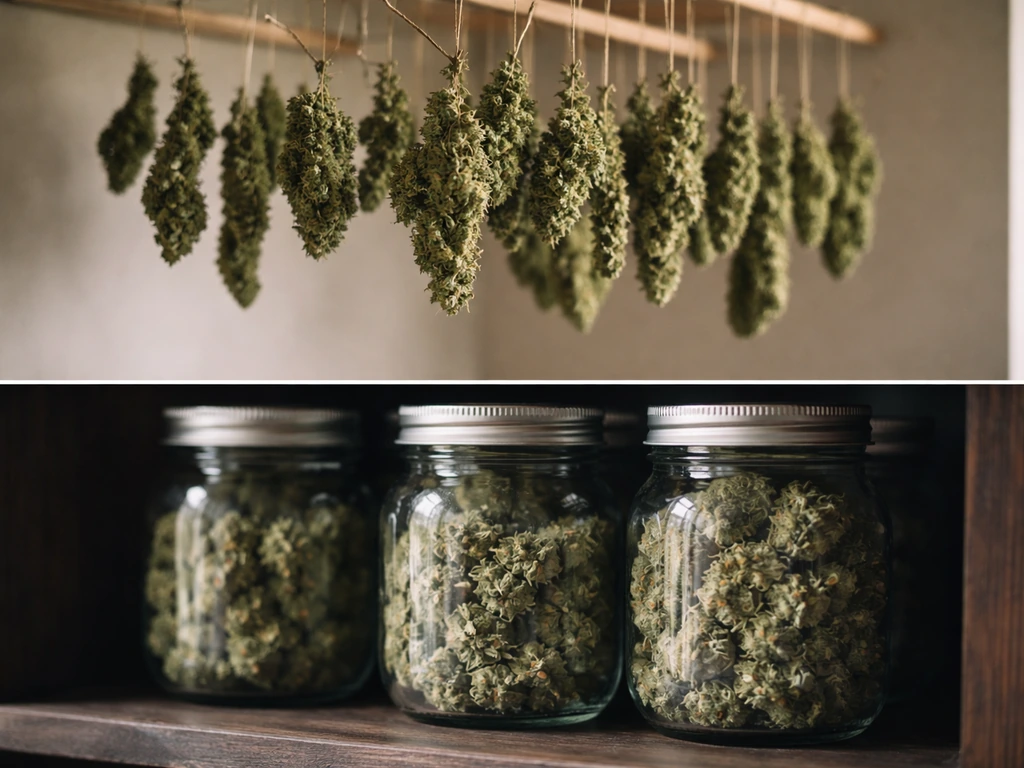
Drying typically takes 7 to 14 days depending on bud density and environmental conditions. The buds are ready to cure when the smaller stems snap rather than bend and the outside of the buds feels dry to the touch but the inside still has some moisture. If you dry too fast (under 5 days), the outside dries before the inside and you'll get harsh, grassy-tasting flower. Slow and steady wins here.
Curing happens in sealed glass mason jars stored in a cool, dark place. Pack buds loosely, filling jars about three-quarters full. For the first two weeks, open the jars once or twice daily for 10 to 15 minutes to release moisture and bring in fresh air. This process is called burping. After two weeks, drop to burping every few days. The target environment inside the jar during cure is 50 to 60% relative humidity and 60 to 65°F. A small Boveda humidity pack (62% RH) inside the jar makes maintaining this much easier. A minimum cure of 2 to 4 weeks significantly improves taste and smoothness. Six weeks to 2 months produces noticeably better results. The curing process isn't just about dryness; it's a slow chemical conversion that develops flavor and refines the effect.
Your Next Steps at a Glance
- Look up your state and local home-grow laws, confirm plant limits, and plan a compliant, discreet grow site
- Choose a strain matched to your climate, season length, and pest/mold pressure
- Start seeds indoors 4 to 6 weeks before your last frost date, or source rooted clones from a licensed dispensary
- Harden off seedlings or clones over 7 to 10 days before moving them fully outdoors
- Prepare your soil or containers with quality amended mix, target pH 6.2 to 6.8, and good drainage
- Feed by stage: higher nitrogen in veg, shift to phosphorus and potassium at the flip to flower
- Monitor for pests and mold at least twice per week throughout the season, treating early and with registered products
- Check trichomes with a loupe in the final weeks to nail your harvest window
- Dry slowly at 60 to 70°F and 45 to 55% RH, then cure in glass jars for a minimum of 4 weeks
FAQ
What should I do if my outdoor plants are getting enough sun but still look stunted or yellow?
First check for root-zone issues, not just leaf problems. In containers, confirm drainage by watering and verifying runoff, then reassess pH (aim 6.2 to 6.8) and avoid adding more nitrogen immediately, because nutrient lockout from pH is a common “yellowing even while feeding” scenario. If the soil pH is in range and the leaves are pale, increase feeding gradually rather than jumping to the label dose.
How can I tell the difference between underwatering and overwatering outdoors?
Use a deeper probe and compare root-zone moisture to surface appearance. If the top inch looks dry but the soil is still wet 2 to 3 inches down, you likely overwatered or have poor drainage. Also watch for signs like limp leaves with cool, wet soil (overwatering) versus drooping with dry, light soil (underwatering). Adjust frequency based on that 2-inch check, and fix drainage before increasing watering.
Do I need to fertilize if I’m using compost and worm castings?
Often you can feed less, but you should still plan for a light supplement. Living soil can cover much of the early veg needs, yet flowering still usually benefits from a bloom-focused amendment or top-dress when you see the stretch and pre-flower phase. Start with small additions, because outdoors leaching from rain can also remove nutrients unevenly.
What’s the best way to prevent bud rot if late-season rain is likely?
Reduce leaf wetness and open airflow early, then act before storms. Water at the base, avoid overhead watering, and consider gentle defoliation to improve canopy ventilation. If rain is forecast during late flowering, you can use a temporary cover that keeps buds from staying soaked while still allowing airflow. After heavy wet weather, shake off moisture carefully and avoid handling buds when they are saturated.
How do I manage light pollution for photoperiod plants in an urban neighborhood?
Photoperiod plants are sensitive to nighttime light interruptions, so shield your grow from any steady or motion-triggered lights. Position plants behind opaque screening, avoid reflective surfaces that throw light upward, and check with a simple test by watching the site after dark. If lights hit the canopy during the dark period even briefly, flowering can delay or become uneven.
Should I grow in fabric pots or something else if I’m worried about overwatering?
Fabric pots are often the easiest win because they improve drainage and allow some air-pruning of roots, which reduces the “stuck wet” root-zone problem. If you use plastic or ceramic, be extra strict about watering intervals, use a proper potting mix with perlite for drainage, and confirm the container has real drainage holes. Regardless of pot type, size up to reduce swings in moisture.
When is the right time to stake or support plants that are forming heavy colas?
Do it earlier than you think. Start staking or adding cages in vegetative growth or right at the beginning of flowering so you do not bruise stems when branches get thick. Use soft ties and check support regularly, because swollen stems can tighten ties and cut into tissue.
What should I do if my seeds sprout but seedlings fail to thrive outdoors?
Most seedling failures come from shock and temperature swings rather than bad genetics. Ensure you hardened off fully (about 7 to 10 days), avoid placing seedlings in direct midday sun on day one, and confirm nighttime temperatures stay reliably above your local comfort zone before transplant. Also protect from wind, because tender stems can dry out fast even when soil moisture looks okay.
How much space do I really need between plants outdoors?
Aim for at least 3 to 4 feet between plants for vegetative airflow, then increase if you expect tall photoperiod growth or dense canopies. Crowding is not only a yield issue, it drives humidity pockets and increases mold risk during late flowering. If you are forced into tighter spacing, prioritize an open canopy (more light penetration, fewer interior leaves).
What’s the safest, most reliable pest control approach during the season?
Start with prevention and respond early. Inspect leaves and the undersides regularly, remove or isolate heavily infested growth, and focus on interventions before populations explode. For treatment choices, rely on products appropriate for outdoor edible-use plants or properly labeled options where permitted, and follow label directions exactly, because “stronger” is a frequent beginner mistake that can cause plant stress.
If I’m checking trichomes, do pistils or plant fade matter as well?
Yes, but prioritize trichome maturity because pistil color can continue changing even as buds mature. Use pistil shift (mostly orange/red), natural leaf yellowing, and stopped swelling as supporting indicators, then confirm with trichome color to decide the harvest window. This helps when weather conditions delay pistils or when one branch matures faster than the rest.
How should I set jar humidity during curing if my buds are already dry?
If you are seeing the outside snap and the stems break during drying, you likely have the moisture mostly right. In the jars, target about 50 to 60% relative humidity and burp daily early on to equalize moisture. If RH trends too high, burp a bit more and verify jar seals and storage temperature, because warm conditions can raise RH and lead to musty odor.
Next Article
How to Grow Photoperiod Outdoors: Beginner Step by Step
Step-by-step guide to growing photoperiod cannabis outdoors, choosing strains, timing day-length changes, and managing l