Growing cannabis outdoors is genuinely one of the most rewarding things you can do as a home cultivator. The sun is free, plants can get enormous, and the yields you can pull from a single well-grown photoperiod plant outdoors would cost a small fortune at a dispensary. But outdoor growing also comes with real variables: weather, pests, light pollution, nosy neighbors, and legal limits that vary dramatically depending on where you live.
How to Grow Weed Outdoors: Step-by-Step Beginner Guide

Marcus Holbrook
19 Apr 2026

But if you need a more location-specific breakdown, also see how to grow weed outdoors in fl as a related option for local constraints and timing. This guide covers everything from picking the right strain and setting up your site all the way through harvest, drying, and storage, so you can follow along like a step-by-step checklist rather than piecing it together from a dozen different sources.
What you actually need before you start
Climate basics
Cannabis grows well outdoors in most temperate and warm climates, but it needs a long enough frost-free window to complete its cycle. Photoperiod strains (the classic variety that flowers when days get shorter) typically need from late spring through September or October to finish. Autoflowering strains are more forgiving because they flower based on age rather than light cycles, which means you can squeeze in a harvest even in shorter summers. In very humid climates, mold is the main enemy.
In very dry or high-altitude climates, you get more UV exposure but less mold pressure. Knowing your local last frost date and your average fall humidity will shape every decision you make. If you need a full step-by-step outdoor plan, pair this with how to grow outdoor weed step by step so your decisions line up from last frost through harvest.
Space requirements
A photoperiod plant grown in the ground from spring can easily reach 6 to 10 feet tall and several feet wide by harvest. Container-grown plants stay smaller but still need room. Plan on at least 4 square feet of canopy space per plant minimum, and more like 9 to 16 square feet if you want full expression. Whatever spot you choose needs direct sunlight for at least 6 hours a day, and ideally 8 or more. South-facing spots (in the Northern Hemisphere) are ideal.
Know the law in your jurisdiction before you plant a single seed
This is non-negotiable. Home cultivation rules differ not just by country but by state, province, and even municipality. Here are a few concrete examples to illustrate how much they vary:
- Canada: Adults may grow up to 4 plants per dwelling (not per person). Some provinces and territories ban home cultivation entirely, so check your province first. Plants must meet boundary and separation requirements from certain shared spaces.
- Germany: Under the Cannabis Act, adults may cultivate up to 3 plants per person for personal use. Consumption is prohibited near schools, children's facilities, playgrounds, and within sight of those areas.
- Massachusetts (USA): Adults over 21 can grow at home, with limits up to 12 plants if more than one adult grower lives in the household. Plants cannot be visible from a public place without the use of binoculars or optical aids.
- Other US states: Rules vary from full home-grow rights to complete bans even in legal states. Always check your specific state and local ordinances.
- Illegal jurisdictions: In many countries and US states, home cultivation remains illegal regardless of quantity. Growing in those places carries serious legal risk.
Look up your local rules before doing anything else. This guide assumes you are growing legally within your jurisdiction and encourages you to stay compliant no matter what.
Picking the right strain for outdoor growing
Not every strain performs equally outdoors. Some were bred specifically for controlled indoor environments and will struggle with temperature swings, humidity fluctuations, or the long vegetative season that comes with outdoor growing. When you are choosing a strain for outdoors, think about three things: your climate, your available space, and how long your growing season is.
Photoperiod vs autoflower outdoors
Photoperiod plants are triggered to flower when the natural dark period gets long enough, generally as daylight dips below around 15 hours. This means they will spend all of spring and summer in vegetative growth, then kick into flowering in late summer, typically finishing in September or October depending on the strain. The payoff is enormous yields. A well-grown photoperiod plant in the ground can produce 21 to 23 ounces per plant (strains like Critical Feminized are known for this kind of output). The downside is that light pollution from streetlights or nearby buildings can disrupt the dark period and cause flowering problems or hermaphroditism, so site selection matters.
Autoflowering strains switch to flowering based on age, not light cycle, making them much simpler outdoors. A strain like Royal Critical Auto can go from sprout to harvest in roughly 8 to 9 weeks, reaching only about 0.6 to 1 meter tall and producing around 115 to 165 grams per plant outdoors. That is a smaller yield than a photoperiod plant, but you can start them later, fit more cycles into one season in warm climates, and avoid the light-pollution problem entirely. If your season is short or your site has light-pollution issues, autoflowers are an excellent starting point.
Strain traits to prioritize for outdoor success
- Mold resistance: Critical in humid climates. Look for strains described as mold or botrytis resistant.
- Shorter flowering time: Strains that finish in 7 to 9 weeks of flower give you more buffer before fall rains and frost.
- Indica or indica-dominant genetics: These tend to be shorter and bushier, finishing faster and handling temperature swings better than pure sativas.
- Feminized seeds: Unless you want to sex plants and potentially deal with accidental pollination, feminized or autoflowering seeds remove a lot of headaches outdoors.
- Climate adaptability: Some breeders specifically note that a strain is suited to northern or continental climates. Pay attention to those notes.
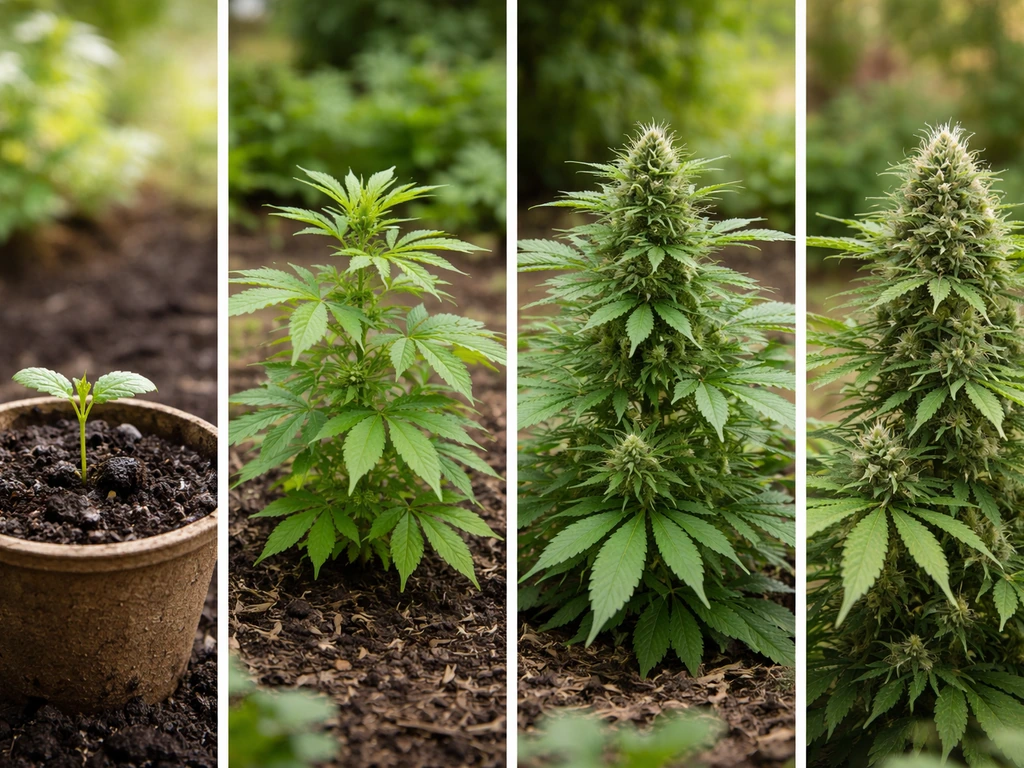
The outdoor grow timeline: seedling to harvest
Here is a realistic, step-by-step timeline for a photoperiod grow in a temperate Northern Hemisphere climate (roughly USDA zones 5 to 8). If you are growing autoflowers, your timeline compresses significantly, but the same stages apply.
- Late March to April: Start seeds indoors. Germinate in a damp paper towel or directly into a seedling plug. Seedlings need warmth (around 70 to 80°F) and 18 hours of light. After 1 to 2 weeks, transplant to a small pot once the taproot has emerged and the first true leaves appear.
- April to May: Vegetative growth indoors or in a greenhouse. Keep plants under 18 hours of light if you are hardening them off slowly. They are not ready for full outdoor life until nighttime temperatures consistently stay above 50°F and your last frost date has passed.
- May to June: Transplant outdoors (after last frost). This is when the plant really takes off. If you are planting in ground, prepare your hole or bed ahead of time. Container growers, place your pots in their final location now.
- June to early August: Peak vegetative growth. Plants focus entirely on building structure and foliage during the long summer days. This is when you train, top, or LST (low-stress train) your plants to maximize canopy coverage and future bud sites. Water regularly and apply vegetative nutrients.
- Mid-August to September: Flowering begins. As daylight hours decrease past the 15-hour threshold, photoperiod plants shift to flower. You will see white pistils emerging at nodes within 1 to 2 weeks of the flip. Switch to bloom nutrients.
- September to October: Late flowering and ripening. Buds fatten and trichomes develop. Watch humidity closely as dense buds are vulnerable to mold. Begin checking trichomes with a jeweler's loupe or microscope from week 6 of flower onward.
- October (or whenever trichomes signal readiness): Harvest. Cut, trim, and move to drying space immediately.
For autoflowers, compress this entire timeline to about 10 to 12 weeks from seed. You can start them outdoors directly in late May or early June and harvest by late August or September, which is actually an advantage in short-season climates.
Visual checkpoints at each stage
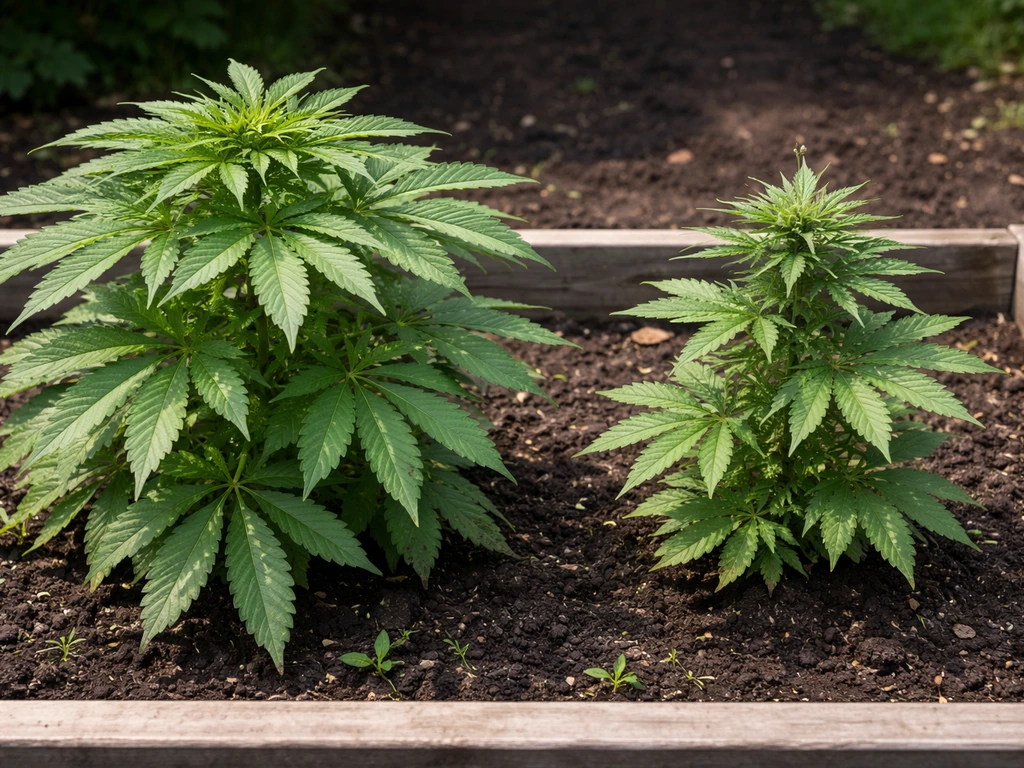
At the seedling stage, you want to see a sturdy stem and bright green cotyledon leaves followed by the first set of serrated true leaves. Yellowing at this stage usually means overwatering or nutrient burn from too-hot soil. In veg, healthy plants are deep green with new growth every few days. Internodes (the space between leaf sets) should be reasonably compact.
Long, stretching internodes indicate not enough light. In early flower, you will see white hairs (pistils) clustering at every node and a noticeable increase in resin smell. By mid to late flower, buds are visibly swelling. Trichomes start clear, turn milky white, then amber.
Harvest at mostly milky with a small percentage of amber (roughly 10 to 20%) for a balanced effect, or wait for more amber if you prefer a more relaxing result.
Setting up your site and choosing your growing medium
Soil in the ground vs containers

This is one of the first real decisions you will make, and both options work well. Here is an honest comparison:
| Factor | In-Ground Soil | Containers |
|---|---|---|
| Yield potential | Highest — roots can expand freely | Moderate — limited by pot size |
| Portability | None — plant is fixed in place | High — can move to shelter or better light |
| Watering frequency | Less frequent — soil holds moisture longer | More frequent — pots dry out faster |
| Soil control | Harder — amend before planting and hope | Easy — total control over mix quality |
| Pest/disease risk | Higher soil-borne pest risk | Lower soil-borne pest risk |
| Stealth | Lower — large plants are obvious | Higher — can be moved or hidden |
| Startup cost | Low — mostly soil amendments | Moderate — pots and premium mix |
For most beginners, containers are the smarter starting point. The ability to move plants to shelter during storms or to optimize sunlight exposure is invaluable. Use fabric pots (smart pots) in the 15 to 25 gallon range for photoperiod plants and 5 to 10 gallon pots for autoflowers. For in-ground growing, dig a hole at least 2 feet deep and 2 feet wide and fill it with a quality amended mix rather than relying solely on native soil.
Building your soil mix
Cannabis does best in well-draining, slightly acidic soil with a pH between 6.0 and 7.0. A reliable basic mix for outdoor containers is roughly 40% quality potting soil, 30% perlite for drainage, 20% compost or worm castings, and 10% additional amendments like coco coir or pumice. Pre-amended soils labeled as 'living soil' or 'craft soil' can simplify this significantly and often provide nutrients through the first 4 to 6 weeks of growth without any additional feeding.
Site configuration checklist
- Maximum direct sunlight: south-facing wall, fence, or hillside as a backdrop to reflect additional light
- Good airflow: avoid tight corners or enclosed spaces where air stagnates and humidity builds
- Privacy: natural screening with hedges, fences, or trellises, and keep plants below fence height where visibility rules apply (like in Massachusetts)
- Water access: you will be watering frequently, so proximity to a hose or water source matters
- No light pollution at night: streetlights or porch lights shining on photoperiod plants during dark hours can stress them and delay or disrupt flowering
- Drainage: avoid low-lying areas where water pools after rain — standing water invites root rot and fungus gnats
Managing light, temperature, and weather outdoors
One of the main differences between indoor and outdoor growing is that you cannot control the environment, only respond to it. That said, there is a lot you can do.
Light management
Photoperiod cannabis flowers when the dark period becomes long and uninterrupted enough, roughly when daylight drops below 15 hours per day. In most Northern Hemisphere locations, this happens around mid-August. The critical thing to understand is that the dark period needs to stay dark. A streetlight or even a porch light shining on your plants between dusk and dawn can prevent the hormonal shift that triggers flowering, or cause stress that leads to hermaphroditism. If light pollution is a problem at your site, either choose autoflowers or use light-blocking screens or shade cloth on a frame to cover plants at night.
Temperature
Cannabis prefers daytime temperatures between 70 and 85°F (21 to 29°C) during vegetative growth, and slightly cooler nights are fine. Once temperatures push past 90°F consistently, growth slows, water stress increases, and terpene quality can suffer. In late flowering, cooler nights (55 to 65°F) actually help develop purple hues and can sharpen terpene profiles. Below 50°F, growth slows significantly, and a hard frost below 32°F can kill plants outright. If a late cold snap is coming, having plants in containers makes it easy to bring them inside for the night.
Humidity and weather
During the vegetative stage, cannabis handles a fairly wide humidity range, generally 55 to 80% RH. Once flowering begins, you want to be much more careful, aiming for 50 to 65% RH. In late flowering especially, dense buds combined with high humidity are a recipe for bud rot (botrytis). If you are in a climate with humid late summers, this is your biggest outdoor challenge. Watch weather forecasts closely in September and October. If you are expecting multiple days of rain or fog above 65% RH, consider harvesting slightly early rather than risking losing your whole crop to mold.
- Use shade cloth (30 to 50%) to buffer heat stress during extreme summer heat waves
- Set up a simple hoop house or temporary greenhouse with clear plastic sheeting to protect plants during unexpected rain or cold snaps in fall
- Shake off standing water from dense buds after rain to reduce mold risk — do it gently but do not skip it
- Increase airflow around plants by removing some large fan leaves in mid-flower to open up the canopy, but avoid heavy late-stage defoliation since wounds can become botrytis entry points
- A small battery-operated fan pointed at plants on humid, still nights can make a meaningful difference
Watering and nutrients: a practical outdoor schedule
How often to water
Outdoor watering frequency depends heavily on your climate, container size, and plant stage. A simple test: stick your finger 2 inches into the soil. If it feels dry at that depth, water thoroughly. If it still feels moist, wait. In hot summer weather, large plants in fabric pots may need water every 1 to 2 days. In cooler, overcast stretches, the same plants might only need water every 3 to 4 days. Overwatering is a more common beginner mistake than underwatering outdoors. When you do water, soak thoroughly until you get runoff from the bottom of the container, then let the medium dry down before watering again.
Nutrient schedule for outdoor growing
Cannabis has different nutritional needs across its life stages. During vegetative growth, plants want higher nitrogen (N) relative to phosphorus (P) and potassium (K). During flowering, they shift to needing less nitrogen and more phosphorus and potassium to support bud development. Here is a simplified outdoor feeding framework:
| Growth Stage | Timing (Approx.) | Nutrient Focus | Notes |
|---|---|---|---|
| Seedling | Weeks 1 to 3 | None or very light | Pre-amended soil provides enough; overfeeding burns seedlings |
| Early veg | Weeks 4 to 6 | Higher N, balanced P and K | Begin feeding at 1/4 to 1/2 strength; increase gradually |
| Peak veg | Weeks 7 to 10 | High N, moderate P and K | Full-strength veg nutrients; train and top during this window |
| Transition to flower | Weeks 11 to 12 (or at flip outdoors) | Reduce N, increase P and K | Bloom boosters and P/K supplements begin here |
| Flower weeks 1 to 4 | Early flower | Low N, high P and K | Core flowering nutrients; maintain consistent pH 6.0 to 7.0 |
| Flower weeks 5 to 8 | Mid to late flower | Minimal N, high P and K, cal/mag | Trichome and bud density phase; watch for deficiencies |
| Final 1 to 2 weeks | Flush or light feed | Water only or minimal salts | Many growers flush to reduce nutrient taste in final product |
Always check and adjust your water pH before feeding. Cannabis in soil prefers a pH of 6.0 to 7.0. Too far outside that range and nutrient lockout happens, meaning nutrients are present in the soil but the plant cannot absorb them. A basic pH pen and a bottle of pH up and down solution will save you a lot of frustration. Check pH every time you mix a feed solution.
Organic vs synthetic nutrients outdoors
Outdoors, organic nutrients and amendments (compost teas, worm castings, fish emulsion, kelp meal, bat guano) are an excellent match for living soil. They feed soil biology, which in turn feeds your plant, and they are very forgiving, making them hard to overapply compared to synthetic salts. Synthetic nutrients give you more precise control and faster response to deficiencies, but require closer pH management and more careful dosing. Both approaches work well outdoors. If you are a beginner using a quality pre-amended soil, you can often get away with very little additional feeding until flowering begins.
Dealing with pests, disease, and weeds
This is where outdoor growing gets humbling. You will face at least one pest or disease challenge in most seasons, and that is completely normal. The key is identifying problems early and responding before they get out of hand.
Common outdoor pests and how to handle them
| Pest | What to Look For | Treatment |
|---|---|---|
| Spider mites | Fine webbing on undersides of leaves, tiny moving dots, yellowing stippling | Neem oil spray, insecticidal soap, predatory mites; spray undersides of leaves |
| Aphids | Clusters of small soft-bodied insects on new growth and stems, sticky honeydew residue | Blast off with water, introduce ladybugs, apply neem oil or insecticidal soap |
| Caterpillars / budworms | Chewed leaves, frass (dark droppings), entry holes in buds | Bacillus thuringiensis (BT) spray applied in evenings; manual removal |
| Fungus gnats | Tiny black flies hovering at soil surface; larvae damage roots | Let soil dry more between waterings; yellow sticky traps; beneficial nematodes |
| Thrips | Silver or bronze streaking on leaves, small fast-moving insects | Insecticidal soap, spinosad, neem oil; apply repeatedly every 3 to 5 days |
A general rule: inspect plants at least twice a week, especially the undersides of leaves. Catching an infestation when it is a few insects versus a full colony makes all the difference. Most organic sprays like neem oil and insecticidal soap need to be applied repeatedly every 5 to 7 days to break pest life cycles. Stop applying any spray products at least 2 weeks before harvest to avoid residue on buds.
Mold and disease
Bud rot (botrytis cinerea) is the most devastating disease for outdoor growers. It typically appears in late flowering when humidity is high and airflow is poor. UC Statewide IPM Program notes that Botrytis or gray mold is linked to humid or moist conditions, with spores able to infect after plants have been continuously wet for 6+ hours or when relative humidity stays around 90% for 6+ hours [humidity is high and airflow is poor](https://ipm. ucanr.
edu/PMG/GARDEN/PLANTS/DISEASES/botrytis. html). You will notice gray-brown fuzzy mold inside dense buds, often starting from the stem outward. By the time you see it on the outside, the inside is already destroyed.
Prevention is everything here: choose mold-resistant strains, maintain good airflow, shake rain off buds, and keep humidity below 65% RH during flowering. If you find botrytis, remove affected bud sections with clean scissors, disinfect your tools between cuts, and increase airflow immediately.
Be careful with late-stage defoliation, though, because cuts and wounds on the plant can actually serve as entry points for botrytis.
Powdery mildew is another common outdoor fungal issue, appearing as white powdery patches on leaf surfaces. It tends to hit in conditions of high humidity with poor airflow. Treat early with potassium bicarbonate spray or a diluted hydrogen peroxide solution. Like botrytis, prevention through airflow and site selection beats any treatment.
Weed management around your plants
Weeds competing for soil nutrients and water around your cannabis plants are a real issue, especially for in-ground grows. Lay down a thick layer of mulch (2 to 4 inches of wood chips, straw, or bark) around the base of your plants to suppress weed germination and retain soil moisture at the same time. Pull weeds by hand before they establish rather than letting them root deeply near your cannabis. Container growers have a big advantage here since the growing medium stays isolated.
Harvest, drying, curing, and storage
Knowing when to harvest
Do not rely on breeder-stated flowering times alone. They are guidelines, not guarantees. The most reliable method is checking trichomes under magnification. A jeweler's loupe (at least 30x) or a digital microscope gives you a clear view. Trichomes start clear, turn milky or cloudy white, then shift to amber. Harvest when the majority of trichomes are milky white with around 10 to 20% amber for a balanced effect. More amber means more sedative and physical effects; mostly milky is more energetic. Additionally, pistils (the white hairs on buds) will have darkened and curled inward by harvest, usually 70 to 90% of them.
Harvesting step by step
- Stop feeding and give plain, pH-adjusted water for the final 1 to 2 weeks before harvest.
- Harvest in the morning before the day heats up, when terpene levels are highest.
- Cut the whole plant at the base or take branches one at a time if the plant is very large.
- Do a rough wet trim immediately: remove large fan leaves but leave sugar leaves (the small resin-coated leaves around buds) if you plan to dry slowly.
- Hang branches upside down or lay on drying racks in a dark, well-ventilated space.
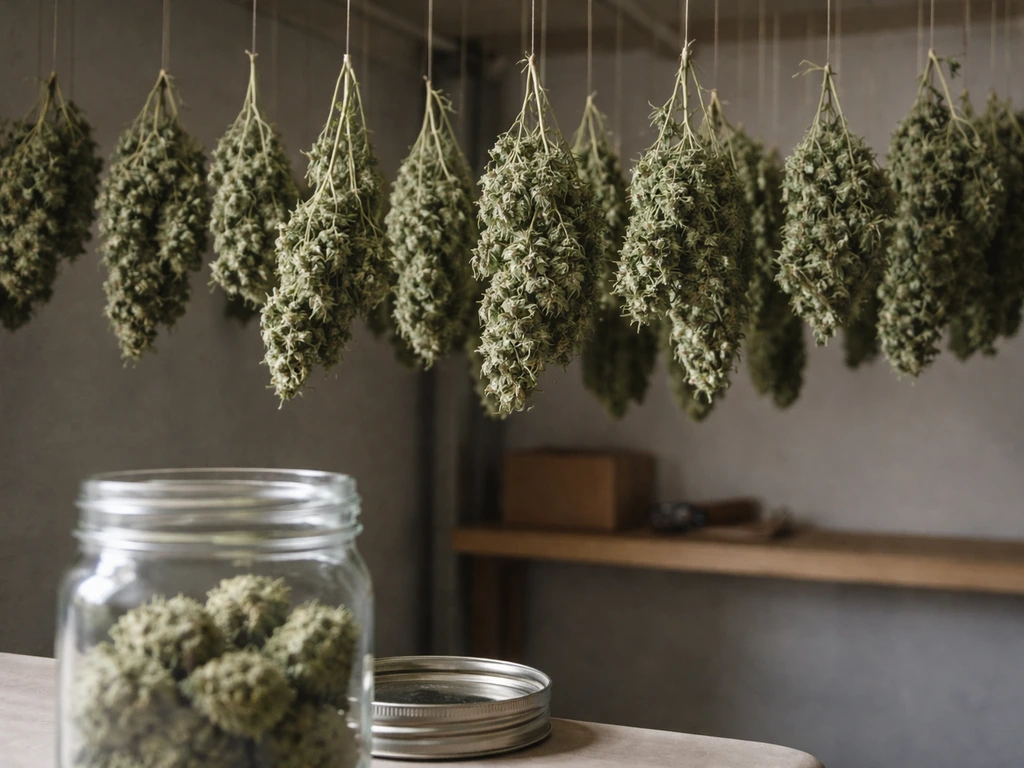
Drying
Drying environment matters enormously for final quality. Aim for a temperature of 60 to 65°F (15 to 21°C) and a relative humidity of 55 to 65% RH. Dark conditions preserve terpenes and cannabinoids. Good airflow (not blowing directly on buds) prevents mold while keeping humidity from building up. The drying process takes approximately 7 to 14 days depending on bud density and ambient conditions. You will know drying is complete when smaller stems snap cleanly rather than bending. Larger stems should still have some flexibility. If buds dry too fast (under a week), you lose terpenes and the smoke will be harsh. Too slow (over two weeks in humid conditions) and mold becomes a serious risk.
Curing
Curing is where good bud becomes great bud. After drying, do your final trim and place buds loosely into wide-mouth glass mason jars, filling them to about 75% full. Seal the jars and store them in a cool, dark place. Target a curing temperature of 60 to 70°F and a relative humidity of 58 to 62% RH inside the jars.
For the first 1 to 2 weeks, open the jars once or twice a day for a few minutes to release moisture and exchange air (a process called burping). If you open the jar and smell ammonia, the buds are still too wet: leave the lids off for an hour before resealing. After 2 to 3 weeks of active burping, you can move to weekly jar checks.
A minimum cure of 3 to 4 weeks produces noticeably smoother, more flavorful results than uncured bud. Extended cures of 6 to 8 weeks or longer can elevate quality even further for certain strains.
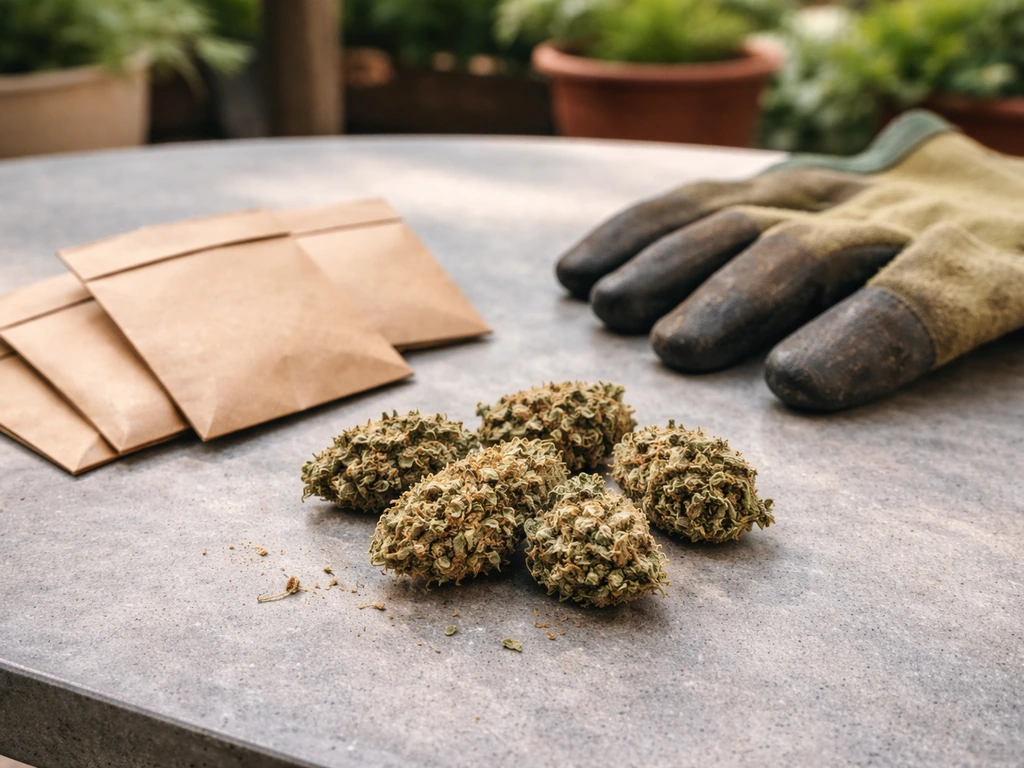
Storage
Once cured, your buds store best in a sealed glass jar kept in a cool, dark, dry environment. Light and heat degrade THC and terpenes over time. Avoid plastic bags for long-term storage since they create static that strips trichomes and can affect flavor. Properly dried and cured bud stored in a glass jar in a dark cupboard at around 60 to 65°F will stay fresh and potent for 6 to 12 months without significant degradation. For very long-term storage beyond a year, vacuum-sealing jars or using oxygen absorbers slows degradation further.
Your practical next steps
If you are just getting started right now (mid-April 2026), you are in a good window for Northern Hemisphere growers. Start seeds indoors this week or next, get your site prepared while they veg, and plan to transplant outdoors after your last frost date. For the best way to grow pot outdoors, align your start dates with your frost-free window and adjust your schedule to your local conditions.
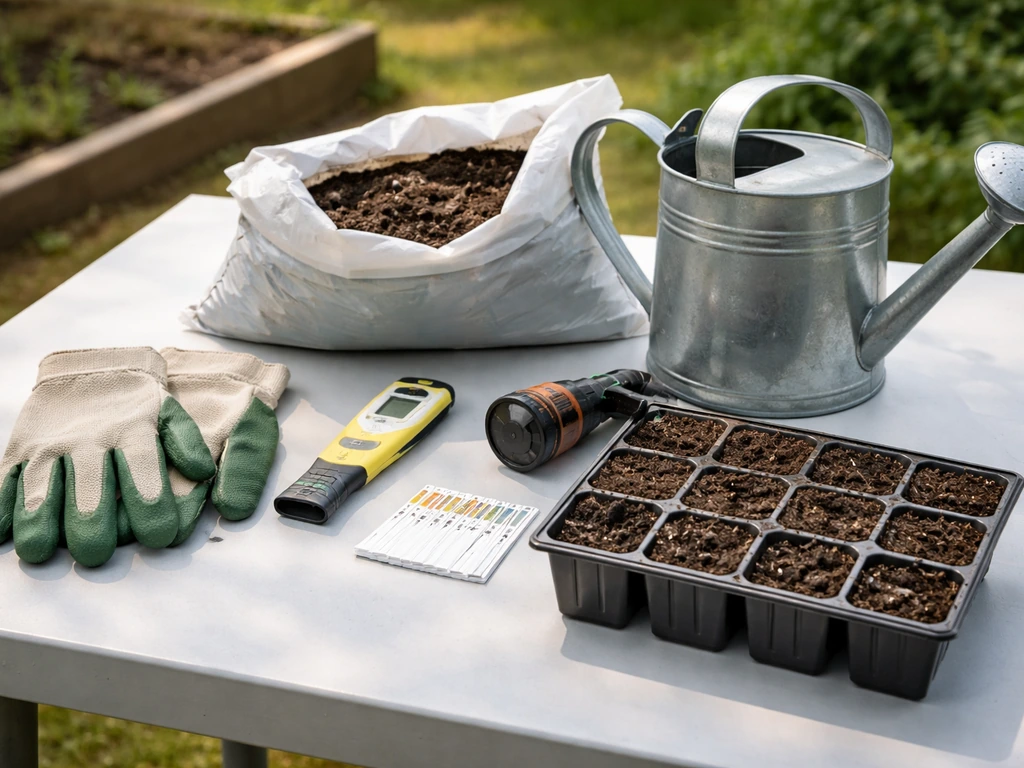
Choose a beginner-friendly strain (a feminized indica-dominant photoperiod or a reliable autoflower), grab fabric pots and a quality amended soil mix, and secure a basic pH pen before anything else. If you are searching for how to grow weed outdoors from seed, focus on your timing, starting conditions, and a simple seed-to-harvest plan.
The specific topics covered briefly here each deserve deeper attention as your grow progresses. If you want the simplest way to grow weed outdoors from seed, focus on getting your strain right, starting at the correct time, and keeping pests and humidity under control how to grow weed outdoors from seed.
Growing from seed has its own nuances covered in detail for those starting at the very beginning, and if you are working with photoperiod plants specifically, understanding how seasonal light changes affect their cycle will sharpen your timing significantly. If you want the full step-by-step for timing and setup, use this guide on how to grow photoperiod outdoors as your baseline.
For those wanting to push quality beyond a basic harvest, there is a lot to explore around dialing in top-shelf results from an outdoor plant, including advanced training and late-season management techniques.
The biggest thing I can tell you from experience: the plants want to grow. Your job is mostly to not get in the way. Set up a good environment, check on them regularly, respond to problems early, and give yourself credit for trying. Even an imperfect outdoor grow will teach you more than any guide can, and most first-time growers are genuinely surprised by how much they harvest. Once you have the basics down, you can focus on how to grow top-shelf weed outdoors by optimizing timing, airflow, and late-season management for bigger, denser buds.
FAQ
Should I start outdoors with seeds or start indoors first when learning how to grow weed outdoors?
For most beginners, starting indoors (or in a sheltered spot) for the seedling stage gives you more control over watering and light, and it helps you avoid slow early growth while weather is still cool. If you do direct sow outdoors, wait until soil temperatures are consistently warm and your last-frost risk is truly over, then plant slightly deeper and keep the surface evenly moist until the first true leaves show.
How do I tell if my plant is getting light enough to avoid stretching outdoors?
Stretching shows up as long gaps between leaf sets (loose internodes) and a generally taller, thinner look. If plants are already taller than expected for their age, increase daily direct sun (move containers, remove shade sources, trim blocking leaves from nearby plants or fences), and avoid heavy nitrogen early because it can worsen vertical growth.
What’s the best way to reduce mold risk if my late season is humid and I cannot control the weather?
Use prevention tactics that do not rely on constant spraying, especially airflow and canopy management. Keep plants spaced, avoid dense foliage that traps moisture, and prioritize early harvesting if a multi-day fog or rain pattern is forecast. In containers, raising pots off the ground slightly and keeping the area around the base clean also improves airflow and reduces spore buildup.
Can I use the same watering schedule every week for how to grow weed outdoors?
No. Outdoor watering must be stage- and weather-dependent, and wind or heat spikes can change needs within days. Instead of a calendar, rely on the finger test at depth and water thoroughly only when the medium dries down, especially in fabric pots where evaporation is faster and beginners often overwater after short dry spells.
How much light pollution is too much for photoperiod plants outdoors?
Even brief night lighting during the dark period can disrupt flowering. If you cannot eliminate it, choose a site with stable darkness, cover plants at night with a properly sealed light-blocking method, and avoid gaps that let light leak around edges. If you see early signs like irregular flowering or stressed pistil behavior, treat the light issue immediately and do not assume it will fix itself.
What should I do if I accidentally over-fertilize during vegetative growth outdoors?
If leaves darken excessively, develop burnt tips, or new growth looks stressed, back off feeding right away and rely on water flushing with plain water to reduce salt buildup. In containers, a thorough soak until runoff can help, then let the medium dry down before any next feeding. If it is an in-ground grow, reduce future amendments and focus on correcting pH and watering instead of adding more nutrients.
What is the safest way to treat pests on buds when I’m close to harvest?
Stop pesticide products well before harvest so residue risk is minimized, and shift toward mechanical and preventative actions earlier in the cycle (hand removal of early infestations, improving airflow, monitoring undersides of leaves). If pests appear late, prioritize targeted removal and environmental fixes rather than repeated sprays, because late treatments can be harder to manage and remove quickly.
How can I avoid bud rot when it starts inside dense buds but I do not see it immediately?
Prevention is the main lever, but you can also check proactively. Once flowering is underway, inspect dense areas and look for early discoloration or fuzz, especially after rainy periods. If you remove affected material, disinfect tools between cuts and increase airflow immediately, avoid aggressive late defoliation that creates fresh entry points for mold.
Should I harvest when trichomes are mostly milky, or wait for more amber outdoors?
Mostly milky with a portion of amber is usually the balanced target, but the right choice depends on your goal and the strain’s behavior outdoors. If your late season has unstable weather, waiting too long can increase mold risk, so you may need to accept a slightly earlier harvest to protect quality. If you can keep conditions stable and plants are healthy, more amber generally leans more sedating.
Why do buds sometimes taste harsh even when they dried and cured for weeks?
Harshness often comes from drying too fast, uneven drying, or jars kept too wet for too long. If stems snap quickly (too brittle) or humidity was below the ideal range early, terpenes can degrade and the smoke feels sharp. During curing, if the jar smells ammonia, the buds are still too wet, so you need more ventilation time before resealing.
What container features matter most for how to grow weed outdoors in pots?
Fabric pots and good drainage matter because cannabis needs oxygen at the root zone. Ensure containers have adequate drainage holes, use trays to avoid muddy mess, and consider pot size based on plant type (bigger for photoperiod, smaller for autos). Also, avoid letting runoff pool under the pot, since standing water can keep the root zone overly wet and increase disease pressure.
Is living soil in containers worth it for beginners learning how to grow weed outdoors?
It can be, mainly because it reduces how often you must feed and it buffers nutrient swings. The catch is you still need to manage pH and watering, and you should not assume living soil eliminates deficiencies, especially later in flowering. Use a potting base that drains well and do not compact the mix.
Next Article
How to Grow 1 Pound Per Plant: Yield Guide for Beginners
Step-by-step plan to grow ~1 lb per plant using strain choice, light, training, feeding, and troubleshooting for beginne