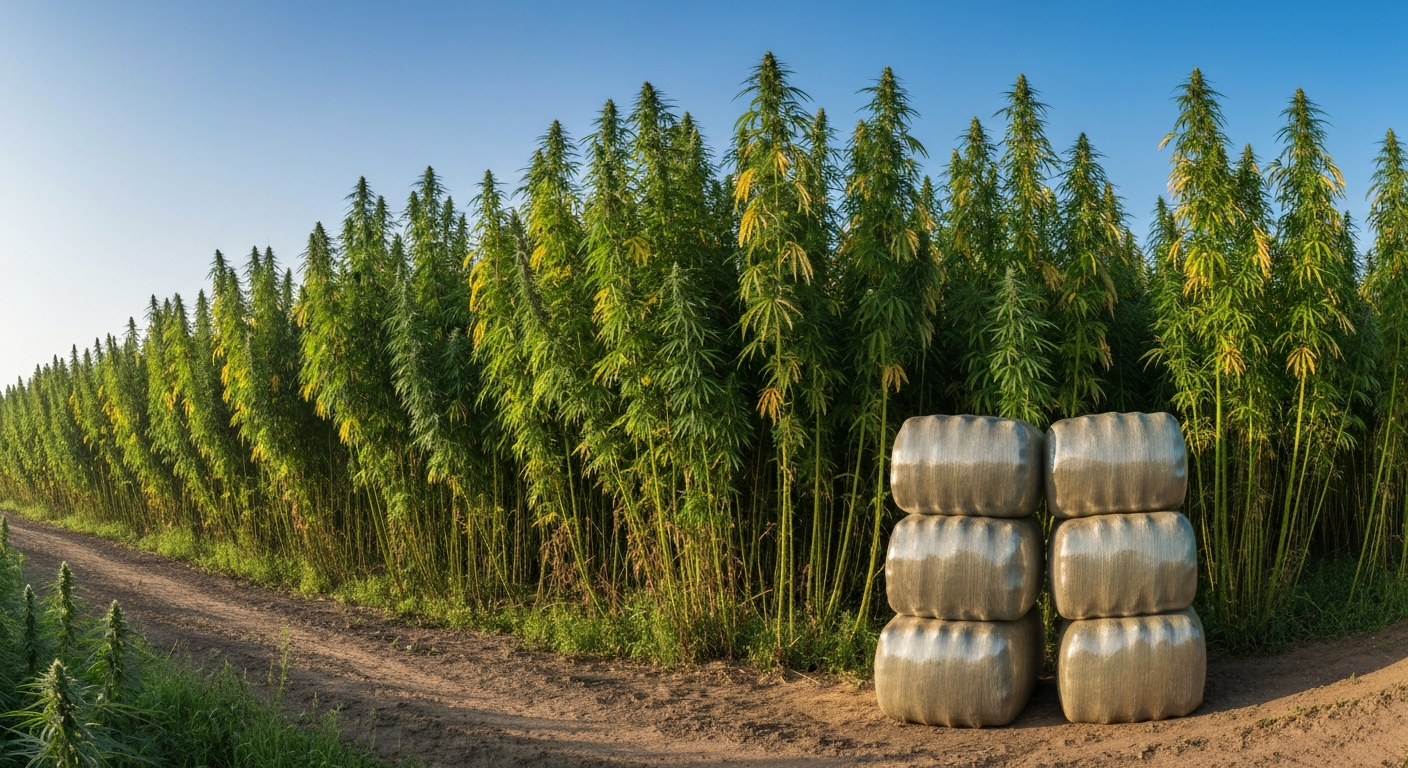
Yes, you can absolutely grow hemp hydroponically indoors, and done right, it produces fast-growing, resinous plants with tight control over every input from nutrient concentration to root-zone oxygen. Hemp, legally defined in the U.S. as Cannabis sativa L. with no more than 0.3% delta-9 THC on a dry weight basis under the 2018 Farm Bill, responds exceptionally well to hydroponic culture. The challenge isn't the plant. It's staying on the right side of your state's licensing requirements, selecting genetics with a reliable THC compliance record, and managing your system consistently enough that you never stress the plants into overproducing THC. This guide walks you through every stage, from picking a system and setting up your space to propagation, feeding, harvest, and compliant testing.
How to Grow Hydroponic Hemp: Complete Indoor Guide for Beginners

Who this guide is for and what you need to know before you start
This article is written for home cultivators at every experience level, complete beginners who have never touched a hydroponic system and experienced cannabis growers who want to pivot into legal, low-THC hemp production. The cultivation mechanics are similar whether you are growing for personal CBD use or exploring whether a home setup could eventually scale. If scaling for commercial purposes interests you, that topic sits in a different lane and involves additional licensing layers worth exploring separately.
One thing I want to be upfront about: hemp is not a regulation-free plant just because it is low in THC. Every jurisdiction treats it differently, and 'home growing hemp' without a registration or license is illegal in many U.S. states. Before you buy a single seed or reservoir, you need to verify what your state, county, and sometimes municipality actually permit. I made the mistake early on of assuming 'legal hemp' meant I could just grow it like tomatoes. It does not work that way. The legal section below is not optional reading.
Can you actually grow hemp hydroponically? Feasibility and real-world benefits
Hemp thrives in hydroponic systems. The plant has a vigorous root system and a high demand for water, oxygen, and nutrients during its vegetative phase, all of which hydroponics delivers more efficiently than soil. In a well-dialed deep water culture or recirculating system, you can cut weeks off vegetative time compared to outdoor or container soil growing, largely because roots sit directly in oxygenated nutrient solution rather than searching through a medium for food and water.
The specific benefits for hemp production are real and measurable. Nutrient delivery is precise, which helps you dial in cannabinoid profiles. You get full control over the root-zone environment, which matters enormously for CBD-dominant genetics that need consistent conditions to avoid stress-induced THC spikes. Environmental control indoors also means you can run photoperiod-dependent flowering schedules to time your harvest rather than waiting on the sun, which is a significant advantage if you are growing cannabinoid hemp and need to test before the legal 30-day pre-harvest window.
The limitations are honest ones. Hydroponics requires more upfront investment than a simple outdoor plot. System failures, a pump going down, a pH swing, or a warm reservoir, can wipe plants fast, faster than they would die in soil. Root diseases like Pythium (root rot) are a genuine hydroponic risk, especially in deep water culture if reservoir temperatures creep above 68°F (20°C). And the compliance piece is no simpler indoors than out: you still need licensed genetics, proper recordkeeping, and pre-harvest THC testing regardless of how you are growing.
Legal and compliance essentials before you buy anything
Under U.S. federal law, hemp is excluded from the Controlled Substances Act as long as the plant material tests at or below 0.3% delta-9 THC on a dry weight basis. That definition comes from the Agricultural Improvement Act of 2018. But federal legality does not automatically mean you can grow it at home, state and local law controls what home cultivators can actually do, and states vary widely.
California, for example, requires registration with the county agricultural commissioner for any hemp cultivation, including small indoor operations. California's Department of Food and Agriculture and many county agricultural commissioners require registration/recordkeeping for hemp cultivation and publish registration forms and sample site/variety reporting templates; see CDFA, Industrial Hemp Program Resources & Forms for state resources and county links CDFA — Industrial Hemp Program Resources & Forms. There is no personal, unregistered home-grow exemption for industrial hemp in California, registration is required regardless of intended use. Colorado requires producer registration, lot reporting, GPS site identification, and the use of certified samplers for pre-harvest testing. Texas licenses hemp producers under its USDA-approved state plan and requires compliance testing that accounts for laboratory measurement uncertainty. Your first step is always to look up your specific state plan and contact your state department of agriculture directly.
On testing: the USDA Domestic Hemp Production Program (codified at 7 C.F.R. Part 990) requires that hemp be sampled no more than 30 days before anticipated harvest. Testing must measure 'total THC,' which includes both delta-9 THC and the converted THC-A value (post-decarboxylation). Labs performing compliance testing must be accredited and, under USDA rules, must report results, including the producer name, license number, FSA lot ID, and test date, to the USDA HeMP system. The USDA Final Rule (Establishment of a Domestic Hemp Production Program (USDA/ Federal Register, Oct 31, 2019)) requires accredited hemp testing labs to report measurement uncertainty or use methods that measure total THC and to submit compliance test results to the USDA HeMP system. You cannot self-test for legal compliance with a home kit; you need a registered, accredited laboratory using validated HPLC methods (such as AOAC 2018.11). DEA registration is also required for labs performing this testing.
- Verify your state's hemp cultivation law before purchasing seed, clones, or any equipment
- Register your cultivation site as required by your state and county (do not assume small indoor grows are exempt)
- Obtain certified or registered hemp genetics — many states require or strongly recommend certified seed
- Maintain a cultivation log recording variety, lot ID, planting date, GPS/address of grow site, and plant count
- Schedule pre-harvest testing through an accredited lab no more than 30 days before anticipated harvest
- Keep all certificates of analysis (COAs), seed invoices, and licensing documents on file for the duration of your state's recordkeeping requirement
Choosing the right hemp genetics for a hydroponic setup
Genetics selection is the single biggest compliance lever you have as a grower. Hemp varieties differ dramatically in their cannabinoid profiles, flowering times, and THC accumulation tendencies, sometimes within the same cultivar grown in different environments. University extension variety trials, including multi-year work from Cornell Hemp and University of Kentucky Hemp Extension, consistently show wide variability in both THC and CBD levels between and even within named cultivars. A variety that tested compliant in a Kentucky field trial may behave very differently in a hydroponic indoor grow where temperature, light intensity, and nutrient inputs differ.
For indoor hydroponic hemp, you want feminized seed or verified female clones from a licensed source, because male plants produce no cannabinoids and any accidental pollination will reduce cannabinoid yield across your entire crop. Seek out varieties specifically bred for indoor production or high-CBD cannabinoid profiles with a documented THC compliance history. Ask your seed or clone supplier for the Certificate of Analysis from third-party testing on the parent genetics, not just a marketing claim. Colorado's Department of Agriculture, for instance, maintains a certified hemp seed variety list that has been validated for compliance, that kind of documented, state-certified starting material is the gold standard.
Also consider flowering time relative to your indoor schedule. Most high-CBD hemp varieties flower in 8 to 10 weeks under 12/12 light. Some autoflowering hemp varieties are available and can simplify scheduling, though autoflowers can be less predictable in their THC accumulation timing. Whatever variety you choose, document the lot ID, the supplier's license number, and the accompanying COA from the moment your genetics arrive. This paperwork is part of your compliance chain.
Comparing hydroponic systems for hemp
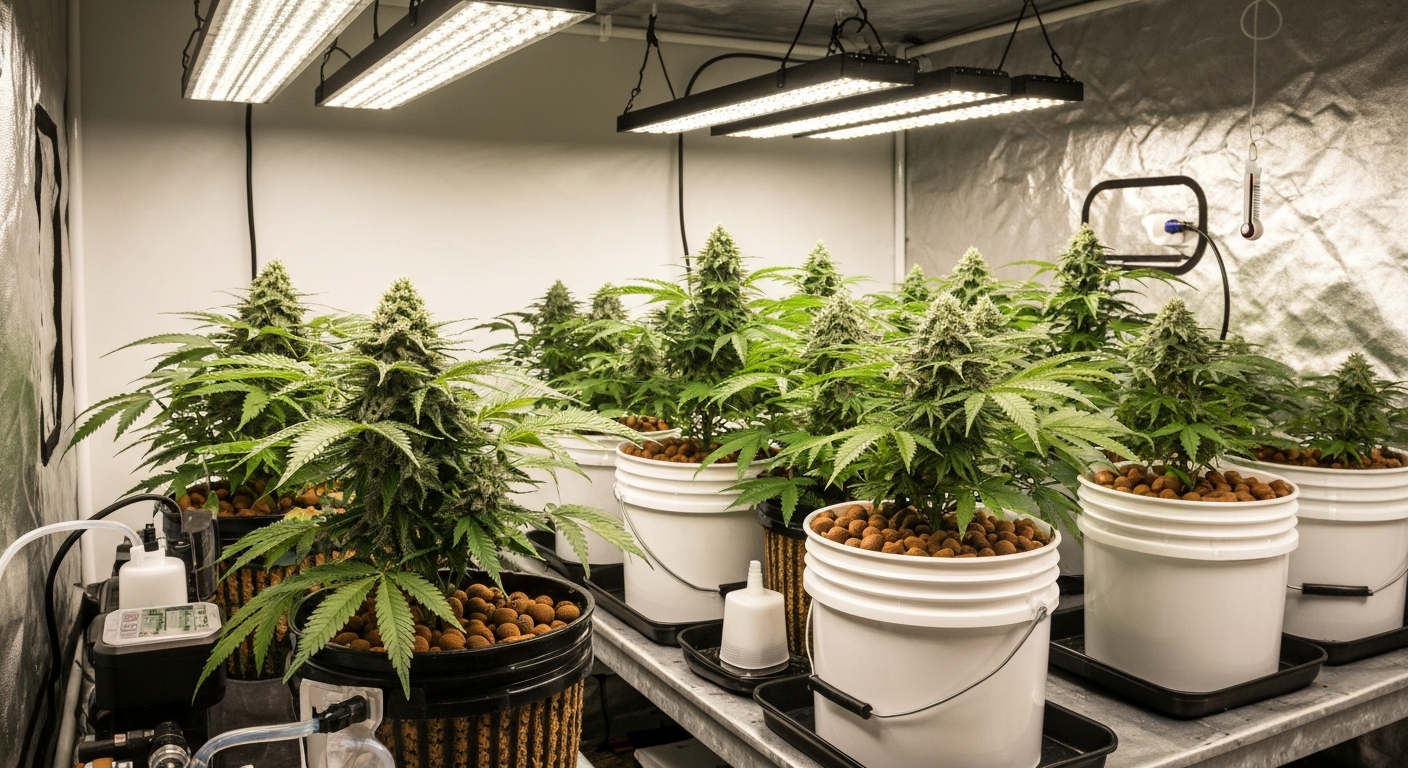
There are five primary hydroponic systems worth considering for indoor hemp. Each has a different profile of cost, complexity, oxygen delivery, and failure risk. My honest recommendation for beginners is deep water culture (DWC) for a single-tent or small room setup: it is the most forgiving to learn, has minimal moving parts, and gives excellent results for hemp's root-hungry growth style. Here is how the main options stack up:
| System | How it works | Best for | Key advantage | Key risk | Beginner friendliness |
|---|---|---|---|---|---|
| DWC (Deep Water Culture) | Roots suspended in oxygenated nutrient solution in a reservoir; air stones/pumps provide O2 | 1–4 plant home grows, beginners | Simple, low-cost, excellent root oxygenation | Reservoir temp above 68°F triggers Pythium (root rot) | High |
| RDWC (Recirculating DWC) | Multiple DWC buckets linked by a recirculating pump to a central reservoir | 4–16 plant setups, consistent multi-plant feeding | Uniform nutrient delivery, easier top-off and pH management from one central point | More plumbing = more potential leak/failure points | Medium |
| NFT (Nutrient Film Technique) | Thin film of nutrient solution flows continuously over bare roots in sloped channels | Smaller or shorter-cycle plants; clone/veg stages | Low medium cost, good oxygenation, easy root inspection | Pump failure causes rapid root dry-out; less suited to large hemp plants in flower | Medium |
| Ebb & Flow (Flood & Drain) | Tray floods with nutrient solution on a timer, then drains back to reservoir | Versatile; works with various media and container sizes | Compatible with many substrates; flexible plant spacing | Flooding/drain timing errors increase root disease risk; media selection critical | Medium |
| Aeroponics | Roots hang in air; misted with nutrient solution at timed intervals | Advanced growers optimizing growth speed and O2 exposure | Highest root oxygenation, fastest growth rates | Most technically complex; mister clogging, pump failure, or timer errors are catastrophic | Low |
If you are comfortable with basic plumbing and want to run 6 or more plants uniformly, RDWC is the logical next step up from DWC. Ebb and flow is a solid choice if you want the flexibility to use a coco coir or clay pebble medium rather than bare roots in solution, which can ease your transition from soil growing. Aeroponics produces impressive results but I would not recommend it as a first hydroponic system for hemp, the consequences of a mister clog during early flowering are too severe.
Equipment and supplies checklist
Before you set anything up, it helps to have everything on this list either in hand or on order. Missing one item mid-build often means delayed starts and compromised environmental stability in the first critical days.
Hydroponic system components
- Reservoir (5-gallon bucket per plant for DWC; 20–50 gallon central reservoir for RDWC)
- Air pump(s) with air stones and airline tubing (DWC/RDWC) or water pump and spray manifold (aeroponics)
- Submersible or inline water pump (RDWC, ebb & flow, aeroponics)
- Net pots (2-inch for seedlings/clones; 3.5–6-inch for vegetative and flower)
- Grow medium: hydroton/clay pebbles for DWC and ebb & flow; no medium needed for NFT/aeroponics
- Tubing, fittings, bulkheads, and a timer for flood/drain or recirculating setups
- Light-proof reservoir lids or covers (prevents algae growth)
Lighting
- Full-spectrum LED grow lights (recommended: quantum board or bar-style LEDs for even canopy coverage and low heat output)
- Light timer capable of 18/6 (veg) and 12/12 (flower) schedules
- Light hangers or ratchet straps for height adjustment
- Light meter or PAR meter (optional but helpful for dialing in PPFD targets)
Environmental controls
- Inline exhaust fan sized for your room volume (aim for air exchange every 1–3 minutes)
- Carbon filter attached to exhaust fan (odor control)
- Oscillating circulation fans (at least one per 4x4 foot area)
- Intake fan or passive intake vent with filter
- Digital thermostat/hygrometer combo (one near canopy, one near floor/reservoir)
- Portable air conditioner or space heater depending on climate
- Humidity controller or stand-alone dehumidifier/humidifier
- CO2 monitor (CO2 enrichment is optional but beneficial above 800–1200 ppm at high light intensities)
Meters, testing, and safety
- Digital pH meter (calibrate weekly with 4.0 and 7.0 buffer solutions)
- EC/TDS meter for nutrient solution concentration
- Thermometer for reservoir water temperature (keep 65–68°F / 18–20°C)
- pH up and pH down solutions
- Calibration solutions for pH and EC meters
- Nitrile gloves and eye protection for handling concentrated nutrients
- Fire extinguisher appropriate for electrical fires near grow lights
- GFCI outlets or surge-protected power strips for all electrical connections
Setting up your system and grow room step by step
The order of setup matters. Get your room environment stable before you introduce plants, because chasing temperature and humidity issues while plants are in the system is one of the most common beginner mistakes I see (and made myself). Here is the sequence I recommend.
- Seal and line your grow space: use reflective Mylar or white-painted walls to maximize light reflection; seal any light leaks that could interrupt the 12/12 dark period during flower.
- Install ventilation first: mount your exhaust fan and carbon filter, run ducting to an exit point, and confirm your intake is positioned low and opposite the exhaust. Test airflow before anything else is in the room.
- Position circulation fans: place oscillating fans so they create gentle, constant movement across the canopy — leaves should flutter slightly, not whip. Dead air zones are where mold and pests begin.
- Hang your lights at manufacturer-recommended height (typically 18–24 inches above canopy for LED quantum boards during veg; adjust down to 12–18 inches in flower based on PPFD and plant response). Connect to your timer.
- Place and plumb your reservoir(s): position reservoirs off the floor on a stable surface; for RDWC, connect bucket-to-bucket plumbing before adding water. Check all fittings and bulkheads for leaks with plain water first — never with nutrient solution.
- Fill with plain water and run your air/water pumps for 24 hours to check for leaks, confirm water temperature stability, and verify oxygen output from air stones.
- Set environmental baselines: target 70–78°F (21–26°C) air temperature during lights-on, 64–70°F (18–21°C) lights-off; relative humidity 55–65% in vegetative phase, dropping to 40–50% in flower to reduce mold risk.
- Confirm pH and EC meters are calibrated with fresh buffer solutions before mixing your first nutrient batch.
Reservoir management basics
Hemp plants in DWC can consume 1 to 3 liters of solution per day in vegetative growth and up to 5 liters per day in mid-flower depending on size. Top off daily with pH-corrected plain water to maintain solution volume, then do a full reservoir change every 7 to 14 days to prevent salt buildup and microbial growth. Always pre-mix your nutrient solution in a separate bucket, check pH (target 5.5–6.2 for hydroponic hemp), and confirm EC before adding it to the main reservoir. Keep a logbook of every reservoir change with the date, nutrients used, EC, and pH recorded.
Propagation: seeds vs. clones for hydroponic hemp
Both seeds and clones work well in hydroponic hemp production, and both have real compliance implications that go beyond just which is easier to root. From a compliance standpoint, certified seed from a licensed producer gives you a documented paper trail, the seed lot ID, supplier license, and accompanying COA travel with your records. Clones from a licensed producer are also acceptable in most states, but verify that your state plan permits clone acquisition and that the source is licensed.
Starting from seed
Feminized hemp seed is strongly preferred for cannabinoid production, regular (non-feminized) seed produces roughly 50% male plants, which contribute no usable flower and must be removed before pollen shedding to prevent fertilization. Use rapid rooter plugs, rockwool starter cubes, or jiffy peat pellets to germinate. Pre-soak cubes in pH 5.8 water, push a seed 0.5 cm deep, and place in a humidity dome at 72–77°F (22–25°C) with no nutrient solution yet. Seeds typically crack and send up a tap root within 24–72 hours. Keep the germination medium moist but not waterlogged, overwatering seeds is the most common early mistake. Once the seedling has its first set of true leaves (5–7 days after germination), it is ready to transfer into your net pots and begin very dilute nutrient feeding (EC 0.4–0.6, pH 5.8–6.0).
Taking and rooting clones
Clones eliminate the seedling stage and produce genetically uniform plants, which is a real advantage in a compliance-sensitive crop because all plants should behave consistently with respect to cannabinoid expression. To take cuttings from a verified mother plant, use a clean, sterile blade (rubbing alcohol between cuts) and take 4–6 inch cuttings just below a node. Remove lower leaves, dip the cut end in cloning gel or powder, and insert immediately into a pre-moistened rapid rooter or rockwool clone cube. Place clones in a humidity dome at 72–77°F (22–25°C) with 18 hours of low-intensity light (no high-intensity LED directly over fresh cuttings). Mist the inside of the dome once or twice daily to maintain 80–90% relative humidity around the cuttings. Most hemp clones show visible root tips emerging from their cubes in 7 to 14 days. Do not feed clones until roots are visible, the cutting is living off stored energy and nutrients during rooting, and early feeding causes more harm than good.
Propagation environment summary
| Parameter | Seeds | Clones |
|---|---|---|
| Temperature (air) | 72–77°F (22–25°C) | 72–77°F (22–25°C) |
| Relative Humidity | 70–80% under dome | 80–90% under dome |
| Light schedule | 18/6 (low intensity, 100–200 PPFD) | 18/6 (very low intensity, 75–150 PPFD) |
| Medium moisture | Moist but not saturated | Moist but not saturated |
| Nutrient solution | None until first true leaves emerge | None until roots visible |
| Time to transplant | 7–10 days from germination | 7–14 days from cutting |
Vegetative growth: light, environment, and nutrients
Hemp in vegetative growth responds to 18 hours of light and 6 hours of darkness. Under this schedule, most photoperiod hemp varieties will remain in vegetative growth indefinitely, which gives you control over when flowering begins. Target canopy-level PPFD of 400–600 micromoles per square meter per second during early veg, increasing to 600–800 as plants mature. Quantum-board LEDs at 24 inches canopy distance are typically in this range for most manufacturers, check your light's manufacturer data or use a PAR meter to confirm.
Environmental targets during vegetative growth: air temperature 74–78°F (23–26°C) lights-on, 68–72°F (20–22°C) lights-off; relative humidity 55–65%; CO2 at ambient (~400 ppm) is sufficient for most home setups, but if you are running high-intensity lighting (above 600 PPFD) with good temperature control, supplementing to 800–1000 ppm CO2 can increase growth rate. Make sure your space is well-sealed if you add CO2, running CO2 in a leaky room is wasteful and pointless.
Vegetative nutrient targets
| Week | EC (mS/cm) | PPM (500 scale) | pH target | Notes |
|---|---|---|---|---|
| Week 1 (early veg) | 0.6–0.8 | 300–400 | 5.8–6.0 | Higher N ratio; rooting out from transplant |
| Week 2–3 (mid veg) | 1.0–1.4 | 500–700 | 5.8–6.0 | Increase gradually as plants establish |
| Week 4+ (late veg) | 1.4–1.8 | 700–900 | 5.8–6.2 | Full veg program; begin training |
Hemp in hydro is forgiving about nutrient brands, but it does benefit from a three-part or two-part nutrient line with separate veg and bloom formulas that allow you to shift nitrogen-to-phosphorus ratios as you move through stages. Silica supplements (potassium silicate) strengthen cell walls and improve resistance to pests and environmental stress, add silica first when mixing, before any other nutrients, because it reacts badly with calcium if added in the wrong order.
Training during veg: LST, topping, and ScrOG
Hemp plants grow vigorously and can get tall fast, especially in hydroponic systems. Low-stress training (LST), gently bending and tying stems outward during veg, opens the canopy, brings more bud sites into the light, and keeps plant height manageable. Topping (removing the main growing tip) produces two main colas from one plant and encourages bushier growth, but it adds 5 to 7 days to your vegetative period for recovery. A screen of green (ScrOG) setup uses a horizontal net to weave branches into a flat, even canopy. For a beginner with a small DWC setup, LST with no topping is the lowest-risk approach.
Transitioning to flower: light schedule, environment, and feeding changes
To trigger flowering in photoperiod hemp varieties, switch your light timer to 12 hours on and 12 hours off. Hemp is sensitive to light interruption during the dark period, even a brief light leak can delay or disrupt flowering and, in stressed plants, push THC accumulation upward. Check your room for light leaks before the flip and fix them thoroughly.
In the first two weeks of the 12/12 schedule (the 'stretch' phase), hemp plants can double or even triple in height as they push vertical growth before setting flower sites. Plan for this: make sure you have at least 12–18 inches of headroom above your anticipated final canopy height before you flip. Adjust your light height upward as needed during the stretch, then bring it back down once vertical growth slows.
Flowering environment and nutrient targets
| Stage | Air Temp (lights-on) | Air Temp (lights-off) | RH | EC (mS/cm) | pH | PPFD target |
|---|---|---|---|---|---|---|
| Early flower (weeks 1–3) | 72–77°F (22–25°C) | 65–70°F (18–21°C) | 45–55% | 1.4–1.8 | 5.8–6.2 | 600–800 |
| Mid flower (weeks 4–6) | 70–75°F (21–24°C) | 62–68°F (17–20°C) | 40–50% | 1.6–2.0 | 5.8–6.2 | 800–1000 |
| Late flower / ripening (weeks 7–9) | 68–73°F (20–23°C) | 60–65°F (16–18°C) | 40–45% | 1.0–1.4 (begin fade) | 5.8–6.2 | 600–800 |
| Flush (final 5–7 days) | 68–73°F (20–23°C) | 60–65°F (16–18°C) | 40–45% | Plain pH-adjusted water | 5.8–6.0 | 400–600 |
Switch your nutrient program to a bloom-focused formula when you flip to 12/12. Bloom formulas have lower nitrogen and higher phosphorus and potassium, which supports flower development and resin production. Introduce bloom boosters (PK supplements) around week 4 of flower if your base nutrient program does not include adequate phosphorus and potassium for peak flower production. Taper nutrients back in the final two weeks to encourage plants to use stored resources, then flush with pH-adjusted plain water for the final 5 to 7 days before harvest.
Pest and disease prevention in a hydroponic hemp grow
Prevention is dramatically more effective than treatment in a hydroponic system. Once Pythium gets into a DWC reservoir, for example, it can spread to every plant in the system within days. The most important protective practices are maintaining reservoir temperature below 68°F (20°C), keeping reservoir lids light-proof, cleaning and sterilizing equipment between runs with hydrogen peroxide or unscented bleach solution, and never introducing unclean cuttings or tools into the grow room.
For pests, spider mites, fungus gnats, aphids, and russet mites are the most common indoor hemp threats. Fungus gnats are actually less problematic in true hydroponic setups (no soil for larvae to develop in) than in soil grows, but they will still try to enter through intake vents. Use fine mesh intake screens, maintain a positive pressure differential in the room if possible, and inspect plants weekly. Yellow sticky traps placed at canopy level are an early warning system more than a cure.
Common problems and quick diagnostic guide
| Symptom | Likely cause | Fix |
|---|---|---|
| Brown, slimy roots; foul smell from reservoir | Pythium (root rot) from warm reservoir or low O2 | Drop reservoir temp to 65°F; add beneficial bacteria (Hydroguard/Bacillus amyloliquefaciens); increase aeration; consider H2O2 treatment |
| Yellowing leaves starting at lower canopy | Nitrogen deficiency OR pH lockout | Check pH first (target 5.8–6.2); if pH correct, increase N in solution |
| Brown leaf tips and edges | Nutrient burn (EC too high) or potassium toxicity | Dilute solution; target EC for current growth stage |
| Purple stems and slow growth | Phosphorus deficiency or cold root zone temps | Check reservoir temp (min 65°F); adjust P in nutrient mix |
| Wilting despite full reservoir | Root rot cutting off water uptake; or O2 deficiency | Check roots; verify air pumps are working; check for blockage in air lines |
| White powdery coating on leaves | Powdery mildew (PM) | Improve airflow; reduce humidity below 50% in flower; treat with potassium bicarbonate or dilute hydrogen peroxide spray |
| Tiny moving dots on undersides of leaves; bronzed or stippled leaf surface | Spider mites | Isolate affected plants; treat with insecticidal soap or neem-based spray; increase humidity temporarily to discourage mites |
| Light green/yellow new growth, dark green older growth | Iron or manganese lockout | Check pH — this almost always resolves with pH correction to 5.8–6.0 in hydro |
Harvest timing, pre-harvest THC testing, and what to do with your crop
Harvest timing in compliant hemp production is not just about peak cannabinoid content, it is a legal event with a regulatory deadline built around it. Under the USDA program, hemp must be sampled no more than 30 days before anticipated harvest. That means you need to book your accredited lab sampler before you reach that 30-day window, not after you have already decided to cut. Plan your harvest timing during late veg, work backward from your estimated week-8 or week-9 flowering completion, and contact your lab by week 6 of flower to confirm sampling.
Visually, hemp flowers are ready for harvest when the majority of trichomes have transitioned from clear to milky white (cloudy), with some amber developing, usually 8 to 10 weeks from the flip to 12/12 for most CBD hemp varieties. A jeweler's loupe (30–60x) or a digital microscope is genuinely useful here and costs less than ten dollars. Do not rely on calyx and pistil color alone, as these visual cues are less reliable than trichome inspection for timing peak CBD content.
Post-harvest: drying and curing
After cutting, hang whole branches or individual colas in a dark, well-ventilated space at 60–65°F (16–18°C) and 55–60% relative humidity. Slow drying over 10 to 14 days produces better terpene retention and a smoother end product than fast drying at high temperatures. Once stems snap rather than bend and the outer surface of buds feels dry, transfer to sealed glass jars for curing. Open jars twice daily for the first two weeks (burping) to release moisture and prevent mold. Well-cured hemp flower held at stable humidity (58–62% RH with Boveda packs) will continue to improve in aroma and quality over 4 to 8 weeks.
Recordkeeping for compliance
Keep your compliance documentation organized in a physical or digital folder from day one. At minimum, this should include: your state/county registration or license, seed or clone purchase invoices with supplier license numbers and lot IDs, your cultivation log (planting date, variety, plant count, GPS/site address), all lab COAs from pre-harvest and any voluntary post-harvest testing, and records of any crop disposal if a lot tests above the legal threshold. The USDA and most state programs require labs to report results to the USDA HeMP tracking system using your license number and FSA lot ID, confirm this is happening by reviewing your lab's reporting process before you hire them. Sloppy records are a compliance risk as real as a hot THC test.
Water quality: starting with the right foundation
Tap water quality varies enormously and directly affects your nutrient program. High-EC tap water (above 0.4 mS/cm) contains dissolved minerals that compete with your nutrient solution and can cause unexpected deficiencies. If your tap water EC is above 0.3, consider using a reverse osmosis (RO) filter, which reduces EC to near zero and gives you a clean baseline to build your nutrient solution from scratch. RO water requires you to add a calcium-magnesium (CalMag) supplement as a base, since RO removes beneficial minerals along with the problematic ones. If your tap water EC is below 0.3 and pH is in a manageable range, dechlorinated tap water (let it sit 24 hours or use a small sodium thiosulfate tablet) often works fine for home hydroponic hemp.
Where to go from here
A well-run indoor hydroponic hemp setup gives you year-round production capability, precise environmental control, and a genuinely satisfying grow cycle from propagation to harvest in roughly 14 to 16 weeks including veg time. The investment in equipment and the regulatory homework are real, but they are one-time learning curves. Once you have a compliant genetics source, a working system, and a relationship with an accredited testing lab, subsequent runs get faster and more predictable. For guidance on producing hemp optimized for animal bedding, see our how to grow hemp for bedding resource. For a deeper, step-by-step reference, consult the how to grow hemp book for detailed protocols on hydroponic systems, genetics selection, and compliance.
If you are thinking about whether an indoor hydroponic setup could eventually become profitable rather than just a personal project, the economics of scaling, licensing, energy costs, and market considerations, are a separate and important conversation. For a detailed walkthrough on how to grow hemp for profit, see our in-depth guide. Similarly, if your climate or space makes a greenhouse setup more practical than a fully indoor room, a controlled greenhouse can combine natural light with environmental management in ways worth exploring. See our guide on how to grow hemp in a greenhouse for details on combining natural light with environmental controls. And if your situation involves growing hemp legally in a jurisdiction outside the U.S., the regulatory landscape differs significantly, in particular, legal frameworks in countries like India involve very different permit structures and THC thresholds than U. For guidance on local requirements and permits, see our guide on how to grow hemp legally in India. S. federal and state law.
FAQ
Can you grow hemp (low‑THC cannabis) hydroponically indoors as a home cultivator?
Yes. Hemp (Cannabis sativa L.) with Δ9‑THC ≤0.3% (dry weight) can be produced hydroponically indoors. Hydroponics can give tight environmental control, faster growth, and higher yields, but growers must manage genetics, environment, nutrients and recordkeeping to avoid producing hemp that exceeds legal THC limits. Follow your jurisdiction’s licensing, sampling and testing rules before planting.
Which hydroponic systems are commonly used for hemp and when is each recommended?
Common systems and recommended uses: 1) DWC (Deep Water Culture): simple for single plants or small runs; good oxygenation with air stones but watch reservoir temperature and root disease (Pythium). 2) RDWC (Recirculating DWC): scales DWC for multiple plants; easier nutrient uniformity but needs strong sanitation and redundancy. 3) NFT (Nutrient Film Technique): efficient for clones/young plants and continuous flows; avoids medium but risky if pumps fail and less ideal for large flowering plants. 4) Ebb & Flow (flood and drain): versatile for medium‑to‑large plants; good for growers who like substrate (clay, coco) with periodic wet/dry cycles—timing is critical to avoid root stress. 5) Aeroponics/mist systems: highest oxygenation and growth potential but complex, maintenance‑intensive and sensitive to pump/nozzle failures. Choose based on scale, experience, fault‑tolerance and whether you prefer media‑free roots.
What equipment and supplies are essential for an indoor hydroponic hemp grow?
Checklist: grow tent/room with blackout lightproofing; grow lights (LED/HPS) with dimming; timers; environmental controls (exhaust, intake fans, ducting); inline fan + carbon filter (odor where regulated); humidifier/dehumidifier; heater/AC as needed; thermostat/hygrometer; CO2 controller (optional for sealed rooms); chosen hydroponic system kit (DWC/RDWC/NFT/ebb & flow/aeroponics) including reservoirs, pumps, air stones, tubing, fittings; pH meter and EC/TDS meter; nutrients formulated for cannabis/hemp (vege/flower formulas); pH up/down; water source (RO or tested municipal) and filters; clones/seedlings and trays; propagation dome/heat mat; trellis/netting, plant ties, pruning shears; spare pumps/nozzles; cleaning/sanitizing supplies (hydrogen peroxide, bleach alternatives, alcohol); PPE and logbook or digital records for compliance.
What genotype and seed/clone considerations reduce legal THC risk?
Use certified, well‑documented varieties tested in local trials when possible. Purchase seed or clones from reputable sources and keep documentation (purchase invoices, lot IDs, cultivar names). Choose varieties bred for low Δ9‑THC or fiber/grain/industrial hemp where available. Recognize genotype × environment interactions: some cultivars can drift to higher THC under certain light or stress—test small pilot runs and consult local extension trial data.
What is a clear propagation → vegetative → flowering schedule (light, temp, RH, training) for hydroponic hemp?
Propagation (clones/seedlings, 1–2 weeks): light 18–24h at low PPFD (100–200 µmol/m2/s), temp 72–78°F (22–26°C), RH 65–75%, gentle misting, heat mat 24–26°C for clones. Vegetative (3–8+ weeks depending on target size): light 18/6 (or 24/0 for faster veg) at 300–600 µmol/m2/s, temp 70–80°F (21–27°C) day, ±5°F night, RH 45–60%; begin topping/fIM and low‑stress training (LST), build trellis. Flowering (switch to 12/12 for photoperiod cultivars, or trigger flowering timing for autoflower genetics): light 12/12, PPFD 600–900 µmol/m2/s for canopy, temp 65–78°F (18–26°C) with night drop to reduce stretch, RH 40–50% (lower to 35–45% late flower) to reduce mold; consider CO2 enrichment only in sealed rooms with >800 µmol/m2/s lighting and proper controls. Adjust training: full support for colas, remove lower larf, and use selective defoliation to improve airflow.
What nutrient program, pH and EC/PPM targets should I follow for hemp hydroponics?
General targets (adjust per cultivar): Propagation: EC 0.4–0.8 mS/cm, pH 5.8–6.2. Vegetative: EC 1.0–1.4 mS/cm, pH 5.8–6.2. Early flowering (weeks 1–3): EC 1.4–1.8 mS/cm, pH 5.8–6.2. Mid‑late flowering (weeks 4+): EC 1.6–2.0 mS/cm, pH 5.8–6.2 (some growers raise to 2.0–2.2 late flower for resin development but proceed cautiously to avoid salt buildup). Convert EC to PPM according to meter scale (commonly 500 or 700). Use a balanced macro/micronutrient cannabis/hemp formula with higher N in veg, higher P/K in bloom, and monitor for signs of deficiency/excess. Flush lightly only if salt buildup or at end of life before harvest per local best practice and compliance rules.
How to Grow Hemp for Bedding: Seed-to-Processing Guide
Grow hemp for absorbent animal and commercial bedding: seed-to-processing steps, varieties, harvest, compliance.