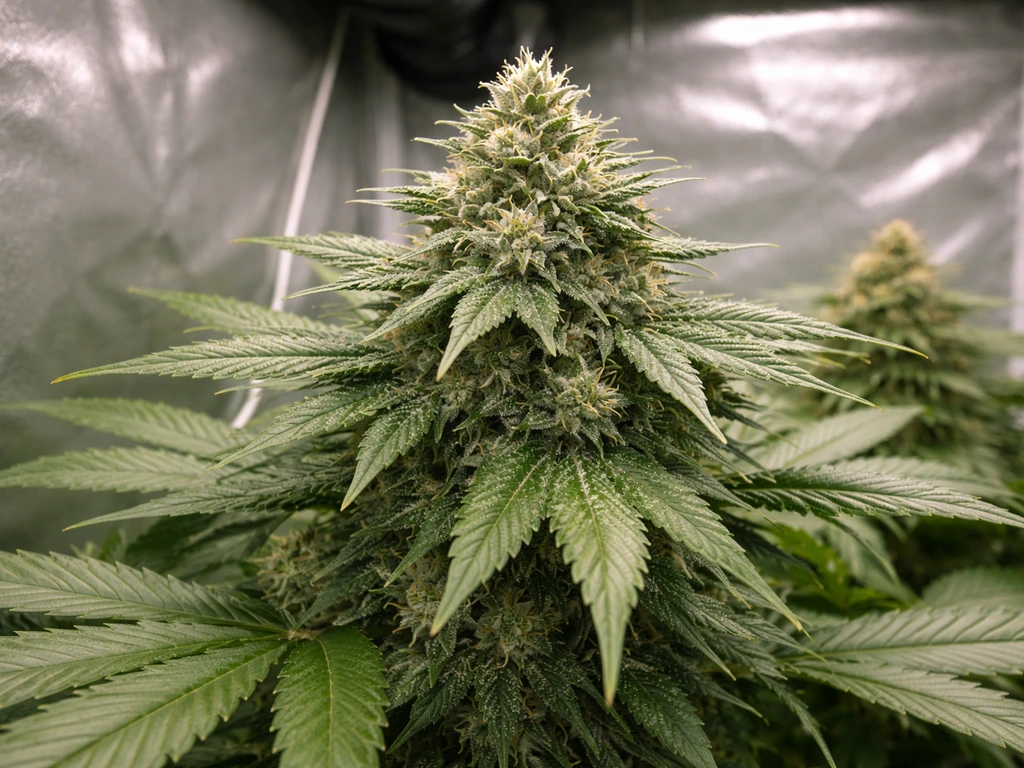
Growing more potent weed comes down to stacking several factors correctly: starting with strong genetics, dialing in your light intensity and climate, feeding at the right rates, training your plants for maximum bud exposure, and then harvesting and curing with enough patience to actually preserve what you grew. Get all of those right together and you will see a real difference. Get just one of them badly wrong and it can undercut everything else. This guide walks through each factor in practical order, with specific targets you can actually use, whether you are growing indoors under LEDs, outdoors in a raised bed, or in a hydroponic system. For a step-by-step walkthrough on techniques and settings, see a companion piece on how to grow the best weed plants. For a step-by-step handbook of high-potency techniques, see how to grow the strongest weed. For a step-by-step companion focused specifically on stepwise cultivation techniques, see our guide on how to grow perfect weed.
How to Grow More Potent Weed: Home Guide, Tools & Checklist

What 'more potent' actually means (and why it matters for how you grow)
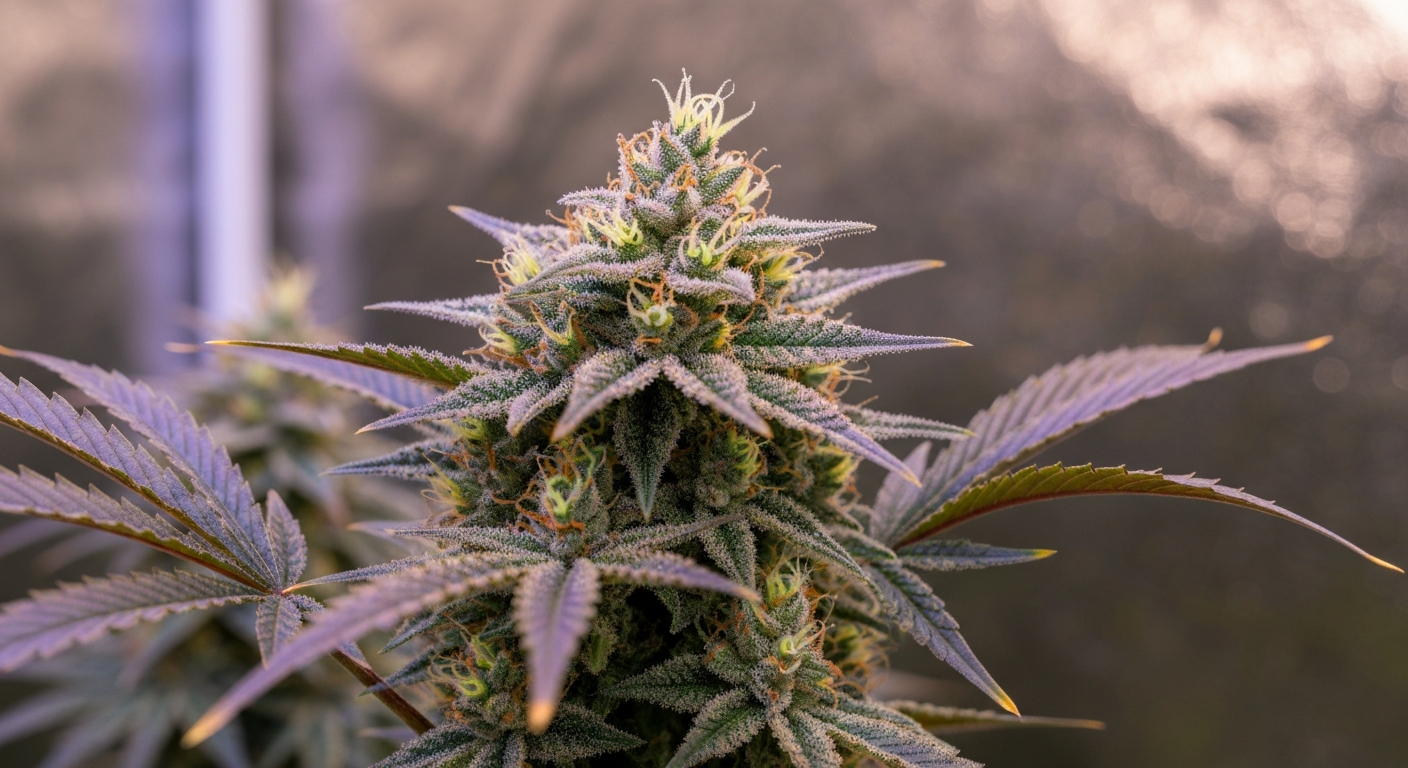
When most growers say they want more potent weed, they usually mean higher THC. That is a reasonable goal, but potency is more than a single number. The full cannabinoid profile (THC, CBD, CBG, and minor cannabinoids), combined with the terpene profile (the aromatic compounds like myrcene, limonene, and caryophyllene), determines the overall effect, flavor, and perceived strength of your harvest. A flower testing at 22% THC with a rich terpene profile will often feel stronger and more complex than the same flower stripped of its terpenes by poor drying. So when this guide talks about improving potency, it means maximizing both cannabinoid concentration and terpene preservation together.
It is also worth being clear about what this guide is for. The techniques here apply to home growers who are growing cannabis legally in their jurisdiction, for personal use or whatever purpose local law permits. Growing for stronger results is a legitimate cultivation goal, but it belongs inside a legal and responsible framework. The next section covers that before anything else.
Legal, safety and responsible-growing checklist
Before you invest in seeds, lights, or nutrients, spend thirty minutes confirming that home cultivation is actually legal where you live, and that you are following any plant-count, space, or licensing rules. Cannabis law varies enormously, not just between countries but between states, provinces, and sometimes municipalities within the same country. Getting this wrong can have serious consequences, and no yield improvement is worth that.
- Verify your local home-grow laws: confirm legal status, maximum plant counts, whether flowering and vegetative plants are counted separately, and any licensing or registration requirements that apply to you.
- Check odor regulations: many jurisdictions and rental agreements have restrictions on detectable cannabis odor outside your property. Plan carbon filter and extraction capacity before you start.
- Secure your grow from unauthorized access, especially if minors are present in the household. Locked rooms or dedicated locked enclosures are standard practice.
- Review fire and electrical safety requirements: high-wattage grow lights, ballasts, and pumps draw significant current. Use properly rated cables, RCDs/GFCIs, and avoid daisy-chaining extension leads. Have a working smoke detector in or near the grow space.
- If using CO2 enrichment: install a continuous CO2 sensor with an audible alarm. OSHA and NIOSH set the permissible 8-hour exposure limit at 5,000 ppm. Keep occupant exposure well below this and use ventilation interlocks.
- Store all nutrients, pesticides, and supplements securely and out of reach of children and pets.
- Keep records of your plant counts, purchase receipts, and any relevant permits in case you ever need to demonstrate compliance.
How potency is formed: genetics, environment and post-harvest care
Think of potency as the product of three overlapping layers. The first is genetics: your plant's DNA sets the ceiling. A cultivar bred to produce 18–24% THC has the biosynthetic machinery to reach that range; a cultivar bred for CBD or fiber does not, no matter how well you grow it. The second layer is environment: light intensity, temperature, humidity, CO2, and nutrient availability all influence how much of that genetic potential the plant actually expresses during flowering. The third layer is post-harvest handling: even a perfectly grown plant can lose significant terpenes and see cannabinoid degradation if it is dried too fast, too hot, or cured improperly. All three layers have to perform for you to reach the top of your cultivar's range.
One thing I had to accept early on is that chasing a single variable does not work. I spent a whole season obsessing over light intensity while ignoring VPD and my nutrient EC, and my results were underwhelming. It was only when I started treating the grow as a system, where every factor supports the others, that the quality started climbing consistently.
Choosing genetics: the foundation of everything
Genetics is the single highest-leverage decision you make as a grower. Choosing a cultivar with documented high THC and terpene-rich profiles gives you a realistic ceiling to aim for. Choosing poorly means the ceiling is low regardless of your inputs.
What to look for in a strain
- Lab-tested THC ranges published by the seedbank or verified by third-party grower reports. Look for strains with consistent test results across multiple growers, not just a single best-case number.
- Terpene profile data where available. Strains bred for a rich terpene profile (myrcene, caryophyllene, limonene, linalool) contribute to the full-spectrum effect that makes potency feel meaningful.
- Stable genetics vs phenotype hunting: F1 hybrids from reputable breeders tend to be more consistent than S1 or polyhybrid lines, which can throw a wide range of phenotypes. For home growers with limited space, consistency matters.
- Cultivar-environment fit: some high-THC strains were bred for specific conditions (e.g., long indoor flowering periods, low humidity tolerance). Match the strain to your actual grow setup.
- Seedbank reputation: look for banks with transparent testing data, consistent seed quality reports, and a history in the market. Community forums and cultivation sites can help you separate genuine results from marketing.
Phenotype selection and testing
Even within the same seed pack, individual plants (phenotypes) can express different cannabinoid and terpene profiles. If you have the space and the legal plant count allows it, running multiple seeds from the same batch and selecting the best-performing phenotype to clone is a proven way to lock in quality. Lab testing a representative sample from each phenotype is the only reliable way to confirm what you actually have. Trichome inspection and smell are good real-time indicators, but they are not a substitute for an HPLC panel if potency verification matters to you.
Indoor vs outdoor vs hydroponics: choosing the right method for your potency goals
There is no single best grow method for potency. Each approach has genuine strengths and real limitations, and the right choice depends on your budget, space, legal context, and how much control you want over variables. I've grown in all three environments and I genuinely think all of them are valid paths. Here is an honest comparison.
| Factor | Indoor | Outdoor | Hydroponics |
|---|---|---|---|
| Environmental control | High — you set light, temp, humidity | Low — weather dependent | High — nutrient precision, climate still needed |
| Light intensity | You control PPFD/DLI with fixtures | Free sunlight, often excellent DLI | Typically indoor; same as indoor |
| Potency ceiling | High when dialed in | High in ideal climates; weather risk | Very high; fastest nutrient response |
| Startup cost | Moderate to high (lights, fans, extraction) | Low to moderate | Moderate to high (system hardware, pumps) |
| Ongoing cost | Electricity and nutrients | Mostly nutrients and soil amendments | Nutrients, system maintenance, electricity |
| Pest/disease risk | Lower (controlled space) | Higher (open environment) | Root pathogens possible; no soil pests |
| Skill level needed | Beginner-friendly with right setup | Beginner-friendly; less monitoring | Best with some experience; pH/EC critical |
| Best for potency if... | You want full control year-round | You have a good climate and privacy | You want speed and nutrient precision |
For most home growers focused on maximizing potency, indoor cultivation gives you the most control over the variables that matter most: light intensity, temperature, humidity, and harvest timing. Outdoor growing can absolutely produce exceptional potency in the right climate, but you are at the mercy of weather during late flowering, which is exactly when humidity spikes and mold pressure can cost you quality. Hydroponics (DWC, coco, NFT, or similar) accelerates nutrient uptake and can support fast-growing, terpene-rich plants, but pH and EC management become more critical because there is no soil buffer. If you are newer to growing, starting in soil indoors is a forgiving first step before moving to hydro.
Planning your grow space
A well-planned grow space protects your plants, your home, and your neighbors from problems. For a practical, step-by-step primer on daily care and maintenance, see our guide on how to take care of weed plants grow. These are the practical elements to sort out before your seeds germinate.
Containment and structure
Whether you use a purpose-built grow tent or a dedicated room, the space needs to be light-tight (for photoperiod plants), easy to clean, and moisture-resistant. Grow tents are the most practical option for most home growers: they are lined with reflective mylar, they are portable, and they contain both light and humidity effectively. Common tent sizes range from 60x60 cm (suitable for 1–2 plants) up to 120x120 cm (4 plants) or 240x120 cm for larger personal grows. Match your tent size to your legal plant count and light capacity.
Ventilation and air exchange
Active ventilation serves two purposes: it removes heat from lights and transpiration, and it supplies fresh CO2 to the canopy. As a baseline, size your inline fan to exchange the full volume of your grow space every 1–3 minutes. For a 120x120x200 cm tent (approximately 288 liters), a fan rated at 150–200 m³/h with a carbon filter is a practical starting point. Passive intake ports or a second fan for intake keeps air moving through the canopy rather than just over it. Oscillating clip fans inside the tent strengthen stems and prevent humid stagnant pockets.
Odor control
A quality activated carbon filter rated for your extraction fan's airflow is non-negotiable for odor management in most home situations. The filter should be replaced or recharged according to manufacturer intervals, typically every 12–18 months depending on use. Running the extraction fan continuously (rather than on a timer) is the most reliable approach during the last 4–6 weeks of flowering when resin production peaks.
Electrical safety
Grow spaces combine electricity, water, and heat in close proximity. Use waterproof or splash-rated extension leads and power strips rated for the total amperage of your equipment. Install a GFCI (ground fault circuit interrupter) or RCD on any circuit feeding the grow space. Keep ballasts and timers elevated off the floor in case of water spills, and never leave drip systems or irrigation running unattended until you are confident in your setup.
Lighting fundamentals for potency
Light is the engine of cannabinoid production. More light, delivered efficiently to the canopy, means more photosynthesis, more biomass, and ultimately more total cannabinoids per square meter. The research is fairly clear on this: canopy yield increases approximately linearly with photosynthetic photon flux density (PPFD) up to very high levels, at least when temperature, CO2, and nutrients are keeping pace. What the research also shows is that higher PPFD tends to raise total grams of cannabinoids per area through greater biomass, rather than reliably increasing concentration per gram in every cultivar. The practical takeaway is that maximizing canopy light delivery matters, but it has to be paired with the rest of the environment.
Lamp types
- LED (quantum board or bar-style): currently the most popular option for home growers. High-efficiency modern LEDs (2.5–3.0+ µmol/J) produce less heat per watt than HPS, allow precise height adjustment, and deliver full-spectrum light. Upfront cost is higher but operating cost is lower long-term.
- HPS (high-pressure sodium): well-proven for flower production with a warm spectrum that suits flowering. Lower efficiency than modern LED but very effective and often cheaper to purchase. More heat management required.
- CMH/LEC (ceramic metal halide): good full-spectrum output, better UV output than HPS, reasonable efficiency. A practical middle ground for small to medium spaces.
- T5/CFL: useful for seedlings and clones but not adequate for serious flower production due to low light intensity at canopy depth.
PPFD and DLI targets
PPFD (measured in µmol·m⁻²·s⁻¹) is the instantaneous photon flux at the canopy surface. DLI (daily light integral, measured in mol·m⁻²·d⁻¹) is the total photons delivered per day, calculated as: DLI = PPFD × photoperiod in seconds ÷ 1,000,000. For example, a PPFD of 800 µmol·m⁻²·s⁻¹ for 12 hours gives a DLI of approximately 34.6 mol·m⁻²·d⁻¹. DLI is a more useful number than PPFD alone because it accounts for photoperiod length and lets you compare different light schedules fairly.
| Growth Stage | Target PPFD (µmol·m⁻²·s⁻¹) | Photoperiod | Approximate DLI (mol·m⁻²·d⁻¹) |
|---|---|---|---|
| Seedling / clone | 150–300 | 18 h | 9.7–19.4 |
| Vegetative | 300–500 | 18 h | 19.4–32.4 |
| Early flower (weeks 1–3) | 500–700 | 12 h | 21.6–30.2 |
| Full flower (weeks 4–harvest) | 700–900+ | 12 h | 30.2–38.9+ |
Stage-specific lighting matters. Research supports using lower PPFD in veg (300–500 µmol·m⁻²·s⁻¹) and pushing intensity higher in the flowering stage (700 µmol·m⁻²·s⁻¹ and above) where CO2 and nutrients can support the extra photosynthetic activity. Pushing PPFD above 1,000 µmol·m⁻²·s⁻¹ in a standard home grow without CO2 enrichment and excellent cooling is unlikely to improve results and may cause light stress.
Measuring light correctly
A PAR meter (or quantum flux meter) that reads µmol·m⁻²·s⁻¹ is the only way to know what your canopy is actually receiving. Manufacturer lumen ratings and wattage tell you very little about canopy delivery because light spreads, reflects, and attenuates with distance. Take measurements at multiple canopy points to identify hot spots and low-coverage zones, then adjust light height or add supplemental side lighting as needed. Many modern LED drivers are dimmable, which makes it easy to gradually raise intensity as plants mature.
Climate control: temperature, humidity and CO2
Temperature and humidity work together to determine vapor pressure deficit (VPD), which controls how efficiently your plants transpire and take up nutrients. Getting climate right is not just about avoiding heat stress; it is about keeping your plant in the physiological range where it can use the light and nutrients you are providing.
Temperature targets
- Seedling and veg: 22–28°C (72–82°F) with lights on; 18–22°C lights off.
- Flowering: 20–26°C (68–79°F) lights on. Cooler canopy temperatures in late flower (20–24°C) are associated with better terpene retention and resin development in many cultivars.
- Root zone: aim for 18–22°C in hydroponic systems to reduce root pathogen risk and support oxygen uptake.
- Avoid sustained temperatures above 30°C (86°F) at the canopy; this accelerates terpene evaporation and can stress plants into producing less dense, lower-quality flower.
Humidity and VPD
- Seedling / early veg: 60–70% relative humidity (RH).
- Mid to late veg: 50–65% RH.
- Early flower (weeks 1–3): 45–55% RH.
- Late flower (weeks 4–harvest): 40–50% RH. Reducing humidity in late flower reduces mold and botrytis risk when buds are densest.
- VPD target range: 0.8–1.2 kPa in veg; 1.0–1.5 kPa in flower. Use a VPD chart with your actual temperature and humidity readings to verify you are in range.
CO2 enrichment: when it helps and when it doesn't
CO2 enrichment (raising room CO2 from the ambient ~420 ppm to 800–1,200 ppm) can increase photosynthesis and yield in cannabis, but only when light intensity, temperature, and nutrients are already adequate to support the extra metabolic activity. If your DLI is below 30 mol·m⁻²·d⁻¹ or your nutrient program is not dialed in, adding CO2 is unlikely to produce measurable improvements and wastes money. Research has also shown that yield increases from CO2 enrichment typically come from greater biomass rather than higher cannabinoid concentration per gram, so the benefit is total cannabinoid output per plant rather than a stronger-testing individual bud.
If you do add CO2, target 800–1,200 ppm during the lights-on period. Install a dedicated CO2 sensor with an audible alarm and link it to your ventilation so the room exhausts CO2 before you enter for extended periods. OSHA and NIOSH set the permissible occupant exposure limit at 5,000 ppm as an 8-hour time-weighted average. See NIOSH Pocket Guide to Chemical Hazards, Carbon dioxide (CDC/NIOSH) for detailed occupational exposure limits and guidance on CO₂ safety NIOSH Pocket Guide to Chemical Hazards — Carbon dioxide (CDC/NIOSH). Do not enter a CO2-enriched room without ventilating it first, and never use CO2 systems in rooms shared with sleeping or common living spaces.
Nutrients, water and pH/EC fundamentals
Nutrients are the raw material for plant growth, but more is rarely better. Overfeeding is one of the most common mistakes home growers make, and it can directly reduce terpene and cannabinoid quality, especially when excess phosphorus or nitrogen is applied late in the flowering stage. Research has found that phosphorus oversupply in late flower can actually reduce THCA and CBDA concentration per gram in some cultivars. Feed to support growth, not to push the plant beyond what it can use.
pH targets
pH controls nutrient availability at the root zone. Even with perfect nutrient ratios, plants will show deficiency symptoms if pH is outside the optimal range, because nutrient ions become locked out at incorrect pH. Use a calibrated digital pH meter and test every feed, not just occasionally.
- Soil and soil-like media (peat, compost blends): target pH 6.0–7.0, ideally 6.2–6.8.
- Coco coir: target pH 5.8–6.3.
- Hydroponic systems (DWC, NFT, aero): target pH 5.5–6.2.
- Runoff pH monitoring: check the pH of water draining from your containers to detect media drift. A rising runoff pH can signal salt buildup; a falling pH can indicate over-acidification.
EC and PPM: what to measure and why
EC (electrical conductivity, measured in mS/cm) is the most accurate and unambiguous way to measure nutrient solution strength. TDS/PPM meters are common but use different conversion scales (EC × 500 for the 500-scale, or EC × 700 for the 700-scale), so two meters showing different PPM readings can both be correct if they use different scales. Always record both your EC reading and which scale your meter uses to avoid confusion. Calibrate your EC meter regularly with a known standard solution.
| Growth Stage | Target EC (mS/cm) — Hydro/Coco | Target EC (mS/cm) — Soil |
|---|---|---|
| Seedling / clone | 0.4–0.8 | 0.3–0.6 |
| Early veg | 0.8–1.2 | 0.6–0.9 |
| Mid veg | 1.2–1.6 | 0.9–1.2 |
| Early flower (weeks 1–3) | 1.6–2.0 | 1.2–1.5 |
| Full flower (weeks 4–late) | 2.0–2.5 | 1.5–1.9 |
| Late flower / pre-harvest | 1.4–1.8 (tapering down) | 1.0–1.4 (tapering down) |
Feeding philosophies and when to adjust
There are broadly two approaches: following a manufacturer's feed chart as a starting framework and adjusting based on plant response, or building a custom program from base components. For most home growers, starting with a reputable manufacturer's chart at 50–75% of the recommended dose and adjusting upward based on plant color and response is safer than going full-strength from day one. Watch for signs of overfeeding (clawed, dark-green leaves, nutrient burn at leaf tips) and underfeeding (pale yellowing, slow growth, leaf drop earlier than expected in flower).
On the question of pre-harvest flushing: the evidence does not consistently support multi-week water-only flushes as a reliable way to increase cannabinoid or terpene concentration. Studies show flushing reduces substrate soluble salt levels but does not produce predictable potency gains across cultivars. A short flush or clean feed at reduced EC in the final week is reasonable for substrate management, but expecting it to significantly boost potency is not well supported.
Pot size, root health and growing media
Root health directly affects plant health and yield. A root system that is cramped, waterlogged, or under oxygen stress will limit the plant's ability to take up nutrients and water regardless of what you are feeding. Match pot size to your intended plant size and flowering duration: a plant grown to 60 cm in height in a 10-liter pot will generally do fine, but a plant trained to fill a 1.2m canopy in a 5-liter pot will become root-bound mid-flower and show stress at the worst possible time.
- Fabric pots and air-pots improve oxygen delivery to roots through air pruning and prevent the anaerobic zones that develop in solid plastic containers with poor drainage.
- For soil grows, a well-aerated mix (30–40% perlite by volume is common) supports good drainage without sacrificing water retention.
- Coco coir benefits from daily or twice-daily irrigation to maintain consistent moisture and prevent dry pockets, especially in hot weather.
- In DWC or recirculating hydro, maintain dissolved oxygen in solution above 6–8 mg/L by keeping water temperature in the 18–22°C range and using adequately sized air pumps.
- Avoid transplanting stress during early flowering: transplant to final container before the plant shows pre-flowers or within the first week of the 12/12 light switch.
Training, pruning, SCROG and LST for denser, more potent buds
Training techniques increase potency indirectly by maximizing the number of bud sites receiving high-intensity light and by creating a more even canopy where every cola develops under similar conditions. For step-by-step training methods to increase canopy size and overall bud mass, see how to make my weed plant grow big. A tall, untopped plant with a dominant central cola shading lower branches produces large quantities of small, airy, lower-potency popcorn buds alongside one good top. Training solves this.
Low-stress training (LST)
LST involves gently bending and tying branches outward and downward to open up the canopy and encourage lateral growth. It creates multiple main colas instead of one, without cutting the plant. Start LST during veg when stems are still flexible, and continue adjusting ties as the plant grows. This is one of the most beginner-friendly techniques and works well in both soil and coco.
Topping and FIMing
Topping removes the main growing tip, causing the plant to produce two dominant colas from the nodes below. FIMing (a less precise cut) can produce 4 new growing tips from a single cut. Both techniques are applied during veg, typically when the plant has 4–6 nodes. Do not top during flowering; the stress and recovery time will cost you more than it gains.
SCROG (screen of green)
SCROG uses a horizontal mesh screen (typically 5x5 cm to 10x10 cm grid) placed 30–40 cm above the canopy. As shoots grow up through the screen, they are tucked back under it and trained to fill the screen horizontally. The result is a flat, even canopy where every bud site receives nearly identical PPFD. This is one of the most effective techniques for maximizing light use efficiency in a fixed indoor space. It does require extra veg time to fill the screen, so plan accordingly.
Defoliation and lollipopping
Removing large fan leaves that block light from bud sites, and removing small underdeveloped lower bud sites (lollipopping), directs the plant's energy to the upper canopy where conditions are best. Light defoliation in early flower (first 2–3 weeks of 12/12) is widely practiced. Heavy or late defoliation can stress plants and is not recommended unless you have experience with your specific cultivar's stress tolerance.
Harvest timing: the most underrated potency factor
Harvesting at the right moment is arguably as important as every environmental factor combined. Harvest too early and cannabinoids are not fully formed. Harvest too late and THC oxidizes to CBN, a less psychoactive compound, and terpenes evaporate or degrade. The window of peak potency is real and it is finite.
Reading trichomes
Trichome color is the most practical real-time indicator of harvest readiness. Use a jeweler's loupe at 30–60x magnification or a digital microscope to inspect trichomes on the calyx surfaces (not the leaves, which mature faster). Trichome progression runs from clear to milky/cloudy to amber.
- Clear trichomes: cannabinoids still developing; too early.
- Milky/cloudy trichomes: multiple controlled studies associate peak total cannabinoid concentration with the point of maximum milky trichome proportion. For a potency-focused harvest, aim for 70–90% milky with minimal amber.
- Amber trichomes: indicate THC is converting to CBN through oxidation. Some amber (10–20%) is acceptable and adds a heavier effect profile; more than 30% amber generally means peak cannabinoids have passed.
- Timing is cultivar-dependent: the research confirms that the exact timing of peak cannabinoid levels varies between cultivars. Do not rely solely on the breeder's calendar estimate; use trichome inspection and, if possible, a lab test on a representative sample to verify your harvest window.
Calendar and pistil checks as supporting tools
Breeder-stated flowering times and pistil color (white turning orange or red) are useful rough indicators but should support trichome inspection rather than replace it. Pistils can change color due to environmental stress independently of actual maturity. Trichome inspection on multiple plants and bud sites is the reliable method.
Drying and curing: where potency is preserved or lost
A lot of growers put enormous effort into the grow and then rush the dry and cure. I made this mistake myself and the difference when I slowed it down was significant: more complex aroma, smoother smoke, and noticeably better effect. The science supports this: controlled slow drying preserves terpenes, and proper curing allows residual chlorophyll to break down and moisture to equilibrate evenly through the bud.
Drying room conditions
- Temperature: 18–21°C (64–70°F). Avoid drying above 25°C, which accelerates terpene volatilization.
- Relative humidity: 45–55% RH during drying. Drying too fast (low humidity) locks moisture unevenly; drying too slow (high humidity) risks mold.
- Airflow: gentle, indirect airflow from a fan to prevent stagnant air pockets without blowing directly on buds.
- Light: dark or very low light. UV and visible light degrade cannabinoids and terpenes over time.
- Duration: most whole-branch or hang-dried flowers take 7–14 days to reach the right moisture level. Target approximately 10–12% moisture content before jarring.
- Readiness check: small stems should snap cleanly rather than bending; the outside of buds should feel dry but not brittle or papery.
Jar curing and water activity targets
Once dried to the right moisture level, transfer to glass mason jars filled to approximately 75% capacity. The ASTM standard for dry cannabis storage (blank" rel="noopener noreferrer">ASTM D8197) specifies a water activity (aw) range of 0.55–0.65 as the safe zone that prevents microbial growth while preserving quality. In practical terms, this corresponds to a headspace RH of roughly 55–65%, with 58–62% being the widely recommended operational target.
- Week 1: burp jars once or twice daily for 15–30 minutes to release excess moisture and CO2. If you detect ammonia or mold smell, leave lids off longer or move flower back to the drying rack briefly.
- Weeks 2–4: reduce burping to once daily, then every few days as moisture equilibrates.
- Week 4–8+: maintain RH at 58–62% in sealed jars. Two-way humidity control packs (set at 58% or 62%) are a practical and well-regarded tool for maintaining this range without daily monitoring.
- Use a small digital hygrometer inside each jar to verify conditions. Do not rely on feel alone.
- For long-term storage (months), keep jars in a cool, dark location. UV exposure and heat above 25°C degrade both cannabinoids and terpenes over time.
Essential tools for a potency-focused grow
You do not need to spend a fortune, but a few tools are genuinely non-negotiable if you are serious about getting the most from your plants. Everything else is nice to have.
| Tool | What it measures / does | Why it matters for potency |
|---|---|---|
| Digital pH meter | Nutrient solution and runoff pH | Correct pH unlocks nutrient availability at the root zone |
| EC/TDS meter | Nutrient solution strength (mS/cm or ppm) | Prevents overfeeding and underfeeding throughout the cycle |
| PAR / quantum flux meter | Canopy PPFD in µmol·m⁻²·s⁻¹ | Confirms actual light delivery; guides height and dimmer adjustments |
| Thermometer + hygrometer (min/max) | Air temp and RH, lights on and off | Keeps climate in the optimal range for terpene and cannabinoid production |
| Jeweler's loupe (30–60x) or digital microscope | Trichome color and development | Essential for identifying peak harvest window |
| CO2 sensor (if enriching) | Room CO2 concentration in ppm | Safety monitoring and enrichment setpoint verification |
| Jar hygrometer (small digital) | Headspace RH during cure | Confirms curing is in the 58–62% target range |
Troubleshooting common issues that hurt potency
Even experienced growers hit problems. The key is recognizing them early and addressing the cause rather than just the symptom.
Nutrient deficiencies and toxicities
Yellowing between leaf veins (interveinal chlorosis) during flowering often signals iron or magnesium deficiency and is usually pH-related rather than a nutrient supply issue. Check pH first before adding more nutrients. Dark-green, clawed leaves with burned tips indicate nitrogen or salt toxicity, reduce EC and flush with pH-adjusted water. Always diagnose before adjusting, because adding nutrients to a plant that already has lockout will make things worse.
Pests
- Spider mites: tiny pale dots on upper leaf surface, fine webbing under leaves. Raise humidity (mites dislike >60% RH), use predatory mites for biological control, or apply potassium soap spray early.
- Fungus gnats: larvae damage roots; adults are mostly a nuisance. Let the top 2–3 cm of soil dry out between waterings to interrupt the larval cycle. Yellow sticky traps catch adults.
- Aphids and whiteflies: inspect the underside of leaves regularly. Insecticidal soap or neem oil early in veg; avoid applying anything to flowering plants that could contaminate flower.
- Never apply systemic pesticides to flowering plants. Residues can concentrate in harvested flower.
Mold and botrytis
Botrytis (grey mold) is the most devastating late-flower pathogen. It destroys buds from the inside out and spreads rapidly in humid, stagnant conditions. Prevention is the only reliable strategy: keep late-flower RH below 50%, maintain airflow through the canopy, defoliate dense areas to improve air circulation, and inspect buds manually every 2–3 days in the final two weeks. Any bud showing grey-brown rot should be removed immediately and disposed of away from the grow space.
Light stress and heat stress
Bleached or white-tipped buds directly under the light indicate light burn (too much PPFD at close range). Raise the fixture or reduce dimmer output. Tacoing (upward leaf curl) often signals heat stress combined with high PPFD. Address both by improving airflow and lowering canopy temperature before raising light intensity. A common beginner mistake is placing lights too close because 'more is better' without measuring actual PPFD or monitoring leaf temperature.
Putting it all together: a practical potency checklist
Growing for potency is really just growing well consistently. These are the decision points and checkboxes worth running through at each stage of your grow.
- Confirm legal compliance and secure your setup before purchasing anything.
- Choose genetics with documented high-THC and terpene-rich profiles from a reputable seedbank.
- Match your grow method (indoor / outdoor / hydro) to your space, budget, and experience level.
- Plan your grow space for containment, light-tightness, ventilation, carbon filtration, and electrical safety.
- Install a PAR meter and set PPFD to 300–500 µmol/m²/s in veg, increasing to 700–900+ in full flower.
- Maintain temperature at 20–26°C and RH at 40–55% during flowering; track VPD.
- Only add CO2 enrichment after confirming your DLI and nutrients can support the extra photosynthesis; install a CO2 sensor with alarm.
- Use a calibrated pH meter (target 6.0–6.8 in soil, 5.5–6.2 in hydro) and EC meter (target 1.6–2.5 mS/cm in full flower for hydro/coco) on every feed.
- Apply LST, SCROG, or topping during veg to maximize even canopy light distribution.
- Defoliate lightly in early flower to improve airflow and bud site light exposure.
- Monitor trichomes with a jeweler's loupe; harvest at approximately 70–90% milky/cloudy trichomes with minimal amber.
- Dry at 18–21°C and 45–55% RH for 7–14 days until small stems snap cleanly.
- Cure in glass jars at 58–62% RH; burp daily in week 1, then taper; use jar hygrometers and consider 2-way humidity packs for long-term storage.
If you are also working on other aspects of plant health and growth alongside potency, the topics of keeping plants healthy throughout their life cycle and managing overall plant development all connect closely to what this guide covers. Strong, healthy plants that grow vigorously and are managed carefully from start to finish are always the foundation that higher potency is built on. For step-by-step basics on maintaining vigorous plants, see how to grow a healthy weed plant for practical, beginner-friendly guidance. There are no shortcuts that substitute for that.
FAQ
What authoritative, evidence-aligned measurements should I use to plan light for high‑potency cannabis grows?
Use PPFD (µmol·m⁻²·s⁻¹) and DLI (mol·m⁻²·d⁻¹). Conservative indoor targets: veg ~300–500 µmol·m⁻²·s⁻¹, flower canopy target ~500–800+ µmol·m⁻²·s⁻¹ when ventilation/heat and nutrients allow. Convert PPFD to DLI with DLI = PPFD × seconds of light per day / 1,000,000. Prioritize even canopy photon delivery; yield per area scales roughly linearly with PPFD until other factors limit. Source examples: Frontiers (2022), Plant Photobiology review (2019), Scientific Reports (2025).
When should I consider CO₂ enrichment and what setpoints are safe and effective?
Only add CO₂ after you can reliably supply high PPFD/DLI, adequate nutrients, and cooling. Practical setpoints for high‑light rooms: 800–1,200 ppm (industry guidance sometimes up to 1,500 ppm). Monitor safety: keep human exposure below OSHA/NIOSH limits (5,000 ppm 8‑hr TWA) and use continuous CO₂ sensors, interlocks and alarms. Sources: Desert‑Aire application note, NIOSH Pocket Guide, photosynthesis studies (2013).
How should I pick genetics to maximize potential potency?
Start with lab‑tested high‑THC/high‑terpene cultivars from reputable breeders with cannabinoid/terpene profiles and stability data. Remember genotype × environment interactions are strong: a cultivar that lab‑reports high potency may respond differently to light, nutrients and training. Do small validation runs and, if possible, send one harvest sample for lab potency to confirm cultivar response before scaling. Cite studies showing genotype×E effects (PubMed 2025 hemp light study).
What are conservative EC / ppm / pH targets by growth stage and media?
Record EC (mS·cm⁻¹) and note ppm conversion scale. Conservative EC ranges: seedlings/clones 0.4–0.8 mS·cm⁻¹; early veg 0.8–1.2; mid veg 1.2–1.6; early flower 1.6–2.0; full flower 2.0–2.5 (hydro/coco). For soil, target ~20–30% lower EC due to buffering. pH targets: hydro/coco ~5.8–6.2; soil ~6.0–7.0. Calibrate meters frequently and measure runoff EC to detect salt buildup. Source: nutrient studies and grower‑validated guides, EC conversion guidance.
What nutrient decisions affect potency and how should I avoid problems?
Use stage‑specific feeding and avoid chronic over‑application. Excess P or N late in flower can dilute or reduce THCA/CBDA concentration in some genotypes. Tailor P to cultivar—many studies found moderate P (e.g., ~30 mg·L⁻¹) sufficient. Decision points: follow a validated nutrient schedule for your media, monitor EC and runoff, reduce N/P entering late flower according to cultivar response, and run small trials if changing programs. Source: PubMed nutrient/P supply (2021).
How do I decide pot size and root health targets for potency?
Choose pot volumes that support desired final plant size without root‑bound stress: common hobby sizes 3–15 L depending on training. Ensure well‑aerated media, consistent moisture cycles, and avoid chronic waterlogging. Healthy root systems support biomass and thus total cannabinoids per plant; poor roots limit yield and can stress plants, altering cannabinoid profiles. Use root inspections, runoff EC, and plant vigor as diagnostics.
How to Grow the Best Weed Plants Step by Step
Step-by-step cannabis growing guide to maximize yield, potency, and quality from seedlings to curing, with troubleshooti