Growing perfect weed comes down to controlling seven things consistently: genetics, environment, light, water, nutrients, plant training, and your harvest and cure. Get all seven dialed in and you'll produce dense, potent, clean-tasting buds every single run. Miss one or two and quality drops fast. This guide walks you through the full process end-to-end, from picking seeds to opening a cured jar, with real numbers and specific steps you can act on today. Follow these steps to learn how to grow a healthy weed plant from seed to harvest. If you want the best results, use those same principles to follow a full plan for how to grow the best weed plants end to end.
How to Grow Perfect Weed: Step-by-Step Home Guide

Marcus Holbrook
1 May 2026
Before you start, a quick note on legality: home cultivation laws vary widely by country, state, and even city. Always check your local regulations before growing. Nothing in this guide is worth a legal problem, so grow within the rules in your jurisdiction.
Choosing genetics and starting materials
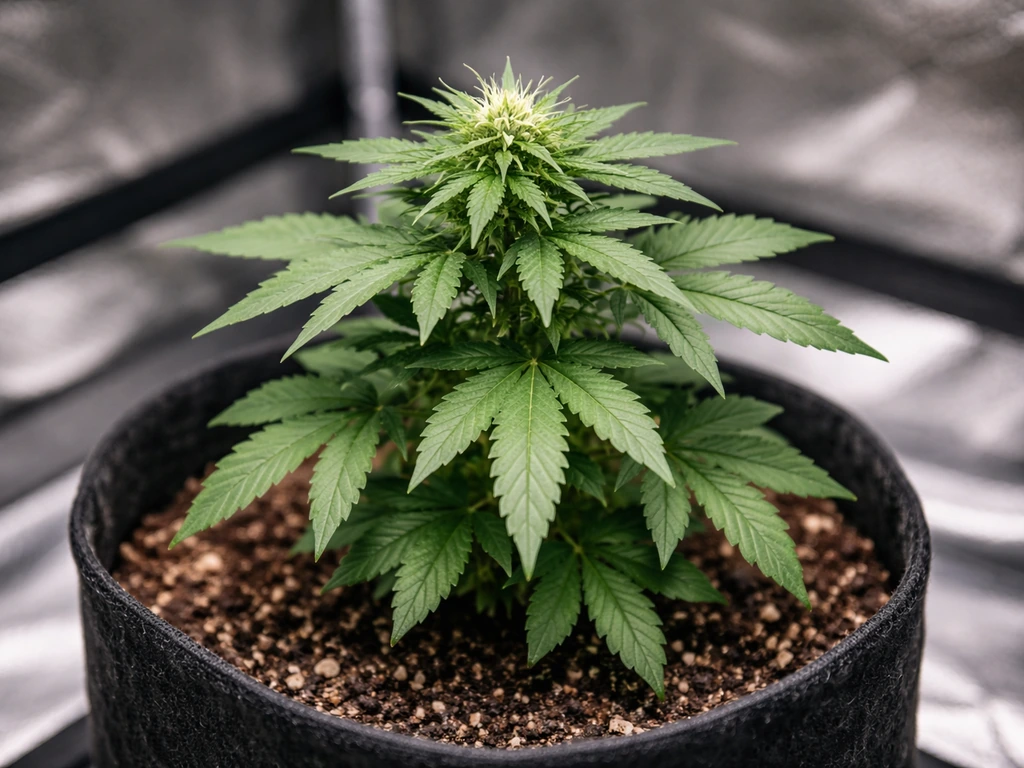
Your genetics set the ceiling on quality. The best environment in the world can't turn mediocre seeds into top-shelf buds, so start here and take it seriously.
Seeds vs clones
Seeds are the easier starting point for most home growers. Buy from reputable seed banks with verified genetics and clear strain information. Clones are faster since they skip germination and carry the exact genetics of the mother, but they can also carry pests or disease if you're not careful about the source. For your first few runs, quality seeds are the safer bet.
Photoperiod vs autoflower
This is the first real decision you'll make. Photoperiod strains require a change in light schedule (usually from 18 hours of light down to 12) to trigger flowering. They give you more control over plant size and veg time, and typically produce larger, higher-quality yields when conditions are right. Autoflowering strains flower based on age rather than light schedule, which makes them simpler and faster, but generally with lower peak yields. For beginners focused on quality, a forgiving photoperiod strain with an 8–10 week flowering window is usually the best pick. Expect a full seed-to-harvest timeline of roughly 10–16 weeks depending on how long you veg and the strain's genetics.
What to look for in a beginner strain
- Compact or medium structure (easier to manage in limited space)
- Shorter flowering time, around 8–10 weeks for photoperiods
- Better mold and pest resistance built into the genetics
- Wider nutrient tolerance so minor feeding mistakes don't cause big problems
- Clear, honest yield and potency data from the breeder
One thing I learned the hard way: a strain rated for massive yields in perfect conditions will yield much less in a first-time setup. Pick something consistent over something ambitious until your skills and environment match the genetics.
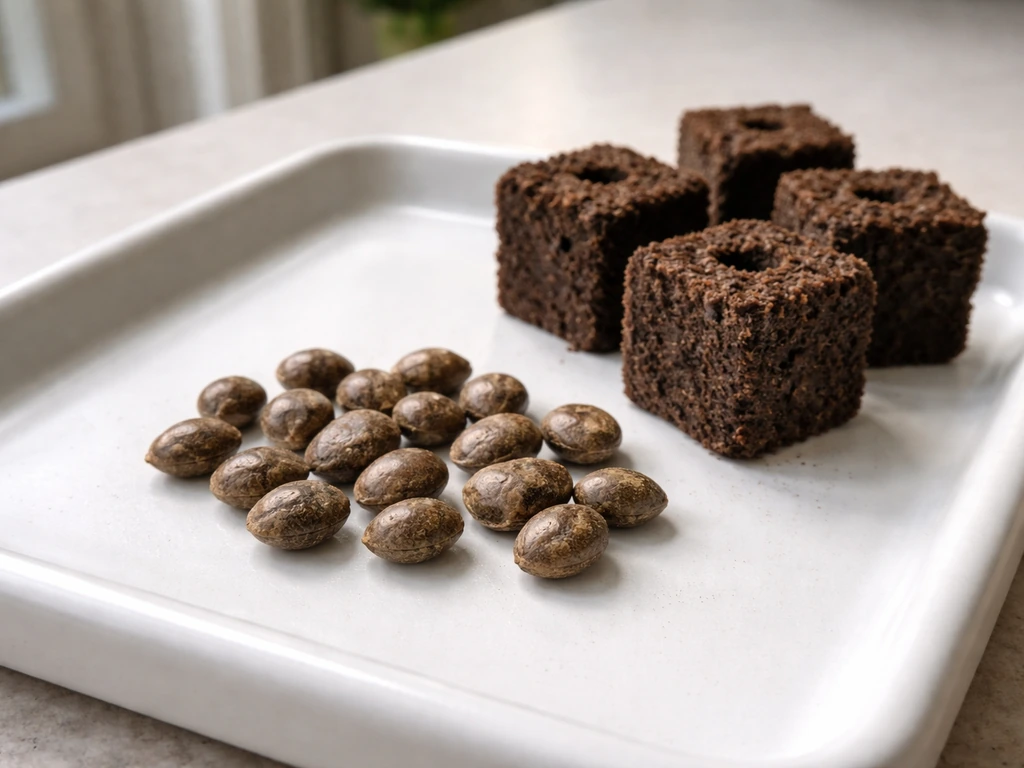
Testing seed viability before you plant
If you have seeds that are more than a year old or you're unsure about quality, run a germination test before committing to a full setup. The paper towel method works well: place seeds between two damp paper towels, keep them warm (around 70–80°F), and check twice daily, re-wetting if the towels dry out. Under good conditions, viable seeds typically show a taproot within 24–48 hours. Give it up to 7 days before writing off a seed. For a batch test, the University of Alaska Fairbanks Cooperative Extension's wet paper towel protocol recommends monitoring over a full 7-day window before drawing conclusions. If more than a few seeds fail to sprout, your batch has viability problems and you need fresh genetics.
Setting up your grow: indoor, outdoor, and hydro
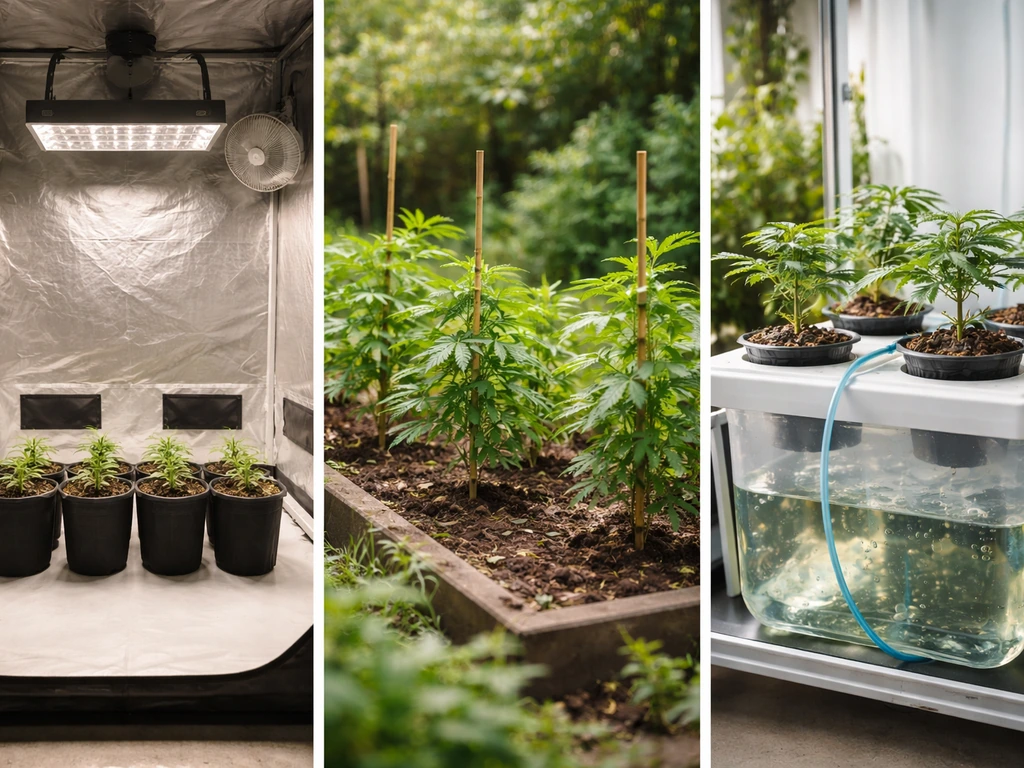
There's no universally "best" setup. Each method has real strengths and real tradeoffs. What matters most is choosing the one you can manage consistently, because consistency beats any fancy equipment.
| Method | Control Level | Startup Cost | Best For | Main Challenge |
|---|---|---|---|---|
| Indoor (soil/coco) | Very high | Moderate to high | Year-round growing, quality control | Managing environment (temp, humidity, light) |
| Outdoor (soil) | Low | Very low | Large yields, natural light | Weather, pests, harvest timing |
| Hydroponic (DWC, NFT, etc.) | Very high | High | Fast growth, maximum quality potential | pH/EC management, system failures |
Indoor growing
Indoor is the most popular choice for home growers who want consistent, high-quality results year-round. You control every variable: light, temperature, humidity, airflow, and CO2. A grow tent is the most practical setup for most people. Size your tent to the number of plants you plan to grow, allowing at least 2 square feet per plant for smaller setups. Use a quality LED grow light sized to your tent (general rule: 30–50 watts of actual draw per square foot for modern LEDs). Add an inline fan with a carbon filter for odor control and air exchange, and a small oscillating fan for canopy airflow. These aren't optional niceties; they directly affect bud quality and mold prevention.
Outdoor growing
Outdoor growing leverages free sunlight and produces large plants with minimal cost. The tradeoff is that you're at the mercy of your local climate, seasonal light cycles, and outdoor pest pressure. Choose a spot with at least 6–8 hours of direct sunlight daily and good airflow. Start seeds indoors 4–6 weeks before your last frost date and transplant after the danger of cold nights has passed. Outdoor harvests are typically in late September through October in the Northern Hemisphere, driven by the shortening days triggering natural flowering.
Hydroponic growing
Hydroponics grows cannabis directly in nutrient solution without traditional soil. Methods like Deep Water Culture (DWC) or nutrient film technique (NFT) deliver nutrients directly to the roots, which speeds up growth and can push quality to impressive levels. The catch is that everything happens faster in hydro, including problems. A pH that drifts out of the 5.5–6.5 range, or a pump failure, can stress or kill plants quickly. Hydro is a fantastic system for growers who want to maximize quality, but it rewards experience and attentiveness. If you're new to growing, consider starting with coco coir as a bridge: it grows like hydroponics but handles beginner mistakes more forgivingly.
Environmental optimization for top-shelf quality
Environment is where most growers leave quality on the table. Plants can only express their genetic potential if the conditions support it. Here are the key variables to control and the specific targets to hit.
Temperature
Cannabis grows best in a temperature range of 70–85°F (21–29°C) during the lights-on period. During lights-off or nighttime, a slight drop of 5–10°F is fine and can even enhance color development in late flower. Avoid temperatures above 90°F: heat stress slows growth, reduces terpene production, and creates conditions for pests. Below 60°F stunts growth and stresses roots.
Humidity
Relative humidity (RH) targets change through the growth cycle and this matters more than most beginners realize. Here's a practical breakdown by stage:
| Growth Stage | Target RH Range | Why It Matters |
|---|---|---|
| Seedling | 65–70% | Young plants uptake water through leaves before roots are established |
| Vegetative | 50–70% | Supports vigorous growth, allows transpiration |
| Early flower (weeks 1–3) | 45–55% | Balances transpiration, starts reducing mold risk |
| Mid to late flower (weeks 4+) | 35–45% | Critical for preventing bud rot in dense flowers |
| Final weeks before harvest | Below 45% | Minimizes mold risk as buds reach maximum density |
Light
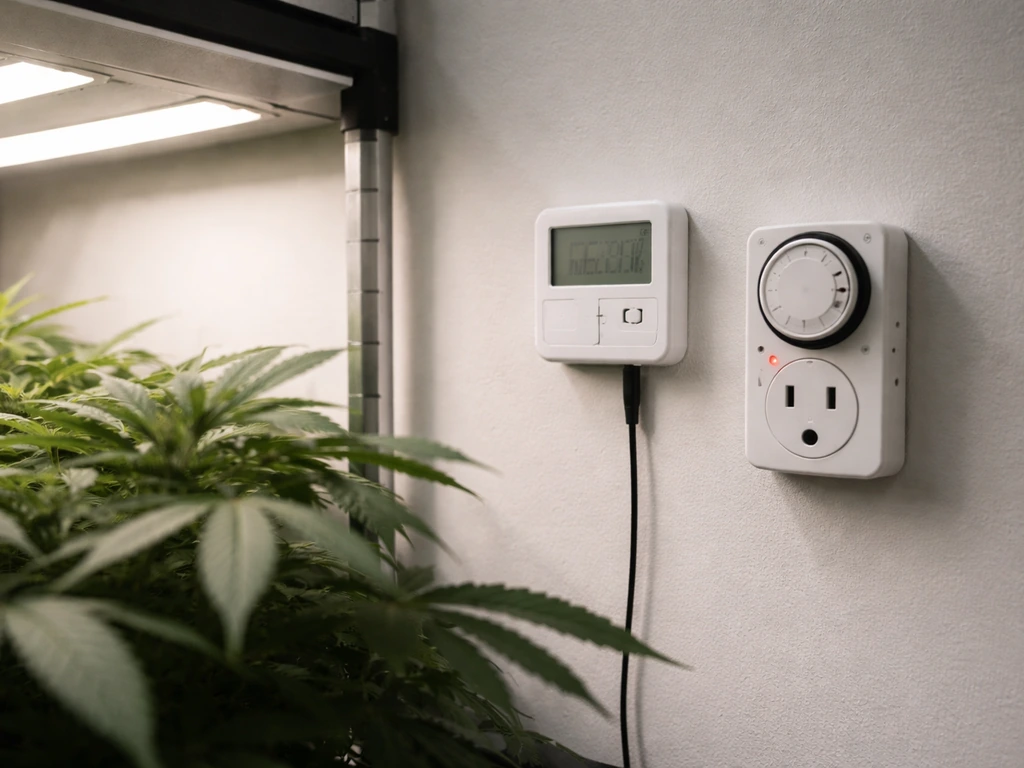
For indoor growing, light intensity and spectrum drive yield and potency. Modern quantum board LEDs are the most efficient option in 2026, delivering the right spectrum with lower heat output than older HPS systems. Aim for 30–50 watts of actual draw per square foot during veg and flower. Keep your light at the manufacturer's recommended hanging distance to avoid light burn, and use a PAR meter if you can to confirm you're hitting adequate PPFD levels across your canopy. During vegetative growth, 18 hours of light and 6 hours of darkness is standard. Switch to 12/12 to trigger flowering in photoperiod strains.
Airflow and CO2
Airflow has two jobs: exchanging stale air and strengthening stems through gentle movement. Your inline fan should exchange the full volume of your grow space air every 1–3 minutes. An oscillating fan inside the tent keeps air moving across the canopy, which significantly reduces the mold and pest risk that comes from stagnant air pockets. If you're running a sealed, optimized indoor setup, CO2 enrichment in the 1000–1500 PPM range can meaningfully increase growth rates and yield, but this is only worth pursuing once your environment, light, and nutrition are already well-dialed. CO2 supplementation with poor light or temperature control won't help.
Odor control
A quality carbon filter paired with your inline exhaust fan is the most reliable odor control method for indoor grows. Size the carbon filter to match or slightly exceed your fan's CFM rating. Replace the carbon filter every 12–18 months or when odor starts escaping. If you're in a jurisdiction where growing is legal but you want to maintain privacy, this is a non-negotiable part of your setup.
Nutrients, watering, and medium/hydro management
Feeding your plants correctly is one of the most misunderstood parts of growing quality cannabis. If you want a practical checklist for how to take care of weed plants as they grow, follow the sections below on environment, nutrients, watering, and training Feeding your plants correctly. Beginners tend to either overfeed (thinking more is better) or underwater out of fear of overwatering. Both kill quality.
Watering fundamentals
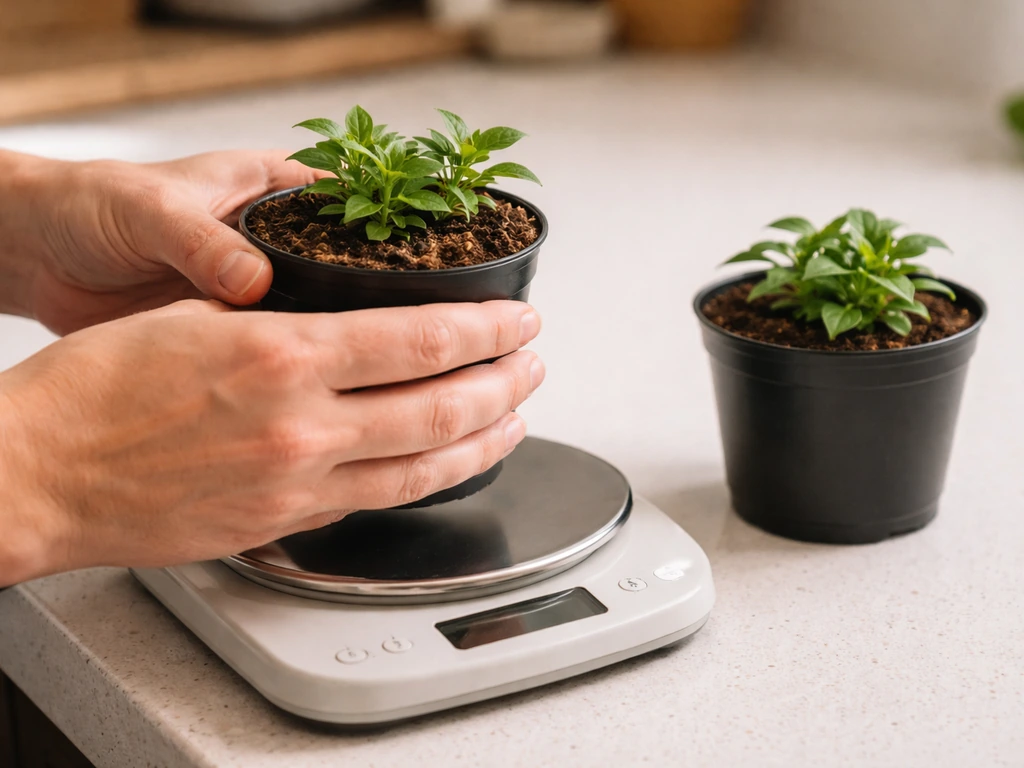
The most reliable way to know when to water in soil or coco is the lift test: lift the pot when dry and again after watering, and learn the weight difference. Water when the medium feels light and the top inch or two is dry. For soil, this usually means watering every 2–4 days depending on pot size, plant size, and environmental conditions. Water thoroughly until you get 10–20% runoff, then let it dry before watering again. Consistent wet-dry cycles promote healthy root development and oxygen availability.
pH management
pH is the single most preventable cause of nutrient deficiencies. If your pH is off, the plant simply can't absorb the nutrients you're feeding it, no matter how good your nutrient line is. Target pH ranges vary by medium:
| Growing Medium | Target pH Range |
|---|---|
| Soil | 6.0–7.0 |
| Coco coir | 5.5–6.5 |
| Hydroponic (DWC, NFT, etc.) | 5.5–6.5 |
| Coco/hydro late veg | Around 6.0 |
| Coco/hydro flowering | 5.6–5.8 |
Always pH your water after adding nutrients, not before. Check your runoff pH as well, especially in coco and soil, because it tells you what the root zone is actually experiencing. A big gap between input and runoff pH signals a problem that needs addressing.
Nutrients and EC (electrical conductivity)
EC measures the total dissolved solids in your nutrient solution and tells you how strong your feed is. Cannabis in hydro and coco generally performs well with an EC between 1.4 and 2.4, adjusted by growth stage. Start lower in seedling and early veg, then ramp up through vegetative and into early flower, and back off slightly in the final weeks. Always measure your input EC and your runoff EC. If runoff EC is much higher than input, salts are building up in the medium and you need to flush or leach. In coco, pH control is especially critical because unlike soil, coco doesn't buffer pH naturally.
Nutrient stage basics
- Seedling stage: little to no added nutrients; most seedling mixes have enough for the first 2–3 weeks
- Vegetative stage: higher nitrogen (N), moderate phosphorus (P) and potassium (K); support leafy growth
- Early flower: reduce N, increase P and K to support bud development
- Mid to late flower: high P and K, very low N; follow your nutrient line's bloom formula
- Final 1–2 weeks: consider a pre-harvest flush with plain pH-adjusted water to clear residual salts
A note on flushing: research on pre-harvest flush duration (including a 2025 HortScience study) shows that flush duration can affect dried bud weight and overall quality outcomes. A flush of 1–2 weeks with plain water before harvest is a widely practiced approach among quality-focused home growers, though results vary by medium and nutrient program.
Training, pruning, and plant management for better bud development
Training your plants isn't just about controlling size. It directly increases the number and quality of bud sites and improves airflow through the canopy, which means better bud development and lower mold risk. This is one of the highest-leverage skills you can develop as a home grower.
Low-stress training (LST)
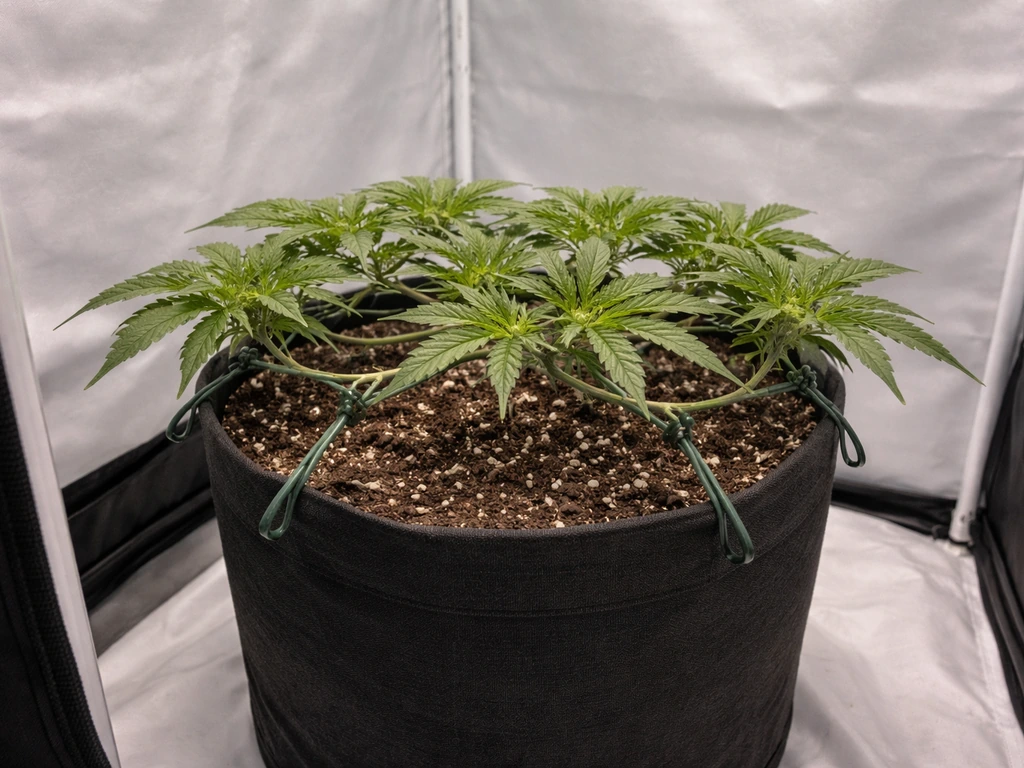
LST involves bending and tying down branches to create a flat, even canopy rather than a single dominant cola. Start LST in early vegetative growth once the plant has 4–6 nodes and the stems are still flexible. Doing it earlier is easier and less stressful on the plant. The goal is to expose lower bud sites to direct light by opening up the canopy. LST is safe to use on autoflowers too, where high-stress techniques like topping are riskier.
Topping and FIMing
Topping removes the main growing tip, which causes the plant to redirect energy into two main colas instead of one. Done repeatedly, it creates a bushy, multi-topped plant. Top during vegetative growth only, and give the plant at least a few days to recover before any other stress. FIMing (a variation of topping) can produce 4 or more new tops from a single cut but is slightly less predictable. Both techniques are photoperiod-friendly; for autoflowers, skip topping and stick with LST.
SCROG (screen of green)
SCROG uses a horizontal net or screen placed above the plants. As branches grow through the screen, you weave them horizontally to fill the net evenly. SCROG creates a flat canopy where every bud site gets even light exposure, and the improved airflow through the canopy helps prevent mold and pests. The practical target: fill about 70–80% of your net before switching to 12/12 for flowering, since plants typically stretch another 30–50% in early flower and will fill the rest naturally.
Lollipopping and defoliation
Lollipopping means removing the lower growth on the plant that doesn't receive enough light to develop quality buds. These lower, shaded sites drain energy from the top buds without contributing meaningfully to yield or quality. Remove them in the last week or two of veg or at the flip to 12/12. Selective defoliation (removing large fan leaves that block bud sites) can also help light penetration in a dense canopy, but be conservative: leaves are energy factories, and over-stripping the plant does more harm than good.
Flowering essentials and harvest timing
The flowering stage is where all your setup pays off, and it's also where the most quality-killing mistakes happen. Stay consistent with your environment, don't stress the plants with dramatic light leaks or temperature swings, and watch your plants closely as harvest approaches.
Managing the flowering environment
Keep temperature in the 70–80°F range with lights on. Drive humidity down progressively through flower: target 45–55% RH in early flower and 35–45% RH by mid to late flower. A stage-based humidity guide like SeedMaxTech's similarly recommends around 40, 55% RH for early flower and notes that higher humidity later in flowering can increase mildew or bud-rot risk target 45–55% RH in early flower and 35–45% RH by mid to late flower. In the final weeks, if you can push below 45% without stressing the plant, do it. This dramatically reduces the risk of botrytis (bud rot), which can destroy an entire harvest in days once it takes hold. Maintain consistent airflow across and through the canopy throughout flowering.
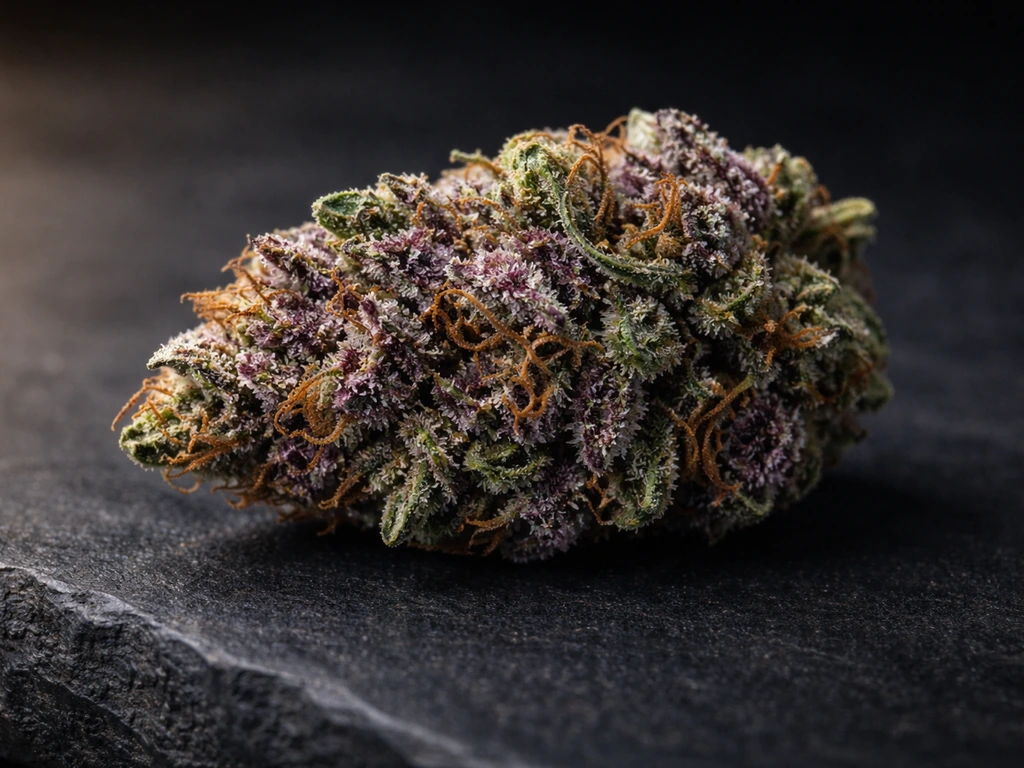
Reading trichomes for harvest timing
Checking trichomes with a jeweler's loupe (30–60x) or a digital microscope is the most accurate way to know when your plants are actually ready. Trichomes go through three stages: clear (immature, harvest too early), cloudy/milky (peak THC, harvest window opening), and amber (THC converting, more sedative effect). For the highest potency and quality, aim to harvest when the majority of trichomes are cloudy with a small percentage (10–20%) turning amber. A useful secondary check is pistil color: around 70% of pistils showing orange or reddish-brown also suggests harvest readiness. Strain-listed flowering times are estimates, not deadlines. Always let the trichomes be your final guide.
The final week and pre-harvest flush
In the final 1–2 weeks before harvest, many growers switch to plain, pH-adjusted water to flush residual nutrients from the medium. This is particularly relevant in coco and hydro where nutrient salts accumulate. Whether flushing meaningfully improves taste in all situations is still debated in the research, but it's a low-risk practice that many experienced growers swear by for cleaner-tasting final product.
Troubleshooting and quality-focused finishing: drying and curing
Growing great buds is only half the job. What happens after you cut the plant is where you either preserve all that quality or watch it disappear. A poor dry and cure can ruin flowers that grew perfectly. And before we get to dry and cure, let's address the most common in-grow problems that kill quality before harvest.
Common quality killers and quick fixes
| Problem | Likely Cause | Fix |
|---|---|---|
| Yellowing leaves (early) | Nitrogen deficiency or pH lockout | Check and correct pH first; adjust nutrient formula if pH is fine |
| Curling, clawing leaves | Nitrogen toxicity or overwatering | Reduce feeding strength; let medium dry more between waterings |
| Stunted growth | Root problems, pH issues, or temperature stress | Check root zone pH, inspect roots for rot, confirm temps are in range |
| Bud rot (grey mold) | High humidity + poor airflow in dense canopy | Lower RH below 45%, improve canopy airflow, remove affected material immediately |
| Spider mites or fungus gnats | Dry soil surface (gnats) or hot/dry conditions (mites) | Sticky traps, let topsoil dry out (gnats), raise humidity slightly and improve airflow (mites) |
| Light burn or bleaching at tops | Light too close or intensity too high | Raise light, reduce intensity, check manufacturer's hanging height recommendations |
| Airy, loose buds | Insufficient light, high temps, or harvested too early | Increase light intensity, correct temperature, verify trichome maturity before harvest |
Drying your harvest correctly
After cutting your plants, hang whole branches or trimmed buds in a dark, controlled space. Target a drying environment of around 60–68°F (15–20°C) with 50–65% RH. Airflow should circulate gently through the room but shouldn't blow directly on the buds. This slow drying process should take 10–14 days. Drying too fast (under 5–7 days) locks in harsh chlorophyll flavors and degrades terpenes. You'll know it's time to move to jars when the smaller stems snap cleanly rather than bending.
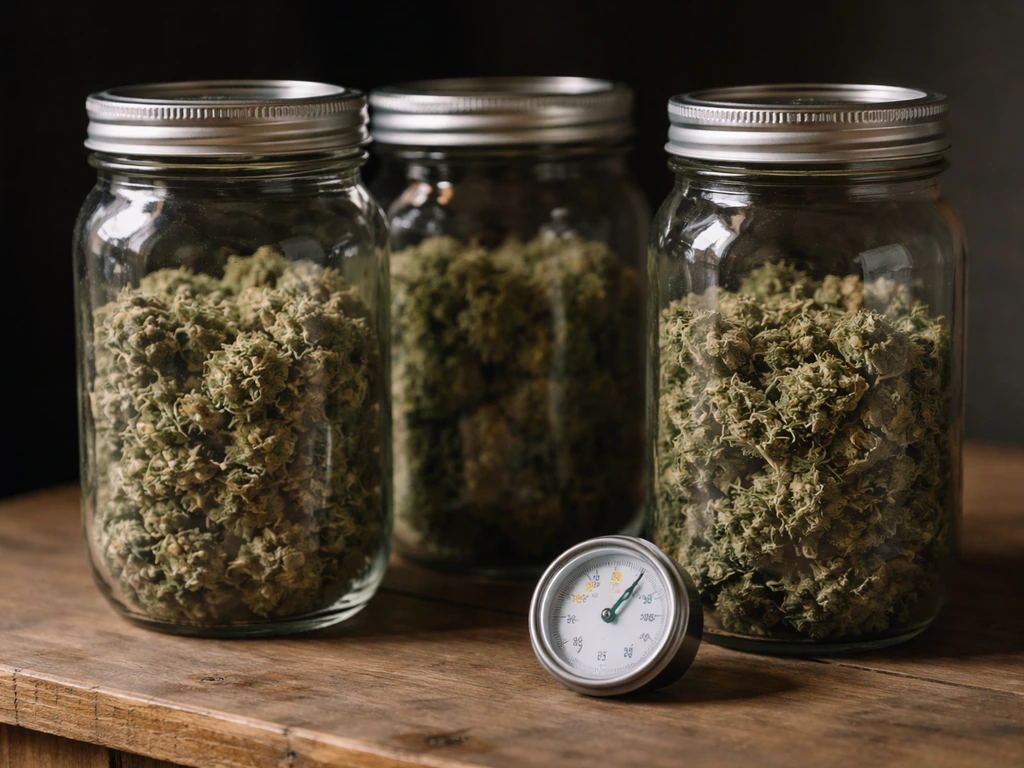
Curing in jars
Once dry, trim your buds (if you haven't already) and pack them loosely into wide-mouth mason jars, filling to about 75% capacity. The target humidity inside the jar is 58–62% RH. Use a humidity pack (like Boveda 62) to maintain this level passively, or monitor with a small hygrometer inside the jar. In the first week, burp the jars daily for 10–15 minutes to release moisture and fresh oxygen. After the first week, reduce burping to every few days, then weekly. A minimum cure of 2–4 weeks significantly improves flavor and smoothness. Six to eight weeks of curing produces noticeably better results, and some strains continue improving for months.
Mold prevention during cure
Never let jar humidity exceed 65% RH: that's the threshold where mold risk becomes real. If you open a jar and smell ammonia, the buds are too wet and need more drying before going back in. Inspect daily during the first week and every few days after that. Store jars in a cool, dark location, away from heat sources and direct light, which degrades THC and terpenes.
Your practical daily and weekly monitoring checklist
Consistency is the real secret to perfect weed. Here's what to check on a regular schedule:
| Frequency | What to Check |
|---|---|
| Daily | Temperature and RH levels (lights on and off), plant appearance for stress signs, water/feed if needed, check for pests or mold |
| Every watering | pH and EC of input water/nutrients, runoff pH and EC, note any changes |
| Weekly | Canopy height and training adjustments, light distance and intensity check, inspect trichomes in late flower, check carbon filter for odor |
| At each stage transition | Update nutrient formula (veg to flower shift), adjust light schedule if photoperiod, lower target humidity for flower stages |
| During dry and cure | Check jar RH daily (week 1), burp jars, inspect for mold, confirm stems snap (not bend) before jarring |
If you follow this process from genetics selection through to a proper cure, you'll be producing consistently high-quality cannabis that rivals dispensary-shelf product. The principles behind growing the best possible weed, growing the healthiest plants, and maximizing potency all point to the same fundamentals covered here: stable environment, correct pH and nutrients, good training technique, and patience at harvest. If you focus on the same fundamentals, you will also learn how to grow more potent weed in a repeatable way. If your goal is how to grow the strongest weed, dialing in potency starts with stable conditions and precise pH and nutrient management maximizing potency. The more grows you complete, the more intuitive these checks become, and the better your results will get with each run.
FAQ
What’s the most common reason homegrown weed looks great but smokes harsh or tastes bad?
Most often it’s over-drying too fast or curing too wet. Even if trichomes were ready at harvest, drying below about 7 days can lock in harsh chlorophyll flavors, and jar humidity above 65% can create off-odors. Aim for a full 10 to 14 day dry and keep jar RH between 58 and 62%.
How can I tell if my seedling problem is light, watering, or nutrient related?
Check the timing and pattern. If stems stretch upward with pale leaves, light is usually too weak or too far. If leaves droop right after watering and recover slowly, watering or drainage is likely. If you see edge burn or dark clawing early, nutrients may be too strong or pH may be off. Measuring runoff pH and EC (especially in coco) helps separate causes quickly.
Should I start with autos or photoperiods if my goal is “perfect” quality?
For quality-focused beginners, photoperiods are usually easier to refine because you can control vegetative time and size. Autos can be fine, but you have less recovery time after mistakes since you cannot extend veg, and high-stress techniques are riskier. If you want a first win while learning, pick a forgiving photoperiod with an 8 to 10 week flowering window.
What should I do if I’m getting nutrient lockout, even though my pH seems correct?
Look at runoff pH and runoff EC, not just your input. If runoff EC is much higher than input, salts are building and the plant may be struggling even with correct pH. If runoff pH is drifting far from target, your medium is not buffering correctly (coco especially), and your feed schedule or watering volume likely needs adjustment.
How much can I rely on flowering time estimates from seed labels?
Treat them as a starting point, not a deadline. Strain-listed timelines vary with how long you veg, your light intensity, and even your local environment. The reliable rule is trichomes first, with pistils as a secondary cue. If trichomes are not mostly cloudy, harvest early will reduce potency and flavor.
Do I really need CO2 to grow top-shelf weed indoors?
Usually no. CO2 only meaningfully helps when temperature, humidity, and light intensity are already dialed in. If your light is weak or your temps swing, CO2 won’t compensate and can waste money. Start by hitting your correct light draw per square foot and stable temps, then decide whether you want to add CO2 later.
What’s a safe way to increase odor control without overheating my tent?
Use an inline exhaust fan matched to your carbon filter rating, and avoid running the filter and fan so aggressively that temperatures spike. If you want more odor capture, improve negative pressure and passive intake flow rather than constantly boosting fan speed to the max. Also remember to replace the carbon filter when odor starts escaping, typically around 12 to 18 months.
How do I know whether to flush before harvest, and when should I stop if I’m unsure?
If you’re using coco or hydro, many growers switch to plain pH-adjusted water for 1 to 2 weeks, mainly to reduce residual salt buildup. If your plants are not taking up water normally or leaves are deteriorating rapidly, stop flushing and return to a gentle, consistent feed to avoid stressing the plant near harvest. The best signal is how the plant responds, not the calendar alone.
Why do some buds get airy even when trichomes look ready?
Airiness usually comes from inconsistent airflow during flowering, insufficient light distribution, or stress from temperature and humidity swings. Canopy uniformity matters a lot, training helps, and mold prevention targets overlap with bud development targets. Verify that your canopy is evenly lit and that you keep RH dropping through flower, especially from mid to late flower.
During curing, what’s the difference between “fixable too-wet” and “you already ruined it”?
If jar RH exceeds 65% or you smell ammonia, that’s a clear sign the buds are too wet and need more drying time before jarring again. If you see fuzzy mold or persistent sour or rotting odors, it usually cannot be reliably saved. When in doubt early, remove the buds and re-dry to the correct feel, then re-pack with jar RH in the 58 to 62% range.
Next Article
How Much Weed Can One Seed Grow and How to Maximize It
Realistic yield from one cannabis seed, what limits it, and steps to maximize flower at home from seed to harvest.