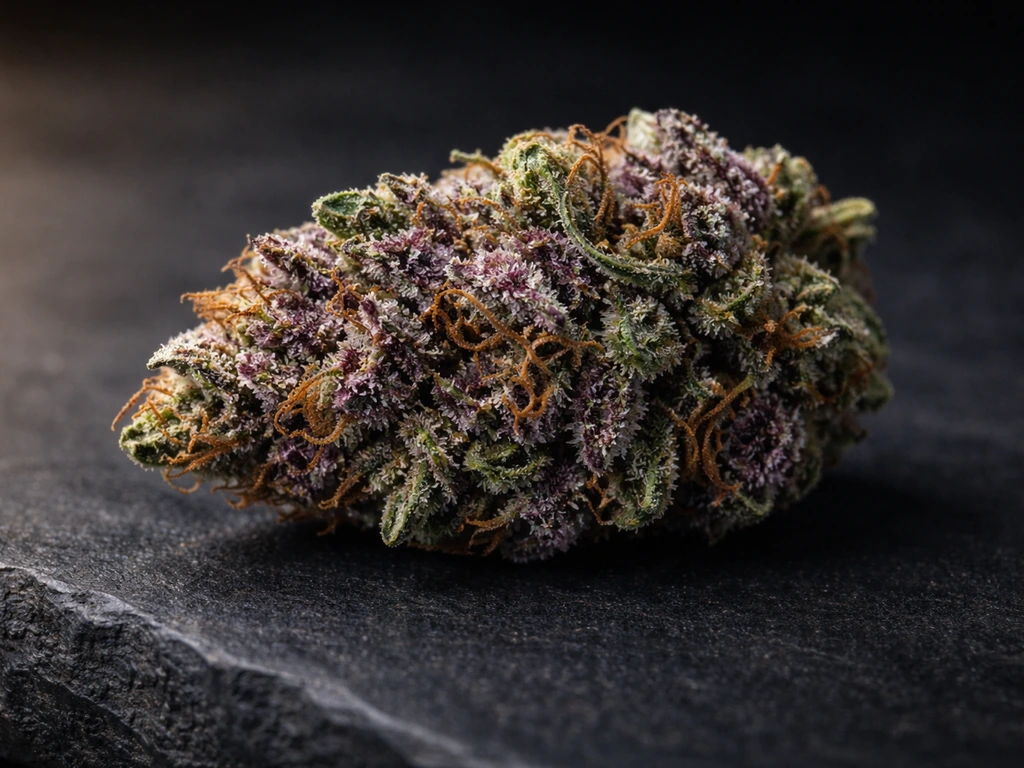
Growing the strongest weed comes down to stacking five things in your favor: high-THC genetics, a dialed-in environment, clean nutrition, smart training, and patient post-harvest handling. Get all five right and you can consistently produce flowers well above the average legal-market benchmark of around 17.8% THC. Miss one, and even the best genetics will underdeliver. This guide walks you through every step from seed selection to the curing jar, with real numbers and actionable fixes you can use today.
How to Grow the Strongest Weed: Step-by-Step Guide

Marcus Holbrook
27 May 2026
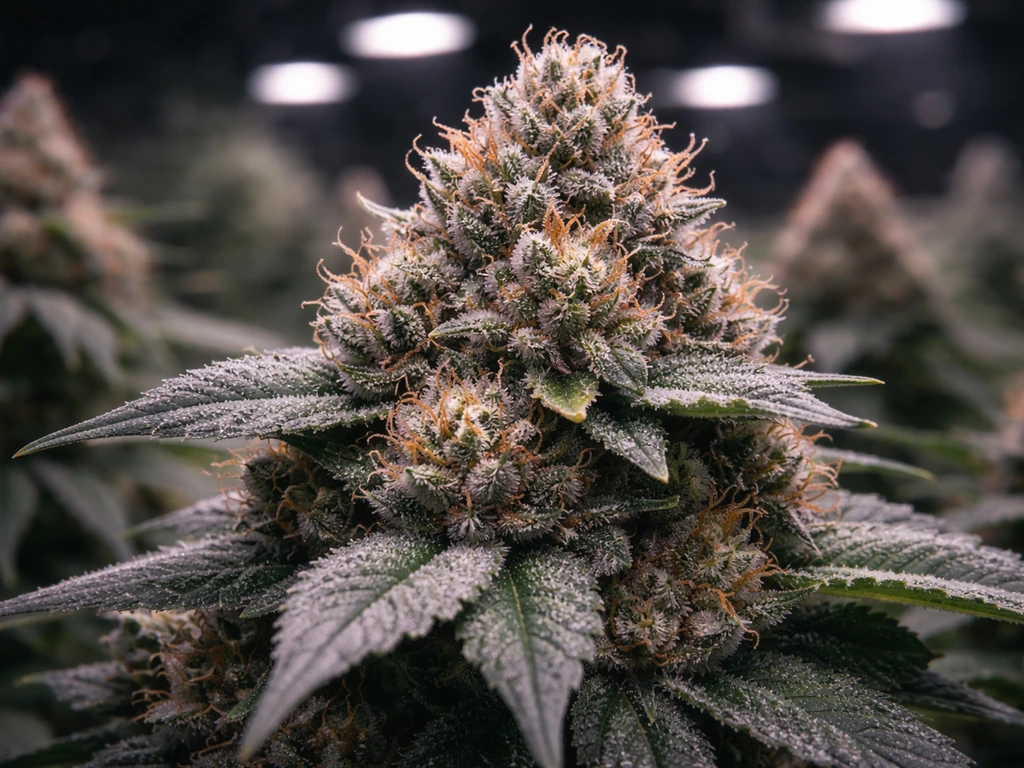
Pick genetics built for potency
Genetics set your ceiling. THC and CBD expression is largely heritable, meaning the cannabinoid profile a plant produces is determined at the genetic level, not just by how you grow it. No amount of fancy lighting or expensive nutrients will push a mid-shelf cultivar past its genetic limit. Start with strains that have been selectively bred for high THC and come from a reputable seed bank or licensed clone source that publishes verified lab data.
When choosing a strain, look at three things: advertised THC percentage (cross-reference with third-party lab data whenever possible), flowering time (shorter isn't always weaker, but long-flowering photoperiod strains often pack denser, more resinous buds), and stability (F1 hybrids from established breeders tend to be more consistent than unstable crosses). Autoflowering varieties have improved dramatically and are a solid choice for beginners or outdoor growers in climates with short summers, but the very highest-potency expressions still tend to come from photoperiod feminized lines.
Also think about terpene profile alongside THC. Terpene biosynthesis is just as genetically regulated as cannabinoid production, and a cultivar rich in myrcene, limonene, or caryophyllene adds to the perceived effect intensity. Chasing raw THC percentage alone is a narrow view of "strongest" for most growers.
- Buy seeds from breeders who publish lab-tested THC data, not just marketing claims
- Feminized photoperiod seeds give you the most control over flowering timing
- Autoflowering seeds are beginner-friendly and faster but may cap out lower on THC
- Look for stable F1 hybrids or proven IBLs (inbred lines) for consistent results
- Avoid mystery seeds from unknown sources if potency is your primary goal
Choose your grow method and set it up properly
Indoor, outdoor, and hydroponic growing are all legitimate paths to strong cannabis. Each has real trade-offs. The "best" method is the one you can control consistently in your specific situation. Before committing, also make sure you understand the plant-count and grow-space limits in your jurisdiction, since responsible cultivation means staying within local legal boundaries.
Indoor growing
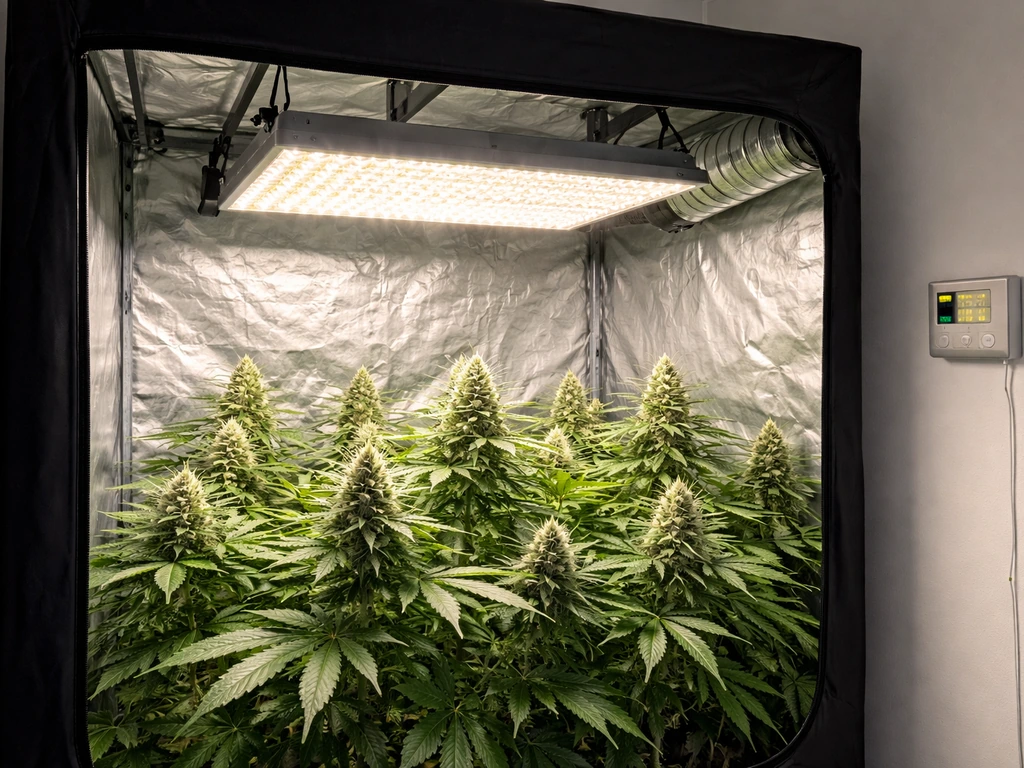
Indoor gives you the most control over every variable that affects potency: light spectrum, photoperiod, temperature, humidity, and CO2. A 4x4 tent with a quality LED in the 600W–1000W equivalent range is the standard beginner setup. Use fabric pots (3–5 gallon for most photoperiod plants) in a quality peat/perlite mix or coco coir, and run an inline fan with carbon filter for odor control and air exchange.
Outdoor growing
Outdoor plants can produce enormous yields with zero electricity cost, and quality sun-grown cannabis can be genuinely potent. The downside is that you cannot control rain, humidity spikes, pests, or light pollution from street lights, all of which can reduce potency or trigger problems. Choose a strain with mold resistance if your region gets wet late-season weather, plant in large fabric pots or raised beds with quality amended soil, and time your planting so harvest falls before your first frost or rainy season.
Hydroponic growing
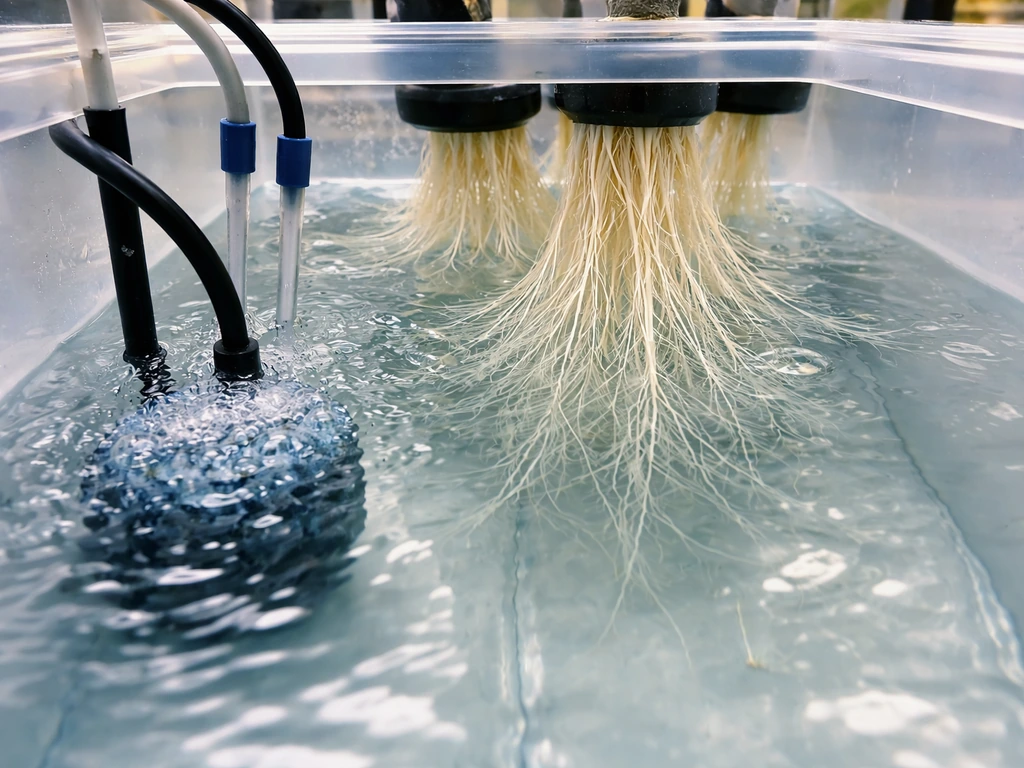
Deep water culture (DWC), nutrient film technique (NFT), or coco coir run-to-waste are the most common hydro setups for home growers. Hydroponics can accelerate growth and allow very precise nutrition delivery, which is why many experienced growers use it to push potency. The trade-off is that mistakes (pH swings, pump failures, root problems) happen faster too. If you're new to growing, I'd suggest starting with coco coir before jumping to full DWC; it gives you most of the hydro benefits with more forgiveness.
| Method | Potency Potential | Difficulty | Cost to Start | Best For |
|---|---|---|---|---|
| Indoor soil/peat | High | Beginner-friendly | Low-Medium | First-time growers wanting control |
| Indoor coco coir | Very high | Intermediate | Medium | Growers ready to dial in nutrition |
| Indoor DWC hydro | Very high | Intermediate-Advanced | Medium-High | Experienced growers pushing yield/potency |
| Outdoor in-ground | High (climate dependent) | Beginner-friendly | Low | Legal climates with good summers |
| Outdoor in pots | High | Beginner-friendly | Low-Medium | Flexibility, mold-resistant strains |
Optimize your environment: light, airflow, temperature, and humidity
Environment is where most beginners leave potency on the table. You can have the best genetics in the world and still harvest mediocre buds if your environment is off. The key variables to nail are light intensity and spectrum, temperature, relative humidity, VPD (vapor pressure deficit), and airflow.
Light intensity and spectrum
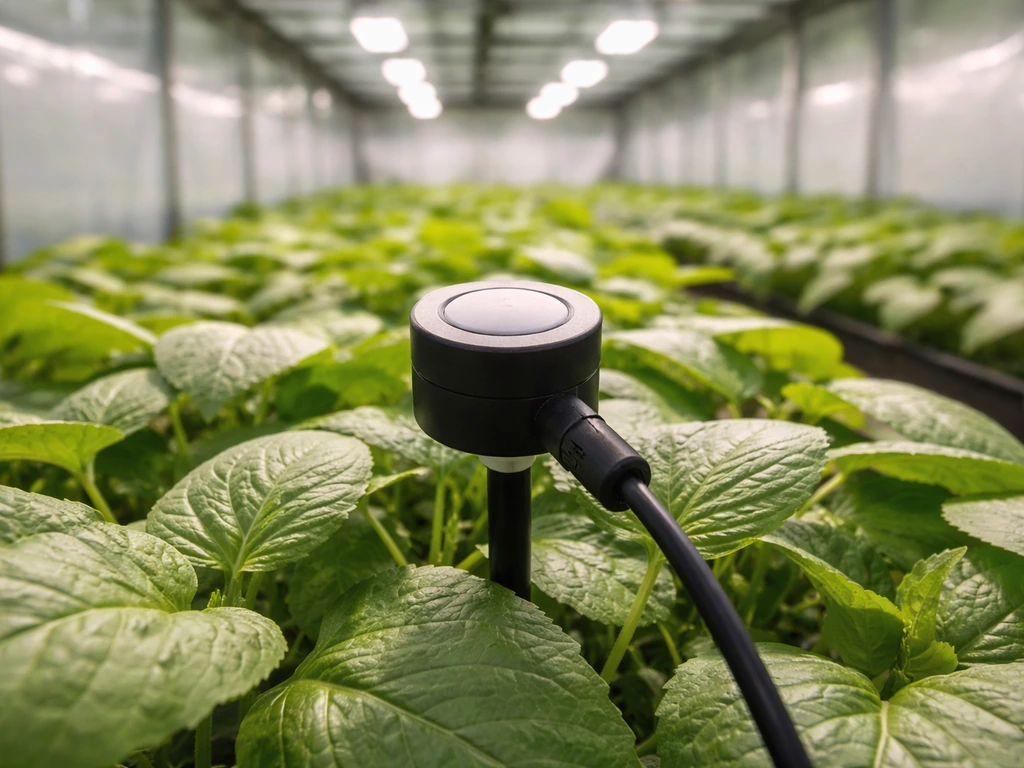
Stop thinking in watts and start thinking in PPFD (photosynthetic photon flux density) and DLI (daily light integral). PPFD measures how much usable light hits your canopy per second (micromoles per square meter per second), and DLI is the total daily dose. For cannabis, target roughly 400–600 µmol/m²/s during seedling/early veg, 600–900 µmol/m²/s during late veg, and 900–1200 µmol/m²/s during flowering. Use a PAR meter or a PPFD-capable phone app to actually verify your numbers at canopy level rather than trusting manufacturer claims. Full-spectrum LEDs with strong red and blue output are the current standard for indoor growing; CMH (ceramic metal halide) is a solid alternative. Don't rush to maximum intensity early, since seedlings can be bleached by too much light.
Temperature and humidity by stage
Temperature and humidity both shift throughout the grow. High relative humidity during late flower is a direct potency threat: a 2025 Frontiers in Plant Science study confirmed that elevated RH significantly decreases cannabinoid concentrations and delays flowering. Botrytis (bud rot) thrives in high humidity and poor airflow, especially in weeks 6 through 10 of flowering when buds are dense enough to trap moisture. Keep RH dropping progressively through flower so you finish in the 40–50% range.
| Growth Stage | Temperature (Day) | Temperature (Night) | Relative Humidity | VPD Target |
|---|---|---|---|---|
| Seedling | 70–77°F (21–25°C) | 65–70°F (18–21°C) | 65–70% | 0.4–0.8 kPa |
| Vegetative | 72–82°F (22–28°C) | 65–75°F (18–24°C) | 50–70% | 0.8–1.3 kPa |
| Early flower (wk 1–3) | 68–78°F (20–26°C) | 62–70°F (17–21°C) | 50–60% | 1.0–1.5 kPa |
| Mid-late flower (wk 4+) | 65–75°F (18–24°C) | 60–68°F (16–20°C) | 40–50% | 1.5–2.0 kPa |
| Final two weeks | 65–72°F (18–22°C) | 58–65°F (15–18°C) | 40–45% | 1.5–2.0 kPa |
Airflow and CO2
Good airflow does two things: it prevents humidity from pooling around dense buds (the main trigger for botrytis), and it strengthens stems through gentle mechanical stress. Run an oscillating fan on a timer so leaves shimmer but don't thrash, and make sure your inline exhaust is pulling enough air to exchange your tent volume every 1–3 minutes. CO2 supplementation is worth considering at the advanced level: raising CO2 to 1000–1500 ppm can push PPFD tolerance higher and increase growth rates, but it only makes sense if your other variables are already dialed in and your grow space is sealed.
Nutrients and pH/EC from veg to flower
Nutrition affects potency more through what you avoid than what you add. Nutrient excess, wrong pH, and salt buildup all cause lockout, meaning your plant literally cannot absorb what it needs even if the nutrients are sitting right there in the medium. I've seen beautifully grown plants produce weak buds simply because the pH was drifting two points off target for weeks.
pH targets by medium
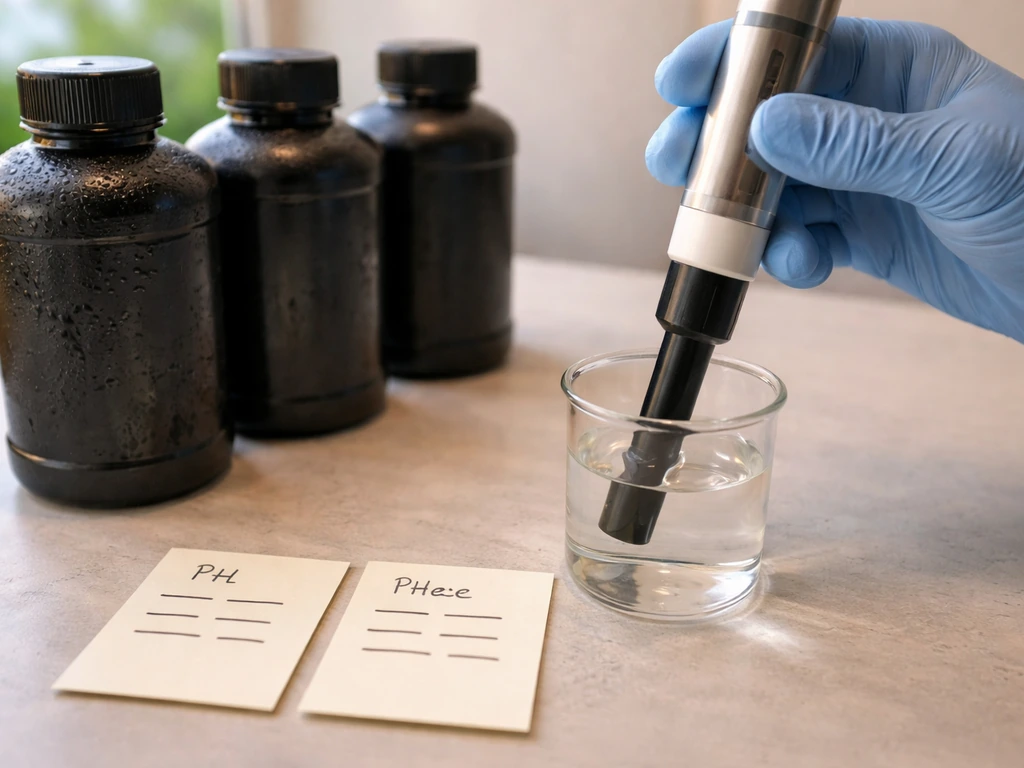
pH determines which nutrients are available for root uptake at any given time. In soil and peat-based mixes, target a feed pH of 6.0–7.0 with 6.2–6.8 being the sweet spot. In coco coir and hydroponic systems, the target is tighter: 5.8–6.3 for coco (with 5.8–6.1 during early veg and 5.8–6.3 during flower), and 5.5–6.1 for pure DWC hydro. Always pH your water after adding nutrients, not before. Invest in a quality digital pH pen and calibrate it weekly.
EC targets across the growth cycle
EC (electrical conductivity) measures the total dissolved nutrient load in your solution. Start low, especially with young plants, and build gradually. For coco and hydro runs, a practical starting point is EC 0. Linda Seeds’ hydro/coco guidance also supports using stage-based low starting targets, including beginning coco and hydro nutrition around EC 0 before building up EC 0 as a practical starting point for coco and hydro runs. 8–1.2 mS/cm during seedling, 1.2–1.8 mS/cm during veg, 1.8–2.4 mS/cm during peak flower, then stepping back down to 0.5–1.0 mS/cm in the final 1–2 weeks. Soil growers can monitor less obsessively but still benefit from checking runoff EC to catch salt buildup early.
Macro and micronutrient strategy
During vegetative growth, plants want higher nitrogen relative to phosphorus and potassium. Flip that ratio as soon as you switch to 12/12 for flowering: drop nitrogen, raise phosphorus and potassium. Many nutrient lines make this easy with separate veg and bloom formulas. Calcium and magnesium are the most commonly missed micronutrients, especially in soft-water regions or coco grows, and deficiency shows up as interveinal yellowing on mid-canopy leaves. A CalMag supplement at 1–2 ml/L through most of the cycle prevents most issues. Don't chase every symptom with a new bottle; most mid-grow deficiency symptoms are actually pH lockout, so check pH before adding anything.
On flushing: the practice of running plain pH'd water through the medium in the final 1–2 weeks before harvest is standard advice in home growing communities, aimed at clearing residual salts. Its effect on final smoke quality is genuinely debated, but if you've been running high EC feeds, a gentle transition to lower EC or plain water in the final stretch is unlikely to hurt and may reduce harshness.
Training your plants for denser, stronger buds
Plant training is how you turn one main cola into many, exposing more bud sites to direct light and creating an even canopy where every flower gets the intensity it needs to develop fully. More light-exposed sites means more bud development, and more bud development means more trichome-covered surface area. This directly impacts both yield and perceived potency.
Topping and FIM
Topping means cutting the main growing tip (usually at the 4th or 5th node) to force two new main colas to develop instead of one. Do it once the plant has 4–6 nodes and is growing vigorously. FIM (a less precise cut that takes about 75% of the growing tip) can create 4 or more new shoots but is harder to control. Both techniques should be done only in veg, ideally giving plants 1–2 weeks to recover before flipping to flower. Autoflowering plants can be topped carefully but don't always have enough veg time to recover, so low-stress training (LST) is generally preferred for autos.
LST and SCROG
Low-stress training involves bending and tying branches outward and downward to open up the canopy and expose lower growth to light. It's the safest technique for beginners because it doesn't involve any cutting. SCROG (screen of green) takes LST a step further by weaving branches through a horizontal net positioned 8–12 inches above the pots, then flipping to flower once the screen is 50–70% filled. Branches should be placed in the screen after topping and before the flip, then tucked under the net until stretch ends. Both methods consistently produce more even canopies with better-developed buds at every node.
Defoliation timing
Removing large fan leaves that block bud sites from direct light can improve airflow and light penetration. Do a moderate defoliation pass at the start of flower (around day 20–21) to open up the mid-canopy, and optionally a lighter pass around day 40–42 to clear leaves that have closed back in. Avoid heavy defoliation during the final 3 weeks of flower; the plant needs those leaves to fuel final bud development and trichome production.
Harvest timing and curing for actual potency
You can grow a perfect plant and throw away a significant chunk of its potency in the last two steps: harvesting too early or too late, and rushing the dry and cure. Once those last two steps are dialed in, you can dramatically increase your odds of learning how to grow a healthy weed plant with strong, consistent results. I've made both mistakes. The difference between well-cured and poorly-cured cannabis from the same plant is genuinely significant in terms of smoothness, aroma, and effect.
Reading trichomes to time your harvest
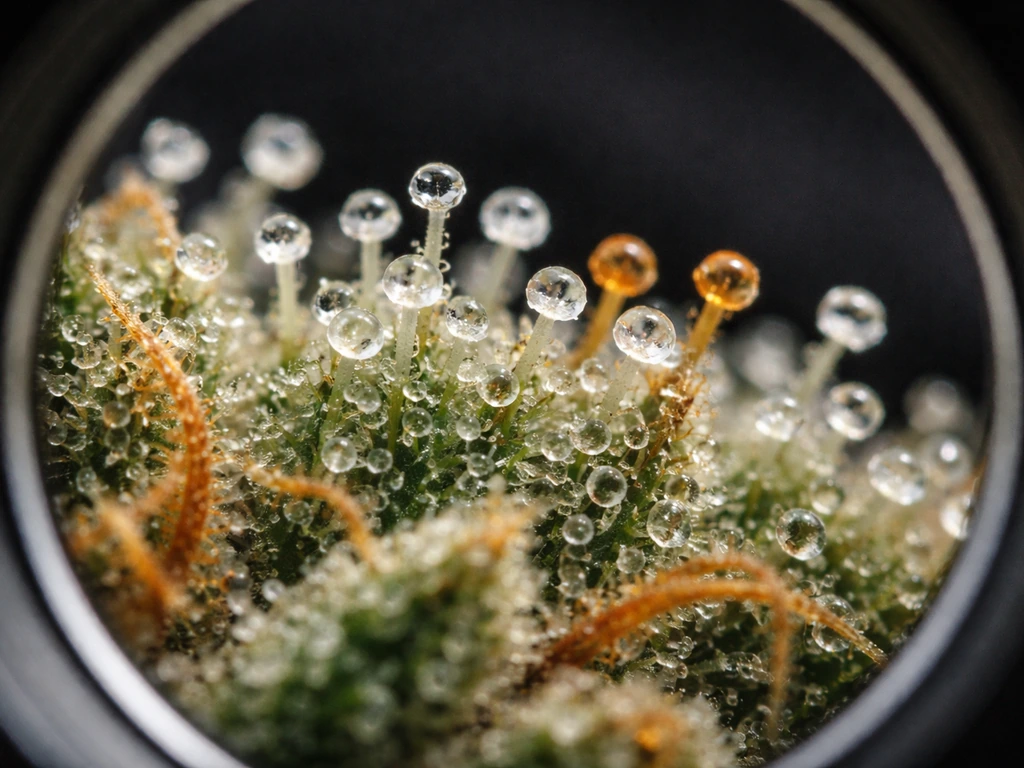
The most reliable harvest indicator is trichome color, examined with a jeweler's loupe (30x or 60x) or a digital microscope. Trichome heads progress through three stages: clear/translucent (not ready, THC still developing), cloudy/milky white (peak THC, most cerebral effect), and amber (THC beginning to degrade to CBN, more sedating effect). For maximum THC potency, harvest when the majority of trichomes on the buds themselves (not the sugar leaves, which amber faster) are fully cloudy with perhaps 5–10% amber. If you want a heavier, more relaxing effect, let amber creep up to 20–30%. Waiting too long past that point measurably reduces potency as cannabinoids degrade.
Drying
Cut whole branches and hang them in a dark, well-ventilated space. Target a drying environment of 60–70°F (15–21°C) with 55–60% relative humidity. Slow drying (7–14 days) preserves far more terpenes than a fast dry. If you rush with heat or low humidity, terpenes volatilize and buds taste harsh and flat. The buds are ready to move to jars when small stems snap (rather than bend) and the outside of the buds feels dry to the touch, even if the inside is still slightly moist.
Curing
Place dried buds loosely in glass mason jars, filled about 75% full. For the first two weeks, open jars ("burp" them) for 15–30 minutes once or twice daily to let off accumulated moisture and fresh air in. If buds feel wet when you open the jar, leave the lid off longer. After two weeks, daily burping can drop to every few days. A minimum cure of 4 weeks noticeably improves smoothness and effect; 6–8 weeks is where most experienced growers consider it fully developed. For long-term storage, maintain 18°C (about 64°F) and 45–55% RH, ideally in a cool dark location with minimal oxygen exposure.
Troubleshooting weak buds: what went wrong and how to fix it
If your harvested cannabis is underwhelming in potency or quality, one of the following issues is almost always the cause. Work through this list diagnostically rather than throwing money at the problem.
Insufficient light
This is the single most common cause of airy, low-potency indoor buds. If your PPFD at canopy level during flower is below 600 µmol/m²/s, your buds will be loose and underdeveloped. Upgrade your light, lower it closer to the canopy (while watching for heat stress), or reduce your grow footprint so the light you have covers a smaller area at higher intensity. Check actual PPFD with a meter, don't guess.
Nutrient lockout and pH problems
If plants look deficient but you're feeding regularly, check pH first. Most "deficiency" symptoms in mid-to-late flower are actually pH-induced lockout where nutrients are present but unavailable to the roots. Flush with pH-correct water, recheck runoff pH and EC, and then adjust your feeding. Also make sure you're letting the medium dry down between waterings in soil; roots need oxygen, and constantly wet soil causes root rot and poor nutrient uptake.
Humidity and mold problems
Botrytis (gray mold/bud rot) can destroy weeks of work in days. It thrives when RH spikes above 60% during flower, especially at lights-off when temperatures drop and relative humidity rises. Check your nighttime RH separately from your daytime readings. Improve airflow through the canopy with oscillating fans, maintain RH below 50% from mid-flower onward, and inspect buds weekly by gently opening dense colas to look for internal browning or white fluffy growth.
Hermaphroditism and pollination
A "hermie" plant develops male pollen sacs alongside female flowers, usually triggered by environmental stress: light leaks during the dark period, dramatic temperature swings, physical damage, or using unstable genetics. Even a single small banana (male stamen) can pollinate your entire crop, forcing the plant to direct energy into seed production rather than resin. Inspect plants weekly during flower. Fix any light leaks immediately. If you find male structures, remove them with tweezers or remove the whole plant if the infestation is widespread. Starting with quality feminized seeds from a reputable breeder dramatically reduces this risk.
Pests and disease
Spider mites, fungus gnats, thrips, and powdery mildew all reduce plant health and therefore cannabinoid production. Prevention is easier than treatment: inspect new clones or plants before introducing them to your space, maintain healthy VPD (mites prefer hot/dry, mildew prefers cool/humid), and keep your grow area clean. Catch problems at the first sign by checking undersides of leaves weekly. Avoid applying pesticides during flower; many leave residue that degrades smoke quality.
Harvesting too early
Impatience is one of the most honest mistakes I've made in growing. THC and other cannabinoids are still being produced right up to harvest, and cutting plants even one to two weeks early can meaningfully reduce final potency. Stick to the trichome method rather than relying on breeder-stated flowering times, which are often optimistic estimates under ideal conditions.
Your next steps today
Whether you're starting your first grow or trying to improve an existing one, the improvements with the biggest potency impact are almost always the same: better genetics, more light, tighter humidity control, and patient curing. If you want a complete walkthrough for how to grow perfect weed, the sections above break down each step from genetics to curing. You don't need to fix everything at once. If you're mid-grow right now, focus on dialing in your humidity (especially at night during flower) and double-check your canopy PPFD. If you're planning your next grow, start with genetics research and build your environment around meeting the light and climate targets in this guide. If you're planning your next grow, start with genetics research and then dial in your environment for the biggest results, which overlaps with specific tactics like how to make my weed plant grow big. If you want a step-by-step approach to improving potency, start by using the genetics and environment targets in the earlier sections of this guide how to grow more potent weed. Growing the strongest weed isn't about any one secret; it's about removing the weakest link in your chain, one grow at a time. If you follow a solid, practical care routine from veg through flower, you can improve your odds of growing strong, potent weed how to take care of weed plants grow.
- Check your jurisdiction's home grow rules and plant-count limits before starting
- Choose a feminized photoperiod or autoflowering strain with published lab-verified THC data
- Measure your actual PPFD at canopy height with a meter or PAR-capable app
- Set up a temperature and humidity monitor with nighttime logging to catch RH spikes
- Calibrate your pH pen and verify your feed pH is hitting the correct range for your medium
- Plan your training strategy (LST for beginners, topping + SCROG for intermediates) before veg ends
- Source a jeweler's loupe or digital microscope for trichome inspection before harvest
- Set up a dedicated dark, ventilated drying space targeting 60–70°F and 55–60% RH
- Stock glass mason jars and commit to a minimum 4-week cure before judging the final product
FAQ
How do I tell if my strain is actually high potency, or just marketed that way?
Use the advertised THC as a starting point, then verify with third-party lab results if available (ideally from the breeder or seed bank). Also check flowering time and stability claims, because some “high THC” lines reach their best resin only under specific light intensity and humidity control, not typical home conditions.
Do I need CO2 to grow the strongest weed?
No. CO2 only helps if your environment is already dialed, especially canopy PPFD, airflow, temperature stability, and RH trend in late flower. If you rely on CO2 to compensate for weak lighting or poor humidity control, you can end up with faster growth but not stronger final buds.
What’s the most common mistake when measuring PPFD for potency?
Measuring at the wrong height or only in one spot. PPFD changes across the canopy, so take readings where the tops will actually sit, at the same height you expect during flowering, and map multiple points across the grow footprint. If you move lights during the cycle, recheck, because potency drops when intensity drifts below target.
My buds are forming, but they’re still airy. What should I check first?
Confirm that canopy PPFD in flowering is hitting your target (the guide emphasizes 600+ as a key threshold for denser buds). Next check late-flower humidity and nighttime RH, since dense flowers plus humidity spikes can reduce development and promote problems that harm resin quality.
Is flushing with plain water really required for stronger weed?
It’s not automatically required. The more important factor is avoiding prolonged pH drift and salt buildup that causes lockout. If your EC and pH have been stable, a gentle reduction in nutrient strength in the final stretch is usually less risky than sudden “all water” transitions, especially in coco or hydro.
How do I avoid nutrient lockout if my pH keeps drifting?
Calibrate your pH pen weekly, and always re-check pH after nutrients are mixed (since adding nutrients can shift pH). Keep consistent feed timing, avoid letting solutions sit too long, and in coco or hydro check runoff or solution pH frequently enough to catch drift before it becomes a multi-day problem.
What’s the best way to correct a pH-related issue mid-grow?
Stop adding new nutrients “by schedule” and focus on restoring uptake. Re-run pH-correct water through the medium (or adjust the reservoir for hydro) and verify with runoff or solution readings, then reduce feeding strength temporarily until pH stabilizes. If deficiency symptoms appear, prioritize pH correction before adding extra bottles like CalMag.
Can I harvest earlier if my trichomes look mostly cloudy?
Be careful. If you cut when many trichomes are still clear/translucent, you can lose a meaningful portion of peak THC formation. The guide’s “mostly cloudy with a small amber fraction” approach is designed to reduce that risk. If you need a heavier effect, you can wait longer for amber, but waiting too far past the amber window can reduce THC.
Should I check trichomes on sugar leaves or the buds?
For potency, examine the buds themselves. Sugar leaves often amber faster than the flowers, so using only sugar leaf color can lead you to harvest later than intended for maximum THC.
My jars get too humid after burping. What should I do?
If buds feel wet when you open the jars, extend the burping windows, and ensure your drying environment wasn’t too humid or too fast. Also make sure jars are not overfilled (the guide targets about 75% full), since tighter packing traps moisture and slows equilibrium.
How long should I dry, and how can I tell if my dry is going too fast?
Target a slow dry window (about 7 to 14 days). If you’re drying quickly due to high temps or low humidity, outside may feel dry while terpenes are already lost, and smoke can turn harsh. Use the stem snap and outer dryness cues, but don’t rely on smell alone, because aroma can change during an overly fast dry.
How can I prevent bud rot if my humidity is hard to control?
Control RH trend, not just daytime readings, especially at lights-off. Keep RH below about 50% from mid-flower onward, improve airflow so dense buds don’t trap moisture, and inspect colas weekly by gently checking internal browning or unusual growth.
What light leak problems cause hermaphrodites, and how do I troubleshoot them?
The main risk is light during the dark period, including poorly sealed tent zippers, gaps around intake/exhaust vents, and opening the space during lights-off. If you suspect light leaks, verify with a light test during full dark (no visible glow), and avoid stressing plants with extreme temperature swings during flowering.
Do pest issues always reduce potency, even if plants look okay?
Often yes. Even light infestations can divert plant energy and cause stress that reduces resin development. Prevention and early detection matter most, check undersides of leaves weekly, and avoid applying pesticides late in flower to prevent residue and smoke-quality degradation.
I’m growing autos. Should I still top or FIM for potency?
Generally no for beginners, because autos often don’t have enough veg time to recover from cutting. The guide recommends low-stress training instead for autos, since it can improve canopy uniformity without delaying recovery during the compact life cycle.
What single change gives the biggest potency improvement if I can only do one thing next grow?
Start with genetics and canopy light. In practice, the guide’s diagnostic logic suggests you should first verify canopy PPFD during flowering and then tighten late-flower humidity control and curing. If those are already good, focus on removing the bottleneck causing symptoms, usually pH drift or salt buildup.
Next Article
How to Grow Perfect Weed: Step-by-Step Home Guide
Step-by-step home cannabis grow plan for top-shelf buds: setup, feeding, training, flowering, harvest, drying and curing