Growing a healthy cannabis plant comes down to matching the right strain to your setup, then dialing in light, water, nutrients, and airflow at every stage from seed to harvest. Get those fundamentals right and most problems either never show up or are easy to fix before they spiral. This guide walks you through the whole process in the order you'll actually need it, with real numbers and clear actions you can take today. Once you dial in these basics, you can follow a step-by-step routine to learn how to grow perfect weed from seed to harvest.
How to Grow a Healthy Weed Plant From Seed to Harvest

Marcus Holbrook
19 Jun 2026
Before anything else: know your local rules
Cannabis cultivation laws vary dramatically by country, state, and province. Before you germinate a single seed, check what your local jurisdiction allows for home growing, including plant count limits, whether indoor-only rules apply, and what pest management products are legal to use on cannabis in your area. In Canada, for example, Health Canada has mandatory pesticide testing requirements for licensed producers, and British Columbia's integrated pest management guidelines specifically address what inputs are appropriate for homegrown cannabis. Even if you're growing for personal use, applying a pesticide that isn't authorized for use on cannabis can create health risks you don't want. Start legal and stay legal throughout.
Choosing the right strain and setup
Your strain choice and your growing environment are completely intertwined. Pick a photoperiod strain if you want maximum control over the veg-to-flower transition; pick an autoflower if you're a beginner who wants a simpler timeline or you're growing outdoors in a northern climate with a short season. For indoors, indica-dominant or hybrid strains tend to stay compact and manageable. Sativa-dominant plants can stretch to double their height in flower, which matters a lot if your tent ceiling is 5 feet.
Your three main paths are indoor soil, outdoor soil, and indoor or outdoor hydroponics. Each one is a legitimate, rewarding way to grow.
| Method | Best for | Main advantages | Main challenges |
|---|---|---|---|
| Indoor soil | Beginners, year-round growing | Forgiving pH range, easier nutrient buffering, low startup cost | Slower growth than hydro, pest vectors in soil |
| Outdoor soil | Lower costs, large plants | Natural light, bigger yields per plant, low running costs | Weather-dependent, pest exposure, seasonal limits |
| Hydroponics (DWC, coco, NFT) | Faster growth, precise control | Faster veg, higher potential yields, cleaner root zone | pH drifts faster, less forgiving of mistakes, higher setup cost |
For most beginners, indoor soil is the most forgiving starting point. Soil buffers pH swings and nutrient fluctuations better than hydro, so small mistakes don't immediately show up as sick plants. Once you understand what a healthy plant looks and feels like, transitioning to coco or hydroponics becomes much easier because you already have a baseline to compare against.
Germination and early seedling care
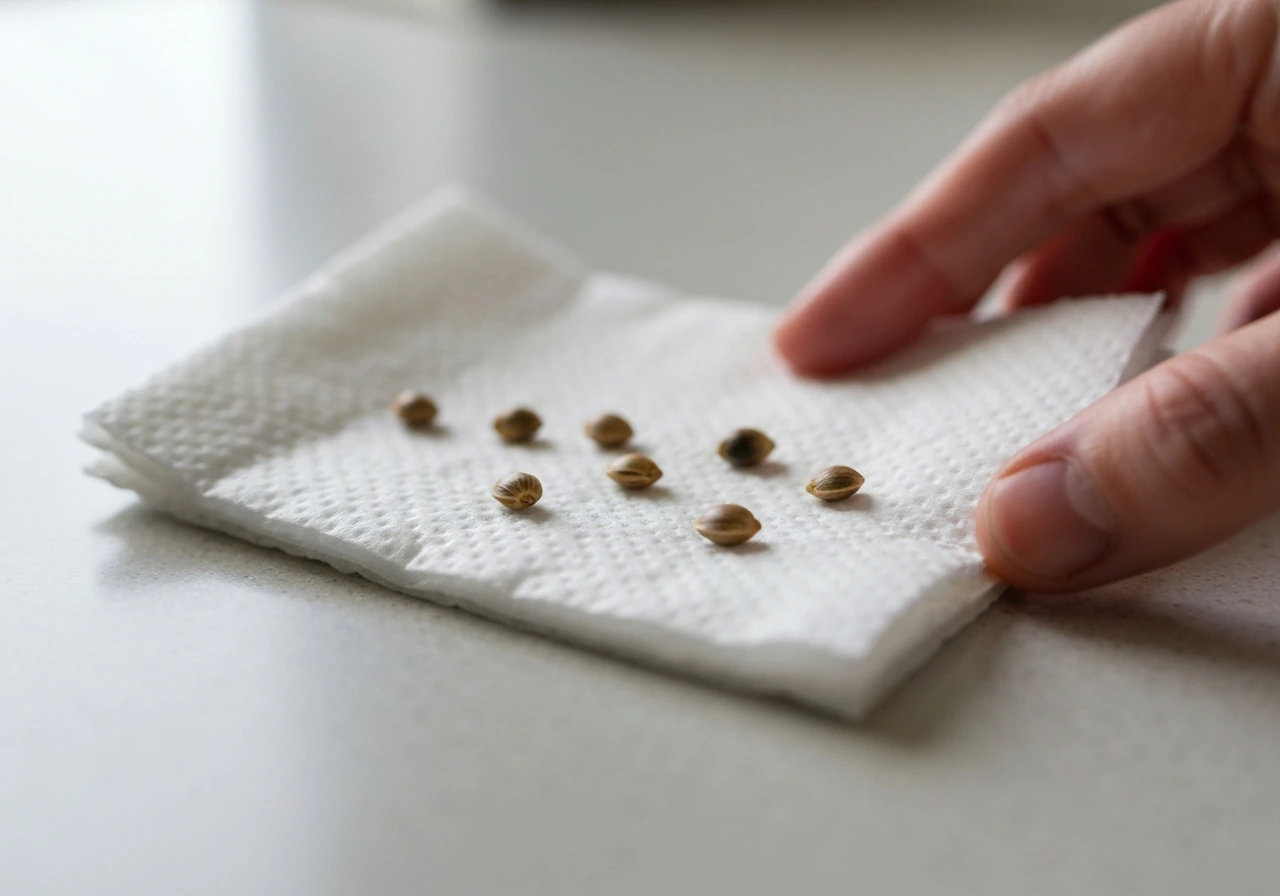
Germination is simple, but a few small details make a big difference. If you want a deeper, step-by-step guide, follow the full advice on how to take care of weed plants to support healthy growth from seedling through flowering few small details make a big difference. Seeds germinate fastest when temperatures are warm, ideally between 70 and 85°F (21 to 29°C). Below that range, germination slows down significantly and the risk of fungal damping-off increases, especially if your growing medium stays wet and cool. Damping-off is caused by soil fungi that rot seeds and destroy newly emerged seedlings, usually right at the soil line. It's one of the most common beginner killers and almost always comes down to overwatering and low temperatures working together.
The most reliable germination method is the paper towel technique: place seeds between two damp (not soaking) paper towels, put them in a sealed zip-lock bag, and keep them somewhere warm and dark. Check daily. Most healthy seeds crack and show a taproot within 24 to 72 hours. Once the taproot is about half an inch long, transfer it carefully into your growing medium, taproot facing down, about half an inch deep.
Water pH matters from day one. Water pH matters from day one. For soil, aim for a water pH of 6.0 to 6.5. For coco coir, target 5.8 to 6.2. For rockwool or hydroponic systems, use 5.5 to 6.0. Rockwool cubes are naturally alkaline and need to be soaked in a buffered solution at around pH 5.5 to 6.0 before use, otherwise the water you add will drift up in pH and lock out the nutrients your seedling needs.
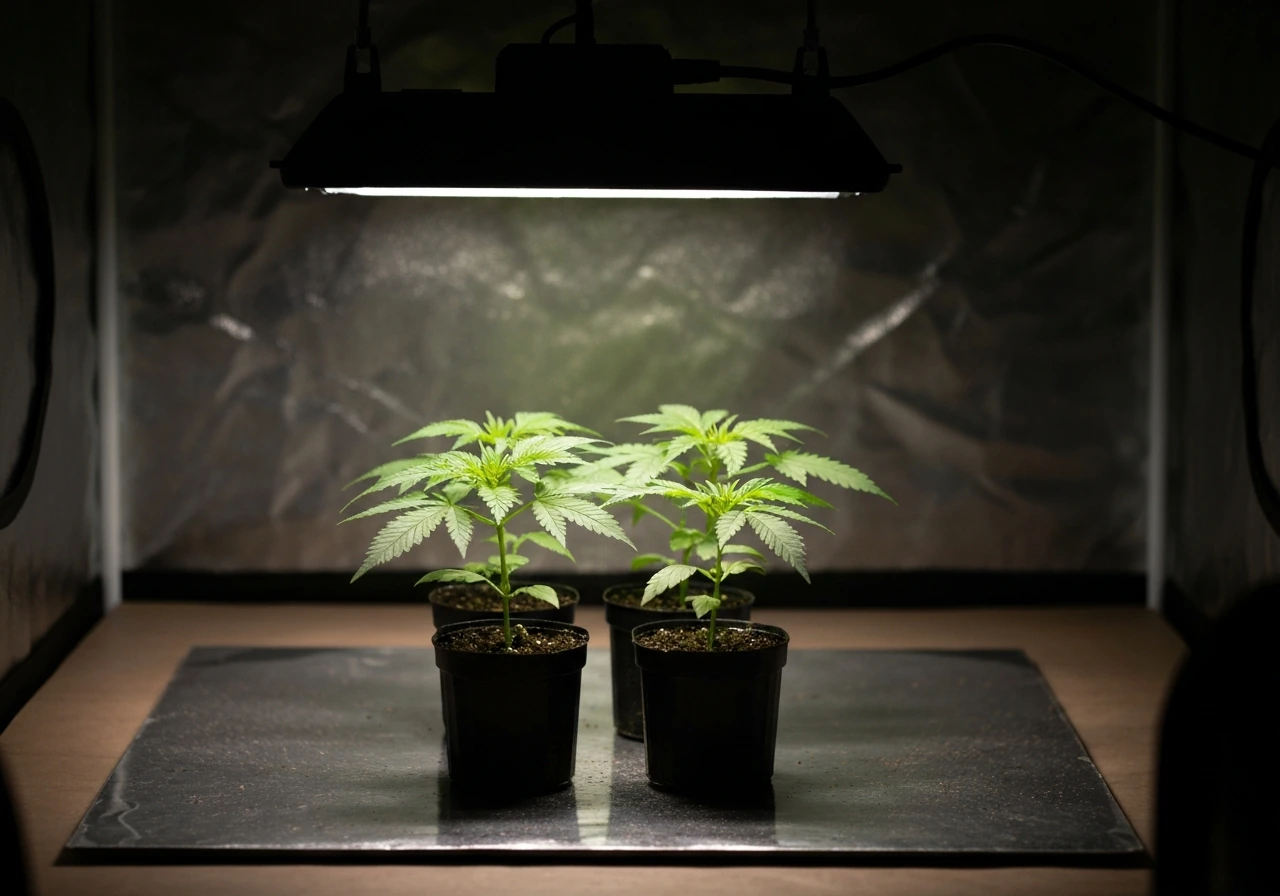
Seedlings need very little light at first, around 200 to 400 µmol/m²/s PPFD at the canopy. That's enough to support healthy, compact growth without burning tender new growth. Keep your light closer than you'd think for the first week or two, because seedlings that don't get enough light stretch upward looking for it, which leaves them with weak, floppy stems. Keep the medium just barely moist, not wet. Overwatering is the number one seedling mistake.
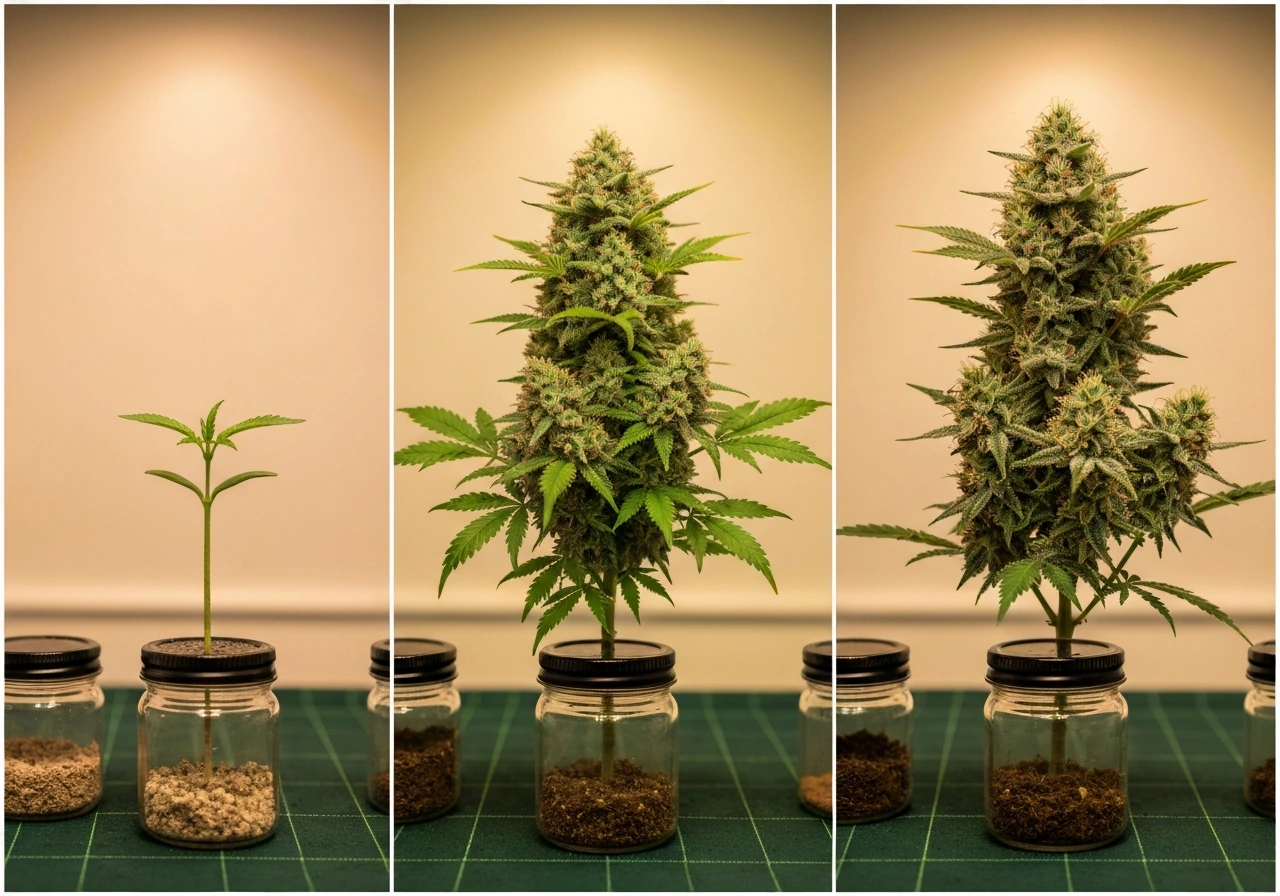
Veg growth fundamentals
Light during veg
Once your plant has two or three sets of true leaves, it's in vegetative growth. For photoperiod strains indoors, you'll keep lights on 18 hours a day and off for 6. PPFD targets during veg typically run between 400 and 600 µmol/m²/s for most strains, ramping up toward 600 to 900 µmol/m²/s as the plant gets larger and more developed. Always measure PPFD at the canopy level, not at the light fixture, because intensity drops off significantly with distance.
Watering habits
The most reliable watering method is the lift test. Pick up your pot before and after watering. A dry pot feels noticeably lighter. Water when the medium is dry about an inch or two down, then water thoroughly until you get about 10 to 20% runoff from the bottom. This wet-dry cycle is critical for healthy root development and for preventing root rot, which becomes more likely whenever roots stay wet and cool.
Basic training techniques
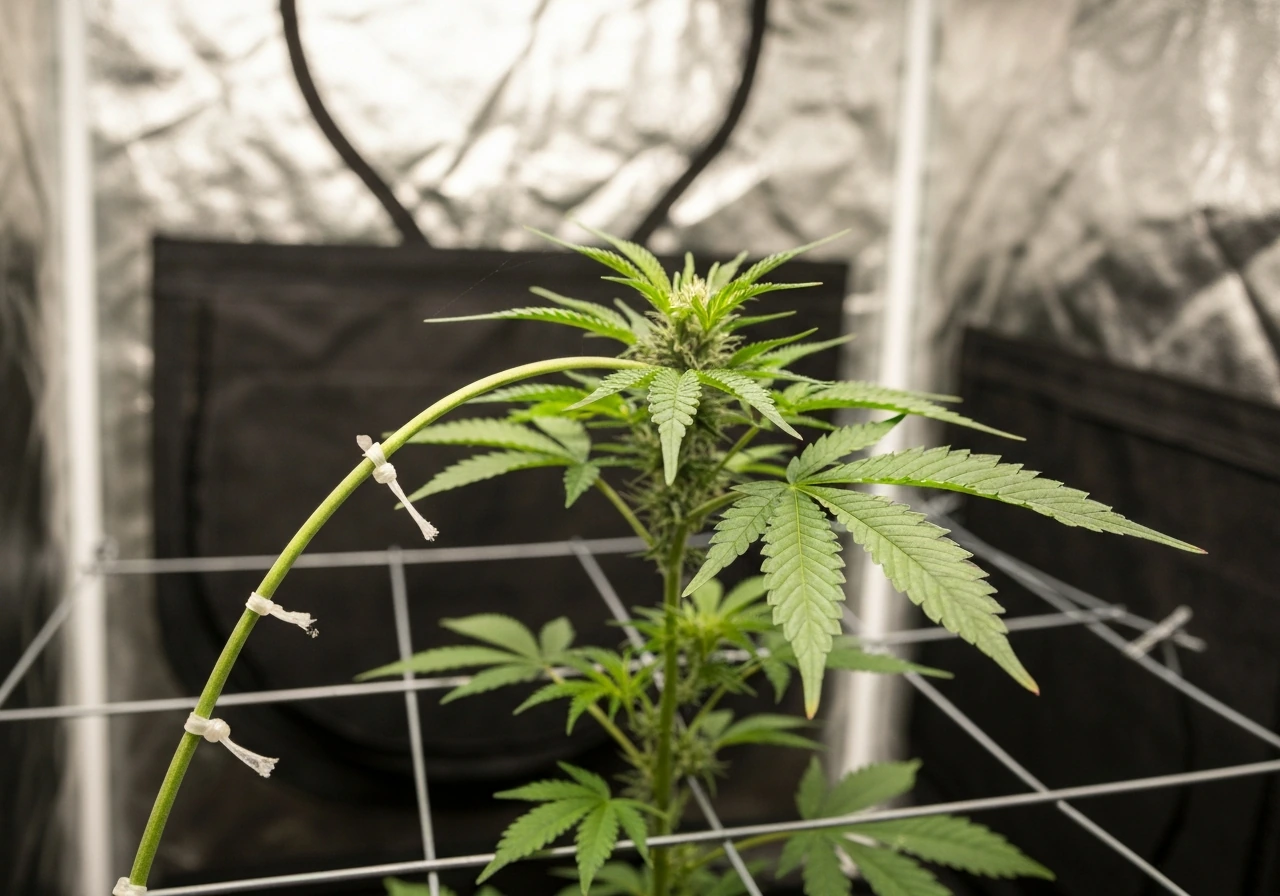
Training during veg is how you shape the plant structure that will determine your yield. If you apply training during veg with the right light and nutrients, you can significantly improve how big your weed plant grows make your weed plant grow big. Low-stress training (LST) means bending the main stem and tying it down to encourage the canopy to spread outward rather than grow as one tall central cola. It's gentle, reversible, and beginner-friendly. Topping, which means cutting the main growing tip, creates two main colas instead of one and makes the plant bushier overall. Start topping after the plant has five or six nodes. Both techniques are more effective in veg than anywhere else in the lifecycle, so don't wait.
Flowering for healthy bud development
For photoperiod strains, you trigger flowering by switching the light cycle to 12 hours on and 12 hours off. Autoflowers begin flowering on their own, typically around week 4 to 6 from germination, regardless of light schedule. Once flowering starts, your priorities shift: support bud development, maintain environmental conditions tightly, and start watching for moisture-related problems like mold.
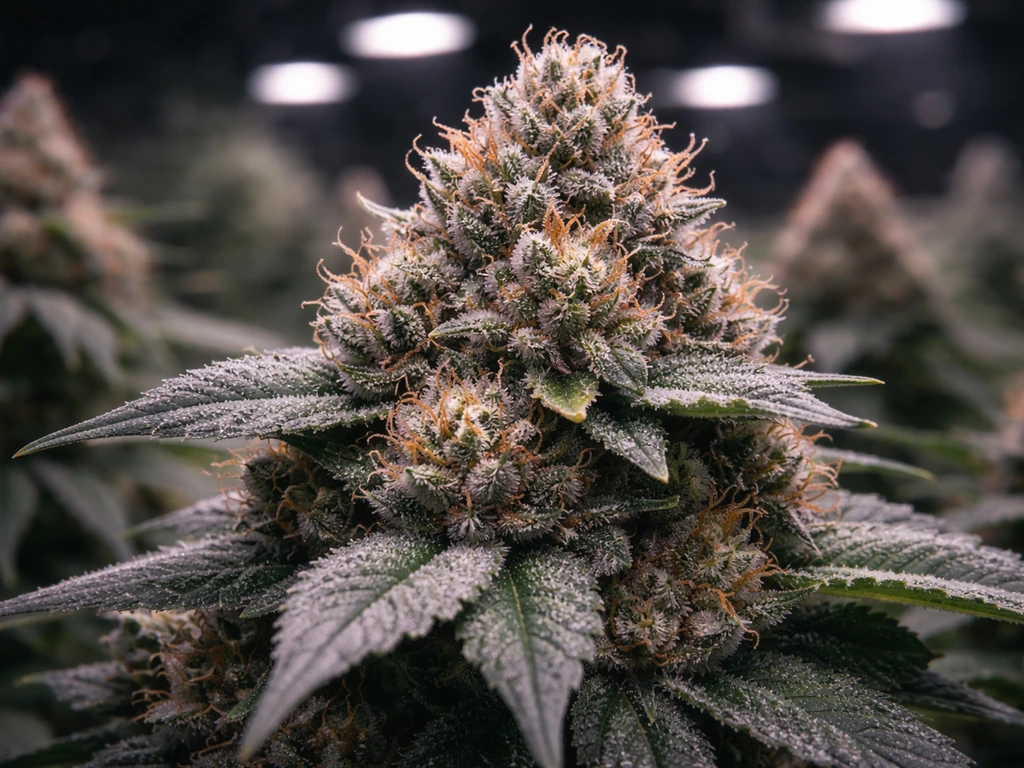
During the first two to three weeks of flowering (the stretch phase), plants can nearly double in height. Adjust your light height accordingly and check PPFD regularly. As buds develop, increase PPFD toward the upper range, around 800 to 1000 µmol/m²/s for most strains under well-dialed conditions, though this depends on your specific light and strain. Dense buds trap moisture, which is exactly the environment that Botrytis (gray mold) loves. We'll cover that in the troubleshooting section, but keeping airflow moving through the canopy from the start of flower is your best preventive tool.
Defoliation during flower, meaning selectively removing large fan leaves that block light and trap humidity, is a debated technique but useful in practice, especially for dense indoor grows. Remove leaves that are covering bud sites or sitting flat in the canopy trapping moisture, but don't overdo it. Stressing the plant too hard during flower can reduce bud quality.
Environment optimization
Temperature
Cannabis plants generally thrive between 70 and 85°F (21 to 29°C) during lights-on periods. During lights-off (or nighttime outdoors), temperatures can drop 10 to 15°F without stressing the plant. What you want to avoid is extremes: temperatures above 90°F cause heat stress, bleaching, and reduced terpene production; temperatures below 60°F stress roots, slow uptake, and increase disease risk. During late flower, some growers deliberately run slightly cooler nights (around 65°F) to enhance color and terpene expression, but this requires careful monitoring.
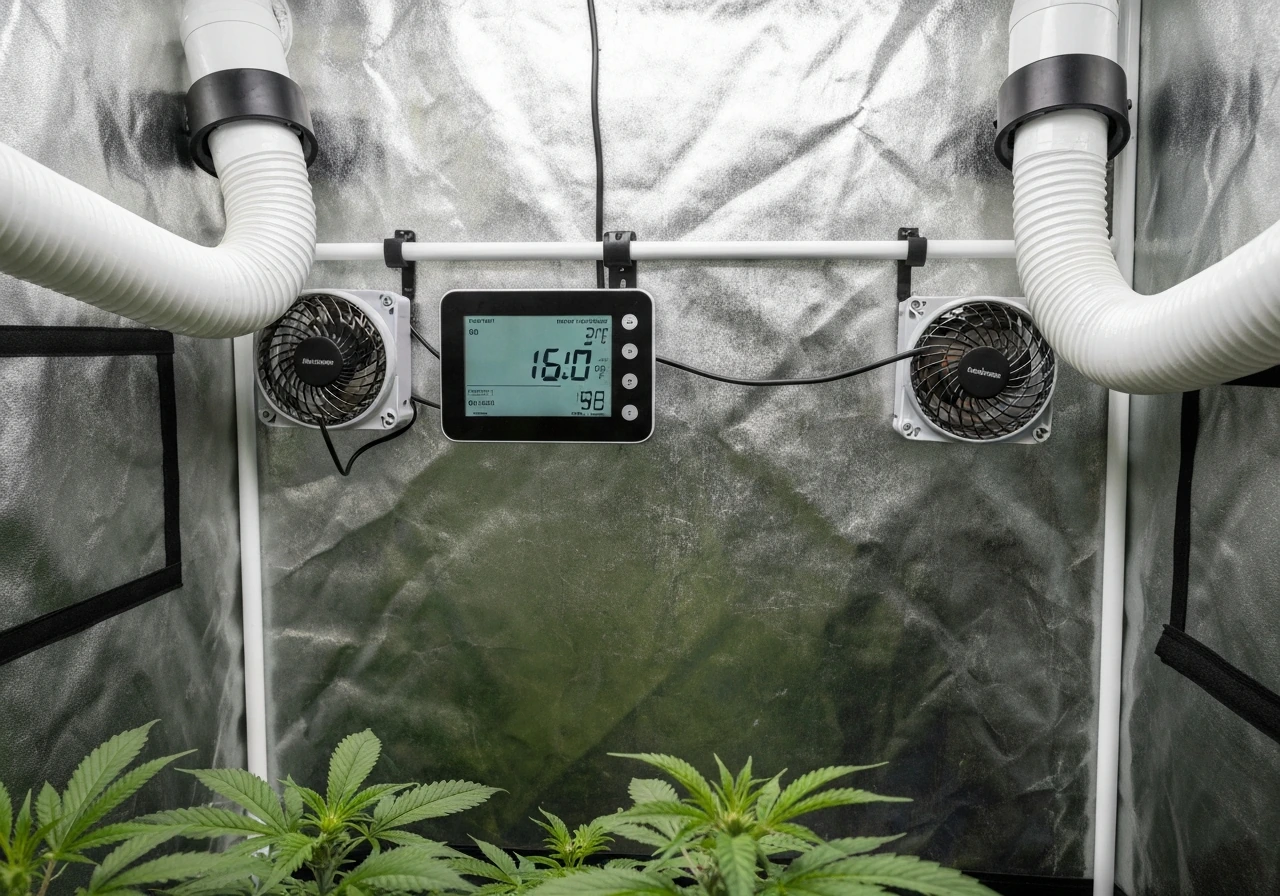
Humidity and VPD
Vapor pressure deficit (VPD) is the measurement that ties temperature and humidity together into one number that actually predicts plant behavior. It's more useful than just tracking relative humidity alone, because RH means different things at different temperatures. Target VPD ranges by growth stage are roughly 0.4 to 0.8 kPa during seedling, 0.8 to 1.2 kPa during veg, and 1.0 to 1.5 kPa during early to mid flower, climbing toward 1.5 to 2.0 kPa in late flower. Higher VPD in late flower is important because lower humidity (around 40 to 50% RH) is your main defense against gray mold, which thrives when relative humidity exceeds 93% in the canopy and moisture sits on leaf surfaces for 8 or more hours.
Airflow
Every grow space needs two types of airflow: circulation fans that keep air moving through the canopy and an exhaust fan that pulls fresh air in and pushes stale, humid air out. Stagnant microclimates inside dense canopies are where mold, mites, and fungus gnats get their foothold. An oscillating fan at canopy level and another below it will handle most indoor spaces. Outdoors, choose planting locations with good natural wind exposure and space plants far enough apart that they're not blocking each other's airflow.
CO₂
Atmospheric CO₂ is around 400 to 420 ppm. Cannabis can utilize elevated CO₂ up to about 1200 to 1500 ppm when light intensity is also high (above 800 to 1000 µmol/m²/s PPFD). Below that light threshold, adding CO₂ has minimal effect. CO₂ supplementation is a legitimate tool for maximizing yields in a dialed-in advanced grow, but for most beginners, your energy is better spent getting light, temperature, and humidity right first. CO₂ enrichment with a sealed grow room also raises temperatures, so it requires additional climate control investment.
Nutrients and watering
Feeding schedule basics
Cannabis has two broad nutrient phases that map directly to veg and flower. During veg, plants are hungry for nitrogen (N) to build leaves and stems. During flower, demand for phosphorus (P) and potassium (K) increases while nitrogen demand drops. Most nutrient lines are built around this and label their products accordingly. For soil growers using a quality amended soil, you often won't need to add nutrients until week 3 or 4, because the soil is already feeding the plant. For soil growers using a quality amended soil, you often won't need to add nutrients until week 3 or 4, and if you want a full roadmap toward how to grow the best weed plants, keep reading for the feeding and watering fundamentals. In coco or hydro, you start feeding from the first week with seedling-strength solution.
Start at half the manufacturer's recommended dose and observe how the plant responds over 3 to 5 days before increasing. Nutrient burn (tips turning brown and curling) is much easier to cause than deficiency, and deficiency is easier to fix than burn. Feed, then watch.
Recognizing and correcting deficiencies and toxicity
Most nutrient deficiencies in home grows are actually pH-related lockout rather than a true lack of the nutrient in the soil or solution. When pH drifts outside the optimal range for your medium, nutrient molecules become chemically unavailable even if they're physically present. This is called nutrient lockout. The fix is almost always to flush the medium with correctly pH-adjusted water and let the plant recover before resuming feeding.
- Yellowing older (lower) leaves: likely nitrogen deficiency, common in late flower but also triggered by lockout
- Brown, dry tips on leaves: nutrient burn from overfeeding or high EC in hydro
- Purple stems on young plants: often a phosphorus issue, check pH first
- Interveinal yellowing on newer leaves: magnesium or iron deficiency, again often a pH problem
- Entire plant pale yellow: major nitrogen deficiency or root zone problem (root rot, overwatering)
In hydroponic systems, pH can drift faster than in soil, sometimes within hours in a warm reservoir. Check pH at least daily in active hydro systems and adjust as needed. Buffering strategies can help slow drift, but regular monitoring is non-negotiable.
Common problems and how to fix them
Pests
Spider mites are tiny (barely visible to the naked eye) and leave a distinctive fine webbing on the underside of leaves. They love hot, dry conditions. Insecticidal soap and horticultural oils are effective control options for home growers when applied consistently and thoroughly to leaf undersides. Check your local regulations before applying any pest management product to cannabis; some products that are legal for vegetables are not approved for cannabis in your jurisdiction. Integrated pest management principles recommend starting with non-chemical interventions like increasing humidity slightly (mites hate it) and improving airflow, using chemical controls only when necessary.
Fungus gnats are more annoying than dangerous in small numbers, but their larvae feed on roots and can stunt seedlings or damage young plants. They're almost always associated with consistently moist growing medium. The fix is letting the top inch or two of your medium dry out between waterings, which disrupts the life cycle. Yellow sticky traps at soil level will tell you exactly how bad the infestation is.
Mold and Botrytis
Gray mold (Botrytis) is one of the most damaging problems in late-flowering cannabis. It typically starts on older or damaged tissue and spreads quickly to dense buds in humid conditions. The key conditions that trigger it are free moisture sitting on plant tissue for 8 to 12 hours, relative humidity above 93% in the canopy, and temperatures in the 55 to 65°F (13 to 18°C) range. Your prevention toolkit is tight environmental control: keep late-flower humidity below 50% RH, maintain temperatures above 65°F during lights-on periods, keep air moving through the canopy, space plants so they're not touching, and remove any dying leaves proactively. If you want higher potency, pair your mold-prevention airflow and humidity control with harvest timing based on trichome color. Once Botrytis appears in a bud, remove the affected section immediately with clean scissors, bag it, and get it out of the grow space.
Stress and environmental problems
Drooping, overwatered plants look similar to underwatered ones from a distance, but there's a key difference: overwatered plants are drooping in wet soil and feel heavy when you lift the pot; underwatered plants droop in dry, light soil. Heat stress shows up as tacoing (leaf edges curling upward), bleaching near the light source, and reduced trichome production. Light stress (too much intensity) looks similar but is confirmed by measuring your PPFD. Stretching (long gaps between nodes, thin stems) means not enough light during early veg or seedling stage.
Nutrient lockout
If your plant suddenly shows multiple deficiency symptoms at the same time despite you feeding correctly, suspect lockout before adding more nutrients. Confirm your pH is in range, flush the medium with clean pH-adjusted water at about three times the pot volume, and let the plant dry out and recover. Resume feeding at half strength once the medium is ready again. Adding more nutrients to a locked-out plant makes the problem worse.
Harvest, drying, and curing
Knowing when to harvest
The most reliable harvest timing method is checking trichome color with a jeweler's loupe or digital microscope. Trichomes start clear, transition to milky white, and then amber. Most growers harvest when trichomes are mostly milky with roughly 10 to 30% amber, depending on whether they want a more cerebral or heavier effect. Secondary indicators are pistil color (most pistils should have darkened and curled in) and the overall swelling and density of the buds. Seed bank harvest windows are rough estimates, not exact deadlines.
Drying
Drying is where a lot of otherwise great grows get ruined by impatience. Hang whole branches or whole plants upside down in a dark, well-ventilated room at 60 to 70°F (15 to 21°C) and 55 to 65% relative humidity. This slow drying process takes about 7 to 10 days. The goal is to bring moisture content down to roughly 10 to 12% before moving to curing jars. The classic readiness test is the stem-snap test: small stems should snap cleanly rather than bend. If they still bend, keep drying.
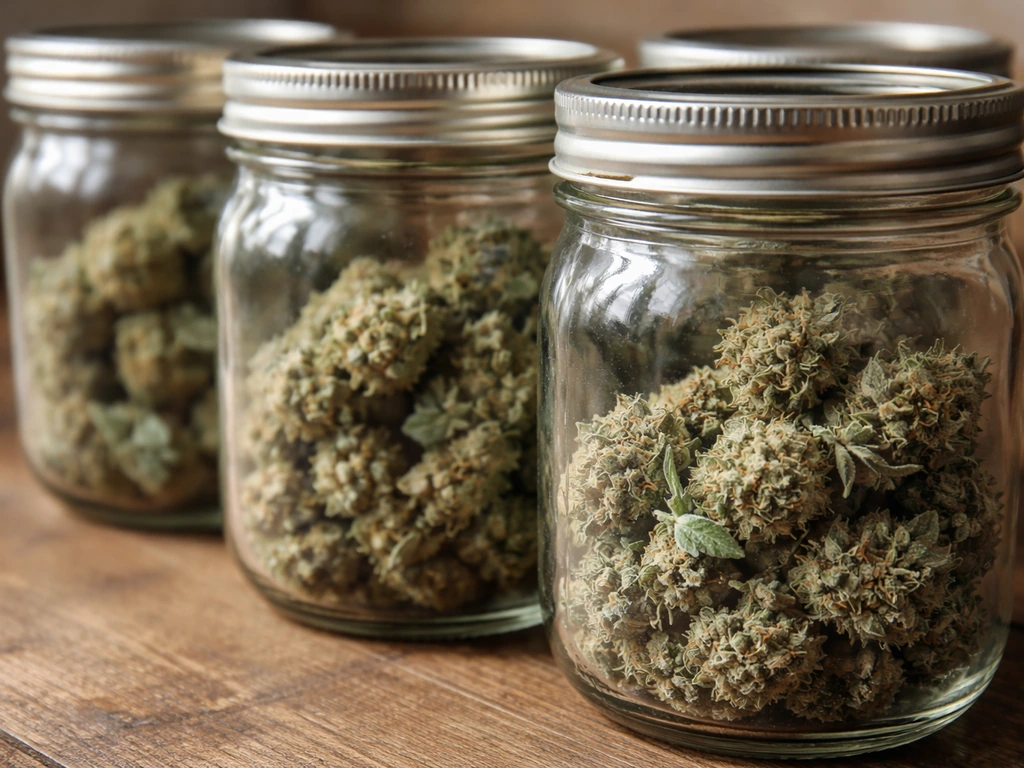
Curing
Curing in sealed glass jars is what transforms adequately dried cannabis into something that smells and smokes significantly better. Trim your buds, fill jars about 75% full, and store them in a cool dark place. For the first week, open the jars (burp them) twice daily for 10 to 15 minutes to let moisture equalize and excess water vapor escape. After the first week, drop to once a day. Target relative humidity inside the jars at around 58 to 62% using humidity packs if needed. A minimum cure of two weeks is functional; four to eight weeks produces noticeably better results for most strains. If you open a jar and smell ammonia, that means the buds were too wet when jarred and bacteria are working on them. Spread them out and dry further immediately.
Quality checks
A properly grown and cured bud should be sticky to the touch from resin, have a strong and characteristic terpene smell, and break apart easily without being bone-dry or crumbling. If it smells like hay or grass, it either dried too fast, cured too short, or was harvested underdeveloped. If it's harsh to smoke, the most common culprits are a too-fast dry, insufficient cure time, or not flushing in the final week or two of flower. The cure is the last phase of growing a healthy plant and it deserves the same attention you gave to every stage before it.
Growing a healthy cannabis plant is genuinely achievable for anyone willing to pay attention to the basics consistently. Once you have the basics down, you can focus on the specific techniques that help you grow the strongest weed possible how to grow the strongest weed. The details around maximizing potency, training for maximum yield, or dialing in a hydroponic system for even faster growth are worth exploring once you have a healthy baseline to build from. Most problems, whether that's pests, mold, deficiencies, or stressed plants, are easier to prevent than fix, and prevention almost always comes back to the same core habits: appropriate light intensity, clean pH-adjusted water, good airflow, and watching your plants closely enough to catch changes early.
FAQ
How do I tell if my cannabis seed is viable before I waste weeks growing it?
A quick viability check is the float test, place the seed in room-temperature water and remove ones that float after 1 to 2 hours, then confirm with a germination attempt. If you do germination, look for a firm, pale taproot and avoid continuing if you see a mushy seed coat or no movement after 72 hours in warm conditions.
What should I do if my seedlings stall or stop growing after the first true leaves?
First confirm light and watering, seedlings need consistent, gentle moisture and enough PPFD to avoid stretching. Then check pH, in coco or hydro a small drift can cause lockout quickly, flush with correctly pH-adjusted water and resume at half-strength once you see new growth.
Is it better to water with a nutrient solution or plain water during seedling stage?
For most beginners, use plain pH-adjusted water until you have 2 to 3 sets of true leaves, then start seedling-strength nutrients at half dose. Starting nutrients too early is a common cause of salt buildup and root stress, especially in coco and rockwool where roots are sensitive.
How do I reduce nutrient burn risk while still feeding enough for healthy growth?
Use the feed-then-watch approach with smaller adjustments, start at half dose and wait 3 to 5 days before increasing, watch new growth color and leaf posture rather than only tips. If you see tip browning, stop increasing nutrients, flush with correctly pH-adjusted water, and let the plant dry back slightly before restarting at lower strength.
What’s the best way to confirm nutrient lockout is happening, not a true deficiency?
Look for multiple symptoms at once plus slow recovery, then verify pH in your medium or reservoir before changing anything else. If symptoms are present while feeding is correct, flush the medium with about three times the pot volume of correctly pH-adjusted water, then dry down to your usual wet-dry cycle and resume feeding at half strength.
Should I pH-adjust every time, even in soil with an amended mix?
If you are using high-quality amended soil and watering with correctly buffered water, you may not need frequent adjustments, but you should still test. If you see repeated yellowing despite consistent growth conditions, check runoff pH or simply flush once with pH-adjusted water to reset the root zone.
How can I prevent mold in flower without constantly changing my environment?
Start with canopy airflow and humidity targets, keep RH in late flower below 50% and maintain steady exhaust and circulation. Don’t rely on reactive fixes like trimming after you already see lesions, instead remove dying leaves early and avoid over-dense clusters that trap moisture.
What’s a safe way to defoliate in flower if I’m worried about stressing the plant?
Only remove leaves that block bud sites or lay flat against the canopy, take small sections over multiple days rather than stripping everything at once. If the plant is already showing stress (droop, pale leaves, or slowed growth), pause defoliation and stabilize light, VPD, and watering first.
If drooping could mean too much water or too little, what’s the fastest way to tell which it is?
Use the lift test plus a finger check, overwatered pots feel heavy and medium stays cool and wet, underwatered pots feel light and the medium feels dry an inch or two down. Fix by adjusting to your wet-dry cycle, do not alternate daily watering because that pattern often worsens root problems.
How often should I check VPD, and what do I do if it’s outside target range?
Check at least once daily and again when lights switch on or off, because temperature swings shift VPD quickly. If VPD is too high, raise humidity slightly or lower temperature, if it’s too low, reduce humidity or increase airflow, avoid chasing VPD with nutrients or heavy foliar changes.
Can I use CO₂ to boost growth if I’m not already running advanced climate control?
CO₂ helps most when light intensity is high and the grow room is well controlled, otherwise the extra CO₂ can be wasted or cause temperature creep. If you are still dialing in PPFD and humidity, prioritize light distance, VPD, and airflow before adding enrichment.
What’s the safest approach to pest control on cannabis if I’m not sure what products are legal where I live?
Start with non-chemical integrated pest management, improve airflow, inspect leaf undersides daily, and use sticky traps at canopy height for monitoring. Before applying any product, check cannabis-specific authorization in your jurisdiction, because some items approved for other crops are not approved for cannabis.
How do I know when it’s time to harvest if trichomes look mixed?
Harvest when most trichomes are milky with the amber percentage matching your desired effect, but also look at how far along the buds are, not only one top cola. If lower buds are less mature, you can consider partial harvesting or staggered cuts, especially in uneven indoor canopies.
What humidity should I aim for during drying, and what’s the most common drying mistake?
Dry around 55 to 65% RH at 60 to 70°F with good ventilation, and avoid rushing the process by making the room too warm or too dry. The most common mistake is drying too fast, which leads to hay or grass flavor and harsh smoke.
How can I troubleshoot ammonia smell in curing?
Ammonia usually means the buds were too wet at jar time and bacteria started breaking down sugars. Open jars immediately, spread buds out to continue drying until they feel springy and the stems are closer to snapping, then rejar at around 58 to 62% RH in the container.
Next Article
How to Grow the Strongest Weed: Step-by-Step Guide
Step-by-step to maximize cannabis potency: strains, lighting, nutrients pH, training, harvest timing, curing, and fixes.