You can grow a healthy cannabis plant from seed to cured bud in roughly 3 to 5 months, depending on the strain and method you choose. To grow a weed plant successfully, you also need a legal, reliable setup and the right growing conditions from germination through flowering. The core steps are: germinate your seed, grow the plant under the right light for 4 to 8 weeks in veg, flip to a 12/12 light schedule to trigger flowering, harvest when trichomes are milky or amber, then dry and cure for 2 to 4 weeks. Every step has variables that matter, but none of them are rocket science. Here is the full roadmap.
How Grow a Weed Plant: Seed to Harvest Step by Step

Marcus Holbrook
9 Jun 2026
Check the law before you grow a single seed
Before you buy seeds or set up a tent, spend 20 minutes confirming that home cultivation is legal where you live. If you are wondering, “Can I grow my own weed plant?”, the first step is making sure you meet your local legal limits. Rules vary enormously by country, state, and even city. In Canada, Health Canada allows adults to grow up to 4 cannabis plants per household under the Cannabis Act, but plants must not be visible from a public place. British Columbia mirrors that 4-plant household cap and reminds growers to check whether their local municipality has added extra rules on top of provincial ones. In the US, states like Massachusetts allow up to 6 plants per person with a 12-plant household cap, while New York allows adults 21+ to grow up to 3 mature and 3 immature plants per person, with a household maximum of 6 mature and 6 immature. Some states are more restrictive: Illinois, for example, only permits home cultivation for registered medical patients (up to 5 plants). Many states and countries still prohibit home growing entirely. If you are unsure, check your state or provincial cannabis authority directly. This article assumes you have confirmed that cultivation is legal for you and that you are growing responsibly within those limits.
Pick your grow setup before anything else
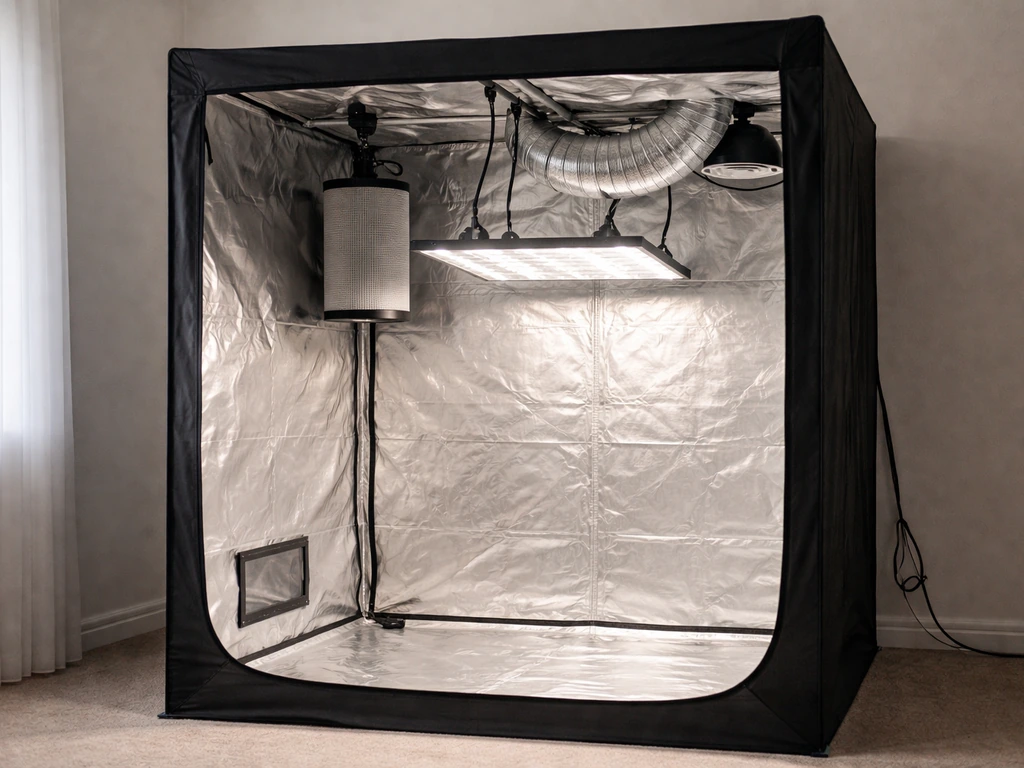
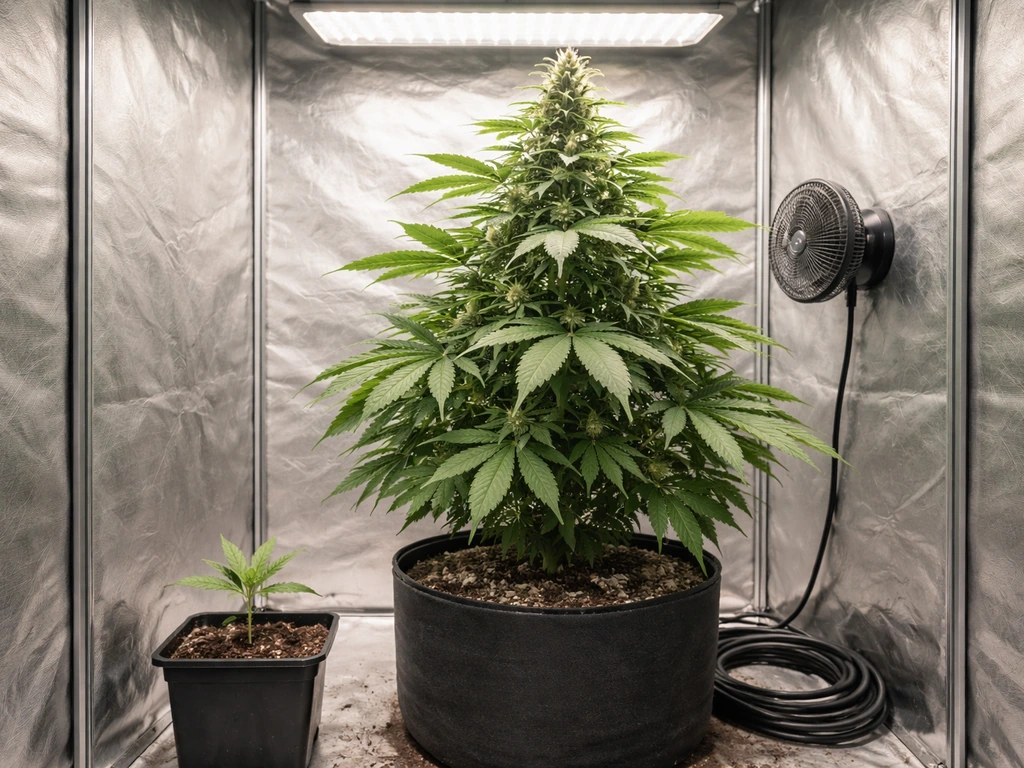
The setup you choose shapes every decision that follows, so make this call first. The three main options are indoor (grow tent or dedicated room), outdoor (garden or balcony), and hydroponic. Each has real advantages, and none is objectively better for a beginner. Outdoor growing is the lowest-cost way to get started and produces large plants, but you are at the mercy of your climate and season. Indoor growing gives you full control over light, temperature, and humidity year-round but costs more upfront. Hydroponics can grow plants faster than soil and is highly efficient, but it has a steeper learning curve for dialing in nutrients and pH. For most first-time growers, a 2x4 or 4x4 foot grow tent indoors with a quality LED light is the most forgiving and controllable starting point.
Your basic indoor setup checklist
- Grow tent (4x4 ft is a practical starter size for 1 to 4 plants)
- Full-spectrum LED grow light sized to your tent (aim for roughly 30 to 50 watts of actual draw per square foot)
- Inline fan and carbon filter: match the fan's CFM rating to your tent volume with a buffer for ducting losses
- Small oscillating clip fan for airflow inside the tent
- 5-gallon fabric pots (these prevent overwatering and promote healthy roots)
- Quality potting mix or coco coir substrate
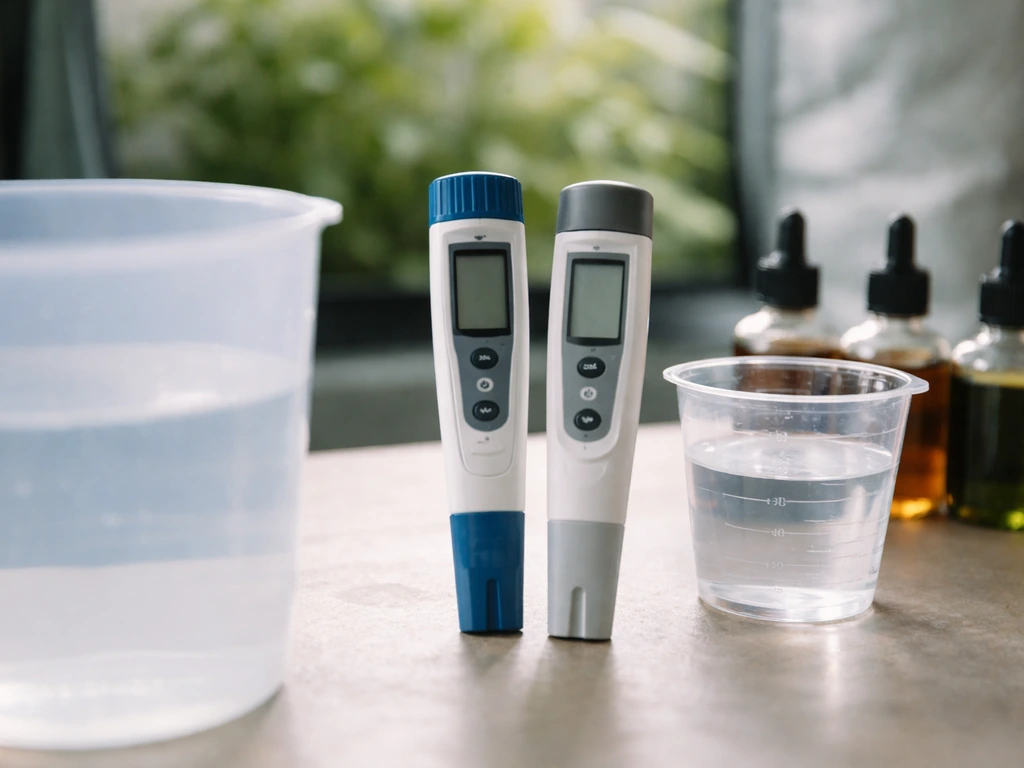
- pH meter and a basic EC/TDS meter
- pH-up and pH-down solution
- Nutrients (a three-part base nutrient set covers most grows)
- Timer for your lights
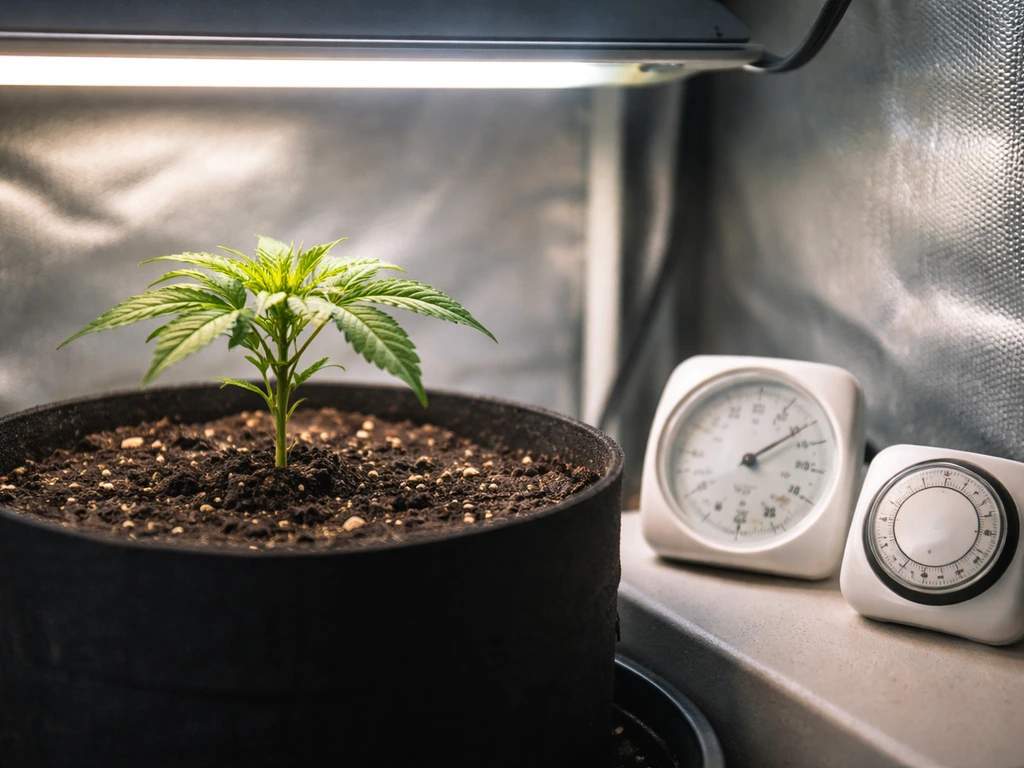
- Thermometer and hygrometer
The carbon filter is not optional if you have neighbors or live in an apartment. It attaches to your inline fan, runs air through activated carbon, and eliminates virtually all odor. Set it up so the tent maintains negative pressure, meaning air is always being pulled out rather than pushed in. That keeps smells contained. Once your tent is assembled and your light and ventilation are running, you are ready to start your plant.
Germination: getting your seed or clone started
You can start from either a seed or a clone (a rooted cutting taken from a mature plant). You can try growing from dried bud, but it is less reliable than starting from a seed or a clone. Seeds are more accessible for most beginners and let you start from scratch with a predictable genetics history. Clones skip the seedling phase and save a few weeks, but they also carry over any pests or disease from the mother plant, so source them carefully.
How to germinate a cannabis seed
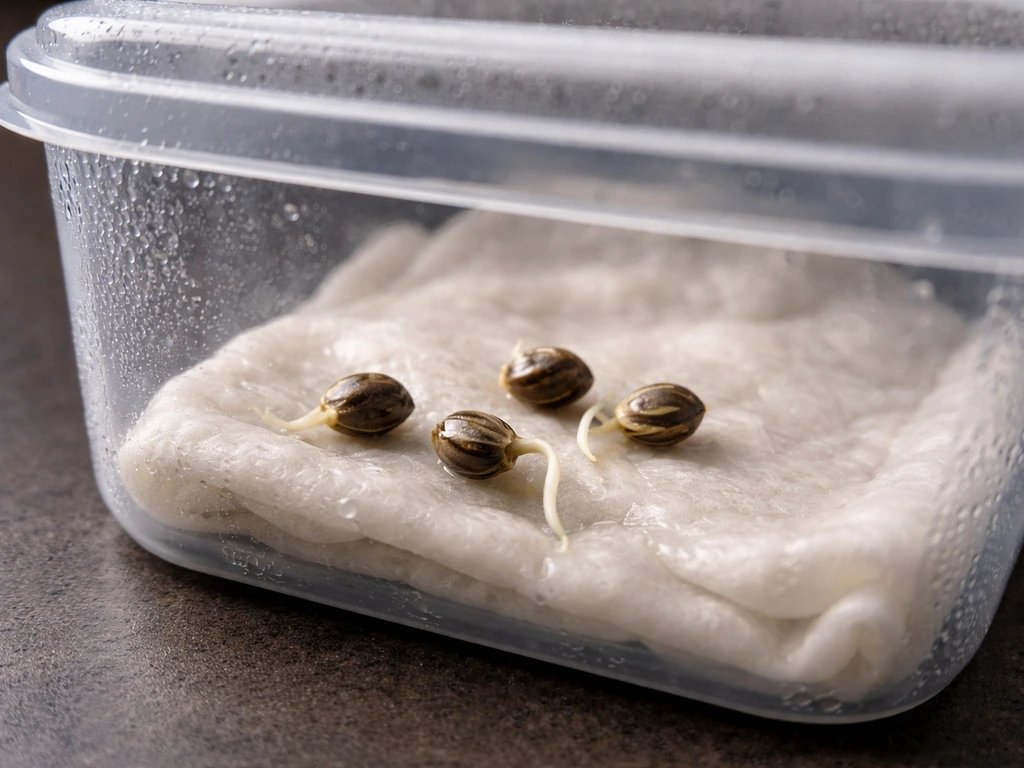
- Soak the seed in a glass of plain, room-temperature water for 12 to 24 hours until it sinks.
- Transfer it to a folded, damp (not soaking wet) paper towel inside a sealed plastic bag or between two plates.
- Keep it in a warm, dark spot at 75 to 85°F (24 to 30°C). This temperature range is the sweet spot for seed germination.
- Check every 12 hours. A taproot should appear within 24 to 72 hours.
- Once the taproot is about 1/4 to 1/2 inch long, plant it taproot-down about 1/2 inch deep in moist (not wet) seedling mix.
- Keep humidity high (65 to 70%) and use a seedling dome or humidity dome if you have one.
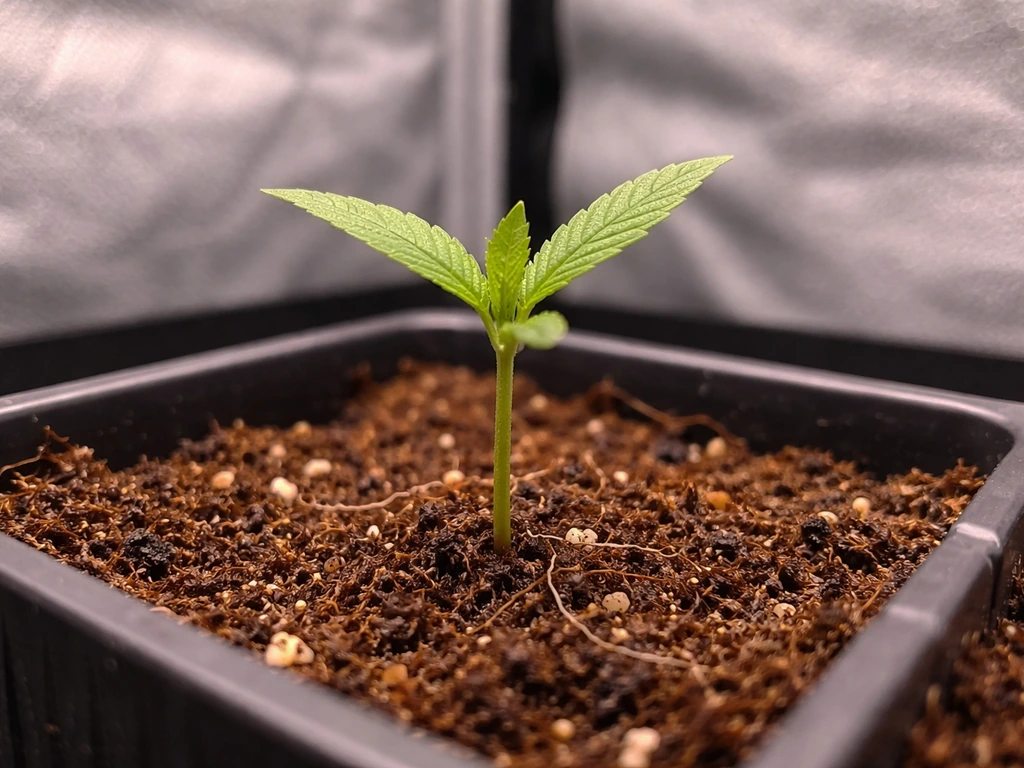
- Your seedling should break the surface in 2 to 5 days. Start your light at 18 hours on, 6 hours off.
In the first week, water very lightly around the base of the seedling using a spray bottle. The roots are tiny and the biggest mistake most beginners make here is overwatering. Let the top inch of soil dry out before watering again. For the first 1 to 2 weeks, the seedling lives off nutrients stored in the seed itself, so hold off on any added fertilizer during this phase.
Starting from a clone
If you are starting with a rooted clone, place it directly into a small container (1 to 2 gallons) with moist potting mix and put it straight under your veg light at 18/6. Keep humidity at 65 to 70% for the first few days while the clone gets established. Once you see new growth pushing out, the roots have taken hold and you can treat it like a normal vegging plant.
Vegetative growth: building a strong plant
Vegetative growth is the phase where your plant builds its structure: roots, stems, branches, and leaves. This is the foundation that your eventual harvest sits on. A plant that goes into flower strong and healthy will almost always outperform one that was stressed in veg. Most growers veg their plants for 4 to 8 weeks, though autoflowering strains handle this phase on their own schedule regardless of light.
Light during veg
Photoperiod plants (the most common type) need more than 12 hours of light per day to stay in veg. The standard schedule is 18 hours on, 6 hours off. Keep your LED at the manufacturer-recommended height, which is usually 18 to 24 inches above the canopy during veg. If the plant is stretching tall and thin, the light is too far away. If tips are bleaching or curling, it is too close. Aim for a leaf surface temperature around 77 to 82°F and an ambient tent temperature of 70 to 85°F.
Environment targets for veg
| Parameter | Target Range |
|---|---|
| Temperature (lights on) | 70 to 85°F (21 to 29°C) |
| Temperature (lights off) | 65 to 75°F (18 to 24°C) |
| Relative humidity | 50 to 70% |
| Light schedule (photoperiod) | 18 hours on / 6 hours off |
| CO2 (ambient) | 400 to 700 ppm (no enrichment needed at home scale) |
| Airflow | Gentle movement across all leaves, no hard wind |
Basic training techniques

Training your plant during veg can meaningfully increase your yield without adding equipment. The two simplest techniques for beginners are low-stress training (LST) and topping. LST involves gently bending branches outward and securing them with soft ties so the plant spreads horizontally. This exposes more bud sites to direct light. Topping means cutting the main growing tip above a node once the plant has 4 to 5 nodes. It creates two main colas from one and produces a bushier structure. Do topping at least 1 to 2 weeks before you plan to flip to flowering so the plant has time to recover.
Flowering: when the buds actually grow
For photoperiod strains, flowering is triggered by reducing light to 12 hours on and 12 hours off. This mimics the shortening days of late summer and tells the plant it is time to reproduce. Autoflowering strains flip to flower automatically at around 3 to 5 weeks old regardless of light schedule, which makes them a popular choice for beginners who want a simpler timeline.
The flowering timeline
Most indica-dominant strains flower in 8 to 9 weeks. Most sativa-dominant strains take 10 to 12 weeks or more. Autoflowers finish in 8 to 11 weeks from seed, total. In the first 2 weeks of flowering (the stretch period), expect your plant to grow 50 to 100% taller. Plan your light height accordingly. By weeks 3 to 4, you will see white pistils forming clusters that become buds. From week 5 onward, buds start to swell and fatten. This is when your environment settings and nutrient inputs matter most.
Environment during flower
| Parameter | Target Range |
|---|---|
| Temperature (lights on) | 65 to 80°F (18 to 27°C) |
| Temperature (lights off) | 60 to 70°F (15 to 21°C) |
| Relative humidity | 40 to 50% (drop to 35 to 45% in late flower) |
| Light schedule | 12 hours on / 12 hours off (strict darkness during off period) |
| Airflow | Good circulation, especially around dense bud sites |
Humidity control in flowering is critical. High humidity above 55% in late flower is the main cause of bud rot (botrytis), which can destroy an entire harvest in days. If your tent humidity climbs, add a small dehumidifier or increase your exhaust fan speed. The dark period must be completely dark: even a brief light leak can cause stress and, in some strains, trigger hermaphroditism, where the plant produces male pollen sacs alongside buds.
Nutrients, pH, and watering: the details that make or break a grow
Cannabis needs three primary macronutrients: nitrogen (N), phosphorus (P), and potassium (K), plus a range of secondary and micronutrients. In veg, you want higher nitrogen relative to P and K to fuel leafy growth. In flower, you scale nitrogen down and bring P and K up to support bud development. Most bottled nutrient lines walk you through this with a feed chart, and following the chart at half to three-quarters strength is safer than following it at full strength when starting out.
Feeding schedule overview
| Growth Stage | N-P-K Focus | EC Target (soil) | Notes |
|---|---|---|---|
| Seedling (weeks 1 to 2) | None or very light | 0.4 to 0.8 mS/cm | Plain water or very dilute feed only |
| Early veg (weeks 3 to 5) | High N, moderate P/K | 0.8 to 1.2 mS/cm | Increase gradually as plant grows |
| Late veg (weeks 6 to 8) | High N, moderate P/K | 1.2 to 1.6 mS/cm | Prepare for flip |
| Early flower (weeks 1 to 3) | Moderate N, increasing P/K | 1.4 to 1.8 mS/cm | Begin transition nutrients |
| Mid to late flower (weeks 4 to harvest) | Low N, high P/K | 1.6 to 2.0 mS/cm | Use bloom boosters if desired |
| Flush (final 1 to 2 weeks) | Plain pH-adjusted water | Under 0.5 mS/cm | Optional but widely practiced |
pH: the variable most beginners ignore and then regret
pH determines whether your plant can actually absorb the nutrients you are feeding it. Even a perfect nutrient solution is useless if the pH is wrong. For soil grows, target a pH of 6.0 to 7.0, with 6.3 to 6.8 being the sweet spot. For coco coir or hydroponic grows, target 5.5 to 6.5, ideally 5.8 to 6.2. Measure the pH of your water after adding nutrients, then adjust with pH-up or pH-down solution before feeding. Test runoff water occasionally too: if it is drifting below 5.8 or above 7.0, your root zone is getting out of range. I got yellow leaves on my second grow before I realized my tap water was sitting at pH 7.8 and I had been inadvertently locking out iron and magnesium for weeks.
Watering: when and how much
The single most common beginner mistake is overwatering. Cannabis roots need oxygen as much as they need water, and constantly wet soil suffocates them. The simple lift test works well: lift your pot when dry and when fully watered so you learn the weight difference. Water when the pot feels light and the top inch of soil is dry. When you water, water thoroughly until you get about 15 to 20% runoff from the bottom of the pot, then let the medium dry out before watering again. In veg with a 5-gallon pot, this usually means watering every 2 to 3 days depending on your environment. In late flower with a dense root ball, it could be every day.
Troubleshooting: what goes wrong and how to fix it
Almost every grow hits at least one snag. The key is catching problems early and not overreacting with multiple simultaneous fixes. Change one variable at a time, then observe for 48 to 72 hours before changing another.
Common problems and fixes
| Problem | Likely Cause | Fix |
|---|---|---|
| Drooping, clawing leaves | Overwatering or underwatering | Check pot weight and soil dryness. Let dry out more between waterings if overwatering; water more frequently if underwatering |
| Yellowing lower leaves | Nitrogen deficiency or pH lockout | Check runoff pH first; if in range, add a nitrogen-rich feed |
| Brown leaf tips | Nutrient burn or heat stress | Reduce nutrient concentration; check light distance and temperature |
| Pale, bleached leaves near light | Light burn | Raise the light; check PPFD with a meter if you have one |
| Tall, thin, stretching plant | Insufficient light intensity | Lower the light (while staying within safe range) or increase light intensity |
| White powdery coating on leaves | Powdery mildew | Improve airflow, reduce humidity below 50%, apply potassium bicarbonate spray |
| Gray fuzzy patches on buds | Bud rot (botrytis) | Remove affected material immediately, lower humidity to below 45%, increase airflow |
| Tiny moving dots on leaves, webbing | Spider mites | Introduce predatory insects or use neem oil or insecticidal soap spray in veg |
| Yellow sticky insects on leaves | Fungus gnats or aphids | Allow soil to dry more thoroughly; use yellow sticky traps; apply Bacillus thuringiensis (BTi) to soil for gnats |
| Male pollen sacs appearing on female | Hermaphroditism from light stress | Ensure 12-hour darkness is completely uninterrupted; remove hermaphrodites to protect other plants |
Hermaphrodites deserve a specific note: a plant that grows both male pollen sacs and female buds will pollinate itself and your other plants, filling all your buds with seeds. It is usually triggered by light stress during the dark period in flower. Inspect plants every few days in early flower, and if you find a plant producing banana-shaped pollen sacs (nanners) or proper round pollen sacs, either remove it from the room or remove the sacs carefully before they open. When in doubt, pull the plant.
Harvest timing, drying, curing, and storage
Harvesting too early is one of the most common beginner mistakes, and it shows up as harsh, headache-inducing weed with less effect. The most reliable harvest indicator is trichome color, checked with a jeweler's loupe (60x) or a digital microscope. Trichomes are the tiny crystal-like structures covering the buds. When they are mostly clear, the plant is not ready. When they turn milky white (cloudy), THC is at peak. When some amber trichomes appear (20 to 30% amber is a common target), the high shifts slightly more sedative. Most growers aim for mostly milky with a small percentage of amber as their sweet spot. Secondary indicators include pistil color (70 to 90% of white hairs turning orange or red) and calyx swelling.
How to harvest
- Stop feeding nutrients and water with plain pH-adjusted water for the final 1 to 2 weeks (the flush, if you practice it).
- On harvest day, cut branches or the whole plant at the base.
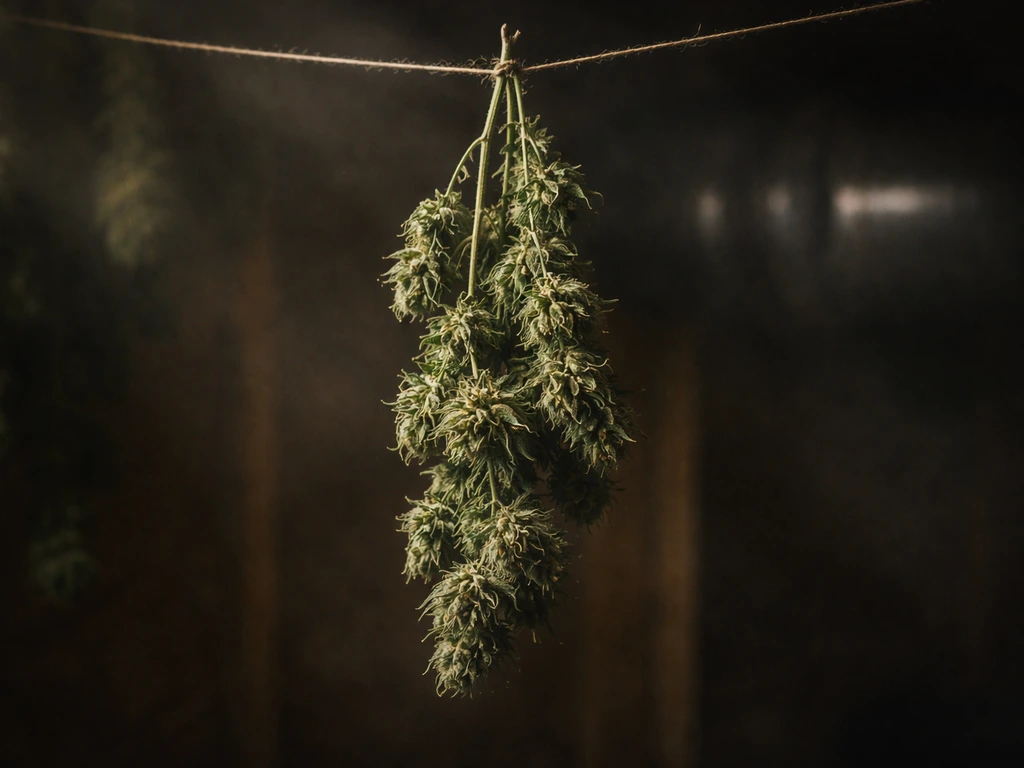
- Remove large fan leaves immediately. You can wet-trim (remove all leaves now) or dry-trim (trim after drying). Both work; wet-trimming is easier but messier.
- Hang branches upside down in a dark, ventilated room at 60 to 65°F (15 to 18°C) with 50 to 60% relative humidity.
- Dry slowly for 7 to 14 days. The slower the dry, the better the smoke. Small buds may dry faster; check daily from day 7 onward.
- Buds are ready to jar when the smallest stems snap instead of bend and the outside of the bud feels dry but the inside still has a little moisture.
Curing for better quality
Curing is where good weed becomes great weed. It finishes drying the interior of the bud evenly, breaks down chlorophyll, and develops aroma and smoothness. Place your dried buds in wide-mouth glass mason jars, filling them about 75% full. For the first 2 weeks, open the jars (burp them) for 10 to 15 minutes once or twice a day to let moisture equalize and release. Use a hygrometer inside the jar: you want to hold 55 to 65% RH in the jar, which corresponds to the ASTM D8197 water activity target of 0.55 to 0.65 for dry cannabis flower. If the jar reads over 70% RH, leave it open longer to dry. If it reads below 50%, add a Boveda or similar humidity pack. After 2 weeks of daily burping, drop to every few days. Most growers cure for a minimum of 4 weeks, but 6 to 8 weeks produces noticeably better results.
Long-term storage
Once cured, store jars in a cool, dark place away from heat and UV light. Avoid the refrigerator (too much humidity fluctuation) and freezer unless you are storing for more than a year and use specialized containers. A dark cupboard or drawer at room temperature works well for up to 6 months. Keep jars airtight and do not open them unnecessarily. Properly cured and stored cannabis can hold its quality for 12 months or more.
Your next steps
If you are working with a small or limited space, growing a compact plant is a real skill in itself, and there are specific techniques built around that. If you prefer to avoid synthetic inputs entirely, a natural or organic growing approach using living soil or compost teas is a very rewarding path. If you want to learn how to grow a weed plant naturally, focus on organic inputs like living soil and compost teas and build healthy soil first natural or organic growing approach. And if you are still deciding whether home growing makes sense for your situation at all, thinking through the costs, space, and effort upfront saves a lot of frustration later. Every grow teaches you something the last one did not. Start simple, take notes, dial in one variable at a time, and the second grow is almost always dramatically better than the first.
FAQ
Do I need different nutrients for soil versus coco or hydroponics?
Yes. Soil mixes can buffer pH and nutrients longer, while coco and hydro need more frequent, carefully pH-managed feeding. If you switch mediums, also switch nutrient strategy, especially for pH targets and how often you run feed, otherwise you can get deficiency or lockout even if you follow the chart.
How do I know if I’m overfeeding instead of underfeeding?
Watch for salt buildup and tip burn, not just leaf color. If runoff EC or salts are rising, or new growth is clawing or edges are burning, you are likely too strong or not flushing. In early veg, it is usually safer to feed lighter than the recommended full strength, then adjust after 3 to 5 days.
What’s the best way to deal with pH drift over time?
Recheck pH after you mix, then again just before feeding. If your water is high in minerals or your reservoir sits for long periods, pH can shift, particularly in coco and hydro. Stir and measure frequently in larger reservoirs, and consider using smaller batches for stability.
How can I reduce odor in a more apartment-friendly way beyond a carbon filter?
Make sure all tent seams and intake gaps are sealed, and confirm the fan always runs on negative pressure (no air leaks when the fan is running). Also keep carbon fresh and avoid storing wet plant material near living spaces, since aroma can build during trimming and drying.
Can I reuse soil from a previous grow?
You can, but it requires serious management. Old soil often contains accumulated salts, depleted nutrients, and possible pests or pathogens. For reused soil, you typically need to amend with fresh nutrients, recharge with organic inputs, and consider sterilization depending on your grow method and risk tolerance.
Should I trim leaves in flowering, and how much is too much?
Light, selective defoliation can improve airflow and reduce shadowing, but removing too much early can slow recovery and reduce yield. Focus on leaves blocking bud sites from light, avoid stripping fan leaves immediately after you flip unless plants are clearly overloaded, and do any trimming gradually over several days.
What should I do if my plant hermies despite good dark periods?
First, increase stress-proofing immediately: ensure the dark period is truly uninterrupted, improve cooling to reduce heat stress in the dark cycle, and check for light leaks from LEDs, reflective surfaces, and indicator lights. If you spot pollen sacs, remove the plant or the sacs right away, because even a small number can seed the whole room.
How do I prevent bud rot beyond just lowering humidity?
Also manage airflow inside the canopy and avoid direct humid air pockets around dense buds. Keep oscillating fans circulating without blasting one spot constantly, remove dying leaves that hold moisture, and consider earlier defoliation of the densest interior growth in late flower.
What’s the safest way to water when I’m using fabric pots or very large pots?
Watering scales with pot size and airflow. Use the lift test for fabric pots, then water until you get consistent runoff, not a small splash. In large containers, the top surface can feel dry while the root zone is still wet, so rely on pot weight and timing rather than surface dryness alone.
How long should I dry before curing, and what changes if my drying environment is different?
Dry duration depends on temperature, airflow, and humidity, not a fixed number of days. Dry until stems snap rather than bend, then move to curing jars. If your room is warmer or drier, drying can finish too fast, trapping chlorophyll flavors, so slow things down by reducing temperature and airflow.
Can I harvest in stages, instead of all at once?
Yes, stagger harvesting is useful when top buds mature earlier than lower buds. However, drying rates and jar monitoring become more complex, so label batches and keep them separate. If lower buds are less mature, expect a different potency and curing timeline for each batch.
What records should I keep to improve the next grow fastest?
Track at least: seed/clone origin, dates for germination and flip, daily temp and humidity ranges, watering dates and volume, pH in and runoff pH (if you measure), nutrient brand and strength, and any interventions. The fastest learning comes from correlating leaf symptoms with what changed 2 to 7 days earlier.
Is a grow light schedule for flowering always exactly 12/12?
For photoperiod strains, yes, but ensure the timer is stable and there are no accidental light interruptions during the dark period. If you need to access the tent, plan it so you can do tasks without opening bright lights into the room, and consider a blackout curtain or goggles-free workaround depending on your setup.
Next Article
What Do You Need to Grow a Weed Plant at Home
Beginner home cannabis guide: legal basics, seeds, indoor or outdoor setup, light, climate, nutrients, tools, checklist.