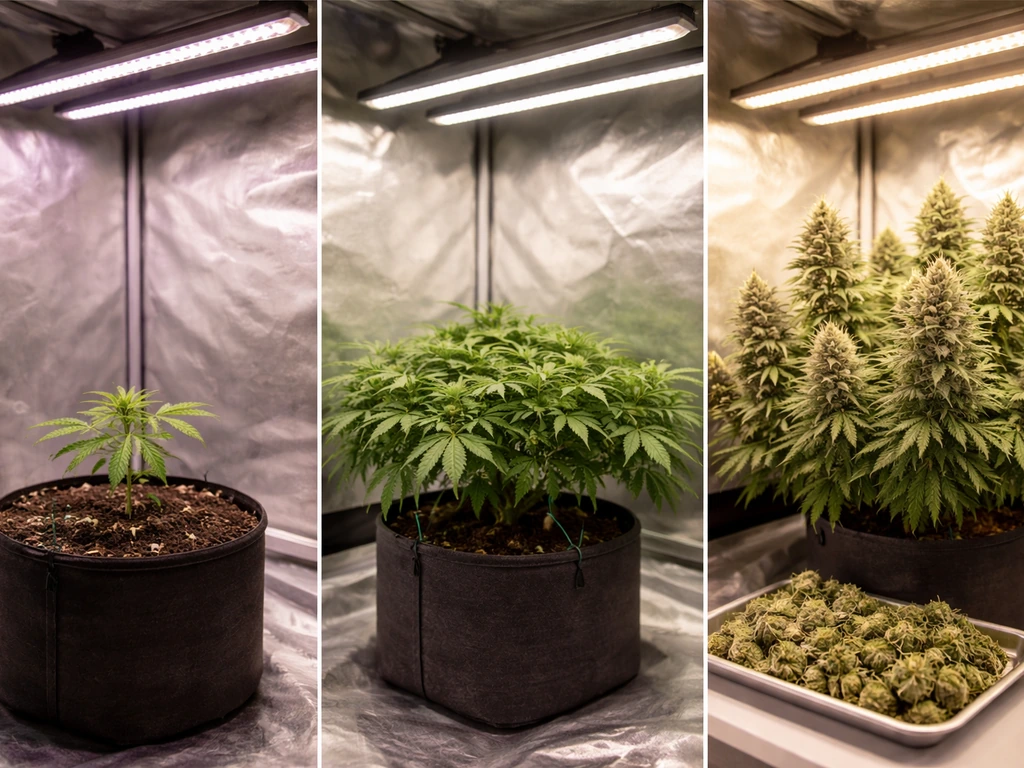
Indica cannabis grows well indoors because its shorter stature (typically 60–120 cm in a managed indoor environment), compact branching, and faster flowering cycle (7–9 weeks) suit the space and time constraints most home growers are working with. Pick a proven indica-dominant strain, set up a properly ventilated space with the right light intensity for each growth stage, keep temperature between 20–26°C (68–79°F) and relative humidity stage-appropriate, feed a balanced nutrient schedule, and you can realistically harvest 30–100+ grams per plant depending on your setup and skill level.
How to Grow Indica Indoors: Complete Step-by-Step Guide

Marcus Holbrook
19 Jul 2026
Who this guide is for and what you'll learn
This guide is written for home growers at every level, from someone who has never germinated a seed to a hobbyist looking to tighten up their technique. If you are brand new, you will find step-by-step setup instructions, beginner checklists, and honest notes on the mistakes I made early on so you can skip them. If you have grown before, the sections on training, environmental control, and troubleshooting will help you push yields higher and solve problems faster. By the end you will know how to plan and build your indoor grow space, choose an indica strain, manage the plant from seed or clone through harvest, dry and cure your flower correctly, and keep the whole operation safe and legal.
Check the law before you grow anything
Home cultivation rules vary enormously by country, state or province, and even municipality. Getting this wrong carries real legal consequences, so treat this section as the first step, not an afterthought.
Canada
Under Canada's Cannabis Act, adults 18 or 19 and older (depending on province) may cultivate up to four plants per residence for personal use. Medical personal production requires registration with Health Canada and comes with its own plant-count rules tied to your authorized daily amount. Health Canada's practical booklet 'Growing cannabis at home safely' is the best single reference for Canadian growers and covers registration, plant limits, and structural considerations. If you plan to modify electrical wiring or add a dedicated circuit for your lights, your province or municipality may require a building permit.
United States
Rules differ state by state and can vary further by city or county. California (Prop 64 / Health and Safety Code §11362.2) permits adults 21 and older to cultivate up to six live plants per private residence, though local jurisdictions can restrict that further. Colorado (CRS §18-18-406) allows up to six plants per adult and up to 12 per residence, but requires plants to be in a locked, enclosed space. Several states still prohibit home cultivation entirely. Always check your state's current statute and your local municipal code before spending a dollar on equipment.
Europe
The legal picture across the EU is fragmented. Some countries have active pilot programs or decriminalization frameworks; others treat personal cultivation as a criminal offense. The European Union Drugs Agency (EUDA, formerly EMCDDA) maintains current summaries of member-state policies, which is the best starting point. Always cross-reference the national law of your specific country before proceeding.
Electrical and fire safety
Indoor grow operations have been linked to house fires, overloaded circuits, and illegal wiring hazards, as documented in U.S. Fire Administration technical reports. Use GFCI-protected outlets for any equipment near water, match your circuit load to your equipment draw, use fixtures rated for damp locations, and never run extension cords as permanent wiring. If you need a new circuit, hire a licensed electrician. Respiratory risks are also real: poor ventilation in an enclosed grow allows mold spores and bioaerosols to accumulate. Refer to blank" rel="noopener noreferrer">Interpretation IC 62.1-2010-6 of ANSI/ASHRAE Standard 62.1 (ASHRAE) for guidance on ventilation rates and control measures to reduce indoor bioaerosol and mold accumulation in enclosed grow spaces. A peer-reviewed study published on PMC documented fungal and pesticide respiratory hazards in indoor cannabis grows, which is exactly why proper exhaust ventilation is non-negotiable, not optional.
Indica vs sativa: what actually matters for indoor growing
It is worth being honest here: genomic research published in PLOS ONE (Sawler et al., 2015) and a 2021 Nature Plants study both found that the 'indica' and 'sativa' labels you see on seed bank websites are not genetically precise categories. Cannabis labelling is associated with genetic variation in terpene synthase genes (Nature Plants, 2021). The differences in chemotype (cannabinoid and terpene profile) map to a relatively small number of gene loci, not a clean genome-wide split. What the labels do reliably predict in practice are morphological traits, growth patterns, and general flowering behavior, which is why they are still useful for indoor planning. When you buy an 'indica-dominant' strain from a reputable breeder, you are largely buying a specific growth pattern and flowering window, not a guaranteed chemical fingerprint.
| Trait | Indica-dominant | Sativa-dominant |
|---|---|---|
| Typical height indoors (unmanaged) | 60–120 cm | 120–200+ cm |
| Internodal spacing | Short, compact | Long, stretchy |
| Flowering period | 7–9 weeks | 9–14+ weeks |
| Leaf shape | Broad, dark green | Narrow, lighter green |
| Canopy management needed | Low to moderate | High (training essential) |
| Yield per plant (general range) | 30–100+ g | 50–150+ g (takes longer) |
| Odor intensity | Moderate to high | Moderate to very high |
| Best for beginners? | Yes, generally | More challenging indoors |
For indoor growing specifically, indica-dominant strains win on practicality. The shorter height fits standard grow tents (60x60 cm to 120x120 cm), the faster flowering window means quicker harvests, and the denser branching structure responds well to low-stress training. If you are also curious about growing sativa indoors, the height and time management challenges are significantly greater. Sativa growing is a genuinely different project and worth reading about separately. For a dedicated walkthrough, see how to grow sativa.
Choosing your indica strain and deciding between seed or clone
Picking a strain
For beginners, prioritize strains described by breeders as forgiving, mold-resistant, and stable. Northern Lights, Blueberry, OG Kush, and Critical Mass are widely recommended starting points because they have predictable growth behavior, are available from multiple reputable seed banks as feminized seeds, and have proven track records in home grow reports. Autoflowering indica strains are another strong beginner option: they flower based on age rather than light schedule, which simplifies environmental management considerably. The tradeoff is that autoflowers generally yield less than photoperiod plants in the same space.
Seed vs clone
Seeds are the easier starting point if you are not sourcing from a trusted mother plant. Feminized seeds eliminate the need to sex plants and remove males before they pollinate your crop. Regular seeds produce roughly 50% males, which you will need to identify and remove during early vegetative growth. Clones let you skip germination and guarantee the sex and genetics of the plant, but they can also carry pests or disease from the mother. If you take clones from a healthy mother plant you already own, the risk is low. If you source clones from someone else's grow, inspect them carefully and quarantine for at least a week before introducing them to your space.
Planning your grow: space, goals, and timeline
The single most useful thing you can do before buying any equipment is to decide exactly where you are growing and how much of that space you want to dedicate to plants. Your space determines your light size, which determines your heat load, which determines your ventilation requirements. Everything flows from that first decision. A standard 120x120x200 cm grow tent is the most popular starting point for home growers because it fits in a spare bedroom, closet, or basement corner and is large enough for four to six indica plants under a single 400–600W equivalent LED fixture. For a full step-by-step walkthrough on how to grow canna plants, see our detailed beginner's guide.
Realistic yield and timing by grow space and skill level
| Setup | Skill Level | Plants | Veg Time | Flower Time | Expected Yield |
|---|---|---|---|---|---|
| 60x60 cm tent, 200W LED | Beginner | 1–2 | 3–4 weeks | 7–9 weeks | 15–40 g per plant |
| 90x90 cm tent, 300W LED | Beginner/intermediate | 2–3 | 4–5 weeks | 7–9 weeks | 25–60 g per plant |
| 120x120 cm tent, 600W LED | Intermediate | 4–6 | 4–6 weeks | 7–9 weeks | 40–100 g per plant |
| 240x120 cm tent, 2x 600W LED | Experienced | 8–10 | 4–6 weeks | 7–9 weeks | 60–120+ g per plant |
| Dedicated grow room, 1000W+ LED | Experienced | 10+ | Variable | 7–9 weeks | 100+ g per plant |
These numbers assume a soil grow with adequate nutrients and no major problems. Hydroponics can push yields 20–30% higher in the same space given the same light, but the learning curve is steeper. Total time from seed to harvest for a photoperiod indica is typically 14–20 weeks: 1–2 weeks germination/seedling, 4–6 weeks vegetative, 7–9 weeks flowering, plus 10–14 days drying and 2–4 weeks curing. Plan for the full process, not just the growing part.
Building your indoor setup step by step
- Choose your enclosure: a fabric grow tent is the most practical option for most home growers. Tents are light-proof, reflective internally (usually Mylar), easy to ventilate, and available in sizes to match almost any budget or space. A converted closet or dedicated room works well too but requires you to paint walls flat white or line them with reflective material and seal light leaks yourself.
- Position the tent or room: place it where ambient temperature is relatively stable, ideally 18–24°C year-round. Garages can work but temperature extremes in summer and winter will cause problems. Avoid direct sunlight on the exterior of the tent.
- Select your lighting: for most home growers in 2026, a quality quantum-board LED is the best choice. Research published in Frontiers (2021) confirmed that cannabis yield and potency respond differently to PPFD levels across growth stages. Target canopy PPFD of roughly 200–400 µmol/m²/s during vegetative growth and 600–1000 µmol/m²/s during flowering. Measure with a quantum PAR meter rather than guessing from wattage claims. High-end HPS fixtures are still effective but generate more heat and use more electricity per unit of usable light delivered.
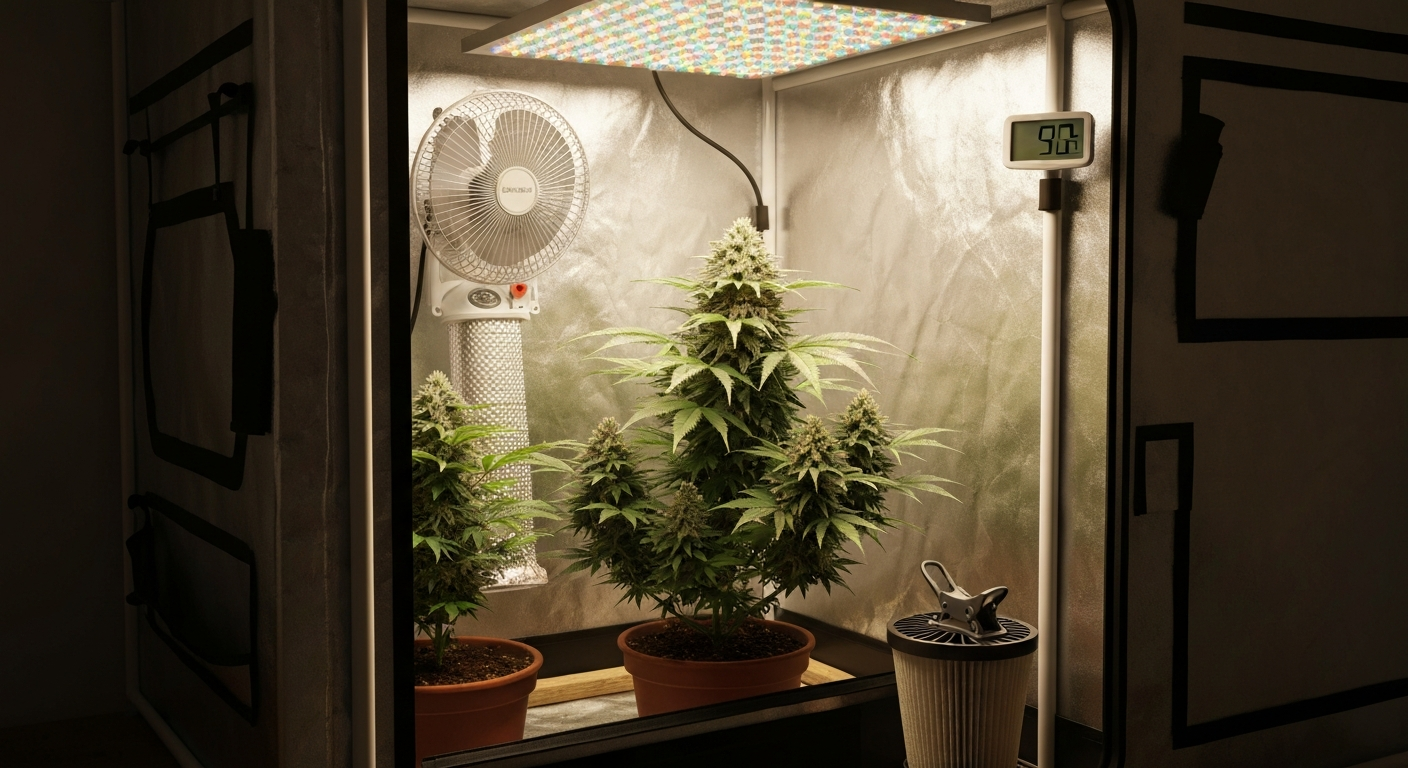
- Set up ventilation: size your inline exhaust fan to turn over your grow-space volume every 1–3 minutes (20–60 air changes per hour). Add 25–40% to that CFM number to account for the airflow resistance of a carbon filter and ducting bends. A carbon filter on the exhaust controls odor, which matters for both discretion and basic neighborly courtesy. A small oscillating fan inside the tent strengthens stems and prevents hot/humid air from pooling around the canopy.
- Install temperature and humidity monitoring: a digital thermo-hygrometer with a min/max log is the minimum. Knowing your nighttime lows and daytime peaks is essential for diagnosing most environmental problems before they become plant problems.
- Choose and prepare your growing medium: more detail in the next section, but decide now between soil, coco coir, or hydro so you can source the matching nutrients and containers.
- Set up your water supply: pH-adjusted water is non-negotiable. Cannabis in soil prefers a root-zone pH of 6.0–7.0 (ideally 6.2–6.8); in coco or hydro the target is 5.5–6.2. Buy a reliable digital pH pen and calibration solution before your first watering.
- Run a full dry test before plants go in: set up all equipment, run lights and fans for 24–48 hours, and monitor temperature and humidity. Identify and fix problems now rather than after you have live plants depending on the system.
Growing medium: soil vs hydroponics
Soil is the most forgiving medium for beginners and the one I recommend if this is your first grow. A good cannabis-specific potting mix (or a quality peat/perlite blend with added mycorrhizae) provides a natural buffer against pH swings and nutrient fluctuations, which means your plants will tolerate minor mistakes better. Coco coir is technically a soilless medium that behaves more like hydroponics: it is inert, requires full nutrient supplementation from the start, but drains and aerates extremely well. Pure hydroponic systems (deep water culture, nutrient film technique, flood and drain) deliver nutrients directly to roots and can significantly accelerate growth, but demand precise monitoring of pH and electrical conductivity (EC) and less tolerance for errors. Choosing the right soil is its own detailed topic worth researching before your first grow. For detailed guidance on what soil to grow cannabis and how to mix or choose potting media, see our soil selection and potting mix guide.
| Factor | Soil | Coco Coir | Hydroponics (DWC/NFT) |
|---|---|---|---|
| Beginner-friendliness | High | Medium | Low |
| Nutrient buffering | Good | None (requires full feed) | None (full control required) |
| Watering frequency | Every 2–4 days | Daily or twice daily | Continuous/automated |
| Yield potential | Good | Very good | Highest |
| Equipment cost | Low | Low-medium | Medium-high |
| pH management difficulty | Low (6.0–7.0) | Medium (5.5–6.2) | High (5.5–6.2, constant) |
| Risk if something goes wrong | Lower | Medium | Higher |
| Best for | First-time growers | Intermediate growers | Experienced growers |
Feeding and watering your indica
Cannabis needs three primary macronutrients: nitrogen (N), phosphorus (P), and potassium (K). During vegetative growth, the plant needs more nitrogen to build leaves and stems. Once you flip to flowering, it needs less nitrogen and significantly more phosphorus and potassium to support bud development. Most commercially available cannabis nutrient lines are formulated around this, and their feeding charts are a reliable starting point. I usually start at 50–75% of the manufacturer's recommended dose and adjust up based on plant response rather than going full dose from the start. Nitrogen toxicity (dark, clawing leaves) and nutrient burn (brown leaf tips) are far more common beginner mistakes than underfeeding.
Example nutrient schedule (soil, photoperiod indica)
| Stage | Weeks | N-P-K Focus | EC Target (mS/cm) | Notes |
|---|---|---|---|---|
| Seedling | 1–2 | Minimal/plain water | 0.4–0.8 | Most quality soils contain enough for seedlings; no additional feed needed |
| Early veg | 3–4 | High N, low P/K | 0.8–1.2 | Introduce base nutrients at 50% dose |
| Mid-late veg | 5–6 | Balanced N-P-K | 1.2–1.6 | Increase to 75–100% dose; watch for leaf color response |
| Early flower (weeks 1–3) | 7–9 | Reduce N, increase P/K | 1.4–1.8 | Transition or 'bloom' nutrients; stop any nitrogen-heavy base |
| Mid flower (weeks 4–6) | 10–12 | Low N, high P/K | 1.6–2.0 | Bloom boosters if using; maintain consistent watering |
| Late flower / flush (weeks 7–9) | 13–15 | Minimal nutrients | 0.4–0.8 | Flush with plain pH-adjusted water for final 1–2 weeks before harvest |
Water when the top 2–3 cm of soil feel dry, or when pots feel noticeably lighter than they did after the last watering. Overwatering is one of the most common beginner killers: cannabis roots need both water and oxygen, and waterlogged soil starves roots of air. In coco or hydro, follow the medium's specific watering/feeding frequency guidelines, which will be higher than in soil.
Environmental targets through each growth stage
| Stage | Daytime Temp (°C) | Night Temp (°C) | Relative Humidity (%) | Light Schedule |
|---|---|---|---|---|
| Seedling/clone | 22–26 | 20–24 | 65–75 | 18/6 |
| Vegetative | 22–26 | 18–22 | 50–70 | 18/6 |
| Early flower | 20–26 | 18–22 | 45–55 | 12/12 |
| Mid-late flower | 18–24 | 16–20 | 35–50 | 12/12 |
| Final 2 weeks flower | 18–24 | 16–18 | 35–45 | 12/12 |
Keeping flowering relative humidity below around 50% is particularly important for dense indica buds, which are far more susceptible to botrytis (bud rot) than loose sativa structures. Oregon OSHA guidance for cannabis workers recommends similar humidity ceilings to protect both product quality and the health of people working in the space. If your RH climbs above 55% during late flower, increase exhaust airflow and consider a dehumidifier.
Training, pruning, and height management
Indica plants are naturally compact, but training them still pays off in increased yield and better light penetration through the canopy. The goal of most training techniques is to create an even, flat canopy where multiple bud sites receive direct light rather than one tall central cola shading everything below it.
Low-stress training (LST)
LST involves bending and tying branches rather than cutting them. Start by gently bending the main stem outward and securing it to the pot edge with soft plant ties or pipe cleaners around week 3 of veg. Side branches will naturally grow upward to fill the space. Continue bending and tying new growth every few days. This is the most beginner-friendly technique because mistakes are reversible, it does not slow growth, and it works well in small tents.
Screen of Green (ScrOG)
A ScrOG uses a horizontal screen (usually 10x10 cm mesh) positioned 20–30 cm above the pots. You train branches through the screen during veg, weaving them into an even grid. When roughly 70–80% of the screen is filled, flip to 12/12 to trigger flowering. ScrOG maximizes even light distribution and is excellent for indica plants in medium-to-large tents.
High-stress training: topping and FIMming
Topping means cutting the main growing tip, which causes the plant to produce two new main colas from the node below. Done during early veg (at the 4th or 5th node), it creates a wider, bushier plant and effectively doubles your primary bud sites. FIMming (acronym for 'F* I Missed') is a related technique where you remove only about 75% of the growing tip, often producing four new shoots instead of two. Both techniques slow growth for a few days while the plant recovers, so avoid them in the last two weeks of veg. Detailed pruning techniques for cannabis plants are worth learning in depth as your grows get more advanced.
Defoliation
Removing large fan leaves that block light from lower bud sites during early and mid-flower can improve yields. I remove no more than 20–30% of leaves at a time and give the plant 3–5 days to recover before defoliating again. Stripping plants heavily during late flower is a common mistake that stresses the plant at the worst possible time.
What if your plant is too short?
Indica plants can sometimes stay very compact if light intensity is too high early on, if pot size is restrictive, or if the strain is a very short autoflower. Extending vegetative time by a week or two, raising the light slightly to reduce intensity, and transplanting to a larger container are the primary tools. If you specifically need your plants to grow taller, there are targeted techniques worth exploring for height management. If you specifically need your plants to grow taller, there are targeted techniques worth exploring for height management, see a focused guide on how to make cannabis plants grow tall for step-by-step methods and timing tips.
Flowering: triggering and managing the flip
Photoperiod indica plants flower when the daily dark period reaches 12 continuous hours. You trigger this by switching your timer from 18/6 (light/dark) to 12/12. Indica plants typically show the first pistils (white hairs) within 7–14 days of the flip. Expect a 'stretch' of 20–50% additional height during the first 2–3 weeks of flower; indica strains stretch less than sativas but still stretch. Do your final training and any major defoliation before this stretch begins. Once you are past week 3 of flowering, avoid any high-stress techniques.
During flowering, tighten environmental controls. Light leaks during the dark period can cause hermaphroditism (the plant develops both male and female flowers), which will seed your crop. Check your tent or room for light leaks after flipping to 12/12 by sitting inside in complete darkness and looking for any light penetration.
Pest, disease, and nutrient deficiency troubleshooting
| Problem | Symptoms | Likely Cause | Fix |
|---|---|---|---|
| Nitrogen deficiency | Yellowing of lower/older leaves starting at tips | Low N in feed or locked-out by pH | Check pH first; increase N in feed if pH is correct |
| Phosphorus deficiency | Purple/red stems and leaf undersides in flower | Low P or pH out of range (below 6.0) | Adjust pH to 6.2–6.8; add bloom nutrients |
| Overwatering | Drooping, clawing leaves; pot feels heavy | Too frequent watering; poor drainage | Let medium dry out; improve drainage with perlite |
| Root rot (hydro/overwet soil) | Brown slimy roots; wilting despite wet medium | Pythium fungus; poor oxygenation | Add beneficial bacteria (e.g., hydroguard); improve aeration |
| Spider mites | Fine webbing; tiny moving specks on leaf undersides | Low humidity; imported from outside/other plants | Neem oil or insecticidal soap spray; increase humidity slightly |
| Fungus gnats | Small flies near soil; larvae damage roots | Overwatered or organically rich soil | Dry out top layer; yellow sticky traps; beneficial nematodes |
| Botrytis (bud rot) | Grey/brown mold inside dense buds | High humidity above 55% during late flower | Remove affected tissue immediately; increase airflow/dehumidify |
| Powdery mildew | White powdery coating on leaves | Low airflow, high humidity, crowded canopy | Improve circulation; potassium bicarbonate or dilute hydrogen peroxide spray |
| Light burn | Bleached/white leaf tips nearest the light | Light too close; PPFD too high at canopy | Raise light; check canopy PPFD with quantum meter |
| Heat stress | Cupped, taco-shaped leaves near canopy | Temps above 28–30°C | Improve exhaust ventilation; add AC if needed |
Knowing when to harvest
The most reliable harvest indicator is trichome color, checked with a jeweler's loupe (30–60x) or a digital microscope. Clear trichomes mean the plant is not ready. Milky/cloudy trichomes indicate peak THC development. Amber trichomes signal that THC is degrading to CBN, which produces a more sedative effect. Most growers harvesting indica for its classic effect target 70–90% milky with 10–20% amber. A secondary indicator is pistil color: when roughly 70–90% of the pistils have turned from white to orange/red, the plant is in the harvest window. Use both indicators together rather than relying on either alone, and do not rely solely on the breeder's stated flowering time, which is an average, not a guarantee.
Drying and curing properly
Drying and curing account for a huge portion of your final product quality, and it is the part most beginners rush. After harvest, hang whole branches or individual buds in a dark, well-ventilated space at 15–21°C and 45–55% RH. Aim for a slow dry of 7–14 days. Buds are ready to jar when the small stems snap rather than bend. Pack loosely into glass mason jars and open them ('burp') for 15–30 minutes twice daily for the first two weeks, then once daily for weeks two through four. Curing for at least 3–4 weeks significantly improves smoothness, flavor, and aroma. Curing for 6–8 weeks is noticeably better still. Rushing this process is one of the most common mistakes I see in home grow reports.
Common mistakes and how to avoid them
- Overwatering: the single most common beginner error. Water only when the top few centimeters of soil are dry and the pot feels light.
- Skipping pH management: even a slightly off pH (below 6.0 or above 7.2 in soil) locks out nutrients and mimics deficiency symptoms. Measure and adjust every watering.
- Buying cheap, uncalibrated meters: a bad pH meter will give you false confidence. Calibrate your pen before every grow cycle with fresh calibration solution.
- Flipping to flower too early: indica plants that go into flower at less than 20–25 cm will be very small at harvest. Give them enough vegetative time to fill your space.
- Ignoring light leaks after the 12/12 flip: even brief light interruptions during the dark period can cause hermaphroditism and seeded buds.
- Harvesting too early: the 8-week breeder estimate is a minimum, not a deadline. Use trichomes as your actual guide.
- Rushing the dry and cure: impatience here wastes weeks of careful growing. A properly cured indica smokes and tastes dramatically better than wet-dried flower.
- Overcrowding the tent: more plants in less space does not always mean more yield. Four well-trained plants in a 120x120 cm tent will outperform eight cramped ones.
Beginner pre-grow checklist
- Confirm home cultivation is legal in your jurisdiction and review plant limits.
- Choose your grow space and measure dimensions (height matters especially for lights and fans).
- Select a beginner-friendly feminized indica strain from a reputable breeder.
- Purchase a quality LED fixture appropriately sized for your tent footprint.
- Set up inline exhaust fan with carbon filter sized to exchange tent volume every 1–3 minutes.
- Install a thermo-hygrometer and check baseline temperature and humidity before any plants go in.
- Buy a digital pH pen, calibration solution, and pH up/down adjustment solutions.
- Prepare your growing medium (pre-amended soil or coco with base nutrients ready).
- Source containers with drainage holes: 7–11 liter pots are a good starting size for indica in soil.
- Run the full setup for 48 hours, measure conditions, and fix any issues before germinating seeds.
- Germinate seeds using the paper towel method or directly in a seedling plug/peat pellet.
- Keep a grow log from day one: date, watering amount, pH, any observations.
A few final thoughts
Growing indica indoors is genuinely learnable, even if your first grow is messier than you planned. The fundamentals, dialed-in environment, correct watering, appropriate light intensity, and clean genetics, account for the vast majority of your outcome. Every problem you solve builds knowledge that makes the next cycle easier and more productive. Keep a grow journal, take photos, and do not be too hard on yourself when something goes wrong. I have killed plants at every stage of this process and still learned something useful each time. Follow the checklist, keep your legal situation clear, and the rest is just paying attention.
FAQ
What primary legal and safety topics must the article cover to be legally compliant across jurisdictions?
Clear, jurisdiction‑aware legal guidance: local possession and plant limits, minimum age, licensing/registration for medical production, landlord/local rules, and building/electrical permit warnings. Safety topics: electrical/fire risk (illegal wiring, overloaded circuits), ventilation/IAQ and mold/pesticide risks, PPE and safe pesticide use, and storage/childproofing. Authoritative sources to cite: Health Canada (personal production guidance and 'Growing cannabis at home safely' PDF), California Water Boards (cannabis cultivation policy), Colorado Revised Statutes, EMCDDA/EUDA (Europe overview), USFA/FEMA indoor grow fire risk report, UC Riverside or NFPA/NFPA 70E electrical safety guidance, and applicable state/local statutes and municipal codes.
Which botanical and taxonomy claims need authoritative backing when explaining 'indica' vs 'sativa'?
Explain that retail 'indica' and 'sativa' labels are morphological/marketing conventions rather than strict genetic taxa. Cite genomic/chemotype studies showing overlap and limited genome‑wide separation (Sawler et al., PLOS ONE 2015; Nature Plants 2021 genomic/terpene synthase findings). Emphasize selecting by chemotype (THC/CBD ratios, terpene profile), breeder reputation, and observed morphology/phenotype stability.
What detailed cultivation topics and data must be included to make the article truly actionable?
Step‑by‑step items for seed vs clone workflow, complete setup (space dimensions, tent vs room, light meet‑in points), recommended canopy PPFD targets by stage, ventilation and CFM sizing, temperature and RH targets for each stage, media comparisons (soil vs hydroponics) with pros/cons, media and nutrient brand examples, watering/feeding schedules and EC/ppm and pH ranges, vegetative training/pruning methods (LST, topping, supercropping, ScrOG), height management tactics, flowering schedules (photoperiods), harvest timing indicators (trichome color, pistil), drying/curing methods and timelines, pest/disease ID & remediation, deficiency diagnosis and corrective feed charts, expected yields/timelines by grow-space and light wattage, and a beginner checklist. Include concrete numeric targets, example light and nutrient schedules, and measurement tools to use (quantum meter, EC meter, pH meter, hygrometer/thermometer).
Which authoritative horticulture and lighting sources are needed to support PPFD and light‑spectrum recommendations?
Peer‑reviewed lighting studies that link PPFD and yield/secondary metabolites (e.g., Frontiers 2021 and related PLOS/PMC articles) and manufacturer PPFD maps (Fluence/Gavita) to justify canopy PPFD targets and mounting heights. For efficiency comparisons cite independent fixture analyses and industry guides (DesignLights Consortium QPL where applicable, and current PPE/fixture tests). Recommend measuring PPFD at canopy with a quantum meter and provide numeric targets per stage (seedlings ~50–150 µmol·m−2·s−1; veg ~200–600; flower 600–1000+ µmol·m−2·s−1).
What ventilation, HVAC and IAQ references should be cited for safe indoor grows?
ASHRAE Standard 62.1 for ventilation/IAQ principles, state extension/HVAC guidance for grow operations (e.g., Oregon OSHA cannabis grow guidance), and practical tent/grow resources for CFM sizing (recommend exchanges every ~1–3 minutes / 20–60 ACH and add 25–40% to fan CFM for filters/ducts). Use USFA/FEMA for health/fire hazard context and cite carbon‑filter and ducting best practices. For CO2 enrichment or larger fixed installs, consult HVAC professionals and ASHRAE.
Which safety and occupational health literature is important for mold, pesticide and respiratory risk sections?
Peer‑reviewed reviews on respiratory risks in the cannabis industry (e.g., 'The Emerging Spectrum of Respiratory Diseases in the U.S. Cannabis Industry' — PMC) to explain bioaerosol, mold, and pesticide exposure hazards. Combine with state OSHA/grower guidance for PPE, re‑entry intervals after pesticide use, integrated pest management (IPM) practices, and avoidance of banned/illegal pesticides.
Next Article
How to Grow Sativa Indoors: Seed to Harvest Guide
Step-by-step seed to harvest guide for growing sativa indoors, including lighting, nutrients, training, flowering, and d