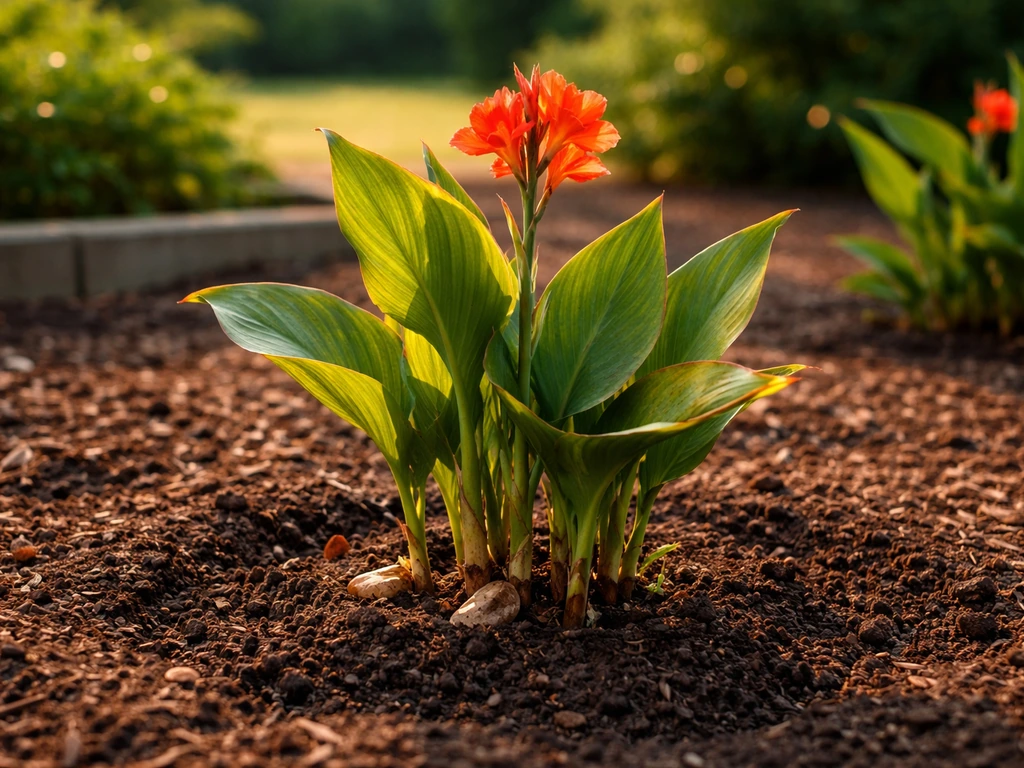
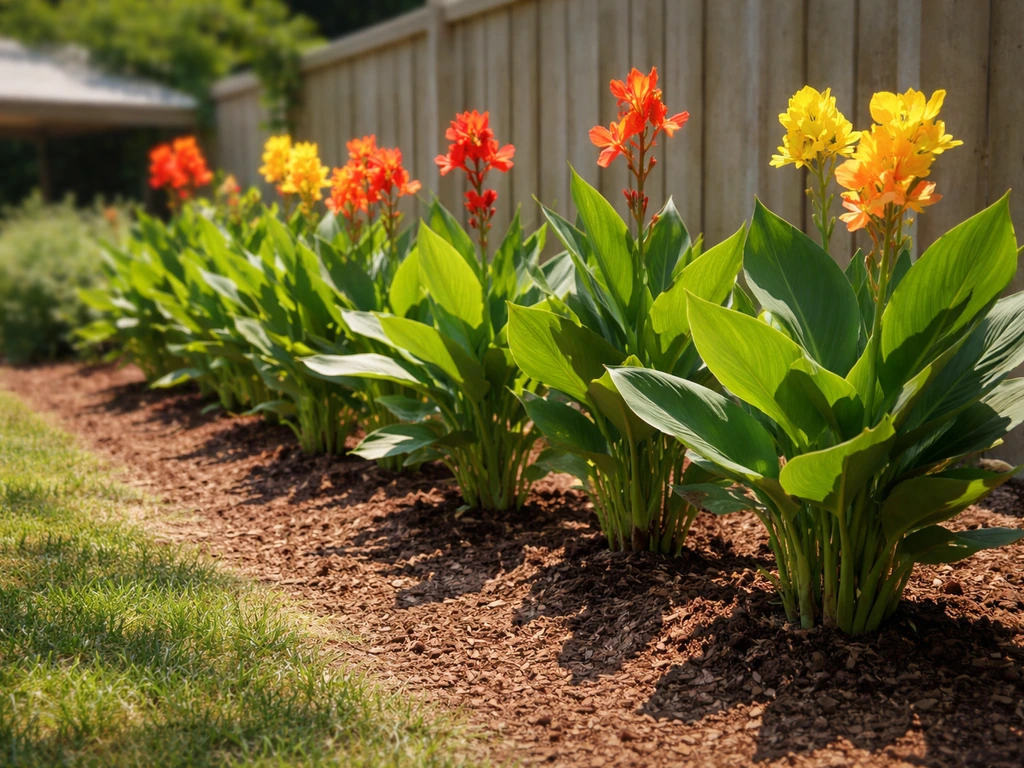
Canna plants (Canna x generalis, often called canna lilies) are one of the most rewarding warm-season ornamentals you can grow. Plant the rhizomes 2 to 3 inches deep in full sun, in rich, well-drained soil, space them about 2 feet apart, keep the soil consistently moist but never waterlogged, feed them monthly with a balanced fertilizer, and they will reward you with bold tropical foliage and vibrant blooms from midsummer through fall. That is the core of it. Everything below is the detail that helps you get there without losing rhizomes to rot or waiting all season for flowers that never come.
How to Grow Canna Plants: Step-by-Step Guide for Beginners

Marcus Holbrook
28 Apr 2026
What canna plants actually are (and what they need to thrive)
Cannas are rhizomatous perennials, meaning they grow from chunky underground stems called rhizomes rather than true bulbs. The species most commonly sold at garden centers is Canna x generalis, a hybrid bred for showy flowers and striking foliage in colors ranging from deep burgundy to variegated green and gold. They are classified as hardy in USDA zones 7 through 10 by some references and as broadly tolerant from zones 4 through 11 when growers are willing to lift and store rhizomes over winter. In practice, if you live in zones 8 through 11, you can leave rhizomes in the ground year-round. Anywhere colder, treat them as annuals or lift them before the first hard freeze.
The non-negotiables for healthy cannas come down to four things: lots of sun, warm soil, consistent moisture with excellent drainage, and regular feeding. Get those four right and cannas are genuinely easy. Neglect any one of them and you will be troubleshooting yellowing leaves, absent blooms, or soggy rotting rhizomes. The sections below walk through each condition in order.
Getting started: rhizomes vs. seeds, timing, and picking your spot
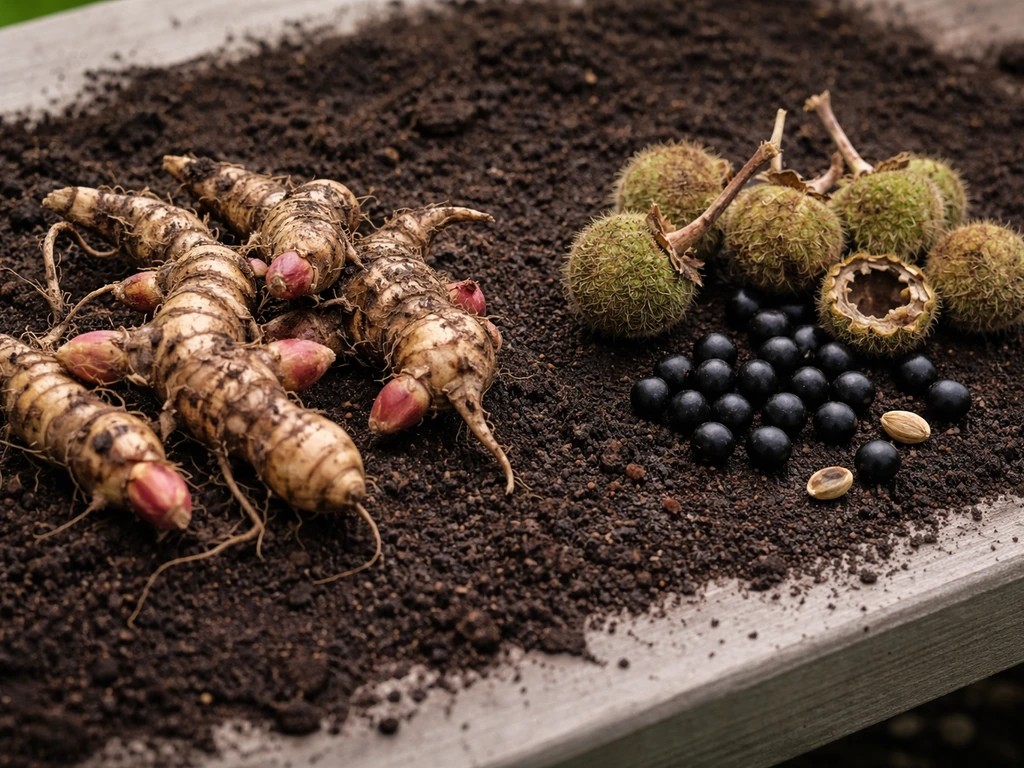
Rhizomes or seeds?
For most beginners, rhizomes are the right call. They are faster, more reliable, and the flowers you get will match the parent plant exactly. Seed-grown cannas can flower the same year if started early enough in spring, but canna seeds have extremely hard seed coats that require scarification (nicking or lightly sanding the seed coat) followed by an overnight soak in warm water before they will germinate. Even then, germination takes 7 to 10 days at a soil temperature of 75 to 85°F (24 to 29°C), and hybrids grown from seed may show variation in flower color or form compared to the parent. Flowers from seed-started plants typically appear about 80 to 110 days from sowing, or roughly 55 to 80 days after transplanting outdoors. If you want predictable results quickly, buy rhizomes.
When to plant
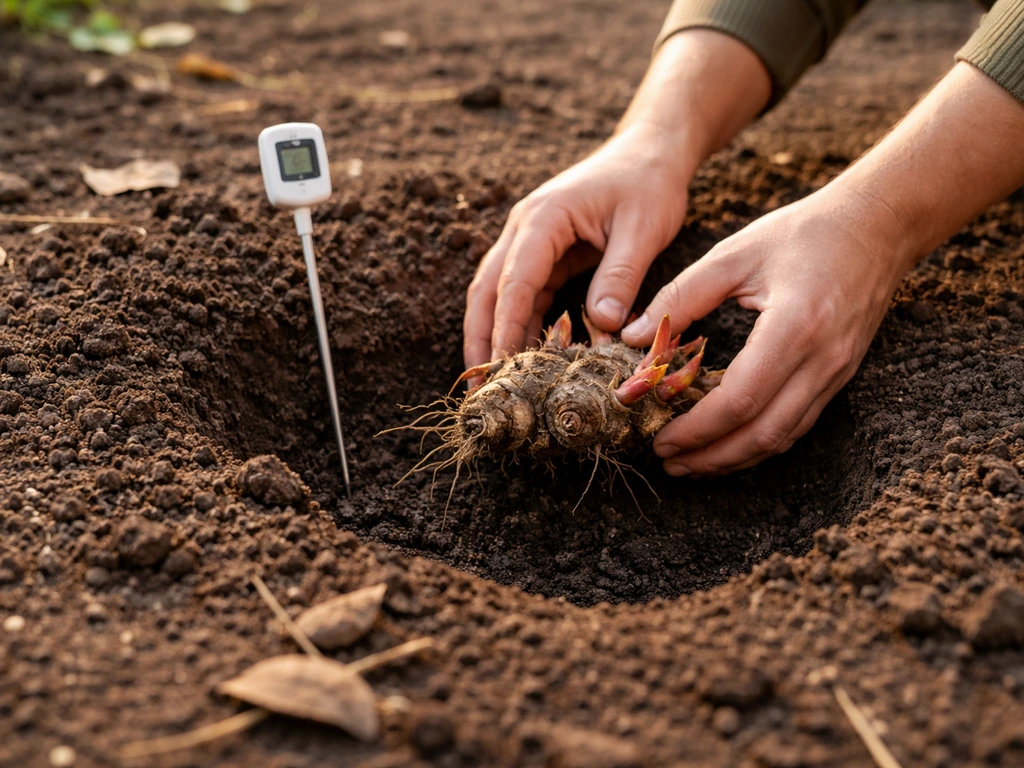
Timing is everything with cannas because cold, wet soil is the fastest route to rotting rhizomes. Do not plant outdoors until the soil has warmed to at least 60°F and all frost risk has passed. If you want a head start, begin rhizomes indoors in pots 4 to 6 weeks before your average last frost date. For seeds, start indoors 8 to 10 weeks before last frost. This indoor start approach is especially worth doing if your growing season is short, because it lets you get established plants with a full root system into the ground the moment conditions are right.
Choosing your spot or container
Cannas want a minimum of 6 to 8 hours of direct sun per day. Less than that and you will get lush foliage but few or no flowers. In a garden bed, pick the sunniest spot you have. For containers, choose a pot with a minimum capacity of about 5 gallons (roughly 20 liters) and make sure it has drainage holes. Adding a layer of gravel or pebbles at the bottom of the pot helps prevent the drainage holes from becoming blocked with soil and improves drainage. Container cannas are a great option if you want to move plants indoors before frost or if your garden soil is heavy clay that drains slowly.
Soil, planting depth, and spacing
Cannas grow best in moist, organically rich, well-drained soil. A neutral to slightly acidic pH suits them well. If your native soil is heavy or compacted, amend it with compost before planting. Sandy soil that drains fast works fine as long as you compensate with consistent watering. The goal is soil that holds enough moisture for the plant to drink from but never stays waterlogged, because prolonged saturation is what triggers the soilborne fungi (Sclerotium rolfsii and Fusarium spp.) responsible for rhizome rot.
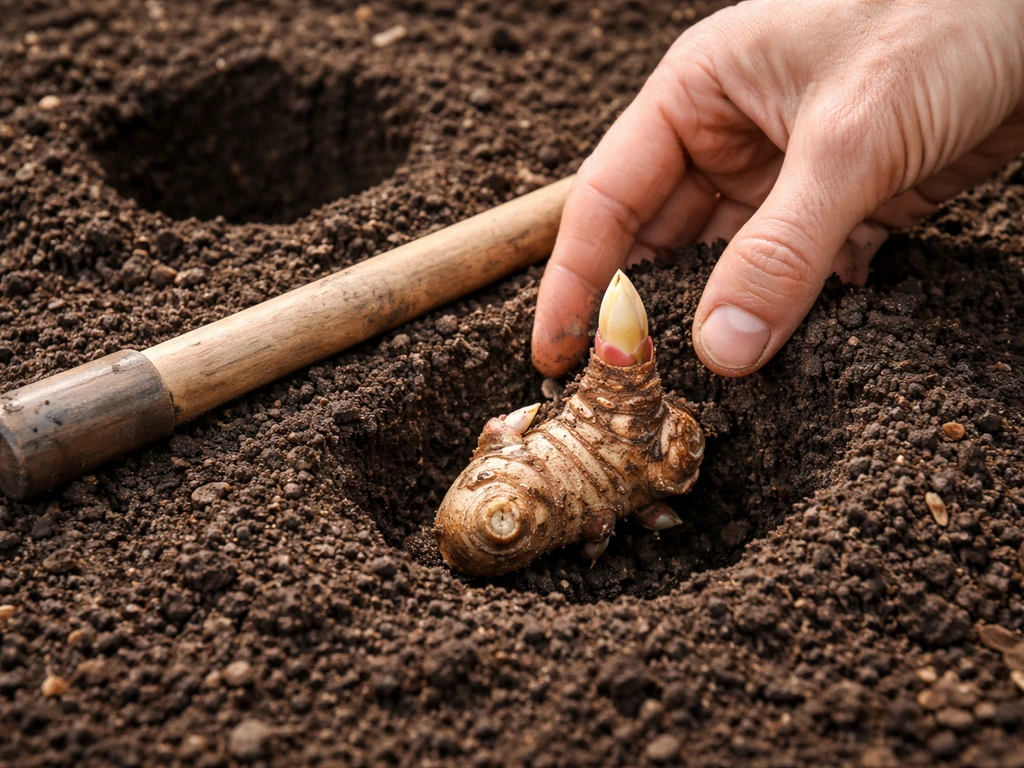
Plant rhizomes with the growing eye (the bud pointing upward) about 2 to 3 inches deep. Some guides suggest up to 4 to 6 inches, but erring toward the shallower end of that range reduces the risk of delayed emergence and poor blooming, which is a real issue when rhizomes are buried too deep. Space plants 2 to 2.5 feet apart. That spacing might feel generous when you are looking at small rhizomes, but cannas spread and the airflow between mature plants makes a meaningful difference in disease prevention. Crowded cannas are more prone to fungal issues and harder to manage.
| Planting Method | Depth | Spacing | Time to Bloom |
|---|---|---|---|
| Rhizome (garden) | 2–3 inches | 2–2.5 feet | 6–8 weeks after emergence |
| Rhizome (container) | 2–3 inches from pot base | One per 5-gal pot | Similar to garden |
| Seed (indoor start) | Surface to 0.5 inch | Thin to one per cell | 80–110 days from sowing |
Light, temperature, watering, and airflow
Sun and temperature
Full sun, 6 to 8 hours minimum, is not a suggestion for cannas. It is the difference between a plant that blooms all summer long and one that just sits there looking leafy. Cannas are subtropical plants that genuinely love heat. They thrive through summer's worst stretches and actually perform better in intense warmth than many garden plants do. The main risk is not heat, it is cold: soil below 60°F stresses rhizomes, and frost kills the tops outright.
Watering correctly
After planting, water the soil thoroughly and then monitor rather than watering on a fixed daily schedule. Right after planting (before shoots emerge), some growers water daily to keep the soil from drying out completely, but the more important rule is this: check the soil about 3 inches (8 cm) down before watering. If it still feels moist, wait. Once plants are established and actively growing through spring and summer, deep watering once or twice a week is a reasonable baseline, adjusted upward in extreme heat or for container plants (which dry out faster). Containers especially need more frequent checking. The one thing to avoid completely is letting the soil stay wet for extended periods. That is the primary cause of rhizome rot.
Airflow and humidity
Good airflow around canna foliage helps keep fungal issues like leaf spot and rust at bay. The spacing recommendation of 2 feet apart is partly about this. If you are growing cannas in a sheltered or enclosed space, make sure there is some air movement. Avoid overhead watering that leaves moisture sitting on the leaves, especially in humid conditions. Water at the base of the plant whenever possible.
Feeding cannas: a simple nutrient schedule
Cannas are heavy feeders, especially once they hit their growth stride in late spring and early summer. A balanced fertilizer like 10-10-10 works well through the season, or you can shift to a slightly phosphorus-forward ratio like 5-10-5 when you want to encourage blooming. Start fertilizing in early spring when growth begins and continue approximately once a month through the growing season. Do not skip the monthly feeding through summer, because that consistent nutrition is what sustains continuous flowering rather than a single early flush.
- Early spring (at emergence): apply a balanced 10-10-10 granular or slow-release fertilizer to support initial leaf and stem development
- Late spring through midsummer: continue monthly applications, optionally switching to 5-10-5 to give phosphorus a slight boost for flower production
- Late summer: taper off feeding as the season winds down, especially in climates where rhizomes will be lifted for winter storage
- Always water in granular fertilizers after application to avoid burning roots
For container cannas, liquid fertilizers applied every two to three weeks during the growing season can be easier to manage than granulars and give you faster control over adjustments. Because containers leach nutrients with each watering, they tend to need feeding more often than in-ground plants.
How to encourage canna flowering and keep it going
Cannas have the potential to bloom all summer long when conditions are right, but a few specific factors determine whether that actually happens. The biggest are sunlight (not negotiable, as mentioned), planting depth (rhizomes planted too deep frequently fail to bloom), and consistent feeding. If your plants are pushing out lush green growth but no flowers, those three are the first things to check.
Deadheading (removing spent flower stalks) encourages the plant to redirect energy into producing new blooms rather than setting seed. Once a flower spike finishes blooming, cut it back to the next lateral bud or down to the foliage line. This is a simple habit that makes a real difference in how long the flowering season extends. Keep up the monthly fertilizer through the bloom period, and do not let the soil dry out completely between waterings during hot spells.
For seed-started plants, getting them under way 8 to 10 weeks before your last frost date gives them the best shot at flowering the same year. Rhizome-started plants have a significant head start and typically bloom earlier in the season. Either way, the combination of heat, full sun, and regular feeding is what triggers and sustains flowering in cannas.
Troubleshooting common canna problems
Rhizome rot
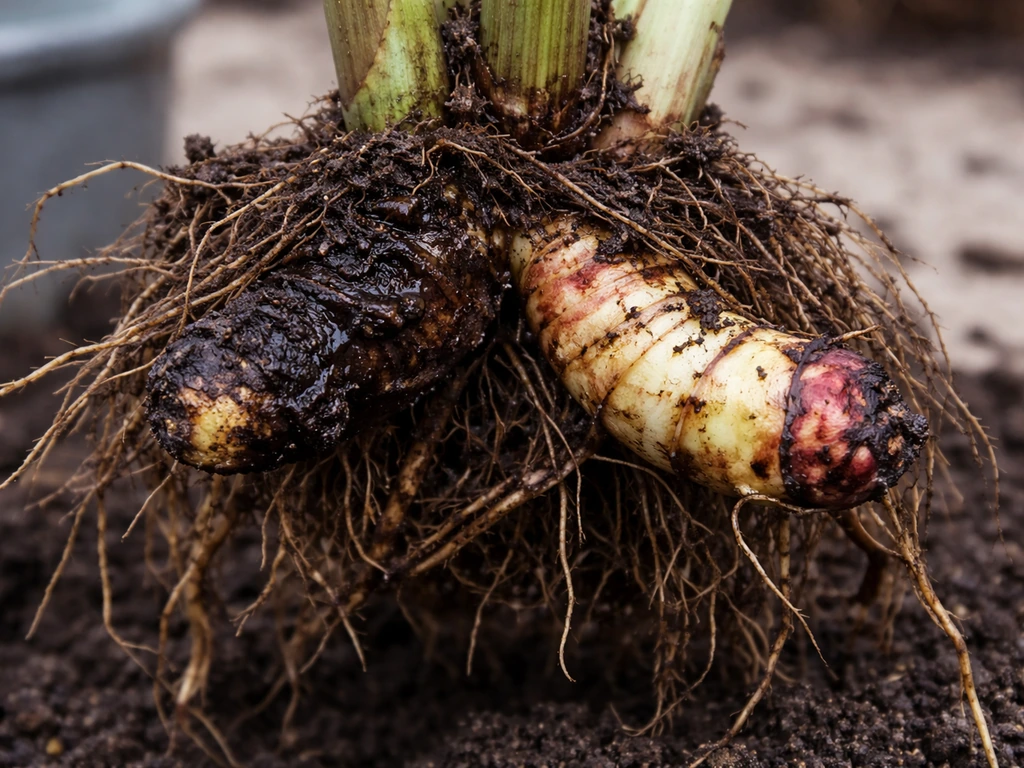
Rot is the most serious and common problem beginners run into, and it almost always traces back to overwatering or poorly draining soil. The fungi responsible (Sclerotium rolfsii and Fusarium spp.) are soilborne and thrive in consistently damp conditions. If you dig up a rhizome and find it soft, mushy, or discolored, rot has set in. Remove and discard affected material, do not compost it. Improve drainage by amending the soil or switching to a container with proper drainage holes. Going forward, use the finger-test method: only water when the top 3 inches of soil feel dry. In containers, make sure nothing is blocking those drainage holes.
Yellow leaves
Yellowing leaves on cannas can have several causes. Overwatering is the most common, and it often goes hand in hand with early rot symptoms. Nitrogen deficiency from insufficient feeding is another frequent cause, especially mid-season when the plant's demand outpaces what the soil provides. If the yellowing is accompanied by slow overall growth, try a feeding application. If the soil has been staying wet, cut back on watering and check for root or rhizome damage. Yellowing that starts on older lower leaves and works upward is often a nutrient issue. Yellowing that is more widespread or patchy may indicate overwatering or disease.
Pests: aphids and spider mites
The two pests you are most likely to encounter on cannas are aphids and spider mites. Aphids cluster on new growth and flower buds, sucking sap and leaving sticky residue. Spider mites show up in hot, dry conditions and cause stippled, bronzed leaf surfaces. Both respond well to neem oil applied according to label directions, and both are worth monitoring for regularly rather than waiting until you have a heavy infestation. For aphids specifically, a strong spray of water can knock populations back before you need to reach for anything else. Encouraging beneficial insects (ladybugs, lacewings) in your garden helps keep both pests in check naturally.
Fungal leaf issues and rust
Canna rust (caused by Puccinia thaliae) produces orange or rust-colored pustules on the undersides of leaves, with corresponding yellowing or streaking on the upper surface. It spreads via spores and is worsened by overhead watering and poor airflow. Remove and dispose of affected leaves promptly. Fungal leaf spot presents as dark or water-soaked spots on foliage. Both issues are best prevented by watering at the base rather than overhead, maintaining proper plant spacing, and avoiding leaving debris around the base of the plant. In severe cases, a fungicide labeled for ornamental use can help manage spread.
No blooms
If your canna is growing well but not flowering, run through this checklist before assuming something is seriously wrong.
- Sunlight: is the plant getting at least 6 to 8 hours of direct sun? Shade is the single most common reason cannas refuse to bloom.
- Planting depth: was the rhizome planted deeper than 3 to 4 inches? Deep planting delays or prevents blooming.
- Feeding: has the plant been fertilized monthly? Nutrient-starved cannas put energy into survival rather than flowering.
- Season timing: how long has the plant been in the ground? Rhizomes started indoors and transplanted typically bloom within a few weeks of establishing. Patience is sometimes the answer.
- Overcrowding: has the planting become too dense over seasons? Divide and replant with proper spacing.
Transplant shock
Moving cannas from indoor starts to the garden can cause brief wilting or stalled growth if the transition is abrupt. If you are growing cannabis indoors alongside cannas, this guide on how to grow indica indoors can help you dial in lighting, temperature, and watering for healthy plants. Harden off indoor-started plants over 7 to 10 days by gradually increasing their outdoor exposure before planting. Start with a few hours of morning sun and sheltered afternoon conditions, then move to fuller sun exposure each day. Water well at transplant and avoid fertilizing for the first week or two to let roots settle without the stress of pushing new growth.
Seasonal care and what to do at the end of the season
In zones 8 and warmer, cannas can stay in the ground over winter with minimal protection. In zones 7 and below, lift the rhizomes after the first frost kills back the foliage, shake off excess soil, let them dry for a few days, and store them somewhere frost-free where temperatures stay above about 45°F (7°C). A garage, basement, or insulated shed works well. Pack them in barely damp peat moss or newspaper and check on them through winter to make sure they are not shriveling or rotting. Come spring, you replant and start the cycle again.
Through the growing season, the main maintenance tasks are deadheading spent flower spikes, pulling any weeds that compete for moisture and nutrients, and checking the soil moisture before watering. If you are also growing cannabis, you can use a similar idea of doing the right maintenance at the right time by following a guide on how to prune cannabis plants as they grow. To help cannabis plants grow taller, use cannabis-specific training and pruning techniques at the right growth stages prune cannabis plants as they grow. If you are specifically aiming to grow sativa, use a cannabis-specific pruning and feeding routine so the plants develop the right structure and vigor also growing cannabis. If you are also growing cannabis, choosing the right soil is critical, so check a dedicated guide on what soil to grow cannabis for best results. Cannas are not high-maintenance plants once established. The work is mostly in getting the initial conditions right: the right depth, the right drainage, enough sun, and consistent feeding. Nail those and you will have a plant that blooms reliably all summer with minimal fuss.
If growing cannas has got you thinking more broadly about plant care routines, the principles around spacing, airflow, and nutrient timing carry over well to other plants covered on this site. Getting these fundamentals dialed in builds a strong foundation for any growing project you take on next.
FAQ
Do I need to soak canna rhizomes before planting to help them sprout?
Soaking is optional for most beginners. If the rhizomes look dry, you can mist or lightly dampen them a day before planting, but avoid soaking for long periods because it can increase early rot risk in cold or poorly drained soil. Focus instead on planting after soil warms to at least 60°F, and keep watering controlled until shoots emerge.
What’s the best way to tell if my canna soil is too wet even when the surface looks dry?
Use the finger-test at 3 inches down, and also check the pot or bed for drainage. In heavy soil, the surface can dry while the lower zone stays saturated. If you consistently feel cool, wet soil at that depth, improve drainage (compost for structure, or switch to a container with unobstructed holes) before watering more.
My canna foliage is huge, but there are no flowers. What should I check first?
Start with sun, planting depth, and fertilizer timing. Too little direct sun (under 6 to 8 hours) commonly produces lush leaves with few buds, and rhizomes planted too deep often stay vegetative. Also verify you’re fertilizing about monthly once growth starts, and consider a slightly higher-phosphorus ratio once flowering begins.
Can I grow canna plants indoors year-round?
You can grow them indoors temporarily, but they need strong light and warm conditions to flower well. If you keep them indoors, use a large pot with drainage and place them in the brightest location you have, supplementing with grow lights if needed. For many climates, the easier approach is to bring container cannas indoors to overwinter near frost-free temperatures rather than trying to sustain full outdoor-like growth all year.
How deep should I plant canna rhizomes if I’m in a wet, cool spring area?
In cooler, wetter springs, stay toward the shallower end of the planting depth guidance, around 2 to 3 inches, and avoid deep planting. Deeper placement keeps rhizomes in cooler, wetter soil longer, which increases the odds of delayed emergence and rot.
Do cannas need staking?
Sometimes. If you have very large varieties or windy exposure, flower stalks can bend. The safest time to stake is early, soon after shoots reach a few inches, so you don’t damage rhizomes later. Use soft ties and avoid tightening too much against wet stems.
Should I remove leaves or cut the plant back during the growing season?
Avoid heavy pruning during active growth unless you’re removing damaged or diseased foliage. For healthy cannas, the main cutback is deadheading flower spikes to stimulate new bloom. If rust or leaf spot appears, remove affected leaves promptly to reduce spore spread.
When overwintering in colder zones, how do I prevent rhizomes from shriveling?
Store rhizomes in barely damp material (peat moss or loosely covered newspaper) and keep them in a consistently cool, frost-free place above about 45°F (7°C). Check every few weeks, if they start to look dry, lightly re-moisten the packing material, but never so wet that condensation or rot becomes likely.
What should I do if a newly planted canna doesn’t sprout by late spring?
First, confirm soil temperature was warm enough and that you planted the rhizomes at an appropriate depth. Then check moisture without overwatering, feel 3 inches down and only water when it’s trending dry. If the rhizomes were planted after cold, wet weather or remain in cold soil, they may rot before sprouting, so inspect one carefully for softness or discoloration before replanting.
Are aphids and spider mites a big problem on cannas, and what’s the quickest control method?
They’re usually manageable if you monitor early. For a fast first step, spray aphids off with a strong jet of water, especially on new growth and bud clusters. For spider mites, treatment is most effective when you catch them early in hot, dry weather, and neem oil can help when applied according to the label.
Next Article
How to Grow One Weed Plant: Beginner Step-by-Step
Step-by-step guide to grow one cannabis plant: setup, germination, light, feeding, troubleshooting, harvest and curing.