For cannabis, you want a light, airy, well-draining loam-style mix with a pH held between 6.0 and 7.0 (ideally 6.2 to 6.8 for soil), a good balance of organic matter for nutrients, and enough perlite or similar amendments to keep roots breathing. Compact, waterlogged, or wildly off-pH soil is the number one reason home grows underperform, and the fix is usually simpler than most people think: start with the right mix, dial in your pH, and let the roots do the rest.
What Soil to Grow Cannabis: Specs, Mixes, and Troubleshooting

Marcus Holbrook
18 Jun 2026
Best soil types for cannabis at a glance
Cannabis grows best in a loose, well-aerated medium that drains quickly but still holds enough moisture to keep roots hydrated between waterings. The closest natural soil type to that ideal is a sandy loam or loamy soil with a healthy percentage of organic matter mixed in. That said, most home growers are not starting with garden soil, they are building or buying a containerized mix, which gives you a lot more control.
There are two main approaches most growers land on: a living-soil style mix loaded with biology and slow-release organics, or a lighter base medium paired with bottled nutrients. Both work well. The right choice comes down to how hands-on you want to be with feeding and how much time you have to prepare a mix before planting. I will walk through both in detail below, but here is a quick-reference breakdown first.
| Soil Style | Best For | pH Target | Typical Base | Feeding Approach |
|---|---|---|---|---|
| Living/super soil | Experienced growers, organic grows | 6.0–7.0 | Compost, worm castings, amendments | Water only (or minimal top-dressing) |
| Pre-mixed cannabis soil | Beginners, fast setup | 6.2–6.8 | Peat or coco, perlite, light charge | Bottled nutrients from week 3–4 |
| DIY amended loam mix | Intermediate growers | 6.2–6.8 | Peat/coco + perlite + compost | Bottled nutrients or compost teas |
| Plain vegetable/garden soil | Not recommended in containers | Varies | Topsoil, compost, sand | Avoid — too dense for containers |
The soil specs that actually matter
Before you buy or mix anything, it helps to know what you are actually targeting. Cannabis is not that hard to please, but it does have specific preferences around pH, texture, drainage, and air in the root zone. Get these four things right and you eliminate the majority of common growing problems before they start.
pH: the single most important number
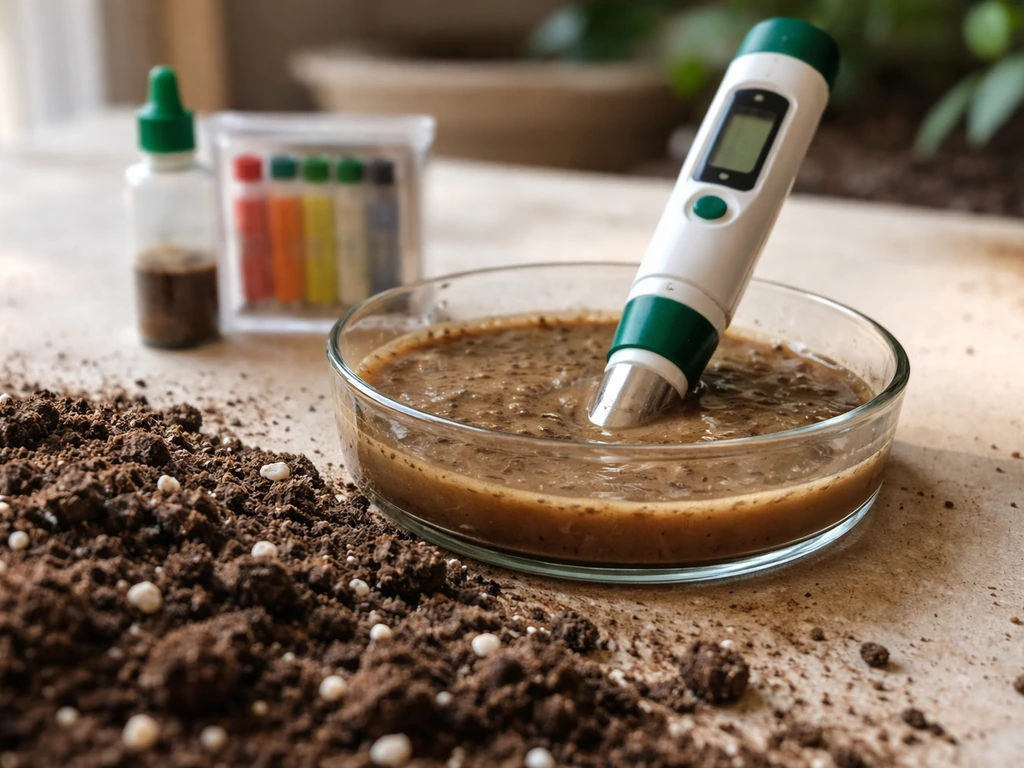
Target a soil pH of 6.2 to 6.8. At that range, the key nutrients cannabis needs, nitrogen, phosphorus, potassium, calcium, magnesium, and sulfur, are all reasonably soluble and available at the root zone. Drift below 5.8 or above 7.2 and you will start seeing availability problems even if the nutrients are physically present in the soil. This is nutrient lockout, and it looks exactly like a deficiency because it basically is one. Soil has more natural buffering than coco or hydro, which means pH swings are slower, but they still happen, especially in containers. Check your runoff pH weekly with a reliable meter, not cheap paper strips.
Texture and structure
Soil texture describes the ratio of sand, silt, and clay particles, and it controls almost everything else: how fast water moves through, how much air stays near roots, and how nutrients bind to particles. For cannabis in containers, you want something closer to the sandy-loam end of the spectrum, loose enough that water drains within a few seconds of reaching the surface, but not so sandy that it dries out in hours.
The rough target is about 50% pore space in the medium, with roughly equal amounts of that pore space occupied by air and water. Drainable porosity is commonly described in terms of the percentage of air-filled pores present once the soil has drained to field capacity, directly tying drainage expectations to root-zone oxygen air-filled pores present when the soil has drained to field capacity.
In practice, that means a mix that feels light and fluffy in your hand, not dense or clumping.
Drainage and aeration
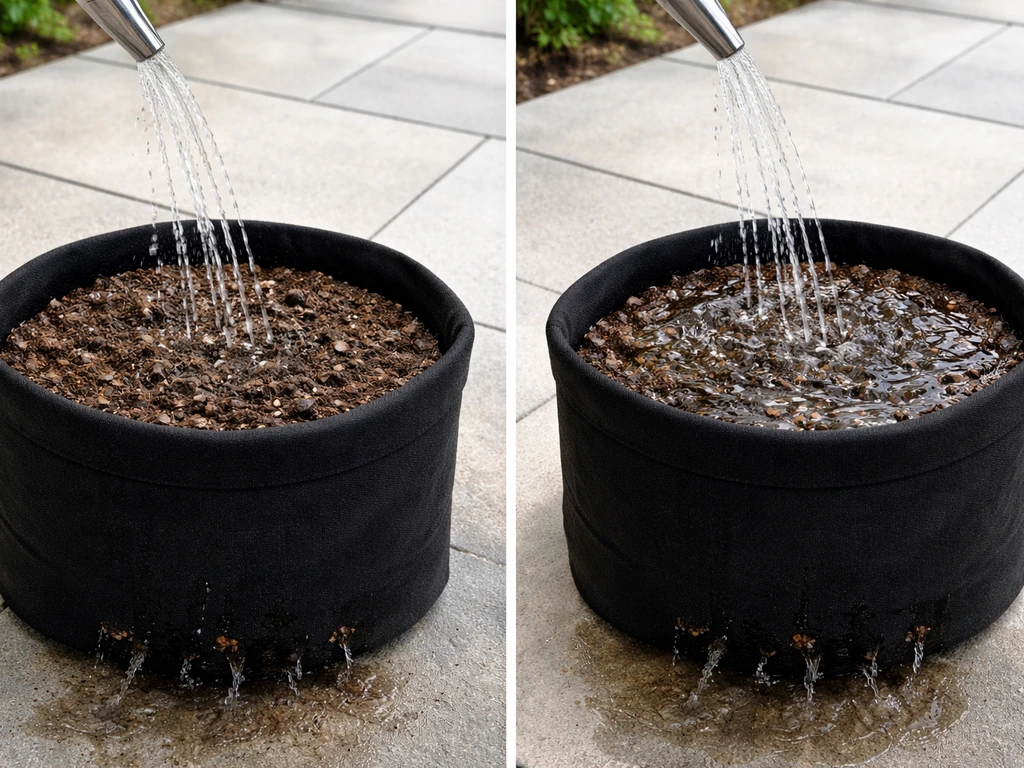
Poor drainage is probably the most common soil-related mistake I see. When soil stays waterlogged, the air-filled pores fill with water and roots are essentially suffocated. Low soil oxygen also triggers anaerobic conditions where byproducts build up that are directly toxic to roots. The fix is twofold: build drainage into the mix with amendments like perlite, and use a container that does not trap water. Fabric pots are genuinely better than plastic for this reason, they allow passive air exchange through the walls and prevent waterlogging at the bottom. For indoor growing especially, adding 20 to 30 percent perlite by volume to your mix is one of the easiest and most impactful things you can do.
Amendments worth adding (and a few to skip)
A good cannabis soil is not just one ingredient, it is a blend that balances fertility, structure, water retention, and microbial life. Here is what I actually add to my mixes and why.
The core amendment list
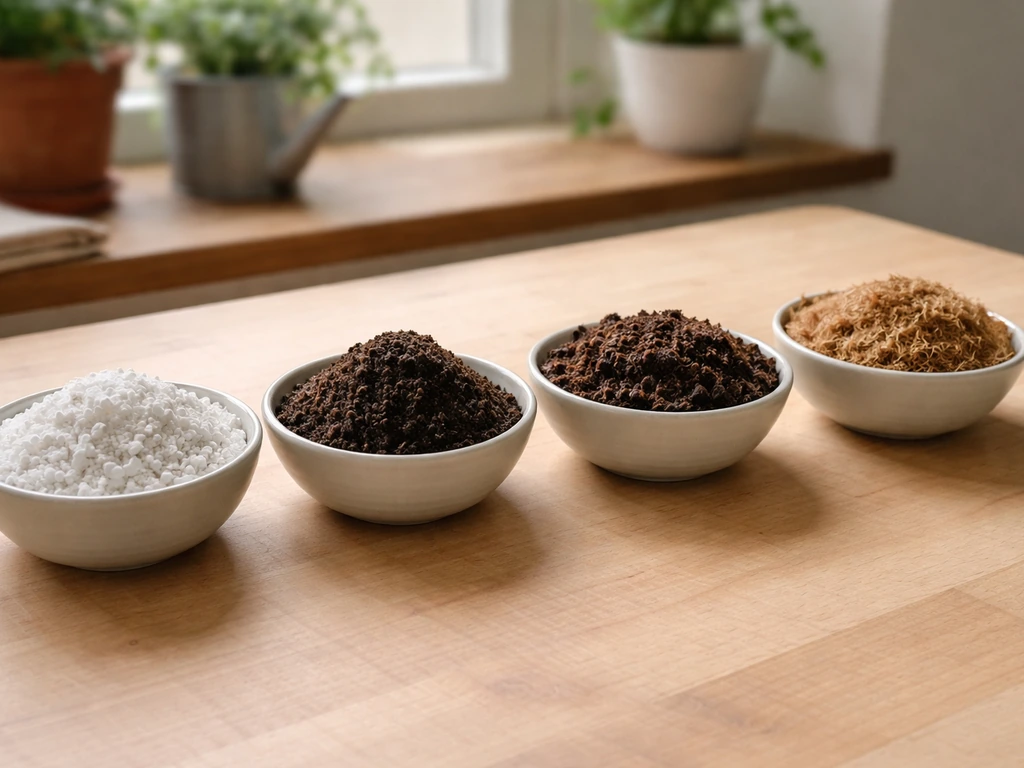
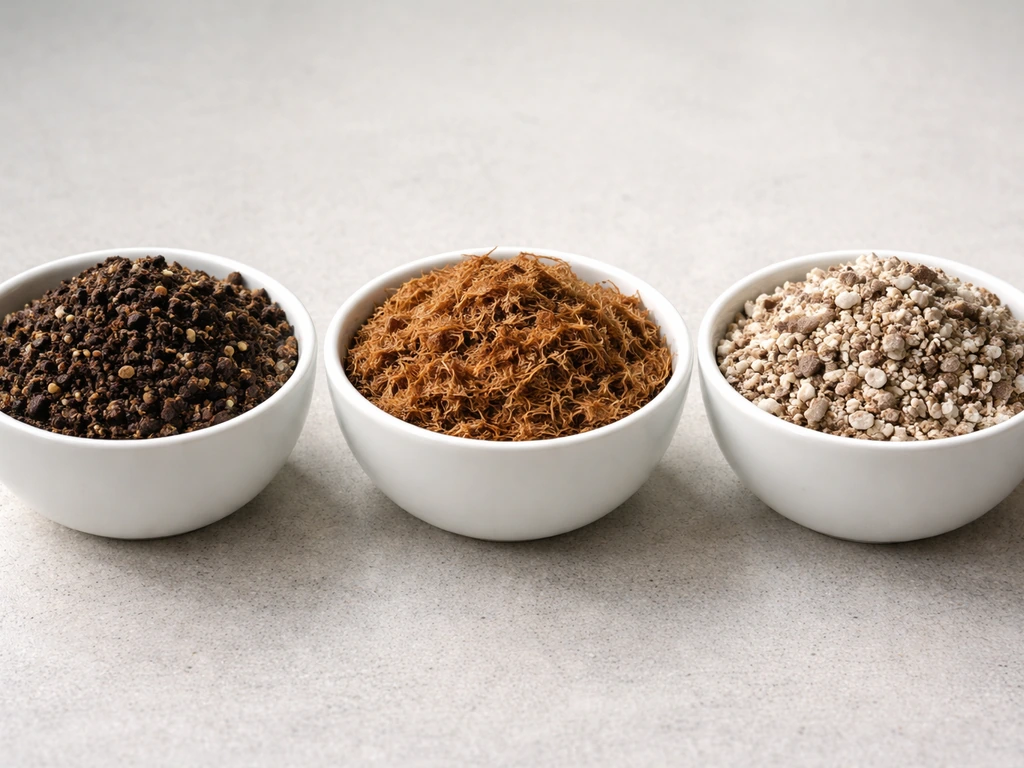
- Perlite (20–30% of mix volume): volcanic glass that creates stable air pockets and prevents compaction. This is non-negotiable in containers. Do not skip it.
- Worm castings (10–20%): incredibly nutrient-dense, rich in organic matter, available phosphorus, and exchangeable cations. They also introduce beneficial microorganisms. Go with a reputable source — cheap castings are often mostly peat or filler.
- Compost (15–30%): adds slow-release nutrients and feeds soil biology. The key word is finished compost. Fresh or immature compost can cause nitrogen immobilization and even phytotoxicity because the microbial activity is still too hot. If the compost still smells like manure or is still actively heating up, it is not ready.
- Peat moss or coco coir (as a base, 30–50%): both hold moisture well while staying relatively light. Coco is a better environmental choice and is pH-neutral; peat is slightly acidic (around 3.5–4.5 on its own) and needs lime added to bring it to a workable range. Either works.
- Dolomite lime (about 1–2 tablespoons per gallon of mix): used to buffer pH when peat is the base. It adds calcium and magnesium and slows pH drift. Skip this if your base is already pH-adjusted.
- Mycorrhizal inoculants: research supports that arbuscular mycorrhizal fungi can improve root development and overall plant growth, especially in living-soil environments. Many pre-mixed media (like Pro-Mix HP) include these already.
- Kelp meal or fish bone meal (small amounts): slow-release organic nutrient sources that feed soil biology over time. Useful in living-soil builds.
Things to avoid in your mix
- Garden or topsoil in containers: far too dense, compacts badly, and drainage becomes a serious problem indoors.
- Moisture-retaining crystals or 'water-holding' gels: marketed as helpful but they create wet pockets and contribute to overwatering and root rot, especially in containers.
- Immature or hot compost: this was mentioned above, but it is worth repeating. Nitrogen lockup from unstable compost is a real and underappreciated problem.
- Cheap generic potting soil with heavy bark or wood chips: bark takes a long time to break down and temporarily ties up nitrogen as it decomposes.
- High-salinity fertilizer pre-charges: some soils marketed as 'super charged' or 'feeding for 6 months' have very high salt levels that can burn seedlings and young clones. Always check the EC of a new medium before transplanting sensitive plants.
Pre-mixed soil vs building your own
If you are a first-time grower or you just want a low-fuss setup, buying a quality pre-mixed cannabis or horticultural soil is a perfectly legitimate choice. Products like Biobizz All-Mix (a peat-based blend with worm castings, perlite, and a light nutrient charge) or Pro-Mix HP (peat and perlite with pH adjustment and mycorrhizae) give you a solid starting point without the math. The trade-off is cost at scale and less flexibility to dial things in exactly how you want.
When evaluating any pre-mixed soil, look for these things on the label: a listed pH in the 6.0 to 6.8 range, perlite or pumice as a listed ingredient, some form of organic matter like compost or worm castings, and an EC value or 'nutrient charge' description. Avoid anything where the first or only listed ingredient is 'topsoil' or 'composted forest products' with nothing else.
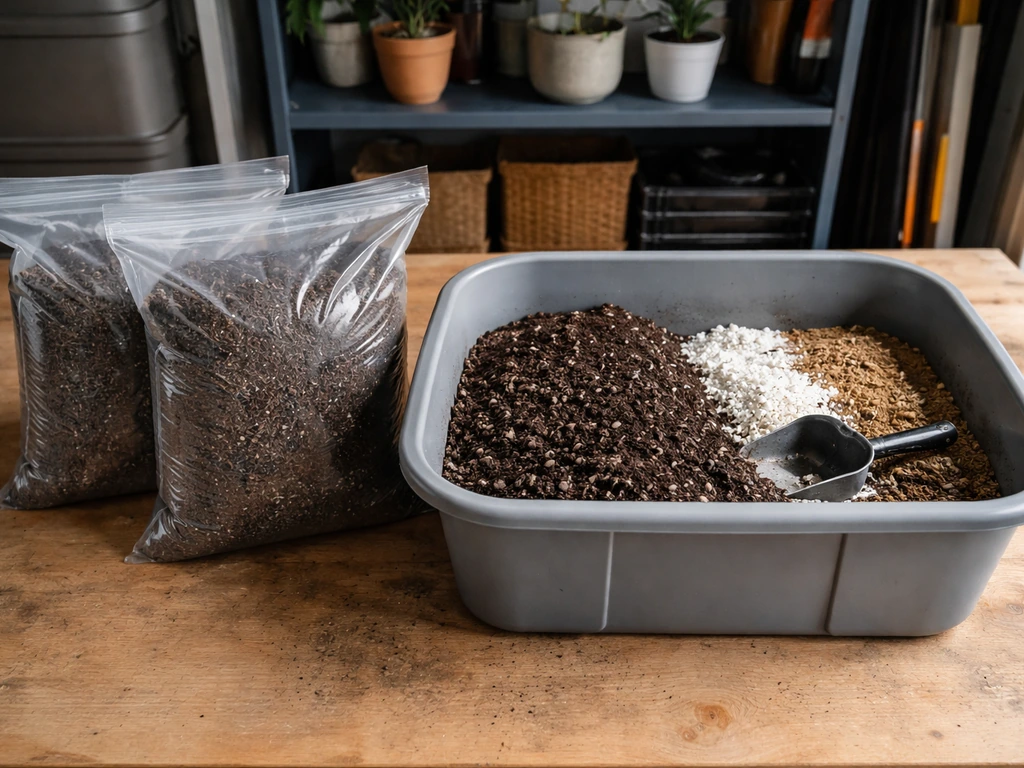
For growers who want more control, or who are scaling up to multiple plants and want to save money, a DIY mix is straightforward once you have done it once. A simple and reliable starting recipe for indoor container growing: 40% high-quality coco coir or peat-based potting mix, 30% perlite, 20% finished compost or worm castings, and 10% amendments (dolomite lime, kelp meal, or whatever else fits your goals). Mix it well, water it to field capacity once, and let it sit for a day before planting. If you are building a living soil that you want to 'cook' before use, mixing in dry organic amendments and letting microbial activity stabilize, plan for 4 to 6 weeks before the mix is ready to plant into.
Feeding in living soil vs nutrient-fed soil
This is where a lot of growers get confused, and honestly I made these mistakes early on too. The approach to feeding is completely different depending on which soil system you are running.
Living soil: mostly hands-off feeding
A properly built and cooked living soil is designed to supply nutrients through microbial activity breaking down organic matter over time. Your job is mostly to water and occasionally support the biology with compost teas, aloe, or top-dressings of dry organic amendments. You should not be pouring bottled nutrients into living soil, doing so, especially with synthetic fertilizers, can damage the microbial community that makes the whole system work.
Expect the first 2 to 4 weeks to look slow while the plant and soil biology get established. By mid-veg, a healthy living soil plant will visibly accelerate. If you see deficiency signs in a living soil, your first diagnostic check is pH, not nutrients, lockout from pH drift is far more common than an actual shortage of nutrients in a properly built mix.
Conventional soil with bottled nutrients
In a lighter base medium or a pre-mixed soil with a modest nutrient charge, you will typically need to start supplementing around week 3 to 4 of vegetative growth, once the plant has used the available nutrients in the mix. Start at half the manufacturer's recommended dose and work up based on what your plant tells you. Yellowing older leaves suggests nitrogen is running low. Dark, claw-shaped leaves or very deep green growth usually means you are overfeeding.
Check your runoff EC weekly, high runoff EC means salts are building up and it is time to flush and back off. Keep your feed-water pH between 6. 2 and 6. 8 every single time.
This is the most common thing growers forget to do consistently, and it causes more problems than almost anything else.
| Grow Stage | Living Soil Action | Bottled Nutrient Soil Action |
|---|---|---|
| Seedling (weeks 1–2) | Water only, no amendments | Water only — let the medium's charge feed the plant |
| Early veg (weeks 3–4) | Water + optional compost tea | Begin light feeding at 25–50% dose |
| Mid-late veg (weeks 5–8) | Top-dress with worm castings or kelp meal | Full veg-formula dose; monitor runoff EC |
| Transition to flower | Optional bloom top-dress (bat guano, bone meal) | Switch to bloom formula; reduce nitrogen |
| Mid flower | Water only or compost tea | Bloom nutrients; check runoff pH and EC weekly |
| Late flower / flush | Plain water | Plain water for final 1–2 weeks to clear salts |
Container setup, outdoor soil, and the problems you will run into
Indoor containers
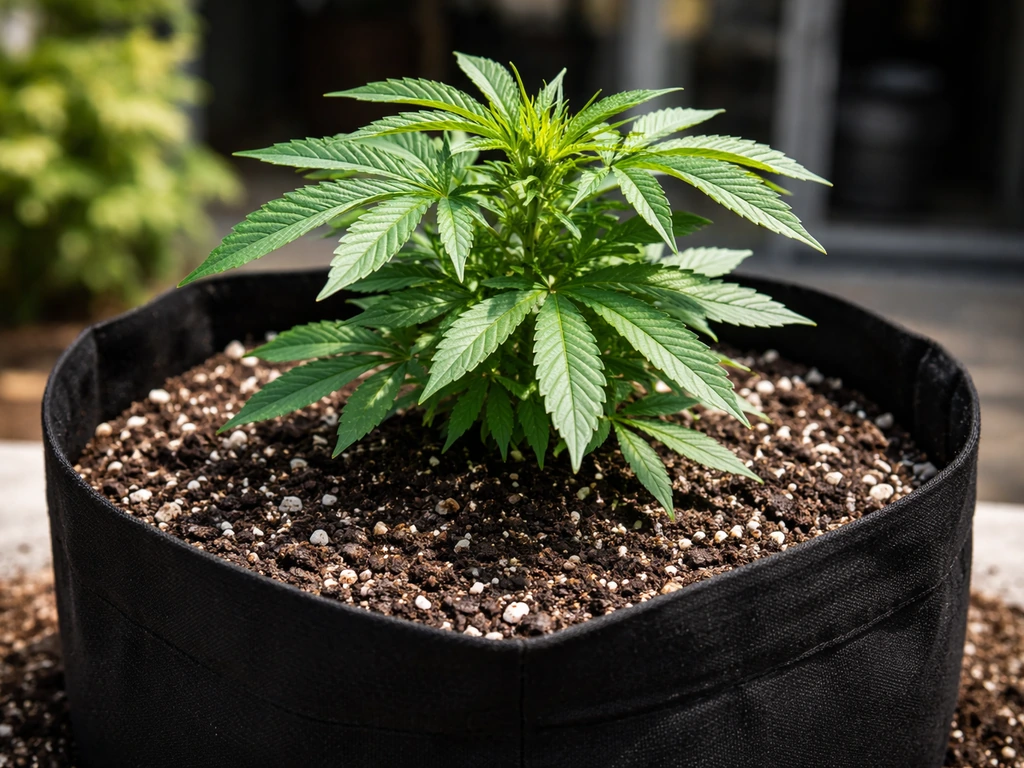
For indoor grows, fabric pots are strongly preferable over plastic. They allow air to reach roots through the sides, which promotes air-pruning (roots stop growing when they hit air rather than circling the pot), prevents waterlogging, and massively reduces the chance of root rot.
A 3-gallon fabric pot works for a plant you want to keep compact, 5-gallon is the most common all-purpose size, and 7-gallon or larger is appropriate for plants you plan to veg for 8 or more weeks. To encourage cannabis plants to grow tall, you also need to dial in light intensity and timing during vegetative growth, because growth height is heavily influenced by how much usable light the plant receives veg for 8 or more weeks.
Bigger pots mean more soil, more buffer, and more room for root development, but they also mean the medium stays wet longer, which matters for drainage timing.
Outdoor soil
Outdoor plants in containers follow the same rules as indoor, fabric pots, well-amended mix, consistent pH management. If you are planting directly into the ground, test your native soil pH first. Many garden soils in rainy climates trend acidic (below 6. 0), while dry-climate soils can trend alkaline (above 7.
5). For in-ground planting, amend a 2 to 3 cubic foot zone around where the plant will go: mix in compost, worm castings, and perlite (or coarse sand for true in-ground beds), and adjust pH with lime (to raise) or sulfur (to lower) based on your test results.
For sativa-dominant strains grown outdoors, root zone space matters a lot since these plants grow significantly larger, a topic covered in more detail when looking at how to grow sativa varieties specifically.
Common soil problems and how to fix them
Slow growth with dark green leaves and drooping is almost always overwatering and poor drainage. The fix: let the medium fully dry out between waterings (pick up the pot, if it feels light, water; if it still feels heavy, wait), add more perlite to your next mix, and consider switching to fabric pots.
Yellowing leaves with no obvious pattern can be nutrient deficiency, but before you reach for a bottle, check your pH. A large percentage of apparent deficiencies are actually pH-induced lockout, the nutrients are in the soil but cannot be taken up because the pH is off. Test runoff pH first. If it is outside 6.2 to 6.8, flush with correctly pH'd water and let the medium recover before adding more nutrients. For identifying whether symptoms appear first on older or younger leaves, that matters: mobile nutrients like nitrogen show deficiency in older leaves first, while immobile nutrients like calcium and iron show problems in new growth first.
Fungus gnats are a strong signal your medium is staying too wet for too long. The larvae live in the top inch or two of moist soil and damage roots. Let the top layer dry out completely between waterings. Yellow sticky traps help monitor adult populations. Avoid overwatering and the problem mostly resolves itself. If it persists, a top layer of coarse sand or perlite makes it harder for adults to lay eggs.
Root rot shows up as yellowing, drooping, slow growth, and roots that look brown, slimy, or mushy when you check the bottom of the pot. It is almost always caused by chronically wet, poorly aerated soil. Prevention is far easier than treatment: well-draining mix, fabric pots, correct watering frequency. If you catch it early, removing the plant, trimming affected roots, rinsing with a diluted hydrogen peroxide solution, and repotting into fresh dry medium can save the plant. As your cannabis plant grows, you can also learn how to prune cannabis plants to manage growth and improve airflow trimming affected roots.
Indoor vs outdoor soil differences, and when to repot or refresh
Indoor and outdoor cannabis shares the same soil fundamentals, but the context creates some real differences in what matters most. Indoors, you are working in a controlled environment with no rain events, no temperature swings, and no native soil organisms entering the mix, which means the medium you build is essentially all the plant gets. Drainage and pH management are entirely in your hands. Outdoors, native microorganisms and rainfall both affect your soil over time, which can be an advantage (more biological activity) or a challenge (pH drift, waterlogging during heavy rain, or nutrient flushing).
Repotting is something many first-time growers do too late. A root-bound plant, where roots have filled the container and started circling, shows slower growth, faster drying out, and often nutrient deficiencies because there is simply not enough medium left to hold adequate water and nutrients. A good general rule: start seedlings in small containers (1 gallon or less), transplant to a mid-size container (3 gallon) once the plant is established, and move to your final container (5 to 10 gallon depending on planned plant size) before the stretch of early flowering. Indica-dominant plants that tend to stay compact do well in 3 to 5 gallon containers, for more on that, growing indica indoors well is partly about matching container size to the strain's natural footprint.
Refreshing soil between grows is important if you are reusing a mix. After a full grow cycle, the medium is depleted, salt-loaded, and compacted. When soil becomes compacted, it can restrict root penetration and worsen internal drainage, which also affects how efficiently nutrients like nitrate and ammonium reach roots [the medium being depleted, salt-loaded, and compacted](https://extension. psu.
edu/effects-of-soil-compaction). You can revive it by flushing thoroughly, adding fresh worm castings and compost (10 to 20% by volume), and mixing in fresh perlite to restore aeration. For living soil builds, many growers simply top-dress and replant into the same container, the biology re-establishes and the cycle continues. For peat or coco-based mixes used with bottled nutrients, full replacement is usually easier than trying to rehabilitate a heavily used medium.
Coco especially tends to hold salt and degrade in structure after a grow or two.
The bottom line: start with a light, well-amended mix at pH 6.2 to 6.8, build drainage in from the start with perlite, choose your feeding strategy (living soil vs bottled nutrients) and stick with it, check your runoff pH consistently, and use fabric pots whenever possible. If you want the full process, including lighting, watering, and timing, follow this guide on how to grow canna plants. Get those basics right and your soil will do most of the heavy lifting for you.
FAQ
If my tap water is usually around pH 8, should I still use it for cannabis soil?
You can use it if you reliably measure and adjust the feed water to the soil target (about pH 6.2 to 6.8). What matters most is the pH of the water you put in, plus the runoff pH you check weekly, because container soil can drift even when your tap source is consistent.
How do I know whether my soil problem is pH or actual nutrient deficiency?
Use runoff testing first. If runoff pH is outside about 6.2 to 6.8, assume lockout until proven otherwise, then flush with correctly pH’d water and wait for recovery. Also look at leaf-age patterns, mobile nutrients like nitrogen tend to show first on older leaves, while immobile nutrients like calcium and iron often appear in newer growth.
Can I grow cannabis in pure peat, pure coco, or straight compost?
Pure peat or straight compost usually fail the “air and drainage” requirement, they can stay too wet or compact in containers. Coco can work but behaves differently than soil, it typically requires stricter feed control and pH consistency. A better approach is blending with perlite or another aeration component and using compost or castings in limited percentages (often as a portion of the mix rather than the whole base).
What’s the right perlite amount, will more always be better?
More aeration helps only until the medium becomes hard to keep evenly hydrated. As a starting point, about 20 to 30% perlite by volume is commonly effective for containers. If your mix dries out too fast or your plant wilts easily between waterings, reduce perlite and increase the moisture-holding component rather than continually adding more.
Do I need a soil meter, or are paper strips enough for checking runoff pH?
A meter is more dependable because pH strips are easier to misread and are less consistent at the target range. If you only use strips, you can end up over-correcting. The article’s key point is weekly runoff checks, so aim for a tool you can trust for small changes.
Should I flush my cannabis when using soil?
Flush decisions depend on the system. For lighter mixes with bottled nutrients and salt buildup, the article suggests checking runoff EC weekly and flushing when runoff EC stays high. For living soil, the approach is different, you generally avoid harsh flushing that disrupts the microbial cycle, unless symptoms clearly point to excess salts or another specific cause.
How do I measure “field capacity” when I water my new mix?
Field capacity is when the medium is evenly moist and begins draining freely, you should not see standing water. A practical method is to water slowly until runoff starts, then stop, let it drain, and observe container weight. After the first watering, you can learn a “wet” and “dry” weight range, which helps prevent overwatering later.
My soil smells sour or swampy, what does that mean?
A sour or anaerobic smell usually indicates the medium stayed wet too long and air was displaced. That aligns with poor drainage and low oxygen conditions, the next step is to dry down fully, improve aeration (more perlite or better pot drainage), and consider switching from plastic to fabric pots if you are still using plastic.
What container size should I choose if I’m not sure how long I’ll veg?
If you may veg longer than planned, it’s usually better to size up earlier to avoid late transplant stress and too-small root volume. The article suggests starting smaller for seedlings, then moving to a mid-size container once established, and reaching your final container before early flowering, because root-bound plants dry faster and can show deficiency-like symptoms from reduced medium volume.
Is fabric pot use only for indoor grows, can I use it outdoors too?
You can use fabric pots outdoors, they still improve oxygenation and reduce waterlogging during rain events. Outdoor conditions add variables like rainfall and pH drift, so fabric pots can be especially helpful in areas prone to heavy wet periods, but they will also dry out faster during heat, so watering schedules still need attention.
Can I reuse soil after harvest without replacing everything?
Sometimes, but the medium often becomes depleted, compacted, and salt-loaded after a full cycle. The article’s “refresh” approach includes thorough flushing, adding fresh worm castings or compost (roughly 10 to 20% by volume), and adding perlite to restore structure. If the mix was heavily salt-affected or coco-based, full replacement is often easier than trying to rehabilitate it.
How deep should I plant seedlings into my cannabis soil mix?
If you plant too deep, seedlings can struggle with oxygen availability in the lower zone, especially in wetter media. A safer practical rule is to match the seedling’s stem depth to what it had in its starter container and ensure the root zone still has loose, well-draining structure, then adjust upward only if you notice consistent issues like persistent stalling or poor vigor.
What if I can’t get my runoff pH into range, even after adjusting feed water?
Persistent runoff pH drift usually points to an underlying buffering issue in the mix (for example, insufficient or excessive amendments) or an imbalance that needs time to stabilize. First verify your meter accuracy and adjust only the feed water pH. If runoff still won’t stabilize after a corrective flush and recovery period, the medium likely needs rebalancing, which may mean changing the mix in a future grow rather than trying repeated overcorrections mid-cycle.
Next Article
How to Prune Cannabis Plants as They Grow Step by Step
Step-by-step guide to prune and trim cannabis as it grows, including topping, suckers, lollipopping, timing, and afterca