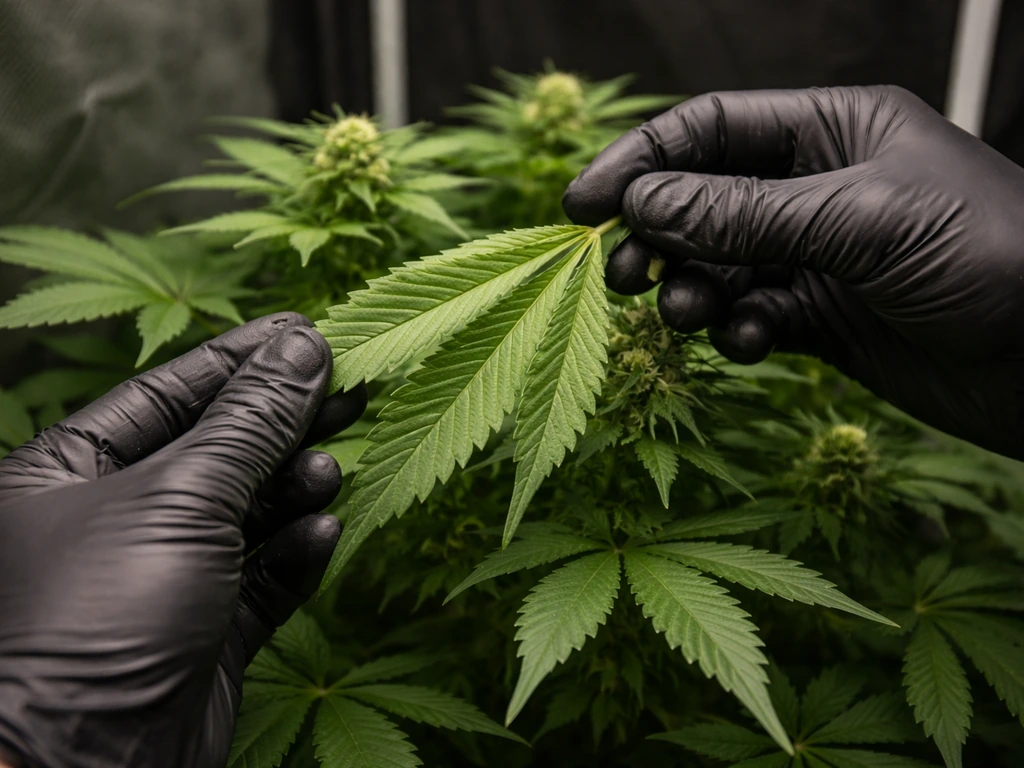
Prune cannabis by making clean cuts to specific growth during vegetative stage and the early transition into flower, removing fan leaves blocking bud sites, sucker shoots stealing energy from the lower canopy, and the main growing tip if you want multiple colas. Stop any major cutting by the time week 3 of flowering arrives, keep each session conservative (no more than 20–40% of foliage at once, and 3–5 leaves if you are new), always use sanitized scissors or shears, and give your plant 3–7 days to bounce back before touching it again.
How to Prune Cannabis Plants as They Grow Step by Step

Marcus Holbrook
15 May 2026
When to prune: matching the growth stage to the technique
Timing is the single biggest variable in whether pruning helps or hurts your plant. Cannabis goes through distinct phases and what is safe to remove changes dramatically across them.
Early vegetative stage (weeks 1–3 from seedling)
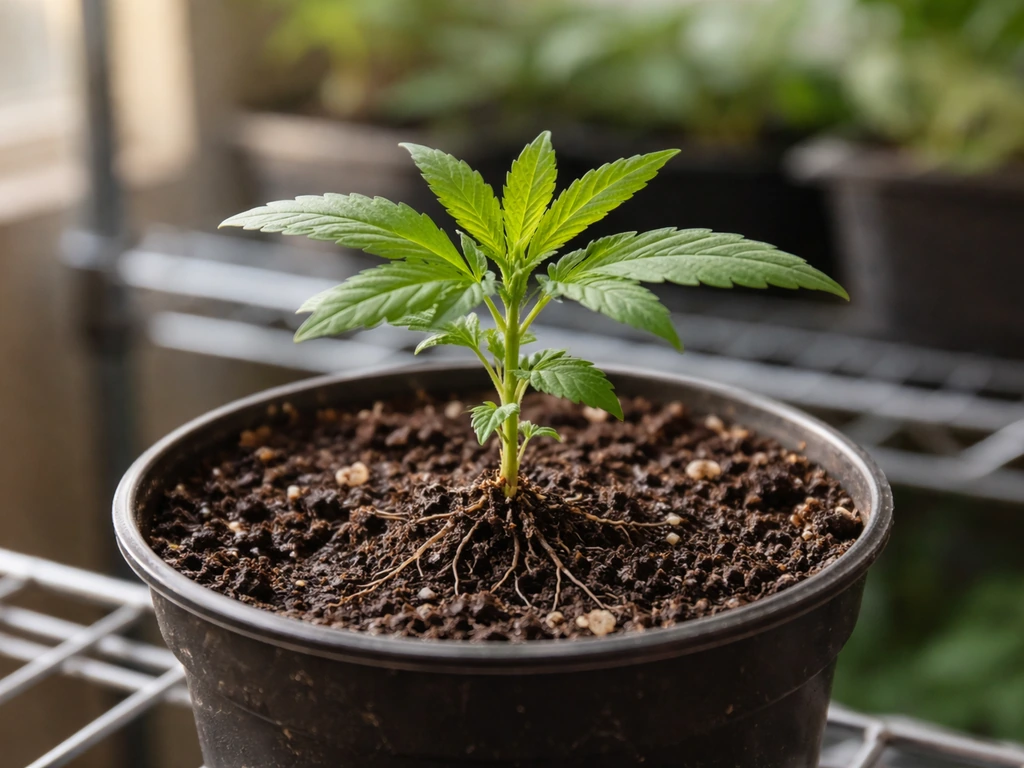
Leave the plant alone for the first two to three weeks. It is building its root system and needs every leaf it has to fuel that work. Removing growth at this point slows establishment without giving you any structural benefit. Once you can count at least four to six nodes on the main stem, the plant is ready for its first training decisions.
Mid-to-late veg (weeks 3–8, or whenever the plant is well established)
This is your prime window for the most impactful pruning and shaping. Topping, removing sucker shoots, and low-stress bending all belong here. The plant recovers fast in veg because its energy is fully pointed at vegetative growth, so it can bounce back from a topping cut in about 3–7 days. You can run multiple training sessions during veg as long as you space them far enough apart for the plant to stabilize before the next one.
Pre-flower and transition (the first 7–10 days after flipping to 12/12)
The flip to 12/12 kicks off a stretch phase that can nearly double some plants in height. This window is a good moment for one targeted cleanup session: removing large fan leaves blocking bud sites and lollipopping the lower third of the plant. Keep it to roughly 25–40% of foliage removed maximum, focusing on lower growth and shading leaves rather than anything near the top canopy. After that cleanup, stop cutting and let the plant roll through the stretch. Aggressive changes to light intensity, irrigation, or feeding at the same time as heavy pruning compound the stress, so treat this period as a ramp, not a switch.
Early flowering (weeks 1–3 of 12/12)
Light, targeted work is still possible in the first couple weeks of flower, but you are on a shorter leash. The plant is stretching hard, forming bud sites, and its recovery from cuts is much slower than in veg because energy is already redirected toward reproduction. Growcast’s indoor beginner guide similarly notes that during flowering weeks 1 to 2 plants enter a stretching phase, which comes with general expectations for increased height by the end of the stretch stretching hard. If you missed a cleanup before the flip, you can carefully remove obvious problem growth in week 1 or 2, but keep it minimal. Once the stretch wraps up around weeks 3–4, bud sites are filling in and you should stop cutting entirely.
Mid and late flowering (weeks 4 onward)
No pruning. The plant cannot meaningfully recover from significant cuts at this point, and removing leaves exposes developing buds to light stress and environmental fluctuation. If a single diseased or completely dead leaf is causing a problem, remove just that leaf, but treat anything beyond that as off-limits.
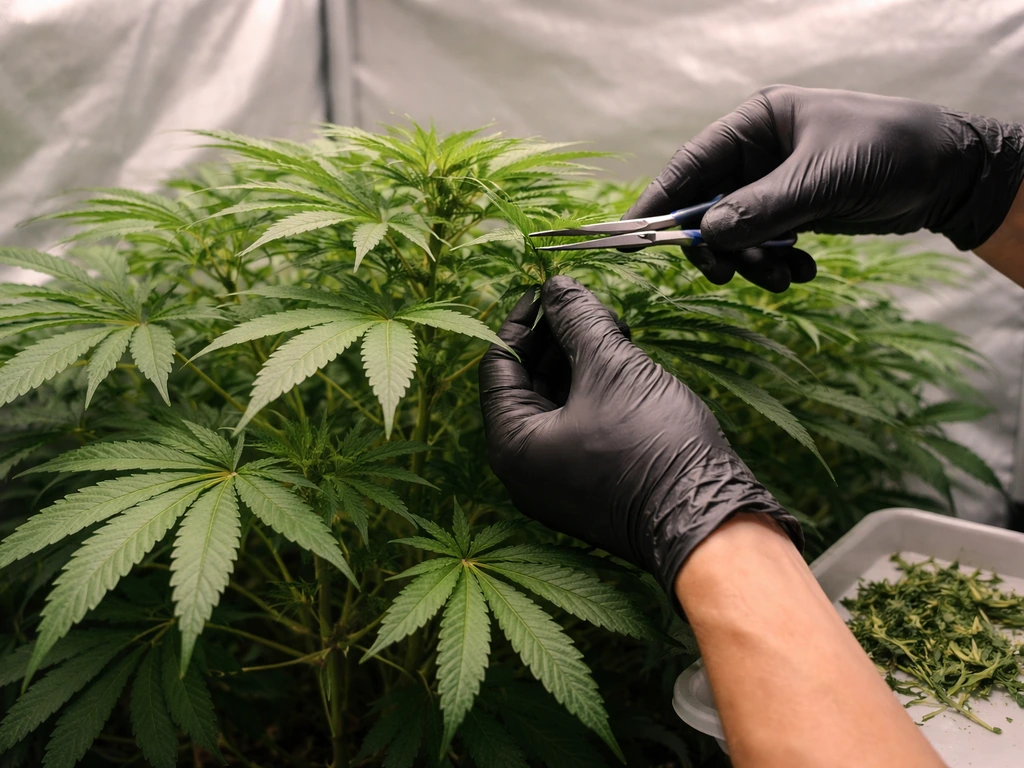
Tools, setup, and hygiene before you make a single cut
Skipping tool sanitation is one of those mistakes that seems harmless until you transfer a pathogen across every plant in your tent. I learned this the hard way on my second grow. Use sharp pruning scissors or shears (dull blades crush tissue instead of cutting it cleanly), and sanitize them before you start and between every plant or major cut.
The two reliable options for sanitation are 70% isopropyl alcohol or a 1:9 bleach-to-water solution. Dip the blades for at least one minute, then wipe off the excess before the tool touches the plant. Residual bleach on a fresh cut can cause localized chemical damage, so that wiping step matters. Keep a small container of your chosen sanitizer on your grow table so you can re-dip between cuts without breaking your workflow.
- Sharp trimming scissors for smaller fan leaves and suckers
- Pruning shears for thicker stems (topping the main cola, removing large branches)
- Isopropyl alcohol (70%) or bleach solution (1 part bleach, 9 parts water) for tool sanitation
- A small jar or container to soak tools between cuts
- Clean gloves to avoid transferring oils and pathogens from your hands
- A clean tray or surface to collect removed material (avoid letting it pile up in the grow space)
Set up your space before you start. Good lighting in the grow area, a clear view of the plant from all angles, and a calm environment make it easier to make deliberate decisions rather than reactive snips. Rushing through a pruning session is where mistakes happen.
What to actually remove and how to do it
Topping: splitting one main cola into two (or more)
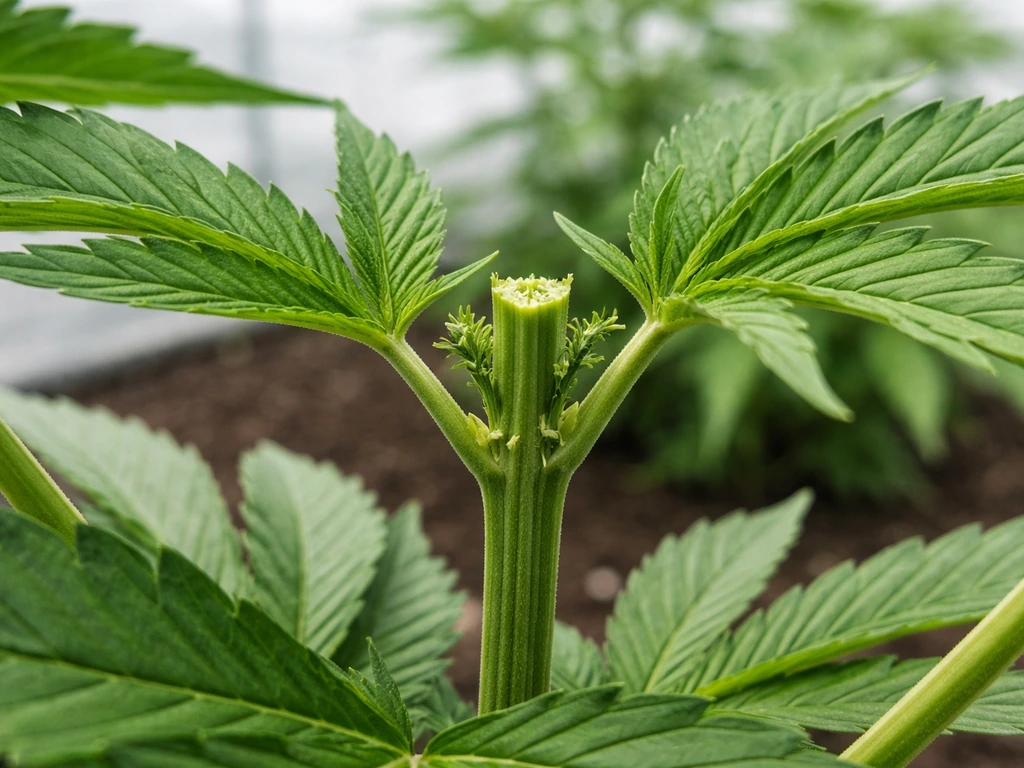
Topping is the most impactful single cut you can make in veg. Wait until the plant has developed at least 5–6 nodes, then cut the main growing tip cleanly just above the topmost node. This removes apical dominance and redirects growth energy into the two side branches directly below the cut, eventually giving you two main colas where there was one. Repeat the process on those two new tops after they grow out and you can build a very even, bushy structure with four, eight, or more main bud sites.
After topping, expect the plant to pause upward growth for roughly 3–7 days. You may see slight drooping in the first 24–72 hours while it redirects energy. That is normal. Do not top again until the plant has clearly resumed vigorous growth. Never top during flowering.
Removing sucker shoots and lower growth
Sucker shoots (also called suckers or undergrowth) are the small, spindly side branches that grow from nodes near the bottom of the plant. They rarely receive enough light to develop into meaningful bud sites, but they pull significant energy from the main canopy. Removing them during late veg and the pre-flower cleanup redirects that energy upward. Pinch or cut them off as close to the main stem as possible without damaging the stem itself.
Fan leaf removal and defoliation
Fan leaves are the plant's solar panels, so removal is always a trade-off. The target is leaves that are directly shading bud sites or blocking airflow through the canopy, not healthy leaves that are doing their job. For beginners, a conservative rule is 3–5 leaves per session. For growers who are comfortable with the plant's response and doing a full pre-flower cleanup, removing 20–40% of foliage during a planned session (focusing on large fan leaves and lower lollipopping) is a recognized approach. Pull the leaf by gripping the stem close to the main branch and snapping it cleanly downward, or cut it with your scissors.
Lollipopping: cleaning the lower third
Lollipopping means stripping all growth from roughly the bottom third of the plant, leaving a bare stem below a full canopy up top (like the shape of a lollipop). This is typically done in the pre-flower cleanup window. Remove all small shoots, bud sites, and fan leaves below the point where meaningful light penetration stops. The goal is to eliminate energy sinks that will never produce quality buds and to improve airflow through the lower canopy, which reduces mold risk.
Step-by-step: pruning workflow as the plant grows
- Wait until the plant has 5–6 nodes before any significant intervention. Let it establish itself first.
- Mid-veg session 1: Top the main growing tip just above a node once you can count at least 5–6 nodes. Remove obvious sucker shoots from the lower nodes at the same time. Sanitize tools before and between cuts.
- Wait 5–7 days and watch for recovery. Look for new growth resuming at the two lateral branches below your topping cut.
- Mid-veg session 2 (optional): Once the plant has recovered and the two new tops are growing vigorously, top those as well if you want more main colas. Continue removing any new sucker shoots that appear lower on the plant.
- Late veg / pre-flower cleanup (1–3 days before flipping to 12/12 or when pre-flowers appear): Remove large fan leaves that are shading bud sites, strip the lower third of the plant (lollipopping), and do a final sucker-shoot cleanup. Target no more than 25–40% of total foliage in this session.
- Post-flip (days 1–14 of 12/12): Limit work to minor adjustments only. If a large fan leaf is directly smothering an emerging bud site, remove it. Keep removals to 3–5 leaves maximum per session, and space sessions at least 5–7 days apart.
- Week 3 of flower onward: Stop all pruning. Monitor and manage environment only. If a diseased or completely dead leaf is present, remove just that leaf.
Aftercare: what to do right after pruning
The 24–72 hours after a pruning session are when your plant is most vulnerable. Keep conditions stable, and resist the urge to push nutrients or dial up light intensity right after a heavy session. The plant is temporarily less capable of processing energy efficiently because it has fewer leaves to work with.
- Maintain temperature in the mid-70s°F (around 24–26°C) and humidity around 65–75% during recovery to reduce stress and support healthy transpiration
- Water normally but avoid overwatering, since the reduced leaf surface area means the plant is transpiring less than usual
- Hold back on any nutrient increases for at least 3–5 days after a significant pruning session
- Keep light at its current intensity and distance rather than moving it closer right after cuts
- Watch for drooping, curling, or yellowing in the days immediately after pruning — some slight wilting in the first 24 hours is normal, but sustained drooping beyond 72 hours is a signal the plant was over-stressed
- If the plant shows stress signs for more than 5 days after pruning, stop any further defoliation plans and let it fully recover before reconsidering
Recovery in veg is genuinely fast when you time things right. New growth often resumes within 3–7 days after topping, and the plant frequently comes back bushier and more vigorous than before. Recovery in flowering is slower and less dramatic because the plant's energy is already committed to bud production, which is exactly why you want most of your pruning work done well before the flip.
Common mistakes and how to fix them
Over-pruning and slow recovery
Removing too much at once is the most common beginner pruning mistake, and I have done it myself chasing a cleaner canopy before I understood the plant's limits. If your plant is growing slowly, leaves are yellowing faster than normal, or new growth looks thin and weak after a pruning session, you took too much. The fix is to stop all further pruning, stabilize your environment, and wait. Do not try to correct over-pruning with heavy feeding or elevated light intensity because the plant cannot process those inputs efficiently without enough leaf surface. Give it two full weeks of undisturbed recovery.
Hermaphroditism risk from stress
Aggressive pruning or training during flowering is a documented stress trigger for hermaphroditic flower formation, where the plant develops both male pollen sacs and female buds. This is a serious problem because pollen from hermed flowers can seed your entire crop. The best prevention is keeping major pruning to the vegetative stage and pre-flower window, being conservative with any cuts during the first two weeks of flower, and avoiding stacking multiple stressors (pruning plus a light schedule change plus a temperature swing, all at once). If you spot any small, banana-shaped pollen sacs forming among your buds, remove them immediately with tweezers and re-evaluate whether your plant was over-stressed.
Removing leaves too close to bud sites in flower
When you strip leaves from around developing buds in mid-to-late flowering, you expose those buds directly to the environment in ways they are not designed for. Buds that are suddenly exposed to intense direct light can bleach. Exposed buds in high-humidity environments face increased mold risk. If you feel the urge to defoliate in late flower, ask yourself whether the issue (poor airflow, shading) could be solved by other means like adjusting plant spacing or repositioning branches rather than cutting.
Using dull or unsanitized tools
Crushed tissue from a dull blade is an open invitation for pathogens. A clean cut from a sharp blade heals much faster. If you notice browning, rotting, or unusual discoloration around cut sites, unsanitized tools are the most likely culprit. Soak tools in 70% isopropyl alcohol for at least one minute between plants and wipe them dry before use.
Indoor vs outdoor: the rules change with the environment
| Factor | Indoor | Outdoor |
|---|---|---|
| Control over timing | Full control — you decide when to flip and prune on your schedule | Tied to natural light cycles and seasons — pruning windows are less flexible |
| Stretch management | Manage stretch by controlling light schedule and intensity after flip | Stretch can be dramatic and hard to control; prune/train before outdoor stretch begins |
| Pest and disease pressure | Lower baseline pressure, but sanitation still essential | Higher pressure — sanitation between cuts is critical to avoid spreading disease |
| Lollipopping priority | High — lower canopy rarely gets useful light intensity indoors | Moderate — outdoor plants get light from more angles, but lower growth still matters |
| Defoliation intensity | Moderate defoliation generally well-tolerated in controlled environment | Be more conservative — temperature swings, wind, and pests add background stress |
| Recovery conditions | You control temperature and humidity precisely during recovery | Recovery depends on weather — time sessions for stable, mild conditions |
Outdoor plants can nearly double in height during the early flowering stretch, which means your pre-flower pruning and training work needs to happen earlier and more deliberately than indoors. If you let an outdoor plant go into the stretch unprepared, you end up with a tall, loose structure that is hard to work with later. Prune and shape while the plant is still in full veg, before the natural light cycle triggers the flip.
Hydroponic growers sit in a slightly different position. The high-efficiency nutrient delivery in hydro means plants grow fast and respond intensely to stress, so they can be more sensitive to aggressive pruning than soil-grown plants of the same age. If you are growing in soil instead of hydro, choosing the right soil mix and drainage helps support steady growth and faster recovery after pruning soil to grow cannabis. If you are growing in hydro, treat the conservative end of every recommendation here as your default: fewer leaves per session, longer recovery windows between sessions, and extra caution around the veg-to-flower transition.
Quick rules of thumb to take into your grow room today
- Do your most impactful pruning in mid-to-late veg, not in flower
- Top after node 5 or 6 for the best structural results
- Never remove more than 40% of foliage in a single session, and stay at 3–5 leaves if you are new
- Sanitize tools with 70% isopropyl alcohol between every cut and definitely between plants
- Give the plant 5–7 days to recover before the next session
- Lollipop the bottom third during pre-flower cleanup, not mid-flower
- Stop all pruning by week 3 of flowering and do not restart it
- If the plant shows stress for more than 5 days, stop and let it recover fully
- Avoid stacking pruning stress with other major changes like light intensity increases or feeding schedule changes
Getting confident with pruning takes a grow or two, and that is completely normal. If you are also working on understanding how to make your plants grow tall or how to optimize your indoor environment for indica or sativa strains, the pruning approach shifts slightly depending on the plant's natural structure and growth speed. If you are specifically trying to dial in how to grow indica indoors, use this pruning framework to match timing, keep stress low during the transition, and shape for a dense canopy indica or sativa strains. If you want to know how to grow sativa, use this same idea to adjust timing and training for a taller, faster-stretching structure indoor environment for indica or sativa strains. If you are growing canna plants, the same idea of matching pruning to growth stage helps you avoid unnecessary stress and keep growth on track grow canna plants. The fundamentals here apply broadly, but a naturally compact indica and a tall-stretching sativa will need different timing and intensity decisions at the margins.
FAQ
What should I do if I accidentally prune a lot, or I notice dead leaves right after?
Treat it like a cleanup only, not a restructuring. Remove just the single obvious dead or badly diseased leaf, plus any small, clearly detached tissue, and stop there for the rest of the session. Keep airflow steady and watch the cut area at least a few days before making any further changes, since removing multiple damaged leaves together can act like over-pruning even in veg.
Can I combine pruning with plant training (bending, tying, or low-stress training) in the same week?
Yes, but only early and conservatively. In veg, you can use gentle bending or low-stress ties to open the canopy, and you should still avoid removing more than a small fraction of foliage at once. In early flower, focus on removing only what blocks bud sites (lower lollipopping, shading fans), and avoid training that creates repeated stress hits during the stretch.
How do I tell whether my plant is actually ready for the next pruning session?
If the plant is still in transition or stretching and you see leaves collapsing from shock, pause pruning and let it stabilize first. A practical decision aid is to wait until new growth is clearly pushing again (not just leaf color changes), then resume only with one targeted session. The article’s 3 to 7 day bounce window is your guide for when the plant is ready for the next intervention.
My canopy looks uneven. Should I prune to make it symmetrical, or focus on airflow and light only?
Start by removing the cause of the blockage rather than chasing uniformity. If lower growth is shaded, that is when lollipopping is most useful, but you should not strip healthy mid or upper leaves that feed top bud sites. If your canopy looks lopsided, use one conservative session to open airflow on the most crowded side, then reassess after recovery.
If I’m topping for multiple colas, do I need to prune fan leaves differently than usual?
Do not rely on a fixed leaf count alone, because plant size and density matter. If you want multiple colas from topping, your first cut timing (after enough nodes form) is more important than how many leaves you remove later. Use the same conservative removal limits, then limit additional changes to just what supports the new branch structure.
Is it better to snap off fan leaves or cut them with scissors?
Be cautious with leaf snapping if the stem or petiole looks dry or brittle, since that can tear tissue and slow healing. Cutting with sharp, sanitized scissors often gives a cleaner result when leaves are stressed (especially near the veg-to-flower shift). If you notice browning around leaf removal points, switch method and stop further cuts.
What if my tools were not sharp, could that cause problems even if I sanitized them?
Sanitizing helps with disease spread, but it does not undo damage from crushing. After each cut, check that tissue edges are clean and not frayed. If you used dull blades or had obvious smearing, increase your recovery caution, keep the next session lighter, and avoid stacking multiple cuts in the same day.
If I find a banana-shaped pollen sac, do I keep pruning to clean up the canopy?
Yes, but treat it as a controlled decision. Remove the pollen sacs immediately with tweezers, then keep pruning minimal from that point onward because additional stress can worsen the situation. Also, re-check nodes and nearby branches, since more than one sac can appear and go unnoticed.
Late flowering feels too crowded. What’s safer than defoliating around buds?
Not the way you would in mid flower. If buds are already well formed, late defoliation increases exposure and can trigger bleaching or mold risk, and the plant cannot recover well. If a leaf is truly blocking airflow, try improving airflow by repositioning or spacing branches rather than cutting directly around developing buds.
I’m new. How should I adjust the pruning plan during the first two weeks of flowering?
If the plant is in the first couple weeks after the flip, prioritize minimal targeted cleanup only, and avoid experimenting with heavy changes. For new growers, the conservative approach is one small session, wait for recovery, then reassess before any second intervention. This reduces the chance of compounding stretch stress with pruning stress.
Next Article
How to Grow Canna Plants: Step-by-Step Guide for Beginners
Step-by-step guide to grow ornamental canna lilies, from rhizomes and planting to light, watering, fertilizing, pests, a