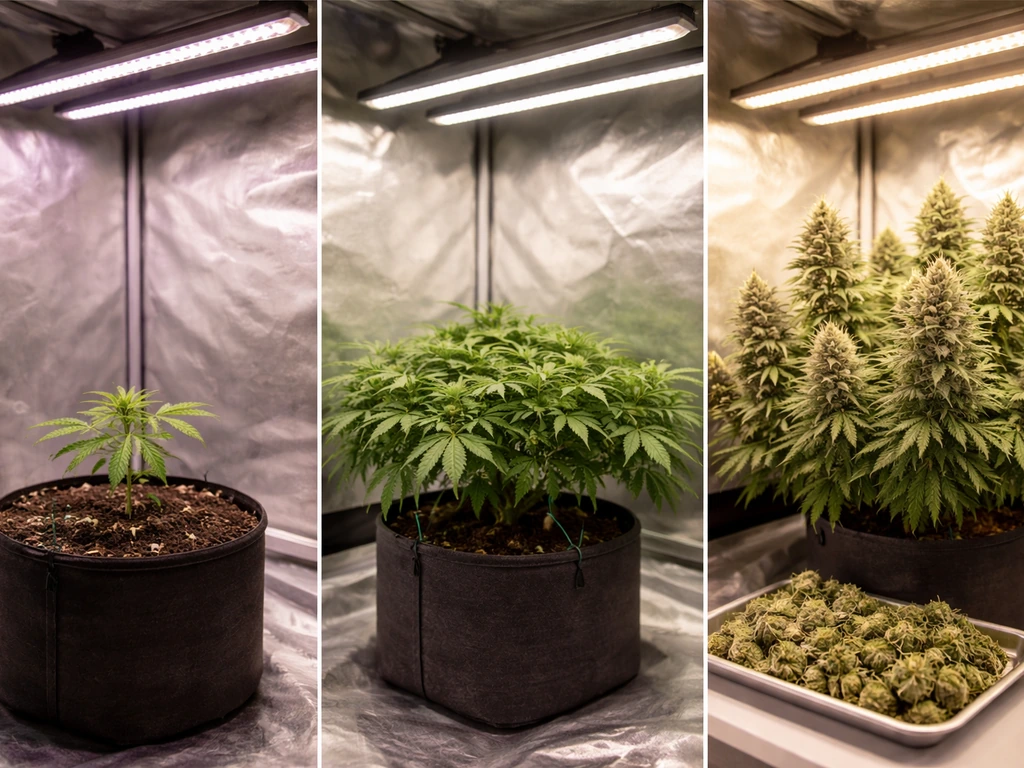
Growing sativa indoors is absolutely doable, but it demands more planning than growing an indica. Sativas stretch hard once flowering starts, often doubling or even tripling in height, so if you flip your lights too late you'll run out of vertical space fast. The core workflow is: pick a manageable strain, set up your environment carefully, germinate and veg with steady care, flip to 12/12 light when your plant is about one-third of your target final height, train aggressively to keep the canopy flat, feed by growth stage, and harvest only when trichomes tell you it's time. That's the whole map. Everything below fills in the details.
How to Grow Sativa Indoors: Seed to Harvest Guide

Marcus Holbrook
20 Jun 2026
Choosing the right sativa strain and sourcing seeds
Strain choice is where a lot of beginners go wrong with sativas. A true pure sativa like Golden Tiger can flower for 11 to 14 weeks (77 to 98 days) and stretch to ceiling height in a standard grow tent. That's a beautiful plant, but it's a challenging grow for someone without experience managing vertical space and long bloom cycles. For most home growers, sativa-dominant hybrids are the smarter starting point.
Something like Mimosa (around 9 to 10 weeks flowering, indoor peak around 80 cm) gives you that bright sativa character with a more predictable size and timeline. Royal Moby is another popular option: around 9 to 10 weeks of flowering indoors, though it can stretch up to 1.4 meters (nearly 5 feet) in height, so you still need to plan your space. If you have the room and patience, longer-flowering pure sativas reward you with exceptional yields and effect profiles. If you're working with a 1.2 x 1.2 m tent and a 2-meter ceiling, lean toward a hybrid with a stated indoor height under 1 meter before training.
For seed sourcing, always buy from a reputable breeder with documented genetics. Look for feminized seeds if you want to skip sex-screening plants, or autoflowering sativa-dominant seeds if you want a faster, simpler cycle (though autos sacrifice some yield and training flexibility). Check your local regulations before purchasing or growing: cannabis cultivation laws vary widely by country, state, and municipality, and it's your responsibility to know what's legal where you live.
| Strain | Type | Indoor Flowering Time | Indoor Height | Best For |
|---|---|---|---|---|
| Mimosa | Sativa-dominant hybrid | 9–10 weeks | ~80 cm | Beginners, smaller tents |
| Royal Moby | Sativa-dominant hybrid | 9–10 weeks | Up to ~140 cm | Intermediate growers, larger spaces |
| Golden Tiger | Pure sativa | 11–14 weeks | Very tall (2 m+) | Experienced growers, large rooms |
Indoor setup basics for growing sativa
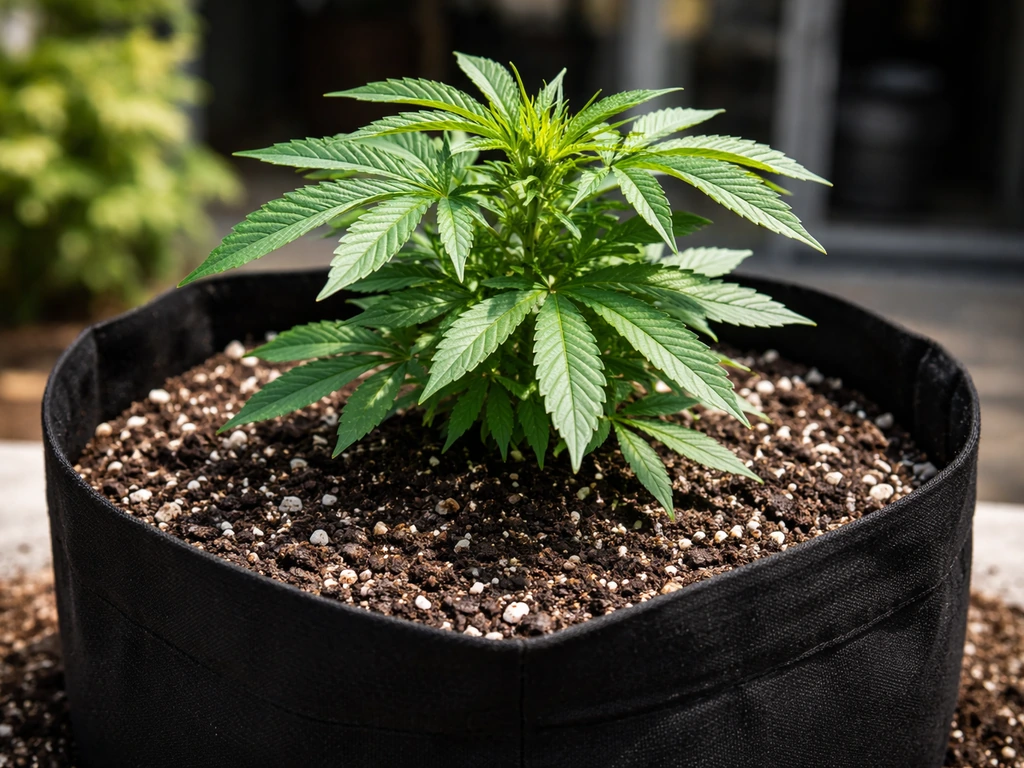
Sativas evolved near the equator under intense sun, which means they want strong light, warm temperatures, and lower relative humidity compared to indicas. Get these parameters dialed in before your seeds even crack.
Space and tent sizing
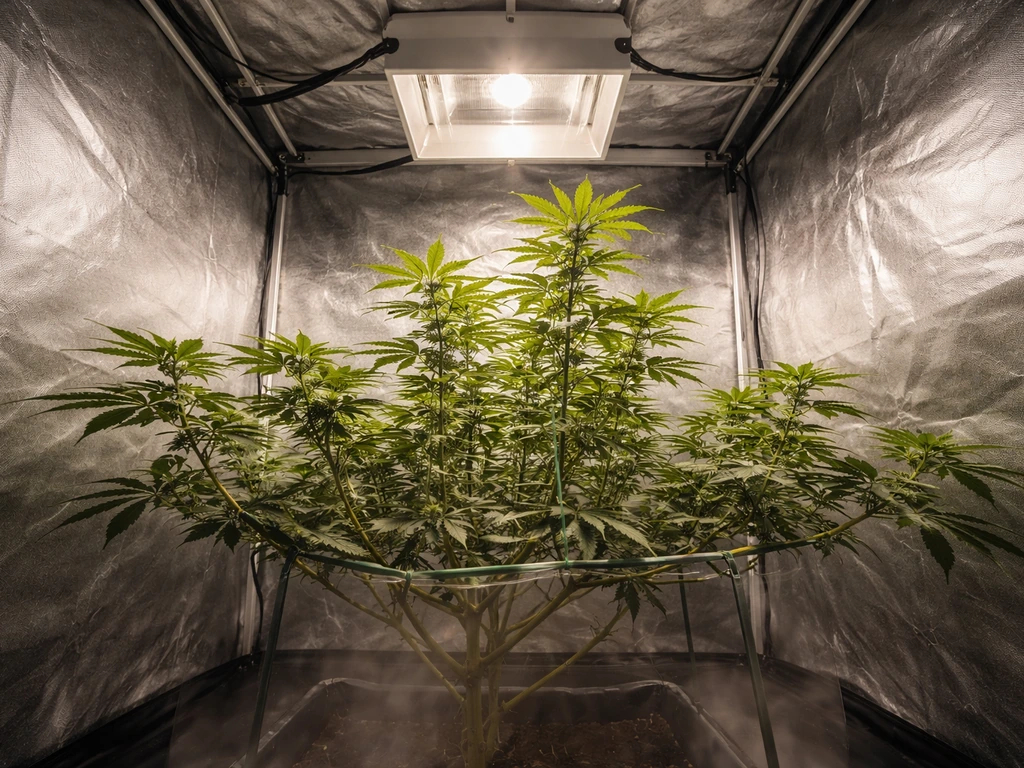
Because sativas stretch so aggressively in early flower, you need more vertical clearance than you'd expect. A standard 2-meter grow tent can work, but you'll need to train hard and flip early. If you're running a taller space (2.4 m or more), you'll have more breathing room. I'd recommend at minimum a 1.2 x 1.2 x 2 m tent for one to four sativa plants. Going wider (1.2 x 2.4 m) lets you run a proper horizontal canopy with training, which is honestly the best approach for sativas indoors.
Lighting
HID lights (HPS or CMH) have a long track record with sativas, but modern full-spectrum LEDs are just as effective and run cooler, which matters in a warm grow. Aim for 600 to 1000 watts of HPS equivalent coverage, or around 40 to 50 watts per square foot with quality LED panels. During veg, run an 18/6 light schedule (18 hours on, 6 off). You'll drop to 12/12 to trigger flowering, covered in detail below. Keep lights at the manufacturer-recommended distance to avoid light burn: typically 45 to 60 cm for HID, 30 to 60 cm for LED depending on intensity.
Temperature and humidity targets
| Growth Stage | Temperature (Day) | Temperature (Night) | Relative Humidity |
|---|---|---|---|
| Seedling | 20–25°C (68–77°F) | 18–22°C (64–72°F) | 65–70% |
| Vegetative | 22–28°C (72–82°F) | 18–24°C (64–75°F) | 50–70% |
| Early Flower | 20–26°C (68–79°F) | 18–22°C (64–72°F) | 40–50% |
| Late Flower | 18–24°C (64–75°F) | 16–20°C (61–68°F) | 30–40% |
Invest in a good digital thermometer/hygrometer combo and put it at canopy level. That's the reading that matters. A good exhaust fan and carbon filter system handles odor while maintaining airflow. Keep fresh air moving across the canopy with an oscillating fan: it strengthens stems and reduces mold risk, which is especially important during the long sativa flower period when buds bulk up.
Germination and early vegetative care
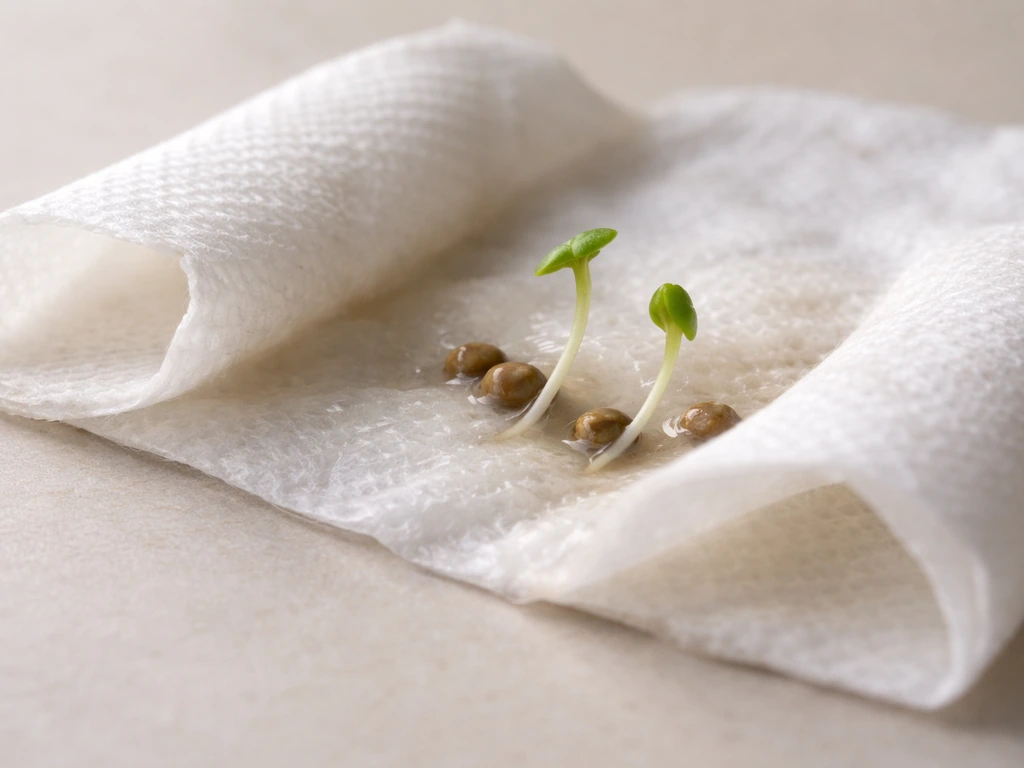
The easiest germination method I've found is the paper towel technique: dampen (not soaking wet) two paper towels, place your seeds between them, fold the towels over, and put them in a sealed plastic bag or between two plates at around 22 to 25°C (72 to 77°F). Check every 12 hours. Most quality seeds crack and show a taproot within 24 to 72 hours. Once the taproot is 0.5 to 1 cm long, transfer it carefully into a small starter pot (a 7 to 10 cm nursery pot or a Solo cup works well) with a light seedling mix. Plant the seed about 1 cm deep, taproot pointing down.
For the first week or two, your seedling doesn't need much. Keep the medium lightly moist (not soaked) and humidity high (65 to 70%). Under an 18/6 light schedule, seedlings emerge and start pushing their first true leaves (the serrated cannabis leaves) around day 7 to 14. Don't feed nutrients yet: a seedling mix has enough to carry the plant for two to three weeks. Overfeeding a seedling is one of the most common beginner mistakes.
Once the plant is showing its third or fourth node (set of leaves), you can transplant to a larger container (a 3- to 5-liter pot) and begin a light vegetative feeding schedule. This is also when you want to start thinking about training, because sativas respond really well to early low-stress work. The vegetative stage for sativa-dominant plants typically runs 4 to 8 weeks indoors depending on how tall you want them to get before flipping, but remember: you're aiming to flip when the plant is only about one-third of your target final height.
Flowering and photoperiod control for sativa
This is the section that trips up most indoor sativa growers, so read it carefully. Photoperiod sativas (non-autoflowering) require a shift to 12 hours of light and 12 hours of uninterrupted darkness to trigger flowering. That 12/12 switch is your signal to the plant that autumn has arrived and it's time to reproduce.
The critical sativa-specific rule: flip to 12/12 when your plant is roughly one-third of your final desired height. If you want a finished plant at 120 cm, flip when it's around 40 cm tall. If your ceiling clearance and setup allow a 150 cm finished plant, flip at about 50 cm. Sativas will stretch dramatically in the first 3 to 6 weeks of flowering: some strains double in height, others triple. I've seen Royal Moby go from 50 cm to 130 cm during early flower alone. If you flip late, you'll be tying stems to the tent poles to keep them from hitting the lights.
Once you flip, make the dark period absolutely light-tight. Even a small light leak can disrupt the flowering hormone cycle and cause hermaphroditism (where the plant grows both male and female flowers) or re-vegging. Use quality blackout tent material, tape any gaps, and don't open the tent during the dark cycle. The total flowering time varies a lot by strain: sativa-dominant hybrids typically run 9 to 11 weeks, while pure sativas can run 11 to 14 weeks or longer. Check your breeder's stated flowering time as a baseline, but always confirm with trichome inspection rather than the calendar alone.
Nutrients and feeding schedule by growth stage
Cannabis needs three primary macronutrients: nitrogen (N), phosphorus (P), and potassium (K), plus a range of secondary and micronutrients. Sativas have a high nitrogen appetite during veg and transition to needing more P and K during flower. Getting this wrong is where most beginners cause problems: either underfeeding (deficiencies) or overfeeding (nutrient burn and lockout).
Seedling stage (weeks 1 to 3)
No additional nutrients needed if you're using a quality seedling mix. Just pH-correct water at 6.0 to 7.0 for soil (6.5 is ideal), or 5.5 to 6.5 for coco/hydro. Watering frequency: when the top 1 to 2 cm of medium feels dry. Overwatering at this stage stunts growth more than almost anything else.
Vegetative stage (weeks 3 to 8)
Start feeding at quarter-strength of your nutrient line's recommended dose and work up to full strength over two weeks. Look for a high-N vegetative formula. Feed every second or third watering and always water to 10 to 20% runoff to prevent salt buildup. A typical veg feed might look like: CalMag supplement (especially under LED or in coco), a base veg nutrient with 3-1-2 NPK ratio, and a root stimulator for younger plants. Check runoff pH and EC (electrical conductivity) regularly to catch problems early.
Transition and early flower (weeks 1 to 4 of 12/12)
Shift from high-N to a bloom formula, typically moving to a 1-3-2 or similar P/K-dominant ratio. Keep some nitrogen in the early weeks of flower because the plant is still building mass. Many growers use a transition or bloom booster during weeks 2 to 4 of flower. Watch for early deficiency signs: yellowing lower leaves (normal in late flower, but not in early flower), curling tips (early sign of nutrient burn), or interveinal chlorosis (often magnesium or iron).
Mid to late flower (weeks 4 to 10+)
Reduce or eliminate nitrogen. Push P and K to support bud development with a late-bloom or ripening formula. Many growers add a carbohydrate supplement or bud-swelling booster here. In the final 10 to 14 days before harvest, flush your medium with plain pH-corrected water to clear residual salt buildup. Some growers skip flushing; it's genuinely debated. I flush, especially in soil, because the final smoke quality seems cleaner to me.
Training, canopy management, and space planning for sativas
This section is where growing sativa indoors gets interesting. Because sativas are natural climbers that want to reach for the sky, you have to redirect that energy horizontally. The payoff is a wide, flat canopy that exposes every bud site to direct light, which means significantly better yields per watt of lighting.
Low-stress training (LST)
LST is the friendliest starting point for beginners. You simply bend branches and tie them down with soft wire, plant ties, or pipe cleaners to anchor points around the pot. Start LST once the plant has 4 to 5 nodes. Gently bend the main stem down and outward, then tie it. As the plant grows, continue bending and tying new growth outward. Over time you create a circular, flat canopy. This is low-risk, reversible, and works brilliantly for controlling sativa stretch.
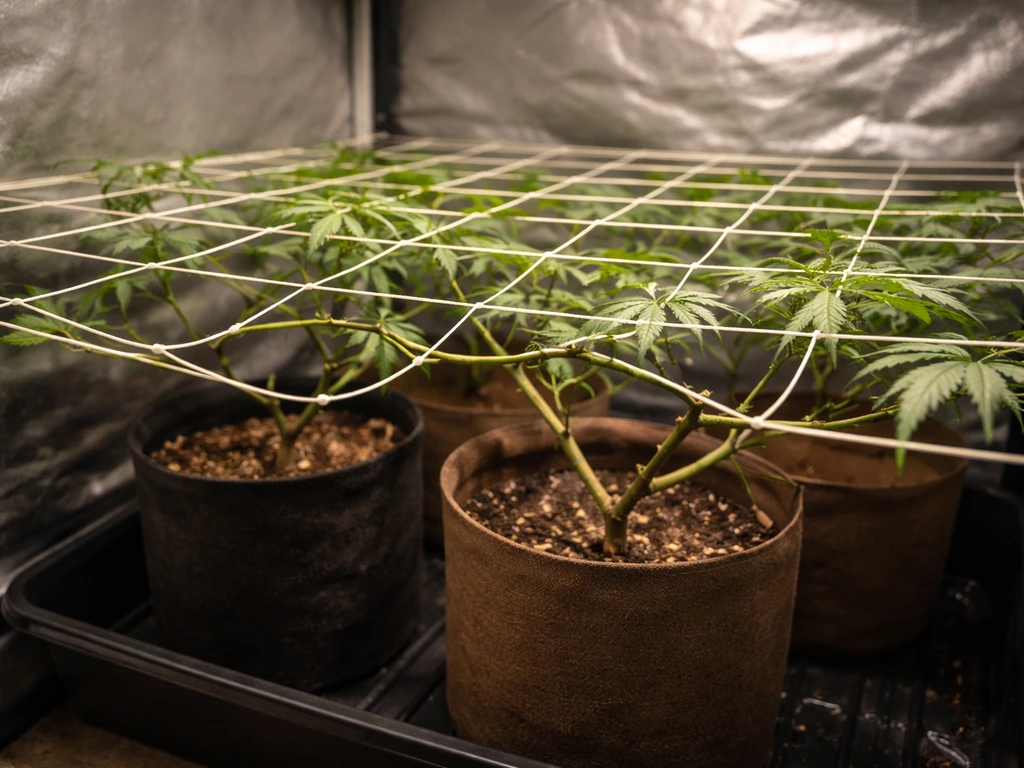
Screen of Green (ScrOG)
ScrOG is my favorite method for sativas in a tent. You install a horizontal screen (5 x 5 cm mesh works well) about 30 to 40 cm above the pot and weave branches through it as they grow. The screen holds the canopy flat and even. Stop filling the screen just before you flip to 12/12, so stretch fills the screen from below. A well-executed ScrOG with a sativa-dominant plant in a 1.2 x 1.2 m tent can produce exceptional yields because every bud site is at equal light distance. Growing cannabis plants tall is sometimes the goal outdoors, but indoors the ScrOG approach converts that vertical energy into horizontal coverage.
Topping and FIMing
Topping means cutting the main growing tip off, which forces the plant to grow two main colas instead of one. You can top multiple times during veg to create four, eight, or more main colas. FIMing (a less precise cut of the tip) produces a similar but bushier effect. Both techniques are good for sativas because they break apical dominance and redistribute energy into lateral growth. Always top during veg, never in flower. Give the plant at least a week to recover after each top before doing it again. Combine topping with LST for maximum canopy control.
Lollipopping and defoliation
Sativas in flower can get bushy enough that lower bud sites receive almost no light. Lollipopping strips lower branches and leaves from the bottom third of the plant so the plant focuses energy on the top canopy. Light strategic defoliation of fan leaves during flower (I do a light defoliation at the start of flower and again around week 3 to 4) improves airflow and light penetration. Don't go overboard: removing too many leaves stresses the plant and can slow bud development. Prune selectively, not aggressively.
Harvest timing, drying, curing, and troubleshooting
Knowing when to harvest
The calendar and the breeder's stated flowering time are your starting guides, not your finish line. The only reliable way to know when a sativa is ready is to look at trichomes under magnification (a jeweler's loupe at 30x to 60x, or a digital microscope, works well). Trichomes start clear and glassy, turn milky white as THC peaks, then shift amber as THC degrades to CBN. For sativas, most growers harvest when trichomes are mostly milky with around 10 to 20% amber for a clear, energetic high, or push to 30%+ amber for a heavier, more sedating effect. Also watch the pistils: when 70 to 90% of the white hairs have darkened and curled in, you're in the harvest window.
Drying
After harvest, hang whole branches or individual buds upside down in a dark, well-ventilated room at 15 to 21°C (60 to 70°F) and 45 to 55% relative humidity. A slow dry over 10 to 14 days preserves terpenes and produces a smoother smoke. Don't rush this with high heat or a food dehydrator. Buds are ready to move to cure jars when the outside feels dry to the touch and small stems snap cleanly (rather than bending).
Curing
Place dried buds loosely in wide-mouth glass mason jars, filling them about 75% full. Store jars in a cool, dark place. For the first week, open jars twice daily for 10 to 15 minutes to release moisture and gas (this is called burping). In weeks 2 to 4, burp once daily. After week 4, burp every few days. A minimum cure of 4 weeks significantly improves flavor and smoothness; 8 weeks is even better for most sativas. Boveda humidity packs (62% RH) inside the jars help maintain ideal curing humidity once initial burping is done.
Common problems and how to fix them
- Sativa stretch out of control: Flip to 12/12 earlier next grow (remember the one-third rule). Mid-grow, use aggressive LST or ScrOG to redirect vertical stems horizontally. As a last resort, super-cropping (pinching and bending stems at a 90-degree angle) can buy several inches of clearance.
- Nutrient burn (tips curling and browning): Reduce feeding strength by 25 to 50% and flush with plain pH-correct water. Always feed at or below manufacturer recommendations until you know how your strain responds.
- Yellowing leaves in early flower: Check pH first (soil: 6.2 to 6.8; coco/hydro: 5.8 to 6.3). Yellowing from pH lockout looks the same as deficiency but won't respond to more nutrients. If pH is correct, check for nitrogen deficiency and adjust feed.
- Mold (bud rot or powdery mildew): Increase airflow immediately, drop humidity below 50% in flower, remove and dispose of affected material. Prevention is everything: keep humidity low in late flower and ensure air circulates through the canopy.
- Light burn (bleached tops or curling upward): Raise your light or reduce intensity. Sativas can grow fast enough that the canopy closes on the light in a matter of days, especially mid-flower stretch.
- Pests (fungus gnats, spider mites, thrips): Inspect plants regularly, especially undersides of leaves. Sticky yellow traps catch fungus gnats. Neem oil or insecticidal soap works for mites and thrips. Keep your grow space clean and avoid overwatering (wet topsoil invites gnats).
- Slow or stalled flowering: Confirm your dark period is completely light-tight. Any light leak, even from a timer LED, can interrupt the photoperiod signal. Also check that temperatures aren't dropping below 15°C at night, which can slow bud development.
If you're also growing or considering indica varieties alongside your sativa project, the process shares many fundamentals but the differences in stretch, flowering time, and canopy management are significant enough that the two types benefit from separate space planning. Similarly, soil choice underpins all of the nutrient work covered here: a quality cannabis-specific mix or amended organic soil makes feeding much more forgiving, and it's worth getting that foundation right before your seeds go in the ground. For the best results, start with a cannabis-friendly soil mix or amended organic soil, then adjust pH to stay within the ideal range for healthy nutrient uptake soil choice.
Growing sativa indoors successfully comes down to respecting what the plant naturally wants to do and building your setup around those tendencies rather than fighting them. Get your environment dialed in, train early and consistently, flip at the right height, feed by stage, and be patient during that long flower. If you want a step-by-step guide on how to grow indica indoors, apply the same environment, training, and feeding logic but tailor it to indica's shorter stature and faster flowering. The payoff when you crack open a jar of properly grown and cured sativa is absolutely worth the extra planning.
FAQ
How many sativa plants can I grow in a tent without wasting light or causing airflow problems?
Use canopy area, not just number of pots. In a 1.2 x 1.2 m tent, one well-trained plant often outperforms multiple lightly trained plants because sativas need consistent light distance across the canopy and they stretch for weeks. If you run multiple plants, increase airflow and consider space for lateral growth, not just stem height.
If I flip to 12/12 when the plant is one-third of its final height, what if it still ends up too tall?
Plan for the early-flower stretch you cannot fully control. The safest options are earlier flipping, choosing a shorter hybrid, and using a strict ScrOG or LST plan that sets a hard canopy height before flowering fills in. If you’re already in flower and it’s too tall, manage the canopy, not the main stem, to avoid damaging the plant.
What’s the difference between managing stretch with LST, topping, and ScrOG?
LST is gradual and reversible, it works by bending growth sideways while the plant is still flexible. Topping and FIMing restructure the branching pattern during veg, creating more tops so the plant spreads its growth. ScrOG gives you a physical canopy limit in the tent, making it the most reliable method when height control is your top priority.
Do I need to worry about light leaks during the dark cycle even with LEDs?
Yes. LEDs are irrelevant to the risk, the problem is any light interrupting the uninterrupted dark window. Use light-tight materials, avoid opening the tent during darkness, and consider a red light only for prep outside the tent, since even brief exposure can stress photoperiod plants.
Can I veg sativas longer to increase yield?
You can, but longer veg usually increases final height and extends the time you must manage stretch. For sativas, yield gains often come more from better canopy coverage and consistent feeding than from adding weeks blindly. If you extend veg, re-calculate your flip height so the flowering stretch still fits your tent.
When should I start training if my plant grows slowly or has a stressed start?
Wait until the plant has enough recovery and new growth, not just a certain node count. If leaves look pale, droopy, or stalled, training too early can slow recovery. Start with gentle LST first, then add heavier training once you see steady upward growth and healthy new leaf formation.
How do I tell nutrient burn from early deficiencies in sativa veg?
Nutrient burn often appears as tip curl, dark green that can look “too intense,” and leaf edges that crisp or claw. Deficiencies more often show as yellowing patterns that start on specific areas, like older leaves for nitrogen. Also check your runoff pH and EC, if either is out of range, the symptom may be a lockout rather than a simple lack or excess.
Do sativas need more nitrogen than indicas throughout veg?
They do tend to be nitrogen-hungry during active growth, but the bigger issue is not just amount, it’s timing. Transition too late and you risk problems in early flower, too early and you can stunt bud formation. Start shifting toward P and K as soon as you begin flowering while keeping a small nitrogen baseline because sativas still build biomass early on.
Should I flush before harvest, and what if I use coco or hydro?
Flushing is debated, and the “right” approach depends on your medium and nutrient regimen. If you’re in soil, many growers find it helps reduce residual salts, but it is not a magic quality upgrade. In coco or hydro, your nutrient strategy and EC control matter more, so “flushing” may simply lower minerals too fast and stress the plant if done incorrectly.
How long should I dry for sativas if the buds feel dry on the outside quickly?
Dry time is not based on touch alone, it’s based on internal moisture balance. If outside feels dry but smaller stems do not snap cleanly, you still have moisture inside. Aim for a steady dry until stems snap rather than bend, then move to cure promptly to avoid overdrying.
How can I prevent sativa buds from molding during long flowers?
Control humidity at the canopy level and keep air moving consistently. Sativas have long flowering, so even small microclimates inside the canopy can form. Use training that improves airflow, avoid removing too much leaf at once, and monitor for humidity spikes when lights change or exhaust schedules cycle.
Is harvesting based on trichomes enough, or should I also rely on pistils?
Use both as confirmation. Pistils can mature at different speeds, especially in trained canopies, so trichome ratio is more reliable. Still, pistils give a useful window, when most hairs have darkened and curled, you are typically close to the trichome peak.
What humidity should I target during curing, and how do I know my jars are too wet or too dry?
A common target is mid-60% RH during the early curing phase, then gradually lower if your buds continue to dry. If you see condensation or strong “green” wet odors, you likely need more burping and possibly longer dry time before curing. If jars are too dry, buds can feel crunchy, so you may need to adjust curing conditions rather than opening constantly.
Next Article
What Soil to Grow Cannabis: Specs, Mixes, and Troubleshooting
Learn what soil to use for cannabis: ideal pH, texture, drainage specs, mixes, feeding, and quick troubleshooting.