Aeroponics grows cannabis with roots suspended in air and fed by a fine mist of nutrient solution, no soil and no standing water. Done right, it is one of the fastest-growing methods available to home cultivators, with water savings of up to 95% compared to soil and measurably faster early root and vegetative growth than many hydroponic setups. The tradeoff is real though: aeroponics is the least forgiving method on this list. A pump failure or power cut that lasts more than a few hours can kill a crop that took weeks to build. Discover Air‑Atomized Aeroponics (industry/technical review) documents the major practical disadvantage of aeroponics: its high dependence on continuous power and precision hardware, and notes growers report multi‑hour mist interruptions or pump/nozzle failures can rapidly desiccate roots and cause crop loss. If you understand that tradeoff going in, and you are prepared to manage it, aeroponics is genuinely impressive.
How to Grow Weed Aeroponically: Complete Beginner Guide

Who this guide is for
This guide is written for home growers who want a complete, honest walkthrough of aeroponic cannabis cultivation, from first principles through harvest. You do not need prior hydroponic experience, but some comfort with basic DIY tasks (drilling holes, connecting tubing, reading a pH meter) will help. I have organized this so a complete beginner can follow it linearly, while experienced growers can jump to the sections most relevant to them, such as the nutrient schedule, troubleshooting matrix, or strain selection tips. Everything here assumes you are growing at home, in a jurisdiction where cannabis cultivation is permitted, and that you want practical guidance rather than vague inspiration.
What aeroponics actually is
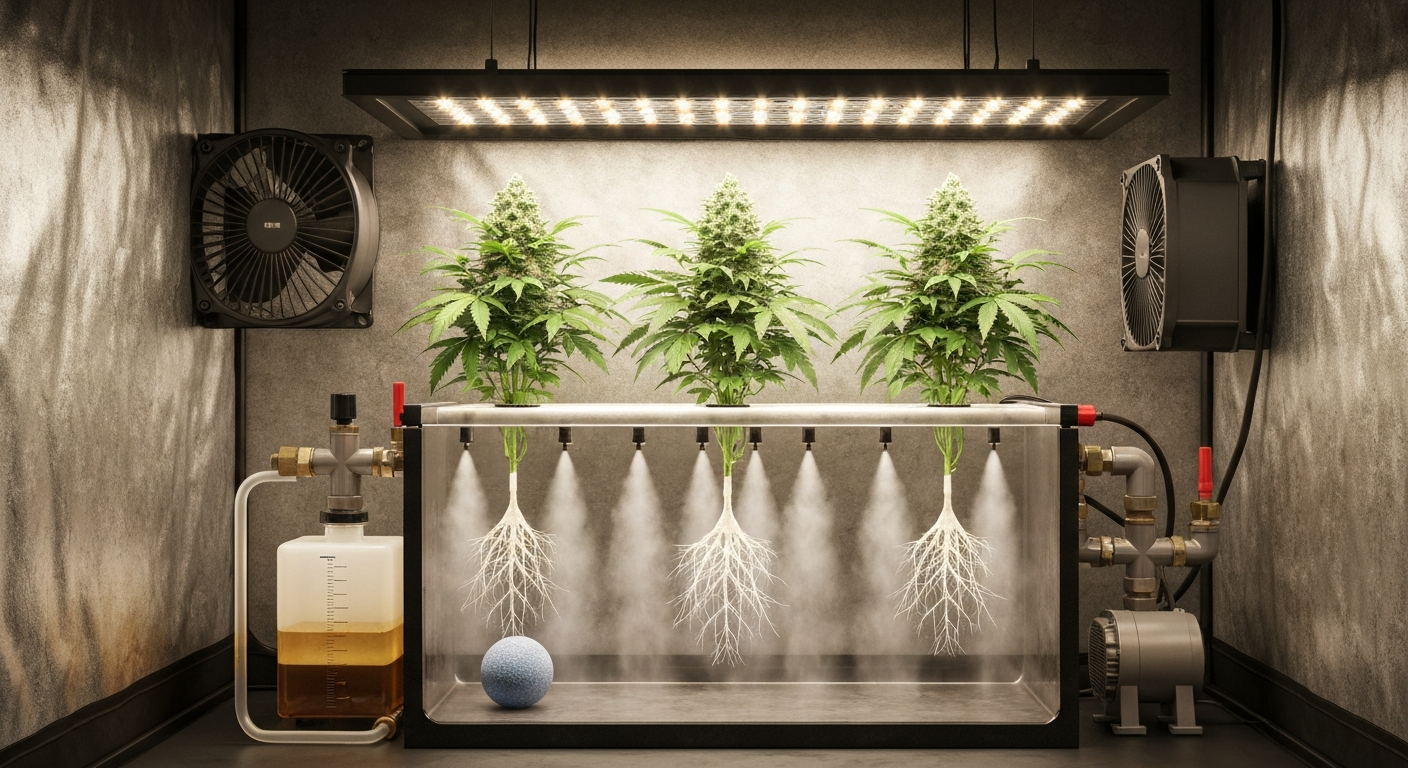
In aeroponics, plant roots hang freely in an enclosed, dark chamber. A pump periodically forces nutrient solution through misting nozzles, coating the roots in a fine spray and then letting them dry slightly before the next cycle. That brief drying period is important: it floods the root zone with oxygen between mist cycles, which is why aeroponics consistently out-performs immersion systems like deep water culture in root oxygenation. Roots need both water and air, and in most hydroponic methods you are always compromising one for the other. Aeroponics is the closest you can get to delivering both simultaneously.
There are two main variants. Low-pressure aeroponics (LPA) uses a standard submersible pump and sprinkler-style nozzles to create larger droplets, typically above 100 micrometers. It is simpler and cheaper to build, but the larger droplets wet roots heavily and leave less air exposure per cycle. High-pressure aeroponics (HPA) uses a booster pump running at 60 to 125 PSI combined with precision atomizing nozzles (Tefen fog nozzles are a popular DIY choice) to produce droplets in the 20 to 100 micrometer range. The finer the droplet, the more surface area it covers on the root and the more oxygen remains accessible. For cannabis, most serious home growers build HPA systems, and that is the system this guide focuses on. NASA research on controlled-environment plant growth was foundational in developing HPA, which should give you a sense of how effective the root-zone science behind it is.
Pros and cons you should know before you build
I will be direct here because I have seen growers buy components enthusiastically, hit a pump failure at week four of flower, and lose everything. Aeroponics has genuine advantages, but the disadvantages are not minor inconveniences. Here is an honest breakdown.
| Factor | Advantage | Disadvantage / Risk |
|---|---|---|
| Growth speed | Faster early root and vegetative growth vs. most hydro methods | Requires consistent management to sustain that speed |
| Water use | Up to 60–95% less water than soil | Requires filtered, temperature-controlled nutrient solution |
| Root oxygenation | Highest available in any cultivation method | Roots desiccate rapidly if mist cycle is interrupted |
| Nutrient uptake | High efficiency due to maximized root surface exposure | Over-feeding damage appears quickly; requires precise EC/pH |
| Disease risk | No standing water reduces some Pythium vectors vs. DWC | Still vulnerable to root pathogens; requires strict sanitation |
| Power dependency | N/A | Total crop dependency on pump and timer; no power = crop loss |
| Cost | Lower long-term water/nutrient cost | Higher upfront hardware cost than soil or basic DWC |
| Complexity | Scalable once understood | Steepest learning curve of common home grow methods |
| Maintenance | Clean cycles are straightforward | Nozzle clogging is frequent without proper filtration |
For comparison: deep water culture (DWC) keeps roots submerged in oxygenated nutrient solution continuously, which is simpler to manage and more forgiving of short interruptions. If you are new to hydroponic cannabis and want a water-based system with a gentler learning curve, DWC is worth considering first. If you prefer a gentler introduction, consult a practical guide on how to grow weed DWC for step-by-step setup and management tips. Aeroponics rewards growers who are ready to build reliable systems and monitor them closely.
Legal and safety considerations
Before you buy a single fitting, check your local laws. Cannabis cultivation is legal for home use in a growing number of jurisdictions, but plant count limits, licensing requirements, and cultivation location rules vary enormously. Some regions allow four plants per household; others require a medical authorization; others prohibit home cultivation entirely. This guide does not tell you what is legal where you are, and it is your responsibility to find out. Cultivating outside the law creates serious personal risk that no growing technique is worth.
For electrical safety: aeroponics combines high-pressure pumps, timers, water, and often high-wattage lighting in a confined space. Use weatherproof or outdoor-rated outlets near any water-exposed components, keep all connections above splash height where possible, and use a GFCI (ground fault circuit interrupter) outlet or breaker. A single drip onto a standard outlet in an enclosed grow tent is a fire and electrocution hazard. Do not skip this.
Ventilation matters for two reasons: plant health and odor control. Cannabis in flower produces detectable odors that can create legal or social problems even in jurisdictions where cultivation is legal. A carbon filter connected to an inline fan and ducted out of your grow space is the standard solution for odor management. Size your fan to exchange the full air volume of your grow space at least once per minute. Ventilation also controls temperature and humidity, which directly affect disease risk and plant performance, so this is not optional.
Water safety in an aeroponic system means managing reservoir temperature, nutrient solution pH, and system sanitation. Keep your reservoir below 22°C (72°F) at all times. Warmer water holds less dissolved oxygen and becomes a Pythium breeding environment. In warm climates or during summer, a small aquarium chiller or ice packs in the reservoir can be the difference between healthy white roots and brown slime.
Key planning decisions before you build
System size
For a first aeroponic build, I recommend starting with two to four plants in a single-chamber system. This keeps reservoir volume manageable (10 to 20 liters is enough), reduces the complexity of your plumbing manifold, and makes it easier to dial in your nutrient schedule before scaling. A 2x4-foot grow tent accommodates four plants comfortably in a compact aeroponic setup with space for lighting, ducting, and your reservoir.
Single-reservoir vs. closed-loop recirculating
A single-reservoir system is what most home growers build: one reservoir feeds the misting nozzles, and solution drains back into the same reservoir. It is simple, cheap, and easy to monitor. A closed-loop system separates the reservoir from the root chamber with dedicated feed and return lines, often with a separate catch tank, which makes it easier to maintain sterility and to flush the system. For a first build, a single recirculating reservoir is fine. As you scale, a closed-loop design gives you more control.
Indoor space and layout
Your root chamber needs to be completely light-proof. Light reaching roots triggers algae growth and degrades root health. Most DIY builders use opaque black plastic storage totes or purpose-built aeroponic chambers. Leave enough overhead clearance for your light (LED panels typically need 12 to 24 inches of clearance from canopy depending on wattage) plus the height of your plants. Plan for your reservoir to sit beside or below the root chamber for gravity return, or add a small return pump if your layout requires it.
Lighting options
LED is the dominant choice for home aeroponic grows because modern full-spectrum LEDs (quantum board style) produce low heat output relative to their PPFD output, which reduces the cooling load in your tent. For a 2x4-foot space, a 200 to 300-watt LED panel delivers sufficient light intensity for both vegetative and flowering stages. CMH (ceramic metal halide) is a good alternative if you want broad spectrum light with high canopy penetration. HPS is effective but adds significant heat that compounds reservoir temperature management challenges. Avoid growing cannabis without adequate lighting: there is no substitute for a proper light source in an indoor grow, regardless of what some searches suggest.
Choosing strains that work well in aeroponics
Not every strain responds equally well to aeroponic conditions. The ideal aeroponic cultivar has moderate-to-vigorous root development, tolerates slightly lower EC than soil-grown equivalents, and does not stretch excessively during the transition to flower (which would create canopy management problems in a fixed root-chamber layout). Indica-dominant and balanced hybrid strains tend to stay more compact and manageable. Autoflowering varieties are an excellent choice for first-time aeroponic growers because their fixed life cycle removes the need to manage light schedule changes, and their compact size suits smaller chambers.
Strains bred specifically for hydroponic performance, often labeled as such by seed banks, are a reliable starting point. Look for cultivars described as feeding efficiently, finishing in 8 to 10 weeks of flower, and producing dense root structure. Avoid very long-flowering or extremely sativa-dominant varieties for your first run: they tend to stretch aggressively and are more sensitive to root-zone fluctuations. Once you have dialed in your system with a forgiving strain, you can experiment with anything.
- Autoflowering hybrids: compact, fixed life cycle, low maintenance for beginners
- Indica-dominant photoperiod strains: manageable stretch, dense root systems, efficient feeders
- Balanced hybrids labeled for hydro: bred to perform in recirculating nutrient systems
- Avoid on first runs: extreme sativa dominants, very long-flowering lines (12+ weeks), and landrace varieties not selected for controlled environments
Equipment checklist for a small home aeroponic system
This list covers a functional HPA system for two to four plants. Exact products vary by region and availability, but these categories and specs are what you need. Do not substitute low-pressure garden sprinkler nozzles for misting nozzles: you will not get the droplet size that makes aeroponics work.
| Component | Spec / Notes | Quantity |
|---|---|---|
| High-pressure diaphragm/booster pump | Aquatec CDP 8800 series or equivalent; 80–125 PSI operating range | 1 |
| Pressure accumulator (bladder tank) | 2–4 gallon capacity; smooths pump pulsation, reduces cycling | 1 |
| Pressure switch or duty-cycle timer | Adjustable cut-in/cut-out; controls mist cycle intervals | 1 |
| Misting nozzles | Tefen fog nozzles or air-atomizing equivalent; ~50–100 µm droplet range | 2–4 (1 per plant site) |
| Per-nozzle inline filters | 50–100 µm rated mesh filter upstream of each nozzle | 1 per nozzle |
| Main inline filter | 200 µm sediment filter on pump inlet line | 1 |
| Reservoir / nutrient tank | 10–20 L opaque food-safe container with lid | 1 |
| Root chamber | Opaque black plastic tote or purpose-built aeroponic chamber, light-proof | 1–2 |
| Net pots | 2-inch or 3-inch net cups fitted into lid of root chamber | 2–4 |
| Hydroponic plumbing tubing | 1/4-inch and 1/2-inch ID poly tubing; rated for nutrient solution | As needed |
| Manifold fittings | Push-fit or compression fittings; tees, elbows, and end caps for nozzle distribution | As needed |
| Air pump and air stones | For reservoir aeration; increases dissolved oxygen in nutrient solution | 1 pump, 1–2 stones |
| pH meter (calibrated) | Digital pen meter; calibrate with pH 4.0 and 7.0 buffer solutions | 1 |
| EC/TDS meter | Digital pen meter; use EC (mS/cm) as primary metric | 1 |
| Thermometer/hygrometer | Monitors air temperature and relative humidity inside grow space | 1 |
| Reservoir thermometer | Monitors nutrient solution temperature; critical for Pythium prevention | 1 |
| pH up and pH down solutions | Phosphoric acid (down) and potassium hydroxide or similar (up) | 1 each |
| 3-part or cannabis-specific nutrient line | Hydroponic formulation: Grow, Bloom, Micro or equivalent; follow manufacturer EC targets | Full set |
| Grow tent or enclosed grow space | 2x4 ft minimum for 4 plants; mylar-lined, with port access for ducting | 1 |
| Full-spectrum LED or CMH light | 200–300W for 2x4 ft footprint; quantum board LED recommended | 1 |
| Inline fan with carbon filter | Sized to exchange grow space volume once per minute minimum | 1 each |
| Backup power / UPS (optional but recommended) | Uninterruptible power supply for pump; protects roots during brief outages | 1 |
| Hydroton/clay pebbles or rockwool cubes | For supporting cuttings or germinated seedlings in net pots | Small bag |
Step-by-step assembly: building your first aeroponic rig
Follow these steps in order. If something does not make sense, pause and re-read before drilling or connecting anything. A clean build now saves hours of troubleshooting later. I learned this the hard way on my first system, which leaked from three different fittings simultaneously because I rushed the assembly.
- Prepare the root chamber: Using a hole saw, drill net pot holes in the lid of your opaque tote, spaced at least 6 inches apart. Drill a drain hole near the bottom of one side for return flow to the reservoir. Wrap any seams or joins with black silicone tape if light can penetrate.
- Mount the nozzle manifold: Inside the root chamber, run your 1/4-inch poly tubing along the bottom or sides. Install a tee fitting for each plant site and connect a nozzle stub pointing upward toward where the roots will hang. Keep nozzles centered under each net pot location.
- Install per-nozzle filters: Before each nozzle, install a 50–100 µm inline filter. This is non-negotiable for HPA systems: even small particles clog atomizing nozzles and will ruin a mist cycle.
- Connect the main supply line: Run 1/2-inch tubing from the pump outlet through the main sediment filter, into the accumulator, through the pressure switch, and then into the root chamber manifold. Tighten all compression fittings firmly but do not overtighten poly fittings.
- Set up the reservoir: Fill it with plain water to start. Place the pump inlet line at the bottom of the reservoir. Add your air stone(s) connected to the air pump to keep reservoir water oxygenated. Place the reservoir thermometer inside.
- Connect the return line: Run drain tubing from the root chamber drain hole back into the reservoir lid. Gravity return works if the root chamber sits above the reservoir; otherwise add a small return pump.
- Set the pressure switch and test for leaks: Set the pressure switch to cycle the pump on at around 70 PSI and off at around 100 PSI (adjust based on your pump model and nozzle spec). Run the system with plain water and check every fitting, the nozzle connections, and the return line for drips. Fix all leaks before adding nutrients.
- Set the mist cycle timer: A typical starting cycle for HPA cannabis is 3–5 seconds on, 3–5 minutes off during lights-on, and slightly extended off-periods during lights-off. Start conservative and adjust based on root moisture: roots should feel damp but not waterlogged between cycles.
- Install the grow tent and lighting: Set up your tent with the grow light mounted at the manufacturer-recommended height. Connect your inline fan and carbon filter. Confirm your thermometer/hygrometer is positioned at canopy height.
- Calibrate your meters: Calibrate your pH meter with fresh buffer solutions before every grow cycle. Calibrate your EC meter against a reference solution. Do not trust uncalibrated meters: they are the single most common source of nutrient and pH problems I see from new growers.
- Add germinated seeds or rooted clones: Place seedlings in net pots supported by clay pebbles or rockwool. Start with a very low nutrient concentration (EC 0.4–0.6 mS/cm) until roots are visibly growing into the chamber.
- Log everything from day one: Note your pH, EC, reservoir temperature, and any observations daily for the first two weeks. This record is what allows you to diagnose problems fast when they appear.
Growing from seed or clone through harvest
Germination and early seedling (Days 1–14)
Germinate seeds in a damp paper towel or directly in a small rockwool cube soaked in pH-adjusted water (pH 5.8). Once the taproot is 0.5 to 1 cm long, transfer to a net pot with clay pebbles. At this stage the root system is tiny and extremely sensitive to both over-wetting and drying. Run mist cycles very briefly (2–3 seconds on, 5 minutes off) and keep your reservoir nutrient solution at EC 0.4 to 0.6 mS/cm with pH 5.8 to 6.0. Maintain air temperature at 22–25°C (72–77°F) and relative humidity at 65–70%. Do not run your light at full intensity: seedlings do not need it and high intensity at this stage causes stress.
Vegetative stage (Weeks 2–5 for photoperiod strains)
Photoperiod strains stay in veg under an 18/6 (18 hours light, 6 hours dark) schedule until you choose to flip to flower. Autoflowering strains move through veg on their own schedule regardless of light cycle. During veg, you will see rapid root development: healthy aeroponic roots should be white, dense, and slightly fuzzy with root hairs. Ramp your EC up gradually to 1.0–2.0 mS/cm as root mass increases, and maintain pH in the 5.8 to 6.2 range. Air temperature 22–26°C (72–79°F), humidity 50–65%. Increase mist cycle frequency slightly as root mass grows and transpiration demand increases.
Transitioning to flower
To trigger flowering in photoperiod strains, switch your light schedule to 12/12 (12 hours on, 12 hours off). Expect a vegetative stretch of 50 to 100% in the first two weeks of flower, especially in sativa-dominant genetics. This is why compact indica or hybrid strains are easier in fixed root chambers: you have limited height. Transition your nutrient ratios at this point toward higher phosphorus and potassium, and lower nitrogen, in line with your nutrient line's bloom schedule.
Flowering through harvest (Weeks 1–10+ in flower)
During flowering, EC targets move to 1.6 to 2.4 mS/cm. Monitor trichome development to determine harvest readiness: a jeweler's loupe or digital microscope (60–100x) lets you inspect trichome color. Mostly clear trichomes mean the plant is not ready. Mostly cloudy trichomes indicate peak THC. A mix of cloudy and amber trichomes (around 20–30% amber) is a common target for a balanced effect. Two weeks before harvest, many growers perform a nutrient flush, running plain pH-adjusted water through the system to clear residual salts. In aeroponics, flushing is quick because there is no medium to flush.
Nutrient and water management
Aeroponics makes nutrient management very precise, which is both its strength and its challenge. Because roots are directly exposed to your solution with no buffering medium, pH and EC errors show up fast. The target pH for aeroponic cannabis is 5.8 to 6.2. Below 5.5, iron and calcium become difficult for roots to absorb. Above 6.5, phosphorus and most micronutrients start locking out. Check pH daily, especially in the first few weeks when root mass is still developing and uptake is uneven.
On EC versus PPM: use EC (measured in mS/cm) as your primary metric rather than PPM. PPM readings from meters vary depending on which conversion factor your meter uses (the 500 or 700 scale), which makes them inconsistent between meters. EC is always EC. Your nutrient manufacturer's dosing guide will usually give PPM targets, so just note which scale they use and convert to EC for your records.
| Growth Stage | pH Target | EC Target (mS/cm) | Approx. PPM (500 scale) | Notes |
|---|---|---|---|---|
| Seedling / early clone | 5.8–6.0 | 0.4–0.8 | 200–400 | Very dilute; roots cannot handle strong solution yet |
| Early vegetative | 5.8–6.2 | 1.0–1.4 | 500–700 | Introduce full nutrient profile gradually |
| Mid-late vegetative | 5.8–6.2 | 1.4–2.0 | 700–1000 | Ramp nitrogen-forward formula; watch leaf color |
| Early flower (weeks 1–3) | 5.8–6.2 | 1.6–2.0 | 800–1000 | Transition to bloom ratios; reduce nitrogen |
| Peak flower (weeks 4–8) | 5.8–6.2 | 1.8–2.4 | 900–1200 | High P and K; watch for signs of tip burn |
| Late flower / flush (weeks 9–10+) | 5.8–6.2 | 0.0–0.4 | 0–200 | Flush with clean pH water; watch trichomes for harvest timing |
Change or top up your reservoir every 7 to 10 days. Do not just add nutrients to the existing solution indefinitely: salt accumulation and pH drift worsen over time. A full reservoir change resets your baseline and reduces the risk of nutrient lockout. Between changes, top up with plain pH-adjusted water to replace what plants have consumed, which will be higher in warm conditions or during peak flower.
Lighting and environmental targets
Aeroponics does not change your lighting requirements compared to any other indoor method. Cannabis needs high light intensity (PPFD of 400–600 µmol/m²/s in veg, 600–900 µmol/m²/s in flower) for maximum performance. A 200 to 300-watt quality LED panel covers a 2x4-foot footprint well. Keep the light at the manufacturer-specified distance from the canopy, typically 12 to 24 inches depending on the fixture, and adjust as plants grow.
| Parameter | Seedling | Vegetative | Flowering |
|---|---|---|---|
| Air temperature (lights on) | 22–25°C (72–77°F) | 22–26°C (72–79°F) | 20–26°C (68–79°F) |
| Air temperature (lights off) | 20–22°C (68–72°F) | 18–22°C (65–72°F) | 16–22°C (61–72°F) |
| Relative humidity | 65–75% | 50–65% | 40–50% |
| Reservoir temperature | 18–20°C (64–68°F) | 18–20°C (64–68°F) | 18–20°C (64–68°F) |
| Light schedule | 18/6 | 18/6 | 12/12 (photoperiod) |
| CO2 (ambient) | 400 ppm (ambient) | 400–500 ppm (ambient) | 400–500 ppm (ambient) |
Routine maintenance schedule
The reliability of your aeroponic system depends entirely on how consistently you maintain it. Here is the schedule I follow, which keeps most problems from developing in the first place.
| Frequency | Task |
|---|---|
| Daily | Check and adjust reservoir pH |
| Daily | Check and log reservoir temperature |
| Daily | Visually inspect root zone through an inspection port for color and smell (healthy roots = white and odorless) |
| Daily | Confirm mist cycle is running (listen for pump and check for mist) |
| Every 2–3 days | Check EC and top up reservoir with plain pH-adjusted water if volume has dropped |
| Every 7–10 days | Full reservoir change: drain, rinse, refill with fresh nutrient solution |
| Weekly | Inspect all nozzle filters; flush or replace any that show partial blockage |
| Weekly | Check all tubing connections and fittings for drips or mineral crust buildup |
| Every 2 weeks | Check and clean main inline sediment filter |
| Each reservoir change | Wipe down reservoir interior with hydrogen peroxide solution (3%) to inhibit algae and biofilm |
| End of cycle | Full system disinfection: drain, flush with dilute bleach or hydrogen peroxide, rinse thoroughly before next grow |
Troubleshooting common aeroponic problems
Problems in aeroponics appear quickly because there is no buffering medium to slow the impact of an error. The upside is that once you know what to look for, diagnosis is fast. Here is a matrix of the most common issues I have encountered and how to address them.
| Problem | Likely Cause(s) | Fix |
|---|---|---|
| Brown or slimy roots | Pythium/root rot; reservoir too warm; low dissolved oxygen | Lower reservoir temp to below 20°C; add hydrogen peroxide (3 mL per liter of 3% H2O2) as a short-term treatment; check aeration; improve sanitation protocol |
| Nozzle not misting (partial or full blockage) | Mineral scale or particle blockage in nozzle or per-nozzle filter | Remove nozzle and filter; soak in white vinegar or citric acid solution; flush with clean water; replace filter media |
| Low pressure / weak mist pattern | Clogged main filter; pump wear; air leak in supply line; undersized manifold | Inspect and clean main sediment filter; check all fittings for air ingress; verify pump output PSI with a gauge |
| Nutrient lockout (yellowing leaves, tip burn) | pH out of range; salt accumulation; incorrect EC | Check and correct pH to 5.8–6.2; perform full reservoir change; check EC against stage targets |
| Root drying between cycles (wilting, crispy root tips) | Mist cycle interval too long; pump failure; nozzle blockage | Shorten off-period of mist cycle; inspect all nozzles; check pump operation; install UPS backup if not already done |
| Algae in reservoir or root chamber | Light leak into root chamber or reservoir; organic contamination | Seal all light leaks with black tape or opaque covers; perform full clean with hydrogen peroxide; ensure reservoir lid is completely sealed |
| Fungus gnats or root aphids | Moist surface media; contamination from outside environment | Allow surface of net pot media to dry between cycles; use yellow sticky traps; treat with beneficial nematodes (Steinernema feltiae) for root pests |
| Excessive stretch in early flower | Genetics; insufficient light intensity; temperature differential too large | Lower light if at minimum height already; reduce night temperature differential; consider plant training (LST) before flip |
| pH drift upward between checks | Root zone biological activity; off-gassing from nutrients | Check more frequently; use a larger reservoir volume to buffer swings; consider a pH dosing pump for larger systems |
How aeroponics compares to other water-based methods
Aeroponics is one of several water-based cannabis growing methods, and the differences are worth understanding before you commit to building a system. Meta‑analysis of influencing factors on lettuce crop yields within CEA systems (2023) shows peer‑reviewed and controlled trials are concentrated in leafy vegetables (lettuce, pak choi, tomato), while cannabis‑specific peer‑review literature is limited and often relies on extrapolation from other CEA/hydroponic research and grower reports. Deep water culture (DWC) is probably the most popular hydroponic method among home growers: roots sit in an oxygenated nutrient reservoir continuously, the setup is simple, and it is very forgiving compared to aeroponics. DWC is a good starting point if you are new to hydroponics and want to understand how cannabis responds to soilless cultivation before adding the complexity of high-pressure misting systems.
Growing cannabis with water as the primary medium (whether that means hydroponics, aeroponics, DWC, or another recirculating method) all require the same fundamentals: correct pH, appropriate EC, clean water, and adequate oxygenation. What distinguishes them is how water and air are delivered to the roots. Aeroponics maximizes air exposure; DWC maximizes continuous hydration; nutrient film technique (NFT) runs a thin film of solution across roots. Each has its place, and there is no single best method for every grower or every setup.
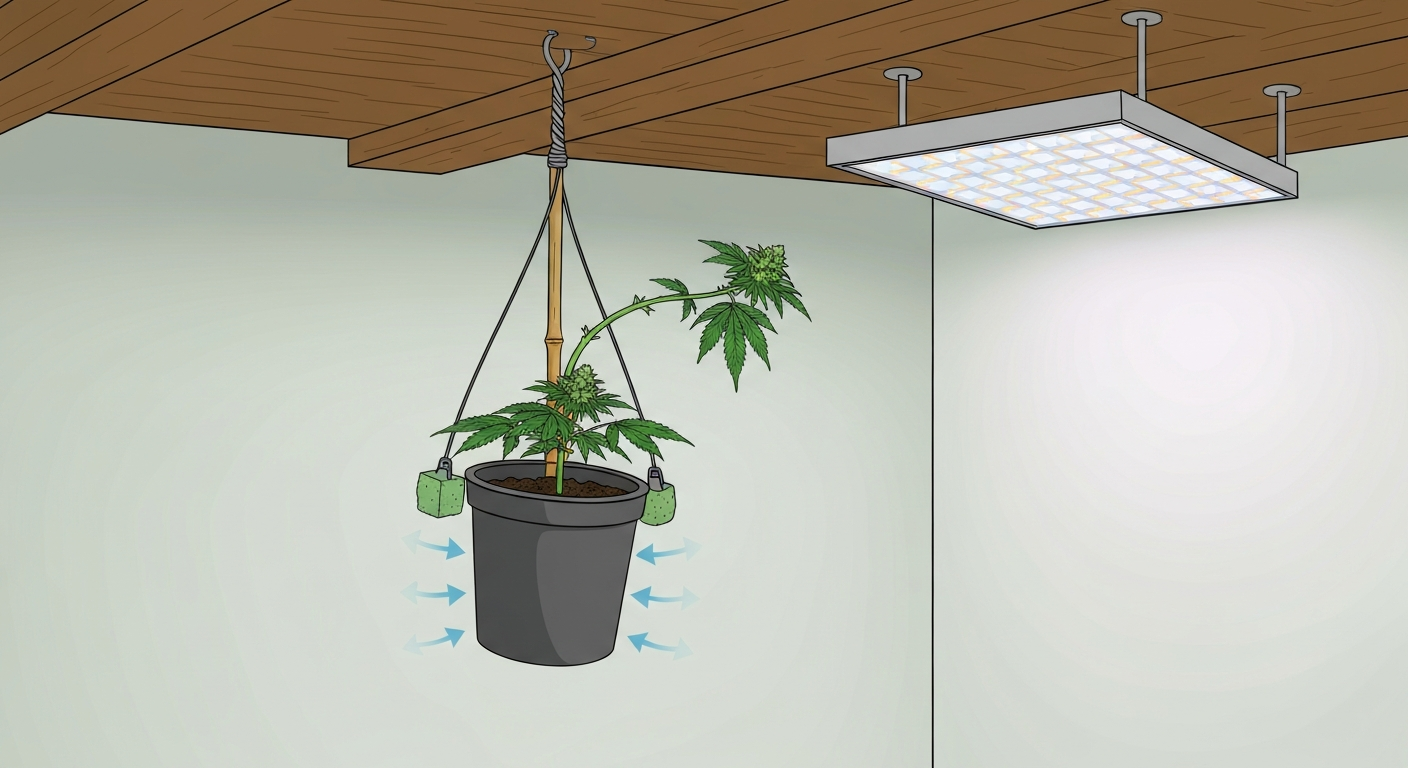
A note on two searches that come up in this topic: growing weed without lights and growing weed upside down. There is no viable way to grow cannabis without adequate artificial or natural light indoors; any search suggesting otherwise is either about sunlight supplementation or is a misconception. If you searched for how to grow weed without lights, the short answer is that reliable indoor cultivation requires adequate natural sunlight or proper artificial lighting, there is no practical substitute. Cannabis is a high-light crop. Similarly, while vertical or inverted growing experiments exist in research settings, there is no practical benefit to growing cannabis plants upside down in a home setup, and the idea is not compatible with aeroponic root chamber design. For those curious about extreme experiments, see how to grow weed underwater for a discussion of why submerged methods are impractical for home growers. If you found this article through one of those searches, the answer is: use proper lighting, and grow your plants right-side up.
Harvest, drying, and curing
Harvest timing in aeroponics is identical to any other method: you are reading trichomes, not tracking days on a calendar. Use a 60x jeweler's loupe or a digital USB microscope to inspect trichomes on the calyx and small sugar leaves. Harvest when you see the ratio of cloudy to amber trichomes matching your target effect. Most growers aiming for high THC harvest at 10 to 20% amber; those preferring a more sedating effect wait for 30% or more amber.
To harvest, cut the plants at the base and remove the root mass from the chamber. Trim large fan leaves immediately. Hang whole branches or individual colas in a dark room at 18 to 20°C (65–68°F) and 45 to 55% relative humidity. Slow drying over 10 to 14 days preserves terpenes far better than fast drying. Once the small stems snap rather than bend and the outside of the buds feel dry to the touch, move to curing jars.
Curing is where aeroponically grown cannabis really delivers. Fill clean glass mason jars to about 75% capacity. For the first two weeks, open jars (burp them) twice daily for 10 to 15 minutes to release moisture and exchange air. After two weeks, burp once daily. After four weeks, you will have a product with noticeably better flavor and smoothness than the same flower dried and consumed immediately. Six to eight weeks of cure is considered optimal by many experienced growers, and aeroponic flower, with its clean root environment and efficient nutrient uptake, responds particularly well to a long cure.
Cost and space reality check
A functional small HPA system for two to four plants will cost more upfront than a comparable DWC or soil setup. Budget approximately $300 to $600 USD for the aeroponic-specific components (pump, accumulator, nozzles, filters, fittings, and root chamber) on top of lighting, tent, and ventilation costs that apply to any indoor grow. The long-term savings come from significantly lower water and nutrient consumption, faster turnover, and potentially higher yield per square foot once the system is dialed in. Whether that math works in your favor depends on how many cycles you run and how efficiently you manage the system.
Space-wise, a 2x4-foot tent fits four plants in a compact aeroponic system with room for all ancillary equipment. A 4x4 allows eight to ten plants and requires a larger reservoir and more nozzle manifold capacity, but the principles are identical. Start small, learn the system thoroughly, and scale from a position of confidence rather than frustration.
FAQ
What is aeroponics and how does it differ from other hydroponic methods?
Aeroponics suspends roots in air and periodically mists them with a nutrient solution, maximizing root oxygenation and uptake. Unlike DWC (roots submerged) or NFT (trickle flow), aeroponics uses fine droplets to feed roots with minimal water volume and higher oxygen exposure, often improving early growth and water efficiency but requiring finer hardware and more uptime reliability.
What are the main pros and cons of growing cannabis aeroponically at home?
Pros: faster early growth, high water and nutrient-use efficiency, excellent root oxygenation, compact footprint. Cons: higher capital and maintenance needs, sensitive to pump/nozzle/power failures (roots can dry quickly), higher disease risk if sanitation or temperatures slip, and more technical tuning required.
Is growing cannabis aeroponically legal at home?
Legal status depends on local, state/provincial and national laws. Check your jurisdiction for possession, home cultivation limits, licensing, and equipment restrictions. Follow electrical, fire and building codes; avoid odor and visibility issues; and never advise illegal activity.
Which cannabis strains suit aeroponic systems best?
Choose robust, vigorous strains with manageable stretch and a compact canopy for small systems. Indica-dominant or hybrid strains with predictable branching (e.g., many stable hybrids) are easier for novices. Avoid extremely tall/super-scraggly sativas unless you have a large system and advanced canopy control.
What parts do I need for a small home high-pressure aeroponic (HPA) system?
Essential parts: opaque root chamber with net pots, high-pressure diaphragm/booster pump (rated GPH @ PSI), accumulator tank or pressure vessel, fine fog/mist nozzles (with per-nozzle filters), pressure-rated plumbing and manifold, nutrient reservoir, inline filter and water/air filtration, pH and EC/DO meters, timers/pressure switch or controller, lights, environmental controls (fan, exhaust, humidifier/dehumidifier), and backup power/protection.
What should be on my setup and pre-run checklist?
Checklist: verify local legality; sterilize/assemble chamber and plumbing; install pump, accumulator and nozzle filters; test pressure and spray pattern; check for leaks; fill reservoir and calibrate pH/EC meters; run a dry cycle then a wet cycle for a few hours; set misting intervals; confirm lights and environmental controls work; and have backup power or redundancy planned.
How to Grow Weed Upside Down: Practical Guide for Home Grows
How to grow weed upside down: safe, legal setups, lighting, watering, troubleshooting and yield expectations.