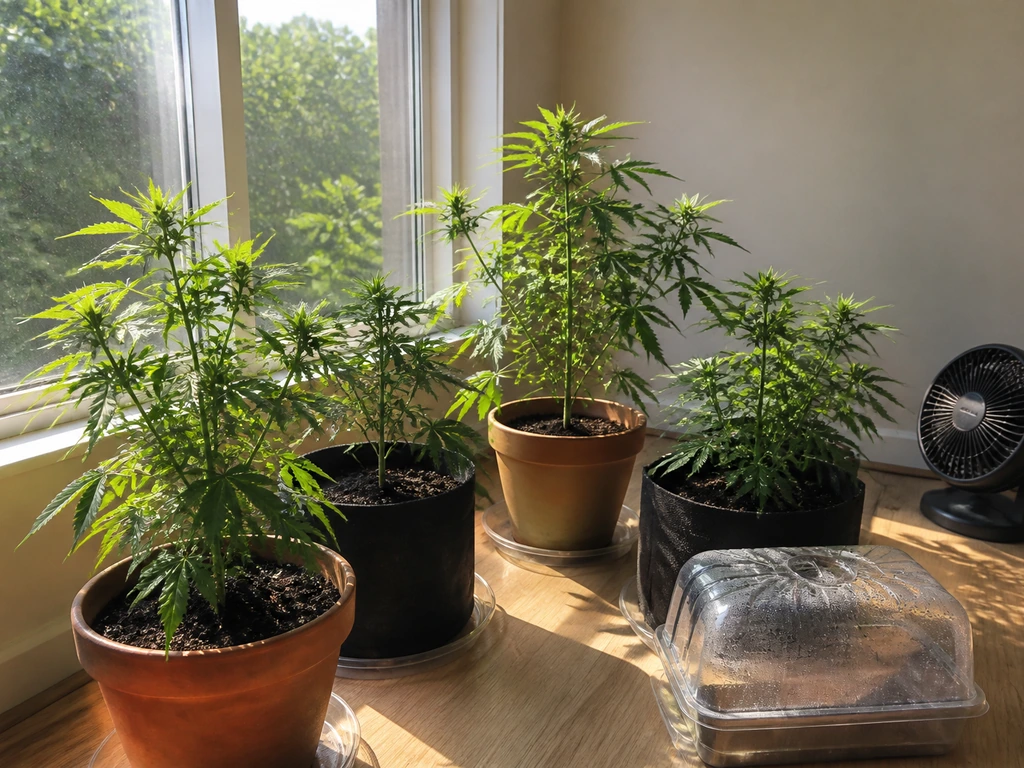
You can grow cannabis in an upside-down hanging planter, and it will survive, but the plant will immediately start bending its shoots back toward the light and away from gravity, so you will never get a neat inverted silhouette. What you get instead is a plant that fights its own container, dries out faster, requires more frequent watering, and presents real structural risks if the hanging hardware fails. For most home growers there are easier paths. That said, upside-down planters work reasonably well for compact, autoflowering strains in small spaces, and the technique has genuine niche uses. This article walks through every version of 'upside-down growing,' which one actually makes sense for a home setup, and exactly how to pull it off safely.
How to Grow Weed Upside Down: Practical Guide for Home Grows

What 'upside-down growing' actually means, three very different things
Before anything else, it helps to separate the three distinct things people mean when they search this topic, because confusing them leads to a lot of wasted time and bad setup decisions.
1. Hanging (inverted) planters
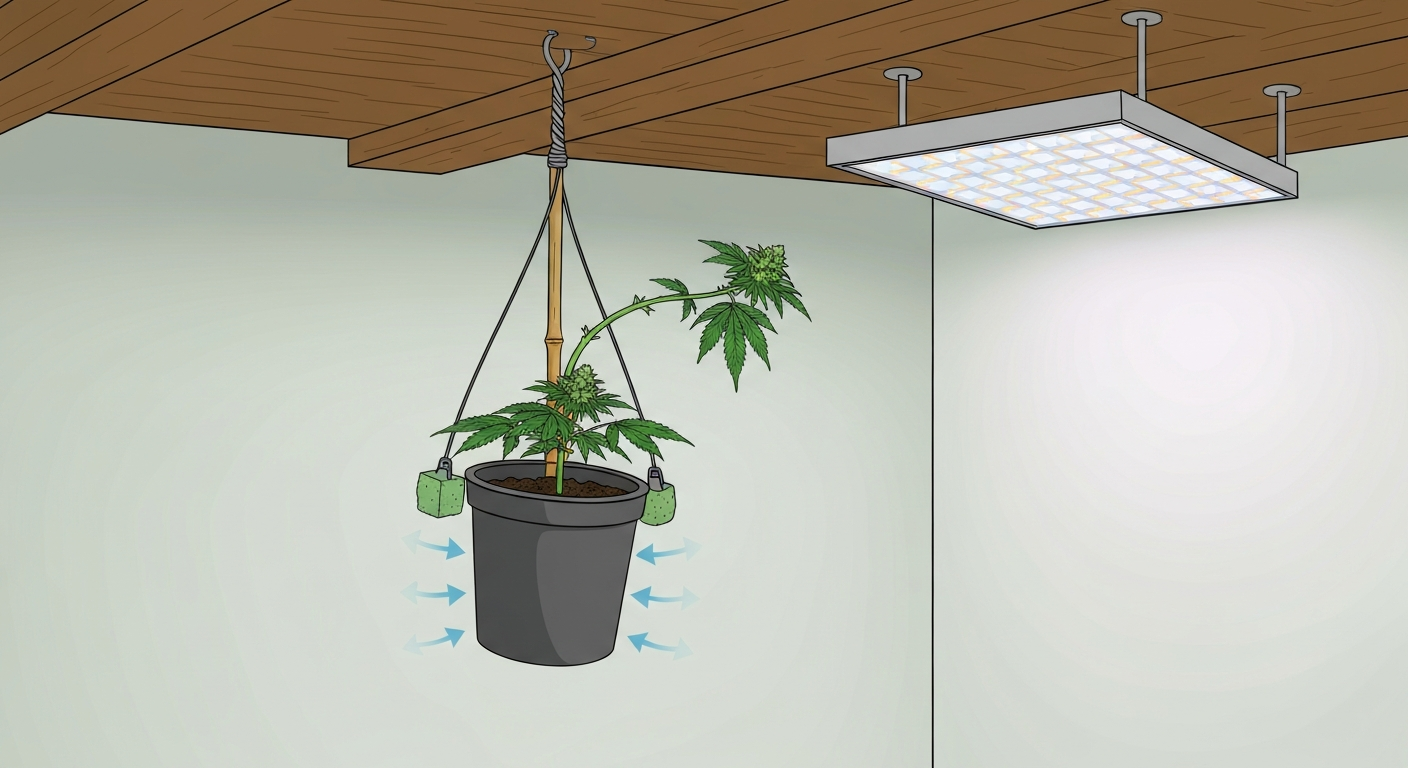
This is the most literal interpretation: a container is suspended from the ceiling or a crossbar with the plant emerging from a hole in the bottom, so roots are on top inside the pot and the growing shoot hangs downward initially. It mirrors the 'Topsy Turvy' tomato planters that were briefly popular in home gardening. The plant's shoots will reorient upward toward light relatively quickly due to phototropism and gravitropism, but the root zone remains inverted inside the hanging container. This is the setup that requires the most structural planning and the most watering attention.
2. Canopy inversion training
Some growers use the phrase 'growing upside down' to describe low-stress training (LST) or super-cropping techniques where branches are bent sharply downward, essentially inverting the canopy plane so that bud sites point outward rather than straight up. This is not the same as an inverted planter. The pot sits normally on the ground or shelf; only the branches are manipulated. This is a well-established, effective technique that I would recommend to almost any indoor grower before attempting a full hanging setup.
3. Drying harvested buds upside down
The third meaning is simply the standard drying method: whole branches or the whole plant is hung upside down after harvest so moisture slowly leaves the buds without pooling. This is not a growing technique at all, it is the most widely recommended drying approach and has nothing to do with how the plant was cultivated. If this is what you were looking for, the short answer is: yes, always dry your harvested cannabis upside down, in a dark room at 60 to 65 percent relative humidity and 60 to 70 degrees Fahrenheit (15 to 21 degrees Celsius), for 7 to 14 days.
Is upside-down growing actually right for you?
I will be direct: the majority of home growers will not benefit from hanging planters compared to a standard floor or shelf setup. But 'majority' is not 'all,' and there are legitimate reasons to try it. Here is an honest breakdown of the tradeoffs.
| Factor | Upside-down hanging planter | Standard upright container |
|---|---|---|
| Space use | Frees floor space; good for very small rooms or balconies | Requires floor or shelf footprint |
| Watering frequency | Medium dries 30–50% faster due to airflow and exposure; more frequent watering needed | Normal drying rate; easier to schedule |
| Structural risk | Ceiling anchor must hold saturated media + dynamic sway loads; failure risk is real | No overhead anchor required |
| Plant stress | Moderate: gravitropism causes stem bending and auxin redistribution; plant adapts but spends energy doing so | Minimal orientation stress |
| Airflow at canopy | Increased air movement around lower canopy, which can help or hurt depending on humidity | Controlled by fans only |
| Setup cost | Hooks, chains, heavy-duty hangers; potentially custom container | Standard pots and trays |
| Light distribution | Can be tricky — lamp position must accommodate upward-curving shoot reorientation | Straightforward lamp-over-canopy geometry |
| Pest/mold risk | Similar or slightly higher if airflow and humidity are not actively managed | Standard risk; well-documented management |
| Best candidate strain | Short autoflowering or compact indica-dominant varieties under 60 cm | Any strain |
The honest verdict: if you have a small balcony, a cramped closet, or want to experiment out of curiosity, a hanging planter with a compact autoflower is a reasonable project. If you are trying to maximize yield or minimize complexity, stick with upright containers and spend your energy on light optimization and training instead.
Legal and safety considerations before you hang anything
Cannabis cultivation law varies enormously depending on where you live. At the federal level in the United States, cannabis remains a controlled substance. Many individual states have legalized or decriminalized adult home cultivation, but the rules differ widely: some states allow four to six plants per household, others allow none, and some permit cultivation only for medical patients. Always check your current state and municipal regulations before growing, regardless of the method. Nothing in this article should be taken as legal advice, and I would never encourage growing where it is not permitted.
Beyond legality, hanging planters introduce physical safety risks that standard floor setups do not. A 15-liter pot of saturated soil can weigh 20 to 25 kilograms (44 to 55 lbs). When you add dynamic sway during watering or from fans, the load on your anchor point is considerably higher than the static weight alone. Drywall cannot hold this safely. You need to anchor directly into a ceiling joist or install a properly rated ceiling hook rated for at least twice the anticipated saturated weight. I got this wrong on my first attempt with a large tomato planter and pulled a drywall anchor straight out of the ceiling. For cannabis, keep pots small (3 to 5 liters maximum for hanging), use lightweight soilless media, and verify your anchor rating before you ever water the plant in position.
- Verify your jurisdiction's home cultivation rules before starting any grow
- Use ceiling joists or rated structural anchors only — never standard drywall anchors
- Choose a hook and chain rated for at least 2x the saturated pot weight
- Keep hanging containers small (3–5 liters) to reduce weight and risk
- Use lightweight soilless media (coco/perlite blends) rather than dense soil
- Position the setup away from electrical fixtures and water-sensitive equipment
- Inspect anchor points, chains, and hooks weekly for wear or loosening
Ventilation requirements
Upside-down planters change airflow patterns in your grow space. The underside of the pot and the root zone are now exposed to room air, which speeds evaporation and can create uneven humidity zones. Research on Cannabis sativa in greenhouse environments shows that elevated relative humidity during flowering meaningfully reduces cannabinoid concentrations and can delay flower development. More practically, dense bud clusters in high-humidity microclimates are prime targets for Botrytis cinerea (bud rot). Running a continuous low-speed oscillating fan across the canopy and maintaining relative humidity at 40 to 50 percent during flower (dropping to 40 to 45 percent in late flower) is not optional, it is prevention. Integrated disease‑management reviews for cannabis recommend continuous air movement through the canopy and active humidity management as primary cultural controls to reduce bud‑rot risk in flowering crops (Integrated Management of Pathogens and Microbes in Cannabis sativa L. under Greenhouse Conditions). An inline exhaust fan and carbon filter remain essential for odor control and temperature management regardless of plant orientation.
Choosing the right strain for an inverted setup
Not every cannabis variety is a good candidate for an upside-down planter. Plant morphology matters enormously here. Pure sativa and sativa-dominant lines typically grow tall with long internodal spacing and significant 'stretch' during early flower, that extra height becomes extra downward hang before the shoots reorient, which adds weight and increases stem stress. Indica-dominant varieties with tighter internodes and shorter stature handle inversion more gracefully because there is simply less plant to reorient.
Autoflowering strains are the best choice for hanging setups for three reasons: they stay compact (typically 40 to 80 cm total height), they have a fixed, shorter life cycle (roughly 70 to 90 days seed to harvest) that limits the duration you are managing an awkward setup, and they do not require a light-schedule change to initiate flowering, which simplifies management when your lamp positioning is constrained by the hanging geometry.
| Strain type | Typical height | Suitability for hanging planter | Notes |
|---|---|---|---|
| Autoflowering (compact) | 40–70 cm | Best choice | Short life cycle, limited stretch, manageable weight |
| Indica-dominant photoperiod | 60–100 cm | Acceptable with small containers | Tight internodes help; watch for heavy bud weight at harvest |
| Hybrid (balanced) | 80–140 cm | Marginal — requires aggressive early training | Use LST to limit canopy size before hanging |
| Sativa-dominant photoperiod | 100–200+ cm | Not recommended | Too much stretch, stem stress, and reorientation effort |
Containers and growing media: what works and what doesn't
Container choice for a hanging setup is more constrained than for a normal grow. You need something lightweight, structurally intact when hung (no flexible fabric pots that deform and spill when inverted), and small enough that saturated weight stays manageable. My recommendation is a rigid plastic nursery pot in the 3 to 5 liter range with a single drainage hole at the base, which becomes the top when the pot is hung. The plant stem passes through a foam collar or fabric insert around that hole to support the stem and prevent media from falling out.
Media options compared
| Media type | Weight when saturated | Drying speed | Suitability for hanging | Notes |
|---|---|---|---|---|
| Standard potting soil | Heavy (up to 1.1 kg/liter) | Slow | Poor | Too heavy; retains water unevenly when inverted |
| Coco coir + 30% perlite | Medium (0.6–0.7 kg/liter) | Moderate-fast | Good | Best balance of weight, drainage, and root oxygenation |
| Pure perlite | Light (0.4 kg/liter) | Very fast | Acceptable | Requires frequent fertigation; minimal buffering |
| Peat-based soilless mix | Medium | Moderate | Acceptable | Lighter than soil; watch for hydrophobia when too dry |
| Hydroton/clay pebbles | Light but no water retention | Very fast | Not recommended alone | Requires constant drip or hand-watering; difficult in inverted pot |
| Rockwool | Light | Fast | Not suitable | Designed for upright hydro systems; poor structural fit for hanging |
Coco coir with 30 percent perlite is consistently the best option I have found for hanging setups. It is lighter than soil, provides good root oxygenation, dries predictably, and handles the slightly increased evaporation rate from the exposed pot without going hydrophobic the way some peat mixes do. You will still need to water more frequently than you would with an upright container, in warm indoor conditions, daily watering is realistic. Keep a pH meter close: coco performs best at root-zone pH 5.8 to 6.2, and because you are watering frequently, drift happens fast.
A note on small hydroponic approaches in a hanging format
It is technically possible to construct a small drip or wick hydroponic setup in an inverted container, but the engineering challenges are significant. Gravity-fed drip systems that work top-down in upright containers must be completely replumbed when the pot is inverted. The nutrient reservoir, pump, and tubing all need to accommodate the reversed geometry, and root oxygenation in a sealed inverted container is difficult to guarantee. For beginners, I would strongly advise against combining inverted planters with hydroponic systems. Get your hanging setup working with coco first, then explore more complex hydroponics in conventional upright formats.
How upside-down orientation compares to aeroponics, DWC, and other water-based systems
This is worth addressing clearly because the sibling topics in this space, including aeroponic growing, deep water culture (DWC), and other water-based systems, are frequently searched alongside upside-down growing as if they are related methods. If you want to explore true water-based systems, see our separate guide on how to grow weed underwater for tips specific to submerged and hydroponic methods. For a practical step-by-step guide to setting up and running a deep water culture (DWC) system, see how to grow weed DWC. If you want step-by-step instructions for a water-based system, see our guide on how to grow weed deep water culture for setup, oxygenation, and nutrient management specifics. For readers curious about water-based cultivation methods, see our concise guide on how to grow weed with water. They are not the same thing, and in most cases they are incompatible with an inverted orientation.
Aeroponic systems suspend roots in an open chamber and deliver nutrients by misting. DWC suspends roots in an oxygenated nutrient solution. Both systems are designed around a specific, engineered relationship between the root zone and a water or mist delivery mechanism. Inverting the plant shoot while keeping a DWC or aeroponic root chamber intact is theoretically possible in purpose-built controlled-environment equipment but is not a practical home setup. The plumbing geometry, pump placement, and root-chamber sealing all assume a particular orientation. Flipping the shoot does not make DWC more effective, it just makes the existing engineering more complicated without adding benefit.
The core distinction is this: DWC, aeroponics, and other hydroponic methods are root-zone delivery systems. Upside-down growing is a shoot-orientation approach. They answer different questions. If your goal is maximizing nutrient uptake efficiency and growth speed, explore DWC or aeroponic methods in a standard upright format. If your goal is freeing up floor space or experimenting with canopy geometry, a hanging planter in coco is the right tool. Mixing the two without serious engineering experience is a reliable way to lose a crop.
Lighting strategies for an upside-down grow
Light positioning is more complicated with a hanging planter than with a standard upright container, and getting it wrong is one of the most common reasons upside-down grows underperform. Here is the core issue: when you first hang the plant, the shoot is pointing downward. Within a few days to a week (depending on growth stage and light intensity), gravitropism and phototropism will cause the shoot tip to curve upward toward the lamp. This means your effective canopy height is dynamic during the early weeks of the grow, and the distance between canopy and lamp changes as the plant reorients.
Natural light setups
If you are growing outdoors or on a balcony with direct sun, a hanging planter actually works reasonably well because sunlight comes from above over a wide arc. The plant will orient its apex upward toward the sun without any intervention, and natural airflow helps manage humidity. The main outdoor risks are wind stress (which can snap stems that are already under gravitropic bending stress) and rain hitting the exposed root zone of an inverted pot. A simple windbreak and overhead rain cover address both.
Artificial light indoors
For indoor grows, LED panels or CMH (ceramic metal halide) fixtures positioned directly above the hanging container work best. I recommend starting with the lamp at the higher end of the recommended distance (for most LEDs, 45 to 60 cm above the canopy) during the first week to allow the plant to reorient without light burn stress on leaves that may initially be at abnormal angles. Once the apex has curved upward and established normal upward growth, bring the lamp to the standard distance for your fixture's power.
Photoperiod strains need 18 hours of light during vegetative growth and a switch to 12/12 to initiate flowering, just as in any upright setup. Autoflowering strains are more forgiving, 18 to 20 hours of light from seed to harvest works well and removes the schedule management burden. Light spectrum matters regardless of orientation: a full-spectrum LED with both blue and red channels (or a CMH for a single-bulb solution) is preferable to blurple-only panels for the flowering stage, where spectrum quality influences cannabinoid and terpene accumulation.
Low-light constraints
Growing cannabis in genuinely low-light conditions, whether upside-down or upright, produces poor results. Insufficient photon flux density (below roughly 200 to 400 micromoles per square meter per second during vegetative growth) leads to stretched, weak stems, reduced resin production, and delayed flowering. An inverted plant already has stem reorientation stress; combining that with low light stress is a recipe for a weak, unproductive plant. If your space cannot accommodate adequate lighting, that is the problem to solve first, before thinking about orientation. For readers facing severe light limits, see our guide on how to grow weed without lights for practical strategies and realistic expectations when photon flux is insufficient.
Airflow, humidity, structural support, and canopy hardware
Getting the physical infrastructure right for a hanging cannabis grow is where most people either succeed or fail. I want to be specific here because I have seen vague advice ('just hang it up!') lead to collapsed setups and lost crops.
Structural support and hardware checklist
- Locate ceiling joists using a stud finder before installing any anchor — never hang from drywall alone
- Install a heavy-duty eye bolt (rated minimum 25 kg / 55 lbs) directly into the joist with appropriate threading depth (at least 38 mm / 1.5 inches into solid wood)
- Use a rated steel S-hook and adjustable chain or ratchet hanger rather than rope, which can fray under sustained load and humidity
- Test the anchor with the pot filled and saturated before the plant is in place — add weight to simulate and look for any movement or creaking
- Leave clearance for the pot to swing slightly without hitting walls, lamps, or other plants — a minimum 30 cm clearance radius is practical
- Check the entire hardware assembly (anchor, hook, chain, pot) once per week throughout the grow
Stem support as the plant reorients
As the shoot bends upward from an inverted position, the stem near the pot exit hole experiences significant mechanical stress. Left unsupported, this bend point can crack or break, particularly in later vegetative stage when stems are thicker and less flexible. A simple bamboo stake inserted into the growing medium and pointing downward (toward the lamp) gives the reorienting stem something to grow along and distributes the bending load. Secure the stem loosely to the stake with soft plant ties at 5 to 7 cm intervals as the shoot extends. This is the single most important thing I would add to any hanging cannabis setup that most guides skip.
Airflow and humidity management
Position an oscillating fan so it moves air across the plant canopy, not directly at it at high speed, which causes wind burn, but at a gentle, continuous rate that you can feel at the canopy level. For a single hanging plant in a small tent or closet, a 15 to 20 cm (6 to 8 inch) clip fan on a low or medium setting is usually sufficient. Keep a digital thermometer and hygrometer at canopy level (not at the top of the room, which reads differently). Target conditions by growth stage are: seedling (65 to 70 percent RH, 20 to 25°C), vegetative (50 to 60 percent RH, 22 to 26°C), early flower (45 to 55 percent RH, 20 to 26°C), late flower (40 to 45 percent RH, 18 to 24°C). Letting humidity climb above 55 percent in late flower with dense, downward-facing bud clusters significantly increases Botrytis risk.
Trellis and canopy support for inverted plants
By mid-flower, your hanging plant's reoriented canopy may carry substantial bud weight. A simple approach is to attach a small horizontal wire frame (a 20 to 30 cm square of garden trellis netting or bent wire) around the stem below the pot exit point. Tie individual branches loosely to this frame to prevent them from drooping under bud weight, which would otherwise create dense, poorly ventilated pockets, exactly the microclimate Botrytis prefers. Think of it as a miniature ScrOG (screen of green) net, but positioned below the inverted pot rather than above an upright one.
Watering, nutrients, and a practical maintenance schedule
The single biggest operational difference between an upside-down planter and a standard setup is watering frequency. In a coco/perlite mix inside an inverted 3 to 5 liter pot under indoor lights, you should expect to water every 1 to 2 days rather than every 2 to 3 days. Feel the medium through the pot wall or use a cheap moisture meter, water when the medium is approaching dryness but not bone dry. Because roots are now on the 'top' of the inverted pot, the wettest zone after watering is at the bottom of the medium (which is physically at the top of the room). Gravity still pulls water downward relative to the medium, not relative to the room, so drainage happens through the top hole (now the bottom of the pot in the room). This actually works in your favor for preventing overwatering if the drainage hole is unobstructed.
Nutrient protocols for an inverted coco grow are essentially identical to standard coco practices. Mix nutrients to an EC (electrical conductivity) of 0.8 to 1.2 mS/cm during early vegetative growth, ramping to 1.8 to 2.2 mS/cm during peak flower, and flushing or tapering back to 1.0 to 1.4 mS/cm in the final two weeks before harvest. Maintain pH at 5.8 to 6.2 in the solution you feed. One area where inverted grows can trip you up: because the medium dries faster, salt buildup can accelerate. A weekly plain pH-adjusted water flush (no nutrients) helps prevent EC creep in the root zone.
| Growth stage | Duration | Watering frequency | Target EC (mS/cm) | Target pH | RH target |
|---|---|---|---|---|---|
| Seedling | Days 1–14 | Every 2–3 days (small volume) | 0.4–0.8 | 5.8–6.2 | 65–70% |
| Early veg | Days 15–28 | Every 1–2 days | 0.8–1.2 | 5.8–6.2 | 55–65% |
| Late veg | Days 29–42 | Daily or every 1.5 days | 1.2–1.6 | 5.8–6.2 | 50–60% |
| Early flower | Weeks 6–8 | Daily | 1.6–2.0 | 5.8–6.2 | 45–55% |
| Peak flower | Weeks 9–11 | Daily | 1.8–2.2 | 5.8–6.2 | 40–50% |
| Late flower / flush | Final 10–14 days | Daily (plain or light feed) | 1.0–1.4 or plain | 5.8–6.2 | 40–45% |
Troubleshooting common problems in a hanging setup
Even with good planning, things go sideways. Here are the issues I see come up most often with upside-down grows and what to do about each one.
- Stem snap at pot exit point: This happens when the reorienting shoot curves too sharply without support. Insert a soft stake as described above. If the stem has already kinked but not broken all the way through, apply a soft splint (a toothpick and tape) around the kink and reduce watering briefly to limit weight stress. Kinked-but-not-snapped stems often recover and develop a woody callus that can actually strengthen the junction.
- Medium drying out in under 24 hours: Your pot may be too small or your room too warm and dry. Try increasing pot size to 5 liters if structural load allows, add 10 percent more perlite to improve water retention (counterintuitively, more perlite improves drainage AND increases total air pockets that hold capillary water), or lower the room temperature slightly.
- Yellowing lower (now upper) leaves: In an inverted setup, the leaves closest to the pot are farthest from the light and most shaded by the container itself. Some yellowing of these inner canopy leaves is normal and not a deficiency. Strip them if they yellow significantly to improve airflow. If yellowing spreads throughout the plant, check pH and EC first.
- Buds showing soft spots or grayish fuzz: This is Botrytis (bud rot). Remove affected tissue immediately with sterile scissors, increase fan speed, and reduce humidity. In a late-flower crop, evaluate whether early harvest of affected colas is preferable to losing the whole plant.
- Plant not reorienting upward after 10–14 days: Check light intensity. If the lamp is too far away or too dim, gravitropic response may be slower and phototropic pull weaker. Move the lamp closer (within safe distance for your fixture) and ensure at least 400 micromoles per square meter per second at canopy level.
- Anchor hardware showing movement or creaking: Stop the grow immediately, remove the plant carefully, and reinstall into a properly rated structural anchor. Do not continue with a compromised anchor point.
Yield expectations: honest numbers
There is no peer-reviewed study comparing yields of upright versus inverted cannabis containers, so I will be honest: yield data for this specific method is anecdotal, drawn from grower forum reports and by analogy from controlled tomato planter trials. The tomato comparison showed comparable fruit yield but real operational disadvantages (faster drying, mess, wind susceptibility). For cannabis, the consensus from grower forums is that compact autoflowers in inverted 3 to 5 liter pots yield in the range of 15 to 40 grams dried per plant under a 200 to 300 watt LED. That is meaningfully less than the same strain in an optimized upright setup of the same pot size, largely because the plant spends energy on stem reorientation rather than bud production and because the root zone constraints of a small inverted container limit vegetative development. If yield is your primary metric, an upright setup with canopy training will outperform a hanging planter. If space efficiency and novelty are the goals, those numbers are workable for personal use.
Harvesting and drying your inverted-planter grow
Harvest timing is the same as any other grow: check trichome color with a jeweler's loupe or digital microscope. Cloudy white trichomes indicate peak THC; amber trichomes indicate degradation to CBN, associated with a more sedative effect. Most growers harvest when trichomes are mostly cloudy with 10 to 20 percent amber. Harvest the plant by lowering the pot from its anchor, cutting the main stem at the base, and removing the root zone from the container. Then hang the trimmed branches (or the whole plant if small enough) upside down from a drying line, which, helpfully, is exactly how the plant was already growing. Dry at 60 to 65 percent RH and 60 to 70°F (15 to 21°C) for 7 to 14 days, then cure in glass jars, burping daily for the first week and every few days for 2 to 4 more weeks. The cure step matters enormously for flavor and smoothness, regardless of how you grew.
Step-by-step setup checklist for a single hanging planter grow
- Confirm legal compliance: verify your local home cultivation rules and plant count limits before purchasing anything
- Select a compact autoflowering strain suited to small containers and short grow cycles
- Choose a rigid plastic 3 to 5 liter pot and prepare a foam or fabric stem collar for the drainage hole
- Fill pot with coco coir/perlite (70/30 blend) and germinate seed in a standard upright position until seedling is established (2 to 3 weeks)
- Install a rated eye bolt anchor into a ceiling joist; attach chain and adjustable ratchet hanger
- Invert the pot once the seedling has 4 to 6 true leaves and the stem is sturdy enough to handle bending stress
- Insert a support stake into the medium pointing downward toward the lamp
- Position lamp 50 to 60 cm above the pot (which is now at the top); plant apex will curve upward toward it within days
- Set up oscillating fan at canopy level; install inline exhaust fan and carbon filter
- Monitor RH and temperature at canopy level with a digital meter; adjust ventilation as needed
- Water daily or every other day with pH-adjusted nutrient solution; check EC and pH of runoff weekly
- As canopy develops and branches extend downward then curve up, attach a small trellis net below the pot for bud support
- Inspect anchor hardware weekly throughout the grow
- Harvest at peak trichome maturity; hang branches to dry and cure as described above
FAQ
What does “growing weed upside down” actually mean?
It can refer to three different things: 1) hanging or inverted planters where the pot is upside down and the stem/cola grows downward from the container, 2) inverting the canopy or training plants so colas point downward (canopy inversion / manifolding), and 3) drying harvested buds upside down. Each meaning has different technical implications and risks.
Is upside-down (inverted) growing practical and likely to work for home cannabis cultivation?
Yes, but with caveats. Plants will reorient by gravitropism and phototropism, so stems and apical growth will change shape rather than remain fixed. Inverted planters are practical for novelty or space-saving setups but bring predictable operational tradeoffs: faster medium drying, increased stem stress and sway, greater microclimate variability inside colas and higher mold risk if airflow/humidity aren’t managed. Canopy training that simply orients colas downward (not permanently flipping the root ball) is often more predictable and easier to manage.
When is inverted growing a good choice and when should I avoid it?
Consider inverted/hanging when: you have a specific space constraint, want to experiment, or are growing small/compact strains. Avoid it if: you cannot control humidity/airflow, you have heavy-harvest varieties with dense buds, you rely on passive ventilation, or local law/room structure prevents safe anchoring. For high-value or large crops, conventional upright or trained canopies usually offer lower disease risk and easier maintenance.
Which cannabis strains are most suitable for upside-down or inverted planters?
Choose compact, bushy varieties: indica-dominant, short-stature hybrids, or modern compact sativa hybrids with tight internodes. Avoid tall, sativa-dominant strains with long internodes and heavy colas unless you plan strong mechanical support and close microclimate control. Autoflowers can be risky because they have limited vegetative time to recover from stress.
Can you use hydroponics or aeroponics with an inverted orientation?
Hydroponic and aeroponic systems are about root-zone delivery, not shoot orientation. You can suspend plants’ shoot systems in various orientations above a DWC or aeroponic root chamber, but permanently inverting the whole pot/root mass is generally incompatible with many hydro setups because plumbing, oxygenation and root support are engineered for conventional orientation. If using soil-less or soilless 'inverted' containers, plan for root oxygenation and irrigation differently.
What container and media choices work best for hanging/inverted planters?
Use lightweight, well-draining, high-aeration media: coco-perlite blends, fast-draining soilless mixes, or small hydroponic baskets with cloner cubes. Avoid heavy, water-saturated garden soils—wet weight increases anchor load and rot risk. For longer runs, consider small fabric pots or basket systems with drip/irrigation lines and a moisture-retentive insert to reduce evaporation.
How to Grow Weed Without Lights: Indoor Natural Light Guide
Grow cannabis indoors using bright natural light only: space setup, airflow, humidity control, training, flowering, and