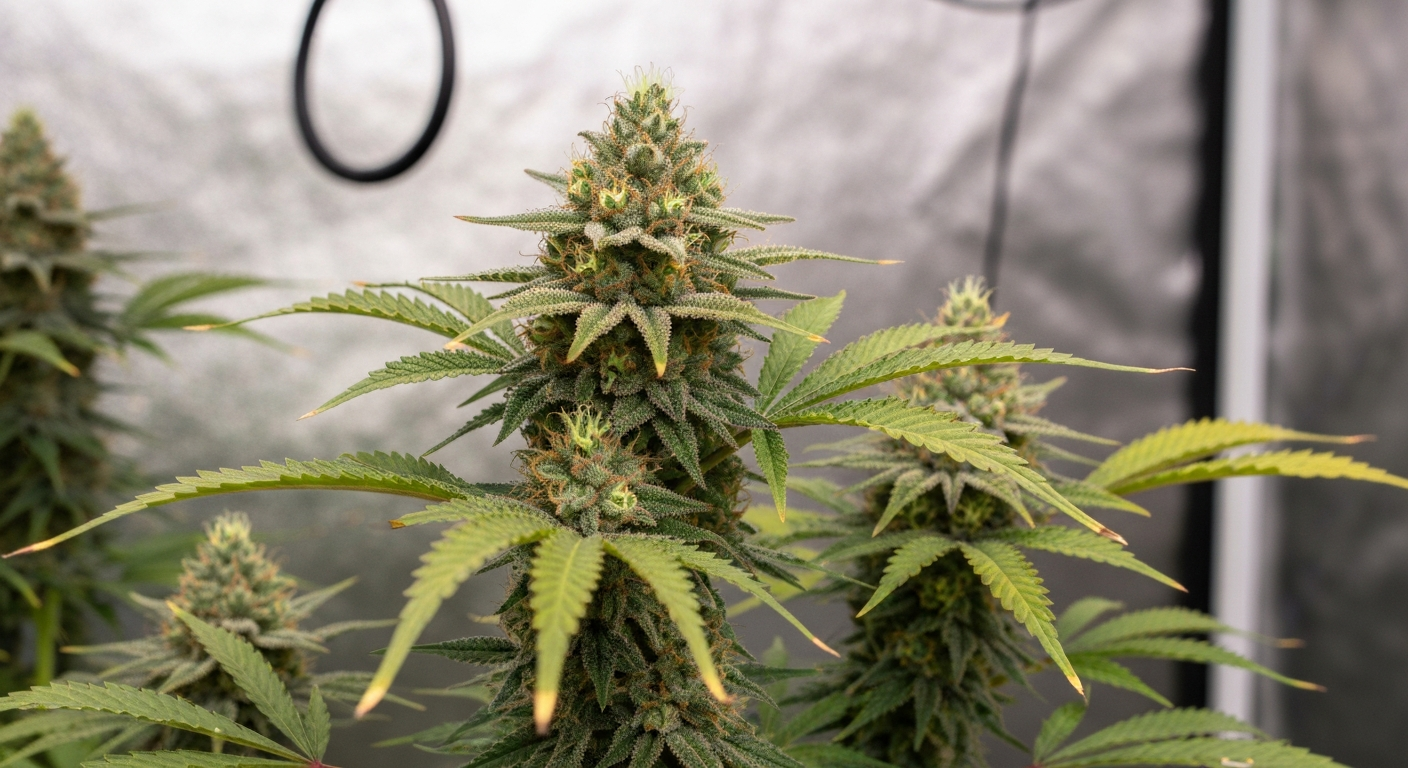
Growing hydro chronic means cultivating cannabis hydroponically to produce the highest-quality, potent buds you can manage at home. The term blends two pieces of grower slang: 'hydro' for a soil-free, water-based growing system, and 'chronic' as a cultural shorthand for top-shelf weed. Whether you're growing a specific strain like Serious Seeds' Chronic (a Skunk/Northern Lights hybrid with a mid-60-day flowering window) or simply aiming to grow exceptional cannabis in a hydroponic system, the process is the same: clean water, dialed-in nutrients, strong roots, and consistent environmental control. This guide walks you through every step, from your first legal compliance check to drying and curing your final harvest. For a focused, step-by-step walkthrough on how to grow hydroponic marijuanas, consult the linked guide for detailed instructions and troubleshooting tips.
How to Grow Hydro Chronic: Step-by-Step Indoor Guide

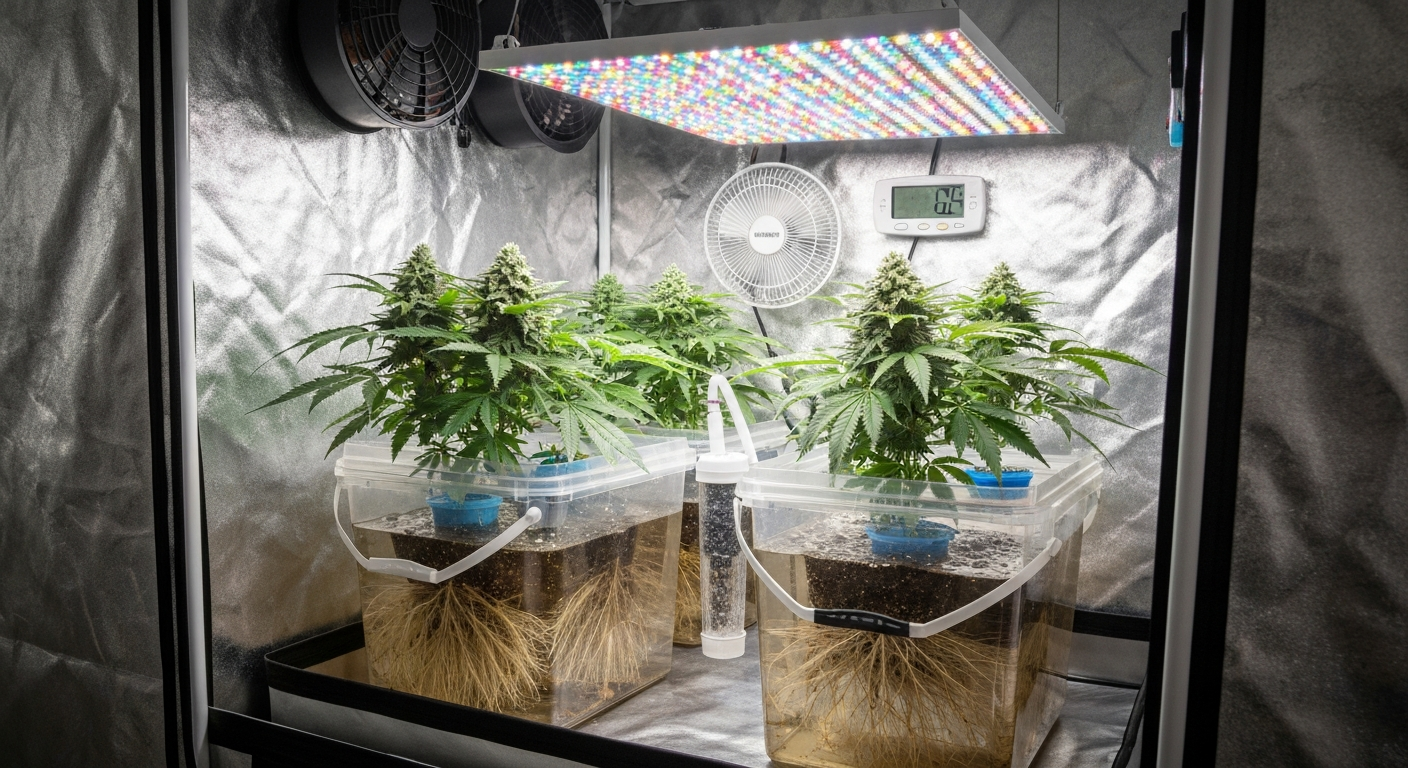
What 'Hydro Chronic' Actually Means and What You're Aiming For
The phrase 'hydro chronic' showed up in cannabis culture as early as the 1994 High Times Cannabis Cup, where a hydro-grown entry competed in the hydro category under that name. Since then it has drifted into everyday use as slang for any premium hydroponically grown cannabis rather than a single defined seed variety. Community forum threads, including a Reddit, discussion on the slang use of 'chronic'/'hydro' (community anecdote), show 'hydro chronic' is often used colloquially to mean top‑shelf hydroponically grown cannabis rather than a single, well‑defined cultivar Reddit — discussion on the slang use of 'chronic'/'hydro' (community anecdote). If you've gone looking for 'Hydro Chronic' seeds at a seedbank, you've probably noticed there's no single widely available product by that name. The closest match most growers settle on is Serious Seeds' Chronic, a Dutch-bred cultivar from the 1990s with documented Skunk and Northern Lights genetics, widely available from reputable seedbanks. It has a reputation for dense, resinous buds and phenotype variability that rewards careful selection.
The grow goal here is simple: produce clean, potent, home-grown cannabis using a hydroponic method that suits your space and budget. For a step-by-step guide on how to grow weed hydro, see our detailed how to grow weed hydro resource for practical, stage-by-stage instructions. Hydroponics gives you faster vegetative growth, easier nutrient management (once you learn to read EC and pH), and the ability to fine-tune your plant's diet in ways that soil simply doesn't allow. I'll be honest, my first DWC run was a mess of pH swings and root-zone panic. But once I understood the system, the results were noticeably better than anything I'd grown in soil up to that point.
Legal Compliance and Responsible Growing: Check This First
Before you buy a single bucket or seed, you need to understand where the law stands. As of August 2026, cannabis remains federally controlled in the United States under the Controlled Substances Act (21 U.S.C. §812). Before the 2026 rulemaking activity the Controlled Substances Act listed “marihuana” as a Schedule I substance (21 U.S.C. §812, Schedules of controlled substances) 21 U.S.C. §812 — Schedules of controlled substances (Controlled Substances Act). In April 2026, the DEA published a Federal Register action that placed FDA-approved marijuana products and certain state-licensed medical marijuana products into Schedule III, with a broader rescheduling hearing scheduled for June 29, 2026. That process is ongoing. At the federal level, personal cultivation still carries legal risk, particularly if it crosses state lines or involves federal land or federally subsidized housing. Your home grow lives and dies on state and local law.
Three commonly referenced state frameworks give you a good benchmark. California (Proposition 64, Health and Safety Code §11362.2) allows adults 21+ to grow up to six living plants at a private residence, though local governments can add restrictions. Massachusetts allows adults 21+ to grow up to six plants per person with a household cap of 12, and plants must be in a locked space not visible from public areas. Colorado permits adults 21+ to grow up to six plants per person (no more than three flowering at a time), with a 12-plant household cap and a requirement for an enclosed, locked grow space. Every other jurisdiction has its own rules. Always verify your local ordinances before you start.
- Confirm your state and local plant count limits before purchasing seeds or equipment
- Verify that your residence type permits cultivation (renters, federally subsidized housing, and HOA properties often have restrictions or outright prohibitions)
- Ensure your grow space can be locked and is not visible from public areas or neighboring properties
- Keep all plants within legal plant counts at all times, including seedlings and clones unless your jurisdiction excludes them from the count
- Do not transport plants, seeds, or harvested material across state lines regardless of the laws in either state
- Document your legal basis for growing (medical card, adult-use registration where required) and keep it accessible
- Check for any local zoning, lease, or HOA clauses that restrict indoor cultivation or high-power electrical installations
- Dispose of waste material (water runoff, trim, root waste) in compliance with local regulations
Planning Your Grow: Space, Power, Ventilation, and Workflow
Good grows start with good planning. A 4x4 foot tent (roughly 120x120 cm) is the sweet spot for most home growers: large enough for four to six plants in a DWC or multi-bucket system, small enough to manage solo. A 2x2 tent works for one or two plants and is a great starting point if this is your first hydro run. Measure your available space before buying anything and account for the height of your light plus the height of your plants at peak stretch, strains with Skunk genetics like Chronic can double in height during early flowering.
Power draw is a real consideration. A 600-watt HID setup in a 4x4 tent draws significant current, and adding reservoir heaters, air pumps, fans, and a dehumidifier can push a single circuit hard. Many growers run a dedicated 20-amp circuit for their grow room. If you're not sure about your electrical setup, consult a licensed electrician before installation. An unexpected circuit trip during the dark cycle can cause hermaphroditism in light-sensitive strains.
Ventilation serves two purposes: temperature control and odor management. You'll need an inline fan sized to exchange the air in your tent every one to three minutes, meaning a 4x4x7 foot tent (roughly 112 cubic feet) needs at minimum a 4-inch fan rated around 200 CFM, with a carbon filter rated for your fan's airflow. Run your exhaust fan on a controller that maintains tent temperature between 70-82°F (21-28°C) with lights on and no lower than 60°F (15°C) during dark periods. A clip-on circulation fan inside the tent keeps air moving across the canopy and prevents hotspots.
- Measure your space fully: width, depth, and ceiling height including light and ducting clearance
- Calculate power load: lights + pumps + fans + environmental controls on a single circuit should not exceed 80% of circuit capacity
- Source a carbon filter and inline fan rated for your tent volume before plants go in, not after odor becomes a problem
- Plan your water change workflow: where will you mix nutrients, how will you drain the reservoir, and where does wastewater go
- Identify your equipment staging area outside the tent for reservoir mixing, pH adjustment, and tool storage
- Confirm ambient room temperature and humidity outside the tent, since tent conditions depend on the room they're in
Choosing the Right Strain: Hybrids, Phenotypes, and Seeds vs. Clones
For a genuine 'hydro chronic' grow, Serious Seeds' Chronic is the logical starting point. It's a proven hybrid with Skunk and Northern Lights lineage, documented mid-60-day flowering times, and wide availability through established seedbanks. Community grow diaries note phenotype variability, you may pop five seeds and get slightly different growth patterns, and some phenotypes show sensitivity to calcium-magnesium levels in hydro systems, so keep Cal-Mag in your nutrient toolkit. If you want a broader hybrid pool to work with, any well-stabilized Skunk, Kush, or OG-lineage hybrid will perform well in hydro, since indica-dominant and hybrid strains tend to have more compact root systems and predictable flowering windows than some sativa-heavy varieties. For step-by-step instructions on how to grow a hybrid weed plant, see the internal guide titled “how to grow a hybrid weed plant.”.
Seeds versus clones is a real decision point in hydro. Seeds give you a fresh, disease-free start with no risk of importing pests or pathogens, but they introduce phenotype variability and add two to three weeks of germination and early seedling time. Clones give you genetic consistency and cut weeks off the timeline, but any pest, pathogen, or root disease on the mother plant travels with the clone. In a sealed hydroponic system, root rot introduced by a clone can spread rapidly. If you're sourcing clones from a trusted, inspected source, they're a fine option. For beginners, feminized seeds are typically the lower-risk path.
Hybrid phenotype selection matters more in hydro than in soil because the grow environment is so controlled. If you start with five seeds, run them through germination and let them grow for two to three weeks in your system before committing to your final plant count. Watch for root vigor, internode spacing, and early leaf color. Healthy, fast-rooting plants with compact internodes are worth keeping. Weak rooters or plants that show stress early can be removed. This phenotype hunting step is how experienced growers consistently produce top-shelf results from variable genetics.
Hydro System Options: Which One Is Right for You
There are five main system types you'll encounter for home cannabis hydroponics. Each has a different complexity level, cost, and failure profile. University extension sources, including guidance from the University of Minnesota Extension's small-scale hydroponics program, recommend Deep Water Culture (DWC) as the best starting point for beginners because it has fewer moving parts and simpler nutrient management than NFT or large drip setups. Here's how the major options compare:
| System | How It Works | Skill Level | Main Advantage | Main Risk | Best For |
|---|---|---|---|---|---|
| DWC (Deep Water Culture) | Roots suspended in aerated nutrient solution in a reservoir | Beginner | Simple, low cost, fast root growth | Oxygen loss or temperature rise causes rapid root rot | First hydro grows, 1-4 plants |
| RDWC (Recirculating DWC) | Multiple buckets connected to a central reservoir with pump circulation | Intermediate | Consistent nutrient levels across all plants, scalable | Plumbing complexity, pump failure affects whole system | 4+ plant grows, experienced growers |
| NFT (Nutrient Film Technique) | Thin film of nutrient solution flows continuously over bare roots in channels | Intermediate | Excellent oxygenation, low water use | Pump failure dries roots within minutes | Smaller, lighter plants; experienced growers |
| Drip System | Nutrient solution dripped onto grow medium via emitters on a timer | Intermediate | Works with a wide range of media, familiar logic | Emitter clogging, especially with organic inputs | Growers transitioning from soil, larger systems |
| Ebb & Flow (Flood & Drain) | Trays flood with nutrient solution on a timer, then drain back to reservoir | Intermediate | Flexible, works with most media and container sizes | Timer failure causes root dry-out or overwatering | Multi-plant setups, experienced growers |
For a first hydro chronic grow, start with DWC. A four-bucket DWC kit from most hydro retailers costs $50-200 for the buckets, lids, air pumps, and air stones, and the system logic is easy to grasp: roots hang in oxygenated water, you change the reservoir every seven to ten days, and you monitor pH and EC daily. Once you understand how your plants respond to nutrient concentration and pH, stepping up to RDWC or another system is a natural progression.
Equipment and Budget Checklist
Complete budget kits for a 2x2 or 4x4 tent with LED lighting, ventilation, and a DWC system start around $300 for basic setups and climb to $700-1,200 for integrated smart kits with digital environmental controllers. Building your own kit piece by piece is cheaper and lets you prioritize quality where it matters most (lights and air pumps) while economizing on buckets and grow media. Here's what you need and why each item matters:
| Item | What to Get | Approximate Cost (USD, mid-2026) | Priority |
|---|---|---|---|
| Grow tent | 4x4 ft for 4-6 plants, 2x2 for 1-2 | $60–$150 | Essential |
| LED grow light | Full-spectrum LED, 200-400W true draw for 4x4 | $80–$350 | Essential |
| DWC buckets/kit | 5-gallon buckets with net-pot lids, 4-bucket kit | $50–$200 | Essential |
| Air pump + air stones | Dual-outlet pump, 1 air stone per bucket minimum | $20–$50 | Essential |
| Inline fan + carbon filter | 4-inch for 2x2, 6-inch for 4x4, with speed controller | $80–$180 | Essential |
| Circulation fan | 6-10 inch clip-on oscillating fan | $15–$40 | Essential |
| pH meter (digital) | Calibrated pen-style meter with buffer solution | $25–$80 | Essential |
| EC/TDS meter | Pen-style EC meter with calibration solution | $15–$50 | Essential |
| Thermometer/hygrometer | Digital combo unit with min/max memory | $10–$25 | Essential |
| Nutrient kit | 3-part base (e.g., General Hydroponics Flora Series) + Cal-Mag | $40–$90 | Essential |
| Growing media | Hydroton/clay pebbles or rockwool cubes (germination) | $15–$40 | Essential |
| Timer (dual outlet) | 24-hour mechanical or digital timer for lights and pumps | $10–$20 | Essential |
| Backup air pump | Same spec as primary pump | $20–$30 | Strongly recommended |
| Light timer backup/UPS | Battery backup or spare timer | $30–$80 | Recommended |
| Jeweler's loupe or digital microscope | 30-60x for trichome inspection at harvest | $10–$40 | Recommended |
The backup air pump is not optional in my view. Extension research and experienced growers alike point to pump or power failure as one of the most common catastrophic failure modes in DWC: roots exposed to stagnant, low-oxygen water for even a few hours at warm temperatures can develop Pythium (root rot) that is very difficult to reverse. University of Minnesota Extension lists pump/power failure, warm low‑oxygen reservoirs (leading to Pythium/root rot), and emitter/dripper clogging as common failure modes that determine backup and monitoring priorities University of Minnesota Extension — Small‑scale hydroponics (failure modes & cautions). A $25 spare pump sitting in a drawer can save an entire crop.
Setting Up Your Hydro System: Step by Step
Site preparation and sterilization are the steps most beginners skip, and it costs them. Any residue, organic matter, or pathogen in your reservoir or buckets becomes a problem once warm, nutrient-rich water starts circulating. Do this right the first time and you'll avoid the most common DWC failures.
- Clean and sterilize all buckets, lids, net pots, tubing, and air stones with a 1% bleach solution (1 ml unscented bleach per 100 ml water), scrub thoroughly, rinse three times with clean water, and allow to air dry completely
- Set up your tent, mount your light at the manufacturer's recommended starting height (typically 18-24 inches above where canopy will be for most LEDs), and run your ducting from the carbon filter through the inline fan to the exhaust port
- Position your DWC buckets inside the tent and run air tubing from your pump (located outside the tent to reduce heat) through a small port or gap, connecting to the air stones in each bucket
- Fill each bucket with reverse osmosis or quality tap water (let tap water sit 24 hours to off-gas chlorine, or use a dechlorinator), leaving 1-2 inches of air gap between the water surface and the bottom of the net pot
- Mix your starting nutrient solution at seedling/clone strength: EC 0.6-0.8 mS/cm using your chosen base nutrient line, following manufacturer's feed chart but starting at roughly half the recommended dose
- Adjust pH to 5.5-6.2 (cannabis roots in hydro prefer this range; 5.8 is the common target) using pH Up or pH Down, testing with your calibrated pH pen
- Confirm water temperature is between 65-72°F (18-22°C) — this is critical, as warmer water holds less dissolved oxygen and creates root rot risk
- Run your system for 24 hours empty before adding plants, checking for air stone function, pump operation, and any leaks
- Confirm light cycle timer is working correctly: 18 hours on / 6 hours off for vegetative stage
Germination and Cloning: Getting Roots Ready for Hydro
Germinating Seeds for Hydro
The most reliable germination method for hydro is the paper towel method followed by transfer to a rockwool or rapid-rooter cube. For a detailed, step-by-step walkthrough on starting seeds in hydroponics, see our guide on how to grow hydro weed from seed. Place seeds between two damp (not soaking) paper towels on a plate, cover with another plate to keep moisture in, and store in a warm dark place at 70-80°F (21-27°C). Most viable cannabis seeds crack and show a taproot within 24-72 hours. Once the taproot is 3-5 mm long (roughly the length of a grain of rice), transfer it taproot-down into a pre-soaked rockwool or rapid-rooter cube. Pre-soak these cubes in pH-adjusted water at 5.5-6.0 before use.
- Soak rockwool cubes in pH 5.5 water for 30-60 minutes, then gently squeeze out excess moisture — cubes should be damp but not waterlogged
- Transfer germinated seed taproot-down into the cube hole, cover lightly with a small piece of rockwool, and place cubes on a humidity dome tray under low light (a T5 or the lowest setting of your LED)
- Maintain humidity above 70% inside the dome and temperature at 72-77°F (22-25°C); mist the dome interior (not the cubes directly) if humidity drops
- Seedlings will emerge from the cube in 2-5 days; once they show their first true leaves (the serrated cannabis leaves after the rounded cotyledons), begin opening dome vents gradually over 2-3 days to acclimate to ambient humidity
- Roots will be visible emerging from the bottom of the cube in 7-14 days from seed; at this point the cube is ready to transfer into the net pot in your DWC system
Cloning for Hydro
Clones taken from a healthy mother plant should be 4-6 inches long, cut at a 45-degree angle just below a node, with the lower leaves removed and only two to three small fan leaves at the top retained. Dip or dab the cut end in a rooting gel or powder rated for hydroponic use. Place the prepared clone directly into a pre-soaked rockwool cube or rapid-rooter, and transfer to a humidity dome at 75-80°F (24-27°C) under low light. Do not use full-strength nutrients during cloning, a very light feeding at EC 0.4-0.6 or plain pH-adjusted water is enough while roots develop.
- Clones typically root in 7-14 days in a humidity dome with rooting hormone and proper temperature
- Signs of successful rooting: clone stays perky and begins showing new growth at the tips
- Signs of failure: wilting that does not recover after humidity dome is closed, yellowing and dropping leaves, brown slimy stem base
- Inspect clone stems and root zone before transferring into your DWC system — any signs of rot or brown slime mean that clone should not go into your system
- Once roots are visibly emerging from the cube (white, healthy-looking roots), the clone is ready for transfer
Transferring Seedlings and Clones Into Your Hydro System
Transplanting a seedling or clone from a humidity dome into a DWC system is a stress moment for the plant. The key is to make the transition as gentle as possible and give the plant a few days to acclimate before ramping up nutrient strength. Fill your net pot with clean clay pebbles (Hydroton), rinse the pebbles thoroughly beforehand to remove dust. Place the rockwool cube containing your rooted seedling or clone into the center of the net pot and pack clay pebbles gently around it to support the cube. The cube should sit so that its bottom is just above or barely touching the nutrient solution surface, roots will find the water and extend downward on their own.
- Rinse clay pebbles in clean water until runoff is clear; rinse again with pH 5.8 water before use
- Set your nutrient solution to seedling/early clone strength: EC 0.6-0.8 mS/cm, pH 5.8, water temperature 65-72°F
- Lower air pump output slightly for the first 48 hours to reduce splashing and disturbance around new root tips
- Keep the humidity in the tent at 60-70% for the first week post-transfer to reduce transpiration stress while roots establish
- Avoid moving or disturbing the plants for the first 3-5 days; let roots reach the nutrient solution without interference
- After 3-5 days, check for new growth at the shoot tips — this is your signal that the plant has established in the hydro system and is ready for normal vegetative nutrient levels (EC 0.8-1.2 mS/cm)
- Gradually increase EC over 7-10 days rather than jumping to full vegetative strength immediately
Vegetative and Flowering Timelines: How Long Does This Actually Take
A full hydro chronic grow from seed to harvest typically runs 90-120 days depending on how long you run the vegetative stage. Chronic (Serious Seeds) has an advertised flowering time of around 63-65 days, though grower journals show some phenotypes running to 70 days. Add 2-3 weeks for germination and seedling, then 3-5 weeks of vegetative growth for a medium-sized plant, and you're looking at roughly 12-17 weeks total from seed to harvest. From clone, subtract the germination period and you can be in the 10-14 week range. For a concise timeline on how long to grow hydro weed from seed or clone, see the linked guide.
| Stage | Duration (Approximate) | Light Schedule | EC Target (mS/cm) | Key Actions |
|---|---|---|---|---|
| Germination | 3-7 days | Low light or humidity dome | 0.0 (plain water) | Taproot emergence, transfer to cube |
| Seedling/Clone Establishment | 7-14 days | 18h on / 6h off | 0.6–0.8 | Dome acclimation, root emergence |
| Early Vegetative | 1-2 weeks | 18h on / 6h off | 0.8–1.2 | Transfer to DWC, gentle feeding ramp |
| Mid-Late Vegetative | 2-3 weeks | 18h on / 6h off | 1.2–1.6 | Training (LST, topping), canopy management |
| Early Flower (Stretch) | Weeks 1-3 of 12/12 | 12h on / 12h off | 1.2–1.8 | Switch light schedule, watch for sex confirmation, reduce training |
| Peak Flower | Weeks 4-7 of 12/12 | 12h on / 12h off | 1.6–2.0 | Full bloom nutrients, trichome development |
| Late Flower / Flush | Final 7-14 days | 12h on / 12h off | 0.0–0.4 (flush) | Trichome inspection, flush with plain pH water |
| Harvest, Dry, Cure | 14-28 days post-cut | N/A | N/A | Hang dry, jar cure with burping schedule |
Lighting and Environmental Control Through Each Stage
Full-spectrum LED lights are the practical choice for most home hydro growers in 2026. They run cooler than HID (high-intensity discharge) lights, which directly reduces the heat load in your reservoir area and reduces your air conditioning needs. For a 4x4 tent, look for LEDs with a true power draw of 250-400 watts. Seedlings and clones want the light dimmed and raised; mature vegetating plants can handle higher intensity. Most quality LEDs include dimming and spectrum controls, so start at 50% intensity and 24 inches above the canopy for seedlings, ramp up to 75-100% at 18 inches during peak veg, and maintain full intensity at the manufacturer's recommended distance during flower.
Temperature and humidity targets shift meaningfully between growth stages. During vegetative growth, aim for 70-82°F (21-28°C) with lights on, 65-75°F (18-24°C) lights off, and relative humidity of 50-70%. During flowering, drop humidity to 40-50% to prevent bud rot, and keep temps at 68-79°F (20-26°C) with lights on. In the final two weeks before harvest, dropping humidity to 35-45% and lights-on temperature to the lower end of the range (around 70-75°F) can encourage resin production. The one number that matters most and often gets ignored: keep your reservoir water temperature between 65-72°F (18-22°C) at all times. Warm reservoir water is the most common cause of Pythium and root rot in DWC.
Nutrient Program: Feeding Your Hydro Chronic From Veg to Flush
General Hydroponics' Flora Series (Flora Gro, Flora Micro, Flora Bloom) is one of the most widely used three-part hydroponic nutrient systems, and their stage-by-stage feed charts are a reliable starting template. The key principle in hydro is to dose to your EC target, not to a fixed volume on a label. Start at half the manufacturer's recommended dose, check EC against the stage target in your schedule, and adjust from there. Here's a practical weekly feeding outline aligned to EC targets documented across major nutrient manufacturers and grower references:
| Growth Stage | Week | EC Target (mS/cm) | pH Target | Notes |
|---|---|---|---|---|
| Seedling/Clone | 1-2 | 0.6–0.8 | 5.8 | Half-strength base nutrients or seedling formula only |
| Early Veg | 3-4 | 0.8–1.2 | 5.8 | Introduce full base nutrients, start Cal-Mag if deficiency signs appear |
| Mid Veg | 5-6 | 1.2–1.6 | 5.8–6.0 | Full veg feeding, can introduce veg boosters |
| Transition (flip to 12/12) | 7 | 1.2–1.5 | 5.8–6.0 | Reduce nitrogen, increase phosphorus/potassium |
| Early Flower | 8-9 | 1.2–1.8 | 5.8–6.0 | Bloom base nutrients, bloom boosters if using |
| Peak Flower | 10-13 | 1.6–2.0 | 5.8–6.0 | Maximum bloom feeding, watch for tip burn as upper limit signal |
| Late Flower | 14-15 | 1.2–1.6 | 5.8–6.2 | Begin reducing nutrient strength |
| Flush | 16 (final 7-14 days) | 0.0–0.4 | 6.0 | Plain pH-adjusted water, let plant consume stored nutrients |
Cal-Mag supplementation deserves specific mention for Chronic phenotypes. Multiple community grow logs flag calcium and magnesium deficiency as a recurring issue with this strain in hydro, particularly when using reverse osmosis water (which strips these minerals). Add a Cal-Mag supplement at 1-2 ml/L alongside your base nutrients from early veg onward. Signs of deficiency: yellowing between veins on upper leaves (magnesium) or brown spots and curled leaf edges (calcium). Correct early, these deficiencies slow bud development if left unaddressed during peak flower.
Reservoir maintenance is non-negotiable. Every seven to ten days, do a full reservoir change: drain completely, rinse the reservoir with clean water, rebuild the nutrient solution fresh, re-check pH and EC, and refill. Between changes, top off with pH-adjusted water (not full-strength nutrient solution) as levels drop. Plants drink more water than nutrients, so the EC in a reservoir rises between changes if you only top off with plain water, check EC every two to three days and adjust accordingly. Water temperature also drifts with room temperature, so if your ambient room temperature runs warm, a small aquarium water chiller for your reservoir is worth the investment.
Root Health and Aeration: Keeping the Root Zone Clean
Healthy roots in DWC should be white, fuzzy (with fine root hairs), and smell clean. Brown, slimy, or foul-smelling roots mean Pythium (root rot) is present. Prevention is far easier than treatment. Keep reservoir temperature below 72°F, run enough air stones to keep the nutrient solution visibly bubbling, and ensure no light reaches the reservoir (even small light leaks accelerate algae and pathogen growth). Wrap your buckets and reservoir lids in Mylar tape or use purpose-built opaque containers.
If you see the early signs of root rot (light brown coloration on root tips, slight sliminess), act immediately. Drain and clean the reservoir, rinse roots very gently with pH 5.8 water, treat with a root-zone beneficial like Hydroguard (Bacillus amyloliquefaciens) at the manufacturer's dose, and drop reservoir temperature as low as you can safely manage. Beneficial bacteria compete with Pythium and can arrest early infections, but they won't reverse severe rot. Prevention through temperature management and clean reservoir practices is the only reliable strategy.
Training and Pruning: Getting the Most From Your Plants
Training dramatically increases yield per square foot by spreading the canopy and exposing more bud sites to direct light. The three methods most applicable to a hydro chronic grow are LST (low-stress training), topping, and SCROG (screen of green). These approaches work in any combination and are especially effective in controlled hydro environments where growth is fast and predictable.
- LST (Low-Stress Training): Bend and tie down the main stem and branches using soft plant ties or garden wire, encouraging a flat, wide canopy. Start at week 2-3 of vegetative growth. No cutting required, so stress is minimal
- Topping: Cut the main stem just above the third or fourth node to create two main colas instead of one. Do this during week 2-3 of veg when the plant has at least four nodes. Allow 3-5 days of recovery before further training
- SCROG (Screen of Green): Install a horizontal net or screen at canopy height and weave branches through it as they grow, creating an even flat canopy. Flip to flower when the screen is 70-80% full. Exceptional for maximizing light penetration in a 4x4 tent
- Defoliation: Remove large fan leaves that block light to lower bud sites during early flowering (weeks 1-3). Do not strip the plant bare — remove leaves that are actually blocking bud sites, not all fan leaves
- Lollipopping: Remove lower growth below the screen or canopy line (branches that won't receive adequate light) to redirect energy to top colas. Do this at or just after the flip to 12/12
Stop major training at the end of the first week of flowering. The stretch period (weeks 1-3 of 12/12) is when Chronic phenotypes can double in height, so plan your screen height and light positioning accordingly. Minor defoliation can continue through week 3 of flower, but avoid cutting anything significant after that point, the plant needs its energy for bud development, not wound healing.
Common Problems and How to Fix Them
pH and Nutrient Lockout
The most common issue beginners face in hydro is nutrient lockout caused by pH drift outside the 5.5-6.5 window. When pH goes above 6.5 or below 5.5, specific nutrients become chemically unavailable to the plant even if they're present in the solution. You'll see deficiency symptoms (yellowing, spots, curling) on plants that are being fed plenty of nutrients. The fix: check pH first before diagnosing any visual symptom, correct pH to 5.8, and do a full reservoir change. Give the plant 48-72 hours to recover before adjusting anything else.
Root Rot (Pythium)
Brown, slimy roots and a swampy smell from your reservoir are the tell-tale signs. Act immediately: drain and sanitize the reservoir, rinse roots gently, lower water temperature, increase aeration, and add beneficial bacteria (Hydroguard or equivalent). Reduce nutrient concentration to EC 1.0-1.2 while the plant recovers. If roots are severely brown and the plant is wilting despite oxygen and temperature correction, recovery is unlikely. Prevent this with consistent temperature management and a clean setup.
Pests
Hydroponic grows are not immune to pests. Spider mites, fungus gnats, aphids, and thrips are the most common in indoor grows. Hydroponic media like clay pebbles is less hospitable to fungus gnats than soil, but adults can still lay eggs in moist rockwool or at the surface of your growing medium. Early detection is everything: inspect the undersides of leaves weekly. Treatment options for a home grow include insecticidal soap, neem oil (in early veg only, not during flower due to taste/smell contamination), and diatomaceous earth around the reservoir lid perimeter for crawling insects. For mites, introducing predatory mites (Phytoseiulus persimilis) is an effective biological control. Never use systemic pesticides on plants you intend to consume.
Quick Troubleshooting Reference
| Symptom | Likely Cause | First Check | Fix |
|---|---|---|---|
| Yellowing lower leaves | Nitrogen deficiency or normal senescence | EC and pH | Raise EC slightly if pH is correct; normal in late flower |
| Yellow between veins (upper leaves) | Magnesium deficiency | Cal-Mag supplementation | Add Cal-Mag at 2 ml/L |
| Brown spots and curled leaf edges | Calcium deficiency | Cal-Mag supplementation | Add Cal-Mag, check pH is below 6.5 |
| Tips burnt on upper leaves | Nutrient burn (EC too high) | EC meter reading | Reduce EC by 0.2-0.3 mS/cm, partial reservoir change |
| Wilting despite full reservoir | Root rot or oxygen deficiency | Root color, water temperature, air pump function | Check root health, lower reservoir temp, add beneficial bacteria |
| Slow growth in veg | EC too low, pH out of range, or temperature issue | pH and EC, then check air/light temps | Correct pH to 5.8, raise EC to stage target |
| Stretched, spindly growth | Light too far away or intensity too low | Light height and dimmer setting | Lower light or increase intensity |
| Algae in reservoir | Light leak into reservoir | Opaque coverage of reservoir | Seal all light leaks, clean reservoir and start fresh |
Harvest Timing: Trichomes Don't Lie
Harvest timing is the single most impactful quality decision you make post-flower. The pistil (hair) method, harvesting when 70-90% of white pistils have turned orange or red, gives a rough window, but trichome inspection under magnification is far more accurate. Use a 30-60x jeweler's loupe or a digital microscope to inspect the trichomes on the bud itself, not the sugar leaves. Trichomes progress from clear (underdeveloped, low potency) to cloudy/milky white (peak THC, more cerebral effect) to amber (THC degrading to CBN, more sedative). For a balanced, potent result from Chronic-type genetics, harvest when 80-90% of trichomes are cloudy with 5-10% turning amber.
In the final 7-14 days before harvest, flush your system with plain pH-adjusted water at EC 0.0-0.4. This depletes stored nutrients from the plant tissue and is widely used among hydro growers to improve the final smoke quality. Complete darkness for the final 24-48 hours before harvest (a 'black out' period) is an optional step some growers use to maximize trichome density, though evidence is largely anecdotal. Regardless, harvest in the morning hours (or just before your lights-on period if on a schedule), as resin content is highest after the dark period.
Drying and Curing: Don't Rush the Last Step
Improper drying and curing is how growers ruin good cannabis after a successful grow. Cut whole branches (or the whole plant if space allows) and hang them upside down in a dark room or tent at 60-70°F (15-21°C) with 50-60% relative humidity and gentle air circulation. Do not direct a fan at the buds. Drying takes 7-14 days. The buds are ready to jar when the small stems snap rather than bend and the outer surface of the bud feels dry to the touch but the interior still has moisture.
Curing is where flavor, aroma, and smoothness develop. Place dried buds loosely in wide-mouth glass mason jars, filling jars to about 75% capacity. For the first two weeks, open the jars once or twice daily for 10-15 minutes to exchange air and release moisture (this is called burping). Use a humidity pack rated for 62% RH (Boveda or Integra Boost) in each jar to maintain optimal moisture. After two weeks of daily burping, reduce to once every few days. By four to six weeks of curing, the flavor and aroma profile will be significantly better than freshly dried bud. Eight weeks produces noticeably superior results if you can wait.
Yield Expectations and What Affects Them
Yield varies enormously based on grow space, light intensity, plant count, training, and the phenotype you're working with. In a well-run 4x4 tent under a quality 300-400W LED, a SCROG setup with four plants of Chronic-type genetics can yield anywhere from 3 to 8 ounces per plant dry weight. Beginners should target 1-3 oz per plant as a realistic first run, focusing on learning the system rather than maximizing yield. By your second or third run with the same genetics and system, you'll know your phenotype's behavior, your system's quirks, and your feeding schedule well enough to push those numbers up meaningfully.
Hydroponic growing genuinely delivers faster vegetative growth and often denser bud structure than soil when dialed in correctly, which is why experienced growers consistently come back to it. The learning curve is real, and the first run is mostly about not making catastrophic mistakes. Nail your pH, keep your reservoir cool, protect your root zone, and give your plants consistent light, everything else is fine-tuning. Good luck with your grow, and remember: every problem you troubleshoot is knowledge you carry into the next run.
FAQ
What does “Hydro Chronic” mean and what are realistic goals for a beginner grower?
“Hydro Chronic” generally refers to cannabis grown hydroponically (soilless systems) and/or the historical cultivar name “Chronic” (1990s Skunk/Northern Lights hybrid). For beginners, realistic goals are: (1) learn one hydro system (DWC recommended), (2) produce small indoor harvests within legal plant limits, (3) maintain clean, stable reservoir conditions, and (4) practice basic plant training to increase usable yield. Always verify local laws before planning grows; where home cultivation is legal, comply with plant limits, age and security requirements.
How do I check legal compliance before starting?
Checklist: (1) Confirm state/local law on home cultivation (plant counts, age limits, household caps). (2) Check landlord/HOA rules and lease terms. (3) Verify secure/locked indoor location and that plants are not visible from public spaces if required. (4) Ensure no distribution/sale unless licensed. (5) Record dates and counts to demonstrate compliance. Use official state regulatory websites (examples: California, Colorado, Massachusetts) and federal status updates when planning.
How should I choose a strain or phenotype for hydroponic indoor grows?
Select compact, predictable hybrids with documented indoor performance and flowering times (e.g., Chronic lineage records show ~60–70 day flower). Consider: (1) advertised flowering days and cultivar stability, (2) phenotype variability—choose seeds/clones from reputable sources, (3) desired CBD/THC profile and aroma, (4) training responsiveness (some phenotypes handle topping/LST better), and (5) caloric and nutrient sensitivity (some report cal‑mag needs). If unsure, start with a stable, indica‑leaning hybrid to simplify training and canopy management.
Which hydro system is best for beginners and what equipment do I need?
Recommendation: Start with a small Deep Water Culture (DWC) or single‑bucket DWC kit. Why: few moving parts, simple reservoir management, low initial plumbing. Basic equipment/budget checklist: (a) grow tent or dedicated room, (b) DWC buckets or RDWC if scaling, (c) net pots and inert medium (clay pebbles), (d) air pump and airstones sized for reservoir volume, (e) submersible water pump for RDWC/recirculating setups, (f) waterproof LED grow light (spectrum for veg/bloom), (g) inline fan + carbon filter for ventilation/odor, (h) hygrometer/thermometer, (i) pH meter and EC/TDS meter, (j) reservoir thermometer, (k) nutrient solution (hydro‑specific), (l) timers, trellis/net for training, (m) basic tools (pruners, gloves, alcohol). Typical small DWC kit cost range: $50–$300; full tent + light setup: $300–$1,200.
How do I germinate seeds or clone into a hydro system?
Step‑by‑step germination to DWC transplant: (A) Germination: use paper towel or rockwool cube method; keep warm (20–25°C) and moist until taproot ~2–5 mm. (B) Seedling: place seedling in a small net pot with starter medium (rockwool or clay pellet) and 12–18 hours low‑intensity light. (C) Clone: take a 1–2" cutting, dip in rooting hormone, root in rockwool or rapid‑rooting cube under humidity dome until visible roots. (D) Transition to DWC: once roots are 1–2 cm, place net pot in lid above oxygenated reservoir with very dilute nutrient (EC 0.4–0.8 mS/cm) and maintain water temp 18–20°C, pH 5.8–6.2. Ramp up light intensity and nutrients slowly during first week in hydro.
What are sample vegetative and flowering schedules for a hydro “Hydro Chronic” grow?
Sample schedules assume one plant per 3–5 gallon DWC bucket or multi‑plant RDWC in a 2x2–4x4 tent. Schedule A — Short veg (4 weeks) to flowering: Week 0–2 seedlings/clones under 18 hrs light; Week 3–4 veg with training (LST/topping) and EC 0.8–1.2; Switch to 12/12 to flower at start of Week 5. Flowering: Weeks 1–3 early bloom EC 1.2–1.6; Weeks 4–7 mid‑bloom EC 1.6–1.9; Weeks 8–10 late bloom flush last 1–2 weeks with reduced nutrients or plain pH‑balanced water. Total time: ~10–14 weeks seed‑to‑harvest depending on phenotype (many Chronic‑line strains finish ~8–10 weeks flowering). Adjust per plant maturity and trichome ripeness.
How to Grow a Hybrid Weed Plant: Complete Beginner Guide
Grow a hybrid weed plant: seed-to-cured step-by-step guide with legal reminders, hydro/soil methods, harvest & curing.