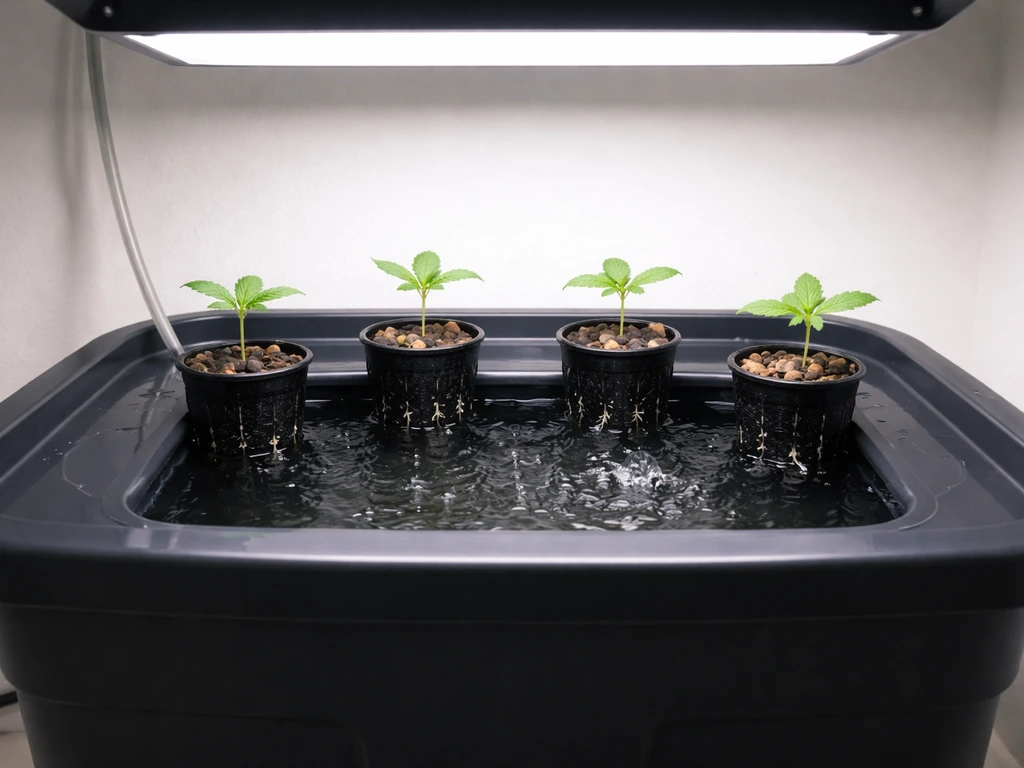
A hybrid cannabis plant is simply one bred from two or more distinct genetic lineages, typically crossing plants from what growers call sativa and indica backgrounds to combine traits from both. Most modern strains you will find in seed banks today are hybrids, meaning you almost certainly grow one already. The reason to choose a hybrid deliberately is control: you can pick a variety that leans toward the energetic, uplifting character associated with sativa genetics, the heavier, more relaxing profile associated with indica genetics, or land somewhere in the middle depending on what you want from your harvest.
How to Grow a Hybrid Weed Plant: Complete Beginner Guide

Marcus Holbrook
5 Aug 2026
SEO Title and Meta Description
Title: How to Grow a Hybrid Weed Plant: Seed-to-Harvest Guide for Home Growers
Meta Description: Learn how to grow a hybrid weed plant at home, from picking genetics and germinating seeds to harvest, drying, and curing. Beginner-friendly, step-by-step.
What Is a Hybrid Cannabis Plant and Why Grow One
Cannabis sativa L. is a single species with enormous genetic diversity. Scientists who study cannabis genomics describe modern commercial cultivars as the products of extensive crossing among historically separated populations, often loosely labeled sativa and indica. Scholarly reviews characterize modern commercial Cannabis cultivars as the products of extensive crossing among historically described lineages (commonly called ‘sativa’ and ‘indica’), and identify hybridization as a major driver of the trait variation seen in the commercial market Scholarly reviews characterize modern commercial Cannabis cultivars as the products of extensive crossing among historically described lineages (commonly called ‘sativa’ and ‘indica’), and identify hybridization as a major driver of the trait variation seen in the commercial market.. Neither of those words is a true taxonomic species name, but they have become useful shorthand in the growing community for two broad genetic clusters that differ in growth structure, flowering speed, and cannabinoid expression. A hybrid sits somewhere between those poles, and breeders can push it closer to one side or the other through repeated selection.
Why does that matter to you as a home grower? Because it gives you real options. A sativa-dominant hybrid tends to grow tall, take longer to flower, and produce an effect many people describe as cerebral or uplifting. An indica-dominant hybrid stays more compact, finishes faster, and tends toward a heavier body effect. A balanced hybrid tries to split the difference. On top of that, breeders select for practical traits like mold resistance, yield, aroma, and ease of cultivation, so choosing the right hybrid means your grow is already working in your favor before you plant a single seed.
Legal and Safety Reminders Before You Start
I want to be direct here: cannabis cultivation laws vary enormously by country, state, province, and even city. Before you buy a single seed, look up the exact rules for your location from the official government source, not a forum post or a social media comment. Laws change, and the consequences of getting it wrong can be serious.
To give you a sense of the range: Canada's federal Cannabis Act permits up to four plants per residence for personal cultivation. California state law generally allows up to six plants per residence for adults, though local municipalities can add restrictions. Colorado similarly allows six plants per adult with a household cap, but city and county ordinances can tighten that further. These numbers are illustrative and current as of the date of this article but can change. Always verify with your local regulatory body.
Beyond plant counts, most jurisdictions that allow home cultivation attach conditions. Common requirements include keeping plants in a locked or secured space, preventing plants from being visible from public areas, and prohibiting cultivation in homes where minors live. A court filing summarizing Proposition 64 and the MAUCRSA regulatory framework (Justia federal court documents) notes that jurisdictions commonly impose non‑technical compliance rules such as keeping plants in locked or secured spaces, preventing visibility from public areas, and restricting cultivation in residences with minors or where local ordinances prohibit home grows Court filing referencing Proposition 64 / MAUCRSA regulatory framework (Justia federal court documents summarizing statutory/regulatory intent). Violation of these conditions can still result in penalties even where personal cultivation is otherwise permitted.
On the safety side, there are a few things worth taking seriously. Indoor grows increase humidity, which raises mold and mildew risks in your living space. They also involve electrical loads from lighting and ventilation equipment, so use properly rated wiring, avoid overloaded circuits, and check your equipment regularly. If you have children in the home, secure all harvested material in child-resistant, locked storage. Poison control centers have documented a rise in accidental pediatric cannabis ingestions since legalization expanded, and secure storage is one of the most important things a responsible home grower can do. In the US, the Poison Control hotline is 1-800-222-1222. Post it somewhere visible.
Choosing Hybrid Genetics and Seed Types
Once you have confirmed that home cultivation is legal where you live, choosing the right seeds is the most important decision you will make. The three main seed categories are regular, feminized, and autoflowering, and each has a distinct set of trade-offs.
Regular, Feminized, and Autoflowering Seeds Explained
Regular seeds produce roughly equal numbers of male and female plants. If you are just trying to produce bud and are not interested in breeding your own seeds, male plants are usually removed and discarded because they produce pollen rather than flowers. For beginners, regular seeds mean extra work and wasted space, so most home growers start with feminized or autoflowering options instead.
Feminized seeds are bred to produce almost exclusively female plants. They still respond to the light cycle, meaning they stay in vegetative growth under long light periods (typically 18 hours of light per day indoors) and switch to flowering when you reduce light to 12 hours. This photoperiod response gives you direct control over plant size before flowering begins, which is useful if you want to maximize yield or practice training techniques.
Autoflowering seeds introduce genetics traced to high-latitude, photoperiod-insensitive cannabis populations, sometimes called ruderalis. Research published in plant genetics journals has identified specific loci responsible for the autoflowering trait, which causes the plant to transition to flowering based on age rather than light schedule. In practical terms, autos typically flower 10 to 14 days after germination regardless of how many hours of light they receive, finish in 8 to 12 weeks from seed, stay compact, and can be run on a simplified 18-to-20-hour light schedule for the whole grow. They are an excellent starting point for first-time growers and for anyone working with limited space.
| Seed Type | Requires Light Schedule Change | Typical Grow Time | Plant Size | Best For |
|---|---|---|---|---|
| Regular | Yes (12/12 to flower) | 14–20+ weeks | Variable, can get large | Breeders, experienced growers |
| Feminized | Yes (12/12 to flower) | 12–18 weeks | Medium to large with training | Growers wanting yield control |
| Autoflowering | No (age-triggered) | 8–12 weeks from seed | Compact, 60–120 cm typically | Beginners, small spaces, fast cycles |
Phenotype Selection, Effects, and THC:CBD Trade-offs
A strain's name on a seed packet is a genotype, the genetic blueprint. What actually grows in your space is the phenotype, which is that genetic blueprint expressed through your specific environment: your lights, your soil or nutrient solution, your temperatures, your training. Two plants from the same seed pack can express noticeably different aromas, stretch patterns, and potency simply because of minor environmental differences. This is normal, and it is actually one of the more interesting parts of growing.
When selecting a hybrid based on effects, the THC:CBD ratio is the most directly relevant number. THC (delta-9-tetrahydrocannabinol) is the primary psychoactive component. CBD (cannabidiol) is non-intoxicating and, according to WHO evaluation, does not produce the same intoxicating effects as THC at typical doses. High-THC hybrids (above 20%) tend to produce stronger psychoactive effects and are what most recreational growers seek. High-CBD strains, often in 1:1 or higher CBD:THC ratios, are favored by growers looking for less intense effects or potential therapeutic use, though I always recommend consulting a qualified health professional before using cannabis medicinally. The National Academies of Sciences has reviewed evidence for cannabis in various clinical contexts and consistently notes that outcomes are formulation- and dose-dependent.
For your first hybrid grow, I genuinely recommend picking something labeled beginner-friendly, meaning a strain with a reputation for being forgiving, robust against minor nutrient errors, and with a moderate flowering time of 8 to 10 weeks. Save the fussy, high-maintenance genetics for once you have a successful harvest under your belt.
Buying Seeds and Storing Them Properly
Buy seeds from an established seed bank with documented genetics and a clear germination guarantee. Look for banks that publish lab-verified cannabinoid data or Certificates of Analysis (COAs) for their cultivars. A COA from an accredited testing laboratory should include sample identification, testing methods, limits of detection, and analyte results including cannabinoid percentages. Many jurisdictions require this level of documentation for commercial cannabis products, and reputable seed banks increasingly provide equivalent transparency. Avoid unverified street seeds if you care about predictable results.
Seeds remain viable for years with proper storage. Keep them in an airtight container, dark and cool, ideally between 6 and 8 degrees Celsius (around 43 to 46 degrees Fahrenheit) with relative humidity around 20 to 30 percent. A small silica gel desiccant packet in the container helps maintain low humidity. Avoid temperature fluctuations, which degrade seeds faster than sustained cold. A dedicated compartment in a wine cooler or a vegetable drawer set to low works well for longer-term storage.
Indoor vs Outdoor vs Hydroponic: Choosing Your Growing Method
Each growing environment has genuine strengths and real limitations. None of them is objectively the best choice because the right method depends on your space, budget, climate, and how much hands-on time you want to invest. Here is an honest breakdown.
| Method | Control Level | Startup Cost | Ongoing Cost | Yield Potential | Best For |
|---|---|---|---|---|---|
| Indoor (soil/coco) | High | Medium | Medium (electricity, nutrients) | Medium to high | Year-round grows, urban growers, privacy |
| Outdoor | Low (weather-dependent) | Low | Low | Potentially very high per plant | Rural growers, warm climates, low-cost cultivation |
| Hydroponic (indoor) | Very high | Medium to high | Medium to high | High to very high | Faster growth cycles, experienced growers, maximizing efficiency |
Indoor growing in containers of soil or coco coir gives you year-round production and full control over the light schedule. It works well in apartments, spare rooms, or dedicated grow tents. The main costs are electricity for lighting and climate control, plus ongoing nutrients. Temperature should be maintained between 20 and 28 degrees Celsius (68 to 82°F) during lights-on, and 16 to 22 degrees Celsius (60 to 72°F) during lights-off. Relative humidity should sit around 60 to 70 percent during early vegetative growth and drop to 40 to 50 percent during flowering to reduce mold risk.
Outdoor growing costs less to set up and can produce enormous yields from photoperiod plants in a good climate. Plants flower naturally when day length shortens in late summer. The trade-offs are exposure to pests, unpredictable weather, and the requirement for more growing privacy. Outdoor grows in warm climates with long summers generally suit sativa-dominant hybrids that need extended flowering times. Indica-dominant hybrids finish faster and handle cooler fall temperatures better.
Hydroponic cultivation delivers nutrients directly to roots in a water-based solution without soil, which typically accelerates vegetative growth and can shorten total grow times noticeably compared to soil. For more on setting up and running hydro systems, the site's hydroponic growing guides cover the full process in detail.
Hydroponic Systems Explained: Which One Is Right for You
If you are considering hydro for your hybrid plant, the system you choose matters a lot. I made the mistake on my first hydro run of picking a complex system before I understood the basics, and I paid for it with a crashed nutrient reservoir and a lost crop. Start with the simplest system that meets your needs, then scale up.
Deep Water Culture (DWC)
DWC suspends plant roots directly in an oxygenated nutrient solution inside a reservoir. An air pump and air stones keep dissolved oxygen levels high enough for roots to thrive submerged. It is the most beginner-friendly active hydro system because there are few moving parts, and reservoir checks are straightforward. Typical reservoir pH for cannabis in DWC should be maintained at 5.5 to 6.2. Nutrient concentration, measured in electrical conductivity (EC), starts around 0.8 to 1.2 mS/cm for seedlings and rises to 1.6 to 2.4 mS/cm during heavy vegetative and flowering growth.
- 5-gallon or larger opaque bucket or reservoir per plant
- Air pump sized to reservoir volume (minimum 1 watt per gallon as a starting point)
- Air stones and tubing
- Net pots (3- to 6-inch diameter)
- Hydroton (expanded clay pebbles) or similar inert media
- pH meter (calibrated regularly) and pH up/down solutions
- EC/TDS meter
- Full-spectrum hydroponic nutrient line (three-part or two-part)
- Thermometer/hygrometer for reservoir temperature (ideal: 18 to 22°C / 65 to 72°F)
Recirculating Deep Water Culture (RDWC)
RDWC links multiple DWC buckets to a central reservoir with a water pump circulating nutrient solution continuously between them. This allows you to grow several plants while adjusting pH and nutrients in one central location. It scales well but involves more plumbing and a higher risk of system-wide issues if a pump fails or pH drifts. Best suited to growers who have already run at least one successful DWC cycle.
- Central reservoir (20 to 40+ gallon capacity for multi-plant setups)
- Individual bucket units per plant with lid and net pot
- Submersible water pump with appropriate flow rate (check manufacturer sizing for bucket count)
- PVC or flexible tubing with fittings for circulation loop
- Return line with appropriate slope back to reservoir
- Air pump and air stones for each bucket
- pH and EC meters (same as DWC)
- Float valve or reservoir level indicator (optional but useful)
Ebb and Flow (Flood and Drain)
Ebb and flow systems flood a grow table or tray with nutrient solution on a timer, then drain it back to a reservoir below. Roots get both a wet and a dry cycle, which encourages strong root development. The system is versatile because you can use virtually any growing medium in the tray, including rockwool, coco coir, or clay pebbles. Flood cycles typically run for 15 to 30 minutes, two to four times per day during vegetative growth and more frequently in flowering when demand increases.
- Flood tray or grow table (ABS plastic or purpose-built trays)
- Reservoir beneath the tray (sized to fill the tray with volume to spare)
- Submersible pump with timer
- Flood and drain fittings (overflow fitting and fill/drain fitting)
- Growing medium: clay pebbles, rockwool slabs, or coco coir in individual pots
- Tubing connecting reservoir to tray
- pH and EC meters
- Overflow tube set to maximum desired flood depth
Nutrient Film Technique (NFT)
NFT runs a thin, continuous film of nutrient solution along the bottom of sloped channels. Plant roots hang in the channel, with the lower portion bathed in the film and the upper portion exposed to air. NFT is highly efficient with water and nutrients but is less forgiving than DWC or ebb and flow. If the pump stops, roots dry out within hours. It works best with plants that have already established a healthy root mass, so many growers start seedlings in rockwool cubes and transplant into NFT channels once roots are visible.
- PVC or purpose-built NFT channels with appropriate slope (1 to 3 cm drop per 100 cm of channel length)
- Reservoir and submersible pump running continuously
- Return tubing from the low end of channels back to reservoir
- Rockwool starter cubes for seedling propagation
- Net pot inserts sized to channel holes
- Timer with continuous-run capability (or always-on pump)
- pH and EC meters
- Backup power or pump redundancy strongly recommended
Aeroponics
Aeroponics suspends roots in air inside a sealed chamber and delivers nutrient solution as a fine mist through high-pressure nozzles on a timed cycle. Root zone oxygenation is maximized, and growth rates can be exceptional. However, clogged nozzles and pump failures are serious and immediate problems. I would not recommend aeroponics for a first or second hydro grow. It rewards growers who already understand nutrient management deeply and can troubleshoot quickly.
- Sealed chamber or purpose-built aeroponic module
- High-pressure pump (minimum 60 to 100 PSI for true high-pressure aeroponics) or low-pressure submersible pump for budget systems
- Misting nozzles sized for droplet diameter (50 microns or less for high-pressure setups)
- Timer with short-interval cycling (mist for 3 to 5 seconds every 30 seconds in high-pressure systems)
- Net pots and neoprene collars
- Reservoir with lid and pump
- pH and EC meters
- Nozzle cleaning kit and spare nozzles
| System | Difficulty | Water Efficiency | Failure Tolerance | Growth Speed | Ideal User |
|---|---|---|---|---|---|
| DWC | Beginner | Good | High | Fast | First-time hydro growers |
| RDWC | Intermediate | Good | Medium | Fast | Multi-plant growers after DWC experience |
| Ebb & Flow | Beginner–Intermediate | Moderate | High | Moderate–Fast | Growers wanting medium flexibility |
| NFT | Intermediate | Very good | Low | Fast | Efficient growers, limited on space |
| Aeroponics | Advanced | Excellent | Very low | Very fast | Experienced growers optimizing for speed |
Step-by-Step Cultivation Timeline
Every hybrid grow follows the same broad arc: germination, seedling, vegetative growth, flowering, and harvest. The exact timeline depends on your strain type, your method, and your environment. The schedule below covers photoperiod feminized hybrids grown indoors, with notes on how autoflowering timelines differ.
Stage 1: Germination (Days 1 to 5)
The most reliable germination method for beginners is the paper towel method. Place seeds between two damp (not soaking) paper towels on a plate, cover with another plate to retain moisture, and keep at 21 to 27 degrees Celsius (70 to 80°F). Check daily. Most seeds show a taproot within 24 to 72 hours. Once the taproot is 0.5 to 1 cm long, carefully transfer to your medium, taproot pointing down, about 1 cm deep. You can also germinate directly in a pre-moistened medium, which avoids handling the fragile taproot.
Stage 2: Seedling (Days 5 to 14)
Seedlings are delicate. They need light (18 hours on, 6 hours off for photoperiod; same or continuous for autos), gentle airflow, and consistently moist but not saturated medium. At this stage you do not need full-strength nutrients. If you are in a quality seedling soil, skip added nutrients entirely for the first 10 to 14 days. For hydro, EC should stay low, around 0.4 to 0.8 mS/cm. Keep humidity high, around 65 to 70 percent, and temperature steady at 22 to 26 degrees Celsius (72 to 79°F). Overwatering is the most common mistake at this stage. I killed my first three seedlings that way.
Stage 3: Vegetative Growth (Weeks 2 to 8 for Photoperiod; Weeks 2 to 4 for Autos)
During veg, the plant builds its structural framework: stems, branches, and fan leaves. Light schedule for photoperiod plants is 18 hours on, 6 hours off. For autoflowers, many growers run 18 to 20 hours of light throughout the entire grow. Nutrient demand increases gradually. Nitrogen is the dominant macro-nutrient at this stage, so look for a veg-formula nutrient with a higher N ratio. In soil, water when the top 2 to 3 cm of the medium has dried out. In coco or hydro, feeding frequency increases significantly because these media hold less or no nutrient buffer.
Veg stage is also when you apply training techniques (covered in the training section below). For photoperiod plants, you control when the plant enters flowering by switching to a 12-hour light schedule. Most indoor growers flip to 12/12 when the plant has reached roughly half its desired final height, because most strains will stretch another 50 to 100 percent during early flowering.
Stage 4: Flowering (Weeks 8 to 16 for Photoperiod; Weeks 4 to 10 for Autos)
Once the light switch is made (or for autos, once the plant matures), flowering begins. Early flowering (weeks 1 to 3) involves significant stretch and early pistil development. Mid-flowering (weeks 3 to 7) is when bud sites bulk up rapidly. Late flowering (weeks 7 onward) is where trichome maturation happens and where you begin monitoring for harvest readiness. Shift nutrients toward a lower-nitrogen, higher-phosphorus and potassium ratio during flowering. Humidity should drop to 40 to 50 percent to minimize mold risk as buds densify. A two-week flush period before harvest, where plain pH-adjusted water is used instead of nutrients, is a common practice many growers use to improve final flavor, though the evidence on this is debated.
| Stage | Photoperiod Duration | Autoflower Duration | Light Schedule (Indoor) | Key Nutrients | Target RH |
|---|---|---|---|---|---|
| Germination | Days 1–5 | Days 1–5 | N/A or low-intensity | None | 70–80% |
| Seedling | Days 5–14 | Days 5–14 | 18/6 | Minimal or none | 65–70% |
| Vegetative | Weeks 2–8 | Weeks 2–4 | 18/6 (photo) / 18–20 hrs (auto) | High N, moderate P/K | 50–65% |
| Flowering | Weeks 8–16 | Weeks 4–10 | 12/12 (photo) / 18–20 hrs (auto) | Low N, high P/K | 40–50% |
| Harvest/Flush | Final 1–2 weeks | Final 1–2 weeks | Same as flowering | Plain pH water | 40–45% |
Environment, Lighting, Medium, and Ventilation
For lighting, LED is the dominant choice for home growers in 2026 and for good reason. Modern quantum board LEDs produce full-spectrum light with high efficiency, running cooler than HPS fixtures and drawing significantly less power for comparable output. A good target for flowering is 600 to 900 micromoles of photosynthetically active radiation (µmol/m²/s) at canopy level. Seedlings and young veg plants need far less, around 200 to 400 µmol/m²/s. HPS (high-pressure sodium) still produces excellent results and is worth considering if you are in a cold environment where the heat output helps maintain temperature.
For growing medium, soil is the most forgiving for beginners because it acts as a pH and nutrient buffer. A quality cannabis-specific potting mix with pre-amended nutrients, proper drainage, and an appropriate particle size works out of the bag with minimal adjustment. Coco coir is a popular middle-ground choice: it is an inert medium like hydro that requires you to provide all nutrients, but it behaves more like soil in watering rhythm. Pure hydroponic systems (DWC, NFT, ebb and flow) are the most demanding of pH and EC precision but reward you with faster growth.
Ventilation is non-negotiable for indoor grows. You need an exhaust fan pulling air through a carbon filter to control odor and humidity, and passive or active intake of fresh air. The rule of thumb is to exchange the air in your grow space every one to three minutes. A 4x4 foot tent (approximately 1.2 x 1.2 meters) with 6-foot (1.8-meter) height has roughly 28 cubic feet of volume; a 4-inch inline fan rated at 200 CFM is more than adequate, but a 6-inch fan gives you headroom for hot weather or larger plants. Indoor cannabis production can increase ambient humidity and VOCs in your living space, so adequate ventilation is both a plant health and a personal health consideration.
Nutrient Schedules, pH, and Watering by Medium
pH is the single variable most growers underestimate when they start. Cannabis takes up different nutrients most efficiently at different pH levels, and if your pH is consistently outside the ideal range, you will see deficiencies even when nutrients are present in adequate amounts. This is called nutrient lockout, and it is responsible for a large proportion of the yellow-leaf panics I see from new growers.
| Medium | Ideal pH Range | EC Seedling | EC Veg | EC Flowering | Watering Approach |
|---|---|---|---|---|---|
| Soil | 6.0–7.0 | N/A (buffered) | 0.8–1.4 mS/cm | 1.4–2.0 mS/cm | Water when top 2–3 cm dry |
| Coco Coir | 5.5–6.3 | 0.4–0.8 mS/cm | 1.0–1.8 mS/cm | 1.6–2.4 mS/cm | Daily or multiple times daily as plants mature |
| Hydro (DWC/NFT/Aero) | 5.5–6.2 | 0.4–0.8 mS/cm | 1.2–2.0 mS/cm | 1.8–2.6 mS/cm | Continuous or timed flood cycles per system |
A basic three-part nutrient line (grow, bloom, micro) or a purpose-formulated two-part cannabis nutrient covers the major macronutrients (nitrogen, phosphorus, potassium) and most micronutrients. In early veg, run nutrients at 25 to 50 percent of the manufacturer's recommended dose and increase as the plant responds. I have seen more problems from overfeeding than underfeeding. If your plant looks healthy, do not increase nutrients just because it seems like a good idea.
In coco and hydro, calcium and magnesium (CalMag) supplementation is almost always necessary because these media do not buffer those minerals the way soil does. Add CalMag at every feeding, especially under LED lighting which can intensify calcium demand.
Plant Training: Topping, LST, SCROG, and SOG
Training techniques manipulate how a plant grows to improve light distribution, increase the number of productive bud sites, and manage height. None of these are required, but most experienced growers use at least one of them.
Topping means removing the main growing tip (apical meristem) to encourage the plant to split into two main stems instead of one. Those two stems each develop into a main cola, effectively doubling your top-level bud sites. Topping is done during veg when the plant has at least four to five nodes. You can top multiple times, though each topping adds a week or more to your veg time. Do not top autoflowers, as they have a fixed vegetative window and cannot recover the lost growth time.
Low-stress training (LST) involves gently bending stems and securing them horizontally with soft ties or clips to keep the canopy even and open. Unlike topping, it does not cut the plant, so it works on autos and causes very little stress. It is my first recommendation for beginners because you can achieve a dramatically more productive grow without risking the plant.
Screen of green (SCROG) uses a horizontal mesh screen positioned above the plants. As the plant grows, branches are tucked under the screen and trained to fill it evenly. All growth above the screen becomes the flowering canopy, and everything below is eventually stripped to improve airflow. SCROG works extremely well in a fixed indoor space with photoperiod plants. Sea of green (SOG) takes the opposite approach: grow many small plants in a tight grid and flip them to flower early, producing one main cola per plant. SOG suits growers who have access to large numbers of cuttings (clones) and want rapid turnover.
Troubleshooting Common Problems
Nutrient Deficiencies
Yellowing lower leaves during mid-to-late flowering is normal nitrogen senescence and not a deficiency. Yellowing that starts mid-canopy in veg, interveinal chlorosis (yellow between green veins), or brown leaf tips are more concerning. Check pH first, always. If pH is in range and deficiency symptoms persist, increase the relevant nutrient gradually. Most common single-nutrient deficiencies in home grows: nitrogen (general yellowing, oldest leaves first), calcium (brown spots with yellow halos, typically on newer growth), and magnesium (interveinal chlorosis on older leaves).
Pests
Fungus gnats are the most common indoor pest and thrive when your medium stays too wet. Their larvae damage roots. Let the top layer of soil dry out between waterings, use yellow sticky traps to monitor adult populations, and consider a top-dressing of diatomaceous earth or beneficial nematodes for larvae. Spider mites leave tiny yellow stippling on leaves and fine webbing on undersides. They spread fast in hot, low-humidity conditions. Remove heavily affected leaves immediately, increase humidity modestly, and treat with neem oil or insecticidal soap at lights-off. Thrips, aphids, and whiteflies are less common but follow similar spray-and-inspect protocols.
Mold and Powdery Mildew
Botrytis (gray mold) in dense buds and powdery mildew on leaves are both humidity and airflow problems. If you see gray fuzzy growth inside a bud, remove and discard the entire affected section immediately and improve air circulation. Powdery mildew looks like white powder dusted on leaf surfaces. Improve airflow, reduce humidity below 50 percent, and treat with a diluted hydrogen peroxide spray or potassium bicarbonate solution. Prevention is vastly easier than cure.
Root Problems in Hydro
Healthy hydro roots are white and slightly fuzzy. Brown, slimy roots indicate root rot caused by pythium or similar pathogens, usually triggered by reservoir temperatures above 22 degrees Celsius (72°F) or insufficient dissolved oxygen. Keep reservoir temperature in the 18 to 22 degrees Celsius range, ensure vigorous aeration, and avoid light leaks into the reservoir. Beneficial bacteria products (Hydroguard and similar) can help prevent and address early-stage root rot when added to the reservoir.
Grow Time and Yield Expectations
Realistic expectations matter. An autoflowering hybrid in a DWC system can go from seed to harvest in as little as 9 to 11 weeks total under good conditions. A photoperiod feminized hybrid in soil, with a six-week veg period and a nine-week flower, will take around 15 to 16 weeks from germination. Outdoor photoperiod plants can veg from spring planting until natural daylength triggers flowering in late summer, meaning total grow time from seed is often 5 to 6 months.
Yield depends enormously on genetics, light intensity, training, and grower skill. A beginner in a 4x4 tent with a single 400-watt LED might reasonably expect 1 to 2 ounces (28 to 56 grams) from an autoflower on the first attempt and 2 to 4 ounces (56 to 113 grams) from a trained photoperiod plant. Experienced growers with dialed-in environments regularly yield 4 to 8+ ounces from the same space using SCROG techniques. Hydroponic growers often see 15 to 20 percent faster vegetative development compared to soil, which can shorten overall cycle length, particularly relevant if you are trying to understand how long to grow hydro weed from start to finish.
Harvest Timing, Drying, Curing, and Storage
Knowing When to Harvest
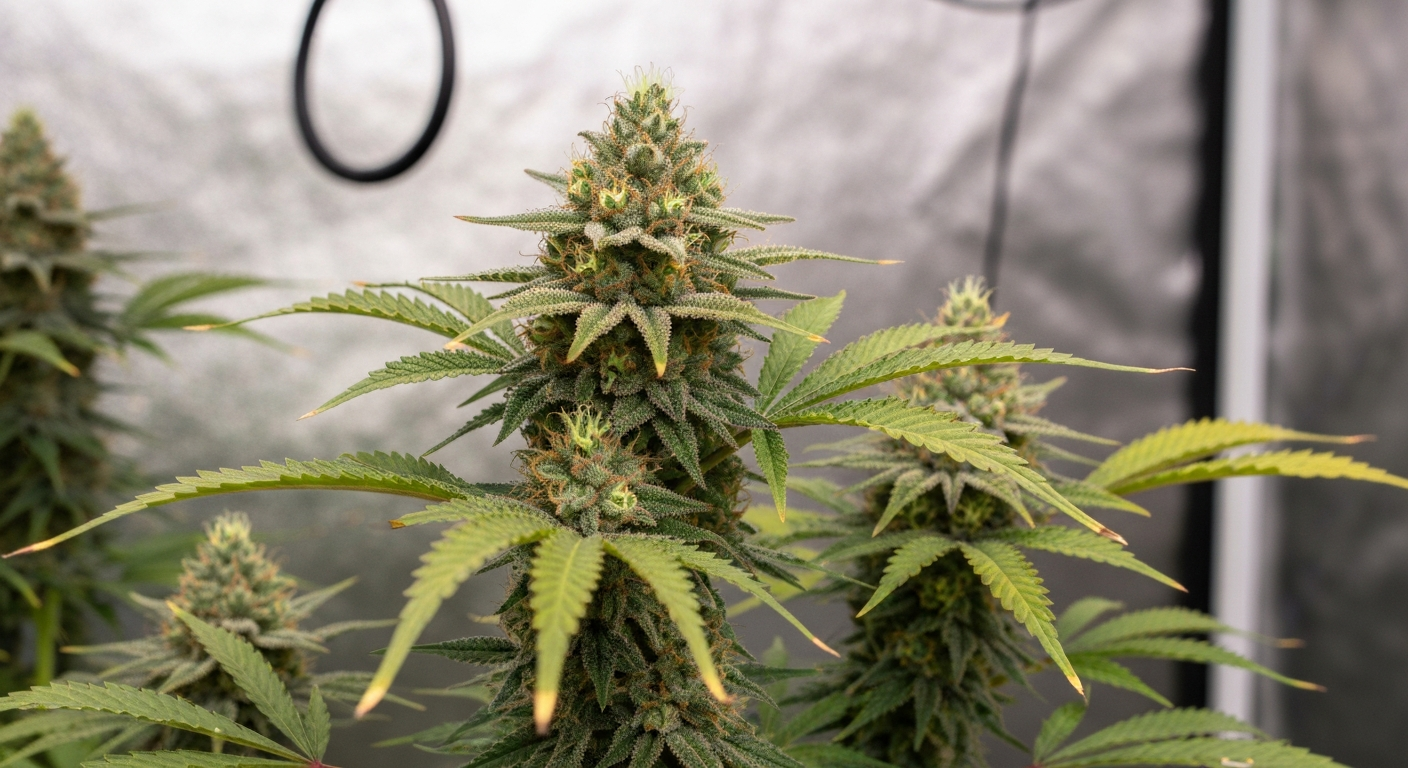
The most reliable harvest indicator is trichome color, examined with a jeweler's loupe (30x to 60x) or a digital microscope. Trichomes start clear, then turn milky white, and eventually amber. Harvest with mostly milky trichomes and minimal amber for a more energetic, cerebral effect. Wait until 20 to 30 percent amber for a heavier, more sedating result. Pistil color is a secondary indicator: when 70 to 90 percent of the white hairs have turned orange or red and curled in, the plant is typically at or near peak maturity. Do not rely on pistil color alone.
Drying
After harvest, hang whole branches or individual buds in a dark space with temperatures between 15 to 21 degrees Celsius (60 to 70°F) and relative humidity around 45 to 55 percent. Airflow should be gentle, not direct. Drying typically takes 7 to 14 days. The buds are ready to move to curing jars when small stems snap cleanly rather than bending.
Curing and Long-Term Storage
Curing in airtight glass jars (mason jars work perfectly) at 60 to 65 percent relative humidity and around 18 to 21 degrees Celsius (65 to 70°F) dramatically improves flavor, smoothness, and shelf life. For the first two weeks, open the jars for 5 to 10 minutes twice daily (a process called burping) to release moisture and gases. After two weeks, burp once daily. A four-week cure is a minimum for good results; eight weeks makes a noticeable improvement. Boveda or Integra humidity control packets inside the jars simplify maintaining the target range. For long-term storage beyond three months, add a food-grade oxygen absorber and keep jars in a cool, dark location.
Beginner Quick-Start Checklist
- Confirm home cultivation is legal in your jurisdiction and note your local plant count limit
- Choose a beginner-friendly autoflowering or feminized hybrid strain from a reputable seed bank
- Set up your grow space: tent or dedicated room, with exhaust fan, carbon filter, and intake
- Install your chosen lighting at appropriate height with a timer
- Prepare your growing medium: pre-amended soil for beginners, coco or DWC for faster results
- Germinate seeds using the paper towel method and transfer once taproot appears
- Maintain temperature 22 to 26°C (72 to 79°F) and humidity 65 to 70% in seedling stage
- Begin low-intensity nutrients at seedling stage week 2 and increase gradually
- Check and adjust pH every watering/feeding session
- Monitor plants daily for pests, deficiencies, or mold
- For photoperiod plants, flip to 12/12 light schedule when plant reaches half target height
- During flowering, drop humidity to 40 to 50% and increase P/K nutrients
- Check trichomes with a loupe starting at week 6 of flowering
- Harvest, dry for 7 to 14 days, then cure in sealed glass jars for a minimum of four weeks
- Store final product in cool, dark, airtight containers away from children
Common Pitfalls to Avoid
- Overwatering: the single most common beginner mistake; let soil dry out between waterings
- Skipping pH checks: nutrient lockout from incorrect pH is often misdiagnosed as deficiency
- Harvesting too early: clear trichomes mean underdeveloped cannabinoids; wait for milky-white
- Over-feeding: start at 25 to 50% of nutrient manufacturer recommendations and increase only when needed
- Topping autoflowers: they cannot recover the lost veg time
- Neglecting airflow: stagnant air breeds mold and pest problems rapidly
- Using unverified genetics: bag seeds produce unpredictable results; buy from reputable sources
- Ignoring reservoir temperature in hydro: anything above 22°C invites root rot
- Rushing the cure: poorly cured buds degrade in quality and harshness significantly faster
- Forgetting secure storage: keeping harvested material away from children is a legal and ethical responsibility in most jurisdictions
Going Deeper: Hydro Grows and Further Reading
If you decide that hydroponic growing is the right path for your hybrid plant, the guides on this site covering how to grow weed hydro, how to grow hydro weed from seed, and how long to grow hydro weed walk through each of those topics in dedicated detail. There is also a full guide to growing hydroponic marijuana that covers nutrient management, system setup, and troubleshooting in more depth than is possible here. For detailed instructions, see our guide on how to grow hydroponic marijuanas. For a focused, step-by-step hydro guide on growing Hydro Chronic, see How to Grow Hydro Chronic. Whether you are growing your first autoflower in a bucket of coco or running a full RDWC system with trained photoperiod hybrids, the fundamental principles covered in this article apply across every method. Start simple, stay consistent, keep records, and every subsequent grow will be better than the last.
FAQ
What is the single core research question I must answer to keep the article legally compliant and non‑actionable?
Identify and cite authoritative, factual background on what a hybrid cannabis plant is, the range of legal frameworks for home cultivation, and health/safety considerations — while explicitly avoiding step‑by‑step procedural instructions that could facilitate unlawful cultivation. The content should inform readers about concepts, risks, terminology, and where to find local law and laboratory/clinical resources without teaching how to grow in practice.
Which types of primary and secondary sources should I rely on to be authoritative and defensible?
Use peer‑reviewed articles and systematic reviews on Cannabis sativa genetics and cannabinoid pharmacology (PubMed/PMC/ScienceDirect); official government/regulatory texts and guidance (federal, state/provincial regulators) for legal limits and COA/testing rules; public‑health and clinical reviews (WHO, NASEM, professional societies) for safety and pediatric risk; state occupational/OSHA guidance for indoor hazard framing; and university/extension production manuals for definitional terminology (seed types, genotype vs phenotype) while avoiding hands‑on cultivation protocols.
What specific genetic and botanical background should be included without giving operational cultivation instructions?
Explain definitions and concepts: what ‘hybrid’ means (crossing genetic lineages; genotype vs phenotype), the historical sativa/indica/ruderalis labels and their limitations, and how hybridization drives trait variation. Cite genomics and phenotypic diversity reviews. Avoid describing breeding techniques, cloning or propagation methods.
How should I present seed‑type terminology (regular, feminized, autoflower) safely?
Define the categories and their genetic/phenological meaning (e.g., autoflower = photoperiod‑insensitive trait linked to ruderalis ancestry) and note typical expected differences in lifecycle and cannabinoid profiles in high‑level terms. Cite genetic mapping and production manual sources. Do NOT provide steps on selecting or producing seeds, or instructions on inducing flowering/sexing plants.
What legal and safety reminders must be included and how should they be sourced?
Include clear, prominent reminders that cultivation legality varies by jurisdiction; provide examples of common personal‑cultivation limits from official regulators (e.g., Health Canada, California summaries) and advise readers to consult current local statutes or regulator websites. Also include safety points: secure storage to prevent pediatric exposure, poison‑control contact info, occupational hazards for indoor grows (humidity, mold, IAQ) and PPE recommendations. Source these points to government statutes, public‑health studies (AAP Pediatrics), WHO reviews and state OSHA pages.
How can I cover growing options (indoor/outdoor/hydroponic) without actionable step‑by‑step guidance?
Provide comparative, non‑procedural overviews: describe pros/cons (control vs cost; weather/pest exposure), high‑level equipment categories (lighting, ventilation, nutrient systems) as descriptive lists, and reference controlled‑environment agriculture reviews and extension manuals. Avoid detailed setup instructions, specific schedules, or parameters that would enable a reader to reproduce a grow.
Next Article
How to Grow Hydro Weed From Seed: Beginner Guide
Step-by-step hydroponic cannabis from seed: germinate, set up system, nutrient and pH schedule, troubleshoot, harvest ba