You can grow cannabis at home from seeds by germinating them in a warm, moist environment, transplanting seedlings into soil or another growing medium, running an 18/6 light schedule through the vegetative phase, then switching to 12/12 to trigger flowering, and harvesting when trichomes turn milky-amber. The whole process takes roughly 3 to 5 months depending on your strain and setup. That's the stripped-down version. What follows is the full walkthrough, from cracking your first seed to storing your final product, written in the order you'll actually need it.
How to Grow Weed From Seeds at Home Step by Step

Marcus Holbrook
24 May 2026
Legality, the basics, and what 'from seed' actually means
Before anything goes in the ground or under a light, check your local laws. Home cultivation rules vary enormously by country, state, and even province or city. In Canada, federal law allows up to 4 cannabis plants per household for personal use (not per person, per household). Germany's federal framework permits adults to grow up to 3 plants simultaneously at their residence for personal consumption. blank" rel="noopener noreferrer">Illinois ties home cultivation rights to state residency and sets strict plant-count limits with penalties for exceeding them. The pattern is the same everywhere: there's usually a plant cap, a possession limit, and sometimes a location restriction. blank" rel="noopener noreferrer">Some Canadian provinces, for example, restrict cultivation to indoors only, while others allow outdoor growing. Always verify the rules for your specific jurisdiction before you start. This guide assumes you are growing legally within your permitted limits.
As for what 'growing from seed' actually means: it means starting with a cannabis seed rather than a clone (a cutting taken from an existing plant). Seeds give you a clean genetic slate with no risk of importing pests or disease from a donor plant. The tradeoff is that seeds take a little longer and introduce some variability, especially if you're working with non-feminized seeds that may turn out to be male plants. For beginners, feminized seeds (bred to produce only female plants, which are the ones that grow the consumable buds) are the most practical starting point. Autoflowering seeds are another beginner-friendly option: they flower based on age rather than a light-cycle change, which simplifies the process considerably. Regular seeds can be male or female and require more management, but they're the foundation of breeding and selection. Know which type you're buying.
Setting up your grow space: indoor vs outdoor, gear, and environment
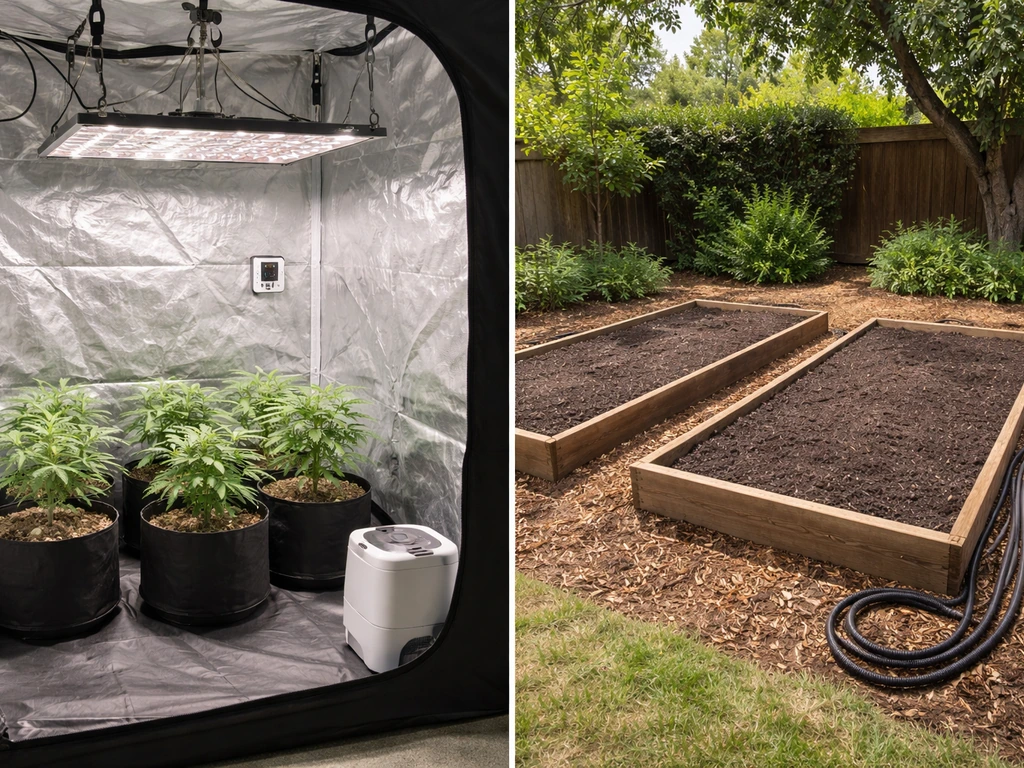
The first real decision is where you're growing: indoors or outdoors. Both are completely valid, and if you've looked at any of the related guides on this site covering different growing approaches, you'll know neither path is inherently superior. The right choice depends on your climate, space, budget, and local rules.
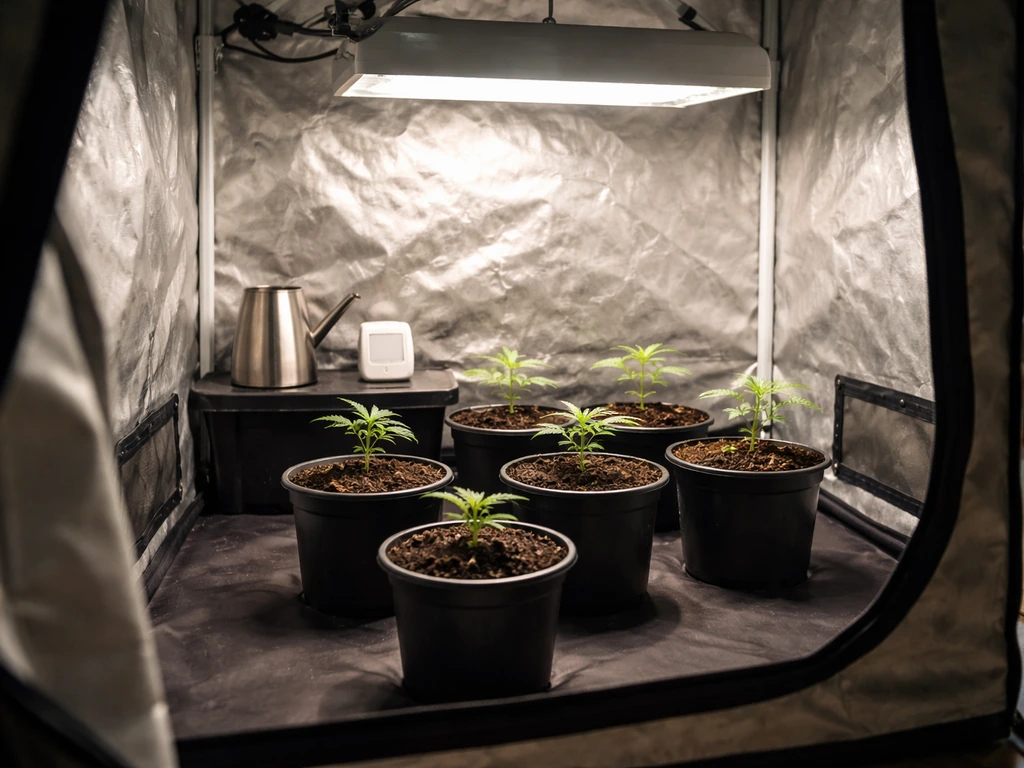
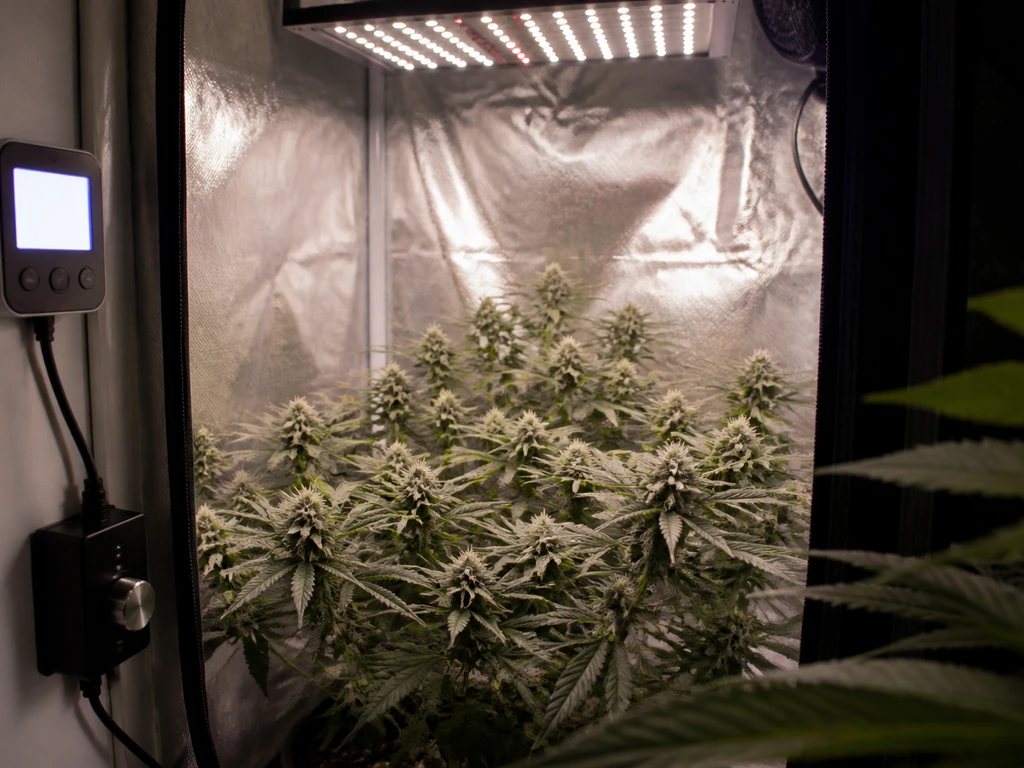
Indoors: control over everything
Indoor growing gives you full control over light, temperature, humidity, and schedule. You can grow year-round, you can fine-tune the environment, and you're not subject to weather events. The cost is setup and ongoing electricity. A basic indoor setup needs a grow tent (2x2 ft is workable for 1 to 2 plants; 4x4 ft gives you room to work), a grow light, a ventilation fan with carbon filter for odor control, a thermometer/hygrometer combo, and pots with a growing medium. LED lights have become the standard for home growers because they run cooler and use less electricity than HPS lights while producing comparable yields. For a 4x4 tent, a 400 to 600-watt equivalent LED is a practical starting point. Aim for these environmental targets during the seedling and vegetative phase: temperature 70 to 80°F (21 to 27°C), relative humidity 60 to 70%. Drop humidity to 40 to 50% during flowering to prevent mold.
Outdoors: free light, bigger plants, more complexity
Outdoor growing uses sunlight, which dramatically cuts costs and often produces larger plants with bigger yields. The tradeoffs are that you're dependent on your local climate and photoperiod (the seasonal change in daylight hours that triggers flowering), you have less pest and disease control, and your harvest window is dictated by the season rather than your schedule. In most Northern Hemisphere climates, seeds go out in late spring (around May to June), plants grow through summer, and flowering happens naturally in late summer and early fall, with harvest typically in September through October. If your jurisdiction permits outdoor growing, match your strain choice to your climate: shorter-season strains for cooler or northern climates, and longer-season strains for warmer regions with longer summers.
| Factor | Indoor | Outdoor |
|---|---|---|
| Startup cost | Moderate to high (lights, tent, fans) | Low (soil, pots or ground beds) |
| Ongoing cost | Electricity for lights and ventilation | Minimal |
| Control over environment | Full control | Weather-dependent |
| Yield per plant | Smaller but consistent | Potentially very large |
| Harvest timing | Year-round (you control the schedule) | Once per year, season-dependent |
| Pest/disease risk | Lower if space is clean | Higher (insects, mold, wildlife) |
| Best for | Urban growers, privacy-conscious, year-round cultivation | Rural or suburban growers with appropriate outdoor space |
Germination: cracking seeds and knowing when seedlings are ready to transplant
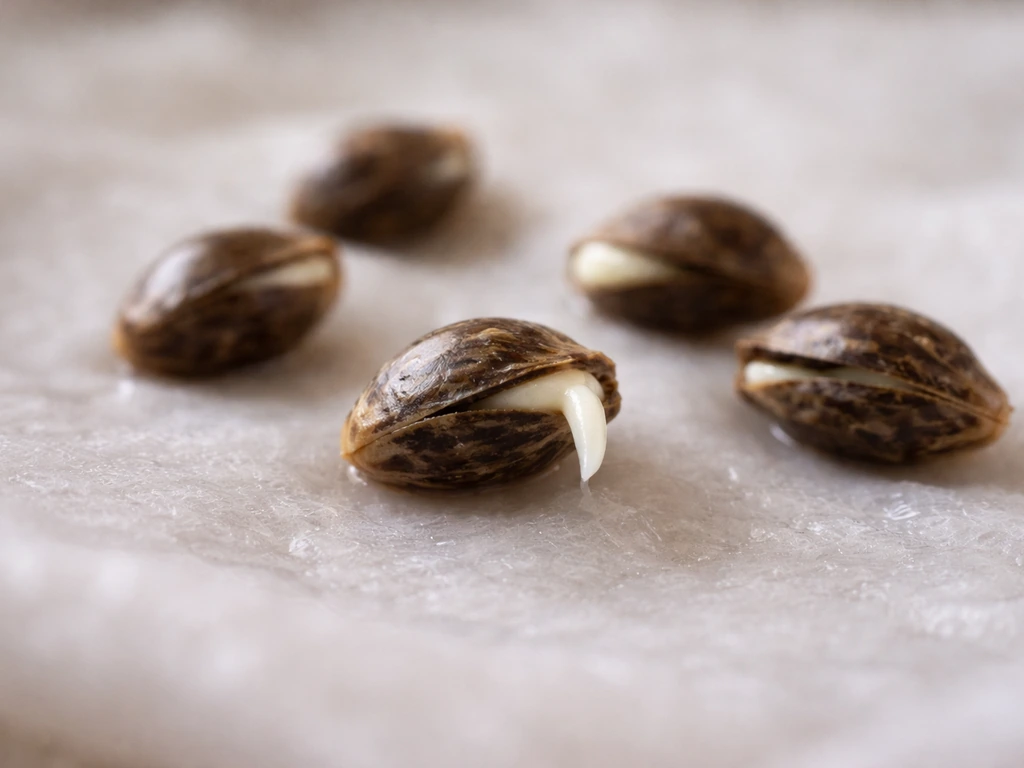
Germination is the process of waking a dormant seed and coaxing the first root (the taproot) out of the shell. Cannabis seeds germinate best at 70 to 85°F (21 to 29°C) with high humidity. There are a few reliable methods.
The paper towel method (most beginner-friendly)
- Place seeds on a damp paper towel (not dripping wet) on a plate.
- Fold the towel over the seeds and place the plate in a warm, dark spot like the top of a refrigerator or inside a cabinet.
- Check every 12 hours. Seeds typically crack and show a taproot within 24 to 72 hours.
- Once the taproot is 0.25 to 0.5 inches (6 to 13 mm) long, carefully transfer the seed (taproot pointing down) into your growing medium, about 0.5 inches (1.3 cm) deep.
- Keep the surface lightly moist until the seedling breaks the soil surface, usually within 1 to 3 days.
Direct soil germination (simpler, lower transplant risk)
Alternatively, plant your seed directly into moist seedling mix about 0.5 inches deep, cover loosely, and keep the container in a warm spot with a humidity dome or plastic wrap over it to retain moisture. This avoids the need to handle a fragile taproot. Germination rates are slightly less visible, but many growers prefer this method because it reduces transplant shock risk.
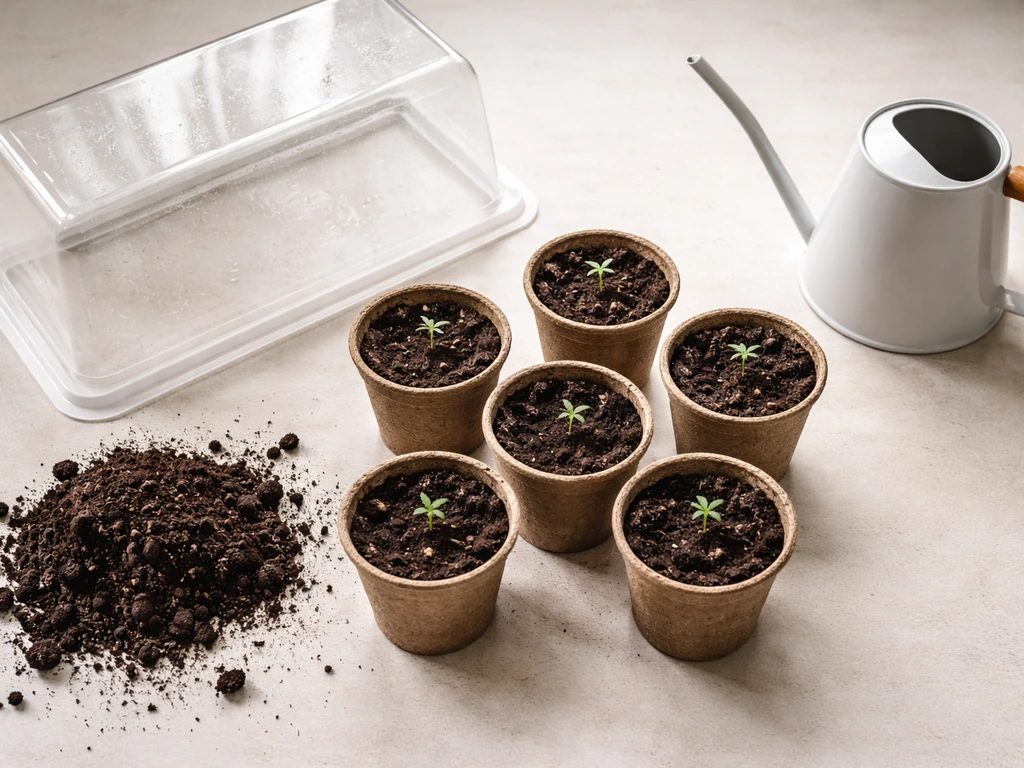
When to transplant your seedling
Start seedlings in small containers (solo cups or 4-inch pots) filled with a light seedling mix, not heavy nutrient-rich soil. Seedlings don't need a lot of nutrients at this stage and can easily get burned. Keep them under low-intensity light (or bright indirect light if outdoors) and maintain high humidity around 65 to 70%. Your seedling is ready to transplant to its main growing container when it has developed its second or third set of true leaves and the root system has started to fill out the small container. This usually happens around days 14 to 21 after germination. For final containers, most home growers use 3 to 5-gallon pots for medium-sized plants and 7 to 10-gallon pots for larger photoperiod strains grown indoors.
Vegetative growth: light, nutrients, training, and what to expect
The vegetative phase is when your plant builds its structure: stems, branches, and leaves. This is the framework everything else hangs on, and what you do here directly affects your final yield. Indoor growers control veg by running an 18-hours-on, 6-hours-off light schedule (18/6). You stay in this phase as long as you want, typically 4 to 8 weeks depending on how large you want your plant before flowering. Outdoors, veg happens naturally through the long days of late spring and summer.
Light and environment during veg
Keep your LED light at the manufacturer's recommended hanging height for the veg stage, usually 18 to 24 inches above the canopy, and adjust as the plant grows. Temperature targets stay at 70 to 80°F (21 to 27°C), and relative humidity should be in the 50 to 70% range. Good airflow matters: a gentle oscillating fan reduces hot spots and strengthens stems by mimicking outdoor wind.
Watering
Overwatering is one of the most common beginner mistakes. I've killed more seedlings this way than I'd like to admit. Water only when the top inch of soil is dry. Pick up the pot: if it feels light, water thoroughly until runoff comes out the drainage holes, then let it fully dry down before watering again. This wet-dry cycle encourages roots to grow down searching for moisture. Cannabis roots need oxygen as much as water.
Nutrients during veg
Cannabis needs three primary macronutrients: nitrogen (N), phosphorus (P), and potassium (K). During veg, plants are hungry for nitrogen to fuel leaf and stem growth, so look for a nutrient formula with a higher N ratio (something like 3-1-2). Start nutrients at half the recommended dose to avoid burning young plants, then work up as the plant matures. Soil pH should be 6.0 to 7.0 for soil grows and 5.5 to 6.5 for hydroponic or coco coir grows. pH outside these ranges locks out nutrients even when they're present in the root zone, which is why a cheap pH pen is worth every dollar.
Basic training techniques
Training your plants during veg increases yield by distributing light more evenly across the canopy. Low-stress training (LST) is the most beginner-friendly approach: gently bend and tie down the main stem to encourage lateral branching. Topping (cutting the main growing tip) forces the plant to develop two main colas instead of one and can significantly increase your overall bud sites. Both techniques take a few days to stress the plant, so do them during early to mid-veg, not right before you plan to flip to flower.
Flowering: triggering it, managing stretch, and keeping plants female
For photoperiod strains grown indoors, you trigger flowering by switching your light schedule from 18/6 to 12/12 (12 hours of light, 12 hours of uninterrupted darkness). The darkness period must be truly dark: even a small light leak can confuse your plants and delay or disrupt flowering. Outdoors, this happens naturally as days shorten past the summer solstice.
The stretch
In the first 2 to 3 weeks after the flip to 12/12, most photoperiod strains go through a 'stretch' where they can double or even triple in height. This catches a lot of beginners off guard. If you're growing indoors, plan for this: don't flip to flower when your plant is already brushing the lights. A good rule of thumb is to flip when your plant is about half the maximum height you have in your grow space. During the stretch, lower your light gradually to maintain the right distance from the canopy.
Preventing accidental pollination
If a male plant releases pollen onto your female plants, you'll end up with seedy buds and dramatically reduced potency and yield. This is why beginners should start with feminized seeds. If you're growing regular seeds, sex your plants early in the flowering stage: females show white hair-like pistils at their nodes, while males show small pollen sac clusters. Remove any male plants immediately and get them well away from your grow space before they open and release pollen. Even a single male plant going unnoticed for a day or two can pollinate an entire crop.
Nutrients and environment during flower
Once flowering begins, shift your nutrient profile away from nitrogen-heavy formulas and toward phosphorus and potassium to support bud development. A bloom formula with a lower N and higher P-K ratio is what you want here. Drop relative humidity to 40 to 50% to reduce mold risk as buds swell and density increases. Temperature can come down slightly to 65 to 78°F (18 to 26°C). Most photoperiod strains finish flowering in 8 to 11 weeks from the flip, depending on genetics.
Troubleshooting common problems from seed to harvest
Almost every grower hits at least a few of these issues. Here's how to identify and fix the most common ones before they cost you your crop.
Seeds not germinating
Old seeds, seeds stored poorly, or seeds that were too cold or too wet during germination are the usual culprits. A 24-hour soak in room-temperature water before transferring to a paper towel can help crack stubborn shells. Temperature below 65°F (18°C) significantly slows germination. If a seed hasn't shown a taproot after 5 to 7 days under good conditions, it's likely not viable.
Damping off
Damping off is a fungal condition that causes seedlings to suddenly wilt and fall over at the base of the stem, like the stem has rotted through. It's caused by overwatering, poor drainage, or overly humid conditions with no airflow. Prevention is the only real solution: use a well-draining seedling mix, water sparingly, ensure gentle airflow, and don't keep humidity domes on seedlings for too long after they've sprouted.
Nutrient deficiencies and toxicity
Yellowing lower leaves often signal a nitrogen deficiency in veg, while purple or red discoloration can indicate a phosphorus deficiency or cold temperatures. Burnt, brown leaf tips (especially on newer growth) usually mean nutrient toxicity or overly concentrated nutrients at the root zone. Always check your pH first before adding more nutrients: a pH problem masquerades as a deficiency because locked-out nutrients look exactly the same as absent nutrients. Flush with pH-corrected water if you suspect salt buildup from overfeeding.
Light problems
Stretchy, thin seedlings with long gaps between nodes (called etiolation) are reaching for light. Move your light closer or increase intensity. Bleached or white-tipped leaves indicate light burn from lights hung too close. Wilting or curling upward can also signal heat stress from lights that run hot. Keep a thermometer at canopy level, not just on the wall, to get an accurate reading.
Pests
Spider mites (tiny dots on leaves, webbing underneath), fungus gnats (larvae in wet soil, small flies around the base), and aphids (clusters on stems and undersides of leaves) are the most common home-grow pests. Sticky yellow traps catch fungus gnats and can serve as an early warning system. Neem oil spray is a widely used organic treatment for many soft-bodied insects during veg, though avoid spraying anything on flowering buds. For fungus gnats specifically, letting the soil dry out completely between waterings eliminates the moist environment their larvae need.
Humidity and mold risk
Botrytis (bud rot) is a gray-green mold that starts inside dense buds and by the time you see it on the surface, it's already spread. High humidity during late flowering, poor airflow inside the canopy, and dense buds that trap moisture are the main risk factors. Keep humidity below 50% in flowering, run an oscillating fan to move air through the canopy, and consider lollipopping (removing lower bud sites and foliage) to improve airflow in the lower canopy. If you find bud rot, remove that section immediately and check surrounding buds carefully.
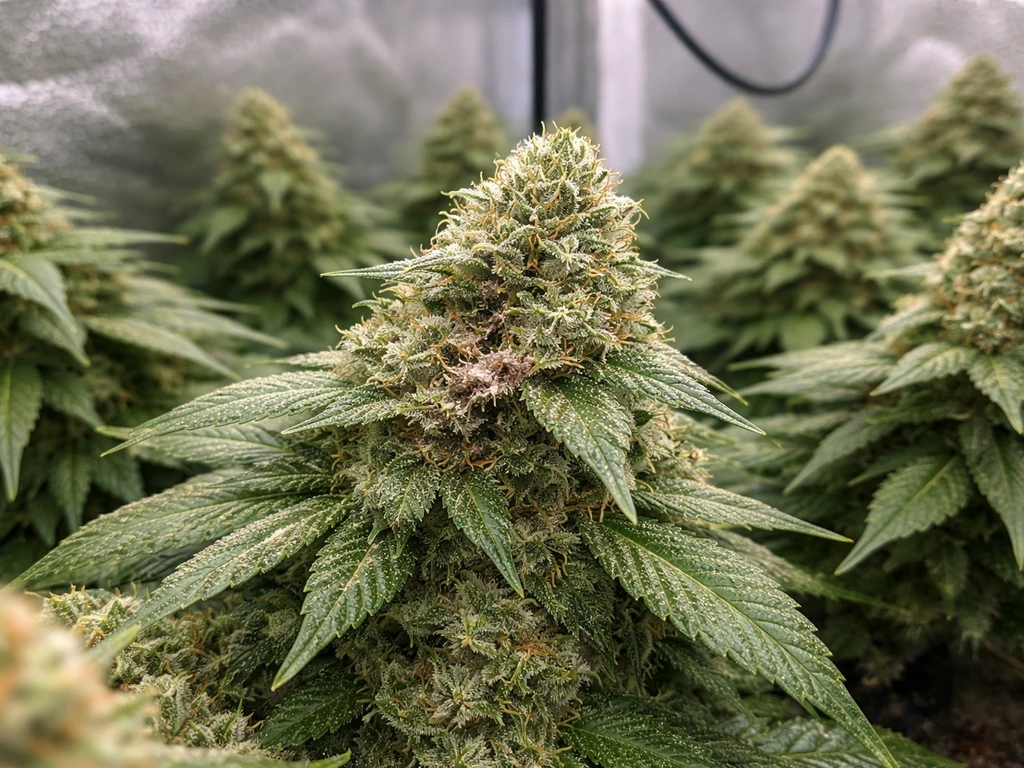
When to harvest
The most reliable way to determine harvest timing is with a jeweler's loupe (30 to 60x magnification) or a digital microscope to examine the trichomes: the tiny crystal-like resin glands on the buds. When most trichomes are clear, the plant needs more time. When they're mostly milky/cloudy white, you're at peak THC. When they begin turning amber, THC is degrading into CBN, which produces a more sedating, body-heavy effect. Most growers harvest when trichomes are a mix of milky and 10 to 30% amber, depending on the effect they want. Secondary cues: almost all white pistil hairs will have darkened and curled in, and the buds will look swollen and fragrant.
Harvest, drying, curing, and storing your crop
Harvest is satisfying but the work isn't over. What happens after the chop is what separates smooth, flavorful buds from harsh, grassy product. Don't rush this part.
Harvesting
Some growers do a 24 to 48-hour darkness period before harvest, believing it increases trichome density. Whether or not that's significant, it's easy enough to do. Cut branches at harvest and trim away the large fan leaves, which have little resin. You can wet-trim (remove all sugar leaves immediately) or dry-trim (leave sugar leaves on during drying and trim after). Wet trimming is faster but harder on trichomes. Dry trimming is gentler and gives you more flexibility with drying rate.
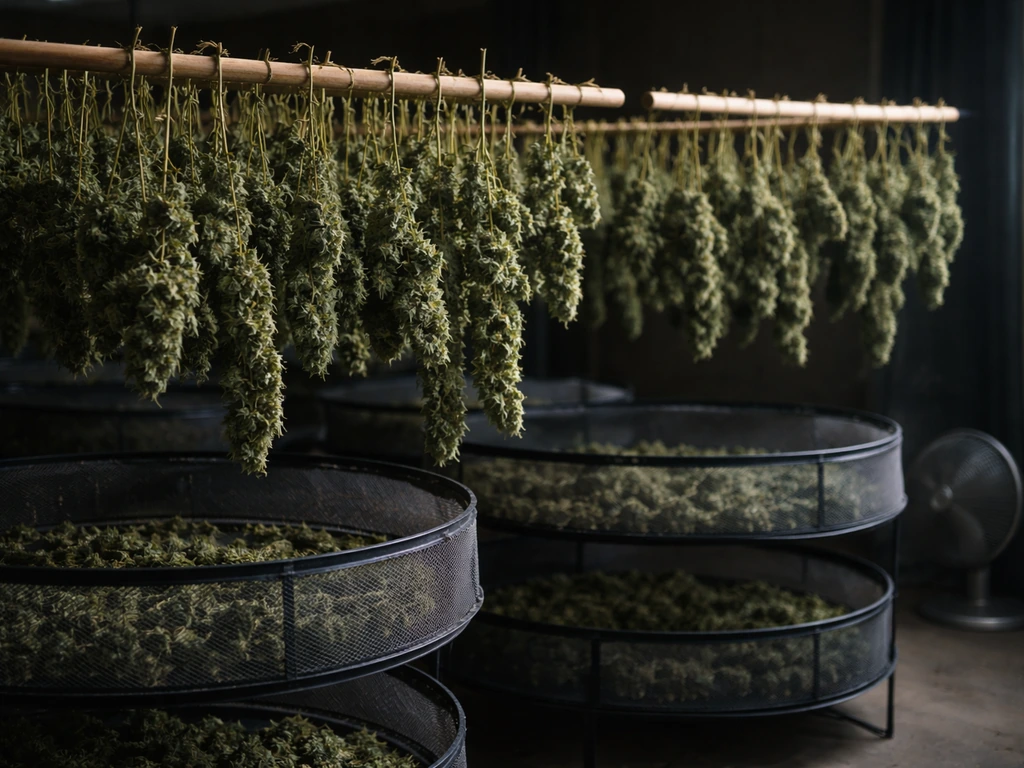
Drying
Hang your trimmed branches upside down in a dark, cool space with good airflow. Target 60 to 65°F (15 to 18°C) and 55 to 60% relative humidity. Drying too fast (high temperature, low humidity) produces harsh, grassy buds because chlorophyll and other compounds don't have time to break down properly. A slow dry of 7 to 14 days is ideal. Your buds are ready for curing when the smaller stems snap rather than bend, and the outside of the buds feel dry to the touch.
Curing
Curing is where the real flavor development happens, and it's the step most beginners skip to their regret. Place dried buds loosely in wide-mouth glass mason jars, filling them about 75% full. Store jars in a cool, dark place. For the first week, open the jars twice daily for 5 to 10 minutes (a process called burping) to release built-up moisture and gases and let fresh air in. After the first week, once moisture levels stabilize, drop to once daily for another week, then once every few days for the remainder of the cure. A minimum cure is 2 to 4 weeks. A 6 to 8-week cure dramatically improves flavor and smoothness. Boveda or Integra humidity packs (62% RH) are worth adding to your jars to maintain ideal humidity during long cures.
Storing your finished product
Once cured, store buds in sealed glass jars away from light, heat, and moisture. UV light degrades THC, so amber or opaque jars are better than clear ones, or just keep clear jars in a drawer or box. Temperature should stay below 75°F (24°C). Properly cured and stored cannabis can maintain its quality for 6 to 12 months, with gradual degradation beyond that. Avoid plastic bags for long-term storage: they create static that pulls trichomes off the buds and don't seal well enough to prevent slow moisture exchange.
Your seed-to-harvest timeline at a glance
| Stage | Duration | Key targets |
|---|---|---|
| Germination | 1 to 5 days | 70 to 85°F, high humidity, darkness |
| Seedling | 1 to 3 weeks | 18/6 light, 65 to 70% RH, light nutrients |
| Vegetative | 4 to 8 weeks (photoperiod) | 18/6 light, 70 to 80°F, 50 to 70% RH, N-heavy nutrients |
| Flowering | 8 to 11 weeks (most strains) | 12/12 light, 65 to 78°F, 40 to 50% RH, P-K nutrients |
| Drying | 7 to 14 days | 60 to 65°F, 55 to 60% RH, dark, airflow |
| Curing | 4 to 8 weeks minimum | Cool, dark, glass jars, burp daily first week |
| Total (approx.) | 3 to 5 months | Varies by strain and veg duration |
That's the full journey from seed to stored bud. Every stage has its learning curve, and you will make mistakes along the way (everyone does). The key is to take notes on each grow, document what you changed, and keep refining. Your second grow will be meaningfully better than your first, and your third better still. Start with feminized seeds, keep your environment dialed in, don't overwater, and give your harvest a real cure. Do those four things consistently and you're already ahead of where most beginners start.
FAQ
Should I start with feminized, regular, or autoflower seeds for my first home grow?
Choose based on your grow time goal and how you’ll control the light. If you cannot reliably keep a dark, uninterrupted 12-hour period, prefer autoflowers, since they don’t depend on the 12/12 light flip. If you can control light timing, photoperiod strains usually let you size the plant during veg, then predictably flower after the flip. Also, check whether your seeds are feminized or regular, because that affects whether you must identify and remove males.
When is the best time to transplant seedlings into their final pot?
Aim to transplant when the seedling has 2 to 3 sets of true leaves and the roots have begun filling the current container, because that reduces recovery time. Avoid transplanting right after a heavy nutrient feed, and water lightly before moving so the root ball holds together. If you see the seedling droop after transplant, it usually recovers within a day or two, but prolonged wilting often means the root zone dried out or the medium was too wet at transplant.
How do I know I’m watering the right amount during early growth?
During seedling and veg, don’t treat every watering the same. Use the pot weight or finger test to confirm the top inch is dry, then water thoroughly until you get runoff, and wait for the pot to lighten again. If you see persistent yellowing plus soft, droopy stems, it’s more likely overwatering or low oxygen than a “need more nutrients” issue. Adjust your watering frequency rather than increasing fertilizer concentration.
What should I check first when leaves show nutrient problems?
Treat pH as a troubleshooting step, not a constant guess. If leaves look nutrient-deficient but your fertilizer strength seems reasonable, measure pH runoff (soil) or the nutrient solution pH (hydro/coco) and compare it to the target ranges. A pH mismatch can mimic both deficiencies and toxicities, so correcting pH before adding more nutrients often prevents a spiral where you keep feeding a locked-out problem.
How strict does “no light during dark period” need to be during 12/12?
Light leaks are most dangerous during the dark period after you flip to 12/12, even small indicators like LEDs on timers or windows reflecting into the tent. If you use a tent, close it fully and cover any reflective surfaces that might “glow” at night, and avoid entering the room with bright lights on during the dark cycle. A common fix for delayed flowering is improving darkness control, not changing nutrients.
Can I train my plant right before switching to flowering?
Yes, you can do low-stress training during early to mid-veg, but avoid major stress immediately before the flip. A practical approach is to complete tying and bending about a week or so before switching to 12/12 so plants have time to recover and reorient. After the flip, keep training minimal, because the stretch is already a sensitive period where snapped or over-bent branches can reduce flowering performance.
What’s the best way to prevent pests before they get out of control?
For pest prevention, the easiest wins are hygiene and early detection. Clean tools, avoid bringing in outdoor plants or soil, and inspect the underside of leaves at least a couple times per week. Use sticky yellow traps to monitor fungus gnats, and if you treat with neem or similar oils, test on one plant first and avoid spraying dense bud sites, especially once flowering is underway. If you see rapid spread, isolate the affected plant quickly.
What should I do if I identify a male plant during flowering?
If you see pollen sacs or early signs of male traits, remove the male immediately and keep it far from your grow area. Don’t just “wait and see,” because a short window can fertilize an entire flowering room. After removal, inspect nearby plants for any sign of seeded growth, and consider cleaning or changing airflow intake paths if the grow space shares ducting or carbon-filter systems.
How can I reduce the risk of bud rot (botrytis) in dense flowering plants?
Bud rot often starts inside dense flowers, so symptoms can appear late. Prevention matters more than cure: keep airflow moving through the canopy, reduce humidity targets during late flowering, and don’t let dense inner buds stay wet from spraying or condensation. If you find rot, remove the affected tissue right away and check surrounding buds carefully, because nearby sections can be compromised even if they look fine.
How do I choose the right harvest day if I want a specific effect?
Harvest timing is a balance between desired effect and shelf-life. A trichome mix with mostly milky and some amber typically gives a more relaxed effect, while mostly clear can be more uplifting but shorter in potency. If you wait too long (very high amber), you may see more sedative effects but also faster THC degradation. For the most consistent results, use magnification on multiple buds across the plant, not just one top cola.
What are the most common drying and curing mistakes that make weed taste harsh?
Don’t rush drying. Keep drying conditions cool and moderately humid, and avoid airflow that directly blasts the buds, since uneven drying can lead to harsh smoke and case-hardening. If smaller stems don’t snap and buds still feel moist inside, continue drying longer rather than starting jars early. For curing, burp jars frequently during the first week, then reduce frequency as the buds stabilize.
How should I store jars during a long cure so they don’t over-dry or mold?
Put dried, cured buds in jars loosely (about three-quarters full) to allow some airflow and avoid excessive compaction, which can slow moisture equalization. If you use humidity packs, add them after the first rough stabilization phase so you don’t “trap” too much moisture. Keep jars in the dark and below about 75°F (24°C), and avoid repeatedly opening jars for long periods, since oxygen exposure can gradually reduce quality.
Next Article
How to Grow Weed at Home Without Equipment From Seed
Step-by-step cannabis grow from seed with minimal tools, using soil-only indoor or outdoor light, plus feeding, training