Growing pot at home is genuinely doable for a first-timer, but only if you treat it like a real project with real planning. The short version: pick a legal setup for your location, choose a forgiving strain, control your environment, feed lightly, and don't harvest too early. Everything below walks you through exactly that, from the day you buy seeds to the day you crack open a properly cured jar. Once you understand the basics of legality, space, and lighting, the rest of the guide shows the practical steps for how to grow cannabis at home Everything below walks you through exactly that.
How to Grow Pot at Home: Beginner Step-by-Step Guide

Marcus Holbrook
22 Apr 2026

Before you start: legal, space, and timeline planning
The very first thing to figure out is whether home cultivation is legal where you live, and exactly how many plants you're allowed. Laws vary more than most people expect. In Colorado, adults 21 and older can grow up to six plants per person, but no more than three can be flowering at the same time. That sounds simple until you realize Denver caps a whole residence at 12 plants regardless of how many adults live there. California's Prop 64 allows adults 21+ to grow up to six living plants per residence, but the plants must be inside a private residence or a locked space and cannot be visible from a public area with normal unaided vision. Ohio has its own secured-space requirements, mandating that plants be grown in a locked closet, room, greenhouse, or enclosed area that prevents anyone under 21 from accessing them and keeps plants out of public view. These three states illustrate a pattern: nearly every legal state has a plant count limit, a visibility restriction, and a youth-access prevention requirement. Check your state statutes AND your city or county ordinances, because municipal rules often bite harder than state ones.
Once you know you're legal, map out your space and timeline before buying a single seed. A realistic indoor grow from seed to a dried, smokable harvest takes between 3 and 5 months depending on strain genetics. Autoflowering strains compress that to roughly 10 to 12 weeks. Outdoor grows follow the sun, so in most of North America you're planting after last frost (late April to May) and harvesting in September or October. Plan around that calendar now. For space, a 2x4-foot tent or a spare closet is plenty for two to four plants and your first real harvest. Make sure wherever you choose has a power outlet nearby, a way to run an exhaust line or open a window, and ideally a door you can close and lock.
Choosing seeds, strains, and your growing style
Your growing environment and your goals should drive strain selection, not the other way around. There are three main paths: indoor growing under artificial light, outdoor growing in soil or containers, and hydroponics (growing in a soilless medium like coco coir or in a water-based system). All three work. None is inherently better for a beginner. The best one is whichever fits your space, budget, and schedule.
| Method | Startup Cost | Control Level | Best Strain Type | Typical Cycle |
|---|---|---|---|---|
| Indoor (soil/pots) | Moderate ($200–$600 for a basic tent setup) | High | Autoflower or photoperiod | 10–20 weeks seed to harvest |
| Outdoor (ground or containers) | Low ($20–$100) | Low (weather dependent) | Photoperiod or autoflower | 5–7 months (seasonal) |
| Hydro (coco coir or DWC) | Moderate-High ($300–$800+) | Very high | Any, but forgiving strains preferred | 9–16 weeks seed to harvest |
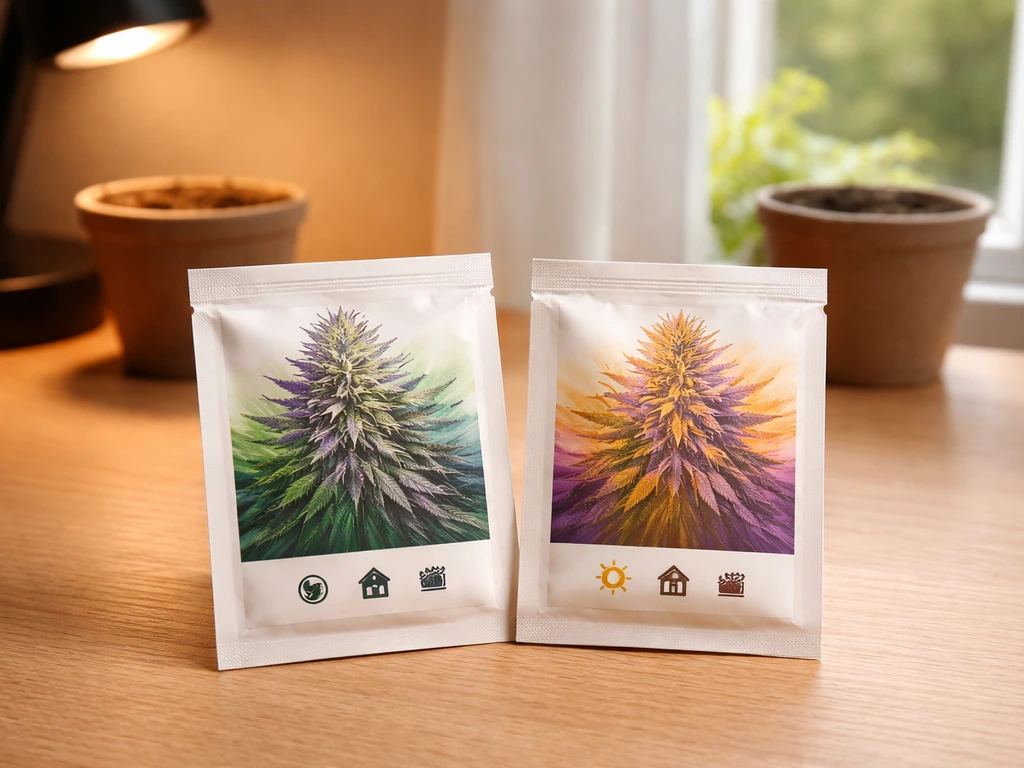
For seeds, buy from a reputable seed bank that ships to your region. For your first grow, lean toward autoflowering feminized seeds. Autos don't need a light schedule change to flower, they finish faster, and they stay compact, which is ideal for limited space. Good beginner autoflower strains include Northern Lights Auto, Gorilla Glue Auto, and Wedding Cake Auto. If you prefer photoperiod strains (which give you more control over plant size before flowering), choose something labeled as 'beginner-friendly' or 'easy to grow,' like Blue Dream, White Widow, or an OG Kush clone. Avoid high-maintenance strains like some pure sativas with 16-week flower times until you've got a harvest or two behind you.
If you're starting from a clone rather than seed, you skip germination and the seedling stage, which shortens your timeline by two to three weeks. Clones need to be hardened off before going into a full-light environment, but otherwise you follow the same vegetative and flowering steps as with a seedling.
Germination and seedling setup
The simplest germination method that actually works: soak your seeds in a glass of room-temperature water for 12 to 24 hours, then transfer them to a folded, damp paper towel inside a zip-lock bag or between two plates. Keep them in a dark spot around 70 to 77°F (21 to 25°C). You should see a taproot emerge within 24 to 72 hours. Once the taproot is about a quarter inch long, plant it taproot-down in a small pot (a 3- to 4-inch seedling pot works well) filled with a lightly moistened, airy starting mix. A dedicated seedling mix or a 50/50 blend of coco coir and perlite drains well and reduces the risk of damping off.
Seedlings are fragile. For the first two weeks, keep light at low intensity about 18 to 24 inches above the canopy. A simple LED propagation light or a 24-watt T5 fluorescent is enough. Run lights for 18 hours on, 6 hours off for indoor grows. Keep humidity between 65 and 70% in the seedling stage, and temperature between 70 and 77°F. Water very lightly, only when the top half-inch of soil is dry, and use plain pH-balanced water (6.0 to 6.5 for soil, 5.8 to 6.2 for coco/hydro). Do not start feeding nutrients until the second set of true leaves appears, which is typically around day 10 to 14. The seedling has enough stored energy in its cotyledon leaves; overfeeding at this stage will stunt it.
Vegetative growth: training, lighting, watering, and nutrient basics
Vegetative growth is when the plant builds all the structure it will use to support buds later. In this stage you want healthy, rapid leaf and stem development. Indoor photoperiod plants stay in veg as long as you keep them on an 18-on, 6-off light schedule. You choose when to flip to flower, which gives you control over final plant size. Autoflowers move through veg on their own timeline, typically 3 to 5 weeks, regardless of light schedule.
Environment targets during veg
| Parameter | Target Range |
|---|---|
| Temperature (lights on) | 72–82°F (22–28°C) |
| Temperature (lights off) | 62–72°F (17–22°C) |
| Relative humidity | 50–70% |
| CO2 (ambient) | 400–700 ppm (no supplementation needed at small scale) |
| Light intensity (PPFD) | 200–400 µmol/m²/s for seedlings, 400–600 for established veg |
| Airflow | Gentle oscillating fan; leaves should flutter, not whip |
Watering rhythm matters more than most beginners realize. Water when the top inch of the medium is dry, lift the pot and water when it feels light, and always water to about 10 to 20% runoff to prevent salt buildup. In soil, that might be every 2 to 3 days in veg. In coco coir, you may water daily or even twice daily once the plant is established, since coco has no nutrient buffer and dries faster. In a deep-water culture (DWC) hydro setup, plants sit in oxygenated nutrient solution and you're monitoring reservoir levels and EC (electrical conductivity) daily instead of watering on a schedule.
For nutrients in veg, use a formula higher in nitrogen (N) relative to phosphorus (P) and potassium (K). A standard vegetative base nutrient at half the manufacturer's recommended dose is a safe starting point for most beginners. I've seen more plants damaged by overfeeding in veg than by underfeeding. Start at half strength, watch the plant for a week, then adjust up only if growth looks slow or leaves are pale. For soil in veg, a target EC of 1.2 to 1.8 mS/cm in the runoff is reasonable. For coco or hydro, feed every watering, starting at EC 0.8 to 1.0 in early veg and working up to 1.4 to 1.8 by late veg.
Low-stress training (LST)
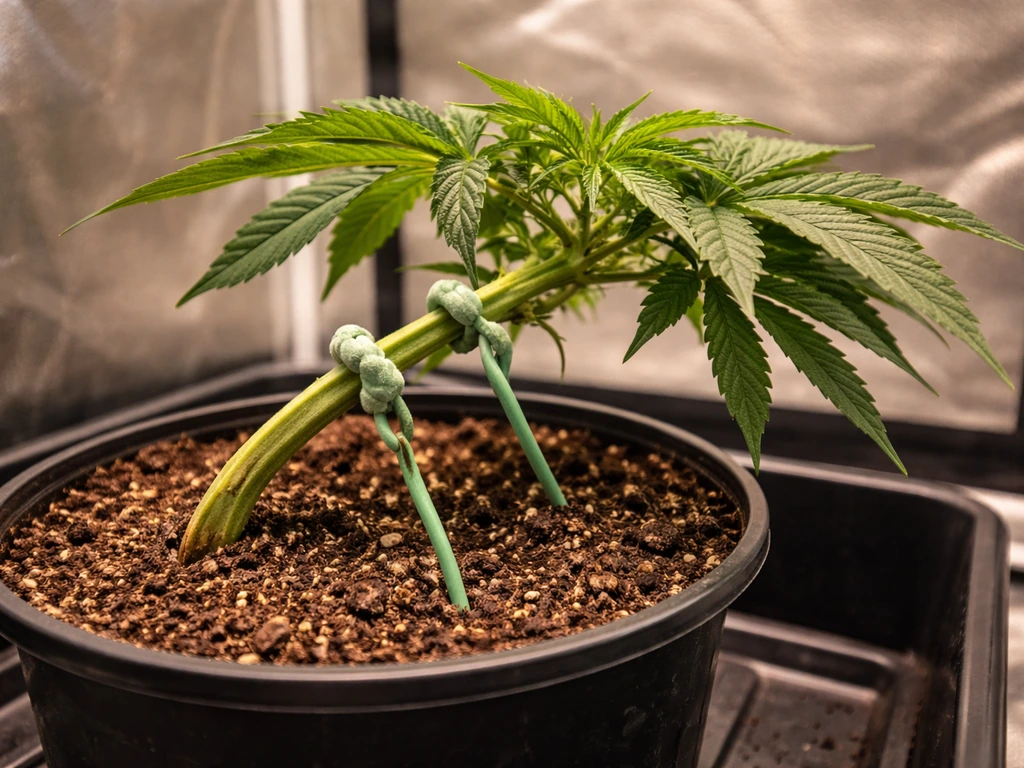
Training during veg helps you get more yield from the same light footprint. The easiest technique for beginners is low-stress training (LST): gently bend the main stem sideways and tie it down with soft plant ties or garden wire, encouraging the lower branches to grow upward and creating a more even canopy. This works well in both soil and hydro setups. Topping (cutting off the main growing tip to create two equal colas) is more aggressive but very effective if done during healthy veg growth, at least before the plant is in its final week of veg. Avoid any high-stress techniques in the two weeks before switching to flower.
Flowering: light schedules, environment, and keeping males out
For indoor photoperiod plants, flowering is triggered by switching the light schedule to 12 hours of light followed by 12 hours of uninterrupted darkness. That 12/12 cycle tells the plant that autumn is coming and it's time to reproduce. The dark period must be truly dark: even a small light leak from a timer indicator or a crack under a door can disrupt flowering and cause stress or hermaphroditism. Autoflowers don't need the schedule change; many growers run autos on 18/6 or even 20/4 all the way through harvest. Outdoor plants flower naturally as day length shortens past about 13 hours of light per day, typically from late July onward in most of North America.
Flowering environment targets
| Parameter | Early Flower (Weeks 1–3) | Mid Flower (Weeks 4–7) | Late Flower (Weeks 7+) |
|---|---|---|---|
| Temperature (lights on) | 70–80°F | 68–78°F | 65–75°F |
| Relative humidity | 45–55% | 40–50% | 35–45% |
| Light intensity (PPFD) | 600–800 µmol/m²/s | 800–1000 µmol/m²/s | 800–1000 µmol/m²/s |
| Airflow | Moderate | Moderate to strong | Strong (mold prevention) |
In flower, your nutrient focus shifts: less nitrogen, more phosphorus and potassium to support bud development. Switch to a dedicated bloom formula around week 2 of flower. Most quality nutrient lines have a clear veg-to-bloom transition schedule; follow theirs as a baseline and dial back if you see any tip burn. During weeks 5 through 7 of flowering (often called the bulk phase), bud size increases most rapidly. In the final 1 to 2 weeks, many growers do a 'flush,' running plain pH-balanced water through the medium to clear any accumulated salts before harvest. This is debated in the community, but for soil grows, a 7- to 10-day flush does no harm and may improve smoothness.
If you're growing from feminized seeds (which you should be for your first grow), male plants are not a concern. But if you used regular seeds or notice a plant behaving oddly under stress, check weekly for male pollen sacs (small, round clusters that look like tiny grape bunches) or banana-shaped stamens emerging from buds (a sign of hermaphroditism). Any plant showing male parts should be removed from the grow space immediately. One male can pollinate every female in the room, turning sensimilla buds full of seeds and destroying your harvest.
Harvest, drying, and curing for better flavor and potency
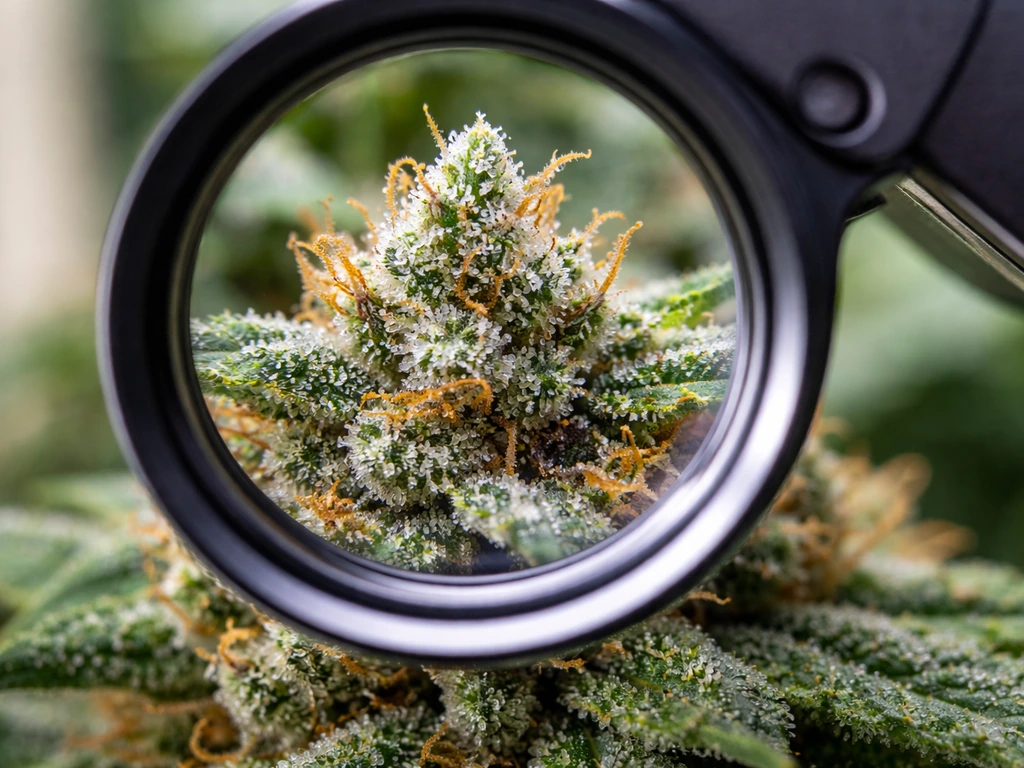
Knowing when to harvest is the skill that separates good home-grown from great home-grown. The most reliable method is checking trichomes with a jeweler's loupe (30x to 60x magnification) or a cheap digital microscope. Trichomes are the tiny crystal-like resin glands covering buds and nearby leaves. Clear trichomes mean the plant is still maturing. Cloudy (milky white) trichomes signal peak THC. Amber trichomes mean THC is degrading into CBN, which produces more of a sedative, body-heavy effect. Most growers harvest when trichomes are mostly cloudy with 10 to 30% amber, depending on their preference. As a rough calendar guide, most indica-dominant strains finish in 8 to 9 weeks of flower, sativas in 10 to 12 weeks.
Secondary harvest indicators: pistils (the hair-like structures on buds) should be mostly orange or red, not white. Calyx swelling should be obvious. And you should be able to smell the strain's full terpene profile clearly. When you're ready, cut the whole plant at the base or cut branches individually. Trim off the large fan leaves immediately (wet trimming) or after drying (dry trimming). Dry trimming preserves terpenes better but takes more effort. Hang cut branches upside-down in a dark room with temperature held between 60 and 70°F and humidity at 55 to 65%. Airflow should be gentle, not blowing directly on buds. This initial dry takes 7 to 14 days. You know it's done when small stems snap cleanly rather than bend.
Curing is what transforms good buds into great ones. Place dried, trimmed buds loosely in glass mason jars, filling them about 75% full. Store in a cool, dark place. For the first week, open the jars twice daily for 10 to 15 minutes ('burping') to release moisture and CO2. After the first week, burp once daily. After two weeks, burp every few days. Minimum cure time for noticeable improvement: 2 weeks. Optimal cure time for full flavor and smoothness: 4 to 8 weeks. The cure is not optional if you care about quality. Rushing it is one of the most common mistakes I see, and it leaves you with harsh, grassy-tasting product that could have been exceptional.
Troubleshooting the most common problems
Stretching and slow growth
Stretching (long, spindly stems with wide internodal spacing) almost always means insufficient light intensity or light being too far from the canopy. Move your light closer or increase wattage. A gentle breeze from a fan also strengthens stems by causing micro-movement. Slow growth or stalled seedlings are usually caused by overwatering, cold root zone temperatures (below 65°F), or pH being out of range. Check and correct pH first since it's the most common culprit; nutrient uptake shuts down outside the 6.0 to 6.5 soil range or 5.8 to 6.2 hydro range regardless of how much you're feeding.
Nutrient burn and nutrient lockout
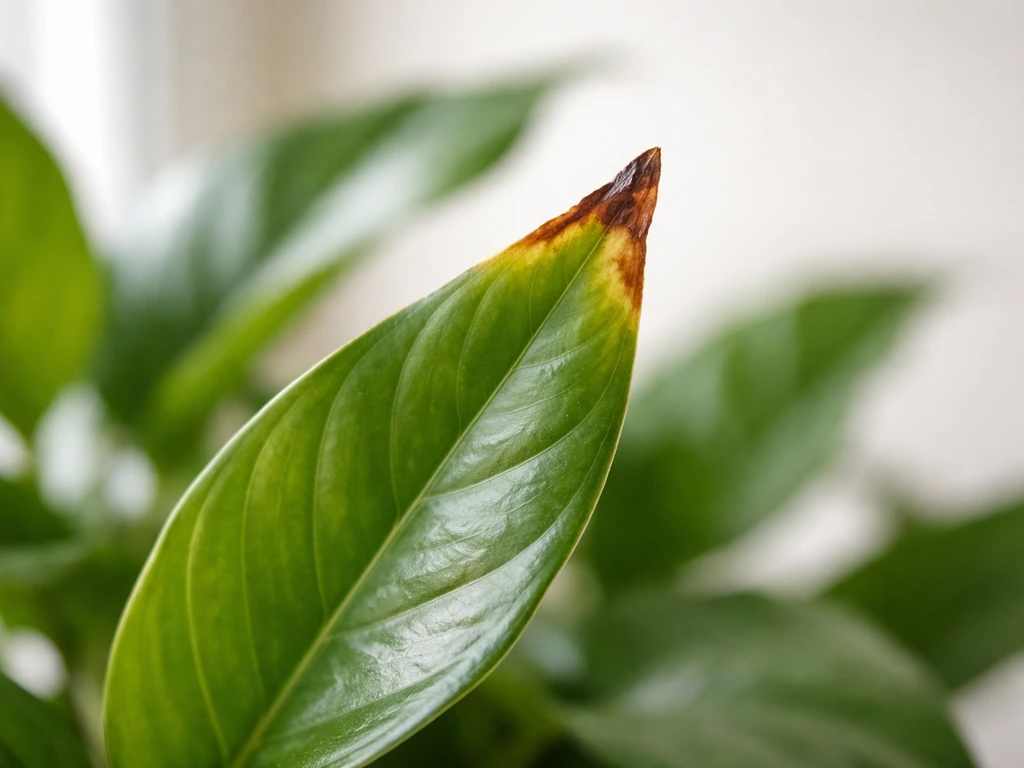
Nutrient burn shows up as brown, crispy leaf tips, starting at the very end of the blade. It means you're feeding too much, too fast. Reduce nutrient concentration by 25 to 30% and flush with plain water if tips are burning on more than a few leaves. Nutrient lockout looks like deficiency (yellowing, purple stems, spots) despite feeding properly. It's almost always a pH problem. Flush with pH-correct water to reset the medium, then resume feeding at a lower starting dose. Always pH your water and feed solution before application, every single time.
Pests: fungus gnats, spider mites, and aphids
Fungus gnats are the most common indoor pest and are almost always caused by overwatering or wet topsoil. Let the top inch or two of your medium dry out between waterings. Sticky yellow traps catch adults; a layer of food-grade diatomaceous earth on the soil surface kills larvae. Spider mites appear as tiny moving dots on the underside of leaves, often with fine webbing. They thrive in hot, dry conditions. Increase humidity slightly, inspect regularly, and treat with a diluted neem oil or insecticidal soap spray. Aphids cluster on new growth and leaf undersides; treat with the same soap spray or a pyrethrin-based spray if the infestation is heavy. Always treat pests in the lights-off period to avoid light-magnified chemical burn, and stop any oil-based sprays at least 2 to 3 weeks before harvest.
Mold and bud rot
Botrytis (gray mold or bud rot) is a silent harvest killer. It starts inside dense buds and works outward, so you often don't see it until damage is significant. Prevention is far more effective than treatment: keep late-flower humidity below 45%, run a strong airflow through your canopy, and defoliate dense foliage to improve air circulation around buds. If you find infected material, cut it out with clean scissors at least an inch past the visible damage, remove it from the grow space in a sealed bag, and reduce humidity immediately. Do not spray infected buds with anything.
Heat stress and light stress
Heat stress causes leaves to curl upward into 'tacos,' bleaching on the upper canopy, and in severe cases, foxtailing buds (thin, tower-like growth that lacks density). Keep canopy temperature under 82°F with lights on. If you're in a hot summer outdoor grow, use shade cloth rated at 20 to 30% during peak afternoon heat. Light stress from fixtures too close shows as bleached white patches on the uppermost leaves directly under the light. Raise the fixture and check manufacturer-recommended hanging distances for the specific wattage and model.
Flowering problems
If an indoor photoperiod plant refuses to flower after switching to 12/12, check for light leaks. Even a small crack of light during the dark period can reset the plant's hormonal clock. Use electrical tape or foam weather stripping to seal any gaps. If buds seem to stop developing and then start throwing new single-finger leaves mid-flower (called re-vegging), something is interrupting the dark period, usually a timer malfunction or accidental light exposure. Fix the light leak, confirm your timer is working, and give the plant 48 to 72 hours of complete darkness to re-set before resuming 12/12.
What to do next: your post-read action checklist
The fastest path from reading this to actually growing is to check off the following in order. Don't skip steps 1 and 2, even if you're eager to order seeds today. If you want a low-cost setup, focus on germinating from seed and keeping seedlings and veg plants healthy using simple, non-specialized inputs until you can expand seeds.
- Confirm your local home grow laws: check your state statute and your city or county ordinances for plant count limits, visibility rules, and secured-space requirements before purchasing anything.
- Decide on your method (indoor, outdoor, or hydro) based on your available space, budget, and how much daily attention you can commit.
- Choose 2 to 4 feminized autoflowering seeds from a reputable seed bank for your first run. Research the specific strain's finish time and height for your space.
- Order or assemble your basic setup: growing vessel (tent, closet, or outdoor container), a quality LED light sized for your space, a small oscillating fan, a thermometer/hygrometer combo unit, pH meter and pH up/down solution, and a beginner nutrient line.
- Germinate your seeds using the paper towel method and transfer to seedling pots once the taproot hits a quarter inch.
- Keep a simple grow journal: date, watering amount, any nutrients given, and a photo every 3 to 5 days. You will refer to this when problems come up.
- Set calendar reminders for key transitions: end of seedling stage (~2 weeks), expected flip to flower or expected auto flower trigger (~4 to 6 weeks from sprout), and estimated harvest window based on strain genetics.
- After harvest, extend your cure to at least 4 weeks before judging the quality of your grow.
- After your first harvest, review your journal and note the two or three things you'd change. Your second grow will be noticeably better than your first.
If you want to go deeper into any specific part of this process, the full lifecycle from seed selection through harvest (including more detail on growing from seed specifically, soilless and hydroponic setups, or scaling up your methods) is covered in more depth across related guides on this site. But the information in this guide is enough to get a real, harvestable grow from start to finish, which is exactly where you should start. If you want more detail on how to grow weed at home from setup through harvest, follow the seed-to-harvest steps in this guide and repeat them for each new batch grow from start to finish. If you want to focus specifically on how to grow weed from seeds at home, use the seed-to-harvest steps above and repeat them for each new batch.
FAQ
Can I grow pot at home in a closet without installing an exhaust fan?
You can try with passive ventilation, but it is risky for mold control, especially in flowering. If you do not run an exhaust line or strong cross-breeze, prioritize better intake airflow and keep temperatures stable, use a hygrometer, and aim for under 45% humidity late in flower. If humidity spikes, install active exhaust or you may lose buds to botrytis.
What light schedule should I use if I’m growing photoperiod plants indoors and want smaller plants?
Use the 18/6 schedule in veg, then keep 12/12 only for flowering. If you want smaller final height, decide the plant size before flipping using LST or topping during veg, because you cannot reliably control stretching after flowering begins beyond light intensity and training during early flower.
Do I need to start with pH-balanced water for soil too, or is it only important for coco/hydro?
It matters for both. Soil usually buffers better than coco, but pH still affects nutrient availability. Always measure and adjust input water and target ranges, 6.0 to 6.5 for soil, and correct the runoff pH if you can, since repeated feedings can gradually move the medium out of range.
How do I tell the difference between overwatering and nutrient issues when seedlings look sick?
Overwatering typically shows up as slow growth plus consistently wet medium, and the plant may look droopy without new nutrient burn patterns. Nutrient burn is usually crispy, brown tips starting at the ends of leaves. Check the top inch dryness and lift the pot weight, then verify pH first, because pH problems can mimic deficiencies and cause poor uptake even if your watering is correct.
Is it okay to reuse my potting mix between grows?
Generally no for beginners. Reused soil can carry salts and can harbor pests, eggs, or fungus issues that are hard to diagnose. If you do reuse, you must at minimum refresh with clean amendments and manage drainage and salt buildup, but the simplest safer approach is using fresh starting mix for seedlings and a clean medium for each cycle.
How long should I keep opening jars during curing, and what if my buds feel too dry?
Open and burp about twice daily for the first week, then once daily. If buds feel crispy or the jar has no condensation, reduce burping frequency and consider adding a small humidity boost via a proper curing humidity aid rather than adding water directly, since wetting buds can restart mold risk.
What should I do if I see male traits in a feminized-seed grow?
Remove the affected plant immediately from the grow area and inspect nearby plants for pollen sacs or banana-shaped stamens. Even one male can seed the room. After removal, check your light schedule for photoperiod plants, since stressors like light leaks and major interruptions can trigger hermaphroditism.
Can I harvest a little early to avoid risk if I’m worried about pests or travel?
You can, but it changes potency and effect. Early harvesting gives more clear trichomes and typically a more energetic or less sedating result. If you must harvest early, focus on trichome timing rather than pistils alone, and dry with ideal airflow so you do not trap pests or rot during the drying window.
What’s the most common reason indoor photoperiod plants do not flower on 12/12?
The dark period is not truly dark. Timer indicators, LEDs, or light from under doors can disrupt the flowering signal. Seal gaps with weather stripping or tape, confirm the timer is operating correctly, and verify you are not seeing light during the entire 12-hour off window.
Should I use a flush in soil, or can I skip it entirely?
You can skip it, many growers do, but the article’s guidance is that a 7 to 10-day flush in soil is unlikely to harm and may improve smoothness by clearing accumulated salts. If you do flush, use pH-balanced water and keep conditions stable, because sudden changes in moisture or temperature can stress plants near harvest.
Next Article
How to Grow Weed at Home Step by Step for Beginners
Step-by-step home cannabis grow guide: choose strains, set light and climate, manage odor, then harvest, dry and cure sa
