You can grow cannabis at home from seed with almost no purchased equipment, but you do need three things that aren't optional: light (either real sunlight or a basic bulb), a container with drainage, and something to grow in (soil works fine). Everything else, grow tents, inline fans, pH meters, LED panels, hydro systems, can be skipped or improvised at the beginner stage. You won't pull a pound off a windowsill plant, but you absolutely can get to harvest with household items and a bit of patience.
How to Grow Weed at Home Without Equipment From Seed

Marcus Holbrook
21 May 2026
Reality check: what 'no equipment' actually means
When people say 'no equipment,' they usually mean they don't want to spend money on a grow tent, a dedicated LED light, an inline fan, a carbon filter, or a hydroponic system. That's a completely reasonable starting point. What it doesn't mean is zero inputs. Cannabis is a living plant that needs light, warmth, airflow, water, and nutrients to complete its life cycle. Some of those come free (sunlight, outdoor air, rain). Others you can source from your kitchen or garden shed. The honest version of a no-equipment grow is a soil-based grow using natural light, repurposed containers, bagged potting mix, and basic household nutrients, not a 'put a seed in dirt and walk away' situation.
One thing worth addressing upfront: a lot of Reddit threads will tell you it's impossible to grow without a proper setup, or that you need at least $300 in gear to do anything worthwhile. That's overstated. People have grown cannabis outdoors for thousands of years without a single piece of modern equipment. The tradeoffs are real, less control, potentially lower yield, more reliance on the right season and climate, but none of that makes it impossible. It makes it a different kind of grow, and this guide is specifically built around that.
Before you start: know your local laws
Home cultivation is legal in a number of U.S. states and countries, but the rules vary significantly. In the U.S., cannabis remains a federally controlled substance under federal law regardless of state statutes. Many states that allow adult recreational use do permit home growing, though plant counts differ by state and some require plants to be in an enclosed or locked space. Medical programs have their own rules, including caregiver provisions and different plant limits. Delaware is one notable exception among recreational-use states that does not allow home cultivation. Check your specific state or local rules before you start, the legal landscape has continued to shift through 2025 and 2026, so current NCSL or state LCB resources are the best place to confirm what's allowed where you live. In its 01/12/2026 final research brief, the Washington State LCB continues to discuss compliance factors and how home cultivation rules can differ under state regulations the legal landscape has continued to shift through 2025 and 2026.
Choosing seeds and strains for a low-equipment grow
Strain choice matters more when you're skipping equipment. Some strains are forgiving, fast, and compact. Others demand dialed-in humidity, temperature, and lighting schedules that are much harder to manage without gear. For a first no-equipment grow, you want strains that work with your conditions rather than against them.
Autoflowering strains are the top recommendation for beginners growing without equipment. They flower based on age rather than a light schedule change, which means you don't have to control your lighting cycle, outdoors, they'll flower naturally no matter the season. Most autoflowers finish in 70 to 90 days from seed, stay compact (usually under 3 feet), and were bred from Ruderalis genetics that tolerate stress better than many photoperiod varieties. Good beginner autoflowers include Northern Lights Auto, Amnesia Haze Auto, and any 'easy' or 'XXL' auto variety from reputable seed banks. For outdoor photoperiod grows, look for fast-finishing, mold-resistant strains if you're in a humid climate, something like an early-harvest outdoor strain that finishes before fall rains hit.
Feminized seeds are worth the slight extra cost if you can get them. Regular seeds produce roughly 50% male plants, which you'll need to remove before they pollinate your females. Dealing with sexing plants is an avoidable complication on your first grow. Autoflowering feminized seeds are the ideal starting point. If you're working with bag seeds (seeds from purchased cannabis), they're usually feminized but may be unpredictable in genetics, still usable, but lower certainty.
Germinating seeds with household items
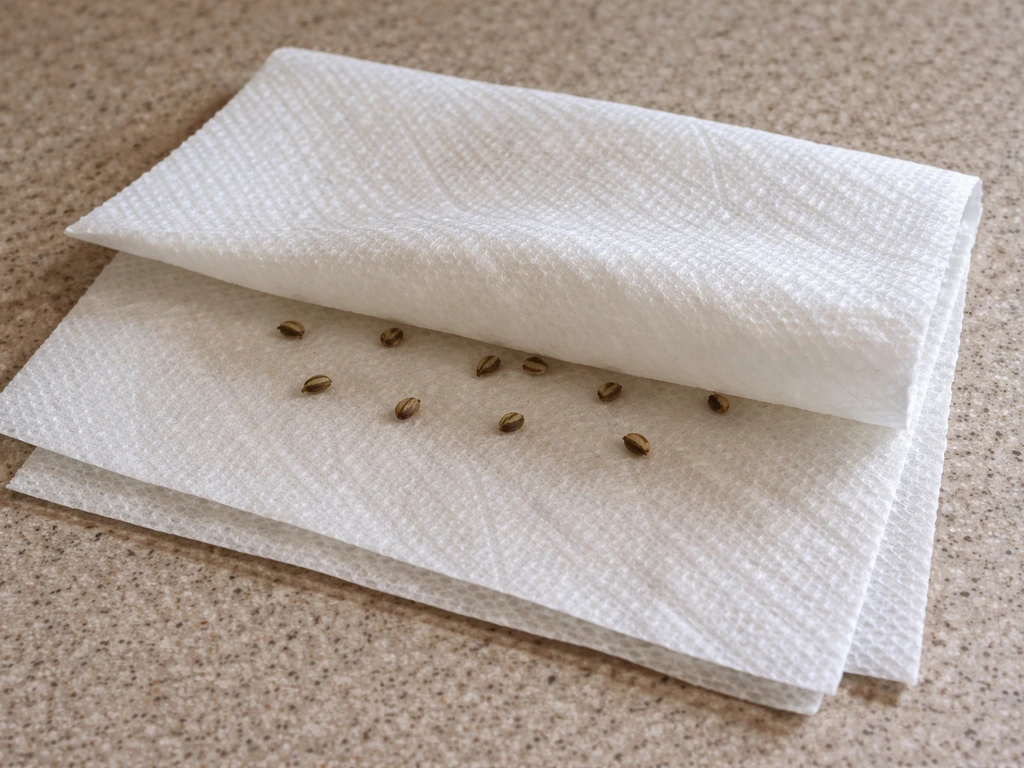
You don't need a propagation tray, a heat mat, or a humidity dome to germinate cannabis seeds. The paper towel method works reliably and requires almost nothing.
- Dampen two paper towels — wet but not dripping.
- Place your seeds between the towels and fold them over.
- Put the paper towels on a plate and cover with another plate or a bowl to retain moisture.
- Keep them somewhere warm — the top of a refrigerator, inside a kitchen cupboard near the oven, or any spot that stays around 70 to 85°F (21 to 29°C).
- Check every 12 hours. Most seeds crack and show a white taproot within 24 to 72 hours.
- Once the taproot is 0.25 to 0.5 inches long, plant it taproot-down in moist soil, about 0.5 inches deep.
The biggest germination mistakes I see are letting the paper towels dry out completely, or leaving seeds in too long until the taproot gets tangled and fragile. Check them regularly and plant as soon as that taproot appears. If you want to skip the paper towel step entirely, you can plant seeds directly in moist soil at 0.5 inches deep and keep the soil consistently moist, it just takes a day or two longer to see the seedling emerge. Both methods work fine without any specialized gear.
Setting up a simple grow space
Growing outdoors (the lowest-equipment option)
If your climate cooperates, outdoor is genuinely the easiest no-equipment path. Cannabis wants direct sunlight for at least 6 hours a day, with 8 or more being ideal. A south-facing spot (in the Northern Hemisphere) with afternoon sun is perfect. The plant gets its own light, temperature regulation, natural airflow, and rain watering, you're mostly just managing the container and feeding. For autoflowers, you can start outdoors any time after your last frost date. For photoperiod strains, plant outdoors once days are long (late spring), and they'll flower naturally as days shorten in late summer and fall.
Growing indoors without a tent or LED
Indoors without a grow tent or dedicated LED is workable but has clear limits. A south-facing windowsill gives you some light, rarely enough for dense buds but enough to keep a plant alive through vegetation. For a better result indoors without gear, a basic cool-white or daylight CFL bulb (23 to 42 watts, 6500K color temperature for veg, 2700K for flower) or a T5 fluorescent shop light from a hardware store costs under $20 and produces real results. These aren't grow lights in the marketed sense, but they are functional grow lights. Keep them 2 to 4 inches from the canopy. A single 40-watt equivalent CFL 18 inches above a plant will fail it, proximity is what matters with low-wattage bulbs.
Airflow is the environmental factor people most commonly skip indoors, and it's where mold problems start. You don't need an inline fan with ducting, but you do need air movement. A small USB desk fan pointing at your plant for a few hours a day is enough to strengthen stems and prevent stagnant humid air from sitting around your canopy. During flowering, keeping relative humidity below 50% is a real target, mold (especially botrytis) hits flowering cannabis hard in humid conditions, and it's a health risk, not just a yield issue. Open a window, run a fan, crack a door: just move the air.
One thing to avoid: don't use unvented combustion heaters (propane, kerosene, or gas) to warm an indoor grow space. Carbon monoxide is a serious risk in enclosed spaces with poor ventilation, and there are documented indoor air quality dangers from these sources. If you need warmth indoors, a basic electric space heater is safe.
Environmental targets to aim for
| Growth Stage | Temperature | Humidity | Light Hours (Indoor) |
|---|---|---|---|
| Seedling (weeks 1-2) | 70-80°F (21-27°C) | 60-70% | 18 hours on / 6 off |
| Vegetative (weeks 3-8) | 70-85°F (21-29°C) | 40-60% | 18 hours on / 6 off |
| Flowering (weeks 8+) | 65-80°F (18-27°C) | Below 50% | 12 hours on / 12 off (photoperiod) / any light schedule (auto) |
| Late Flower / Harvest | 65-75°F (18-24°C) | 40-50% | Same as above |
You don't need a digital thermometer/hygrometer to start, but a $5 to $10 analog one from a hardware store is close enough to monitor your environment, it's one of the few micro-purchases I'd actually recommend even for a 'no equipment' grow, because mold can ruin a whole harvest invisibly until it's too late.
Soil, containers, and watering
Soil is the ideal growing medium for a no-equipment setup because it buffers pH naturally, holds nutrients, and tolerates beginner watering mistakes better than coco or hydro. A quality bagged potting mix, something like Fox Farm Ocean Forest, Roots Organics, or even a basic well-draining potting mix from a garden center, is all you need. Avoid straight garden soil outdoors (compacts too easily in containers) and avoid mixes loaded with time-release synthetic fertilizer pellets (they can burn seedlings and make nutrient management harder). If you can mix 70% potting soil with 30% perlite, drainage improves significantly. Perlite is cheap and available at any garden store.
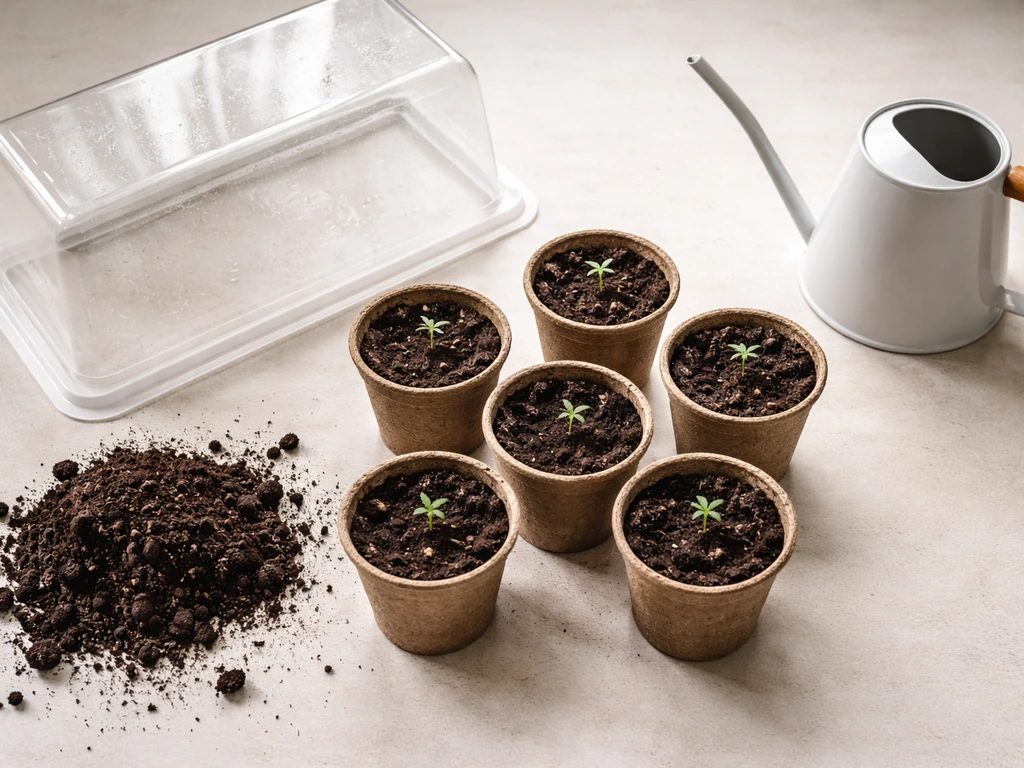
For containers, you have options beyond buying fabric pots. A 5-gallon bucket with holes drilled in the bottom works great for a full-size plant. A repurposed plastic storage tub or large yogurt container works for seedlings and small plants. The key requirements are drainage holes and enough volume, cannabis roots need room. For autoflowers, a 3 to 5 gallon container is the sweet spot. For photoperiod plants, 5 gallons or more gives the root zone space to support a bigger plant. Undersized containers are one of the most common causes of stunted growth.
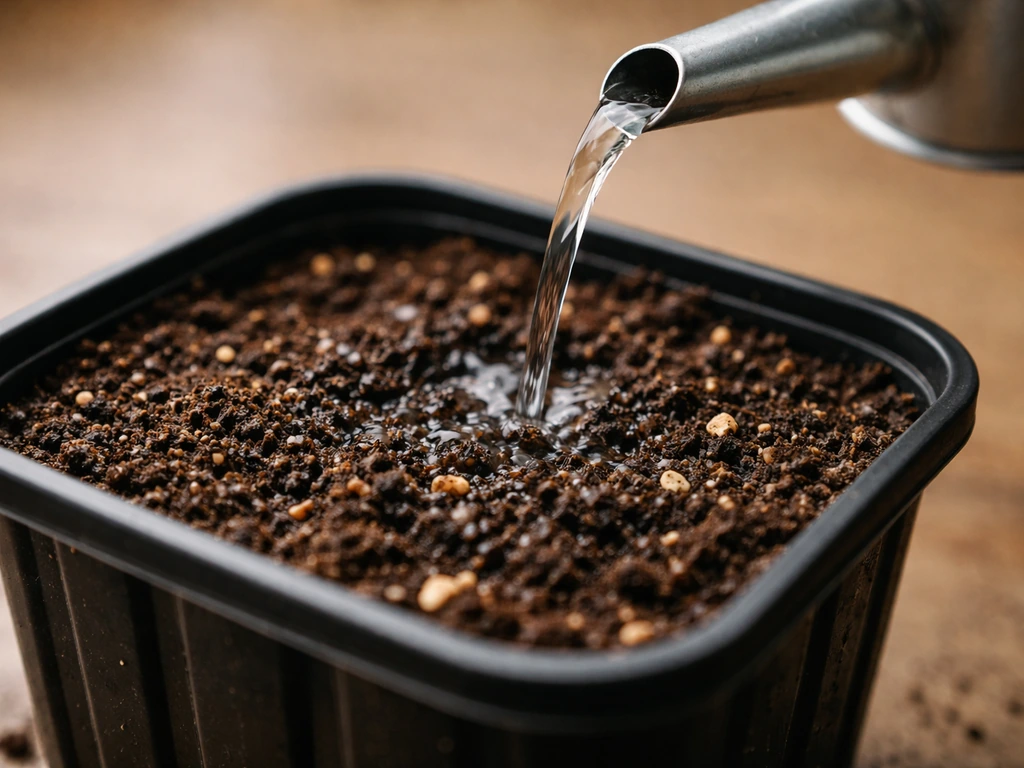
Watering schedule: water when the top inch of soil is dry to the touch, or when you lift the container and it feels light. Overwatering is the single most common mistake beginners make, it causes yellowing, drooping, and root rot. Underwatering wilts the plant but is easier to recover from. With a 5-gallon container in moderate indoor conditions, you'll typically water every 2 to 3 days in veg and every 1 to 2 days in late flower when the plant's demand increases. Water until you get runoff from the drainage holes, then let it drain fully. Tap water is fine, if yours is heavily chlorinated, leave it in an open container overnight to let the chlorine off-gas before using.
Feeding without specialized nutrient systems
A good potting mix has enough nutrients built in to carry a plant through the first 4 to 6 weeks with no added feeding. After that, you'll start to see the plant use up what's in the soil, usually signaled by slightly lightening leaf color. This is when basic feeding starts.
The simplest no-equipment nutrient option is a basic liquid organic fertilizer from a garden center. Something like fish emulsion, liquid kelp, or a balanced vegetable fertilizer (like a 3-3-3 or 5-5-5 NPK ratio) works for the vegetative stage. During flowering, you want lower nitrogen and higher phosphorus/potassium, a tomato fertilizer or bloom-specific formula from any garden store (often labeled 'bloom' or showing something like 2-8-4 on the label) does the job. These are not cannabis-specific products, but cannabis has the same basic nutrient needs as any flowering vegetable.
Feed at half the label's recommended dose to start, plants are easier to underfeed and correct than to overfeed and damage. A basic feeding schedule for a no-equipment soil grow looks like this: plain water for the first 4 to 6 weeks, then alternate water and feed every other watering through veg, then switch to a bloom formula when flower sites appear, and flush with plain water for the last 1 to 2 weeks before harvest to clear residual salts from the soil. You don't need an EC meter or pH pen to do this, just pay attention to how the leaves look.
Reading your plant instead of your meter
- Yellowing from the bottom up, starting with older leaves: normal late-flower nitrogen drawdown, or nitrogen deficiency if happening early in veg.
- Yellowing between leaf veins while veins stay green: magnesium deficiency — a teaspoon of Epsom salt dissolved in a gallon of water is a simple fix.
- Curling tips, dark green leaves, clawing: nitrogen toxicity from overfeeding. Flush with plain water and back off.
- Pale, washed-out overall color: often underfeeding or a pH lockout issue. Flush and resume feeding at lower dose.
- Brown crispy edges: often potassium deficiency, heat stress, or windburn from a fan too close.
Basic maintenance and beginner troubleshooting
Pests
The most common pests on home grows are fungus gnats (from overwatered soil), spider mites (usually from hot, dry, low-airflow environments), and aphids (more common outdoors). Fungus gnats: let the soil dry out more between waterings, their larvae can't survive in dry soil. Spider mites: spray the undersides of leaves with a mix of water and a few drops of neem oil (available at any garden center). Aphids: same neem oil solution, or just wipe them off with a damp cloth if the infestation is small. None of these require specialized pesticides. Catching them early, before population explosions, is the whole game.
Mold and humidity
Mold, especially gray mold (botrytis) in dense buds, is one of the most destructive problems in the flowering stage and it genuinely is a health concern, not just a plant problem. People with respiratory conditions or compromised immune systems are particularly vulnerable. The fix is prevention: airflow and keeping humidity below 50% during flower. If you spot gray or white fuzzy growth on a bud site, remove that section immediately with clean scissors and improve your airflow. Don't try to save moldy buds. Dispose of them and address the root cause (usually stagnant air combined with dense canopy and high humidity).
Seedling failure
Most seedling failures come from overwatering, burying the seed too deep, or putting a fresh seedling under too much light too fast. Seedlings need gentle light and consistently moist (not soggy) soil. If your seedling falls over and the stem looks pinched near the soil line, that's damping off, a fungal issue caused by excess moisture. There's no fix once it happens. Prevent it by not overwatering and ensuring some airflow at the soil surface.
Low-stress training without tools
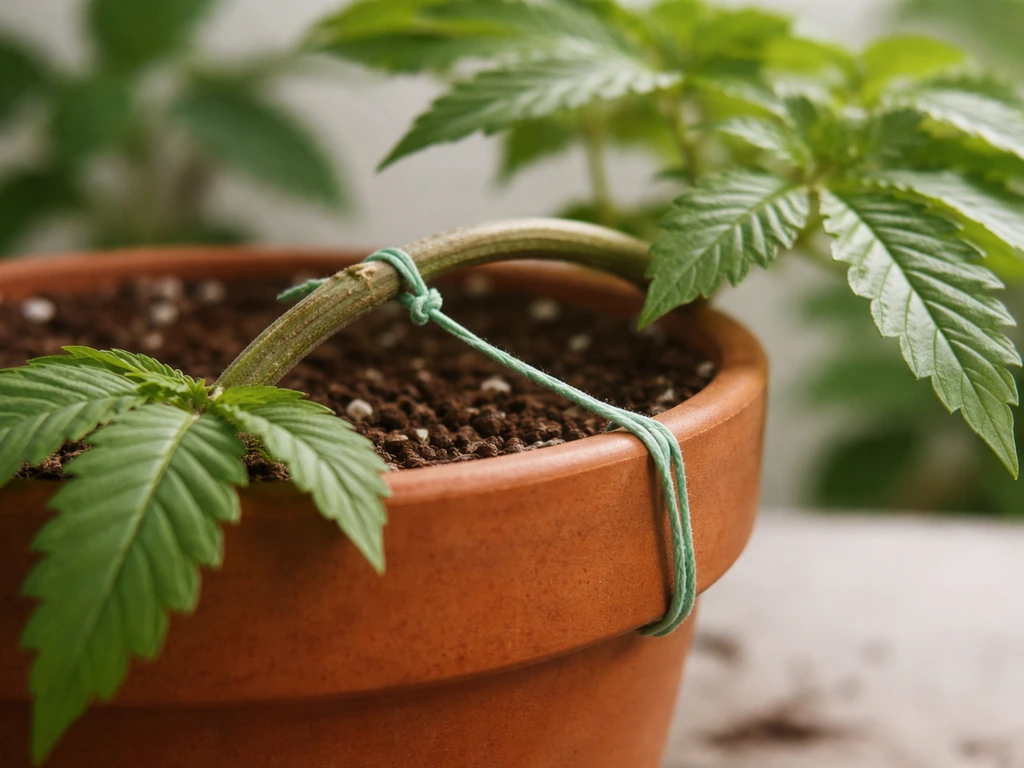
You don't need any gear to do basic low-stress training (LST). Gently bending a branch and tying it down with a twist tie, a piece of string, or a strip cut from an old t-shirt shapes your plant to expose more bud sites to light. This works especially well indoors with CFL lighting because the light drops off sharply with distance, keeping the canopy flat and close to the bulb maximizes what you get. Topping (cutting the main growing tip) is also free, it splits one main cola into two and encourages a bushier shape. Don't top autoflowers; they don't have enough recovery time. Topping works well for photoperiod plants in early to mid-veg.
Knowing when to harvest and curing without gear
Harvest timing is one area where a cheap tool genuinely helps: a 30x to 60x jeweler's loupe (around $5 to $10) lets you examine trichomes. Clear trichomes mean too early. Cloudy white trichomes mean peak THC. Amber trichomes mean THC is degrading, more sedative, less cerebral. For most home growers, the target is mostly cloudy with 10 to 20% amber. If you don't have a loupe, watch the pistil hairs instead: harvest when 70 to 90% of the white hairs have turned orange/red and curled in. It's less precise but workable.
To harvest without equipment: cut branches, trim away large fan leaves (sugar leaves near buds can be left or trimmed, personal preference), and hang them upside down in a dark, cool, well-ventilated space. A closet with a cracked door works. Aim for around 60 to 70°F and 50% humidity during the 7 to 14 day dry. Buds are ready to cure when the small stems snap rather than bend. Too fast a dry (under 5 days) kills flavor and smoothness. Too slow (ongoing moisture, no airflow) risks mold.
For curing, mason jars from a kitchen are genuinely ideal, no specialty equipment needed. Pack loosely (fill jars about 75%), seal them, and open for 15 minutes once or twice a day for the first two weeks. This 'burping' releases moisture and CO2. After two weeks, once humidity inside the jar stabilizes around 58 to 62% (you can gauge this by feel, buds shouldn't feel damp or dry/crispy), reduce burping to once every few days. A 4-week cure noticeably improves smoothness and flavor. An 8-week cure is better. Curing is free, requires no equipment, and is one of the most impactful things you can do for final quality.
When to consider buying a few basics
A truly zero-dollar grow is possible outdoors in the right climate. But there are a handful of inexpensive items that meaningfully improve your odds without turning this into a 'gear-up' project. If you're growing indoors and serious about getting to harvest, a basic CFL or T5 shop light ($15 to $25), a small desk fan ($10 to $15), and an analog thermometer/hygrometer ($5 to $10) are worth it. That's a $30 to $50 total investment that addresses the biggest indoor failure points: inadequate light, stagnant air, and unmonitored humidity. Everything beyond that, tents, carbon filters, pH meters, EC pens, grow controllers, is genuinely optional for a first grow, and can wait until you decide this is a hobby worth investing in.
If you want to go deeper on full indoor setups, soil mixes, or specific strain selection strategies, the broader guides on growing cannabis and growing weed at home on this site cover those paths in more detail. If you want more detail on how to grow cannabis at home, you can explore the full indoor setup and strain-selection guides referenced here. This guide is specifically for getting to harvest with minimal spend, and that's a completely achievable goal starting today. If you want the full step-by-step details on how to grow weed from seeds at home, follow the sections on germination, light, and watering in this guide grow to harvest. If you need a step-by-step overview, follow this guide to learn how to grow pot at home using low-equipment methods.
FAQ
Can I grow weed at home without equipment if I only have a very small amount of space, like a closet or bathroom?
Yes, but you must control light distance and airflow. Use a south-facing window or a cheap CFL/T5, keep the light close (about 2 to 4 inches to the canopy), and run a small fan for a few hours daily. If the room humidity routinely stays high (especially in flowering), a bathroom often won’t be the best option because you can’t exchange air as effectively.
What’s the best way to avoid mold indoors if I can’t measure humidity all the time?
Don’t rely on “looks dry.” During flowering, aim for frequent air exchange, visible leaf drying before night, and no stagnant air around buds. If you see any fuzzy gray or white growth, remove the affected part immediately and increase airflow. If your buds stay tightly packed with consistently damp conditions, increase ventilation rather than “spot treating” moldy areas.
Do I need to pH the water if I’m growing in soil with no meters?
Usually no. Soil buffers pH naturally early on, especially with quality potting mix. The practical approach is to start with plain water, avoid heavy overfeeding, and watch for leaf color changes. If you repeatedly see nutrient burn patterns or persistent pale growth despite feeding, that’s when people typically investigate water chemistry or switch to a fresher mix.
How do I tell if my problem is overwatering versus underwatering without fancy tools?
Overwatering often shows yellowing and drooping with soil that stays wet longer than it should, while underwatering typically shows wilting with dry soil that feels light when the container is lifted. A simple decision aid is to wait and recheck the top inch, if it’s still wet, pause watering; if it’s dry and light, water thoroughly once.
Can I start seeds directly in final containers, or should I transplant from smaller cups?
You can start directly in the final pot, but smaller containers are easier to manage for moisture and reduce the risk of consistently wet soil. If you transplant, do it once seedlings are established and the roots have formed enough to hold soil together. The key is to avoid letting tiny seedlings sit in a large volume of wet mix.
Are autoflowers really easier if I have weak or inconsistent light indoors?
Often, yes, because you don’t need to manage a strict light schedule. However, low light can still stunt autos and reduce bud density, even if they flower automatically. If your indoor light is weak, compensate by keeping the plant very close to the bulb and using a compact container so you can maintain a workable soil moisture rhythm.
What happens if my seeds fail to germinate in the paper towel method?
First check dryness and timing. Seeds fail most when towels fully dry out or when seeds sit too long and the taproot becomes tangled or damaged. If nothing changes after several checks, restart with fresh seeds, keep the towels consistently moist, and plant as soon as a clear taproot appears (or directly into moist soil if you prefer that route).
Should I flush the soil before harvest if I’m doing a no-equipment grow?
It’s optional, and some growers prefer not to flush because it can stress plants if done incorrectly. If you do flush, follow the same “plain water” approach for the last 1 to 2 weeks as described, and avoid turning it into a long water-only period that keeps soil overly wet. The main goal is reducing excess salt buildup from feeding.
What container size is the minimum that still makes sense without equipment?
For autos, a 3 to 5 gallon container is a practical minimum, and for photoperiod plants, plan on 5 gallons or more. Too-small pots dry out fast, making it easier to overcorrect with frequent watering, which can cause stress and nutrient swings.
How do I prevent fungus gnats if overwatering is the most common cause?
Let the top layer dry more between waterings, and avoid consistently damp soil. For prevention in a no-gear setup, don’t keep runoff pooling and don’t mist the top of the soil. If you already see gnats, drying the top and adjusting watering frequency usually stops the larvae’s survival cycle.
Will neem oil work for spider mites if I don’t have specialized sprayers?
You can mix neem oil with water as described and apply it with a simple spray bottle, but target coverage on the underside of leaves. Recheck the plant every few days because mites can rebound. If the infestation is heavy, you may need more than one round, and airflow still matters so humidity doesn’t get trapped.
How long should I dry and cure if my home is more humid than average?
Drying needs to be slow enough to preserve flavor, fast enough to prevent mold. If your home humidity is high, focus on better airflow (not higher heat) and monitor bud feel and small-stem snap timing closely. For curing, jars can still work, but you may need slightly more frequent burping early on to keep moisture from climbing.
Is it safe to use an indoor space heater during a no-equipment grow?
A basic electric space heater is the safer choice. Avoid unvented combustion heaters (propane, kerosene, or gas) because of carbon monoxide risk in enclosed spaces with poor ventilation. If you heat, also keep airflow going so you don’t create hot, dry pockets that favor spider mites.
Do I need to buy “cannabis fertilizer,” or can I use general plant nutrients?
General garden fertilizers work if you match the nutrient stage. Use a balanced or vegetative option early, then switch to a bloom-oriented formula once flower sites appear. Start at half strength to reduce the chance of nutrient burn, and rely on leaf response rather than pushing aggressive feeding.
Next Article
How to Grow Pot at Home: Beginner Step-by-Step Guide
Step-by-step indoor or outdoor cannabis grow plan: lights, temps, watering, nutrients, flowering timing, and harvest cur
