Growing one cannabis plant indoors is genuinely manageable, even for a first-timer. You need a space roughly 2x2 to 2x4 feet, a 100–200W LED light, a small fan with carbon filter, good soil or coco, and about 3–5 months of consistent attention. That single plant can yield anywhere from 1–3 oz (or more with training), and the whole process is far less complicated than most guides make it sound. Here is the exact workflow, from legal check to cured flower in a jar. If you follow the right indoor setup, you can scale this workflow into a complete, step-by-step approach for how to grow cannabis indoors.
How to Grow 1 Weed Plant Indoors: Step-by-Step Guide

Marcus Holbrook
26 Jun 2026
Check your local laws and set up your space first
Before you buy a single seed, spend 20 minutes confirming what is legal where you live. Laws vary enormously. In Canada, adults may grow up to 4 plants per household for personal use under federal rules, though some provinces add restrictions. In California (as of the January 2026 regulatory revision), adults can grow up to 6 plants for personal use at home, which is distinct from licensed commercial cultivation.
New Jersey allows personal-use home cultivation but has specific rules around secure storage of cannabis and cultivation materials under NJAC 17:30, so it is worth reviewing your state's administrative code. Whatever your jurisdiction, the consistent rules are: keep plants out of public view, store harvested cannabis securely, and stay within your plant count. Growing one plant is almost always the safest, lowest-profile approach.
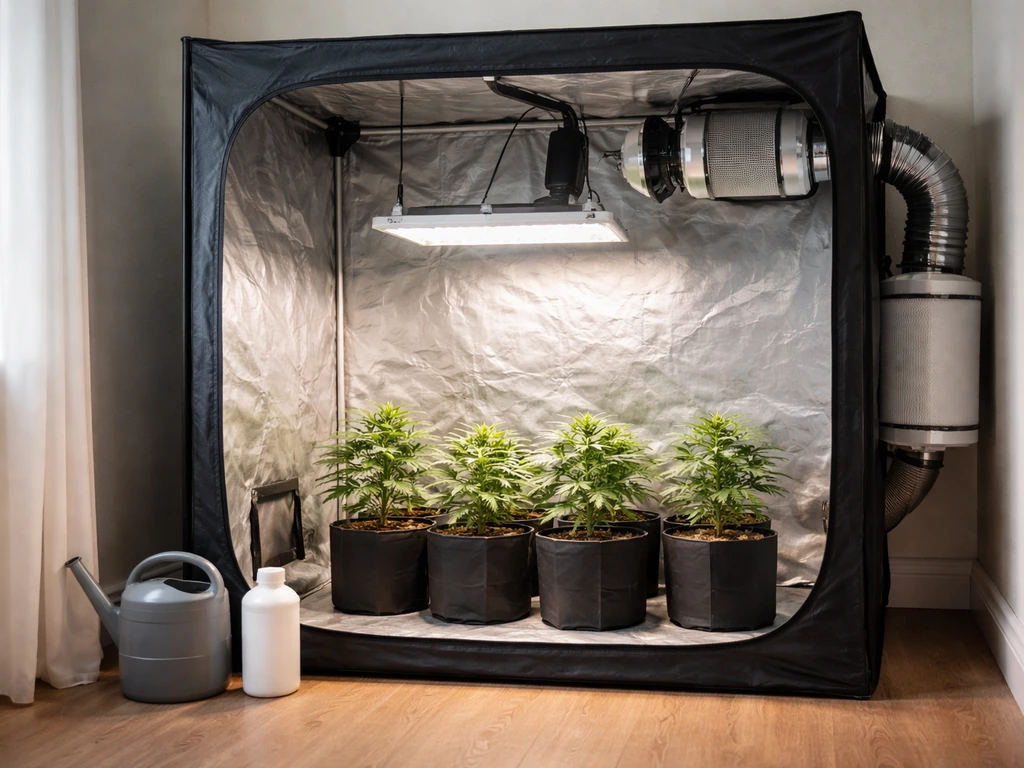
For the physical setup, a dedicated 2x2 ft or 2x4 ft grow tent is the easiest option for a single plant. Tents are lightproof, reflective inside, and have pre-built ports for fans and ducting. A closet or DIY box works too, but you will need to handle light sealing yourself. Here is the minimal gear list you actually need:
- Grow tent: 2x2 ft (smallest workable) or 2x4 ft (more comfortable) — 5 ft tall minimum
- LED light: 100–200W full-spectrum LED sized for your footprint
- Inline fan: 4-inch, roughly 100–150 CFM for a 2x2 tent
- Carbon filter: sized to match or slightly exceed your fan's CFM rating
- Ducting: 4-inch flexible duct to connect fan to filter and exhaust port
- Small oscillating fan: for gentle canopy airflow
- Pots: a solo cup for seedling, then a 3–5 gallon final pot
- Growing medium: quality cannabis soil or coco coir
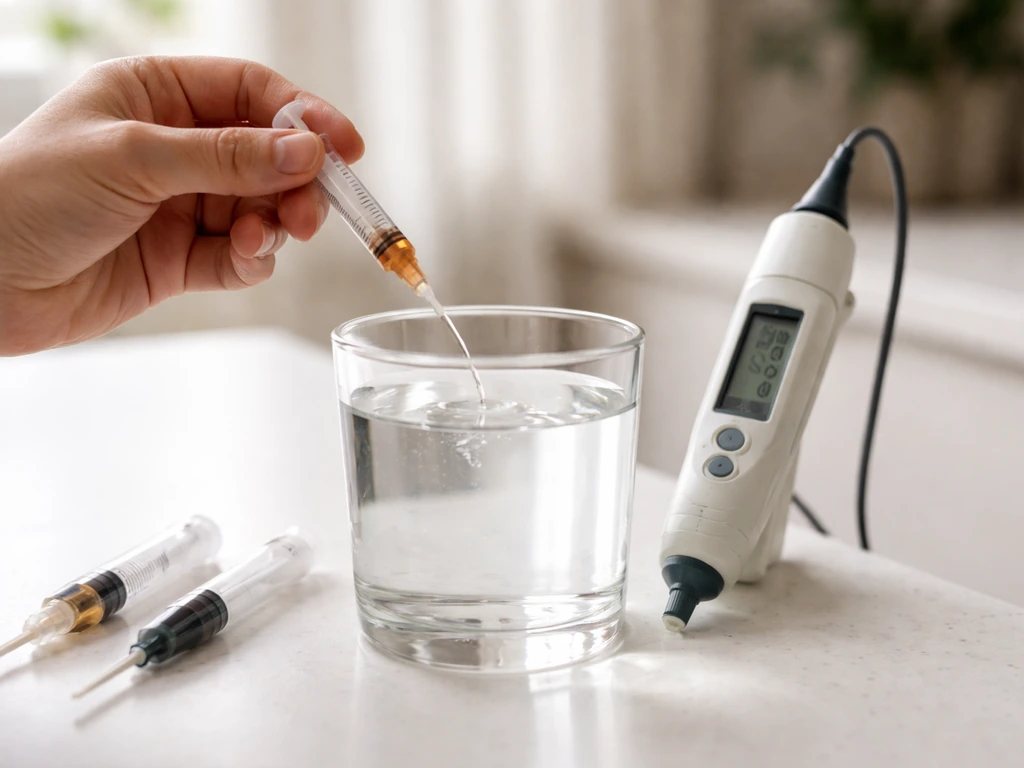
- pH meter (digital, not a cheap triple meter) and pH up/down solution
- Basic nutrients: a simple 3-part or 2-part system (veg and bloom formulas)
- Timer: for your light schedule
- Thermometer/hygrometer: to track temperature and humidity
That list covers everything. You do not need a CO2 injector, an environmental controller, or an automated dripper system for one plant. Those are upgrades for later. Plan your total timeline before you start: an autoflowering plant runs seed-to-harvest in roughly 60–90 days. A photoperiod plant takes 16–28 weeks depending on how long you run veg before flipping to flower. Pick your timeline, then work backward from your harvest goal. If you prefer learning by watching, search for how to grow weed indoors videos that match your setup size and plant type.
Pick your seeds or clone and match the strain to your space
For one indoor plant, strain choice is a practical decision, not just a flavor preference. The two main paths are autoflowering and photoperiod. Autoflowers switch to flowering based on age, not light schedule, and finish in roughly 60–90 days from seed. If you are aiming for how to grow weed fast indoors, autoflowers are usually the simplest route because they finish on a predictable seed-to-harvest timeline.
That makes them forgiving and fast, which is exactly what a first grow benefits from. Photoperiod strains stay in veg as long as you keep them on 18 hours of light, then flower when you drop to 12 hours. They give you more control over final plant size and typically higher yields, but they take longer and require more attention to the light schedule.
| Factor | Autoflower | Photoperiod |
|---|---|---|
| Seed to harvest | ~60–90 days | ~16–28 weeks |
| Light schedule flexibility | Any schedule works (18/6 common) | Requires 12/12 flip to flower |
| Size control | Compact by nature (usually 1–3 ft) | You control size via veg duration |
| Yield potential per plant | Moderate (1–2 oz typical for beginners) | Higher with training (2–4+ oz possible) |
| Beginner friendliness | High — fewer timing decisions | Medium — more steps but more control |
| Cloning option | Not recommended | Yes, clones are viable |
If this is your first grow, an autoflowering indica-dominant or hybrid strain in a 2x2 tent is the easiest path. If you want to practice training and maximize yield, choose a photoperiod strain and use a 2x4 tent so you have room to work. Clones are a great shortcut (they skip germination and shave 2–3 weeks off the schedule), but only source them from a reputable dispensary or licensed provider. Clones.co.com notes roots typically appear within 7–14 days under good conditions. For your first run, feminized seeds are more predictable than regular seeds since you will not have to identify and remove males.
Germination and the first two weeks
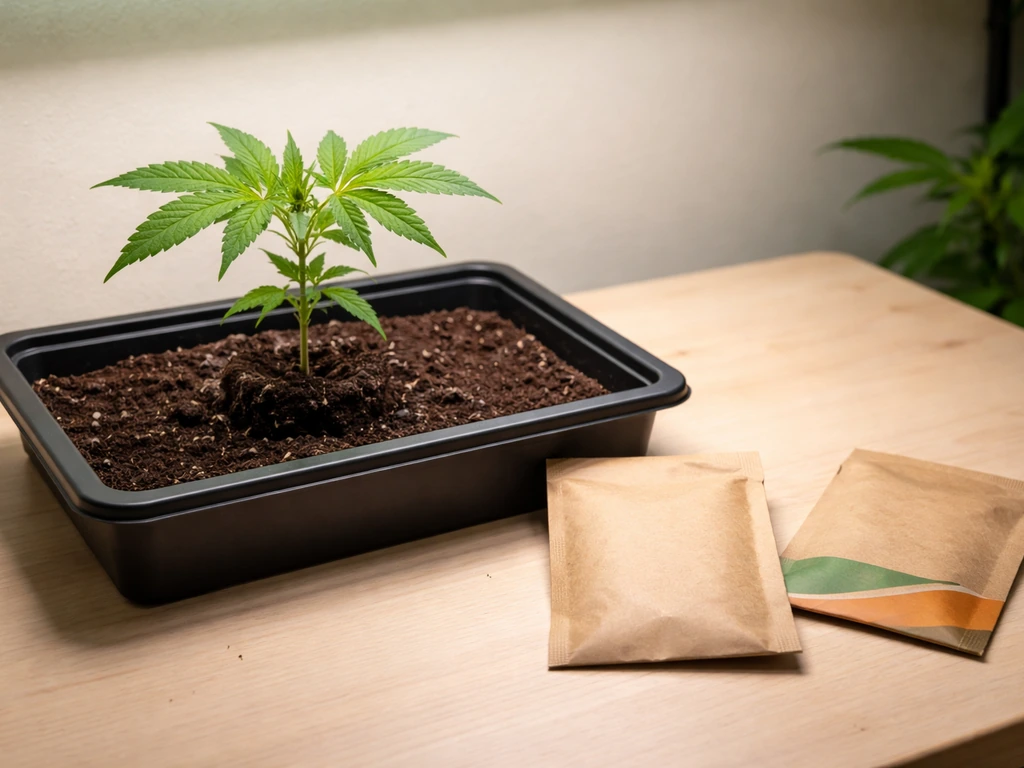
The paper towel method is reliable and lets you see exactly what is happening. Moisten (not soaking wet) two paper towels, place your seed between them, fold them over, and put the whole thing on a plate in a warm dark spot around 22–26°C (72–79°F). Check every 12 hours. A taproot typically emerges within 24–72 hours. Once the taproot is about 0.25–0.5 inches long, it is ready to plant. Handle it by the seed shell only, not the taproot, and plant it taproot-down about a quarter inch deep in a moist solo cup filled with seed-starting mix or lightly amended cannabis soil.
For the first week or two, your seedling is fragile. Keep the environment at 22–26°C and 65–70% RH. A clear plastic dome or a cut plastic bottle over the solo cup helps hold humidity while the seedling is establishing. Water in small circles around the stem (not directly on it) every 2–3 days, and let the topsoil dry slightly between waterings to avoid damping off. Your light should be on at this stage but kept at about 50–60% intensity or hung higher than usual to avoid light stress. As the seedling hardens off over days 7–14, gradually remove the dome and let humidity drop toward 60%.
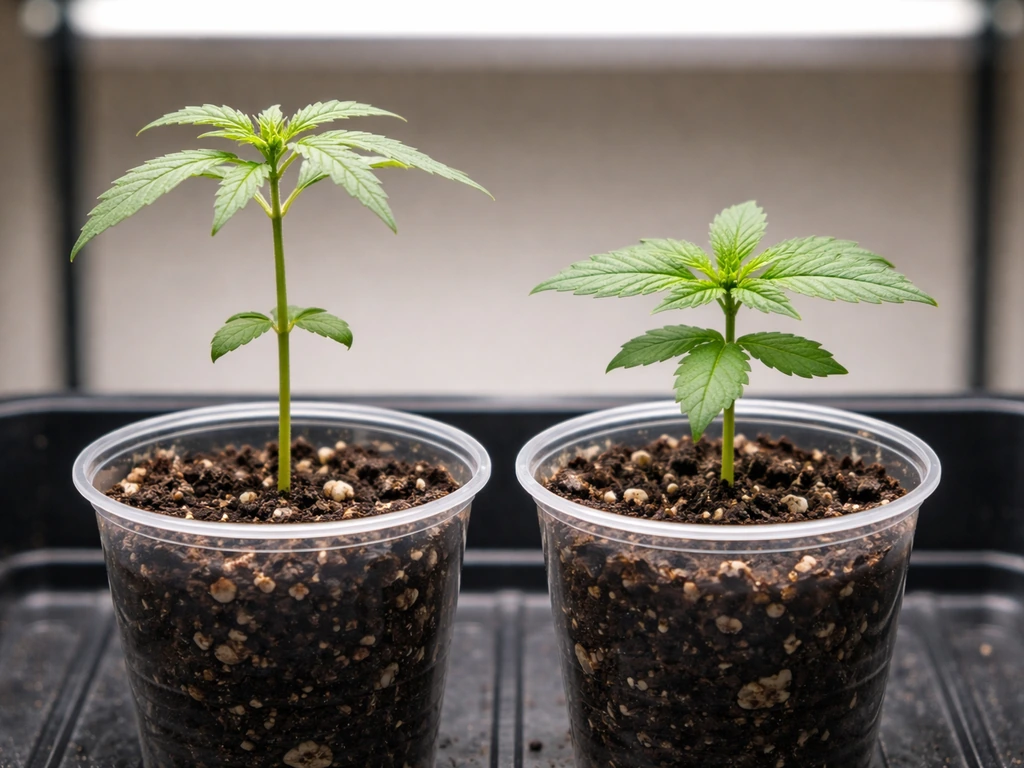
Once your plant has 3–4 sets of true leaves and the roots are visible at the bottom of the solo cup (usually around week 2–3), it is time to transplant into its final 3–5 gallon pot. Tip the solo cup gently, keep the root ball intact, and set it into a pre-moistened pot of your main growing medium. Water lightly around the edges to encourage root outreach. Do not fertilize heavily yet.
Vegetative growth: targets, training, and light schedule
Veg is where your plant builds the structure that determines your final yield. For photoperiod plants, run an 18 hours on / 6 hours off light schedule. Keep your LED at manufacturer-recommended height for veg (usually 18–24 inches above canopy). Environmental targets for veg: temperature 22–28°C (72–82°F), RH around 50–70%, with gentle airflow across the canopy at all times. Your VPD (vapor pressure deficit) ideally sits in a comfortable mid-veg band; if you have a hygrometer that shows RH and temperature, use those readings with a VPD chart to dial in your environment once you are comfortable with the basics.
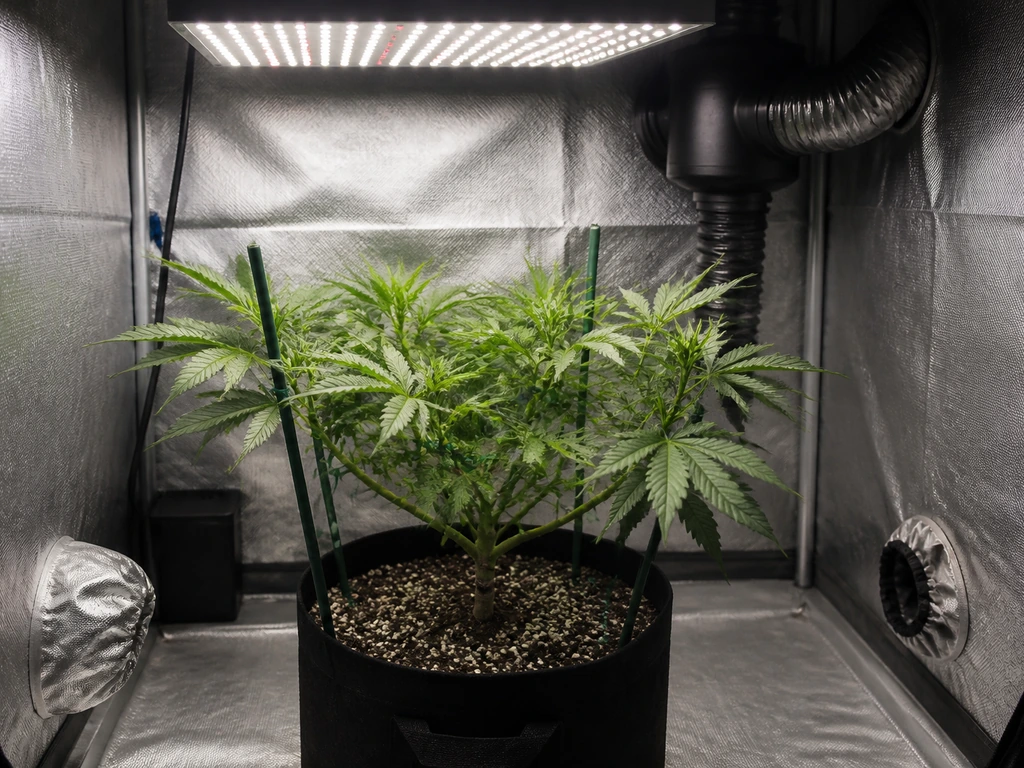
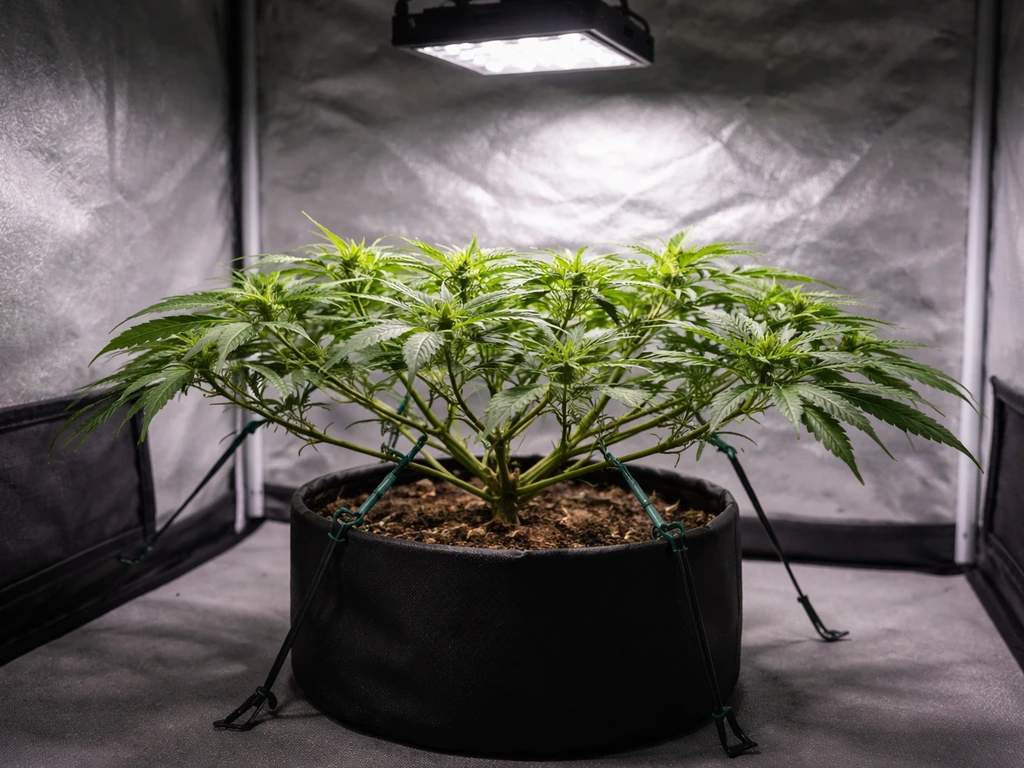
For a single plant, training is your biggest yield lever. You have two beginner-friendly options. Low-stress training (LST) involves gently bending and tying branches outward so the canopy spreads horizontally. This creates multiple bud sites at the same height, which maximizes your light coverage.
Topping (cutting the main stem at the 4th or 5th node) creates two main colas instead of one and encourages a bushier, wider plant. I recommend LST for autoflowers (since topping can stress them during their short veg window) and either LST or topping for photoperiod plants. Start LST around week 2–3 of veg and keep adjusting ties as branches grow.
For a 2x2 tent, aim to keep your trained canopy under about 12–16 inches tall before you flip to flower, since plants typically double in height during the flowering stretch.
Veg duration for photoperiod plants is flexible. A short veg of 3–4 weeks produces a smaller plant and faster harvest. A 6–8 week veg produces a larger canopy and bigger yield. For a single plant in a 2x2 tent, 4–6 weeks of veg usually hits the sweet spot. When your plant has filled out its trained canopy and you are ready to move on, you flip the timer to 12/12 to trigger flowering.
Flowering: the 8–12 week stretch to harvest
Flip your light timer to 12 hours on / 12 hours off to trigger flowering in photoperiod plants. Autoflowers do not need this change, but many growers switch to 12/12 anyway to reduce electricity costs once buds are forming. The first 2 weeks after the flip are called pre-flower or the stretch: your plant will rapidly grow taller (sometimes doubling in height) as it redirects energy from vegetative growth to reproductive development. This is when good LST from veg really pays off, keeping your canopy even.
Environmental targets shift in flower. Temperature: 20–26°C (68–79°F), slightly cooler than veg. Humidity drops progressively through the flowering weeks to reduce bud rot risk. Aim for 55–65% RH in early flower (weeks 1–3), 50–60% in mid flower (weeks 4–6), and 45–55% in late flower (weeks 7 through harvest). If your environment tends to run humid, prioritize the lower end of those ranges. Keep your oscillating fan gently moving air through the canopy but avoid direct blasting on buds.
As your buds develop, add support if needed. A simple bamboo stake or a piece of garden wire looped around heavy colas prevents branches from snapping under bud weight. Around week 6–8 of flower, most growers do a final defoliation pass, removing large fan leaves that are blocking light from lower bud sites. Do not go crazy with this. Remove what is clearly blocking light, leave everything else.
Feeding your plant: a simple beginner nutrient plan
Cannabis nutrition does not need to be complicated for one plant. The core macronutrients are nitrogen (N), phosphorus (P), and potassium (K). In veg, your plant wants more N for leaf and stem growth. In flower, it shifts to needing more P and K for bud development. Most commercial cannabis-specific nutrients (brands like General Hydroponics, FoxFarm, or Canna) sell a simple 2- or 3-part system with clear instructions. Start at half the recommended dose and work up. One plant does not forgive overfeeding as easily as a full garden where you can average things out.
pH is the most important variable beginners overlook, and it causes more problems than any other single factor. Nutrient lockout (when your plant cannot absorb nutrients even if they are present in the soil) is almost always a pH issue. For soil, target a root-zone pH of 6.2–6.8. For coco coir, target 5.8–6.2. For full hydro, target 5.5–6.1. Use a decent digital pH meter and calibrate it regularly. Do not trust cheap combination meters for this. Adjust your water with pH up or pH down solution before you feed or water.
| Growth Stage | N-P-K Focus | Target pH (Soil) | Feeding Frequency | Notes |
|---|---|---|---|---|
| Seedling (weeks 1–2) | Minimal — no added nutrients | 6.2–6.8 | Water only | Seed-starting mix has enough nutrients |
| Early veg (weeks 3–5) | Higher N, moderate P/K | 6.2–6.8 | Every 2–3 waterings | Start at half dose |
| Late veg (weeks 6–8) | Balanced N-P-K | 6.2–6.8 | Every other watering | Increase if plant looks hungry |
| Early flower (weeks 1–3) | Reduce N, increase P/K | 6.2–6.8 | Every other watering | Switch to bloom formula |
| Mid/late flower (weeks 4–8+) | Low N, high P/K | 6.2–6.8 | Every other watering | Add a bud enhancer if desired |
| Flush (final 1–2 weeks) | Plain pH-adjusted water only | 6.2–6.8 | Every 2–3 days | Flushes residual salts before harvest |
For watering cadence, the golden rule is to water when the top inch of soil is dry and the pot feels noticeably lighter. Cannabis roots need oxygen as much as water. Overwatering is the number one beginner mistake, and it looks exactly like underwatering (drooping leaves), which is why so many growers make it worse by adding more water. Lift your pot before and after watering to get a feel for the weight difference. When in doubt, wait one more day.
In the final 1–2 weeks before harvest, switch to plain pH-adjusted water only. This flush clears excess nutrient salts from the medium and the plant, which improves the smoothness of your final smoke. It is more important in coco and hydro than in organic soil, but it is a good habit regardless.
Diagnosing and fixing the most common indoor problems
Stretching and light stress
If your seedling or young plant is growing tall and spindly with large gaps between nodes, it is stretching for light. Move your light closer (check manufacturer specs for minimum distance) or increase intensity. Conversely, if leaf tips are curling up or showing bleached spots near the top of the canopy, you may have light burn from the lamp being too close. Back it off by 2–3 inches and recheck in 24 hours.
Nutrient deficiencies and toxicity
Yellow leaves can mean a lot of things, and jumping straight to adding more nutrients is usually the wrong move. Before you feed anything, check your pH. The single most common cause of apparent nutrient deficiency is pH-driven lockout: the nutrients are there, the roots just cannot absorb them at the wrong pH.
Grow Guide also emphasizes that many apparent nutrient deficiency symptoms are actually caused by pH problems and nutrient lockout, so pH should be checked before adding more fertilizer pH-driven nutrient lockout. Fix your pH, wait 48–72 hours, and see if the plant responds before adding any feeds.
If pH is correct and leaves are still showing symptoms, common visual cues are: yellowing from the bottom up (nitrogen deficiency), purple stems (phosphorus deficiency in cool temps), and brown crispy leaf edges (potassium deficiency or overfeed). Nitrogen toxicity shows as extremely dark green, clawed leaves.
Overwatering and underwatering
Both show as drooping leaves, which is genuinely confusing. Overwatered leaves tend to droop and feel firm or puffy. Underwatered leaves droop and feel thin and papery. Pick up your pot. If it is heavy, do not water. If it is light and the soil is dry an inch down, water thoroughly until runoff exits the bottom, then let it dry again before the next watering. For one plant in a 3-gallon pot, you might water every 2–4 days in veg and every 1–3 days in late flower when the root mass is larger and transpiration is high.
Pests and mold
Spider mites, fungus gnats, and aphids are the most common indoor pests. Inspect the undersides of leaves weekly. Fungus gnats (tiny flies hovering around soil) are a sign of overwatering; let the top inch of soil dry out completely between waterings and add a layer of perlite on top to deter them. Spider mites leave tiny yellow speckles on leaves and fine webbing on buds.
Treat early with neem oil or insecticidal soap (not in late flower near harvest). Bud rot (botrytis) starts as grey fuzzy patches inside dense buds, usually in high-humidity conditions above 60% RH in flower. If you find it, cut that section out immediately with clean scissors, lower your humidity, and increase airflow. Prevention through humidity management is far easier than treatment.
Harvest, drying, curing, and what comes next
Knowing when to harvest
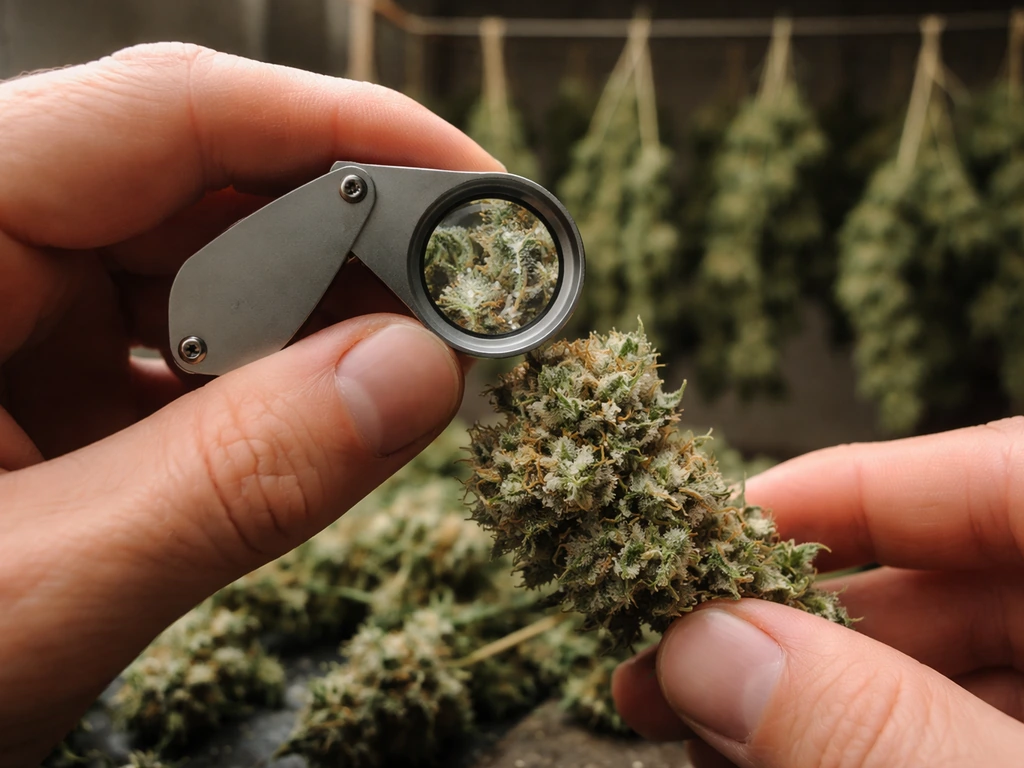
The most reliable harvest indicator is trichome color, viewed through a jeweler's loupe (30–60x) or a digital microscope. Trichomes start clear, turn milky white (peak THC), then amber (THC degrading to CBN, producing a more sedative effect). Most growers harvest when roughly 70–90% of trichomes are milky with a small percentage of amber. A secondary indicator is pistil color: when 70–80% of the white hairs have turned orange or red, you are in the harvest window. Do not rely on pistil color alone. The seed bank's stated flowering time is a rough guide, but your environment, training, and genetics all affect the actual finish date.
Cutting and drying
On harvest day, cut branches from the plant and hang them upside down in a dark, well-ventilated space. Darkness protects terpenes and cannabinoids during drying. Aim for 60–65°F (15–18°C) and 55–65% RH. At these conditions, a proper dry typically takes 10–14 days. Faster is not better. A quick dry at high temperature destroys terpenes and produces harsh smoke. The branches are ready to move to jars when the small stems snap cleanly rather than bending, and the outside of the buds feels dry but the inside still has a slight moisture.
Curing in jars
Trim your buds, place them in wide-mouth glass mason jars (fill to about 75% capacity, not packed tight), and store in a cool, dark location at around 18–21°C and 55–60% RH. For the first week, open the jars once or twice a day for 10–15 minutes to release moisture and exchange air. This is called burping.
If you smell ammonia when you open a jar, the buds are too wet and you need to leave the jar open for several hours. After the first week, burp every other day for 2–3 weeks. A minimum cure of 2–4 weeks improves smoothness and flavor significantly. Six weeks to three months produces noticeably better results.
Boveda 62% humidity packs inside your jars help maintain stable RH during long-term storage and cure.
Responsible storage and next steps
Store your cured cannabis in airtight glass jars, in a cool dark place, away from children and pets. Most jurisdictions with home-grow allowances also require that harvested cannabis be kept secure and out of public view, so a locked box or cabinet is a smart choice regardless of whether it is legally required where you live. Check your local possession limits too: in Canada for example, adults may possess up to 30 grams of dried cannabis in public, and home storage rules differ by province.
Once you have completed your first grow, you will have a completely different understanding of what actually matters. Your second plant will be better than your first, and your third better still. From here, the logical next steps are experimenting with different training methods, dialing in a more precise feeding schedule using EC measurements, or exploring coco coir or a basic hydroponic setup for faster growth.
If you want to go deeper on the full indoor growing process beyond a single plant, the broader indoor growing workflow covers multi-plant setups, more advanced environmental control, and strain selection strategy in much more detail. If you prefer a step-by-step guide written for beginners, a how to grow weed for dummies book can help you organize the basics into an easy routine.
FAQ
Can I start my single plant directly in the final 3–5 gallon pot? It would save time.
You should not germinate straight into the final pot. Start in a small solo cup (about a quarter inch deep in moist seed-starting mix), then transplant when roots are visible and the plant has 3–4 sets of true leaves. This prevents constant overwatering and helps the roots colonize the pot evenly.
How do I estimate canopy height so the plant does not outgrow the light during the flowering stretch?
For a 2x2 tent, plan for the canopy height limits you would see in late veg, then account for the flowering stretch. If you train the top to roughly 12–16 inches before flipping (as the article suggests), you usually avoid touching the light after the first 2 weeks of stretch, which reduces bleaching risk.
What is the simplest way to choose between autoflower and photoperiod for a first indoor plant?
Choose the seed type based on your schedule. If you need a predictable harvest window, use autoflowering. If you want tighter control and potentially higher yields, use photoperiod, but keep in mind you must maintain the 18/6 veg light and then switch to 12/12 at the right time, which adds another decision step.
Is it safe to do heavy training during the early stretch, or should I wait?
Yes, but do it conservatively. Start LST at week 2–3, adjust ties every few days, and avoid major re-bending right before or during the first 1–2 weeks of flowering when the stretch is fastest. Sudden, heavy movement can slow growth or stress the plant.
What should I do if the top of the soil is dry, but my plant looks droopy?
If the top of the soil looks dry but the pot still feels heavy, do not water. This is the common trap for beginners who misread surface dryness. Use the pot weight as the decision maker, and only water when the pot is clearly light and the top inch is dry.
How important is the carbon filter and fan for a single indoor plant, and what setup prevents odor spikes?
Your odor plan matters for more than just odor, it also helps airflow. Even for one plant, keep the carbon filter sized for your tent volume and ensure the fan pulls through the filter continuously. If you run the fan intermittently, humidity and smells can spike in the dark period.
When leaves droop, how do I tell the difference between overwatering, underwatering, and nutrient issues?
If you see drooping, treat it as a diagnosis first, not a feeding first. Pick up the pot, if it is heavy, you likely have excess moisture. If it is light with dry soil, water. Then check pH and wait 48–72 hours before adding nutrients, because apparent deficiencies are often lockout.
Do I need to flush before harvest, and does it work the same in soil vs coco?
Yes, particularly in coco and hydro. Instead of a nutrient flush blanket, switch to plain pH-adjusted water in the final 1–2 weeks, and keep watering cadence consistent so the medium does not stay waterlogged. In organic soil, it is less critical but still helps control salts.
What is the best harvest method if pistils are still changing color but trichomes look mixed?
Do not judge readiness by pistils alone. Pistils can stay colorful for a while after THC peaks, especially under different light intensity and training. Use trichomes (milky with some amber) as the primary indicator, and pistils only as a secondary cross-check.
How do I prevent overdrying during the 10–14 day dry window?
Because one plant is small, it is easy to dry too fast. Keep drying conditions in the 60–65°F and 55–65% RH range, use airflow that is gentle but consistent, and do not speed the process with heat. If buds feel dry on the outside but still bend slightly at the inside, they are not ready to jar.
Can I use humidity packs right away when curing, or should I wait?
Add Boveda or similar humidity packs only after the initial burping period. If the jar smells like ammonia when you open it, the buds are too wet, so leave jars open longer before sealing again. For long cures, humidity packs help stabilize but they cannot fix overdamp buds.
What are practical storage steps for a first grow beyond just curing in jars?
Target stable, safe storage behavior immediately after cure. A locked cabinet or safe is a strong practical option even where not strictly required, and you should store jars away from temperature swings and sunlight to protect terpenes. Also confirm local possession limits and keep cannabis out of public view.
Next Article
How to Grow Weed Indoors for Dummies: Step-by-Step Guide
Beginner step-by-step indoor cannabis grow guide: setup, seed vs clone, lights, nutrients, troubleshooting, dry and cure