You can successfully grow cannabis indoors as a complete beginner by starting with the right strain in a small tent, a decent LED light, basic soil, and a simple nutrient schedule. The whole process from seed to dried flower takes roughly 3 to 5 months depending on the strain you choose. It is not as complicated as it looks online, but it does require consistency, a basic understanding of what the plant needs at each stage, and a commitment to checking on your grow every day. If you are planning your first indoor tent grow, focus on light, airflow, and consistent watering to set up a healthy environment from day one grow cannabis indoors.
How to Grow Weed Indoors for Dummies: Step-by-Step Guide

Marcus Holbrook
19 May 2026
Before anything else, check the home cultivation laws in your specific state, city, and county. Rules vary significantly. blank" rel="noopener noreferrer">California allows eligible adults to grow up to 6 plants at home, but local cities and counties can layer on additional requirements like indoors-only mandates or permits. blank" rel="noopener noreferrer">Illinois medical patients can grow up to 5 plants over 5 inches tall per household. New York requires that seeds, clones, and plants be stored in a secure location inaccessible to anyone under 21. Ohio has its own eligibility conditions tied to primary residence. The point is, federal law aside, your local rules matter most, so confirm what is legal where you live before buying a single seed.
Pick your grow style: seed vs. clone, soil vs. hydro
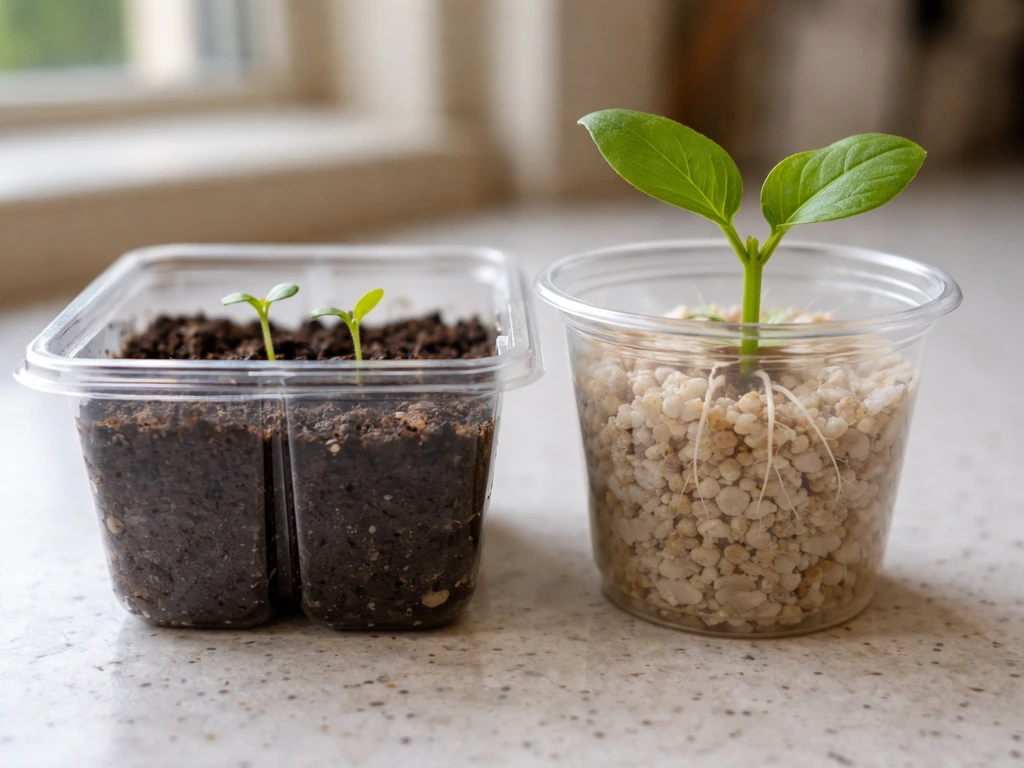
Starting from seed is the most beginner-friendly option. You get a fresh genetic slate, no risk of importing pests or disease from a clone, and the satisfaction of watching the whole lifecycle. Feminized seeds are the go-to for most first-time growers because they are bred to produce only female plants (the ones that grow buds). Autoflowering feminized seeds go one step further: they flower based on age rather than light cycle changes, finish faster (usually 70 to 90 days from seed), and are more forgiving of environmental inconsistencies. If you want the most straightforward first grow possible, start with an autoflowering feminized strain.
Clones (rooted cuttings from a mother plant) let you skip germination and guarantee the sex of the plant, but they require a trusted source. A diseased or pest-infested clone will bring those problems straight into your grow room. Unless you have access to a reliable, clean source, seeds are the better starting point.
Soil vs. hydro: which one should you start with?
For a first grow, soil wins. It is more forgiving, buffers pH fluctuations, supports beneficial microbial life, and gives the plant a natural medium it thrives in. A high-quality pre-amended potting mix (look for ones specifically formulated for cannabis, or a quality peat-based mix with perlite added for drainage) will carry your seedling through the first several weeks with minimal feeding required. Hydroponics, including deep water culture (DWC) and coco coir setups, can produce faster growth and bigger yields, but they demand tighter environmental control and more hands-on monitoring. They are genuinely excellent systems, and worth exploring once you have one or two soil grows under your belt.
| Method | Difficulty | Cost to Start | Error Tolerance | Typical Yield Potential |
|---|---|---|---|---|
| Soil (potting mix) | Beginner | Low | High | Moderate |
| Coco Coir | Intermediate | Moderate | Medium | High |
| Deep Water Culture (DWC) | Intermediate/Advanced | Moderate-High | Low | Very High |
The recommendation here is simple: soil for your first grow, then graduate to hydro or coco once you understand how the plant responds to its environment. If you are already curious about soilless methods, there is more detail in the site's hydroponic growing guides.
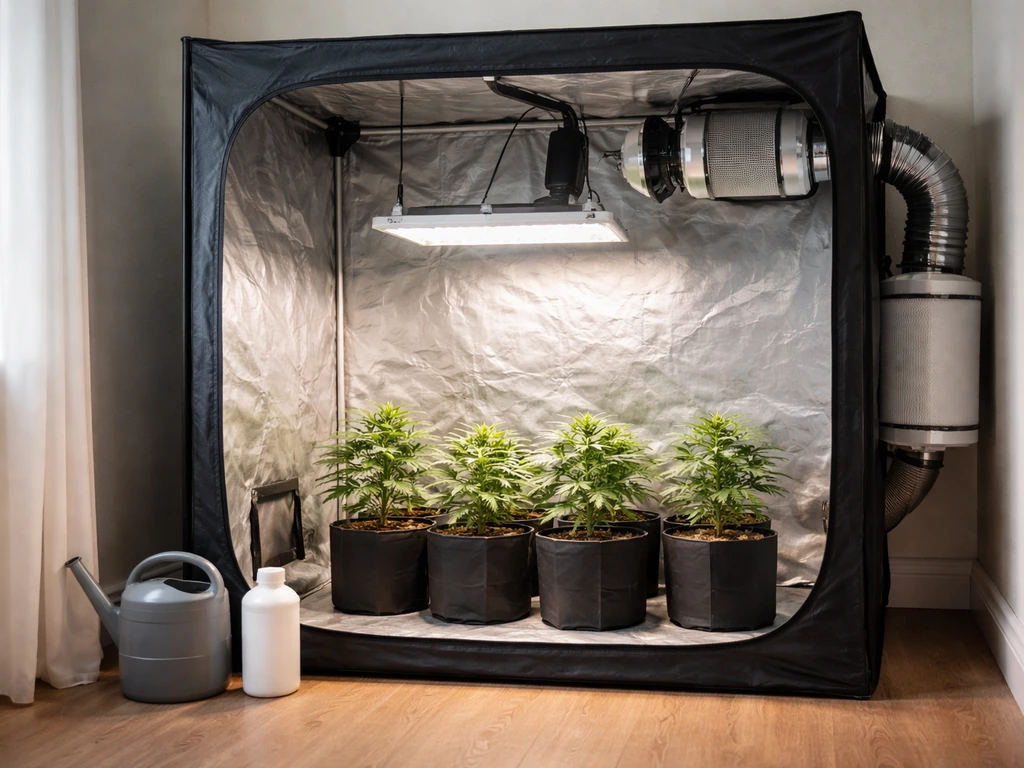
Indoor grow setup checklist
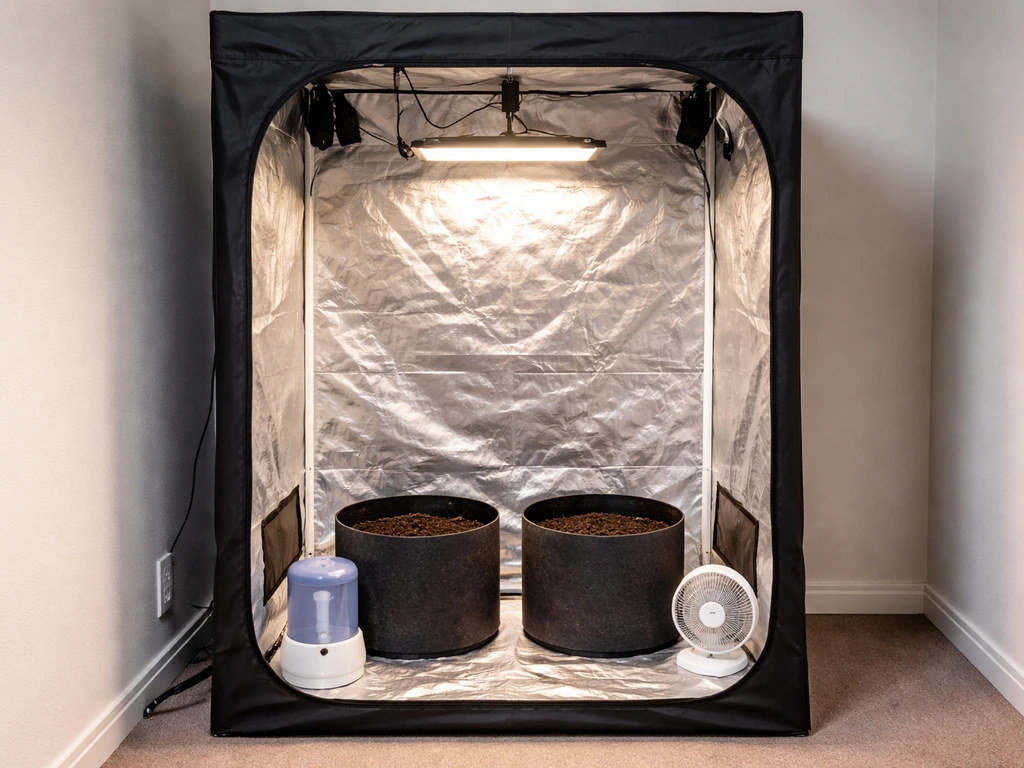
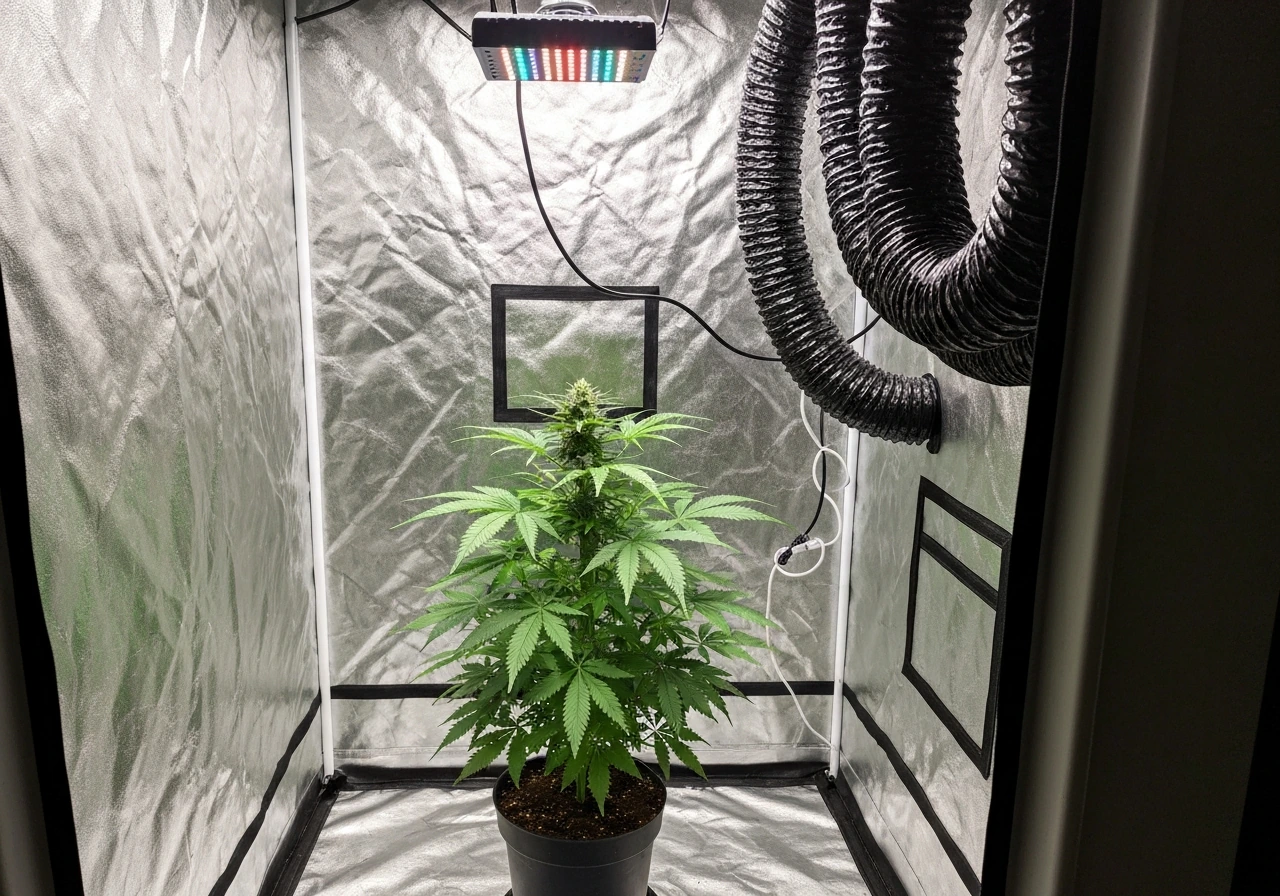
You do not need a dedicated room. A 2x4 foot grow tent is enough to comfortably run 2 to 4 plants, costs between $60 and $120, and keeps your light, smell, and humidity contained. Here is everything you need before the first seed goes in the ground. If you want a simple, step-by-step path for how to grow 1 weed plant indoors, start by dialing in your setup and environment.
Space and containment
- Grow tent: 2x4 ft for 2-4 plants, 4x4 ft for 4-6 plants. Reflective interior walls maximize light efficiency.
- Waterproof tray or saucer under pots to catch runoff and protect floors.
- A dedicated power strip with surge protection for all your electronics.
Lighting
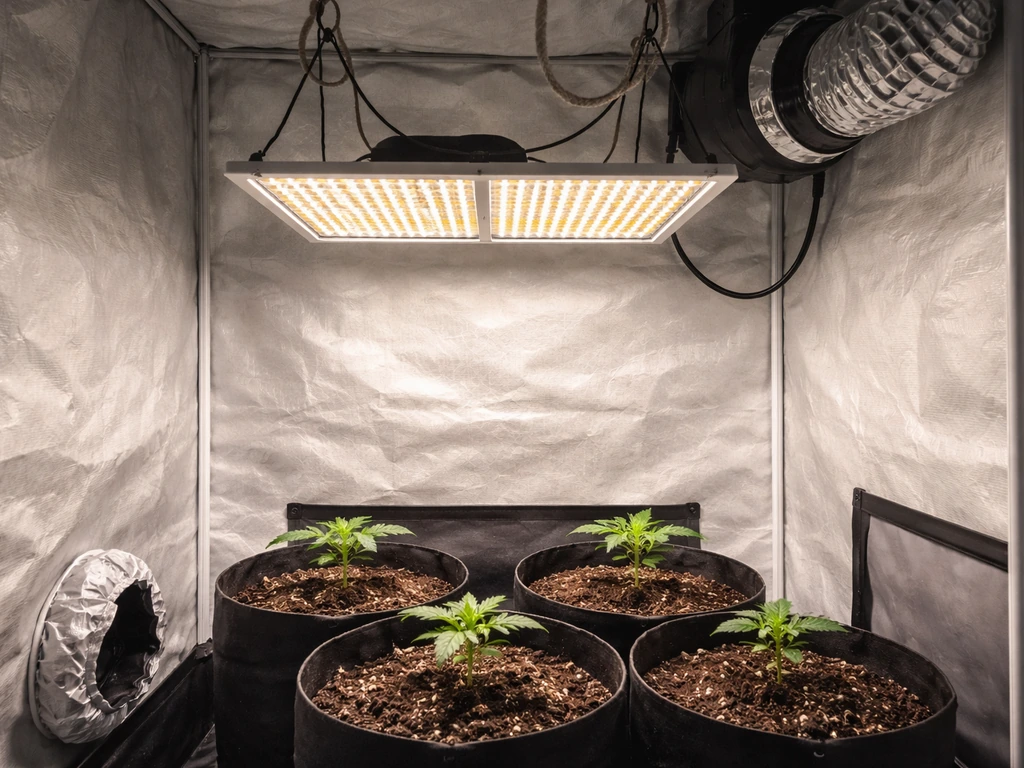
A full-spectrum LED is the best all-around choice for beginners in 2026. Modern quantum board LEDs (brands like Spider Farmer, Mars Hydro, and HLG are commonly referenced) are energy-efficient, run cooler than HPS lights, and cover both veg and flower spectrums. For a 2x4 tent, a 200 to 240 watt LED is adequate. For a 4x4, target 400 to 600 watts. Avoid cheap blurple LEDs with unrealistic wattage claims. If the price seems too good to be true on a 1000W LED for $35, it is.
Ventilation and airflow
- Inline fan and carbon filter: size the CFM rating to your tent volume (length x width x height in cubic feet), minimum 1 air exchange per minute. A 4-inch fan handles most 2x4 tents; a 6-inch works well for 4x4.
- Oscillating clip fan inside the tent for gentle air movement across the canopy. This strengthens stems and prevents hot spots.
- Ducting to route exhaust air out of the grow space or into a larger room.
Odor control
A quality activated carbon filter connected inline with your exhaust fan handles 95 percent or more of cannabis odor during flower. This is not optional if you share walls with neighbors or have people in the household who do not want to smell the grow. Replace the carbon filter every 12 to 18 months or when you notice smell escaping despite the fan running.
Environmental monitoring
- Digital thermometer and hygrometer combo (temp and relative humidity): place it at canopy height.
- pH meter or pH drops: critical for testing soil runoff and any water or nutrient solution before it goes in.
- TDS/EC meter: measures nutrient concentration in your water, especially important in hydro but useful in soil too.
- Timer for lights: a mechanical or digital outlet timer runs about $10 to $20 and handles your light schedule automatically.
Dial in the environment by growth stage
Cannabis is a temperature and humidity-sensitive plant, and the ideal environment actually shifts as it moves through its lifecycle. Getting these numbers right is one of the highest-leverage things you can do as a beginner. I spent my first grow ignoring humidity and paid for it with powdery mildew late in flower. Do not make that mistake.
| Growth Stage | Temperature (°F) | Relative Humidity (%) | Airflow Notes |
|---|---|---|---|
| Seedling (weeks 1-2) | 70-77°F | 65-70% | Very gentle airflow, no direct fan blast on seedlings |
| Vegetative (weeks 3-8) | 70-85°F | 50-70% | Moderate oscillating fan, fresh air exchange every minute |
| Early Flower (weeks 1-3 of flower) | 65-80°F | 40-50% | Strong airflow through canopy, maintain negative pressure in tent |
| Late Flower (weeks 4+ of flower) | 65-75°F | 35-45% | Lower humidity is critical to prevent bud rot and mold |
| Final 2 weeks before harvest | 65-75°F | 30-40% | Keep RH low, watch for any signs of mold daily |
If your tent gets too hot, raise the light, increase exhaust fan speed, or add a small AC unit for the room your tent is in. If humidity is too high during flower, a small dehumidifier placed outside the tent in the same room (pulling air from the tent via exhaust) is the most effective fix. VPD (vapor pressure deficit) charts are a more precise tool for dialing in temp and humidity together, and they are worth looking into once you have the basics down.
Light schedules and growth phases
Photoperiod cannabis strains respond to changes in the light-to-dark ratio to shift from vegetative growth to flowering. Autoflowering strains flower based on age regardless of light schedule. Knowing which type you are growing determines your entire lighting plan.
Photoperiod strains
- Seedling stage (weeks 1-2): 18 hours of light, 6 hours of dark (18/6). Some growers use 20/4 or even 24/0, but 18/6 gives the plant and equipment a rest and works well.
- Vegetative stage (weeks 3 onward): Stay on 18/6 until plants reach roughly half of your desired final height. Cannabis will approximately double in size after the flip to flower, so plan accordingly.
- Flowering: Switch to 12 hours of light and 12 hours of dark (12/12). This mimics the shortening days of late summer and triggers the plant to produce buds. Most indica-dominant strains finish in 8 to 9 weeks of flower; sativa-dominant strains can run 10 to 12 weeks.
- Lights-out period must be completely dark. Even a small light leak can confuse photoperiod plants and cause hermaphroditism (the plant produces both male and female flowers). Tape off any LED indicator lights inside the tent during dark periods.
Autoflowering strains
Autos do not need a light schedule change to flower. Most growers run them on 18/6 or 20/4 from seed to harvest, giving them as much light as possible to maximize growth. Total time from seed to harvest is typically 70 to 90 days. If you want to grow weed fast indoors, focus on fast-finishing genetics, stable temperatures, and consistent daily care to keep development on track 70 to 90 days. The tradeoff is that autos are harder to train aggressively (more on that below) and generally yield less per plant than a well-grown photoperiod. For a first grow, the simplicity is usually worth it.
Feeding and nutrients for beginners
Plants need three primary macronutrients: nitrogen (N), phosphorus (P), and potassium (K). During veg, they want higher nitrogen to build leaves and stems. During flower, they shift toward more phosphorus and potassium to develop buds. Most nutrient lines are labeled for this, so you do not need to memorize ratios, just follow the manufacturer's schedule at half strength to start.
What to buy and how to use it
For a soil grow, a simple 3-part nutrient system (grow, bloom, micro) or an all-in-one liquid like Fox Farm Trio or General Hydroponics Flora Series works well. Start nutrients at 25 to 50 percent of the recommended dose. Overfeeding is one of the most common beginner mistakes and causes nutrient burn: the tips of leaves turn brown and curl. Underfeeding looks like slow growth and yellowing leaves. Both are correctable, but prevention is easier.
- Always pH your water and nutrient solution before watering. Soil grows thrive at a pH of 6.0 to 7.0, with 6.2 to 6.8 being the sweet spot. Outside this range, plants cannot absorb nutrients even if they are present.
- Use a TDS/EC meter to measure nutrient concentration. Seedlings: 100-300 ppm. Veg: 400-800 ppm. Flower: 800-1200 ppm. Flush down to 200-400 ppm in the final 1-2 weeks before harvest.
- Flush with plain pH-adjusted water every 4 to 6 weeks in soil to prevent salt buildup.
- Watch for signs of deficiency (yellowing, purple stems, mottled or spotted leaves) and toxicity (burnt tips, clawing leaves, very dark green color) and adjust accordingly.
CalMag: the supplement most beginners skip
Calcium and magnesium deficiencies are extremely common in indoor grows, especially in filtered or reverse-osmosis water. A CalMag supplement added at 1 to 2 ml per liter throughout veg and early flower prevents the interveinal yellowing and brown spotting that confuse a lot of first-time growers. Add it before other nutrients when mixing your solution.
Simple plant management: watering, training, and monitoring
Watering correctly
Overwatering kills more first-time grows than almost anything else. Cannabis roots need oxygen as much as they need water, and constantly wet soil suffocates them. The right approach: water thoroughly (until you see 10 to 20 percent runoff from the bottom of the pot), then wait until the top inch or two of soil is dry and the pot feels noticeably lighter before watering again. In a 3-gallon pot, this cycle usually takes 2 to 3 days in veg and 1 to 2 days in late flower when the plant is drinking more aggressively.
Basic plant training
Training your plant increases yield by creating a more even canopy that exposes more bud sites to direct light. Low-stress training (LST) is the most beginner-friendly method: gently bend branches outward and tie them down with soft wire or plant ties, encouraging a wider, flatter canopy rather than a single tall cola. Start LST during veg when stems are still flexible. Avoid aggressive techniques like topping or supercropping on your first autoflowering grow since autos have less recovery time. Photoperiod plants in veg handle topping well and can more than double their bud site count with a single top.
What to monitor daily
- Temperature and humidity at canopy height (morning and evening readings give a useful range)
- Soil moisture with a finger test and pot weight
- Leaf color and overall appearance for early signs of deficiency, pest damage, or stress
- Light distance from canopy (adjust as plant grows; check manufacturer's recommendations for your specific LED)
- Any unusual smells beyond normal cannabis scent, which can indicate mold or root rot
Harvest, drying, and curing to preserve quality
Knowing when to harvest
The most reliable harvest indicator is trichome color, which requires a jeweler's loupe (30x to 60x) or a digital microscope. Trichomes are the tiny crystal-like structures on buds and surrounding leaves. Clear trichomes mean the plant is not ready. Milky/cloudy trichomes indicate peak THC. Amber trichomes signal that THC is degrading into CBN, which produces a more sedative effect. Most growers harvest when trichomes are mostly cloudy with 10 to 30 percent amber, depending on the effect they prefer. As a secondary check, most pistils (the small hairs on buds) should have turned from white to orange or brown (roughly 70 to 90 percent) by harvest.
Drying
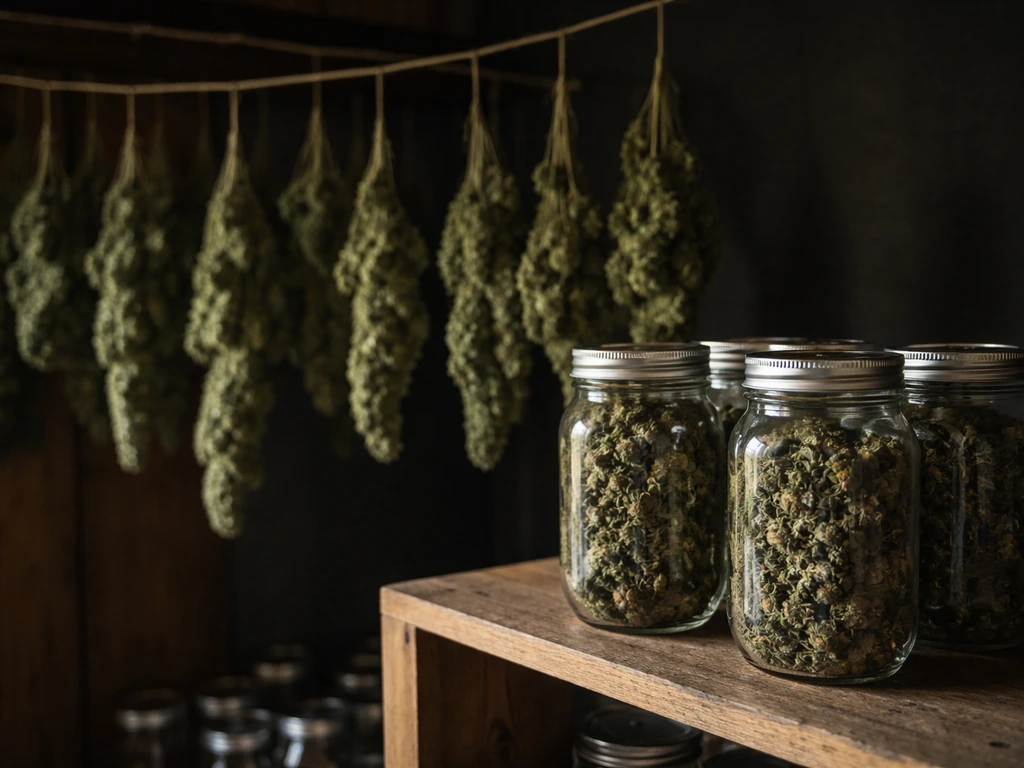
Cut the plant down, trim away large fan leaves, and hang whole branches upside down in a dark space with moderate airflow (not direct), a temperature of 60 to 70°F, and humidity between 45 and 55 percent. Drying too fast (under 3 days) results in harsh, hay-smelling weed. The ideal dry time is 7 to 14 days. Buds are ready to move to jars when the smallest stems snap rather than bend and the outside of the bud feels dry to the touch.
Curing
Place dried buds in wide-mouth mason jars filled about 75 percent full. For the first week, open the jars twice daily for 15 minutes (called burping) to release moisture and let fresh air in. After the first week, burp once daily, then drop to once every few days. A minimum 2-week cure noticeably improves smoothness and flavor. A 4 to 8 week cure is where the real quality shows up. Boveda 62 percent humidity packs placed inside the jars during long-term storage help maintain ideal moisture levels and are worth the small investment.
Troubleshooting common indoor problems
Every grower runs into problems. The key is catching them early and responding methodically rather than making multiple changes at once (which makes it impossible to know what fixed the issue).
| Problem | Likely Cause | What to Do |
|---|---|---|
| Yellowing leaves starting at bottom | Nitrogen deficiency or natural senescence in late flower | In veg/early flower: increase N; in late flower, some yellowing is normal |
| Brown, crispy leaf tips | Nutrient burn (overfeeding) | Flush with plain pH water, reduce nutrient dose by 25-50% |
| Drooping, overwatered-looking leaves | Overwatering or root suffocation | Let medium dry out more between waterings; check for root rot |
| Curling leaves, clawing downward | Nitrogen toxicity or heat stress | Reduce nutrients; check light distance and temps |
| White powdery coating on leaves | Powdery mildew (fungal) | Reduce humidity below 50%, increase airflow; treat with diluted hydrogen peroxide or potassium bicarbonate spray |
| Tiny moving dots on leaves, webbing | Spider mites | Spray with neem oil or insecticidal soap; inspect daily; isolate plant |
| Stretching, thin stems, pale color | Insufficient light or light too far away | Lower light or increase wattage; ensure 18+ hours of light in veg |
| Slow growth, dark leaves, small buds | Root-bound or pH imbalance | Check runoff pH; consider transplanting to larger pot |
| Bud rot (grey/brown soft spots in buds) | Botrytis mold from high humidity | Remove affected buds immediately; drop humidity below 45% in flower |
Prevention beats treatment every time
Most indoor problems come from three sources: wrong environment (temp and humidity outside the target ranges), pH issues preventing nutrient uptake, and overwatering. Fix those three things and you eliminate the majority of beginner problems before they start. Sticky pest traps hung inside the tent and a weekly visual inspection of the undersides of leaves will catch pest issues before they spiral.
Your first grow: what to buy and do this week
If you are ready to start, here is the practical order of operations. Do not get overwhelmed trying to buy everything perfect on day one. Start with the essentials and add to your setup as you learn.
- Confirm your local home cultivation laws and plant limits before purchasing anything.
- Buy a 2x4 grow tent, a 200-240W full-spectrum LED, a 4-inch inline fan with carbon filter, and a clip fan.
- Pick up a thermometer/hygrometer, pH meter, and a bag of quality cannabis-friendly potting soil with added perlite.
- Order 2 to 3 feminized autoflowering seeds from a reputable seed bank. Popular beginner strains include Northern Lights, Blue Dream auto, and Wedding Cake auto.
- Germinate seeds using the paper towel method or directly in a small starter pot at 70-77°F and 65-70% RH.
- Once sprouted, set your light timer to 18 hours on, 6 off, and begin daily environmental monitoring.
- Start a simple grow journal (even a phone note app works) to log watering dates, nutrient doses, temps, and anything you observe. This makes troubleshooting dramatically easier.
- Begin nutrients at half-strength around week 3 to 4 when the soil's initial charge is depleted.
- Enjoy the process. Your first grow will not be perfect, and that is fine. Every grow teaches you something the next one benefits from.
If you want to go deeper on any specific part of this process, there is much more to explore on this site: from detailed guides on growing a single plant to understanding hydroponic systems, managing photoperiod light schedules, and speeding up grow times. If you prefer learning by watching, you can also follow how to grow weed indoors videos for step-by-step visual guidance through each stage. The core steps above are genuinely all you need to get from seed to a successful first harvest. If you prefer a straightforward starting point, a how to grow weed for dummies book can give you step-by-step guidance alongside these core steps. Take it one week at a time, trust the process, and stay consistent with your environment checks.
FAQ
Can I grow indoors if I have a small space or limited time to monitor it daily?
Yes, but do it in a controlled way. Choose an autoflower so you do not need to switch light schedules, start with a smaller tent than you think you need (2x2 or 2x4), and keep temperatures stable at lights on and off. If your room swings a lot at night, you will fight humidity and growth stalls, so consider adding a small heater or relocating the tent before you add more gear.
Do I need pH meters and runoff testing for a beginner grow?
Start by confirming your water source and your mixing order. If you use filtered or reverse-osmosis water, plan on adding CalMag as described (it is often the missing link for new growers). Also, mix nutrients slowly, stir between additions, then check runoff or solution pH only after you have consistent results, since “chasing numbers” right away can create more variation.
Is it possible to grow using organic soil without a nutrient schedule?
You can, but it usually is not the best first choice. Organic soil grows can be forgiving, yet you still need to manage moisture, airflow, and nutrient availability. If you are using premixed “no-feed” soil, wait to fertilize until leaves show real deficiency rather than adding nutrients immediately, and start with smaller top-ups because overfertilizing is still a common issue.
What is the safest way to train without stressing my plant, especially in early veg?
If you plan to use soft plant ties, do your first tie-down during early veg when stems flex easily. For training, avoid letting branches block airflow through the middle of the plant, because that is when you get mildew risk later. Reposition ties gradually over several days rather than forcing a sharp bend in one move.
How many hours of light should I use indoors for autos versus photoperiod plants?
You do not need to run lights 24/7, even for faster growth. For autos, you typically keep a consistent schedule like 18/6 or 20/4 from seed to harvest. For photoperiods, keep veg on a stable light cycle, then switch only when you are ready to flower and keep the dark period truly dark to avoid light leaks.
How can I tell if I am overwatering or underwatering my plants?
Aim for the “just dry enough” rule, then learn your pot’s rhythm. Many beginners overcorrect because they wait too long and then water too aggressively. A practical check is pot weight (lighter means water is needed), plus the top inch of soil drying, then water thoroughly until you see runoff.
What should I do if humidity swings a lot day to night?
Treat your climate targets as a range, not a single number. In flower, humidity that is slightly too high can trigger mildew, but very low humidity can also cause stress and slow bud development. If you are unsure, stabilize temperature first, then use a dehumidifier outside the tent and manage VPD once your basics are working.
What is the best way to respond to nutrient burn so I do not make it worse?
Most beginner nutrient burn comes from dosing too strong too early, not from the concept of feeding itself. Start at a lower strength (as suggested), and if you see burn, do not “fix it” by adding more nutrients. Flush and reset watering habits, then resume with half-strength once new growth looks normal.
My leaves are yellow and growth looks slow, what should I troubleshoot first?
If plants are growing slowly and leaves look pale, rule out environment and watering first. Confirm your light intensity and distance, then check whether the soil is staying too wet or too dry. If color issues persist, CalMag is commonly helpful in indoor setups, especially if your water is low in minerals.
How do I prevent powdery mildew if it shows up during flower?
If you see white powder late in flower, improve airflow and humidity immediately and remove heavily affected leaves, but you also need to stop the conditions that caused it. Do not make multiple changes at once, focus on getting humidity into the safer range, and avoid spraying during late flower because you can create residue problems.
Will a carbon filter fully stop smell, or do I need extra odor control?
Yes, but be careful. Carbon filters reduce odor from exhaust, they do not guarantee total smell elimination from every point in the tent. For stronger setups, keep all ventilation paths sealed, ensure ducting is tight, and avoid opening the tent frequently during lights-off when humidity can rise.
How do I know when to harvest if some buds look more mature than others?
Harvest timing matters, but there is a safer fallback than guessing. If you are unsure, use the trichome check at multiple spots on the plant (top and lower buds) because maturity can differ. If most are mostly cloudy with a bit of amber, you are usually within the window, but avoid waiting past significant amber if you want a less sedating effect.
How can I avoid a harsh or “hay” taste during drying?
Drying and curing can be done too fast or too wet. If smallest stems do not snap and the outside still feels moist, jars will stay too humid and can develop stale, musty flavors. If buds dry in under about three days, you often get harshness, so slow the process using gentler airflow and stable humidity.
Next Article
How to Grow Weed Indoors Step by Step for Beginners
Step-by-step indoor cannabis grow guide: setup, lighting, nutrients, training, flowering, harvest, drying, curing, troub