Here is the short answer: you can successfully grow one cannabis plant indoors from seed to harvest in roughly 3 to 5 months, depending on the strain you choose. If you want a complete, stage-by-stage walkthrough, follow this guide on how to grow 1 weed plant indoors. You need a small enclosed space, a decent light, a fan, a carbon filter, and the discipline to check your plant a few times a week. That is genuinely it.
How to Grow Cannabis Indoors: One-Plant Step-by-Step

Marcus Holbrook
19 Apr 2026
Everything else is refinement. This guide walks you through every stage in order so you know exactly what to do, what to watch for, and what to fix when something goes sideways. If you want a complete step-by-step walkthrough for how to grow 1 weed plant indoors from start to finish, use the sections in this guide to plan every stage.
Check the law in your area before you do anything else
Before you spend a dollar on equipment, confirm that home cultivation is legal where you live and understand your plant limits. Laws vary enormously. In Colorado, for example, [adults 21 and older can grow up to six plants per resident, with no more than three flowering at any one time. ](https://cannabis.
colorado. gov/legal-cannabis-use/home-grow-laws) Under Canadian federal law, adults can grow a maximum of four cannabis plants per household (not per person). Some US states allow home grows; others still prohibit them entirely. Some countries outside North America criminalize cultivation at any scale.
The rules in your jurisdiction are non-negotiable, and ignorance is not a legal defense. Look up your local regulations, confirm the plant count you are allowed, and note any rules about where plants must be kept (locked spaces, not visible from public, etc. ). [Health Canada specifically recommends locked storage to prevent accidental access by children](https://www.
canada. ca/en/health-canada/services/drugs-medication/cannabis/personal-use/growing-cannabis-home-safely. html), and that is a good baseline standard no matter where you live.
Choosing the right setup for one indoor plant
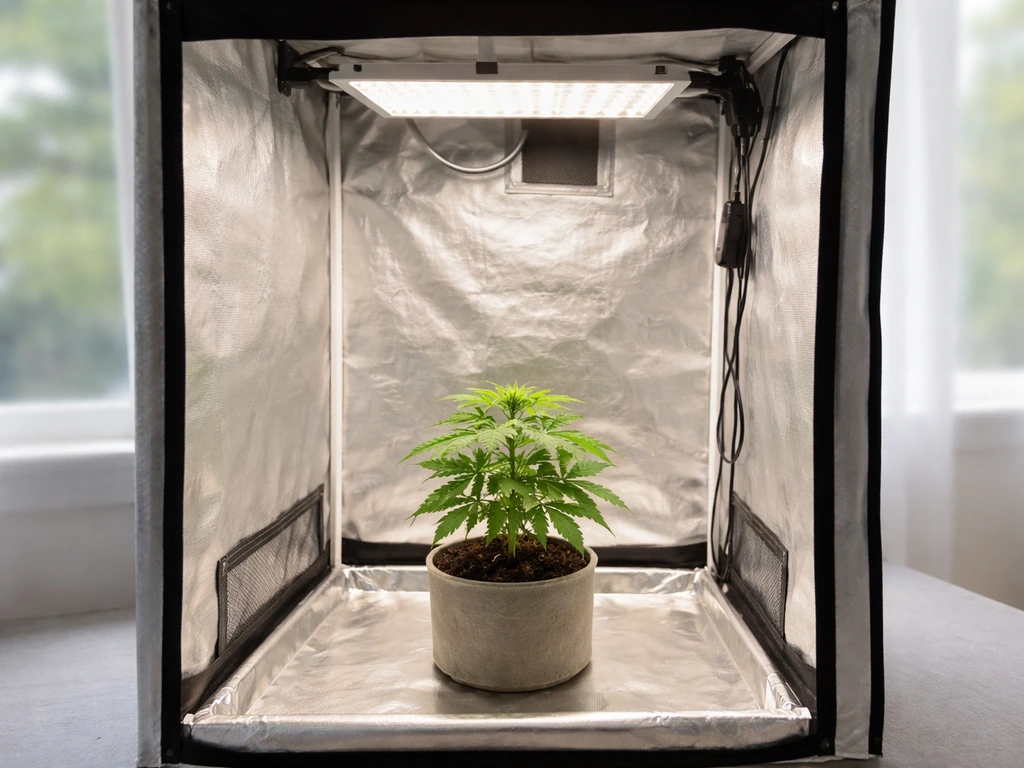
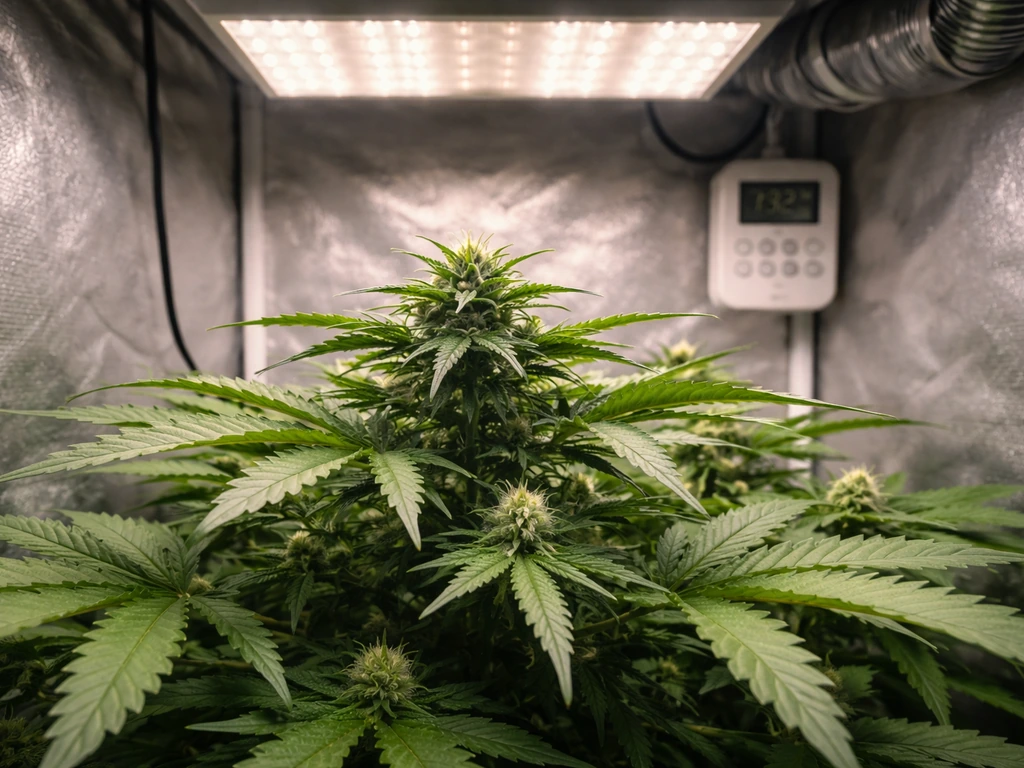
One plant does not need a lot of space, but it does need the right space. A small grow tent is the most practical starting point for a beginner. A 2x2 ft (60x60 cm) tent handles a single plant comfortably, especially if you plan to train it to stay compact. A 2x4 ft tent gives you more room to work and lets the plant spread if you want a bigger yield. Tents come pre-built with reflective interiors, ports for ducting, and a frame you can hang a light from, which simplifies setup significantly.
For lighting, a quality LED panel is the best choice for a beginner growing one plant. Modern quantum-board LEDs run cooler than older HID lights, use less electricity, and cover a small tent effectively. A 100 to 200-watt LED is plenty for a 2x2 to 2x4 space. For ventilation, size your inline fan to your tent volume and then add at least 25% extra capacity to account for carbon filter resistance, duct bends, and duct length.
A 4-inch inline fan typically handles a 2x2 tent; a 6-inch fan suits a 2x4 or larger. Match your carbon filter CFM rating to your fan so you are not choking airflow, which shortens filter life and kills odor control. One popular option is a 6-inch inline fan and carbon filter kit rated around 350 CFM, which suits a medium single-plant setup with room to spare.
- Grow tent: 2x2 ft for tight spaces, 2x4 ft for more flexibility
- LED light: 100 to 200 watts for a single-plant setup
- Inline fan and carbon filter: sized to your tent volume plus 25% for resistance losses
- Ducting to connect fan, filter, and tent exhaust port
- Small oscillating fan inside the tent for air circulation and stem strengthening
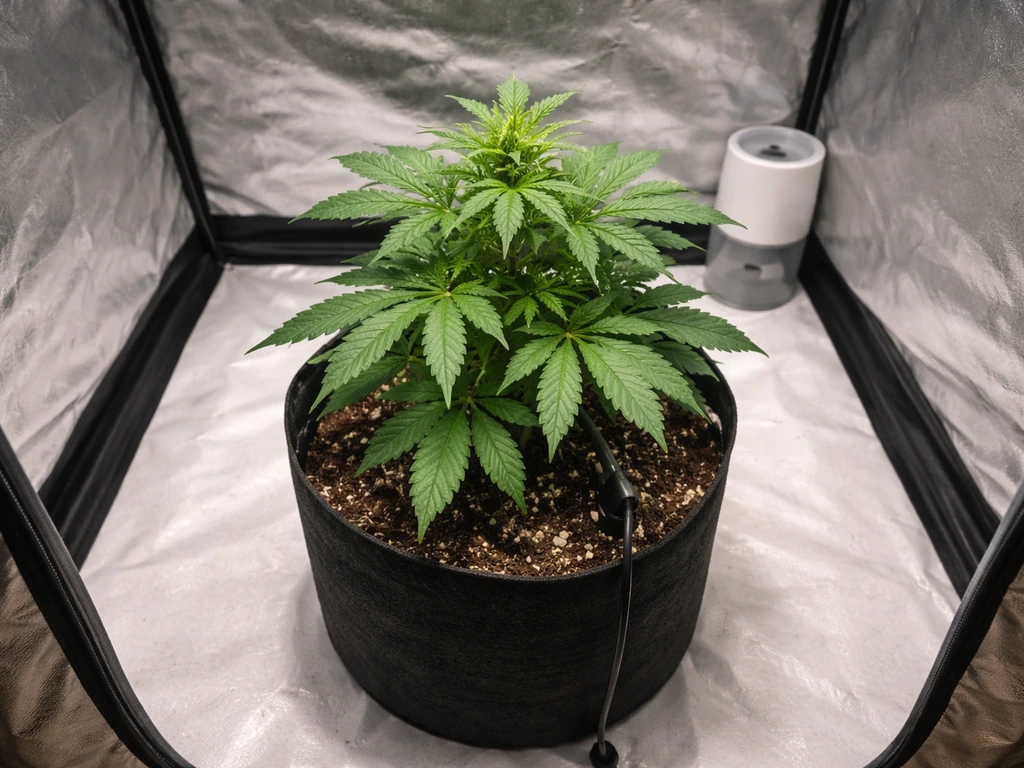
- Fabric pot: 3 to 5 gallons works well for most single-plant soil grows
- pH meter and EC/TDS meter: non-negotiable for diagnosing most problems early
- Timer for your lights
Strain selection and timeline planning
Strain choice shapes everything: how long your grow takes, how tall your plant gets, how much attention it needs, and how forgiving it is when you make mistakes. For a beginner growing one plant indoors, you have two main paths: autoflowering strains and photoperiod strains.
| Feature | Autoflowering | Photoperiod |
|---|---|---|
| Light cycle control needed | No (flowers automatically) | Yes (must switch to 12/12 to flower) |
| Typical seed-to-harvest time | 8 to 11 weeks | 14 to 22 weeks |
| Height | Usually compact (60 to 100 cm) | Variable, can get large |
| Training tolerance | Limited (stress-sensitive) | High (responds well to topping/LST) |
| Beginner friendliness | Very high | Moderate |
| Yield potential per plant | Moderate | Higher with training |
| Re-veg or clone possible | No | Yes |
If you want the fastest, simplest first grow, choose an autoflowering strain. They move from seed to harvest in 8 to 11 weeks regardless of light schedule, stay compact, and do not require you to manage a light flip. If you want more control over size and yield, and you are comfortable managing a light timer, a photoperiod strain gives you the ability to keep the plant in vegetative growth for as long as you want before triggering flowering.
For a single-plant grow, popular beginner-friendly strains include autos like Northern Lights Auto or White Widow Auto, and photoperiod options like Blue Dream or Critical (which tends to stay manageable in size). Whatever you pick, note the breeder's listed flowering time and work backward to plan your overall timeline before you even germinate.
Germination and seedling care

Germination is simple once you understand the three things a cannabis seed needs to crack open: warmth, moisture, and darkness. The paper towel method is the most beginner-friendly approach. Place your seed between two damp (not soaking wet) paper towels, put it on a plate, and store it somewhere dark and warm, ideally between 22 and 25°C (71 to 77°F). A kitchen cupboard above the refrigerator works well because the motor puts off gentle warmth. Check it every 12 hours. The seed will crack and show a white taproot usually within 1 to 7 days.
One thing that trips up beginners: when you plant the germinated seed, the white thing coming out of the shell is the root (the taproot), not a stem. Plant it root-down, about 0.5 to 1 cm deep, and leave it alone. The seedling will push up through the soil on its own within a day or two. Once it breaks the surface, move it under your light at about 50 to 60% intensity and keep it on an 18/6 light schedule (18 hours on, 6 hours off) if it is a photoperiod plant. Autos can run on 18/6 or even 20/4 from start to finish.
During the seedling stage, keep humidity higher than you will later in the grow, around 65 to 70% RH, and temperatures around 22 to 25°C. Water sparingly. Seedlings have tiny root systems and drown easily. Water in a small circle around the stem rather than soaking the whole pot, and only water again when the top inch of soil feels dry. Overwatering is the number one killer of seedlings and it looks almost identical to underwatering, both cause drooping. The difference: overwatered leaves droop but feel firm and almost puffy; underwatered leaves droop and feel limp and papery.
Vegetative stage basics
Vegetative growth is when your plant builds the structure that will eventually hold your buds. For photoperiod plants, you control how long this phase lasts by keeping the light on an 18/6 schedule. The plant will stay in veg indefinitely under this cycle, which means you decide when to flip to flower. For a single indoor plant, a veg period of 4 to 8 weeks from transplant is typical, depending on how large you want the plant to get before flowering.
Lighting in veg
Keep your LED at an appropriate distance from the canopy (check the manufacturer's recommendation, usually 18 to 24 inches for most quantum boards at moderate intensity). Raise or lower based on how the plant responds. Light that is too close causes bleaching or heat stress at the top of the plant. Too far and the plant stretches toward it, getting leggy and weak. Aim for compact, dark green growth with short internodal spacing.
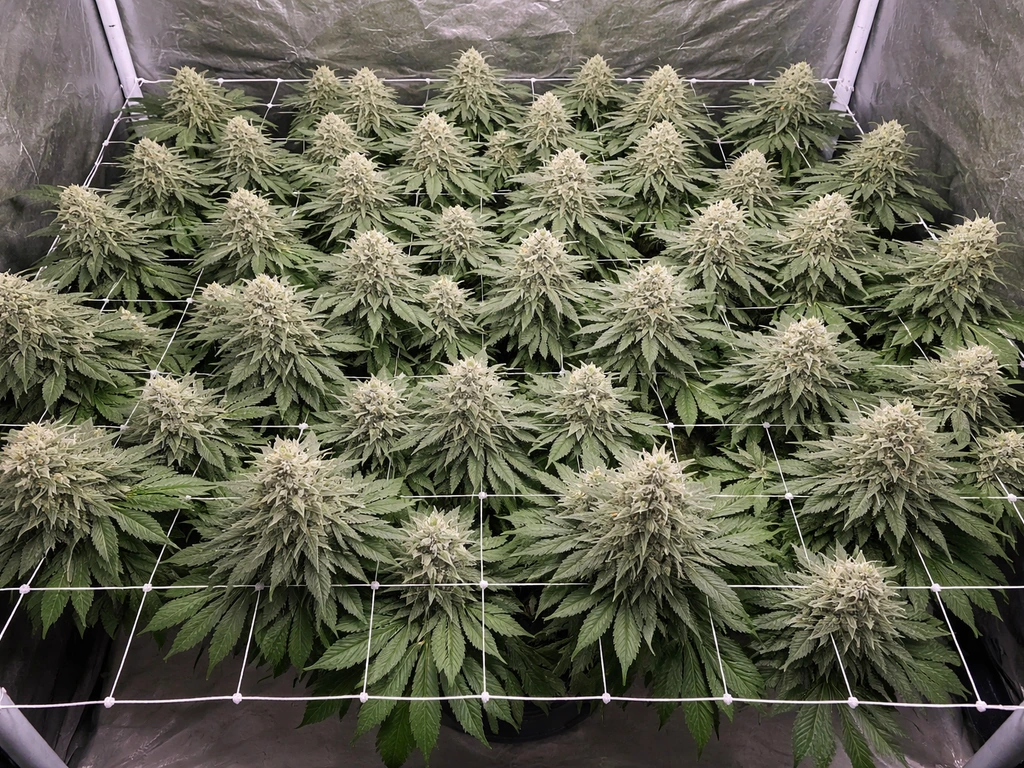
Training for one plant
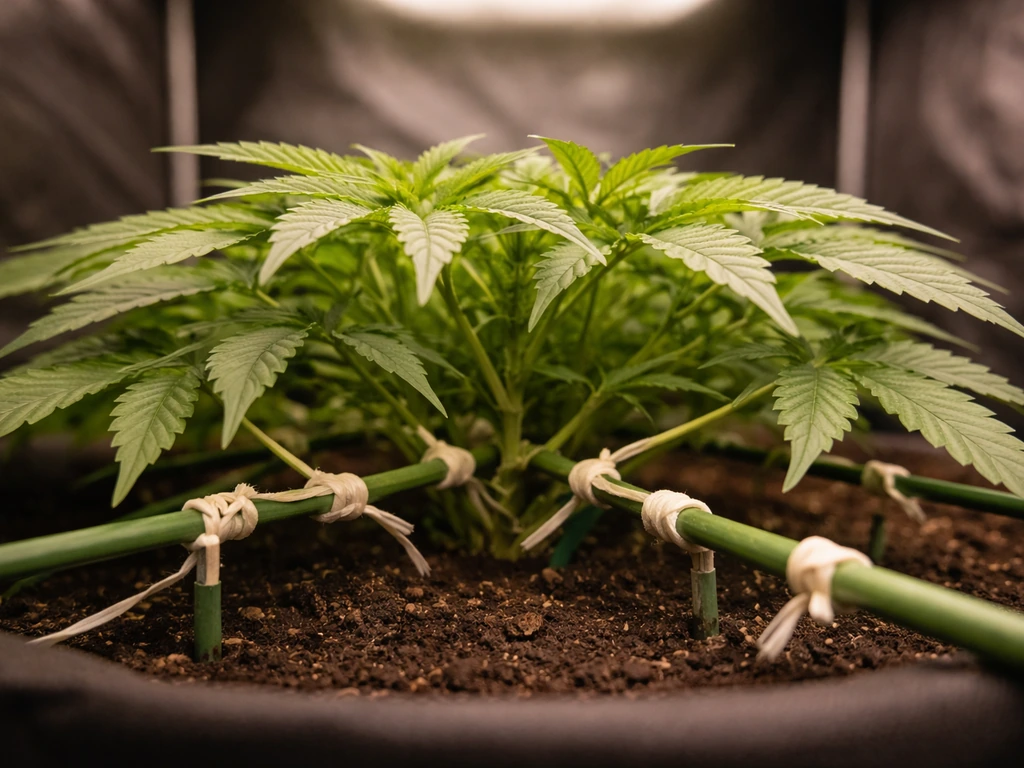
Training a single plant is one of the best ways to dramatically increase your yield without adding more plants. Low-stress training (LST) is the safest technique for beginners: gently bend the main stem sideways and tie it down with soft plant ties or twist ties anchored to the pot. This encourages lateral branches to grow upward and fills your canopy more evenly.
If you want to try topping (cutting the main stem to create two main colas), do it once the plant has developed past its 4th or 5th node. Topping requires a recovery period of a few days, so factor that into your veg timeline. Avoid heavy training on autoflowering plants because they do not have time to recover from stress.
Watering and nutrients in veg
Water when the top inch of soil is dry and the pot feels noticeably lighter than when freshly watered. Always water to runoff (about 10 to 20% of the water you put in should drain from the bottom of the pot) to prevent salt buildup in the medium. During veg, your plant wants nitrogen-forward nutrients. Most quality cannabis nutrient lines have a dedicated grow formula. Start at half the recommended dose, watch how the plant responds over a few days, and increase from there. It is much easier to correct an underfed plant than to flush out a nutrient-burned one.
Veg environment targets
- Temperature: 20 to 28°C (68 to 82°F)
- Relative humidity: 50 to 75%
- Light cycle: 18 hours on / 6 hours off for photoperiod; 18/6 or 20/4 for autos
- CO2: ambient (no supplementation needed for a single small plant in a vented tent)
- Air exchange: full tent volume exchanged every 1 to 3 minutes via inline fan
Flowering stage and harvest timing
For photoperiod plants, you trigger flowering by switching your light timer to 12 hours on and 12 hours off. Do this when your plant has reached roughly half the final height you want, because most strains will stretch 50 to 100% taller during the first two weeks of flower. Autoflowering plants handle this on their own timeline; you just watch for the appearance of pistils (the white hair-like structures at bud sites) which signals they have entered flower.
Flowering typically takes 8 to 11 weeks for most strains, with the bulk of bud development happening in weeks 3 through 6, and the finishing and ripening phase running from roughly weeks 6 through 8 or beyond depending on the strain. During flowering, drop your humidity to 40 to 50% RH to reduce the risk of bud rot (botrytis), which thrives in warm, humid, stagnant air.
Reading harvest readiness
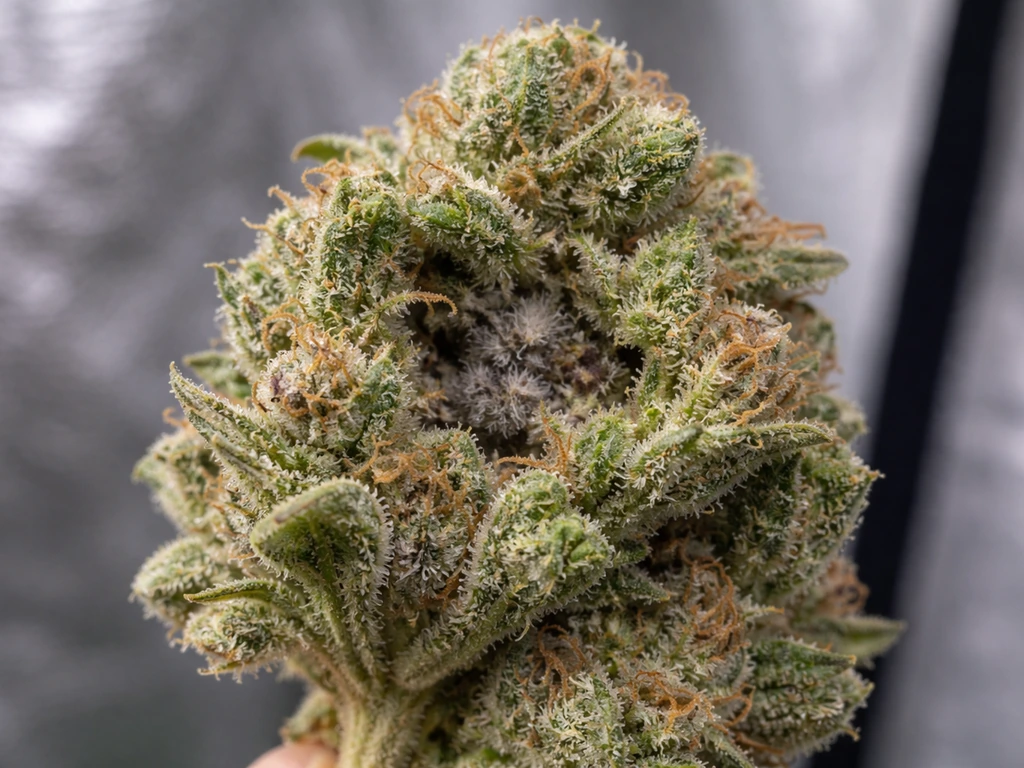
The most reliable harvest indicator is trichome color, and you need a jeweler's loupe (30x to 60x) or a digital microscope to see it properly. Trichomes start out clear, then turn milky white as THC production peaks, and eventually shift to amber as THC degrades to CBN. Harvest when the majority of trichomes are milky white with a small number turning amber, typically 5 to 10%. This window gives you the most potent, balanced effect. If you prefer a more sedative result, wait until more trichomes have gone amber. A secondary signal to watch is pistil color: by late flower, most white pistils will have darkened to orange or red. Both indicators together give you a clear harvest window.
Feeding, medium, and environment optimization
The medium you grow in shapes your feeding approach more than almost anything else. Soil is the most forgiving for beginners because it buffers pH swings and holds nutrients between waterings. Coco coir is faster-draining and more responsive, requiring more frequent feeding but giving you more control. Hydroponic systems (like DWC) are the most technical but can produce very fast growth. For a first single-plant grow, a quality pre-amended soil mix in a 3 to 5 gallon fabric pot is the most straightforward path.
| Medium | Watering frequency | Nutrient control | pH target | Beginner rating |
|---|---|---|---|---|
| Soil | Every 2 to 4 days | Less precise needed | 6.0 to 7.0 | Best |
| Coco coir | Daily or every other day | Precise, every feed | 5.5 to 6.5 | Moderate |
| Hydro (DWC) | Continuous (reservoir) | Very precise | 5.5 to 6.2 | Advanced |
pH is the single most overlooked variable by beginners and the cause of more problems than any other factor. If your pH is off, the plant literally cannot absorb nutrients even if they are right there in the medium. Always pH your water and nutrient solution before feeding. For soil, target 6.0 to 7.0. For coco or hydro, target 5.5 to 6.5. Invest in a decent digital pH pen and calibrate it regularly with calibration solution.
For environment optimization in the flowering stage, target a VPD (vapor pressure deficit) of 1.2 to 1.6 kPa. VPD is a combined measure of temperature and humidity that tells you how hard the plant is working to move water through its system. At a high VPD the plant transpires aggressively and may stress; at a low VPD it cannot transpire efficiently and becomes vulnerable to mold. You do not need to calculate VPD manually: any VPD chart cross-referencing leaf temperature and relative humidity will give you the target zone quickly. In practical terms, for flower this usually means keeping temperatures around 22 to 26°C with RH at 40 to 50%.
Troubleshooting common indoor problems
Every indoor grower runs into problems. Here are the ones you will most likely face in a single-plant grow, and what to do about each of them.
Stretching and leggy seedlings
If your seedling is growing tall and thin with a lot of space between nodes, it is reaching for light that is too far away. Move the light closer (while staying within the manufacturer's safe range) or increase intensity. Seedlings that are already stretched can be planted deeper when transplanting to bury the weak stem section.
Overwatering and underwatering
Both cause drooping, but as mentioned earlier the texture of the leaves differs. The fix for overwatering is to simply wait longer between waterings and make sure your pot has adequate drainage. If you are in soil and the top two inches are still moist, do not water. The fix for underwatering is straightforward: water more thoroughly when you do water, and do not let the medium dry out completely to the point of the pot feeling bone-light and the plant wilting.
Nutrient deficiencies and toxicities
Yellowing lower leaves during late veg or mid-flower is often normal nitrogen mobilization, not a deficiency. Widespread yellowing across the canopy during active growth usually is a deficiency. Burnt, crispy, brown-tipped leaves almost always signal nutrient excess (often nitrogen or fertilizer salts). Before you add more nutrients, check your pH first. A lockout from incorrect pH looks identical to a genuine deficiency. Flush with pH-correct water, recheck runoff pH and EC, and adjust from there.
Pests
Spider mites, fungus gnats, and thrips are the most common indoor pests. Fungus gnats come from overwatered soil and lay eggs in moist medium. Let the top layer dry out between waterings and use yellow sticky traps to monitor adults. Spider mites appear as tiny dots on the underside of leaves with fine webbing; they thrive in hot, dry conditions. Keeping humidity in the appropriate range and maintaining good airflow reduces mite risk significantly. If you catch a pest problem early, neem oil or insecticidal soap sprays handle most infestations before they become serious.
Mold and bud rot
Botrytis (gray mold) is a late-flower killer and it starts inside dense buds where you cannot easily see it. Prevention is your only real tool: keep RH below 50% during flower, ensure strong airflow through and around the canopy (this is where that oscillating fan inside the tent earns its keep), and do not let dense colas touch each other. If you find infected bud, remove it immediately and sanitize your tools before touching anything else in the tent.
Light and temperature stress
Leaves curling upward (tacoing) during the day often signal heat or light stress. Check canopy temperature with a handheld thermometer: if it is above 28°C at canopy level, raise your light, increase exhaust fan speed, or both. Light bleaching shows as white or pale yellow coloring at the top of the plant closest to the light, not to be confused with nutrient issues which start lower on the plant.
Legal compliance, safety, and your next-step checklist
Growing responsibly means more than just staying within your plant count. It means securing your grow space so children and unauthorized people cannot access it. It means managing odor so you are not creating a nuisance or drawing unwanted attention. For a full step-by-step walkthrough of how to grow weed indoors, follow this guide from setup through flowering and harvest. Carbon filtration handles most odor control in a sealed tent environment. It also means being honest with yourself about your jurisdiction's rules and not rationalizing past them. If you are in a state or country where cultivation is not yet legal, no grow guide is worth a criminal record.
Here is a practical checklist to work through before and during your first grow:
- Confirm home cultivation is legal in your jurisdiction and note your plant limit
- Identify a secure, lockable space for your grow tent
- Purchase or assemble your core equipment: tent, LED light, inline fan, carbon filter, ducting, fabric pot, pH meter, timer
- Choose a beginner-friendly strain (autoflowering recommended for a first grow)
- Germinate your seed using the paper towel method at 22 to 25°C in a dark, moist environment
- Transplant once the taproot is visible, root-side down, and move under light at reduced intensity
- Set your light timer: 18 hours on / 6 hours off for veg (or full grow for autos)
- Monitor temperature (20 to 28°C) and humidity (50 to 75% in veg, 40 to 50% in flower) daily
- Water only when the top inch of medium is dry and the pot has lightened noticeably
- pH all water and nutrient solution before feeding (6.0 to 7.0 for soil, 5.5 to 6.5 for coco/hydro)
- Start nutrients at half the recommended dose and adjust based on plant response
- Top or begin LST training after the 4th or 5th node if growing a photoperiod strain
- Switch photoperiod plants to 12/12 light when plant is at half the desired final height
- Drop RH to 40 to 50% at the start of flower to prevent mold
- Monitor trichomes with a loupe in the last 2 to 3 weeks: harvest when mostly milky white with a few amber
- After harvest, dry in a dark space at 15 to 21°C and 55 to 65% RH for 7 to 14 days before curing
One plant is a genuinely achievable project for a complete beginner. The learning curve is steep at first because there is a lot to absorb, but most of what you need to know comes down to watching your plant closely, staying consistent with your environment, and not panicking when something looks slightly off.
If you want to go deeper on the specifics of any single stage, or if you are thinking about scaling up from one plant, there are detailed guides covering each phase in more depth, including fast-track techniques for growers who want to shorten the timeline, beginner-specific walkthroughs that start from absolute zero, and step-by-step guidance for managing a single plant through every week of its life. If you want an even more beginner-friendly roadmap, a “how to grow weed for dummies” book can be a helpful companion as you follow each stage day by day how to grow weed for dummies book.
If you want to see these stages demonstrated visually, search for how to grow weed indoors videos as a related option for each step. If you are trying to use fast-track techniques to shorten the timeline, focus on dialing in lighting, nutrients, and environmental stability from day one. Start with one plant, take notes, and trust the process. For more detail on the basics, see the guide on how to grow weed indoors for dummies.
FAQ
Do I need to start with seeds, or can I use clones when learning how to grow cannabis indoors?
For indoor grows, seed choice matters, but your legal ability to obtain seeds matters too. If you can legally grow where you live, pick a breeder that provides flowering time and height estimates, then plan for your tent size rather than the maximum advertised yield. If you cannot legally cultivate, avoid purchasing or germinating materials, since possession can be treated differently than growing.
What happens if I accidentally change the light schedule on a photoperiod plant?
If you keep running vegetative lighting on a photoperiod plant, it will not reliably flower. You must switch to a 12 hours on, 12 hours off schedule (consistent timing, no light leaks). If you accidentally interrupt the dark period (briefly turning on a room light near the tent), you can delay flowering or cause instability. Using a timer with a backup power option helps prevent accidental schedule drift.
How do I know if my tent is too hot for my LED setup?
A “small tent” can still get heat-soaked. Before you start, measure canopy temperature during the same hours your lights run, with the exact fan and filter setup you plan to use. If you are repeatedly above 28°C at canopy height, the fix is usually not just raising lights, it is improving exhaust flow and sealing air leaks so hot air is actually removed from the tent.
Should I always water until runoff, and how do I avoid drowning a single plant?
For a single-plant soil grow, a practical default is to use a fabric pot that drains well and only adjust watering based on how the pot feels and how moist the medium is 1 to 2 inches down. If you use runoff, aim for a consistent small amount each time and then recheck how quickly runoff occurs. Very fast runoff can mean the soil is drying unevenly or that the medium is too compacted.
If I’m using pre-amended soil, do I still need to check pH regularly?
Yes, pH testing matters even when you use pre-amended soil, but the “where” and “when” differ. Soil is buffered, so you might not see dramatic swings, yet nutrient lockouts still happen. If you see symptoms that do not improve after watering and time, check pH of your input water and, when possible, measure runoff pH to confirm whether the medium is drifting out of the target range.
How do I avoid nutrient burn when following how to grow cannabis indoors?
Start with a conservative fertilizer approach. Begin at about half strength, then only increase after the plant shows steady new growth without clawing, dark overly green leaves, or burnt tips. If you suspect a nutrient burn, do not keep feeding “through it,” instead pause feeding, confirm pH, and let the plant uptake recover.
What’s the safest way to prevent bud rot in a small single-plant tent?
Letting humidity stay too high into flower is a common mistake. If RH is too high, bud rot can start inside dense flowers where you cannot see it early. The best prevention is maintaining 40 to 50% RH in flower, plus ensuring airflow across and between branches, not just a fan blowing at the plant from one side.
How can I reduce the risk of spider mites, gnats, or thrips before they spread?
Even if your environment seems fine, pests can hitchhike on clothing, tools, or from unclean plants. Quarantine anything new (including clones or starter plants) in a separate space for at least a week, inspect underside of leaves daily at first, and use sticky traps to monitor adults. Early detection is far more effective than chasing a heavy infestation.
Do I really need to calculate VPD to grow successfully indoors?
A “balanced” VPD is useful, but you should not chase VPD numbers if you cannot measure leaf or canopy conditions reliably. Instead, treat VPD as a target range and use canopy temperature plus RH as your daily guardrails. If the plant is wilting in flower while RH is low, VPD may be too high for your setup, and you may need to reduce temperature or increase humidity slightly.
How do I choose the exact harvest day if trichomes and pistils disagree?
You should not wait for only one indicator. Trichomes tell potency timing, but pistils and leaf fade provide context on maturity. Harvest too early usually looks like more clear trichomes and a less developed bulk, harvest too late pushes more amber and a heavier effect. If most trichomes are milky with a small amber fraction, that is typically the window for balanced potency.
Which medium is easiest for a first time grower, soil, coco, or hydro?
Your medium choice changes how often you feed and how you handle water quality. Coco generally needs more frequent feeding and tighter pH control because it does not buffer nutrients the same way soil does. Hydroponics is fastest but has the least margin for error, since problems in nutrient strength or dissolved oxygen show up quickly.
What should I check if my carbon filter is not controlling odor in a small tent?
Even for one plant, odor management has practical limits. Carbon filters work best with the right fan sizing and a fully sealed tent path. If you notice odor escaping, the likely causes are underpowered airflow, duct leaks, or insufficient time for air to pass through the filter. Improve sealing and confirm your filter rating matches your fan CFM, then retest by running the system and checking for leaks.
Next Article
How to Grow 1 Pound Per Plant: Yield Guide for Beginners
Step-by-step plan to grow ~1 lb per plant using strain choice, light, training, feeding, and troubleshooting for beginne