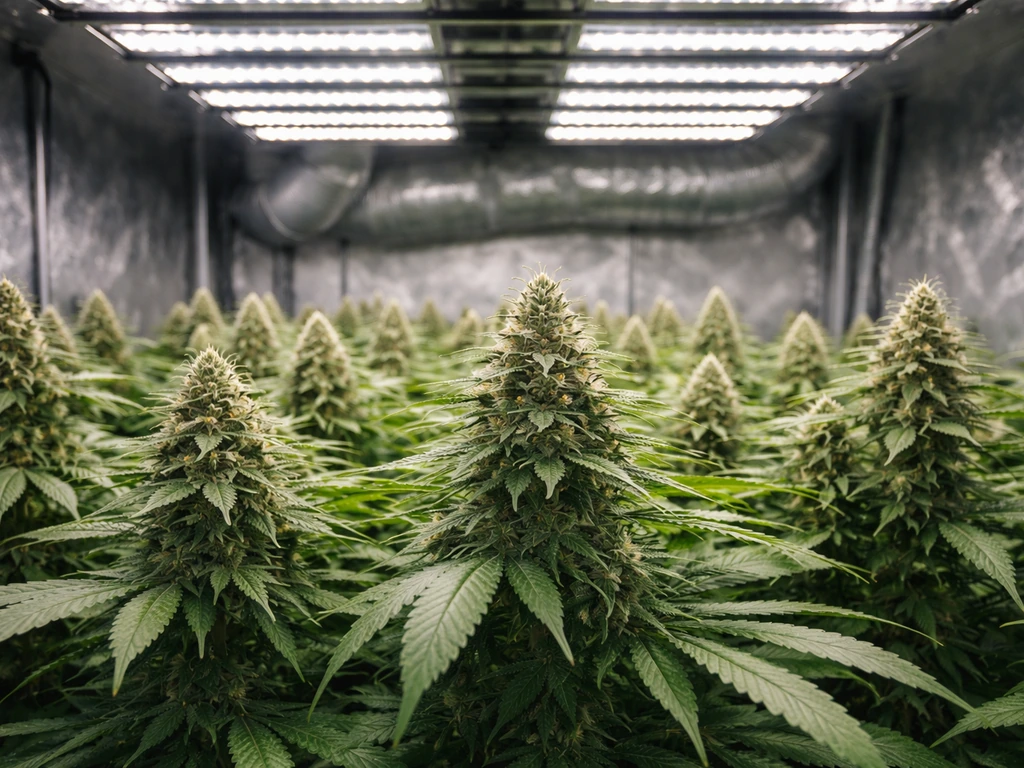
Yes, you can absolutely grow clones outdoors, and in many ways it is easier than starting from seed. A rooted clone skips the germination stage entirely, giving you a head start of two to four weeks compared to a seedling. The catch is that clones need a gentle transition from the controlled indoor environment where they were rooted to the harsher conditions outside, and your seasonal window has to line up with your local climate. Get those two things right and outdoor clone growing is one of the most rewarding ways to produce cannabis at home.
How to Grow Clones Outdoors: Step-by-Step for Beginners

Marcus Holbrook
11 Aug 2026
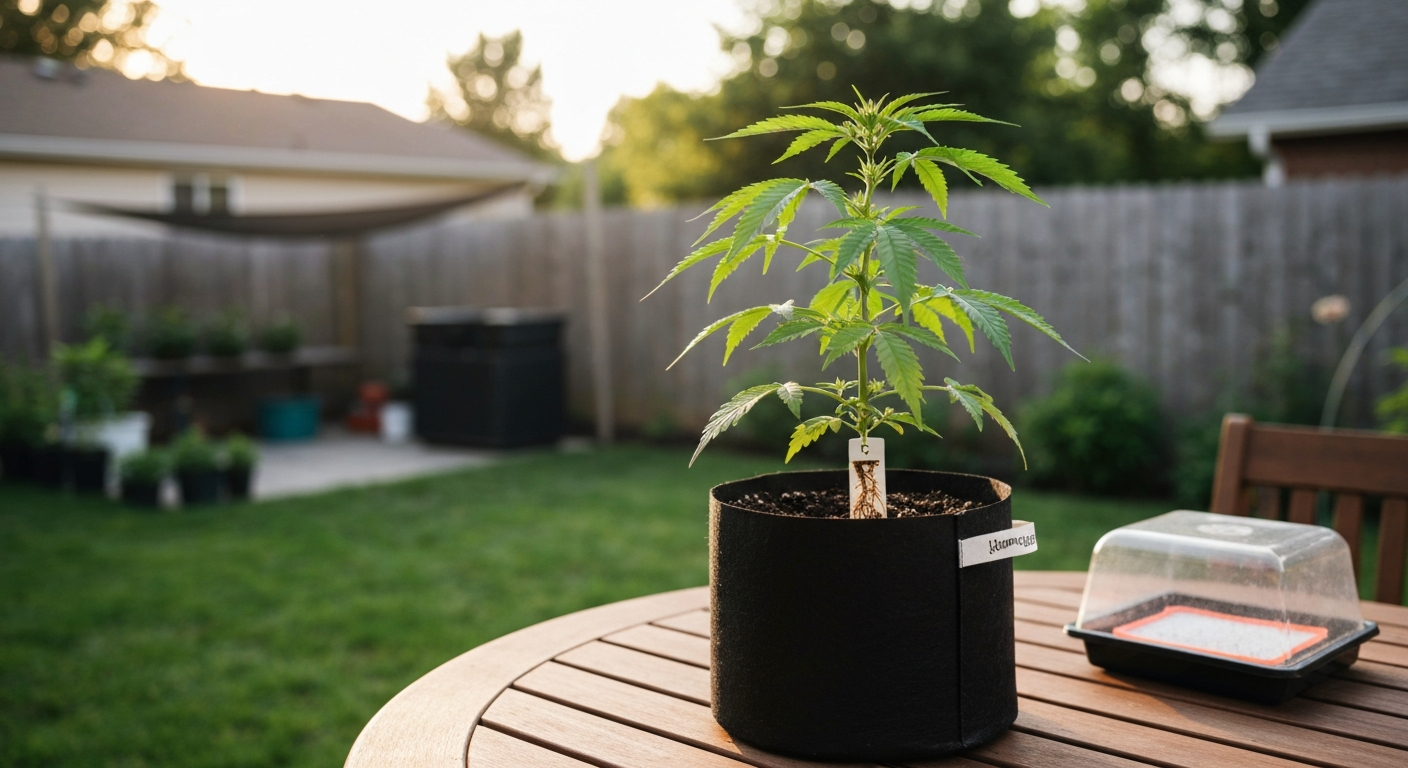
Can you grow clones outdoors?
The simple horticultural answer is yes. Clones are cuttings from a known mother plant that have been rooted, and once they have an established root system they behave like any young cannabis plant. Outdoors, photoperiod varieties will vegetate through the long summer days and then flower automatically as day length shortens past roughly 12 hours of direct light, usually in late summer at most latitudes in the Northern Hemisphere. Autoflowering clones are far less common (and less practical, since autos do not clone as reliably), so this guide focuses on photoperiod genetics.
Seasonally, your two hard limits are frost dates and day length. Cannabis is frost-sensitive, so clones cannot go outside until your last average frost date has passed, and you need plants to finish flowering before your first fall frost arrives. The USDA Plant Hardiness Zone Map and NOAA's frost date climatologies for your zip code are the two tools I use every spring to pin down my safe window. The US Naval Observatory's sunrise/sunset calculator is equally useful for knowing exactly when day length will drop below 12 hours at your latitude, which tells you roughly when flowering will kick off.
Legal responsibilities, sourcing clones, and dispensary-sourced plants
Before you buy a clone or cut one from a mother plant, you need to understand where you stand legally. Under U.S. federal law, cannabis remains a Schedule I controlled substance under the Controlled Substances Act (21 U.S.C. §812), and federal prohibition applies regardless of what your state law says. As of mid-2026, rescheduling rulemaking activity is ongoing through the DEA and Department of Justice, but no federal rescheduling has been finalized, so federal risk still exists. Always check your current state and local rules before you do anything.
At the state level, rules vary enormously. California's Proposition 64 allows adults 21 and older to cultivate up to six living plants per person. Oregon caps non-commercial outdoor cultivation at four plants per household under ORS 475C. Washington State currently prohibits recreational home cultivation for most adults, with a limited exception for registered medical patients. These are just three examples, and the picture changes from state to state and even city to city. Municipal zoning codes frequently layer additional restrictions on top of state law, including setbacks from property lines, visibility requirements, and outright local bans. Check your municipal code (Municode is a good searchable archive for this) before you plant a single clone outside.
For sourcing, you have two main options: cut clones yourself from a mother plant you already own, or purchase rooted clones from a licensed dispensary where that is permitted. Dispensary-sourced clones are convenient and often come with strain information and a clean bill of health from a tested facility. If you are buying from a dispensary, confirm the clone is fully rooted (not just a fresh cut), ask about any pest or disease history, and quarantine it for a few days before it goes near other plants. The process of working with dispensary-sourced plants is worth understanding in detail, and the legal landscape around that particular sourcing route deserves its own close look. For detailed best practices on working with dispensary-sourced plants, see our guide on how to grow weed for dispensaries.
Choosing strains for your climate and seasonal timing
Not every strain is cut out for your outdoor environment, and this is where I see beginners make their first big mistake. Picking a strain based on reviews alone without checking its finish time is a recipe for watching plants get hit by frost mid-flower. The two things you need to match are finish time and climate resilience.
Finish time matters because photoperiod plants begin flowering when day length drops below roughly 12 hours. At 45 degrees north latitude, that happens around mid-August to early September, and most strains then need 8 to 10 weeks to finish. Do the math: a 10-week finisher triggered in early September won't be ready until mid-November in many regions, well past first frost. In shorter-season climates (northern U.S., Canada, northern Europe) you want strains specifically bred to finish in 7 to 8 weeks of flower, often labeled as 'early' or developed from Ruderalis-influenced genetics without being full autos. In warmer climates like coastal California or the Gulf South, longer-finishing sativas or sativa-dominant hybrids are completely viable.
Climate resilience is the second filter. Dense, humid-loving strains are mold magnets in wet climates. If you are in the Pacific Northwest or the northeastern U.S. where fall brings rain and humidity, look for strains with known mold resistance, often described as having open bud structure or noted resistance to Botrytis. Conversely, hot and arid climates in the Southwest suit almost any indica or hybrid but may stress thin-leafed sativas that prefer milder, humid air.
Materials and tools you will need
- Rooting hormone (gel or powder containing IBA or NAA)
- Propagation cubes (rockwool, peat/coco plugs, or rapid rooters)
- Humidity dome and seedling tray
- Small heat mat (target: 68-77°F / 20-25°C at root zone)
- Low-intensity fluorescent or T5 grow light for rooting stage
- Sharp sterile blade or razor (isopropyl alcohol for sterilizing)
- pH meter and pH adjustment solution (target: 5.8-6.3 for most media)
- EC/TDS meter for nutrient solution strength
- Containers: 1-gallon starter pots, then 5-gallon or larger final pots (or in-ground bed)
- Quality outdoor cannabis soil or amended garden mix
- Perlite (add 20-30% to improve drainage)
- Slow-release granular fertilizer or liquid nutrients (N-P-K, plus Cal-Mag)
- Watering can or drip irrigation
- Bamboo stakes and soft plant ties
- Row cover or frost cloth for late-season protection
- Loupe or jeweler's magnifier (60-100x) for harvest timing
- Clean pruning shears (isopropyl-sterilized)
- Drying rack or hanging lines for harvest
- Hygrometer/thermometer for drying space
- Mason jars or airtight containers for curing
Step-by-step workflow overview: from clone to harvest
Here is the big-picture sequence before we go deep on each stage. Thinking about the whole arc before you start helps you avoid rushing any single phase, which is the most common beginner pitfall.
- Source or take your clone (Week 0)
- Root the clone indoors under a humidity dome (Days 1-14)
- Begin hardening off once roots are established (Days 14-21)
- Transplant into starter container or prepare in-ground site (Day 21-28, after last frost)
- Vegetative growth outdoors (typically 4-10 weeks depending on when you transplant)
- Flowering triggered by shortening days (late summer, varies by latitude)
- Flowering period care: nutrients, IPM, training (8-10 weeks)
- Harvest when trichomes show target maturity
- Dry for 7-14 days, then cure in sealed jars for 2-8 weeks
| Stage | Approximate Timing | Key Target |
|---|---|---|
| Clone sourcing/cutting | Week 0 | Healthy, pest-free cutting from known strain |
| Rooting under dome | Days 1-14 | Visible roots, 68-77°F, 70-90% RH |
| Hardening off | Days 14-21 | Gradual sun exposure, no wilt |
| Transplant outdoors | After last frost date | Soil temp above 60°F (15°C) |
| Vegetative stage | Late spring through midsummer | Strong structure, trained canopy |
| Flower trigger | Day length drops below ~12 hrs | Lat-dependent: Aug-Sep in most of N. America |
| Flowering period | 8-10 weeks post-trigger | IPM, feed support, no stress |
| Harvest window | Sept-Nov depending on strain/location | Trichomes cloudy to amber |
| Drying | 7-14 days at 65-70°F, 45-55% RH | Stems snap, not bend |
| Curing | Minimum 2 weeks, ideally 4-8 weeks | Burp jars daily for first 2 weeks |
Rooting clones outdoors: timing, media, rooting hormone, and humidity setup
Clones should be rooted indoors before they ever see the outdoors. For a full step-by-step guide, see how to grow weed clones. This is not optional. Even a warm summer day outside is too variable for an unrooted cutting. You want a stable, controlled environment first.
Taking a cutting (if you are not buying pre-rooted)
Choose a healthy branch tip with at least two nodes. Using a sterile, sharp blade, cut at a 45-degree angle just below a node. The angled cut increases surface area for root development. Immediately dip the cut end in rooting gel or powder containing indole-3-butyric acid (IBA) or naphthaleneacetic acid (NAA), both of which are auxin compounds that stimulate root initiation. Plant the coated stem 1 to 1.5 inches deep into a pre-moistened propagation cube or rapid rooter plug. Handle the cutting gently because wilted clones are harder to root.
The rooting environment
Place the planted cubes in a seedling tray, cover with a humidity dome, and set the tray on a heat mat. blank" rel="noopener noreferrer">Your targets are an ambient air temperature of 68 to 77°F (20 to 25°C) and relative humidity inside the dome of 70 to 90%. High humidity reduces transpiration stress on cuttings that have no roots yet to supply water. Light should be low intensity, around 200 to 400 lux, from a T5 or fluorescent fixture on an 18/6 schedule. Direct high-intensity light at this stage stresses unrooted cuttings. Crack the dome slightly after Day 5 to prevent excessive moisture buildup and reduce mold risk. blank" rel="noopener noreferrer">Most cannabis clones show visible roots emerging from the cube in 7 to 14 days under these conditions, though some cuts from woody or stressed mothers can take up to 21 days. Once white roots are poking out of the cube by at least half an inch, the clone is ready to move forward.
If you bought a pre-rooted clone from a dispensary, inspect the root system before you do anything else. Healthy roots are white to light tan and should not smell musty. Brown, slimy, or sparse roots are a warning sign. A strong root ball means you can skip straight to hardening off.
Hardening off and acclimatization schedule
Hardening off is the process of slowly introducing your clone to outdoor conditions, and skipping it is probably the single most common mistake I see new growers make. A clone that has spent its entire life under a grow light indoors at 75°F will go into shock if you just put it outside in full sun. Wind, UV intensity, temperature swings, and low humidity can all cause wilting, bleaching, or stunted growth if the transition happens too fast. Give it a week to two weeks and it will reward you.
| Day | Sun Exposure | Duration Outside | Notes |
|---|---|---|---|
| Day 1-2 | Indirect/shade only | 1-2 hours | Choose a cloudy day if possible; watch for wilt |
| Day 3-4 | Morning sun (low intensity) | 2-3 hours | Move inside before midday heat |
| Day 5-6 | Morning sun + dappled afternoon | 4-5 hours | Check soil moisture; water if dry |
| Day 7-8 | 3-4 hours direct sun | 5-6 hours | Plant should look perky and upright |
| Day 9-10 | 5-6 hours direct sun | Full day | Overnight outside if temps stay above 55°F (13°C) |
| Day 11-14 | Full direct sun | Permanent outdoor placement | Transplant or move to final outdoor location |
During hardening off, watch for signs of stress: drooping leaves, yellowing edges, or bleached/white patches on leaves (light burn). A small amount of wilting in the afternoon is normal as the plant adjusts, but if the whole plant is still drooped by early morning it needs more time in shade. Keep a close eye on overnight temperatures during this phase. Cannabis clones are sensitive to cold, and anything below 50°F (10°C) will visibly slow growth or cause purpling of the stems. If a surprise cold snap is forecast, bring the clones back inside for the night.
Transplanting: containers vs. in-ground, soil mixes, and timing decisions
Once your clone is fully hardened off and your last frost date has passed with soil temperatures consistently above 60°F (15°C), it is time to transplant. You have two broad options: containers or in-ground planting, and each has real tradeoffs.
Containers vs. in-ground: a practical comparison
| Factor | Containers | In-Ground |
|---|---|---|
| Mobility | Can be moved for frost protection or light optimization | Fixed position |
| Root volume | Limited by pot size; 5-15 gallon pots common | Unrestricted; larger plants possible |
| Water/feed control | Easier to dial in; faster to flush | More complex; harder to correct |
| Soil quality | You fully control the mix | Depends on existing soil; may need amendment |
| Pest/disease risk | Slightly lower (better isolation) | Higher exposure to soil-borne pests |
| Setup cost | Moderate (pots, quality mix) | Lower if native soil is good |
| Plant size potential | Moderate (limited by pot) | Highest potential yield per plant |
For most home growers, especially beginners, I recommend starting with containers. A 5-gallon fabric pot is an excellent starting point for a clone that will veg for 4 to 6 weeks before flowering. If you have a long season and can get plants in the ground by mid-to-late May in most of the continental U.S., in-ground planting can produce significantly larger plants and higher yields. For guidance on scaling these methods into a legal commercial operation, see how to grow weed commercially. A transplant-sized hole of at least 2 cubic feet filled with amended soil is the minimum for a productive in-ground plant.
Building your soil mix
A good outdoor cannabis soil is loose, well-draining, and rich in organic matter. If you are using containers, a quality bagged cannabis-specific or general potting mix amended with 20 to 30% perlite works well. Aim for a pH of 6.0 to 7.0 for soil-based grows. For in-ground planting, test your native soil pH and adjust with lime (to raise) or sulfur (to lower) as needed several weeks in advance. Mix in compost, worm castings, and a balanced slow-release granular fertilizer at planting. Avoid soils with high bark content, which can lock up nitrogen as it breaks down.
Vegetative growth: watering, feeding, and training
Outdoors, vegetative growth happens naturally from the time you transplant until day length shortens enough to trigger flowering. Depending on your latitude and when you transplant, this could be anywhere from 4 weeks to 4 months of vegetative time. Longer veg equals bigger plants and higher potential yield, which is one of the key advantages of getting clones in the ground early.
Watering
The most reliable watering method for beginners is the finger test: push your finger 1 to 2 inches into the soil. If it feels dry, water thoroughly until runoff comes from the bottom of the container. If it still feels moist, wait another day. Containers dry out faster than in-ground beds, especially in heat and wind. In hot weather you may water containers daily; in cooler or cloudy stretches, every 2 to 3 days is more typical. Overwatering is the number one beginner mistake and it presents as drooping leaves with a 'claw' shape, yellowing from the bottom up, and slow growth. When in doubt, water less.
Feeding schedule outline
Cannabis in vegetative growth needs more nitrogen relative to phosphorus and potassium. During flower, the ratio shifts toward more phosphorus and potassium with reduced nitrogen. A simple liquid nutrient schedule for outdoor container plants looks like this: start at quarter-strength for the first two weeks after transplant, then move to half-strength through mid-veg, and full-strength by late veg. Watch for signs of nutrient burn (brown, crispy leaf tips) and back off if you see it. Calcium and magnesium deficiencies are common outdoors, especially in hot weather and with frequent watering. A Cal-Mag supplement added weekly during veg and early flower prevents most deficiency issues before they start. In-ground plants growing in rich amended soil often need little supplemental feeding during veg but will benefit from phosphorus/potassium support once flowering begins.
Training techniques
Training during veg improves airflow, light penetration, and ultimately yield. Low-stress training (LST) is the most beginner-friendly method: gently bend the main stem and tie it down to encourage lateral branching. Topping, which involves cutting off the main growing tip above a node, creates two main colas instead of one and is best done when the plant has 4 to 6 nodes and is actively growing. Do not top within two to three weeks of the expected flower trigger, as the plant needs time to recover. Defoliation should be minimal outdoors, since outdoor leaves serve as the plant's primary solar panel and protection against pests.
Flowering care: what changes when buds start forming
Once you see the first white pistils appear at bud sites (usually within two weeks of day length crossing below 12 hours), your plant is in flower. This is when your attentiveness pays off. Nutrient needs shift: reduce nitrogen and increase phosphorus and potassium to support bud development. Many growers switch to a 'bloom' formula at this point. Keep pH in range, 6.0 to 7.0 for soil, because phosphorus uptake is especially sensitive to pH swings.
Airflow becomes critical in flower to prevent Botrytis (bud rot), which can devastate a dense outdoor crop in humid fall conditions. If you are growing in a humid climate, remove large fan leaves that block airflow into the canopy every 1 to 2 weeks. Check inside dense bud clusters regularly, especially after rain. Brown or gray fluffy growth inside a bud is Botrytis and needs to be removed immediately with a clean blade and bagged, not composted.
Pest and disease prevention outdoors
Integrated Pest Management (IPM) is the framework used by professional and home growers alike. The core idea is that prevention and monitoring come before any chemical intervention, and that cultural controls (sanitation, spacing, plant health) are your first and most important line of defense.
Common outdoor pests and early signs
- Spider mites: tiny stippled dots on upper leaf surface, fine webbing underneath in heavy infestations
- Aphids: clusters of small soft-bodied insects on new growth and under leaves, sticky honeydew residue
- Caterpillars and budworms: irregular holes in leaves or frass (dark pellets) near bud sites
- Thrips: silver or bronze streaking on leaves, tiny elongated insects
- Root aphids: slow growth, yellowing despite good feed, white specks visible in soil at roots
- Powdery mildew: white powdery coating on leaf surfaces, more common in late veg and early flower
- Botrytis (bud rot): gray-brown mushy rot inside dense buds, worst in wet cool fall weather
Scout your plants every 2 to 3 days during the season, inspecting both sides of leaves and bud sites. Catching a pest problem in its early stage makes it manageable; ignoring it for two weeks can mean losing the crop. For approved treatments, neem oil and insecticidal soaps work well for soft-bodied insects like aphids and early spider mite infestations in veg. Spinosad is effective for caterpillars and thrips. Stop foliar spraying approximately 2 to 3 weeks before harvest to avoid residue on buds, and never spray flowering buds directly with oil-based products as this can cause mold. Always check your state's pesticide regulations before using any product on cannabis, as permitted pesticides vary by state.
Troubleshooting quick reference
| Symptom | Likely Cause | First Response |
|---|---|---|
| Yellowing from bottom up | Nitrogen deficiency or overwatering | Check soil moisture first; if dry, add nitrogen feed |
| Brown crispy leaf tips | Nutrient burn or salt buildup | Flush with plain pH-correct water, reduce feed strength |
| Spots with yellow halos on leaves | Calcium deficiency or early fungal issue | Add Cal-Mag; inspect for powdery mildew or fungal spots |
| Wilting despite moist soil | Root rot or overwatering | Let dry out; check roots for brown slime |
| Pale, bleached new growth | Light burn or iron deficiency | Move to partial shade; check pH (iron locks out above 7.0) |
| Slow growth in flower | Phosphorus/potassium deficiency | Switch to bloom formula; verify pH is 6.0-7.0 |
| Buds rotting from inside | Botrytis (gray mold) | Remove affected material immediately; improve airflow |
| White powder on leaves | Powdery mildew | Apply potassium bicarbonate or dilute hydrogen peroxide spray |
Knowing when to harvest
Harvest timing is the most impactful quality decision you will make, and you cannot assess it accurately with the naked eye alone. A 60x to 100x loupe or jeweler's magnifier is the essential tool here. Look at the trichomes on the buds (not the leaves, which mature faster). In the early harvest window, trichomes are mostly clear and glassy. As they ripen, they turn milky white or cloudy, which signals peak THC. As they continue aging, cloudy trichomes turn amber, indicating degradation of THC into CBN and a more sedative effect. Most growers harvest when 70 to 90% of trichomes are cloudy with a minority turning amber, though your personal preference and target effect will guide the exact call.
Pistil color is a secondary indicator: most plants show 70 to 90% of pistils darkening from white to orange or red at full maturity. Use both trichomes and pistils together rather than relying on one alone. Also check the bract (the small leaf structure directly under each pistil cluster) for swelling, which is a sign of full calyx development and ripeness.
Harvesting, drying, and curing your outdoor crop
Harvest in the morning after any dew has dried but before the heat of the day. If your plant is large, you can harvest in stages, taking the top colas first since they receive the most light and often mature a few days ahead of lower branches. Use sharp, sterile pruning shears and work cleanly to avoid bruising the buds.
Drying
Hang branches or lay buds on a drying rack in a cool, dark room with good air circulation. Target conditions are 65 to 70°F (18 to 21°C) and 45 to 55% relative humidity. At these conditions, most cannabis takes 7 to 14 days to dry to the point where small stems snap cleanly rather than bending. Rushing drying with heat or low humidity degrades terpenes and produces a harsh smoke. Peer-reviewed postharvest research shows that moisture content of approximately 10 to 13% and a water activity at or below 0.65 are the safe targets for storage, minimizing microbial risk while preserving cannabinoids and terpenes.
Curing
Once buds feel dry on the outside but still slightly supple in the center, trim off any remaining sugar leaves and transfer them to wide-mouth glass mason jars filled about 75% full. For the first two weeks, open the lids once or twice a day for 15 minutes (called 'burping') to release moisture and exchange gases. If the buds smell like ammonia when you open the jar, they were not quite dry enough and need the lid left off longer. After two weeks, burping once every few days is enough. Curing for a minimum of four weeks dramatically improves flavor, smoothness, and the subjective quality of the experience. Most growers who try a properly cured bud versus an under-cured one from the same harvest never go back to rushing it.
A few honest reminders before you get started
I have made almost every mistake in this guide at some point: I have skipped hardening off, picked strains that finished too late for my climate, and rushed drying because I was impatient. The step-by-step structure here exists because taking shortcuts on any individual stage usually costs you far more than the time you saved. Start with legal compliance in your jurisdiction as your non-negotiable foundation. Then work through each phase with patience, and the outdoor growing season will do a lot of the heavy lifting for you. The sun, the soil, and a well-rooted clone are a surprisingly capable team.
FAQ
What primary legal and jurisdictional sources do I need to check before writing about growing clones outdoors?
Start with federal law (DEA/Controlled Substances Act) to state the national legal baseline (DEA drug scheduling pages). Then check your target readers’ state statutes and agency guidance (e.g., California DCC, Oregon OHA, Washington LCB) for possession/cultivation limits and licensing. Finally, search municipal codes (Municode) for local bans, setbacks, visibility rules and nuisance ordinances. Cite specific statutes/agency pages and warn readers to confirm current local rules because state/federal rulemaking can change the risk picture.
Which authoritative sources determine seasonal timing and climate suitability for outdoor clones?
Use the USDA Plant Hardiness Zone Map for minimum-winter-temperature risk, NOAA/NWS frost/freeze climatologies for average first/last frost dates, and the USNO/NOAA sunrise‑sunset or daylength calculators to determine photoperiod dates that trigger flowering. These inputs let you set safe transplant windows and predict when photoperiodic plants will flip to flower.
What propagation and rooting references should be cited for accurate cloning methods?
Cite university extension propagation materials (NC State Extension Extension Gardener Handbook, WSU extension on stem cuttings) for general softwood/semi‑hardwood cutting best practices: clean tools, auxin rooting hormones (IBA/NAA), bottom heat (~20–25°C), high humidity domes/misters, and low-stress light. Supplement with reputable industry guides (e.g., Leafly clone guides) for cannabis‑specific rooting time ranges (3–14 days typical).
What specific step‑by‑step actions and timing should be included for sourcing, rooting and hardening clones?
Include steps: (1) verify legal ability to possess/cultivate; (2) source clones from licensed nurseries/dispensaries where required or take cuttings from healthy mother plants; (3) prepare sterile cutting tools and take 3–6" softwood cuttings; (4) apply rooting hormone and place in moist root medium (rockwool/root cubes/soil) under 70–90% RH with bottom heat 68–77°F; (5) expect roots ~7–14 days, monitor and keep humidity high; (6) start hardening off over 7–14 days by gradually increasing airflow and sunlight; (7) transplant outdoors after last-frost window and when roots are established. Tie each timing to local frost/photoperiod data.
What materials, tools and a concise checklist should the article provide?
Provide a beginner checklist: sterile pruners/scissors, rooting hormone (IBA/NAA), root medium (rockwool/root cubes/propagation soil), humidity dome/mister, heat mat (optional), pH meter, soil/containers (pots or in‑ground materials), balanced vegetative and bloom nutrients, water source, garden gloves, trellis/plant supports, IPM tools (sticky traps, magnifier), drying racks, hygrometer/thermometer. Recommend local sources and note regulated purchase restrictions for licensed clones in some states.
How should the article address container vs in‑ground planting choices and what authoritative guidance applies?
Summarize tradeoffs: containers give control over soil and mobility; in‑ground gives volume, buffering and often larger plants. Cite university extension guidance on container sizing, drainage, and soil mixes. Give container size recommendations (3–5 gal for small veg, 10–20+ gal for large plants) and advise soil depth, amendment rates and drainage best practices from extension sources.
Next Article
How to Grow Weed for Dispensaries: A Practical Guide
Grow dispensary-grade weed at home: legal basics, strain choice, indoor setups, nutrients, canopy, harvest, testing-read