Growing weed for dispensaries means getting a commercial cultivation license first. Without one, you legally cannot sell or transfer cannabis to a dispensary anywhere in the US, Canada, or most other regulated markets, full stop. What you can do as a home grower is build the exact same skills, systems, and quality standards that licensed commercial producers use, so that when you are ready to pursue licensing, or simply want to grow the best possible flower, you know exactly what dispensary-grade production looks like from the inside.
How to Grow Weed for Dispensaries: A Practical Guide

Marcus Holbrook
1 Jun 2026
This guide covers both sides: the legal landscape you need to understand before you think about supplying anyone, and the practical cultivation roadmap covering strain selection, environment, nutrients, training, harvest, and curing that gets your product to dispensary quality expectations. Whether you are a complete beginner or a home grower who has already run a few cycles and wants to scale up, this is the practical breakdown you are looking for.
The Legal Reality: Licensing Comes Before Everything

Let me be direct here because this is the part most people gloss over. In Massachusetts, only a licensed marijuana cultivator or microbusiness may cultivate marijuana for adult-use sale to marijuana establishments like dispensaries (935 CMR 500.120). Adults can grow a limited number of plants at their primary residence for personal use, but that personal-use allowance does not authorize sales or transfers to any commercial entity. The moment you hand cannabis to a dispensary without a license, you are operating outside the law.
Canada works the same way. The Cannabis Act creates a strict legal framework controlling production, distribution, sale, and possession. Adults may grow a limited number of plants for personal use, but Health Canada is explicit: you cannot sell homegrown cannabis unless you hold the appropriate license. British Columbia specifically warns that growing or selling cannabis in violation of the Cannabis Act or the Cannabis Control and Licensing Act is a criminal offence, with penalties including seizure, fines, and jail time. Rhode Island structures home cultivation as a personal-use activity, not a retail supply channel.
If you are in the EU, the picture is even more fragmented. The European Union Drugs Agency (EUDA) notes that penalties for cannabis cultivation and supply vary significantly across Member States, and blank" rel="noopener noreferrer">imprisonment is a possible outcome in many countries. There is no single EU answer, so check your national and local law carefully.
The bottom line: use this guide to build commercial-quality skills at home, and if you want to actually supply a dispensary, pursue a cultivation license in your jurisdiction. The application processes are detailed and often expensive, but they are the only legal path to the commercial market.
What "Dispensary-Grade" Actually Means
Most home growers think dispensary quality is just about potency and aesthetics, but commercial expectations go much deeper than that. Licensed cultivators operate inside a seed-to-sale tracking system, Metrc in California and New York, for example, where every batch gets a unique identifier tied to its Certificate of Analysis (COA). That COA records pesticide residues, mold and mildew, heavy metals, cannabinoid percentages, and terpene profiles. In California, the COA is uploaded by the licensed testing lab with a Passed or Failed status before the product can move through distribution to retail. Massachusetts regulations require products to be screened for safety contaminants including mold, mildew, and heavy metals as part of their testing framework.
Canada takes pesticide testing especially seriously. Health Canada requires mandatory testing on a representative sample of each lot or batch, with reporting obligations if residues are found, and quarantine steps if positive results come back. Resampling a failed batch without written regulatory approval is not permitted in California's framework either.
What this means practically for you as a grower: dispensary-grade production is about consistency, documentation, and clean growing practices, not just big buds. Every batch needs to look and test the same as the last one. You need to be able to account for every input, including nutrients, pesticides, and water sources. And your finished product needs to survive independent lab scrutiny. Build those habits now, whether or not you ever pursue a license.
Choosing Strains and Setting Your Product Goals
Before you plant a single seed or root a single clone, decide what you are growing toward. Are you aiming for premium dried flower? Concentrate feedstock? High-CBD wellness products? Each target changes which strains make sense and how you will manage the grow.
Flower vs. Concentrate vs. CBD: How the Goal Shapes the Strain
- Premium flower: prioritize trichome density, terpene expression, and bud structure. Strains like Wedding Cake, Gelato, Runtz, and MAC (Miracle Alien Cookies) consistently perform well in this category. Look for genetics that finish with dense, aromatic buds and a clear visual appeal.
- Concentrate feedstock: total cannabinoid content and resin production matter most. High-THC strains like Gorilla Glue #4, OG Kush, and Zkittlez are popular choices. You can tolerate slightly looser bud structure when the resin glands are abundant.
- High-CBD or balanced ratios: strains like Charlotte's Web, Lifter, or ACDC suit wellness-focused markets. These are also often more forgiving to grow and less likely to attract pests.
- Autoflowering strains: faster cycles (60 to 75 days seed to harvest) and no light-schedule dependency make autos appealing for beginners, but they generally produce lower yields and are harder to clone reliably, which limits consistency.
For dispensary-quality consistency, photoperiod feminized strains from reputable breeders are the standard. They are clone-able, predictable, and proven across thousands of commercial rooms. If you are thinking about cloning dispensary purchases to work with proven genetics, that topic connects closely to what a clone-based commercial operation looks like in practice. If you are wondering how to grow a clone from the dispensary, focus first on the legal and compliance rules, then on creating stable mother plants and clean propagation.
Pick two or three strains maximum when starting out. Mastering a small genetic library beats mediocre results across ten different cultivars. Commercial producers often run the same proven strains for years before rotating.
Setting Up Your Grow: Indoor vs. Greenhouse
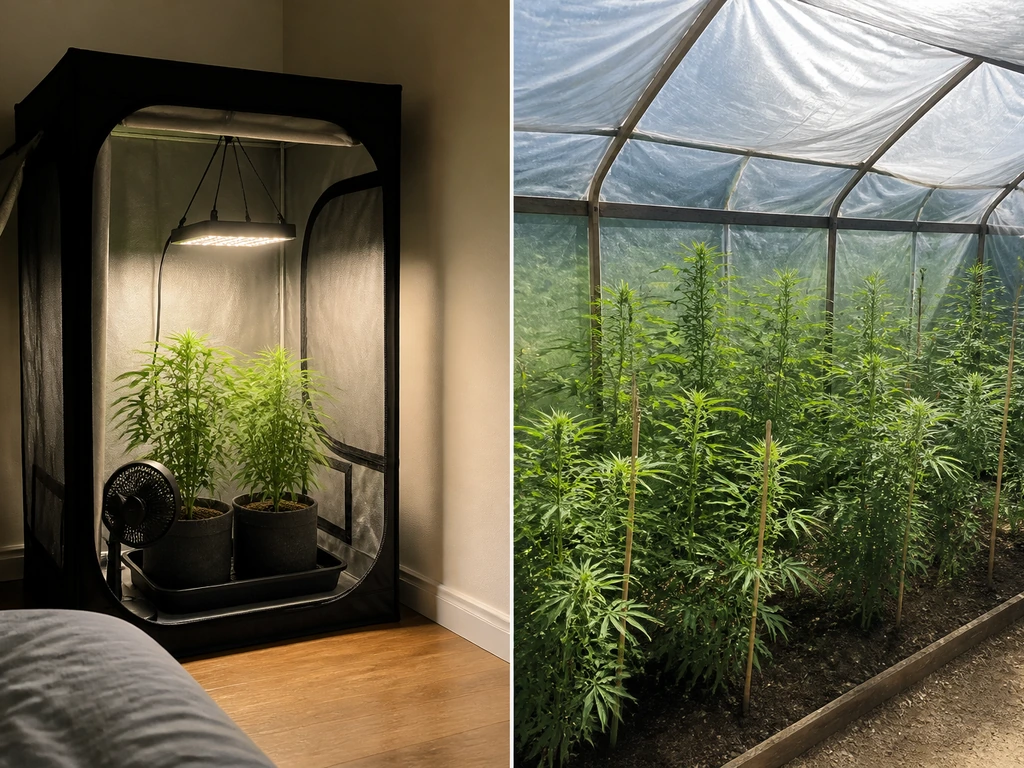
Both indoor and greenhouse grows can produce dispensary-quality cannabis. The choice comes down to your budget, climate, and how much environmental control you need. Outdoor-only grows are generally not viable for commercial production because you cannot control humidity, temperature, or light cycle precisely enough to meet consistent quality standards.
| Factor | Indoor | Greenhouse |
|---|---|---|
| Light control | Full control via artificial lighting (LEDs or HPS) | Natural light supplemented; light deprivation tarps for flower timing |
| Temperature control | Requires HVAC; 70-85°F (21-29°C) in veg, 65-80°F (18-26°C) in flower | Easier in moderate climates; still needs ventilation and heating |
| Humidity control | Active dehumidification required; 40-70% RH in veg, 40-50% in flower | More challenging; requires ventilation fans and vents |
| Startup cost | Higher (lighting, HVAC, electrical) | Lower per square foot; structure cost varies widely |
| Year-round production | Yes, fully controllable | Climate-dependent; light dep enables multiple cycles |
| Pest/mold risk | Lower with good air management | Higher exposure to outdoor pests and humidity swings |
| Yield consistency | Highest; fully repeatable environment | Good with proper management; varies seasonally |
My recommendation: if you are learning and building toward commercial quality, start with a controlled indoor space. A 4x4 or 4x8 tent setup gives you full environmental control and is close enough to a licensed commercial grow room that the skills transfer directly. Greenhouses are excellent for scaling cost-effectively once you have mastered the basics indoors.
Environmental Targets to Hit Every Cycle
- Vegetative stage temperature: 70-85°F (21-29°C) with lights on, 10-15°F cooler with lights off
- Flower stage temperature: 65-80°F (18-26°C); cooler nights (58-70°F) in the last two weeks encourage terpene preservation and color development
- Relative humidity: 60-70% during seedling/early veg, 40-60% in late veg and early flower, 40-50% in mid flower, and 35-45% in the final two weeks to prevent botrytis (bud rot)
- CO2 levels: ambient (400 ppm) is fine for most home setups; supplemental CO2 at 1000-1500 ppm increases yields meaningfully only if your lighting and nutrients are already dialed in
- Air circulation: one full air exchange every 1-3 minutes in the grow space; oscillating fans to prevent hotspots and strengthen stems
- VPD (Vapor Pressure Deficit): target 0.8-1.1 kPa in veg and 1.0-1.5 kPa in flower for optimal transpiration and nutrient uptake
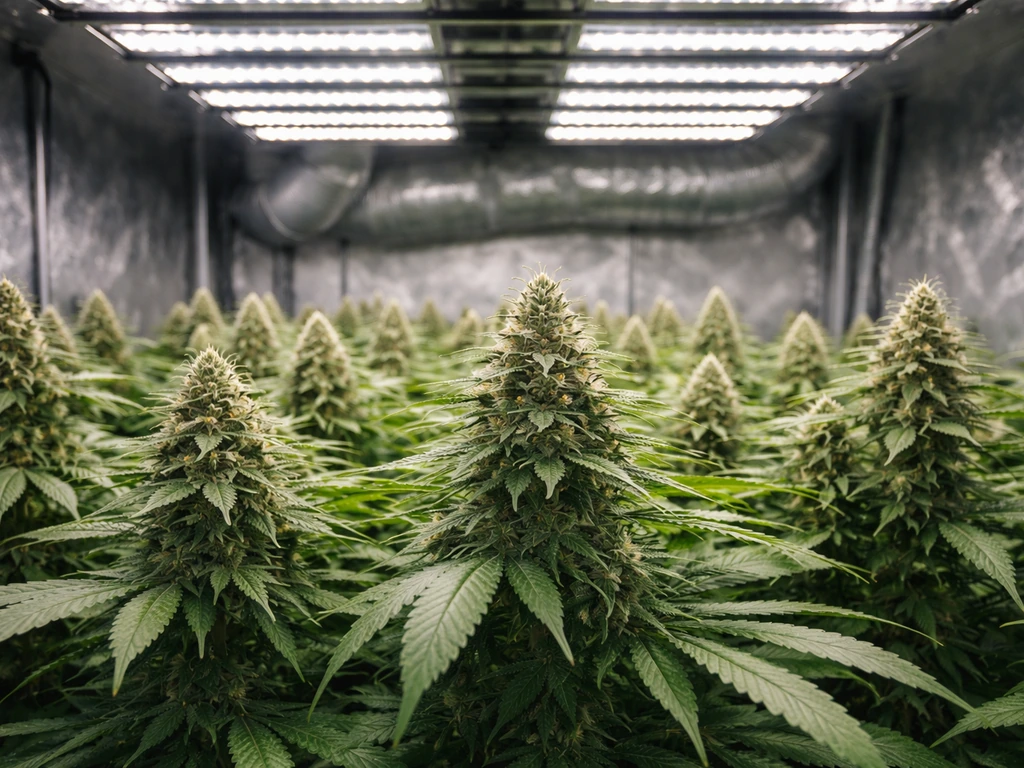
Lighting: What Commercial Growers Actually Use
LED grow lights have become the commercial standard. Modern full-spectrum LEDs from reputable manufacturers (Spider Farmer, Gavita, Fluence, California Lightworks) run at 30-40% less electricity than equivalent HPS setups and produce less heat. For a 4x4 space, a 400-600 watt LED is the right range. For a 4x8, aim for 800-1000 watts. During veg, run lights 18 hours on and 6 hours off. For flower, switch to 12 hours on and 12 hours off to trigger budding in photoperiod strains.
Step-by-Step Cultivation: Clone or Seed Through Harvest

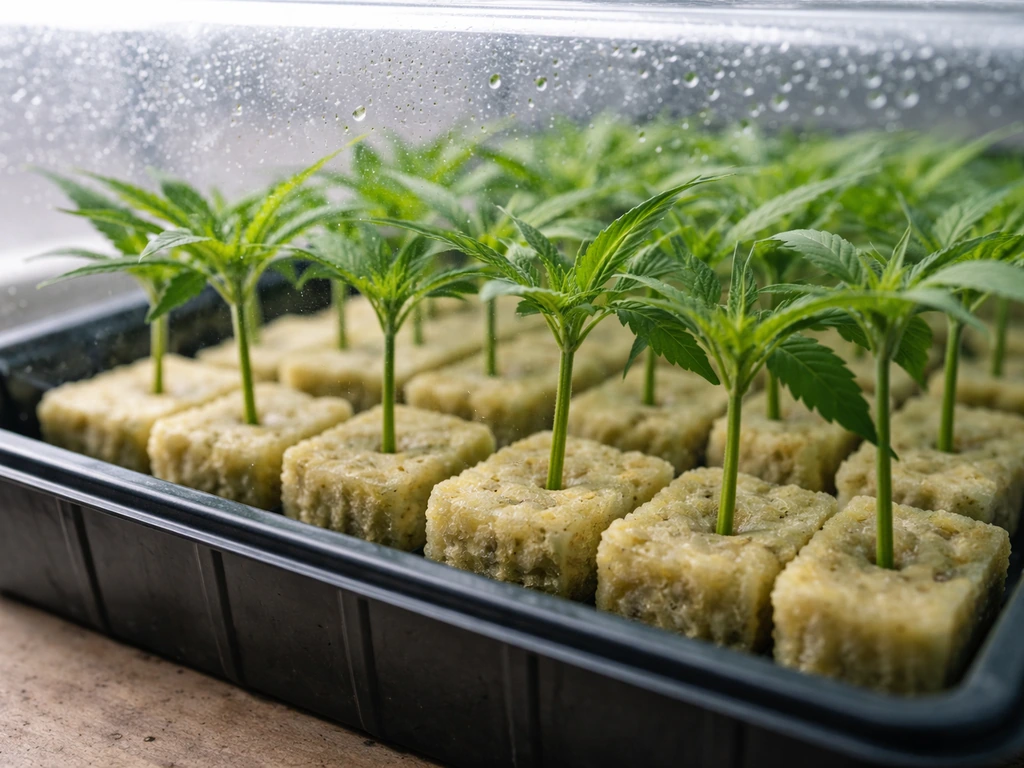
Commercial grows almost universally start from clones, not seeds. Clones guarantee genetic uniformity, which means every plant in a batch behaves the same, matures at the same rate, and produces consistent test results. Seeds introduce genetic variation even in feminized form. If you are building toward dispensary supply, get comfortable with cloning and maintaining a mother plant.
Stage 1: Propagation (Days 1-14)
Take cuttings from a healthy mother plant that is at least two months old and has been in vegetative growth. Cut 4-6 inch stems at a 45-degree angle just below a node, strip the lower leaves, dip in rooting gel (clonex or similar), and place in a propagation medium like rockwool cubes, rapid rooters, or peat plugs. Keep humidity at 75-85% in a propagation dome, temperature at 72-78°F, and use gentle light (T5 fluorescents or low-power LED at 18 inches). Roots should appear in 7-14 days. Do not fertilize until roots are established.
Stage 2: Vegetative Growth (Weeks 2-6 from transplant)
Once rooted clones are transplanted, the vegetative stage builds the plant's structure. Most commercial cultivars are vegged for 3-5 weeks in final containers before flipping to flower. During this stage, run an 18/6 light cycle, maintain temperatures between 70-85°F, and keep humidity around 50-65%. Start feeding at half the manufacturer's recommended dose for your nutrient line and ramp up as the plant grows. Transplant size progression matters: move from propagation plug to a 1-gallon container, then to final containers of 3-5 gallons for indoor or 5-15 gallons for greenhouse grows.
Stage 3: Flowering (Weeks 1-8 to 12, strain-dependent)
Switch to a 12/12 light schedule to trigger flowering. Most indica-dominant hybrids finish in 8-9 weeks of flower. Pure sativas and some haze varieties can run 10-12 weeks. Watch for these flowering milestones: pre-flowers appear in week 1-2, bud sites stack in weeks 3-5, trichomes develop through weeks 5-7, and the final swell and ripening occurs in weeks 7 through harvest. Reduce humidity to 40-50% once buds are forming, and push it down to 35-45% in the final two weeks to minimize mold risk.
Nutrients and Irrigation: Soil and Hydro Both Work
There is no universally best growing medium for commercial-quality production. I have seen exceptional flower come from amended living soil, coco coir, and deep water culture (DWC) hydro systems. What matters is understanding how your chosen medium interacts with nutrients and pH.
Soil and Amended Soil
High-quality pre-amended soils (like Fox Farm Ocean Forest, BuildASoil, or similar) carry enough nutrients for the first 3-4 weeks without supplemental feeding. After that, switch to a cannabis-specific nutrient line. Keep soil pH between 6.0 and 7.0, with 6.2-6.8 being the sweet spot for nutrient availability. Water when the top 1-2 inches of soil are dry and the pot feels noticeably lighter. Overwatering is the number one mistake new growers make. Allow 15-20% runoff with each watering to flush salt buildup.
Coco Coir
Coco coir is an excellent middle ground between soil and hydroponics. It is inert, which means you have full control over nutrient inputs, but it behaves like soil in terms of handling. Keep pH between 5.8 and 6.2. Coco requires more frequent watering than soil, often daily in late flower, and needs calcium and magnesium supplementation because coco naturally binds Ca and Mg ions.
Hydroponics (DWC, NFT, Flood and Drain)
Hydro systems deliver nutrients directly to the root zone, resulting in faster growth and often higher yields. DWC is the most accessible hydro system for home growers: plants sit in net pots over buckets of oxygenated nutrient solution. Keep the solution pH between 5.5 and 6.1. Water temperature should stay between 65-72°F to prevent root rot, and dissolved oxygen should be maintained with air stones running continuously. Commercial hydro grows using systems like NFT (nutrient film technique) or recirculating DWC can achieve harvest-to-harvest cycles of 70-90 days with exceptional yield consistency.
Nutrient Schedule Framework
| Growth Stage | N-P-K Focus | EC Range (mS/cm) | Key Supplements |
|---|---|---|---|
| Seedling/Clone | Low, balanced | 0.4-0.8 | Rooting hormones, minimal cal-mag |
| Early Veg (weeks 1-2) | High N, moderate P/K | 0.8-1.2 | Cal-mag, silica |
| Late Veg (weeks 3-5) | High N, moderate P/K | 1.2-1.8 | Cal-mag, silica, enzymes |
| Early Flower (weeks 1-3) | Transitioning N down, P/K up | 1.4-1.8 | Cal-mag, P/K booster |
| Mid Flower (weeks 4-6) | Low N, high P/K | 1.6-2.2 | Bloom booster, amino acids |
| Late Flower (weeks 7+) | Very low N, moderate P/K | 1.4-1.8 | Ripening formula, humic acids |
| Flush (final 1-2 weeks) | None or flush solution | 0.0-0.4 | Florakleen or plain water |
Always pH-correct your water after mixing nutrients, not before. And test your runoff pH and EC regularly. A runoff EC significantly higher than your input is a sign of salt buildup; flush with plain pH-correct water until runoff EC stabilizes.
Training, Canopy Management, and Getting Maximum Uniform Yield
Dispensary-grade production is not just about the top colas. Commercial buyers and compliance testing sample entire batches, so your whole canopy needs to produce quality buds, not just the tops. Training techniques are how you achieve that.
Topping and FIMing
Topping removes the apical (main) tip of the plant during veg, forcing two main colas to develop instead of one. Do this when the plant has 4-6 nodes and at least 3-4 weeks before flipping to flower. FIMing (a less precise pinch of the top) creates 3-4 main colas. Both techniques increase the number of main bud sites and create a more horizontal canopy.
LST (Low Stress Training)
LST uses soft ties or garden wire to bend branches outward and down, spreading the canopy horizontally. This exposes more bud sites to direct light without cutting the plant. Start LST early in veg and adjust ties weekly as branches grow. Combined with topping, LST is one of the most reliable ways to increase yield per square foot.
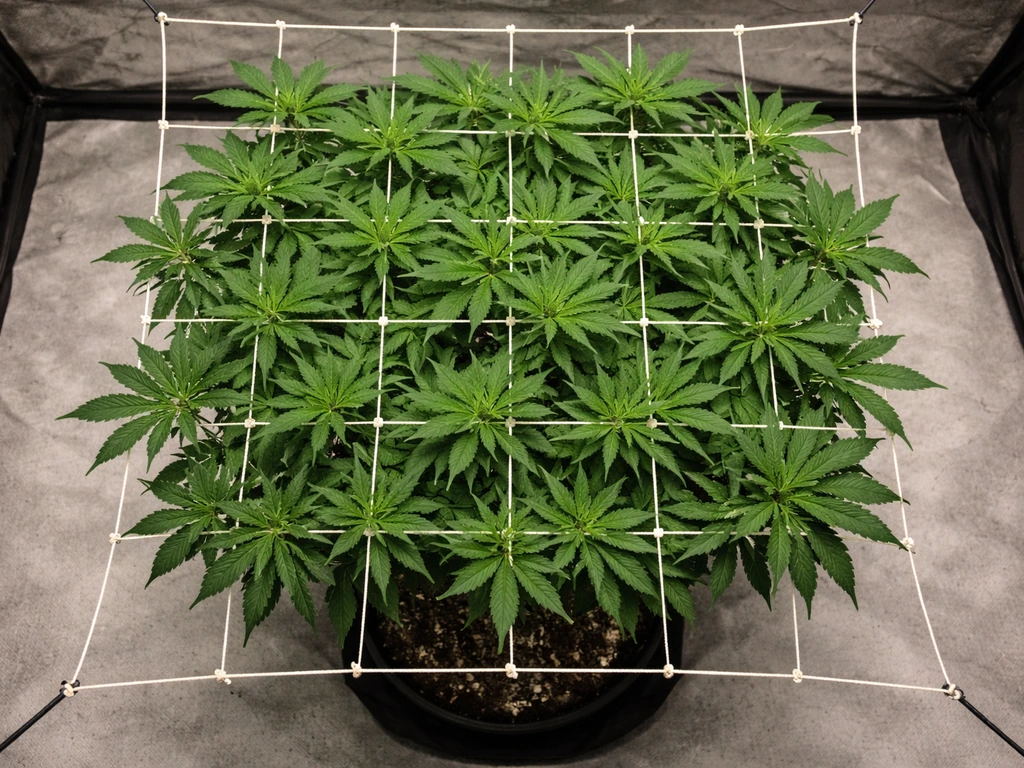
SCROG (Screen of Green)
SCROG uses a horizontal mesh or net (typically 4-6 inches above the pots) to create a uniform canopy. As branches grow through the screen, you tuck them horizontally. By the time you flip to flower, you want 70-80% of the screen filled with bud sites. SCROG is the closest home-grow equivalent to commercial canopy management systems and dramatically improves light uniformity.
Lollipopping and Defoliation
Lollipopping removes all lower growth below the canopy that will not receive adequate light. This redirects energy to the top canopy and improves airflow to prevent mold. Do a major lollipop around week 2-3 of flower. Light defoliation of large fan leaves that block bud sites can be done at the same time and again at week 5. Do not go overboard; removing more than 20-25% of foliage at once stresses the plant.
Harvest, Drying, Curing, and Getting Ready for Lab Testing
How you finish your crop determines whether it tests well, smells great, and actually sells. I have seen otherwise excellent grows ruined by a rushed dry or a careless harvest. This stage deserves as much attention as everything that came before it.
Knowing When to Harvest
The most reliable harvest indicator is trichome color viewed under a jeweler's loupe or digital microscope (60-100x magnification). Clear trichomes mean too early. Cloudy (milky white) trichomes indicate peak THC production. Amber trichomes signal THC degrading to CBN, producing more sedative effects. For dispensary-grade flower targeting peak THC, harvest when 70-90% of trichomes are cloudy with just 10-20% amber. Also look at pistil color: 70-80% of hairs turning orange or brown is a supporting indicator.
Harvesting and Wet Trimming vs. Dry Trimming
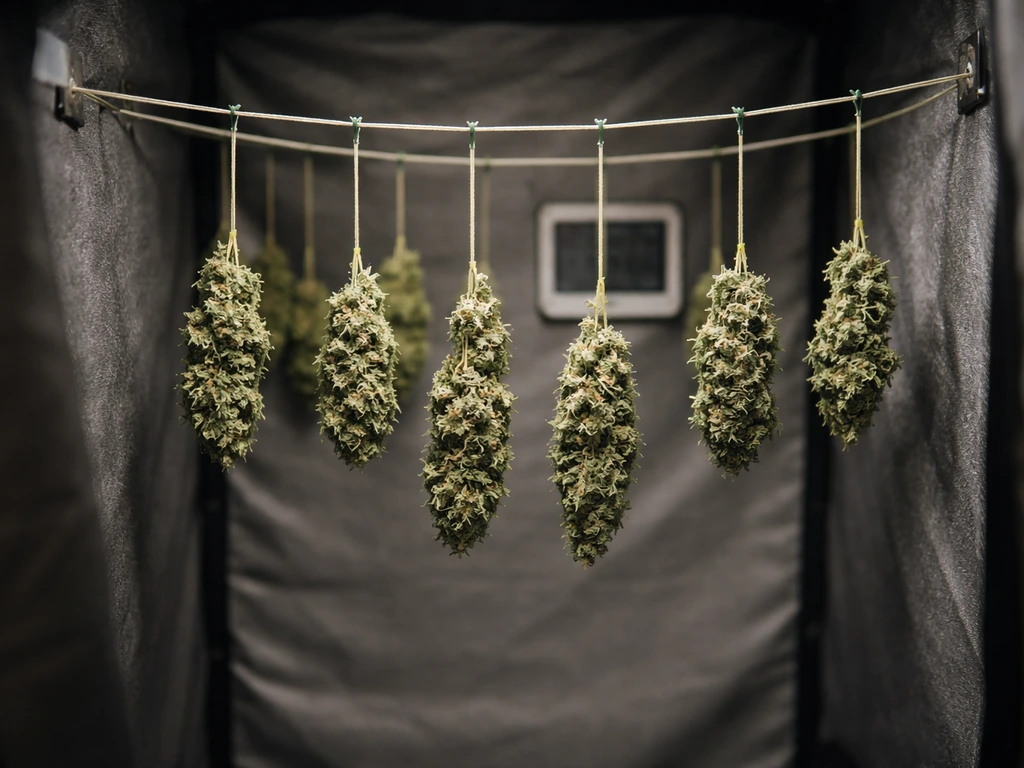
Wet trimming (removing sugar leaves immediately after cutting) is faster and easier but can damage trichomes if done carelessly. Dry trimming (trimming after drying) preserves trichomes better and is the commercial standard for premium flower. Cut the whole plant or large branches, hang them upside down in a dark drying space, and do not trim until after drying.
Drying
Dry in a dark room at 60-65°F and 55-65% relative humidity. At these conditions, drying takes 10-14 days, which is the ideal range. Fast drying (under 7 days) causes chlorophyll to get trapped in the bud, creating a harsh, grassy taste. Slow drying preserves terpenes and allows enzymatic breakdown of chlorophyll. Buds are ready to move to cure when small stems snap rather than bend.
Curing
Place trimmed buds loosely in airtight glass jars, filling them about 75% full. For the first week, open jars twice daily for 15-20 minutes (burping) to release moisture and introduce fresh oxygen. After week one, reduce burping to once daily, then every few days. A proper cure takes a minimum of 4 weeks and noticeably improves flavor, aroma, and smoothness. Six to eight weeks of cure is better for premium dispensary-quality flower. Maintain jar humidity at 58-62% using Boveda or Integra Boost humidity packs.
Lab Testing Readiness: What to Know
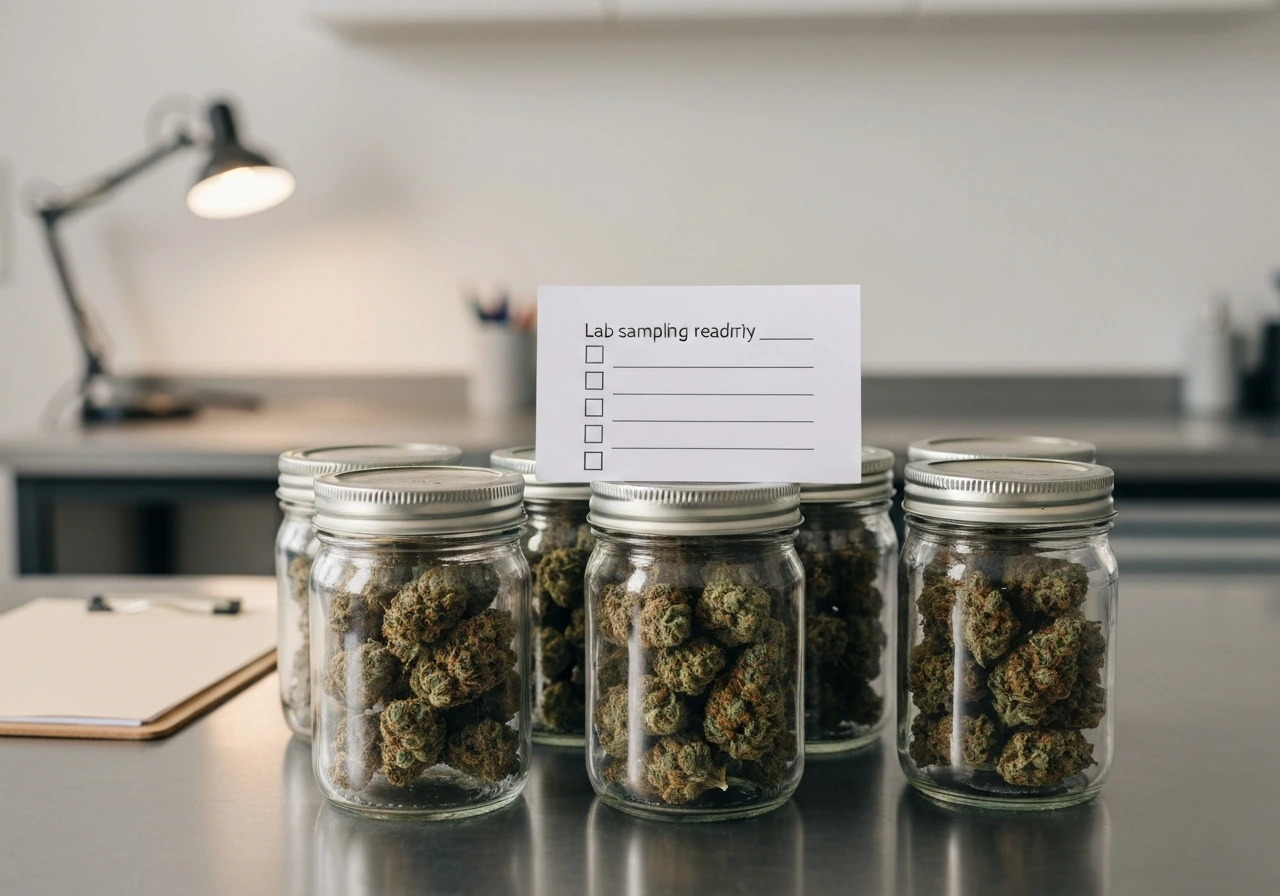
Licensed commercial cultivators submit representative samples of each batch to an independent testing lab. The lab screens for cannabinoid percentages, terpene profiles, pesticide residues, heavy metals, microbial contamination including mold and mildew, and moisture content. If you are building toward commercial operation, keep detailed records of every nutrient, pesticide, and amendment used during your grow. Use only pesticides approved for cannabis cultivation in your jurisdiction, because pesticide failures are a common reason batches fail in markets like Canada (where Health Canada's mandatory pesticide testing applies) and California. Even at home, avoiding synthetic pesticides and using IPM (Integrated Pest Management) strategies keeps your grow closer to test-ready standards.
Troubleshooting the Most Common Problems
Every grower runs into problems. The difference between a good grower and a mediocre one is how fast they diagnose and fix issues. Here are the problems I see most often and how to handle them.
| Problem | Likely Cause | Fix |
|---|---|---|
| Yellowing lower leaves in veg | Nitrogen deficiency or pH lockout | Check runoff pH; correct to 6.2-6.8 (soil) or 5.8-6.1 (coco/hydro); increase N if pH is fine |
| Brown leaf tips and edges | Nutrient burn or salt buildup | Reduce feeding concentration by 25-30%; flush with plain pH-correct water |
| Curling leaves (upward) | Heat stress or overfeeding | Lower canopy temperature; check EC and reduce if above target |
| Stretchy, weak stems in veg | Insufficient light or light too far from canopy | Lower light or increase intensity; ensure 18-24 inch distance for LED |
| White powdery coating on leaves | Powdery mildew (PM) | Improve airflow; reduce humidity below 50%; treat with potassium bicarbonate or dilute hydrogen peroxide spray; remove severely affected leaves |
| Grey/brown fuzzy rot on buds | Botrytis (bud rot) | Remove affected buds immediately; reduce humidity to below 45%; increase airflow; inspect entire crop |
| Slow root development in clones | Low temperature or light stress | Keep propagation dome at 75-78°F; use a heat mat; ensure 18-hour light cycle with low intensity |
| Uneven canopy at flip to flower | Uneven training or overcrowding | LST remaining tall branches down; remove the most overcrowded plants if necessary before flipping |
| Hermaphrodite plants (pollen sacs) | Stress or unstable genetics | Remove hermaphrodites immediately to prevent pollination; review lighting leaks, heat spikes, or water stress |
Your Next Steps as a Cultivator
If your goal is eventually supplying a dispensary, the path is clear: grow legally at home, master your environment and cultivation technique, document everything, and then research the commercial cultivation licensing process in your state or province. The skills are identical to what licensed producers use; only the paperwork and scale differ.
If you want to grow dispensary-quality flower for personal use and deep skill-building, start with one solid grow space, two proven strains, a reliable nutrient line, and a commitment to dialing in your environment before worrying about yield numbers. Fix temperature, humidity, and pH issues first. Everything else gets easier once those fundamentals are stable.
Topics like working with clones, growing clones outdoors in a greenhouse setup, or scaling into a proper commercial operation each deserve their own detailed treatment. If you are specifically trying to grow weed clones, the key is starting with healthy mother plants, using clean propagation steps, and maintaining stable humidity and temperature during rooting working with clones. The cultivation principles here form the foundation for all of those paths. Get this part right, and the rest becomes a matter of logistics and scale.
FAQ
Do I need to be a licensed cultivator to grow weed that I plan to sell to a dispensary?
Yes. Even if you grow at “dispensary quality,” selling or transferring to a dispensary without the required cultivation license is generally illegal. If you want to test your workflow legally, consider keeping everything strictly for personal use until your licensing status changes.
What records should I keep to look “test-ready” like a commercial producer?
Track inputs and environment by date, including water source, nutrient brand and dilution, pH targets and actual readings, EC readings, light schedule, and any pest control steps. Also keep a simple batch log with plant count, clone source or strain, harvest date, drying start and jar date, and any lab test results you receive.
How do I choose between soil, coco, and hydro if my main goal is consistent dispensary results?
Coco is often the easiest way to get consistency because it is inert, so nutrients and pH drive performance, but it requires stricter daily watering and Ca-Mg supplementation. Hydro can be very consistent too, but small mistakes in dissolved oxygen, root zone temperature, or sanitation can cause fast failures. If you want the lowest failure rate while learning fundamentals, soil or coco are usually safer than hydro.
If I miss my pH or overwater once, is the whole crop doomed for testing?
Not necessarily, but it depends on severity and timing. Temporary pH or watering issues can cause nutrient lockout, deficiency, or salt buildup that later shows up as poor terpene development, abnormal growth, or higher residues if pesticides were used improperly. The practical step is to correct immediately, then monitor runoff pH and EC, leaf symptoms, and continue with clean feeding rather than “chasing” problems with heavy changes.
How can I avoid pesticide test failures if I’m growing at home?
Use no unapproved pesticides at all, and avoid “general garden” products that are not labeled for cannabis. Focus on IPM, prevention (clean clones, sanitation, airflow), and mechanical or biological controls when possible. If you ever do apply something, document it and expect that it could lead to batch failure depending on residue sensitivity and the testing rules in your market.
Do I have to run Metrc or other seed-to-sale tracking systems to supply a dispensary?
If you are supplying a dispensary in a regulated market, you generally need to operate inside that system through your licensed status, not as a home grower. As an unlicensed person, you cannot legally integrate your product into the chain of custody, so focus on learning compliance-grade processes at home without trying to “simulate” regulated tracking.
What’s the biggest reason grows look good but fail lab expectations like mold or contamination?
Often it is the dry and cure plus humidity management, not the flowering environment alone. If drying is too fast, too warm, or too humid, you can end up with harsh flavor or microbial risk. The practical defense is keeping drying conditions controlled, managing RH during curing, and avoiding overcrowding that blocks airflow.
Can I reuse soil or coco between runs to save money?
You can, but you must treat it as a contamination risk. In commercial-style practice, growers minimize cross-run disease and salt buildup by sanitizing or replacing media and flushing properly. For home use, if you reuse, do thorough cleaning, manage pests aggressively, and expect more variable results unless you have a repeatable sanitation and reconditioning routine.
Is it better to start from seeds or clones if I want consistency for dispensary expectations?
Clones are usually better for uniformity because plants mature more similarly and behave more consistently in growth rate and canopy shape. If you start with seeds, you will often need selection and pheno hunting, which adds time and variability that can be a mismatch for consistent batch testing goals.
What training method is most “commercial-like” for a small tent?
SCROG is the closest analog because it creates a more uniform canopy, which helps light distribution and makes development timing more predictable across the whole batch. For very small spaces, topping plus LST can also work well, but SCROG typically provides the most repeatable canopy geometry.
How do I know when I should harvest to hit peak quality instead of just “feeling ready”?
Use magnification and target a trichome window rather than relying on calendar days. A practical decision aid is the 70-90% cloudy, 10-20% amber approach for peak THC, then also confirm with pistil browning and stop making large environmental changes right before harvest.
What happens if I over-dry or under-dry before jarring?
Over-drying can reduce terpene expression and make flower taste flat or woody, under-drying can trap more chlorophyll and increase the risk of moldy conditions inside jars. If stems do not snap when moved, that is a sign they likely need more drying time before curing jars.
How long should curing last if my goal is selling, not just smoking?
For premium results that match retail expectations, plan for at least 4 weeks, with 6 to 8 weeks generally improving aroma, smoothness, and overall “sellability.” Short cures can look fine but often underperform in taste and harshness once tested or compared side-by-side.
What should I do if I’m planning a commercial path but I keep failing quality targets at home?
Shift your focus to the highest-leverage variables first: temperature and humidity stability, pH and EC discipline, and dry and cure control. Only after those are consistently within range should you increase complexity like switching mediums, expanding strain counts, or changing training intensity.
Next Article
How to Grow Weed Clones: Rooting to Veg Guide
Step-by-step guide to root and veg weed clones: setup, cuttings, humidity, hormones, transplant, and troubleshooting fai