You can absolutely grow cannabis clones at home, but there is one critical thing to clear up first: you cannot clone dried dispensary flower. Buds sold at a dispensary are dead plant tissue. No cutting, rooting hormone, or humidity dome in the world will coax roots out of them. What you actually need is a living cut from a live cannabis plant. That means either buying a live clone from a licensed retailer where available, getting a cutting from a friend's healthy plant (where legally permitted), or taking cuttings from your own plants once you have them established. Once you have living tissue in hand, rooting and growing a clone is very achievable at home, even as a beginner. Once your clones have rooted successfully indoors, you can follow a step-by-step outdoor plan to harden them off and grow them in the sun how to grow clones outdoors step by step. To turn those rooted clones into dispensary-ready flowers, focus on legal sourcing, consistent veg growth, and a flowering schedule that matches your target strain how to grow weed for dispensaries. If you want the full step-by-step walkthrough, keep reading for the setup, humidity targets, and rooting timeline for how to grow weed clones.
How to Grow a Clone From the Dispensary: Legal and Steps

Legality first: what "dispensary clone" can actually mean
The phrase "dispensary clone" gets used in a few different ways, so it is worth being specific. Some people mean: can I clone the bud I just bought? Others mean: can I buy a live clone from a dispensary? And a third group means: I have a plant I got from a dispensary seed or clone sale, and I want to clone it myself. Each of those is a different situation legally and practically.
In Canada, adults may legally grow up to four cannabis plants per household for personal use under the Cannabis Act. That four-plant limit applies per dwelling, not per person, so a household of two adults still caps at four plants total. Health Canada specifies that home growers must source seeds or immature plants from licensed retailers, and you are permitted to propagate new plants from cuttings and clones taken from those legally obtained plants. That means once you have a legal plant growing, making clones from it is explicitly allowed. Some Canadian licensed retailers and dispensaries do sell live clones, and that is the cleanest path to a dispensary-sourced clone.
In the United States, cannabis home cultivation law varies dramatically by state. States like California, Colorado, Michigan, and others permit adults to grow a limited number of plants at home (often six per person or per household), and some licensed dispensaries in these states sell live clones or rooted cuttings. Other states with legal adult-use sales still prohibit home growing entirely. Always check your specific state and local ordinances before you start, because the rules are genuinely different city to city in some places. Nothing in this article is legal advice, and it is your responsibility to confirm what is permitted where you live.
If your local dispensary sells live clones, that is your easiest legitimate entry point. If not, your realistic options are buying seeds from a licensed source, growing a plant, and then taking your own cuttings from it to build out your grow.
Why you can't clone dispensary bud (and what you actually need)
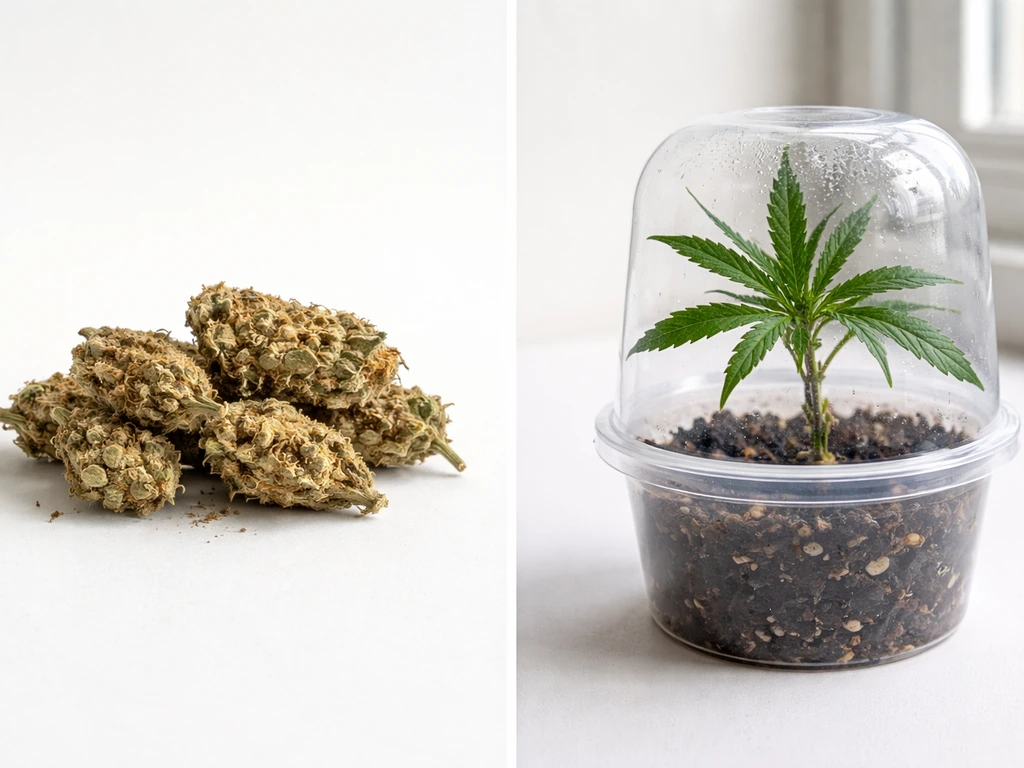
I want to be direct about this because it is the most common misconception I see. Dispensary flower has been harvested, dried, and cured. Every cell in that material is dead. A clone works by taking a section of a live plant that still has meristematic tissue, the living cells capable of differentiating into roots. When you stick a fresh cutting into a rooting medium and provide the right humidity and temperature, those cells activate and push out roots. None of that is possible with dried bud, trim, or any other processed cannabis product.
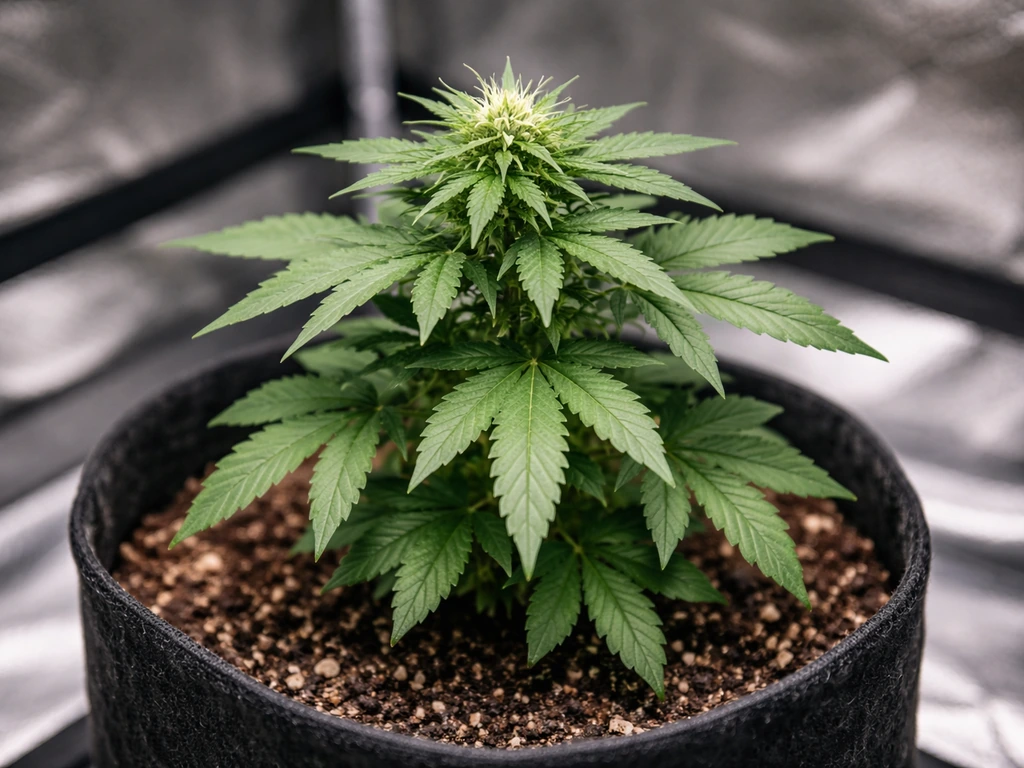
What you need is a cutting from a living cannabis plant that is actively growing. Ideally it comes from a plant in the vegetative stage, though late-stage vegetative or early flowering cuts can be rooted with more effort. The cutting should be green, firm, and healthy, taken from a stem that is neither too woody nor too soft.
Setting up your cloning station
Getting your setup right before you take a single cutting makes the whole process significantly more reliable. Cloning failures almost always trace back to contaminated tools, wrong humidity, or temperature swings, and all of those are preventable with a little prep.
The materials you need

- Sharp, clean razor blade or scalpel (not scissors, which crush stem tissue)
- Isopropyl alcohol (91% or higher) for sterilizing cutting tools
- Rooting hormone: gel is easiest for beginners, powder works too
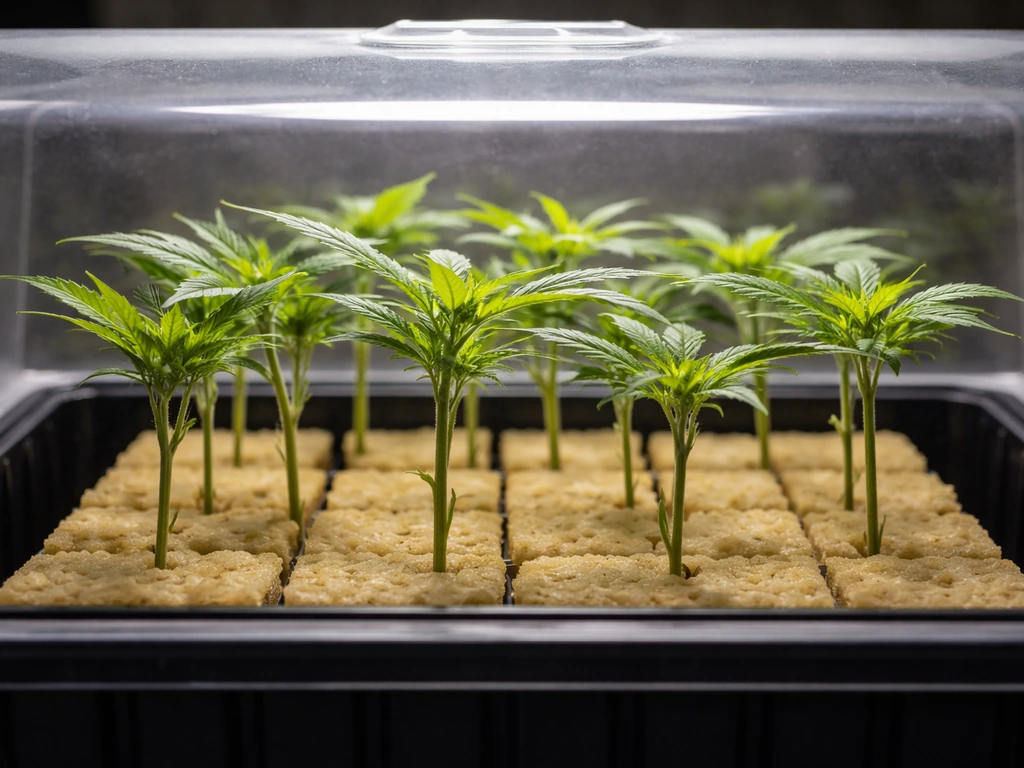
- Propagation tray with humidity dome (a standard 1020 tray with a clear dome is ideal)
- Rooting medium: rockwool cubes, rapid rooter plugs, or small cups with a 50/50 perlite and coco coir mix
- pH-balanced water (5.5 to 6.2 for most media; 5.8 is a reliable target)
- Spray bottle for misting the dome interior
- Small T5 fluorescent or LED propagation light
- Thermometer and hygrometer to track temperature and humidity
- Optional: seedling heat mat to keep the root zone warm
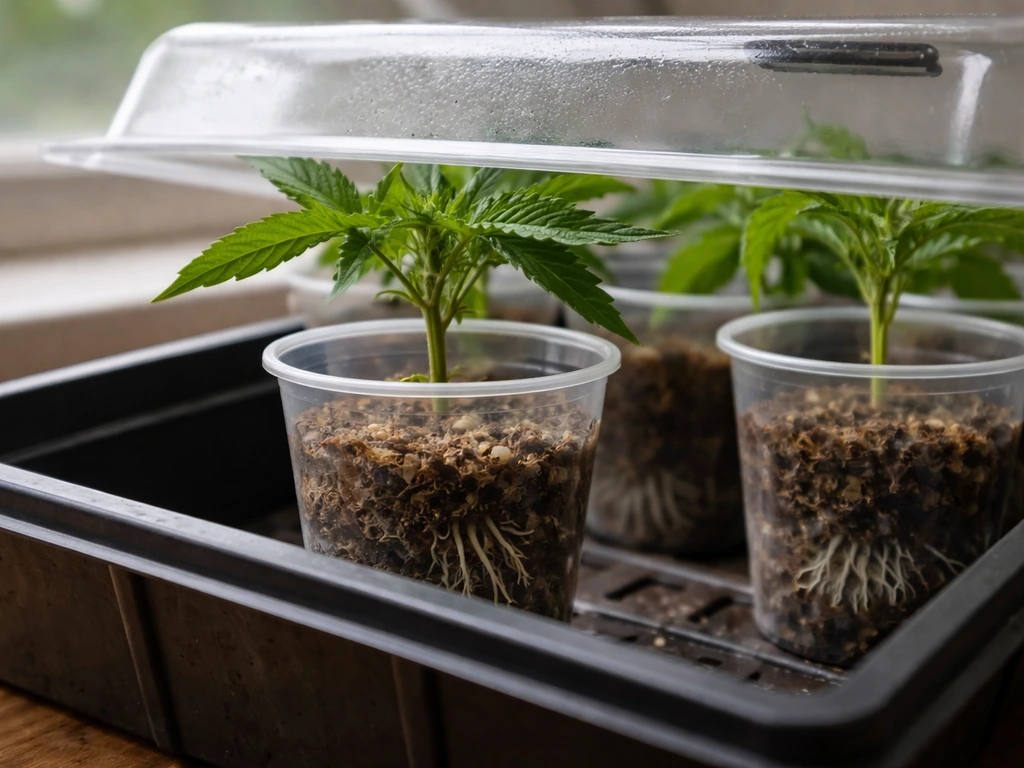
Environment targets
Cuttings have no roots yet, which means they cannot drink water from the medium. They stay alive by absorbing moisture through their leaves, which is why humidity is so important in the early days. Aim for 70 to 80 percent relative humidity inside the dome. Temperature should sit between 72 and 78 degrees Fahrenheit (22 to 25 Celsius) at the canopy. If you have a heat mat, set it to keep the root zone around 75 to 78 F, slightly warmer than the air above. Roots develop faster in warm media.
Sanitation is not optional
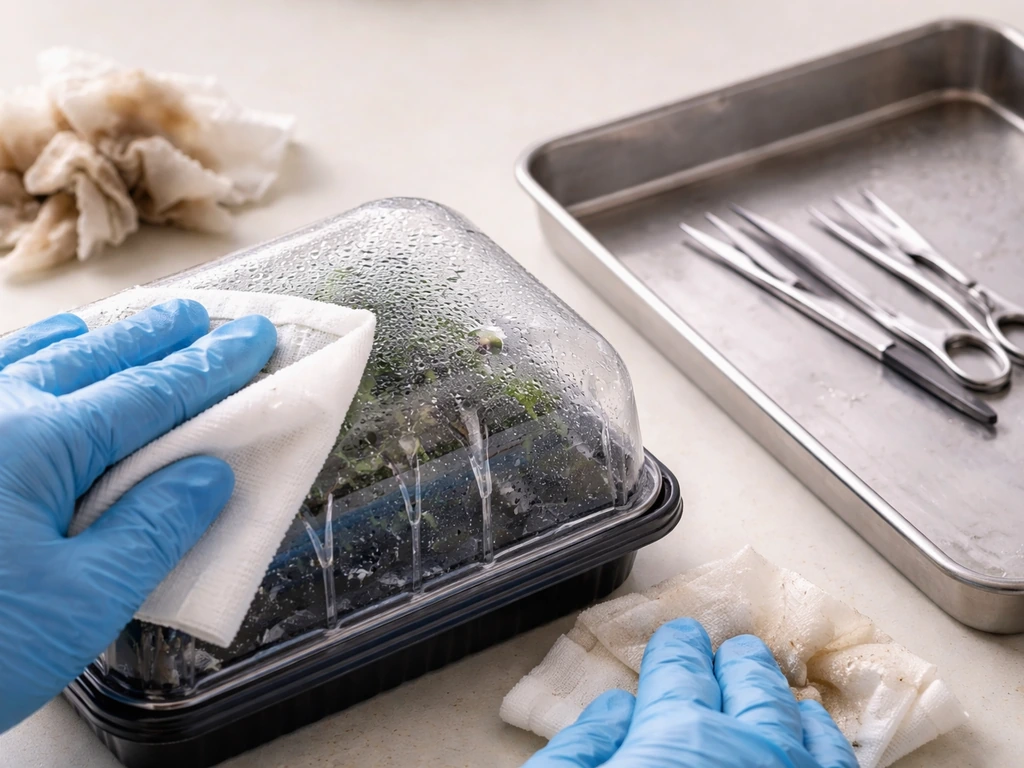
Wipe down your tray, dome, and any tools with isopropyl alcohol before you start. Sterilize your blade between cuts if you are taking multiple cuttings from different plants. Pythium (root rot) and botrytis (mold) are the two most common killers of fresh clones, and both thrive in exactly the warm, humid conditions you are creating. Starting clean is your best defense. I learned this the hard way losing an entire tray of cuts because I skipped the wipe-down step.
Choosing a donor plant and taking the cutting
What makes a good donor
The best clones come from plants that are healthy, actively growing in the vegetative stage, and have not been fed heavy nitrogen in the week before cutting. High nitrogen in the donor plant actually slows rooting because the cutting prioritizes leafy growth over root development. If you can, stop feeding nitrogen to the donor plant a few days before taking cuttings and water it normally. The plant should show no signs of pests, mold, or nutrient deficiency. Stressed plants clone, but they root more slowly and with lower success rates.
How to take the cutting
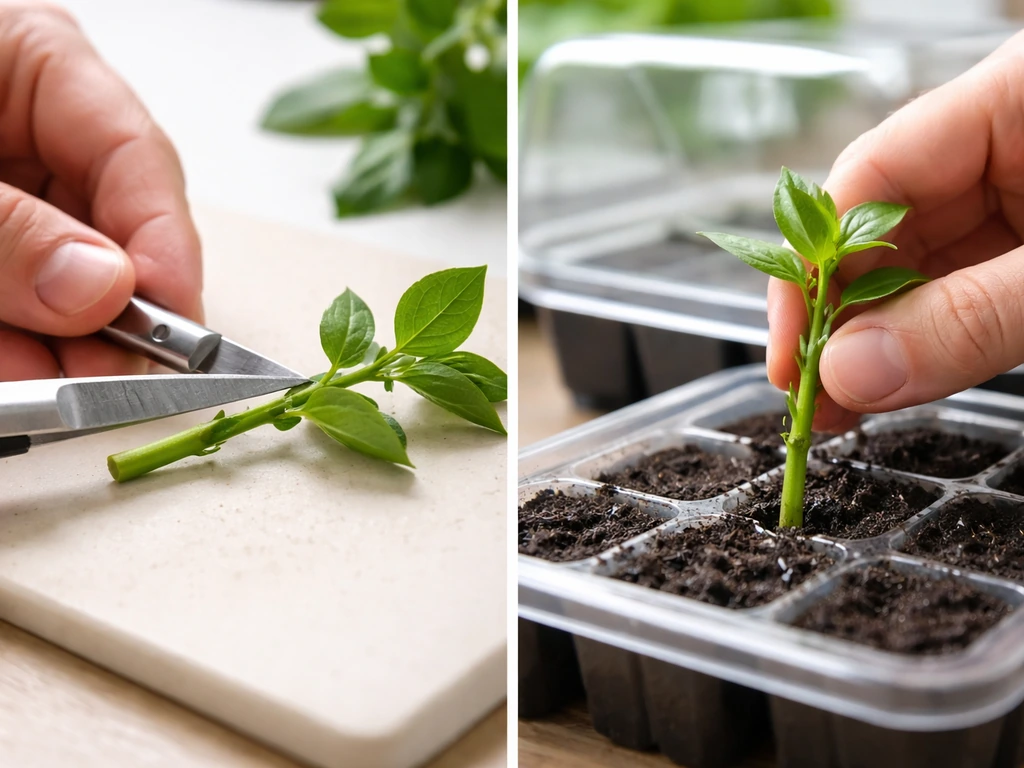
- Sterilize your blade with isopropyl alcohol and let it dry for 30 seconds.
- Select a healthy branch tip with at least two to three nodes (the points where leaves meet the stem). The ideal cutting is 4 to 6 inches long.
- Cut at a 45-degree angle, about a quarter inch below a node. The angled cut increases the surface area available for root development.
- Immediately place the fresh cut into a glass of plain, pH-adjusted water to prevent air bubbles from entering the stem.
- Remove the lower leaves and any large fan leaves from the bottom half of the cutting. Keep two to four smaller leaves at the top. Removing leaves reduces moisture loss while the clone is establishing.
- Optional but recommended: trim the tips of remaining large leaves by about half. This further reduces transpiration without removing the leaf entirely.
- Apply rooting gel to the cut end. If using gel, dip the bottom inch and allow excess to drip off. If using powder, wet the cut end first, then dip into the powder and tap off the excess.
- Insert the cutting into your pre-moistened rooting medium to a depth of about one inch. Do not push so hard that you scrape the rooting hormone off.
Work quickly between the cut and getting the clone into the dome. The longer a fresh cut sits exposed to air, the more risk of air embolism in the stem, which blocks water uptake and slows or prevents rooting.
Rooting methods that work at home
There is no single best rooting medium. Different growers swear by different methods, and all of them work if the environment is right. Here is a practical breakdown of the most common options:
| Method | Setup | Pros | Cons | Best For |
|---|---|---|---|---|
| Rockwool cubes | Pre-soak cubes in pH 5.5 water, insert cutting, place in tray with dome | Widely available, consistent results, easy to transplant into hydro or soil | Requires pH attention, not great for organic grows | Beginners, hydroponic growers |
| Rapid rooter plugs | Soak briefly, insert cutting, dome it | Very forgiving, great root penetration, transfers easily | Slightly more expensive than rockwool | Beginners and intermediates |
| Perlite and coco mix (50/50) | Fill small cups, moisten with pH 5.8 water, insert cutting | Cheap, reusable, excellent drainage and aeration | Requires more attention to moisture levels | Budget-conscious growers |
| Plain water (simple propagation) | Place stem in small jar of clean, pH-adjusted water, change water every 2 days | No medium needed, visible root development | Higher mold risk, roots can be fragile at transplant | Growers who want to watch progress |
| Aeroponic cloner | Stems suspended in chamber, misted with water every few minutes via pump | Fastest rooting, very high success rates | Higher upfront cost, more to clean and maintain | Experienced growers or those cloning frequently |
For a first-time cloner, I recommend rapid rooter plugs or rockwool cubes under a dome. They are forgiving, widely available at any garden center or hydro store, and give you a consistent environment without requiring much monitoring. Water cloning works too but carries more mold risk in warm conditions and produces more fragile root systems that can get damaged during transplant.
Light during cloning
Keep light intensity low while cuttings are rooting. An 18/6 light cycle (18 hours on, 6 hours off) is standard. Use a T5 fluorescent or a low-intensity LED propagation light positioned 4 to 6 inches above the dome. High-intensity light will stress cuttings that cannot yet move water efficiently. You will notice clones that get too much light start to wilt or curl even inside the dome.
Rooting timeline and when to transplant
Most healthy cannabis cuttings show their first root tips within 7 to 10 days under good conditions. Full rooting, meaning roots that are 1 to 2 inches long and visible at the bottom or sides of the medium, typically happens between days 10 and 21. Some strains or older cuts may take up to 28 days. If you have not seen any roots by day 21, something in the environment is off, and it is time to troubleshoot rather than wait longer.
Crack the dome vents slightly starting around day 5 to 7 to begin acclimating the clones to lower humidity. By day 10 to 14, open the vents more. This gradual transition prevents the shock that happens when a humidity-dependent clone suddenly hits dry room air. If you pop the dome off all at once after two weeks, you will likely see dramatic wilting even on clones that have rooted.
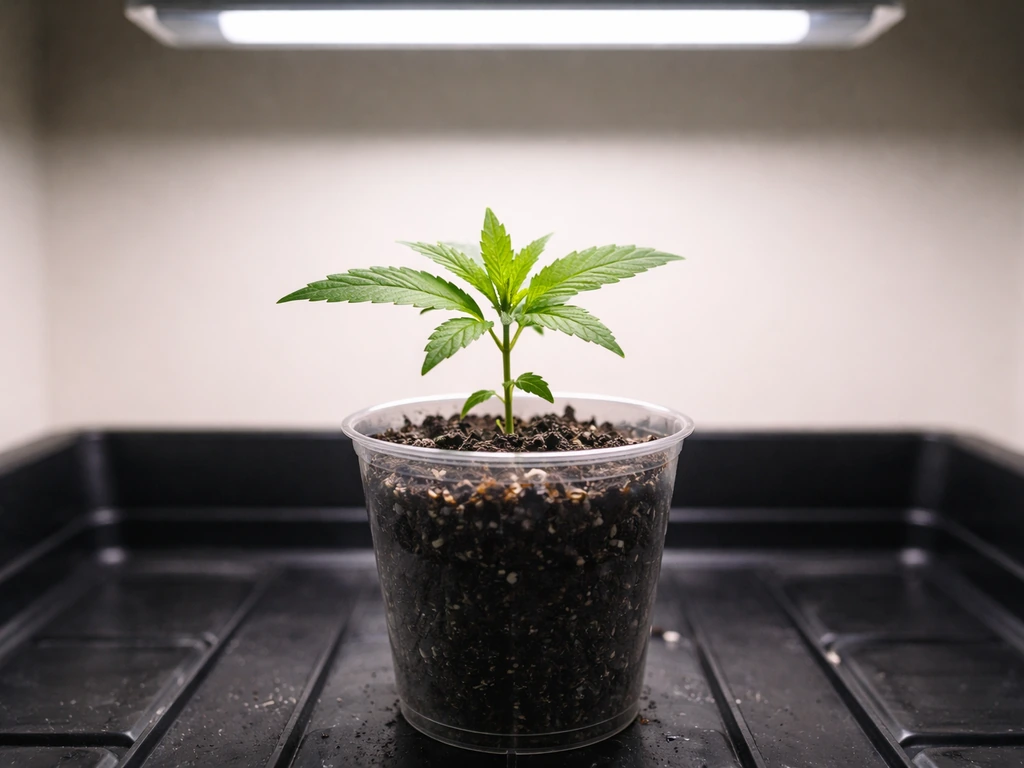
A clone is ready to transplant when roots are visible outside the medium and the plant shows new leaf growth. New growth from the tip is one of the clearest signs the cutting has successfully rooted and is transitioning to active vegetative growth. At that point, transplant into your veg medium: soil, coco, or a hydroponic system.
Troubleshooting: when things go wrong
No roots after 2+ weeks
Check temperature first. Root development is highly temperature-sensitive. If your root zone is below 68 F, rooting will be very slow or stall entirely. Add a heat mat if you do not have one. Also check that your medium is moist but not waterlogged. Rockwool or coco that is too wet becomes anaerobic and roots cannot form in oxygen-deprived media. Finally, confirm your rooting hormone was applied correctly and had not expired.
Stem rot at the base
Brown, mushy stems at the soil line usually indicate pythium or another water mold. This happens when media stays too wet, temperatures are too high, or your setup was not sanitized. Prevention is easier than cure here. If you catch it early on one or two cuttings, you can try trimming the rotted portion, re-cutting the stem at a clean point, applying fresh rooting hormone, and restarting in sterilized medium. But in most cases, stem rot means that cutting is lost.
Mold on leaves or in the dome
White or gray fuzzy growth on leaves or on the surface of the medium is usually botrytis or powdery mildew. Reduce dome humidity slightly, improve airflow by opening vents more, and remove any affected leaves immediately. If the mold is on the medium surface only and not on the plant, let the medium dry out slightly between mistings. Mold in the dome almost always means airflow is too low or humidity is too high for too long.
Yellow leaves on the clone
Some yellowing of lower leaves is normal and expected. The cutting is cannibalizing those leaves for energy while it focuses on rooting. As long as the upper leaves stay green and the stem stays firm, yellowing lower leaves are not a crisis. If yellowing spreads upward rapidly or the whole cutting looks pale, check pH of your water and misting solution, and make sure the cutting has some indirect light. Complete darkness slows rooting.
Wilting that won't recover
Persistent wilting after the first 24 hours under the dome usually means humidity is too low or the stem has an air blockage. Raise humidity to 80 percent and re-mist the dome interior. If the cutting came out of water and sat exposed for more than a minute before going into the medium, an air embolism may have formed. You can try re-cutting the stem at a fresh angle, re-applying rooting hormone, and placing it back in moist medium with the dome sealed tightly.
After rooting: acclimation, nutrients, and growing to harvest
Once your clone is rooted and transplanted, the main job is transitioning it from the coddled cloning environment to the conditions it will live in through veg and eventually flower. This transition is where a lot of growers lose otherwise healthy clones by moving too fast.
Light and environment during early veg
Move your freshly transplanted clone under your main veg light, but start it at about 50 to 60 percent intensity or raise the light higher than usual for the first three to five days. Clones that went from a low-light propagation setup directly under a high-intensity LED or HID can show bleaching or stress curling. Step intensity up gradually over the first week. Maintain 18/6 or 20/4 light cycles for veg. Temperature in the grow space should be 70 to 80 F with moderate humidity around 55 to 65 percent.
Starting nutrients
Freshly rooted clones do not need heavy feeding right away. If you transplanted into a quality potting mix with any pre-amended nutrients, hold off on additional feeding for the first five to seven days and let the plant settle in. When you do start feeding, begin at half the manufacturer's recommended dose and work up from there. Watch the leaves for signs of burn (brown tips) or deficiency (yellowing) and adjust accordingly. Nitrogen is the primary driver in veg, but balanced NPK with good micronutrients produces healthier plants overall.
Watering a newly transplanted clone
Water in a circle around the outer edge of the root ball rather than directly over the stem. This encourages roots to spread outward through the medium. Let the pot dry down between waterings, which for a small clone in a larger container might mean watering every two to three days. Overwatering is one of the most common issues after transplant, especially for growers used to keeping clones in a constantly misted dome.
Growing from here to harvest
Once a clone is established in veg, it grows exactly like any other cannabis plant. Veg it until it reaches the size you want, typically four to eight weeks for indoor grows depending on your space, then flip to a 12/12 light cycle to trigger flowering. Because clones are genetically identical to their mother, they will produce the exact same strain characteristics, potency, and structure. This is one of the biggest advantages of cloning: once you find a phenotype you love, you can preserve and reproduce it indefinitely. To scale up into how to grow weed commercially, you will also need to plan for throughput, staffing, and consistent quality control. If you plan to take more clones later, take cuttings from your best plants during veg before flipping to flower, which connects directly to building your own mother plant setup over time. For growers interested in expanding beyond personal cultivation, the dynamics shift considerably, but for the home grower working within a four-plant limit, cloning lets you maximize the genetic quality of every plant in that allowance.
The whole process from cut to harvest typically runs 90 to 120 days for indoor photoperiod strains, with 10 to 21 days for rooting, four to eight weeks of veg, and eight to twelve weeks of flower depending on strain. Autoflowering strains do not respond well to cloning because they are time-based rather than light-cycle-based, so if you are working with autos, seeds are a better starting point than clones.
FAQ
Can I clone the flower I just bought at a dispensary?
No. “Dispensary clone” can be misunderstood, but processed buds are dried tissue. Only fresh, living stem tissue from an actively growing plant can root, so you would need a live clone or a fresh cutting from a legal live plant source.
If my dispensary has “clones,” what is the easiest legitimate way to get one?
If your dispensary sells rooted cuttings or live clones, purchase those directly. It is the cleanest option because you are starting with living, viable tissue and avoiding contamination from handling dried product or improperly stored material.
Is cloning legal everywhere, and do rules change if I’m starting from a plant I already own?
Many places allow cloning only after you legally possess a mother plant, not from harvested or purchased product. In Canada specifically, cloning is allowed from plants sourced from licensed retailers, but you still must stay within household plant limits.
How do I prevent spreading mold or root-rot between different clones?
In most real-world setups, you should plan to disinfect everything the moment you notice a problem. If multiple donor plants or trays are involved, sterilize tools between plants and use separate trays or media when possible to reduce cross contamination.
What donor-plant conditions give the best rooting success?
Avoid taking cuttings when the donor plant is under stress (pests, visible disease, severe nutrient issues). Also try not to cut right after heavy nitrogen feeding, and take cuttings from healthy vegetative growth for the highest rooting consistency.
Do I keep the dome closed the whole cloning period?
Cuttings that remain in the humidity dome too long after roots form can develop mold or weak roots. A common best practice is to start venting around day 5 to 7 and increase ventilation gradually through days 10 to 14 rather than removing the dome abruptly.
What should I troubleshoot first if my clones take longer than 21 days to root?
Yes. If the root zone runs cool, rooting can stall even when the dome humidity is perfect. Make sure the medium temperature stays in the target range (around the mid to high 70s Fahrenheit), then check again before changing everything else.
Is it normal for clone leaves to yellow, and when is it a sign of a bigger issue?
Some yellowing at the bottom can be normal, but watch the whole plant. If new growth is pale, stems soften, or wilting persists beyond the first day, treat it as a real problem (often humidity, temperature, pH, or air blockage).
What do I do if I see brown, mushy stems, do I toss the clone?
If stem rot appears, brown and mushy tissue at the base usually cannot be “saved” reliably. A practical approach is to remove affected clones early, discard contaminated medium when possible, and restart with sterilized tools and fresh propagation media.
How do I handle botrytis or powdery mildew in the dome without losing all my clones?
If you see fuzzy growth on leaves or the medium, increase airflow and slightly reduce humidity, then remove affected tissue immediately. Keep the dome conditions consistent, because rapid swings from very wet to very dry can worsen stress even if airflow improves.
My clone wilted after transplant into the dome, can I fix an air blockage?
Re-cutting can help if you suspect an air embolism, especially when a clone sat exposed too long before going into medium. In that case, trim back to fresh tissue, reapply rooting hormone if you use it, and reseal the dome with the original humidity targets.
How should I adjust light after clones are rooted and transplanted into veg?
Start light lower than your veg setup and ramp intensity over several days. Even if the clones rooted, a sudden jump to high intensity can bleach or stress them because the roots are not yet fully supporting higher transpiration.
When can I start nutrients on rooted clones, and how much should I use?
Avoid heavy feeding right away. If you transplanted into pre-amended or nutrient-containing media, give it time to settle (often about a week), then start at a reduced dose and increase only as leaves show healthy growth without burn.
What is the best way to water clones after transplant so I do not overwater?
Watering frequency depends on container size and dryness rate, but a good rule is to water around the outer root zone and let the pot dry down between waterings. Continuous wetness is one of the fastest ways to cause post-transplant problems.
Why don’t autos clone as well as photoperiod strains?
Cloning works best with photoperiod strains because you can control vegetative growth with the light cycle. Autoflowering plants are time-based, so clones usually do not provide the intended timing benefits; seeds are typically the better starting point for autos.
How can I keep the same strain quality across multiple harvests using clones?
Yes. Clones are genetically identical to the donor, so you can preserve a preferred phenotype by taking cuttings from the best mother during veg. The main planning step is scheduling cuttings before flip, so you always have enough rooted plants for your next run.
How Much Weed Can One Seed Grow and How to Maximize It
Realistic yield from one cannabis seed, what limits it, and steps to maximize flower at home from seed to harvest.