To successfully grow weed from clones, you take a healthy cutting from a mother plant, dip it in rooting hormone, stick it in a moist medium under a humidity dome with low-intensity light, keep temps around 72-78°F (22-26°C), and wait 7-14 days for roots to develop before transplanting into veg. That's the core loop. The details below will help you do every step correctly and troubleshoot when things go sideways.
How to Grow Weed Clones: Rooting to Veg Guide

Marcus Holbrook
2 May 2026
Selecting healthy clones and planning your grow setup
Before you ever pick up a pair of scissors, know what a good clone candidate looks like. You want cuttings from plants that are at least 4-6 weeks into vegetative growth, showing no signs of pests, mold, or nutrient stress. Leaves should be deep green, stems should be firm, and the plant should look vigorous overall. A stressed or sick mother plant produces stressed cuttings, and stressed cuttings rarely root well. If you're sourcing from a dispensary or a friend's grow rather than your own mother plant, inspect carefully before you take anything home.
Plan your setup before you start cutting. You'll need a cloning tray or dedicated cloner, a humidity dome, a rooting medium, rooting hormone (gel, powder, or liquid), and a light source. For vegetative propagation, root-setting hormones can be made as solutions (examples include IBA and NAA) or purchased commercially under various names (e.g., IBA, Rootone, Seradix) rooting hormone (gel, powder, or liquid). Keep everything within arm's reach and sanitized before the first cut. Clones are vulnerable the moment they're separated from the mother, and a clean, organized workspace dramatically cuts contamination risk. I've lost entire batches to mold simply because I rushed the setup and worked on a dirty surface.
Here's a quick checklist of what to have ready before you start:
- Sharp, sterile scissors or razor blade (rubbing alcohol between each cut)
- Rooting hormone: gel (easiest for beginners), powder, or liquid IBA/NAA-based product
- Propagation tray with humidity dome and vent holes
- Rooting medium: rockwool cubes, rapid rooter plugs, peat/perlite mix, or a recirculating aeroponic cloner
- Distilled or pH-adjusted water (target 5.8-6.2)
- A low-wattage fluorescent or LED panel for rooting-phase light
- Clean workspace, gloves optional but helpful
Also worth thinking about at this stage: where are these plants going once they're rooted? Your end environment, whether indoor tent, outdoor garden bed, or hydroponic system, affects decisions you make now. Indoor growers have full control over the veg phase and can keep clones on an 18/6 light schedule indefinitely. Outdoor growers need to time rooting so plants are ready to go outside after the last frost. Hydro growers will want to root directly into rockwool or net pots if possible to minimize transplant shock. We'll get into each path more specifically later in this guide.
Taking clones correctly and preparing cuttings
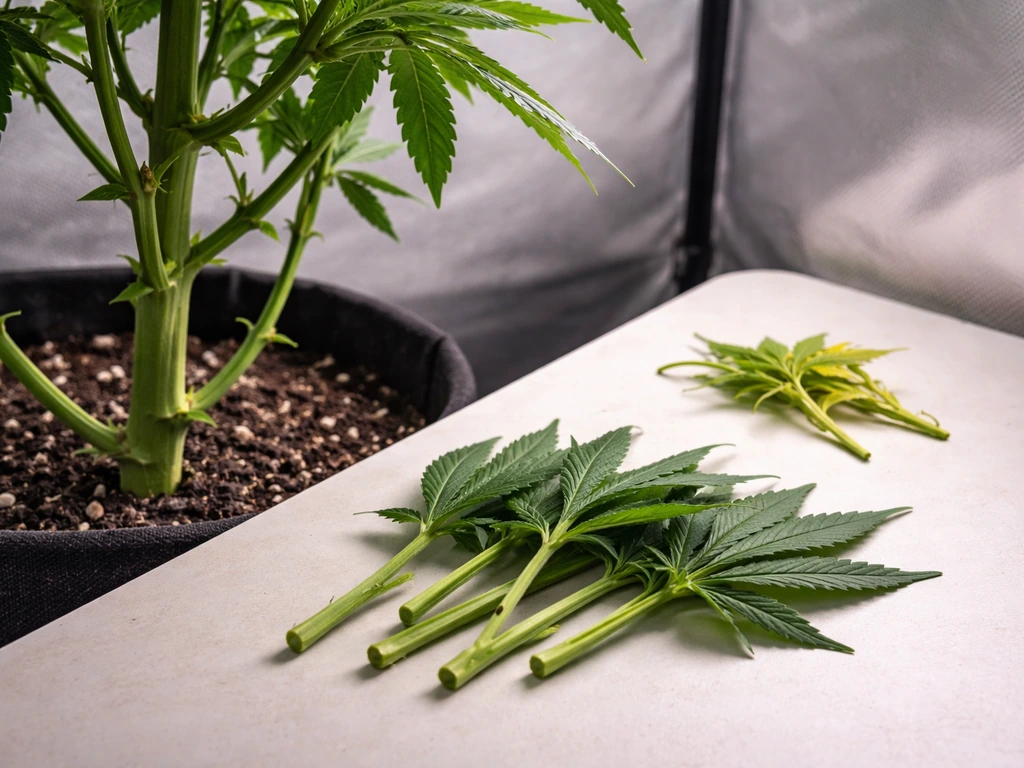
The cut itself is more important than most beginners realize. Take your cutting from a lower branch node on the mother plant, aiming for a stem that's 4-6 inches long with at least 2-3 nodes. Cut at a 45-degree angle just below a node. That angled cut increases the surface area exposed for root development and prevents the stem base from sitting flat and rotting in wet medium. Make the cut clean and fast, not sawing or dragging.
Immediately after cutting, place the stem into a small cup of plain pH-adjusted water. This prevents air bubbles (called air embolisms) from forming in the stem tissue, which can block water uptake and cause the cutting to wilt fast. While the stem is in water, trim away any large fan leaves in the bottom half of the cutting and reduce the remaining fan leaves by about one-third to one-half. This reduces transpiration demand while the clone has no roots to supply water.
Once trimmed, gently scrape the bottom inch of the stem with a clean blade to expose the inner cambium layer. This is the meristematic tissue where roots emerge. Scraping (sometimes called wounding) isn't strictly required, but it meaningfully speeds up rooting by exposing more tissue to your rooting hormone. Then dip immediately into your hormone of choice and get it into the medium without delay.
Rooting methods: medium, hormones, humidity, and lighting
Choosing your rooting hormone
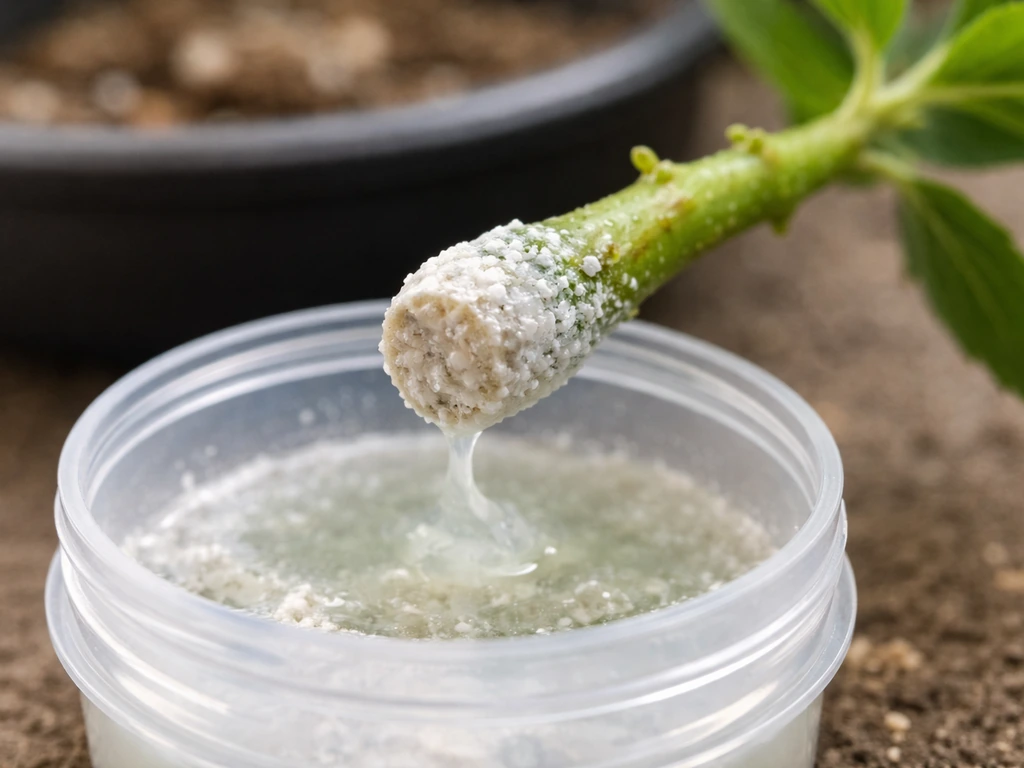
Rooting hormones work by delivering synthetic auxins, specifically IBA (indole-3-butyric acid) and sometimes NAA (naphthaleneacetic acid), to the stem tissue. These compounds trigger root initiation. Concentration matters a lot here. Too little and you get slow, patchy rooting. Too much and you can actually damage the cutting. Commercial rooting gels designed for cannabis cloning (like Clonex) are pre-formulated at safe concentrations and are the easiest starting point for home growers. If you're using a more concentrated liquid dip product, check the label carefully. Products like Dip'N Grow contain around 1.0% IBA and 0.5% NAA as a concentrate, meant to be diluted before use. Research on propagation hormone use consistently shows that the precise concentration range, typically somewhere in the 20-200 ppm range for dilute liquid solutions, and the duration the stem sits in the solution both affect the outcome. A UF/IFAS propagation lab script on rooting hormones likewise notes that the hormone source or formulation and its concentration influence rooting results, including distinctions among auxin formulations like IBA and NAA precise concentration range (typically around 20-200 ppm) and the duration the stem sits in the solution both affect rooting outcomes. When in doubt, use a ready-to-use gel at label strength rather than mixing a concentrate.
Picking your rooting medium
| Medium | Pros | Cons | Best For |
|---|---|---|---|
| Rockwool cubes | Sterile, excellent moisture retention, easy to transplant | Must be pre-soaked and pH-adjusted to 5.5-6.0; can overwater | Indoor and hydroponic grows |
| Rapid Rooter / Starter Plugs | Beginner-friendly, pre-moistened, good aeration | More expensive per unit than DIY mixes | Beginners, any grow style |
| Peat/perlite mix (1:1) | Cheap, good drainage, widely available | Less sterile, need to monitor moisture carefully | Soil and outdoor grows |
| Aeroponic cloner (recirculating) | Very fast rooting (5-10 days), no medium needed | Higher upfront cost, pump maintenance needed | Experienced growers, large batches |
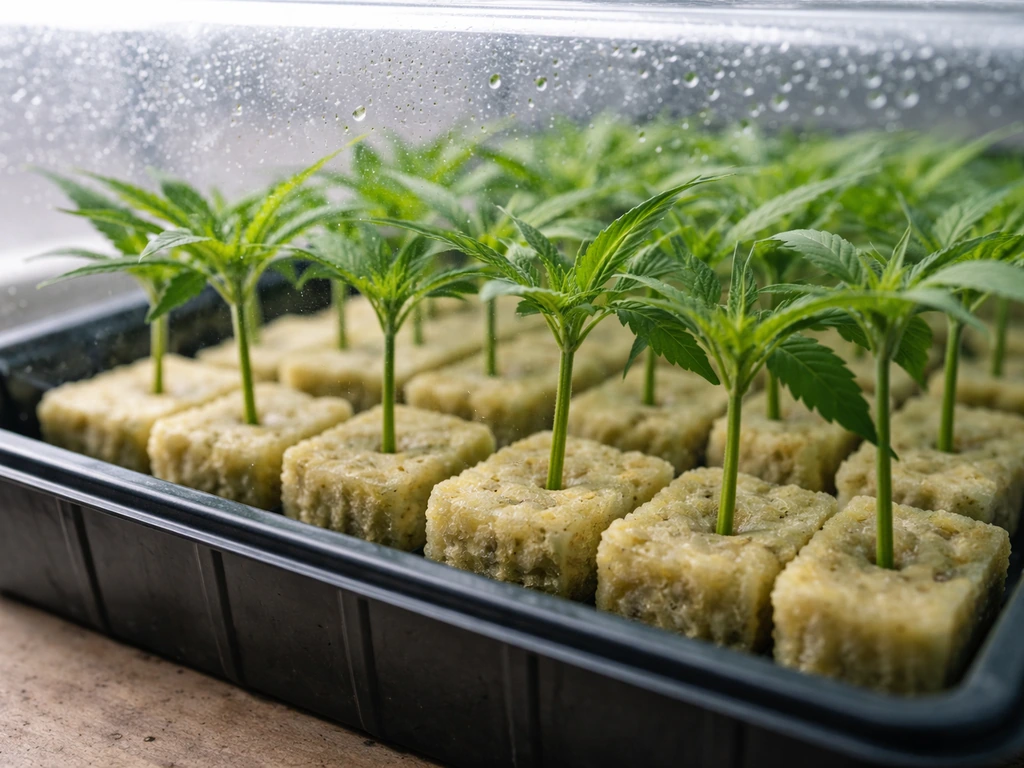
For most beginners, rapid rooter plugs or rockwool cubes are the simplest path. Pre-soak rockwool in water adjusted to pH 5.5 for at least an hour before use, then gently squeeze out excess water so it's moist but not dripping. Plugs that are too wet are one of the most common reasons clones rot at the stem base.
Humidity, temperature, and light during rooting
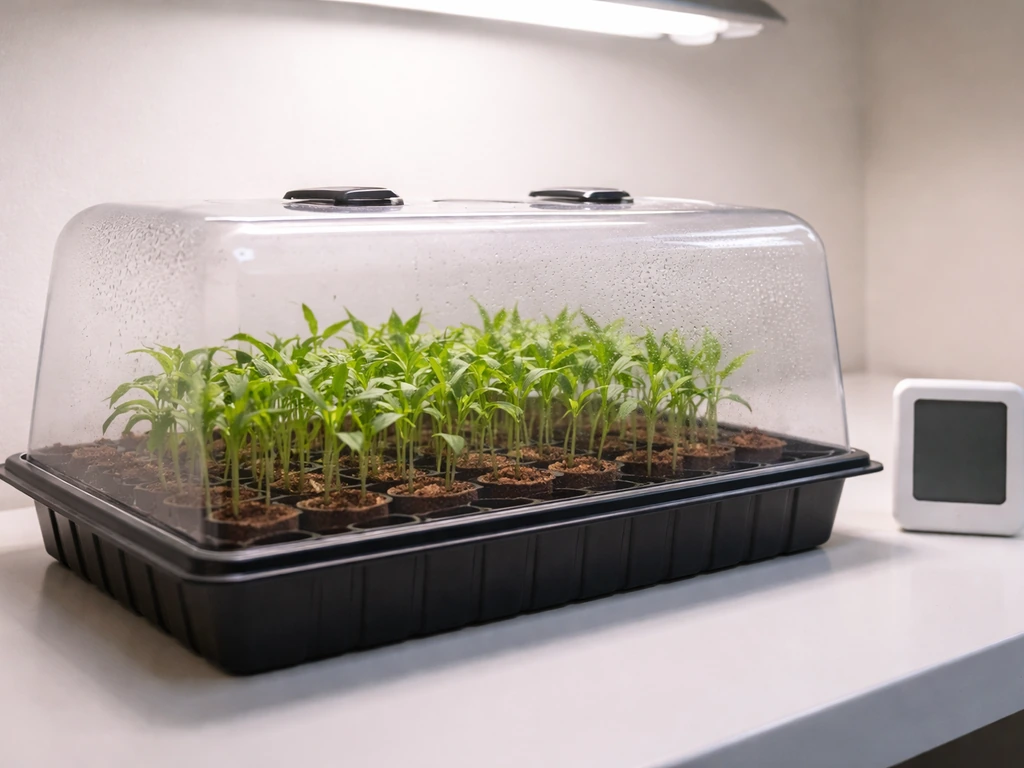
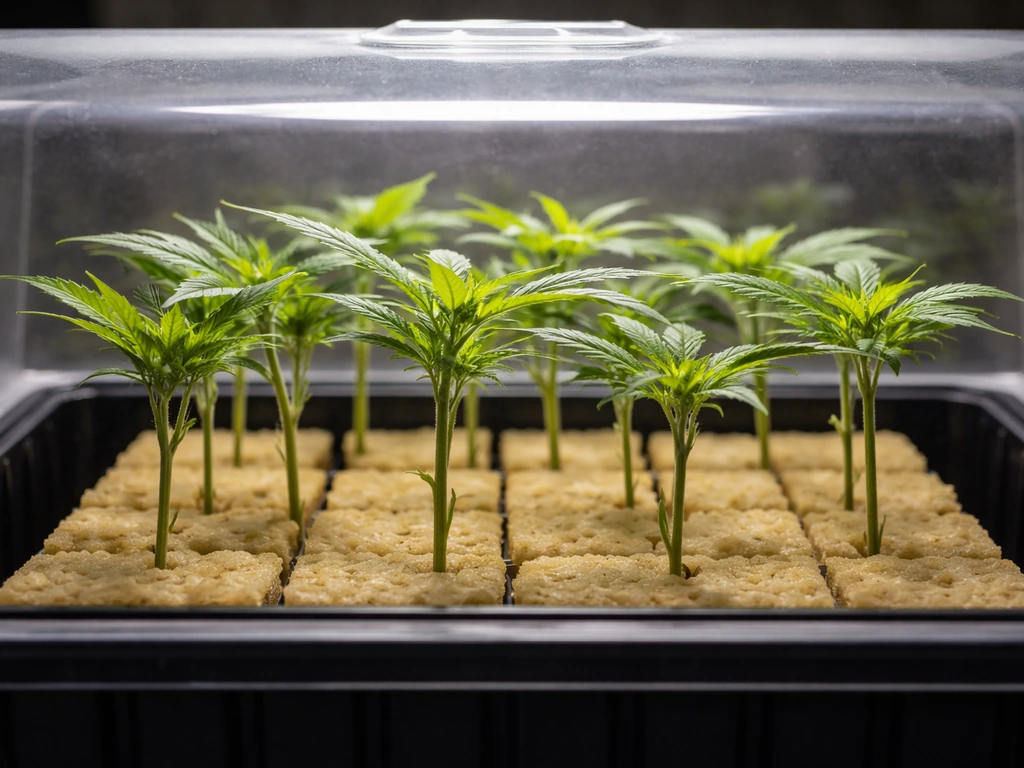
Clones have no roots, so they rely on absorbing water through their leaves until roots form. This is why high humidity is critical during the first week or so. Keep your dome at 80-90% relative humidity for the first 5-7 days, then start cracking the vents to slowly lower humidity toward 70% by day 10-14. A dome with adjustable vents lets you do this gradually. Avoid sealing the dome completely with no airflow. Stagnant air at high humidity is a mold incubator.
Temperature should sit between 72-78°F (22-26°C) in the rooting zone. Bottom heat is genuinely useful here. A seedling heat mat under the tray can raise the medium temperature 5-10°F above ambient, which speeds root development noticeably. Aim for root zone temps around 72-75°F specifically. Air temperature above the dome matters less during this phase.
Lighting during the rooting phase should be gentle. Clones don't need or want intense light before they have roots. A T5 fluorescent or a low-wattage LED panel running at 18 hours on / 6 hours off, positioned 4-6 inches above the dome, is plenty. High-intensity LEDs or HPS at this stage can cause excessive leaf transpiration and wilting. Once you see roots poking through the bottom of the medium, you can start increasing light intensity incrementally.
Troubleshooting cloning problems and root development checks
Even when you do everything right, cloning throws curveballs. Here are the most common problems and what's actually causing them:
| Problem | Likely Cause | Fix |
|---|---|---|
| Wilting within 24-48 hours | Air embolism, low humidity, or too much light | Mist the leaves, check dome seal, reduce light intensity |
| Stem base turning brown/mushy | Overwatered medium or fungal stem rot | Remove affected cutting, let medium dry slightly, improve airflow |
| No roots after 14+ days | Incorrect hormone application, temperature too low, or wrong medium moisture | Check root zone temp, reapply hormone if trying again, ensure medium is moist not wet |
| Yellowing lower leaves | Normal during rooting (plant cannibilizes lower leaves), but check for mold | Normal if only bottom leaves; improve airflow if mold is visible |
| Leaves curling upward | Heat stress or overly dry conditions after dome removal | Lower light intensity, mist lightly, reintroduce dome temporarily |
| White fuzzy growth on medium | Mold from too-high humidity and zero airflow | Open dome vents, remove visibly molded plugs, add a small fan nearby |
To check root development without yanking the clone out and damaging it, look at the bottom of the tray or the underside of the plug. White root tips poking through are a clear signal of successful rooting. In aeroponic cloners, you can see roots forming directly along the stem inside the reservoir. In opaque medium like rockwool, a gentle tug test works: if there's slight resistance when you lightly pull upward on the stem, roots have anchored. No resistance and the plug feels loose means not ready yet.
Day 7 is typically when you start checking. Most healthy clones show visible roots by days 10-14. If you're at day 18 with nothing visible and the cutting is still alive and green, check your root zone temperature first. Cold medium is the most common hidden culprit for slow rooting.
Transplanting rooted clones and starting veg
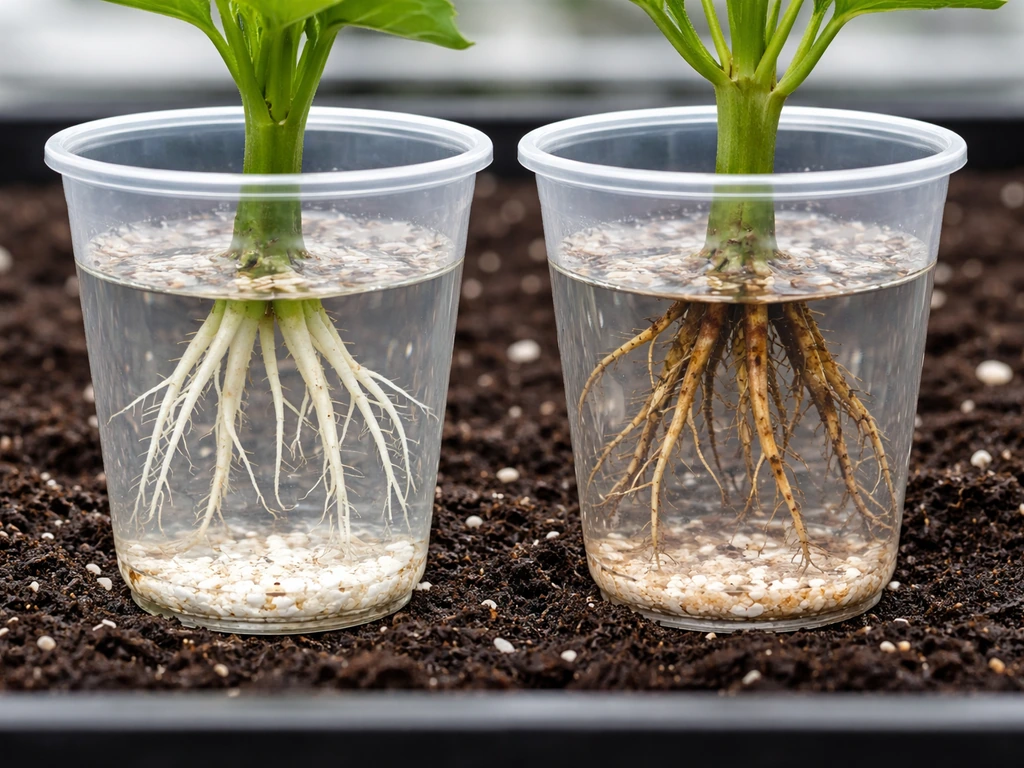
A clone is ready to transplant when roots are at least 1-2 inches long and showing healthy white color. Brown or slimy roots need to be addressed before transplanting. For soil or coco grows, prepare your container in advance, usually a 1-gallon pot to start, filled with lightly pre-moistened medium. Make a hole slightly larger than the plug, lower the rooted clone in without compressing the roots, and backfill gently. Water in with plain, pH-adjusted water (6.0-6.5 for soil, 5.8-6.1 for coco) at low volume to settle the medium around the root zone.
For hydroponic systems, place the rockwool cube directly into the net pot with hydroton or similar medium supporting it. Make sure the cube base makes contact with the nutrient solution or that your system's feeding cycle keeps roots hydrated immediately after transplant. Hydro clones in a recirculating deep water culture or DWC system can experience a transition period of 2-3 days where they look slightly stressed as roots adjust from air-rooting to water submersion. This is normal.
Keep newly transplanted clones in a slightly lower-light environment for the first 24-48 hours. Think of it as hardening off. Dropping them directly under 600-watt HPS or high-intensity LEDs on day one invites transplant shock. After 48 hours with no significant wilting, you can bring them up to your normal veg light intensity.
Early veg care: watering, light schedule, and initial feeding
Watering in early veg
Newly transplanted clones have a small root system relative to their leaf mass, which means overwatering is the number one mistake at this stage. Water the root zone only, not the entire pot. In a 1-gallon pot, start with roughly 8-12 oz of water per watering, only when the top inch of medium is dry. As the root system expands over the following 1-2 weeks, the plant will drink faster and you can increase volume. The classic method: lift the pot. If it feels light, water. If it feels heavy, wait.
Light schedule and intensity
For indoor veg, 18 hours of light and 6 hours of darkness is the standard. Cannabis in veg won't flower on this schedule, so you have full control over how long you veg before flipping to 12/12. Most home growers veg clones for 3-6 weeks before flowering, but the timing depends on target plant size. During the first 1-2 weeks after transplant, keep your LED or HID at moderate intensity and distance. A PPFD of around 400-600 µmol/m²/s is appropriate. Ramp up toward 600-800+ µmol/m²/s as the plant establishes.
Initial feeding strategy
Don't start feeding nutrients immediately after transplant. Most quality potting soils contain enough base nutrients to carry a clone for 1-2 weeks. Starting nutrients too early on a stressed transplant is a fast path to nutrient burn. Signs of burn include crispy, brown-tipped leaves, usually appearing on older growth first. When you do start feeding, begin at 25-50% of the nutrient manufacturer's recommended dose and watch for the plant's response before increasing. Nitrogen is the primary driver in veg, but a balanced N-P-K formula with micronutrients is sufficient for early growth.
For hydroponic growers, start with an EC of around 0.8-1.2 mS/cm in early veg and pH at 5.8-6.1. Watch for signs of deficiency or toxicity closely in the first week. Coco coir growers should start cal-mag supplementation from day one, since coco naturally buffers calcium and magnesium out of solution.
Cloning-to-harvest pathway notes for indoor, outdoor, and hydroponic contexts
Once your clone is rooted and into veg, the path forward depends on your grow environment. Each setup has a few key considerations to keep in mind from this point on.
Indoor grows
Indoor growers have the most flexibility. You control the light schedule completely, so you can veg a clone for as long or as short as you want before triggering flower with a 12/12 schedule. A common approach is to veg until the plant is roughly half the target final height, since most cannabis strains double in size during the flowering stretch. Clones from a known mother plant have a big advantage here: you already know the strain's flowering time and growth characteristics, so planning is much simpler than starting from seed.
Outdoor grows
If you're growing outdoors, timing your clone rooting relative to your local last frost date is everything. Start rooting clones indoors 4-6 weeks before your planned outdoor transplant date. Once outdoor temperatures are consistently above 50°F (10°C) at night and plants are rooted and in early veg, you can begin hardening them off by placing them outside for progressively longer periods each day for about a week before leaving them out full time. Outdoor plants will begin flowering naturally as day length shortens in late summer, so the exact timing depends on your latitude. Growers considering growing clones outdoors step by step will find the hardening-off and seasonal timing details especially important to nail down.
Hydroponic grows
Hydroponic clones, especially those rooted in aeroponic cloners or rockwool, often develop faster in veg than soil-grown plants once the root system is established and dialed in. Keep a close eye on pH drift in your reservoir, as it can shift quickly with young plants. Daily pH checks for the first two weeks of hydro veg are not overkill. EC management becomes more important as the plant grows; increase EC gradually from around 1.0 mS/cm in early veg toward 1.6-2.0 mS/cm as the plant matures into mid-veg. Reservoir changes every 7-10 days keep the solution fresh and prevent salt buildup.
Regardless of your chosen path, the clone-to-harvest timeline for an indoor grow typically runs 8-16 weeks from transplant depending on veg length and strain flowering time. Outdoor grows from late-spring clones usually harvest in September through October in the Northern Hemisphere. Hydro grows can often shorten the overall timeline by 1-2 weeks compared to soil due to faster nutrient uptake and root development. If you're growing for a commercial or dispensary-level operation, the workflow scales up but the core principles remain exactly the same as described here. If you want to know how to grow weed commercially, scale your clone, nutrient, and environmental control steps while tightening sanitation and quality checks commercial or dispensary-level operation. If you're aiming for how to grow weed for dispensaries, the same cloning and veg basics are applied at larger scale with tighter quality and consistency checks.
The biggest thing I'd leave you with: cloning rewards consistency and cleanliness more than any other phase of growing. Get your workspace sterile, your humidity dialed, your hormone applied correctly, and your temperatures stable, and you'll have a high success rate almost immediately. The first batch that fails teaches you more than any guide can. Note what went wrong, adjust one variable at a time, and you'll be running reliable clones within a few attempts.
FAQ
Which part of the mother plant should I take weed clones from (lower branches vs top growth)?
Aim to take clones from the healthiest, most vigorous lower side growth, but don’t assume “lower is always better.” The most reliable cuttings come from branches that are actively growing, not shaded, and not already showing early nutrient issues. If the mother is stressed (drooping, pale leaves, pest damage), even a perfect cutting technique often results in slow or failure to root.
How long can I keep weed clones in water after cutting before I put them in the rooting medium?
If you don’t have a ready rooting medium, you can hold the cuttings briefly in clean, pH-adjusted water to prevent dehydration, but time matters. Once the cutting is air-drying, viability drops fast. Work efficiently, keep cut ends submerged, and avoid leaving them in water for long periods (hours, not overnight) before they go into the medium.
What humidity level is actually safest during the first week, and what signs mean it’s too high or too low?
Don’t chase a perfect “absolute” humidity number, focus on preventing condensation and stagnation. If your dome has visible droplets and the inside walls stay wet, lower humidity or increase gentle airflow, because that combination often leads to stem base rot. Conversely, if leaves are crisping and drooping early, humidity may be too low or airflow too aggressive.
Why do my clones rot at the stem base even though I’m using rooting hormone and a dome?
If your medium is sterile but the clones still rot at the base, the most common causes are over-wetting (too-soggy rockwool or plugs), contaminated tools, and keeping the clone sitting in hormone or wet solution too long. Use moist, not dripping medium, sanitize between batches, and ensure hormone is applied briefly then immediately transferred into the plug.
Can I use a stronger rooting hormone mix to get faster root growth, or is more always better?
Yes, for many growers the fastest path is a ready-to-use gel at label strength, because concentrated dips can be easy to overdose. If you must dilute a liquid concentrate, follow the label dilution instructions exactly, and remember that “more hormone” can reduce success by damaging tissue or stressing the clone.
What should I troubleshoot first when clones are staying alive but not showing roots by day 14?
If clones are alive but not rooting, check the root zone temperature before anything else. Cold medium commonly slows rooting dramatically, even when the dome air temperature seems fine. Aim for the root zone target, use bottom heat if needed, and confirm with a probe thermometer placed in the tray or plug area.
How do I know when weed clones are truly ready to transplant, especially if roots are visible but look imperfect?
A “ready” clone typically has healthy, white root growth (about 1 to 2 inches) and firm anchoring. If roots are brown, slimy, or the plug breaks apart easily, it’s better to pause transplanting and fix the cause (often moisture level, airflow, or temperature) before moving to veg.
What’s the best way to prevent overwatering after transplanting rooted clones into a 1-gallon pot?
Overwatering is the most frequent issue after transplant because the leaf mass starts larger than the root system can support. Water based on the root-zone dryness (not the schedule), start with low volume, and lift the pot to judge weight. If leaves are wilting but the medium is already wet, don’t add more water.
When should I start nutrients after transplanting clones, and how can I tell if I fed too early?
Feed timing depends on plant stress and medium nutrient level, but a practical rule is to wait until the clone shows clear recovery and new growth. For many setups, that means roughly 1 to 2 weeks in soil, or earlier only if the product and medium are clearly nutrient-ready. Starting early with strong nutrients often shows up as leaf-tip burn on older leaves.
In hydroponics, why do clones sometimes stall even when my pH and EC numbers look close?
If you see pH drift in hydro, younger plants can react quickly to swings even if values are “near” the target. Measure pH frequently during the first couple weeks, calibrate your meter, and make small corrections. Sudden large adjustments and inconsistent reservoir replacement are common reasons hydro clones stall.
How should I ramp light after cloning so I don’t trigger transplant shock?
Light too intense during the rooting-to-veg transition commonly causes wilting and slowed recovery. Use a gradual ramp, and prioritize stable distance and moderate PPFD at first. Once you see active new growth, you can increase intensity stepwise rather than jumping directly to your veg maximum.
Do some cannabis clones root more slowly than others, and how do I tell genetics vs my technique?
Genetics matter, but environment and handling matter more for rooting success. Some strains inherently root more slowly, but you should still see some response within the typical window when conditions are correct. If a particular strain consistently underperforms, compare your root zone temp, plug moisture, and humidity management to your best-performing batches.
My cloning success rate varies batch to batch, what’s the most common reason and how do I diagnose it?
Varying results across batches usually comes from one of a few controllable inconsistencies: mother plant health, clone age and leaf trimming consistency, hormone contact time, plug wetness, and temperature stability. Use a simple change log and adjust only one variable at a time, otherwise you can’t know what fixed (or caused) the problem.
Next Article
How to Grow a Clone From the Dispensary: Legal and Steps
Learn the legality and step-by-step process to clone cannabis, what not to use from dispensary buds, and how to root cut