Growing cannabis from seed at home is genuinely straightforward once you understand a handful of core concepts: the plant's life stages, how light controls flowering, and why pH matters more than almost anything else. Reddit communities like r/microgrowery and r/cannabisculture have collectively solved most beginner problems already, but the advice is scattered across thousands of threads. This guide pulls the best of that community knowledge together with solid horticultural practice so you have one place to start, whether you're germinating your first seed under a desk lamp or setting up a proper tent.
How to Grow Weed Seed Reddit Guide: Beginner to Harvest 2026

Marcus Holbrook
27 Jul 2026
What this guide covers and a word on responsibility
This is a practical, seed-to-harvest walkthrough aimed at beginners who've already spent time scrolling Reddit and walked away with 40 browser tabs and more questions than answers. I've been there. The guide covers germination, seedling care, vegetative growth, and the decisions you need to make before you ever drop a seed in water. It treats indoor, outdoor, and hydroponic growing as equally valid paths, because they are. What it does not do is tell you to break the law or skip safety steps because a Reddit comment said it was fine.
Legal, safety, privacy and odor control, check these before you start
Cannabis cultivation is legal for adults in some jurisdictions, decriminalized in others, and a serious criminal offense in many more. Your first step is to look up the specific rules where you live, including plant count limits, whether home growing is permitted under medical programs, and whether seeds are legal to purchase. Do not rely on Reddit for legal advice, jurisdictions vary enormously, rules change, and a three-year-old top comment from a different country can get you into real trouble.
On the practical safety side, your grow space needs adequate ventilation to prevent mold and manage heat, especially if you're running HID or high-wattage LED fixtures. Electrical safety matters: use proper outlets, avoid overloading circuits, and keep water well away from ballasts and drivers. For privacy, a quality carbon filter paired with an inline fan handles odor control effectively during flowering, this is non-negotiable if you live in an apartment or share walls with neighbors. Light leaks from an indoor tent can signal a grow to outsiders during dark periods, so seal them. Being a responsible grower means thinking about all of this before the seeds arrive.
- Verify local plant count limits and any licensing requirements before purchasing seeds
- Use a carbon filter and inline fan rated for your grow space volume to control odor
- Check electrical load — most grow tents need a dedicated 15- or 20-amp circuit
- Seal all light leaks in your tent or room, especially during the 12-hour dark period
- Store nutrients and growing chemicals out of reach of children and pets
- Keep your grow discreet — discuss it only with people who need to know
Cannabis basics: life stages and key terms explained
Cannabis moves through distinct life stages: germination, seedling, vegetative growth, flowering, and finally harvest. Each stage has different needs for light, water, and nutrients. Understanding these stages is the single most useful thing a beginner can learn because almost every piece of advice you'll find on Reddit is framed around them. A question like 'why are my leaves yellowing?' has a completely different answer in week two of veg versus week six of flower.
Two terms that trip up nearly every beginner are photoperiod and autoflower. Photoperiod (or 'photo') strains flower in response to a change in light hours, specifically when they receive 12 hours of uninterrupted darkness. This mimics the natural shortening of days in late summer, and you trigger it manually indoors by switching your timer to a 12/12 schedule. Autoflower strains (which carry ruderalis genetics) flower based on age rather than light hours, usually beginning to flower at 3 to 5 weeks regardless of your light schedule. This makes autos more forgiving for beginners but also less responsive to certain training techniques.
Feminized seeds are bred to produce almost exclusively female plants, which is what you want because only females produce the resin-coated flowers growers are after. Regular seeds produce roughly 50 percent male and 50 percent female plants. Males produce pollen and will fertilize females if left in the same space, seeding your crop. Unless you're breeding, most beginners should start with feminized seeds to avoid this complication entirely.
| Seed Type | Flowers By | Sex Ratio | Best For | Training Flexibility |
|---|---|---|---|---|
| Photoperiod Feminized | Light change (12/12) | ~99% female | Beginners who want control over timing | High — responds well to LST, topping, SCROG |
| Autoflower Feminized | Age (3–5 weeks) | ~99% female | Beginners wanting fast, simple grows | Limited — avoid heavy topping, use LST gently |
| Photoperiod Regular | Light change (12/12) | ~50/50 | Breeders and experienced growers | High — same as photoperiod feminized |
| Autoflower Regular | Age (3–5 weeks) | ~50/50 | Breeders working with auto genetics | Limited — same as autoflower feminized |
Choosing a strain: what actually matters for beginners
The indica vs. sativa distinction you'll see everywhere on Reddit is mostly a marketing frame at this point. From a practical cultivation standpoint, what matters more is flowering time, expected height, difficulty rating, and whether the strain suits your environment. A strain labeled 'sativa-dominant' often stretches dramatically in flower and can double in height during the first two weeks of 12/12, which is a shock if your tent is only 1.5 meters tall. For a first grow, look for strains with a difficulty rating of 'easy' or 'beginner-friendly,' a flowering time under 9 weeks, and a moderate expected height.
Where you buy your seeds matters. Reputable seed banks with established track records, verifiable customer reviews, and clear germination guarantees are worth the extra cost over random eBay listings. If you're in a jurisdiction where purchasing seeds is legal, you can find well-reviewed vendors with dedicated communities on Reddit, check the pinned posts in r/microgrowery for current recommendations, since vendor reputation changes over time. Avoid buying based on flashy packaging or inflated THC percentage claims alone.
- Choose a strain rated 'easy' or 'beginner' for your first grow
- Check expected height and make sure it fits your space with room to spare
- Look for strains with a flowering period of 8–9 weeks or less to start
- Buy from a vendor with verifiable reviews and a germination guarantee
- Avoid purchasing more seeds than you'll use in 12–18 months unless you can store them properly
Seed selection and storage: making the right calls
For most beginners, feminized photoperiod or feminized autoflower seeds are the right choice. Feminized photoperiod gives you more control, you decide when flowering starts, you can veg longer for bigger plants, and training techniques work well. Feminized autoflowers get you to harvest faster (often 60 to 75 days from seed) and are more forgiving of minor light leaks, but you get less total yield per plant and less ability to recover from early mistakes. I started with autos because I was impatient, and I don't regret it, but my second grow with photoperiod feminized seeds taught me a lot more about the plant.
Before your seeds arrive, do a quick visual check when they come in. Healthy, viable seeds are firm to the touch, have a dark brown, tan, or striped/mottled shell, and don't crush when pressed lightly between your fingers. Pale, green, or visibly cracked seeds are unlikely to germinate well. A pre-soak float test (placing seeds in plain room-temperature water for 12 to 24 hours) can also give you a rough viability read, seeds that sink by the end of the soak are more likely to be viable, though this isn't a perfect guarantee.
For storage, the enemies of seed viability are heat, light, and moisture. Short-term storage (a few months): an airtight opaque container with a small silica gel pack kept in a cool, dark drawer or cupboard works fine. Medium-term (up to a year): a refrigerator at around 4 to 8 degrees Celsius with silica gel inside an airtight container is the standard recommendation from most seed banks. Long-term: seeds can be vacuum-sealed and deep-frozen, but they must be fully dried first and the temperature should remain consistent, repeated freeze-thaw cycles damage seeds quickly.
- Inspect seeds visually — firm, dark, mottled shells are a good sign
- Avoid seeds that are pale green, very light tan, or that crumble under slight pressure
- Do a 12- to 24-hour pre-soak float test for older seeds — sinkers are more likely viable
- Store in an airtight, opaque container with silica gel desiccant
- Keep storage temperature at 4–8°C for medium-term, consistent deep-freeze for long-term
- Label containers with strain name, seed bank, and purchase date
- Never refrigerate seeds in a frost-free fridge without an airtight container — humidity cycling will damage them
How to germinate: three methods compared
There is no single 'best' germination method, each has its place depending on your setup and how hands-on you want to be. The three most commonly recommended methods on Reddit and in grower guides are the paper towel method, direct soil sowing, and starter plugs (jiffy pellets, rockwool cubes, or coco plugs). Here's how each one works and where each tends to succeed or fail.
Paper towel method
- Moisten two paper towels with plain, pH-balanced water (around pH 6.0–6.5) — damp but not dripping
- Place seeds on one towel with at least 2–3 cm of space between them
- Fold the second towel over the top, then place the whole thing on a plate
- Cover with a second plate or a loose plastic bag to retain moisture
- Keep in a warm location at 21–26°C — the top of a refrigerator or a seedling heat mat on low works well
- Check every 12 hours without disturbing the seeds; mist lightly if the towel dries out
- Taproots typically emerge within 24–72 hours; transplant when the taproot is 0.5–1.5 cm long
- Handle germinated seeds with clean tweezers only, taproot pointing downward, plant 0.5–1 cm deep
The paper towel method gives you clear visual confirmation that a seed has germinated before you commit it to soil, which is why it's popular with beginners. The main downside is the transfer step, a tiny, fragile taproot can be damaged if you're not careful, and any contamination on your hands or tools can introduce pathogens. Use sterile technique and don't wait too long before transplanting.
Direct soil sowing
- Pre-moisten your seedling medium (light, airy mix — avoid heavy, nutrient-dense soils at this stage)
- Make a small hole about 0.5–1 cm deep with a pencil or your finger
- Drop the seed in pointed end down if visible, then cover lightly — do not compact the soil
- Mist the surface gently and cover the pot with a clear humidity dome or plastic wrap
- Keep at 21–26°C and maintain moisture without waterlogging — mist rather than water
- Seeds typically sprout and push through the surface within 3–7 days
Direct sowing avoids the fragile transfer step entirely, which makes it arguably the least stressful method for the seed. The trade-off is that you can't see what's happening underground, if a seed doesn't sprout after 7 to 10 days, you don't know whether it hasn't germinated yet or whether it's already rotted. That said, many experienced growers prefer direct sowing precisely because it eliminates handling trauma.
Jiffy pellets and starter plugs
- Hydrate your jiffy pellet or starter plug in pH-adjusted water (5.8–6.2 for coco/hydro plugs, 6.0–6.5 for peat-based jiffy)
- Allow to fully expand and drain off excess water
- Poke a small hole in the center (roughly 0.5–1 cm deep) with a toothpick
- Place the seed in the hole, cover gently, and place plugs in a humidity tray
- Maintain warmth (21–26°C) and keep the plugs moist but not saturated
- Once roots are visible at the bottom and sides of the plug (typically 5–10 days), transplant the whole plug into your growing medium
Starter plugs scale well if you're germinating multiple seeds at once, and the plug-to-pot transplant is seamless because you're never handling bare roots. They're especially useful for hydro setups. The small extra cost per plug is worth it for most beginners running a few plants.
| Method | Visibility of Progress | Transfer Stress Risk | Equipment Needed | Best For |
|---|---|---|---|---|
| Paper Towel | High — you see the taproot | Medium — careful handling required | Paper towels, plates, tweezers | Beginners who want confirmation before committing to soil |
| Direct Soil Sow | Low — all underground | None — no transfer needed | Just your growing medium and a pot | Beginners who want minimal handling of seeds |
| Jiffy/Starter Plug | Medium — roots visible at edges | Very low — whole plug transplants | Plugs, humidity tray, pH water | Beginners running multiple seeds or moving to hydro |
Seedling care: lights, humidity and what not to do
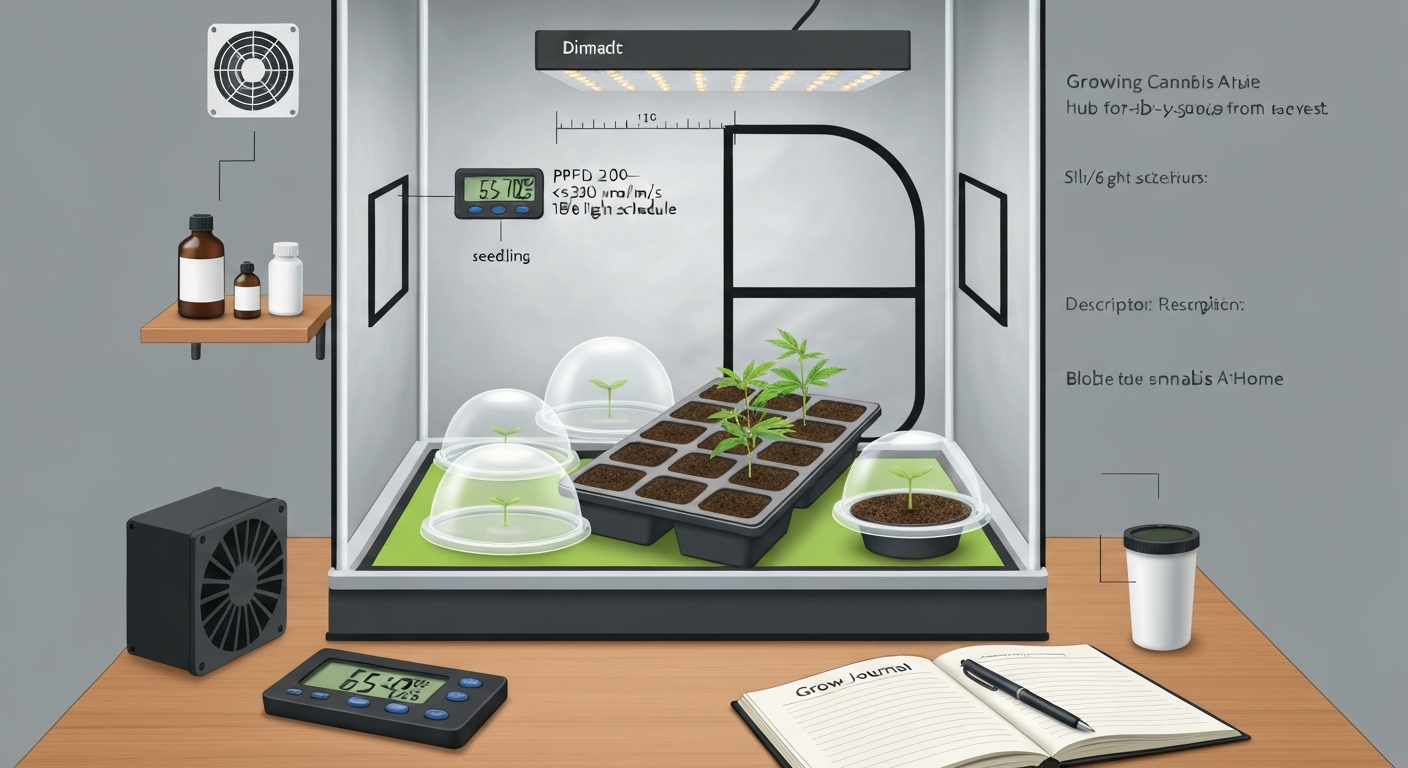
Once your seedling has emerged and its first set of true leaves (the serrated cannabis leaves, not the round cotyledons) has appeared, the main priority is gentle, steady light and stable humidity. Seedlings do not need intense light, in fact, blasting them with a high-PPFD LED at full power is one of the most common beginner mistakes I see on Reddit. For seedlings, you're targeting a PPFD of roughly 200 to 300 µmol per square meter per second. A T5 fluorescent, a small LED panel dimmed down, or even a quality CFL positioned 10 to 15 cm above the canopy is plenty at this stage.
An 18- to 20-hour light schedule works well for seedlings and young plants. Running 18 hours on and 6 hours off (18/6) is the standard recommendation for beginners because it promotes strong growth without the risk of light stress that can come with continuous 24-hour light. Some research does suggest that continuous light can increase growth rate in certain cultivars, but it also carries a real risk of causing photooxidative stress and leaf damage, especially in young plants, so 18/6 is the safer, well-tested default.
Humidity is the other variable that new growers underestimate. Seedlings take in most of their water through their leaves at this stage because their root systems are tiny. Aim for 65 to 70 percent relative humidity under a dome during the first week, dropping gradually to around 50 to 60 percent as the plant develops. If you're seeing seedlings wilt despite moist soil, low humidity is often the cause. Conversely, consistently high humidity (above 75 percent) throughout the seedling stage increases the risk of damping off, a fungal condition that collapses the stem at the soil line.
On nutrients: do not feed seedlings during the first 7 to 14 days. The Comprehensive Guide to Cannabis Nutrient Regimens - Cannabis Growers Blog notes that most beginner schedules recommend very light or no base nutrient for the first 7–14 days (use plain pH‑balanced water or 10–25% feed) before introducing diluted vegetative nutrient to avoid seedling/root burn. Most quality seedling mixes have enough nutrients already, and adding fertilizer at this stage is more likely to burn fragile roots than help the plant. Plain pH-balanced water is all you need until the plant has two to three sets of true leaves. When you do start feeding, begin at 25 percent of the manufacturer's recommended dose and increase from there based on how the plant responds.
- Keep PPFD at 200–300 µmol/m²/s for seedlings — dim your light or raise it higher if needed
- Run an 18/6 light schedule as your default through seedling and veg stages
- Maintain 65–70% relative humidity under a dome for the first 5–7 days
- Water around the seedling, not directly onto it — encourage roots to spread outward
- No nutrients for the first 7–14 days; plain pH-balanced water only
- Transplant when roots are visibly circling the bottom of the starter pot or plug — do not wait until they're severely root-bound
- Avoid overwatering — lift the pot to judge dryness by weight, not just surface appearance
Common seedling mistakes and how to fix them
| Symptom | Likely Cause | Fix |
|---|---|---|
| Stretchy, tall, pale seedling | Light too far away or too dim | Lower light or increase intensity to 250–300 PPFD |
| Wilting despite moist soil | Low humidity or overwatering root issues | Raise humidity to 65–70%, check drainage |
| Brown, crispy leaf tips | Nutrient burn or too-strong fertilizer | Flush with plain pH water, reduce or stop feeding |
| Stem collapse at soil line | Damping off (fungal) | Improve airflow, reduce humidity, remove affected plant |
| No sprout after 7+ days (direct sow) | Seed too deep, too cold, or not viable | Check temperature (aim 22–25°C), try the paper towel test on another seed |
The vegetative stage: light, training and feeding
The vegetative stage is where your plant builds the structure that will eventually support its flowers. For photoperiod strains, this stage lasts as long as you keep the plant on a long-day schedule, most indoor growers veg for 4 to 8 weeks depending on the size they want. Autoflowers will begin flowering on their own at 3 to 5 weeks from seed regardless of your light schedule, so the 'vegetative window' is shorter and less adjustable. Either way, the goal during veg is strong, even branching and a healthy root system.
Light schedules during veg
Stick with 18/6 as your vegetative light schedule unless you have a specific reason to change it. Your PPFD target during early to mid-veg is roughly 300 to 600 µmol per square meter per second, increasing toward the higher end as the plant matures and you move into late veg. Most modern LED grow lights have a dimmer, use it. Running your light at full power over small seedlings and young plants wastes electricity and risks light stress. When you're ready to flip photoperiod plants to flower, switch the timer to 12 hours on and 12 hours off and maintain that schedule consistently, even small light leaks during the dark period can interrupt flowering or cause re-vegging. Research shows that inflorescence development in female cannabis plants is mediated by photoperiod and gibberellin, confirming that switching to a short-day (12/12) schedule induces flowering Inflorescence development in female cannabis plants is mediated by photoperiod and gibberellin - PMC.
Training basics: LST, topping and SCROG
Training is how you control plant shape, maximize light penetration to lower branches, and ultimately increase yields. The three techniques you'll see mentioned most on Reddit are low-stress training (LST), topping, and the screen of green (SCROG). LST involves gently bending stems and tying them down to create a flat, even canopy rather than a single tall cola. It's low-risk and works on both photoperiod and autoflower strains. Topping means cutting off the main growing tip to force two new main colas in its place, which doubles up over time into a bushy, multi-topped plant. It's more aggressive and should only be done on healthy photoperiod plants with at least 4 to 5 nodes, I'd avoid topping autos unless you're experienced, since they don't have time to recover from stress the same way photos do. SCROG involves weaving branches through a horizontal net positioned above the canopy to maintain an even, productive light-distribution layer, it's a natural next step once you're comfortable with LST and topping.
Nutrients and pH during veg
Cannabis in vegetative growth needs more nitrogen (N) relative to phosphorus (P) and potassium (K). Most nutrient lines reflect this with a 'veg' or 'grow' formula that's N-heavy. Start at 25 to 50 percent of the label dose and work up gradually while watching the plant for signs of deficiency or excess. Your target EC for vegetative growth is roughly 0.8 to 1.6 mS/cm (about 400 to 800 ppm on the 500 scale), though this varies by medium and water quality. Always check your source water TDS before mixing nutrients, if your tap water is already at 300 ppm, your nutrient additions should account for that. Growers using reverse osmosis water often need to add a cal-mag supplement to avoid calcium and magnesium deficiencies.
pH is probably the most important number you'll track throughout the grow. In soil, target pH 6.0 to 7.0 when feeding, with most growers aiming for around 6.2 to 6.8. In coco coir or hydroponic systems, the target range narrows to about 5.5 to 6.5, with most growers keeping it between 5.8 and 6.2. Outside these ranges, nutrients lock out even when they're physically present in the medium, causing deficiency symptoms that look like feeding problems but are actually pH problems. I wasted two weeks throwing extra iron at a plant that just needed its pH corrected. Get a digital pH meter (not drops, they're not accurate enough), calibrate it regularly, and check every time you water.
| Stage | Target EC (mS/cm) | Target PPM (500 scale) | pH (Soil) | pH (Coco/Hydro) |
|---|---|---|---|---|
| Seedling (days 1–14) | 0.4–0.9 | 200–450 | 6.0–6.5 | 5.8–6.2 |
| Early Veg (weeks 2–4) | 0.8–1.2 | 400–600 | 6.0–7.0 | 5.8–6.2 |
| Mid–Late Veg (weeks 4–8) | 1.0–1.6 | 500–800 | 6.0–7.0 | 5.8–6.2 |
| Early Flower (weeks 1–3) | 1.2–1.8 | 600–900 | 6.0–7.0 | 5.8–6.2 |
| Peak Flower (weeks 4–7) | 1.4–2.2 | 700–1100 | 6.0–7.0 | 5.8–6.2 |
| Flush/Pre-harvest (last 1–2 weeks) | 0.0–0.5 | 0–250 | 6.0–6.5 | 5.8–6.2 |
Watering rules of thumb
Overwatering is the number one mistake beginners make, and it's misnamed, it's really over-frequency of watering, not the volume per watering. The goal is to water thoroughly until runoff, then allow the medium to dry down to about 50 to 60 percent moisture before watering again. The lift test is your friend: pick up the pot when the medium is dry and remember how light it feels, then pick it up right after watering and notice the difference. After a week you'll develop an instinct for it. In coco or hydro, the logic is different, coco is typically watered to runoff once or twice per day and should not dry out between waterings the way soil does.
Using Reddit well, and filtering out the noise
Reddit is genuinely one of the best resources for cannabis growers, but it requires some filtering. r/microgrowery is the most active community for home cultivators and has a well-maintained wiki that covers most beginner questions. r/SpeedGrow is good for tracking fast grow timelines. When asking for help, always include your light type and distance, medium, pH and EC readings, feeding schedule, temperature and humidity, and a clear photo in natural light (not the purple/pink glow of your LED). Posts that include this information get useful responses within hours. Posts that just say 'why is my plant dying?' with a blurry photo rarely do.
A few Reddit myths worth ignoring: you do not need to add nutrients during the first two weeks, flushing at the end of a grow is supported more by tradition than by robust science (though it doesn't hurt), and a seed that sprouts slowly is not necessarily bad genetics. Also, when someone posts their harvest weight as evidence of a technique's value, remember that yield is affected by dozens of variables, genetics, VPD, light intensity, training, and root health among them. Treat individual anecdotes as data points, not proofs.
If you're interested in specific growing contexts or regional considerations, including outdoor growing in different climates, cultivating specific strain types like Cheese or Zaza genetics, or adapting techniques to unusual environments, there are other guides on this site that go deeper into those scenarios. For a step-by-step walkthrough on cultivating Cheese specifically, see our guide on how to grow weed cheese. For regional advice, see our guide on how to grow weed Australia for climate-specific outdoor tips, legal considerations, and strain recommendations. For players, see our guide on How to grow weed in DayZ for game-specific steps and tips.
FAQ
What is the simplest step-by-step workflow to grow cannabis from seed at home (beginner-friendly)?
Overview steps (concise): 1) Check local laws and plan for privacy/odor control. 2) Choose seed type (photoperiod vs autoflower, feminized vs regular) and a trusted vendor. 3) Decide setup: indoor (tent), outdoor, or hydroponic — pick one beginner setup. 4) Germinate seed (direct sow or paper-towel/starter plug) and establish seedlings under low light. 5) Vegetative care: 18/6 light, gradual nutrient introduction, train as needed. 6) Flowering (photo strains): switch to 12/12; autoflowers flower by age. 7) Monitor and adjust nutrients, pH, humidity, pests. 8) Harvest when trichomes are at desired maturity, then dry slowly and cure in jars. Practical tips: start small (1–4 plants), keep a grow log, and begin with soil or coco for forgiving error margin.
How do I pick the right seed type and what do terms mean (photoperiod, autoflower, feminized, regular)?
Key definitions and decision checklist: - Photoperiod: flowers when dark period is long enough (you control flowering by switching light schedule). Pros: larger yields, more control. Cons: longer grow time, need to switch lights. - Autoflower: flowers by age (Ruderalis genetics) regardless of light schedule. Pros: faster, simpler light setup. Cons: usually smaller, less training time. - Feminized: bred to produce only (or almost only) females—avoids wasting space on males. - Regular: ~50/50 male/female; needed for breeding and seed production. How to decide: beginners who want simplicity → feminized autoflower or feminized photoperiod if you want bigger yields and training. If you plan to sex plants, consider regulars. Buy from established seedbanks and check reviews. Store seeds cool, dark, dry (short term refrigerator, silica gel, airtight).
What are beginner germination methods, pros/cons, and a safe protocol?
Common methods and protocol: - Direct sow into medium: pros—minimal handling/shock; cons—you can’t visually confirm root before planting. Recommended for beginners. - Paper-towel/plate: pros—see taproot; cons—transfer risk, mold if too wet. - Starter plugs/cubes (rockwool/jiffy/coco): pros—consistent, low transplant shock; cons—need pH control for some plugs. Safe beginner protocol (paper-towel or direct sow): 1) Inspect seed (firm, dark/marbled shell). 2) If using paper towel: damp (not dripping) sterile paper towel on plate, place seed, fold, keep warm ~20–25°C (68–77°F). Cover and check daily. 3) When taproot ~2–10 mm, transfer gently to starter medium with root pointing down and keep humidity high for first 3–7 days. 4) Use plain pH‑balanced water for first 7–14 days; start light at low intensity close to seedlings.
What light schedules, intensities, and distances are recommended by stage?
Practical lighting schedule and PPFD targets: - Seedling/propagation: 18–22 h light; PPFD ≈150–300 µmol·m⁻²·s⁻¹; keep lights close but not scorching (LED: 30–45 cm depending on fixture; T5/fluorescent closer ~5–15 cm). - Vegetative: common beginner schedule 18/6 (alternatively 24/0 for some growers but use caution). PPFD ≈300–600 µmol·m⁻²·s⁻¹. - Flowering (photoperiod strains): switch to 12/12 to induce bloom; PPFD often 600–900 µmol·m⁻²·s⁻¹ in high-light grows — beginners can use lower intensities. Practical notes: raise intensity gradually, watch for light bleaching, and use a PAR/PPFD meter if possible. Maintain stable dark period during flowering to avoid stress and hermaphroditism in photosensitive strains.
What are basic nutrient, pH and EC/PPM targets and a simple beginner feeding schedule?
Beginner-friendly nutrient and pH guidelines: - Media pH targets: soil 6.0–7.0; coco/soilless/hydro 5.5–6.5 (aim ~5.8–6.2 in coco). - EC/PPM rough beginner targets (use meter and start low): seedlings ~0.4–0.9 EC (~200–450 ppm on 500 scale); veg ~0.8–1.6 EC (~400–800 ppm); peak flowering ~1.4–2.2 EC (~700–1100 ppm). - Feeding schedule (simple): Week 0–2 (seedling): plain pH water or 10–25% nutrient. Week 3–6 (early veg): 25–50% label strength, increase weekly to full veg feed. Week 6+ (late veg): full veg feed and start training. Flowering weeks 1–2: maintain veg-level feed then shift to bloom formula; peak bloom weeks 3–6: follow producer chart, monitor signs. Always start at 25–50% manufacturer strength and increase based on plant response; correct pH after mixing nutrients; test runoff EC/PPM weekly.
How do I choose indoor vs outdoor vs hydroponics? Quick pros/cons table and checklist.
Comparison (compact): - Indoor (grow tent/room): Pros—privacy, year-round control of light/temperature/humidity, smaller footprint. Cons—electricity cost, odor control needed. Good for beginners wanting consistency. - Outdoor: Pros—low energy cost, large natural light, big plants possible. Cons—weather, pests, legal/visibility/privacy risks, seasonal. Best if local laws and climate allow. - Hydroponics (NFT/DWC/ebb-and-flow): Pros—fast growth, high yields, precise control. Cons—higher tech, pump/equipment failures can kill roots quickly, steeper learning curve. Checklist: - Indoor: tent, lights, ventilation, carbon filter (odor), timer, small humidifier/dehumidifier as needed. - Outdoor: pick sunny, discreet spot, soil prep, pest barriers. - Hydro: learn reservoir management, pH/EC control, backup power/pumps, and sterile practices. Choose based on budget, legal/privacy constraints, and willingness to monitor systems.
Next Article
How to Grow Weed Australia: Complete Seed-to-Harvest Guide
How to grow weed Australia: legal state-by-state guide, seed-to-harvest steps, strains, setups & safe compliance.