Autoflowers are genuinely one of the easiest cannabis plants to grow outdoors. They don't care how many hours of light they get, they finish fast (most in 70 to 90 days from seed), and a single plant tucked in a sunny corner of a yard or balcony can produce a surprisingly good harvest with minimal fuss. The core process: pick a strain matched to your climate, start seeds after your last frost, give them at least 6 hours of direct sun per day, water and feed lightly, protect them from heavy rain and temperature swings, and harvest when the trichomes tell you they're ready. If you want a simple starting point for germination and early care, follow this guide on how to grow auto flower seed from start to finish. That's the whole game. Everything below fills in the details so you actually know what to do at each stage.
How to Grow Autoflower Outdoors: Step-by-Step Guide

One important note before anything else: growing cannabis at home is legal in some places and illegal in others. Before you plant a single seed, check the laws in your specific jurisdiction. This guide assumes you're growing legally and responsibly. Plant counts, plant height limits, and where you can grow (visible from public spaces or not) all vary by region.
Reality check and picking the right autoflower for your region
Here's what most first-timers don't realize: autoflowers are forgiving, but they're not indestructible. The biggest outdoor mistake I see is grabbing whatever seeds look cool without thinking about climate fit. A strain bred for long, dry Mediterranean summers is going to struggle in a wet Pacific Northwest season with cool nights. You need to match the strain to what your region actually delivers. If you want a full, step-by-step walkthrough after picking a strain, the guide on how to grow autoflowering covers everything from timing to harvest.
Think about three things when choosing: total season length, humidity levels, and temperature range. If you live somewhere with a short summer and frequent rain, prioritize strains with strong mold resistance and a fast finish, something that wraps up in 70 to 75 days from seed. If you're in a hot, dry climate with a long warm season, you have more flexibility and can run strains with longer flowering windows. A compact, mold-resistant strain like Royal Cheese Automatic (roughly 11 to 12 weeks seed to harvest, 60 to 120 cm tall outdoors, rated moderate resistance to mold and pests) is a smart pick for humid or unpredictable climates. For drier, warmer regions with long summers, something like Royal Gorilla Auto (3 to 5 feet tall, 45 to 55 day flower period) works well. Watermelon Automatic is another solid option that stays compact at 3 to 4 feet and finishes flowering in about 45 to 50 days.
A few general rules for strain selection by region:
- Short summers or northern latitudes (above 50°N): Choose fast-finishing strains (70 to 80 days seed to harvest), compact height, and mold resistance.
- Humid subtropical or maritime climates: Mold and pest resistance is your top priority. Avoid very dense-budded strains if possible.
- Hot and dry climates: You have the most options. Heat tolerance matters more than speed. Look for strains described as suitable for 'long summers.'
- High-altitude or mountain grows: Look for cold-hardy genetics and always plan a windbreak. Nighttime temperatures below 10°C (50°F) will stress most autos.
Also check the expected plant height against your privacy requirements. Most autoflowers top out at 2 to 4 feet outdoors, which makes them easy to screen with fencing or companion plants if needed.
When to start: timing, daylight, and keeping roots safe
Because autoflowers flower based on age rather than light cycle, you don't need to time your start around the autumn equinox the way you would with photoperiod strains. Autoflowering cannabis switches from vegetative growth to flowering based on plant age rather than daylength or the light:dark ratio, unlike photoperiod-dependent strains blank" rel="noopener noreferrer">flower based on age rather than light cycle. That's one of their best outdoor advantages. What you do need to think about is temperature and frost risk.
The practical rule: wait until your average overnight low is consistently above 10°C (50°F) before putting autos outside. If you are unsure about when your setup is ready, also review the timing and root safety guidance in When to start: timing, daylight, and keeping roots safe wait until your average overnight low is consistently above 10°C (50°F). Most growers in temperate climates hit this window somewhere between late April and late May in the Northern Hemisphere. In the Southern Hemisphere, that flips to October through November. You can start seeds indoors 1 to 2 weeks before this window to get a slight head start, but don't rush it, cold soil and cold nights slow autos down right when they should be sprinting.
The biggest transplant mistake with autoflowers is disturbing the roots. Unlike photoperiod plants that can recover from transplant shock over several weeks, autos are on a fixed internal clock. Any stress during the seedling or early vegetative stage directly eats into the time the plant has to develop before it starts flowering. This means two things: either start seeds directly in their final container outdoors, or use biodegradable starter pots (like peat or coco coir plugs) that you can drop straight into the final container without touching the root mass. Do not bare-root transplant an autoflower if you can avoid it.
On daylight hours: autoflowers don't need a specific photoperiod to trigger flowering, but more light still means more energy for growth. Aim to start when you're getting at least 14 to 16 hours of daylight per day, which in most temperate regions means a late spring start. If you're further south (lower latitudes), you have more flexibility because day length is less variable year-round.
Setting up your outdoor grow site
Containers vs. in-ground
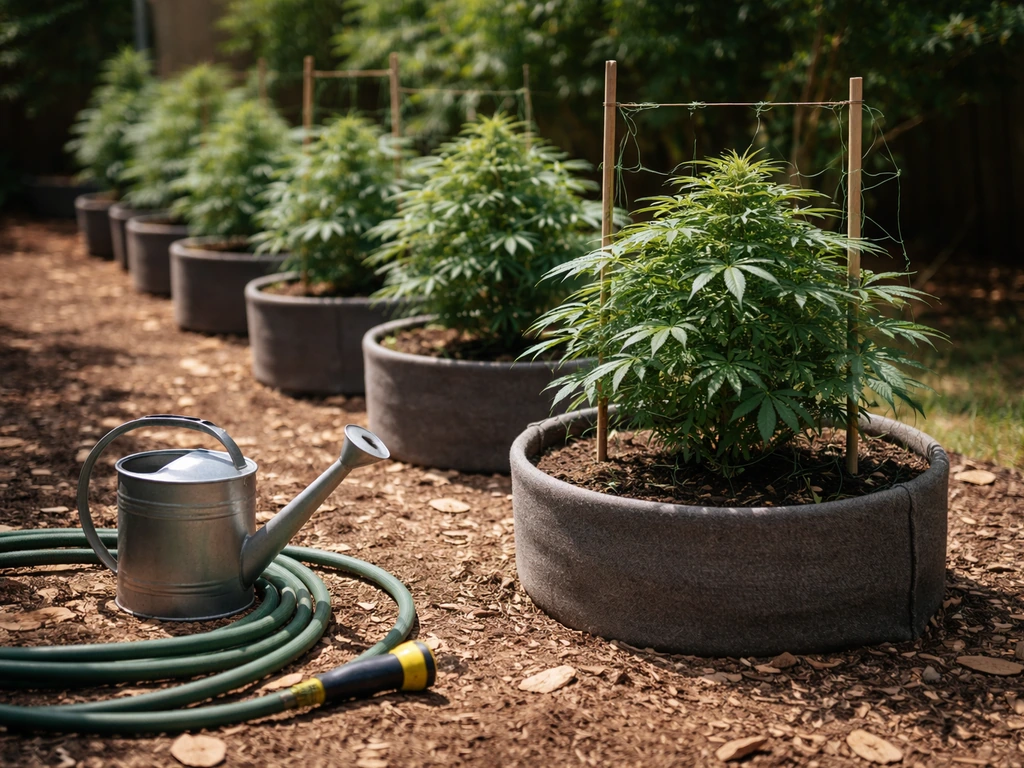
For outdoor autoflowers, containers are almost always the better choice, especially for beginners. Containers let you move plants away from storms, adjust their position to maximize sun exposure throughout the day, and control soil quality precisely. In-ground grows can produce bigger plants because roots spread more freely, but you give up flexibility and it's harder to manage drainage and soil pH.
For container size, a 10 to 15 litre (3 to 5 gallon) pot is the sweet spot for most autoflowers. Too small and you restrict root development; too large and you risk overwatering because there's too much soil staying wet around the root zone. Fabric pots are excellent for outdoor autos because they air-prune roots naturally and drain well. Just be aware they dry out faster in hot weather, so you'll water more frequently.
Soil, drainage, and amendments
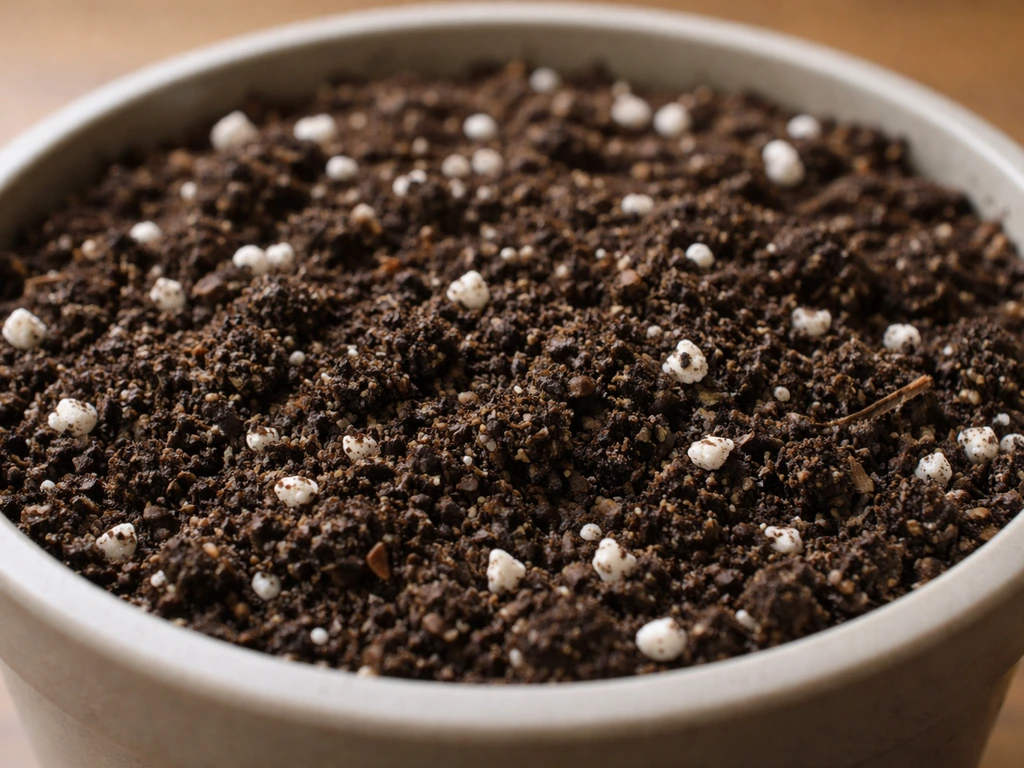
Autoflowers do best in a light, well-aerated soil with good drainage. If you want the quick basics, this guide’s soil and drainage tips are also a good starting point for how to grow autos in soil. A pre-mixed cannabis-specific potting mix or a quality peat-based mix works well. Avoid heavy, compacted soils or anything with a lot of clay, because poor drainage leads to root problems fast. Target a soil pH between 6.0 and 7.0 for soil grows (closer to 6.5 is ideal). If your water is very alkaline or acidic, you'll need to adjust it before watering.
For amendments, autoflowers are light feeders compared to photoperiod plants, especially in the seedling stage. A lightly amended soil with some perlite (roughly 20 to 30% perlite by volume for drainage) is plenty to start. You can add worm castings or a slow-release granular fertilizer to the soil mix for a gentle nutrient baseline, but don't go heavy. Over-fertilizing young autos is one of the most common beginner mistakes and causes more problems than under-fertilizing.
Site selection
Find a spot that gets at least 6 hours of direct sunlight per day, ideally 8 or more. South-facing spots (in the Northern Hemisphere) get the most sun throughout the day. Avoid low-lying areas where cold air and moisture pool at night. Good air circulation around the plants reduces humidity and lowers your mold risk significantly. If your site is very exposed, plan for a windbreak (a fence, hedge, or temporary barrier) because strong wind physically damages plants and speeds up moisture loss.
Watering and feeding your autoflowers outdoors
Watering
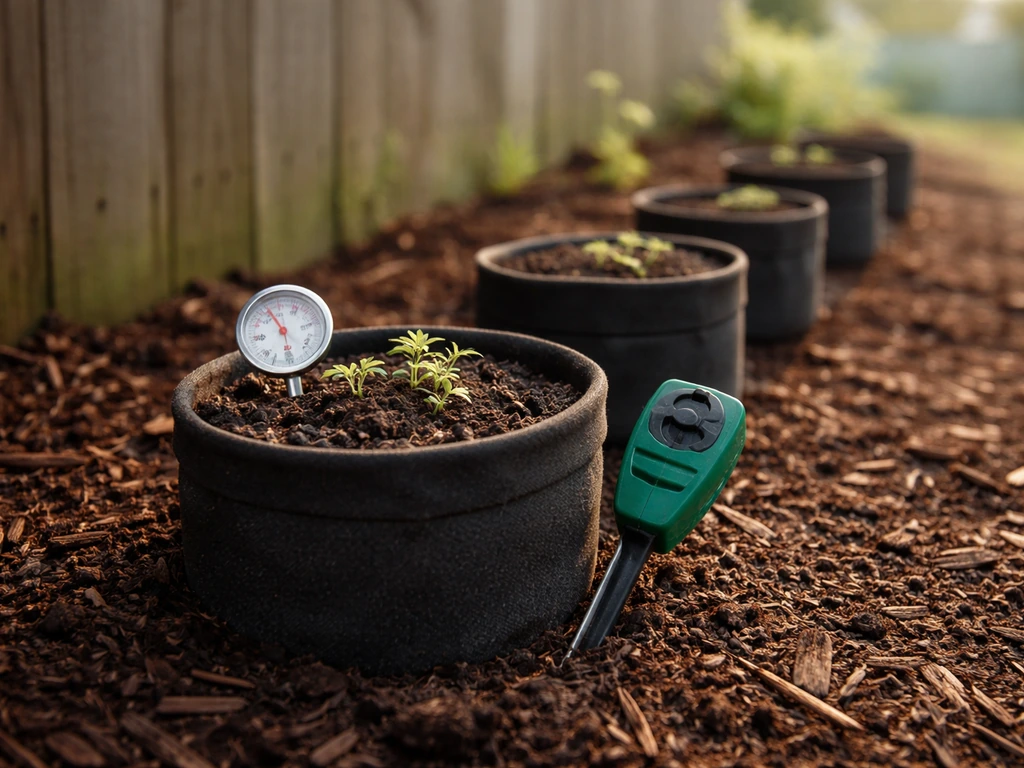
Outdoor autos in containers need consistent moisture without ever sitting in waterlogged soil. The classic finger test works fine: stick your finger about 2 cm (an inch) into the soil. If it feels dry at that depth, water thoroughly until runoff comes out the bottom. If it still feels moist, wait another day. In hot summer weather with fabric pots, you may end up watering every 1 to 2 days. In cooler or overcast weather, every 3 days is more typical.
Always water with pH-adjusted water. A cheap digital pH meter is worth every cent here. Soil pH drifting too high or too low causes nutrient lockout, where the nutrients are present in the soil but the roots can't absorb them. It looks like a deficiency but adding more fertilizer just makes it worse. Check your runoff pH occasionally to make sure your soil isn't drifting out of range.
Feeding schedule
If you started with a pre-amended soil, you likely won't need to feed at all for the first 3 to 4 weeks. After that, introduce a balanced grow nutrient at half the manufacturer's recommended dose. When you see the first pre-flowers (usually around weeks 3 to 4), start transitioning toward a bloom nutrient with more phosphorus and potassium. In the final 2 weeks before harvest, flush with plain pH-adjusted water to clear out residual salts and improve the final taste and smoothness.
| Growth Stage | Approximate Timeframe | Feeding Approach |
|---|---|---|
| Seedling | Days 1 to 14 | No nutrients; rely on starter soil only |
| Early vegetative | Weeks 2 to 4 | Half-dose balanced grow nutrients if needed |
| Late vegetative / pre-flower | Weeks 3 to 5 | Full dose balanced grow nutrient, begin transition |
| Early to mid flower | Weeks 5 to 9 | Bloom nutrient, higher P and K, taper nitrogen |
| Late flower / ripening | Final 2 weeks | Plain pH-adjusted water only (flush) |
Less is more with autos. I've seen beginners burn their plants chasing fast growth with heavy feeding, and it always sets the plant back rather than helping. If leaves look healthy and green, you're probably doing fine. If you see yellowing, identify whether it's a deficiency, lockout, or natural end-of-life senescence before adding anything.
Managing sun, wind, rain, and temperature stress
Outdoor grows live and die by weather management. The good news is that autoflowers are generally more resilient than photoperiod plants because their ruderalis genetics come from harsh northern climates. The bad news is that stress during their short life cycle has a bigger proportional impact because they don't have extra time to recover.
Temperature
The ideal temperature range for autoflowers is 20 to 28°C (68 to 82°F) during the day. Below 15°C (59°F), growth slows noticeably. Below 10°C (50°F), plants can suffer real stress and become vulnerable to disease. Above 30°C (86°F) consistently, plants may show heat stress (leaves curling upward, bleaching near the top). For container grows, move pots to shade during extreme afternoon heat and back into full sun in the morning.
Rain and humidity
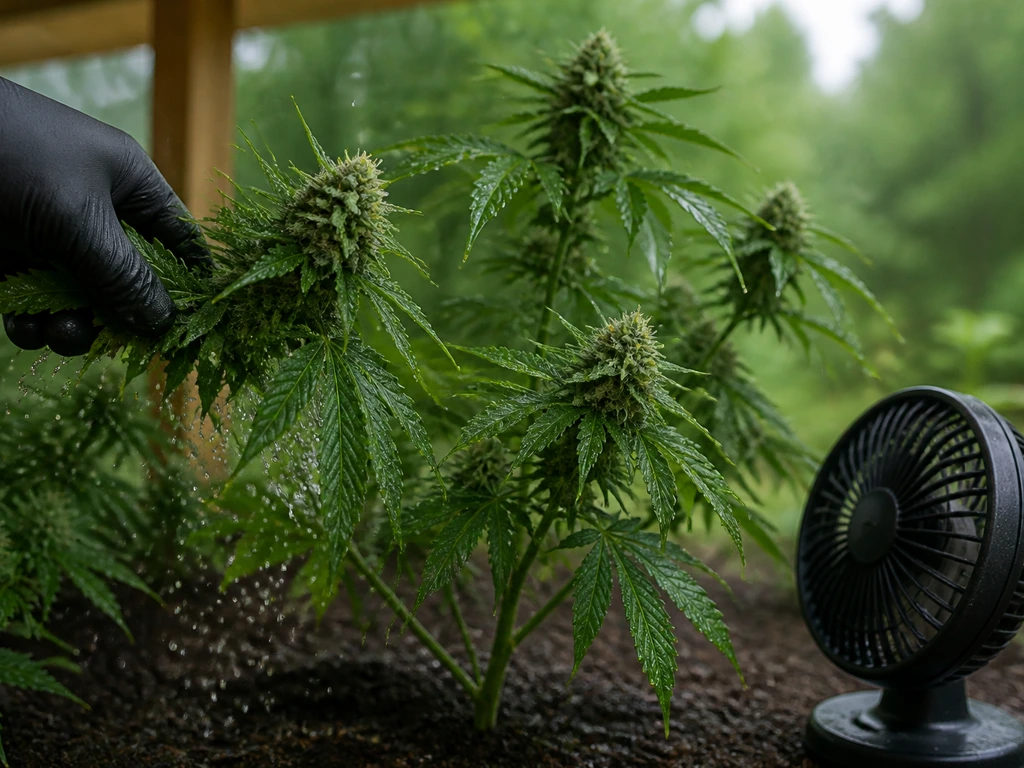
Rain is the biggest outdoor threat during flowering. Heavy, prolonged rain keeps buds wet and humidity high, creating perfect conditions for Botrytis cinerea (bud rot). The BC Government fact sheet on blank" rel="noopener noreferrer">diseases of cannabis in British Columbia illustrates Botrytis (bud rot) in dense cannabis inflorescences, associated with Botrytis cinerea. Bud rot starts from inside dense buds where moisture gets trapped, and by the time you see it on the outside, it's already well established inside. I've lost whole branches this way. If heavy rain is forecast during flowering, move container plants under cover (a porch, greenhouse, or even a temporary tarp frame). Once buds are 50 to 60% developed, treat any prolonged wet period as a high-alert situation.
After rain, gently shake excess water off the buds. Increasing air circulation around plants, by spacing them further apart or using a small fan if they're under cover, helps dry them faster and reduces mold risk. Avoid overhead watering during flowering for the same reason.
Wind
Light wind is actually beneficial because it strengthens stems and reduces surface humidity around the plants. Strong or sustained wind is a problem. It can snap branches, accelerate moisture loss to the point of drought stress, and physically damage buds. A simple windbreak (a fence, trellis with windscreen fabric, or dense companion plants) solves most wind issues without blocking sun.
Pest and disease prevention outdoors
Outdoor grows share an environment with every insect, fungus, and pathogen in your area. Prevention is far easier than treatment, and with autoflowers specifically, you want to catch problems early because you don't have weeks to spare nursing a sick plant.
Common pests to watch for
- Aphids: Cluster under leaves and at stem joints. Wipe off with neem oil solution or insecticidal soap spray early.
- Spider mites: Tiny dots on leaves, fine webbing underneath. Thrive in hot, dry conditions. Neem oil and increasing humidity slightly helps. Check plants daily in hot weather.
- Caterpillars and budworms: Chew holes in leaves and bore into buds. Bacillus thuringiensis (Bt) spray is safe and effective, apply weekly in flowering.
- Fungus gnats: Larvae damage roots. Usually a sign of overwatering. Let the top layer of soil dry out between waterings. Sticky yellow traps catch adults.
- Slugs and snails: Active at night, chew seedlings. Diatomaceous earth around the base of containers helps.
Disease prevention
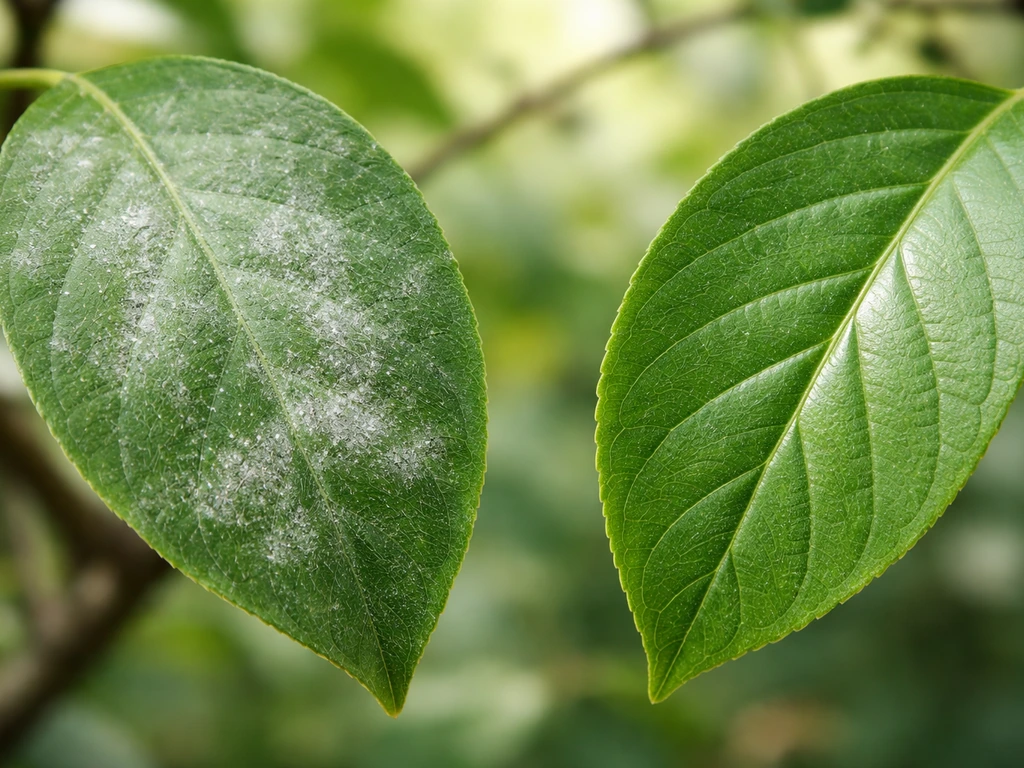
Powdery mildew and bud rot (Botrytis) are the two most likely disease issues outdoors. Powdery mildew shows as white powder on leaf surfaces and usually appears when there's high humidity combined with poor air circulation. Bud rot attacks dense flower clusters, turning them brown and grey from the inside out. Both thrive in the same conditions: humid, stagnant air.
Prevention steps that actually work: space your plants so air can move around them, remove large fan leaves blocking airflow inside the canopy (especially as flowering progresses), avoid overhead watering, and check plants closely every 2 to 3 days during flowering. If you spot early signs of powdery mildew, a diluted hydrogen peroxide spray (3% solution diluted 1:3 with water) or potassium bicarbonate solution applied in the morning can knock it back. For bud rot, there's no treatment once it starts. Remove affected material immediately and cleanly, discard it away from the grow area, and improve airflow to stop spread.
A simple prevention routine
- Inspect plants every 2 to 3 days, checking undersides of leaves and inside the canopy.
- Apply a preventive neem oil spray (diluted per instructions) every 10 to 14 days in vegetative stage. Stop neem applications once flowering starts to avoid residue on buds.
- Keep grow area clean: remove fallen leaves and debris from around containers.
- After rain or high humidity events, check buds closely for early discoloration.
- If using Bt for caterpillars, apply weekly during flowering as a preventive measure.
Knowing when to harvest, fixing late-stage problems, and curing basics
When is an autoflower actually ready?
Seed-to-harvest timelines on packets are estimates, not guarantees. Outdoor variables mean your plants may run faster or slower than advertised. The most reliable way to gauge harvest timing is to look at trichomes with a jeweler's loupe or handheld microscope (60 to 100x). In early flowering, trichomes are clear and glassy. As the plant matures they turn milky white. When most trichomes are milky and roughly 10 to 20% are turning amber, you're in the harvest window. More amber means a heavier, more sedative effect. Mostly milky gives a cleaner, more energetic result.
Secondary signals to watch: pistils (the little hair-like structures on buds) will shift from white to orange or reddish brown as the plant matures, usually 70 to 90% orange at harvest. The calyxes will swell noticeably and leaves will start to yellow (this is normal late-stage nitrogen draw-down, not something to panic about or try to fix by adding more nitrogen).
Common late-stage problems and quick fixes
- Leaves yellowing in the last 2 weeks: Almost always normal nitrogen senescence. Don't add N. Continue flushing.
- Buds not bulking despite being past the expected flower timeline: Check trichomes, not the calendar. Give it another week and ensure it's still getting adequate light.
- Bud rot appearing: Remove affected buds with scissors and discard. Increase airflow. Consider harvesting the affected plant early if rot is spreading fast.
- Nutrient lockout (deficiency symptoms despite regular feeding): Check and adjust water pH. Flush with plain water, let the soil dry, then resume at lower nutrient doses.
- Slow overall growth during flowering: Usually light stress, overwatering, or root issues. Ensure the pot isn't waterlogged and the plant is getting full sun.
Harvesting and post-harvest basics
Harvest in the early morning, before the heat of the day activates and before terpenes volatilize in the sun. Use clean, sharp scissors or pruning shears. You can harvest the whole plant at once or selectively take the top colas first (which ripen slightly ahead of lower buds) and leave the lowers for another week. After cutting, hang whole branches upside down in a cool (18 to 22°C), dark, well-ventilated space with humidity around 50 to 60%. The slow dry takes 7 to 14 days. You'll know it's ready to cure when small stems snap rather than bend.
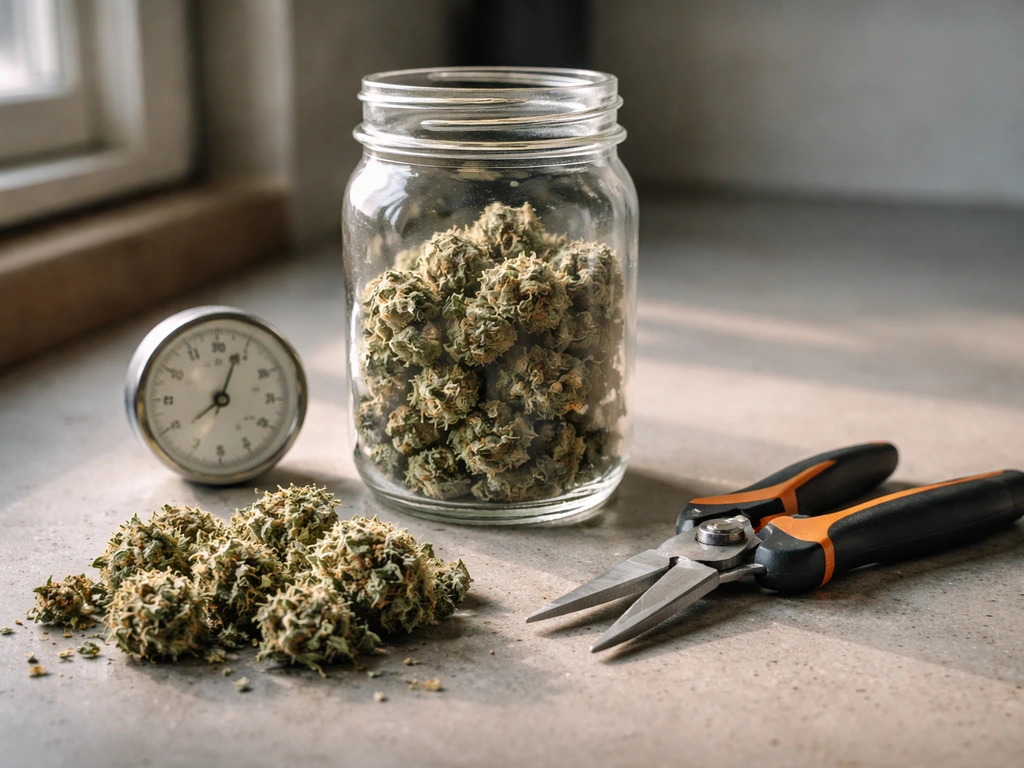
Once dry, trim buds and place them in glass mason jars (roughly 75% full, not packed tight). Seal and store in a cool, dark place. For the first 2 weeks, open the jars once or twice a day for 10 to 15 minutes to let moisture escape (this is called burping). After 2 weeks you can drop to once every few days. A 4 to 6 week cure significantly improves flavor and smoothness. If you smell ammonia when you open a jar, the buds went in too wet: leave the lid off for a few hours and increase burping frequency until it resolves.
This guide focuses on outdoor soil growing specifically, but the same autoflower principles apply whether you're growing in coco coir, hydro, or running everything indoors. The fundamentals of the plant's fixed internal clock, its light feeding preferences, and its intolerance of transplant shock stay consistent across all methods. Getting one successful outdoor grow under your belt gives you a solid foundation no matter which direction you take it next.
FAQ
Can I start autoflowers outdoors before the 10°C (50°F) overnight average is reached, like right after the last frost date?
Better not. The last-frost date and the overnight-average temperature are different. Autos can lose valuable growth time when nights are consistently below 10°C, and the stress can shorten their effective vegetative window. If you want an early start, use a protected setup (cloche, cold frame, or temporary low tunnel) so soil temperatures stay warmer at night, then remove protection once nights reliably meet your target.
What’s the best container material for outdoor autos, when it rains a lot?
In persistently wet climates, choose containers that drain quickly and do not hold water around the root zone, for example fabric pots or well-draining plastic with lots of drainage holes plus a raised stand. Avoid saucers that can trap runoff. If you get frequent downpours, use a movable base so you can shift the pot under cover during long rain events.
How do I handle watering when it’s cloudy for days, so I don’t overwater?
Move from a calendar schedule to a soil-based check. Use the finger test at 2 cm depth, and only water when the root-zone layer at that depth feels dry. In cool, overcast stretches, watering may be much less frequent, and fabric pots can still stay wet longer than you expect if airflow is low.
Should I top, train, or prune autoflowers outdoors?
With autos, avoid anything that meaningfully delays growth, such as aggressive topping. Gentle training can be fine if done very early and with minimal root or stem stress, but the safest beginner approach is low-stress support, tying down only after plants are established. The key constraint is their fixed age-based flowering schedule, so any major cutback reduces final yield.
Why are my leaves turning yellow near the end, is it a deficiency?
Late yellowing is often normal. Near harvest, plants remobilize nitrogen and prioritize flower finishing, so you may see lower leaves fade without a true nutrient emergency. Check whether new growth stays green and whether the pattern is mostly older leaves. If the plant looks otherwise healthy, do not keep increasing fertilizer, instead focus on correct pH and just let the cycle run.
Do I need to flush autoflowers outdoors, and what happens if I skip it?
Flushing is mainly useful if you suspect salt buildup from heavy feeding or inconsistent pH. If you fed lightly, used correct pH, and potted with fresh mix, skipping a strict flush usually does not ruin the outcome. If you do flush, do it with pH-adjusted water and start only in the final two weeks, because withholding nutrients too early can reduce overall flower mass.
My runoff pH is drifting out of range, how do I correct it?
First stop the underlying cause, typically water alkalinity or acidity and inconsistent dosing. Use pH-adjusted water going forward, and monitor runoff occasionally so you can see the trend. If runoff repeatedly overshoots, reduce feeding and ensure your soil has good drainage and aeration, since waterlogged conditions can worsen lockout patterns even with correct input pH.
What should I do if I see bud rot starting in dense areas?
Remove affected tissue immediately and cleanly, discard it away from the grow area, and improve airflow around the remaining buds. Because rot often starts internally, the best move is prevention and early detection, but once you see it, there is usually no effective cure. For container grows, increase spacing or temporarily reposition plants under better shelter so prolonged wet periods stop.
How often should I check plants for mildew or pests during flowering?
During flowering, check every 2 to 3 days because conditions can change fast after rain or heavy dew. Focus on the underside of leaves and inside bud clusters where airflow is limited. Earlier intervention matters because there is no long recovery window for autos if disease spreads.
What’s the safest way to harvest if I can’t dry them immediately right away?
Harvest into a cool, shaded area and avoid leaving cut branches in direct sun or in a warm room. If you delay drying, keep buds loosely ventilated and not sealed in plastic, to prevent heat and trapped moisture from accelerating degradation. Aim to hang within hours when possible, and if humidity is very high, improve ventilation around the drying space rather than rushing heat drying.
How can I tell the difference between cloudy versus amber trichomes when I only have a cheap loupe?
If magnification is inconsistent, pick several areas on the same bud and compare repeatedly. Harvest when most trichomes look milky, then confirm amber presence across multiple locations rather than a single spot. Also cross-check pistil color and overall maturity, since a few misleading trichome readings are common with low-end optics.
Can I germinate indoors and then move the plant outside later in the season?
Yes, starting indoors 1 to 2 weeks ahead can help, but do it without cold-shocking the seedling. Transplant carefully to avoid root disturbance, ideally using a biodegradable pot or direct sow into the final outdoor container. Once outdoors, keep nighttime protection until overnight lows are consistently above your target.
How to Grow Autoflower Weed Seeds Step by Step Guide
Step-by-step autoflower seed grow guide: setup, germination, light, watering, feeding, troubleshooting, harvest, drying
