Autoflowering cannabis grows from seed to harvest in roughly 60 to 90 days without you ever needing to change the light schedule. You keep the lights on 18 to 20 hours a day from start to finish, the plant flowers on its own timeline based on age rather than darkness, and you harvest when the trichomes tell you it's ready. That's the core of it. Everything else, dialing in temperature, humidity, nutrients, and watering, is about not getting in the plant's way during that short, fixed window.
How to Grow Autoflowering Cannabis Step by Step

Marcus Holbrook
26 Apr 2026

What makes autoflowers different from photoperiod plants
Most cannabis strains are photoperiod: they stay in vegetative growth until you cut the daily light down to 12 hours, which signals the plant to start flowering. Autoflowers don't work that way. They carry genetics from Cannabis ruderalis, a subspecies that evolved in harsh northern climates and learned to flower based on plant maturity rather than light cycles. Breed that trait into a modern strain and you get a plant that just... goes. It hits a certain age, switches on its own, and keeps moving toward harvest whether you intervene or not.
That's liberating in some ways and unforgiving in others. On the upside, you don't need a separate tent for veg and flower, and you can run multiple harvests per year without manipulating light. On the downside, the clock starts at germination and doesn't pause. If you stress the plant in week two, it can't fully recover the way a photoperiod plant would because there's no option to hold it in veg while it bounces back. Early struggles often mean a smaller final plant, full stop. Most strains finish in 8 to 10 weeks from seed, with the fastest finishing closer to 60 days and slower genetics running out to 90 or even a little beyond.
Picking the right strain and planning the grow before you start
Strain choice matters more for autos than most people realize. Because the life cycle is fixed, you need a strain whose timeline fits your situation. If you're growing outdoors, the strain's 8 to 12 week window needs to fit comfortably inside your frost-free season. If you're growing in a cold climate, shorter-cycle strains (closer to 60 to 70 days) give you more margin before late-season rain and cold slow things down or threaten the harvest. If you're growing indoors under controlled conditions, you have more flexibility, but you should still know whether you're buying an 8-week strain or a 10-week strain so you can plan your harvest window.
Think about what you want from the final product too. Some autoflower strains lean heavily indica and finish fast with dense, resinous buds. Others are sativa-dominant, grow taller, and take a bit longer. THC-focused strains, CBD-balanced strains, and high-terpene cultivars are all available as autos now. Read the breeder's data sheet, not just the marketing copy. Look for a realistic seed-to-harvest estimate, expected height (important for indoor growers with limited vertical space), and any noted sensitivity to humidity or heat.
Before you drop a single seed, decide on your medium. Soil is the most forgiving starting point for beginners because it buffers pH and holds some nutrient reserve. Coco coir gives you faster growth and more control but requires more precise feeding from the start. Hydroponics is fastest of all but least forgiving. Each path has specific pH and nutrient targets covered below, and the site has deeper dives on growing autos in soil, coco coir, and hydro if you want to go further down one of those routes.
Germination and the seedling stage
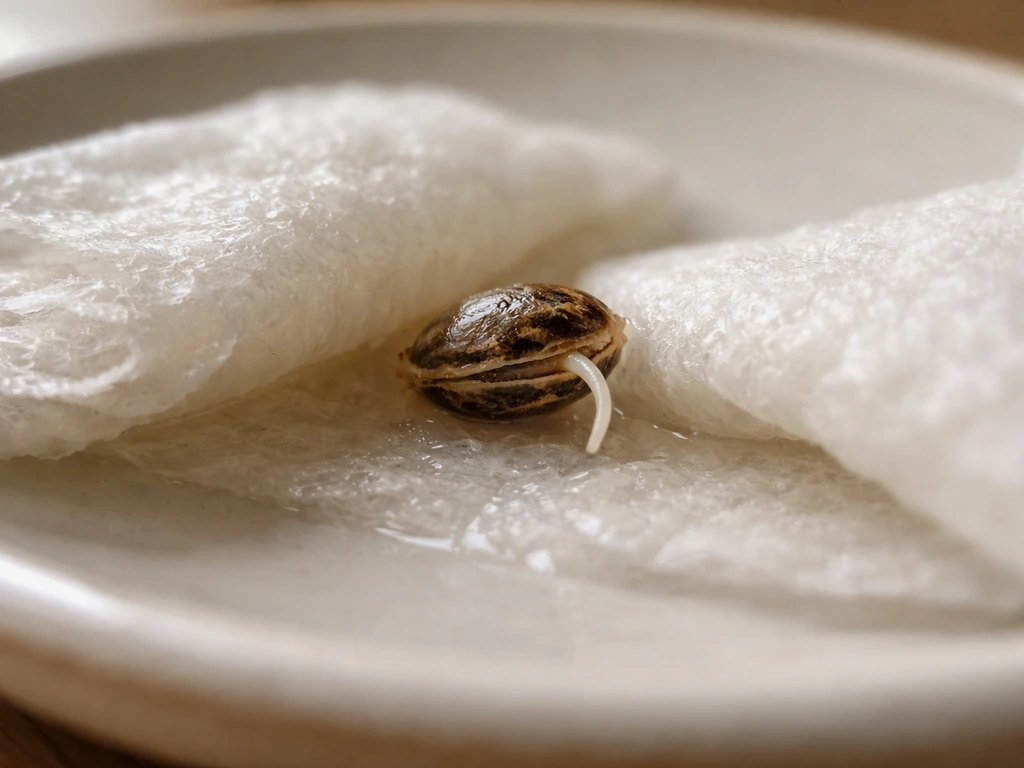
The most common germination method is simple and reliable: place your seed between two damp paper towels, put them on a plate, cover with another plate or plastic wrap to hold moisture, and keep them somewhere warm (around 75 to 80°F, or 24 to 27°C). Most seeds pop a taproot within 24 to 72 hours. If you want to pre-soak in water first, 12 to 24 hours is enough. Don't soak longer than that as it increases contamination risk without speeding things up.
Once the taproot is about half an inch long, plant it taproot-down about a quarter to half an inch deep in a small starter pot or directly into your final container. With autos, transplanting is best avoided if possible because the root disturbance can set them back during a lifecycle that has no time to spare. Many experienced growers germinate directly into the final pot, a 3 to 5 gallon container for most indoor autos.
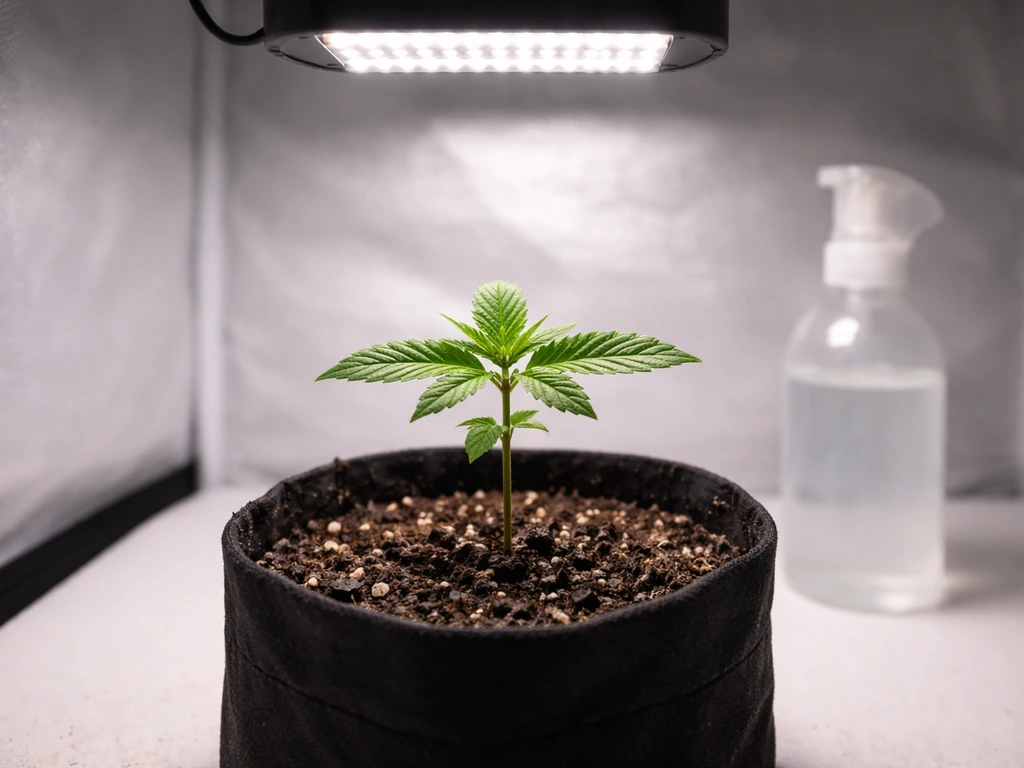
Seedling environment: temperature, humidity, and light
For the first two weeks, keep temperatures between 70 and 80°F (22 to 27°C) and relative humidity between 65 and 80%. These conditions reduce how hard the seedling has to work through its leaves to stay hydrated before its root system is developed enough to do the job. A small humidity dome over the seedling for the first week or so makes this easy to maintain without babysitting. Once you see the first set of true leaves open and the plant start to stand on its own, you can remove the dome and let the seedling acclimate to ambient conditions.
Light during the seedling stage should be gentle. If you're using a full-power LED or HID, raise it to reduce intensity, targeting roughly 300 to 400 µmol/m²/s PPFD at the canopy. An 18/6 light schedule (18 hours on, 6 off) works perfectly well from day one and is the most beginner-friendly starting point. Some growers run 20/4 or even 24 hours to push faster early development, which is valid for autos since they don't need darkness to trigger flowering, but it isn't necessary and some plants grow better with a small rest period.
Water carefully at this stage. Use small amounts every 2 to 3 days, watering in a ring around the base of the stem rather than flooding the whole pot. You're trying to encourage the roots to chase moisture outward. Overwatering a seedling is one of the most common beginner mistakes and it's devastating for autos since recovery time is so limited.
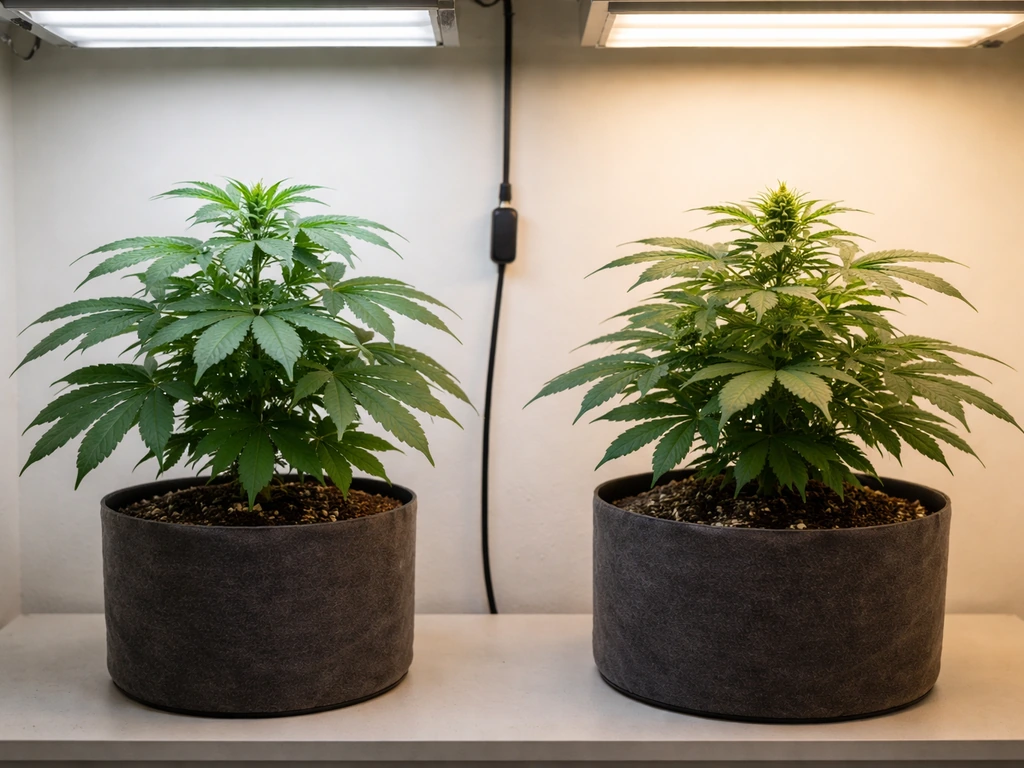
Vegetative growth, transition, and flowering: light and environment
Here's the part that surprises a lot of new growers: with autos, there is no 'flip.' You don't switch the light schedule to trigger flowering. The plant transitions from vegetative growth to pre-flower and then into full flower on its own, typically somewhere between weeks 3 and 5, depending on the strain. You just maintain your chosen light schedule the entire time, from seedling to harvest.
The most common schedule is 18/6, and it's a solid all-around choice. Running 20/4 gives the plant about 11% more daily light and can support slightly faster growth. Running 24/0 adds another 20% on top of that but removes any rest period for the plant. A 24-hour schedule does deliver roughly 33% more light than 18/6, which can push yield, but it also increases heat load and electricity costs. Most home growers land on 18/6 or 20/4 and get excellent results. What matters is not just hours but intensity. Target around 400 to 600 µmol/m²/s PPFD in veg and step up to 600 to 900+ µmol/m²/s once flowering is underway. Keep your light-to-canopy distance appropriate for your fixture's output and check the manufacturer's PPFD charts.
Environmental targets should shift as the plant moves through its stages. Once the seedling phase is done and the plant enters vigorous vegetative growth (roughly weeks 2 to 4), dial humidity down toward 55 to 65%. In flowering (weeks 5 onward), continue stepping humidity down toward 40 to 50% to reduce the risk of bud rot and mold. Temperature during the lights-on period can stay in the 70 to 80°F range throughout the grow. During lights-off, a temperature drop of 5 to 10°F is normal and fine. Good airflow matters throughout: a small oscillating fan moving air across the canopy, combined with an inline fan exhausting through a carbon filter if odor control is a concern, keeps the grow space healthy.
| Growth Stage | Temperature (°F) | Humidity (RH %) | PPFD Target (µmol/m²/s) | Light Schedule |
|---|---|---|---|---|
| Seedling (weeks 1–2) | 70–80°F | 65–80% | 200–400 | 18/6 |
| Vegetative (weeks 2–4) | 70–80°F | 55–65% | 400–600 | 18/6 or 20/4 |
| Early flower (weeks 4–6) | 70–80°F | 45–55% | 600–800 | 18/6 or 20/4 |
| Late flower (weeks 6–harvest) | 65–78°F | 40–50% | 700–900+ | 18/6 or 20/4 |
Watering and feeding autos: keep it lighter than you think
Autoflowers are generally smaller plants than photoperiod strains, which means they have smaller root systems and lower nutrient demands. The most common feeding mistake is hitting autos with the same doses you'd give a larger photoperiod plant. Start at about half the recommended dose on any nutrient label and work up from there based on what you see.
pH: the non-negotiable
pH is not optional. If your water or nutrient solution is outside the target range, the plant physically cannot absorb certain nutrients regardless of how much you've added, and you'll spend weeks chasing deficiencies that are actually lockout issues. For soil, target a pH of 6.0 to 7.0 at the root zone, with 6.2 to 6.8 being the sweet spot. For coco coir, aim for 5.8 to 6.3, since coco doesn't buffer pH the way soil does. For hydroponic systems, keep input solution pH between 5.5 and 6.2.
EC and nutrient stage targets
EC (electrical conductivity) tells you how concentrated your nutrient solution is. During seedling and early veg, keep EC low, around 0.4 to 0.8 mS/cm (roughly 200 to 400 PPM on a 500 scale). As the plant moves into pre-flower and flower, you can step EC up gradually toward 1.2 to 1.8 mS/cm. Watch the leaf tips: if you see the very tips of leaves yellowing or browning (nutrient burn), dial back your feed concentration. In late flower (the final 1 to 2 weeks before harvest), many growers flush with plain pH-adjusted water to clear excess salts from the medium, which can improve final flavor.
The general nutrient profile shifts over the grow. In veg, nitrogen is the priority, with moderate phosphorus and potassium. As flowering kicks in, ease off nitrogen and push phosphorus and potassium to support bud development. Most pre-mixed cannabis nutrient lines are designed with this in mind. Just remember: less is more with autos. You can always add more next watering; you can't un-burn a plant.
Watering frequency and technique
The lift-test is your best friend: pick up the pot when it's dry and remember how light it feels, then water and notice the weight difference. Water when the pot feels light and the top inch of medium is dry. Allow the medium to partially dry out between waterings to keep the root zone oxygenated. In coco, you'll typically water more frequently (often daily or twice daily) because coco holds less water and oxygen tension drops faster than in soil. In soil, every 2 to 4 days is typical depending on pot size, plant size, and humidity.
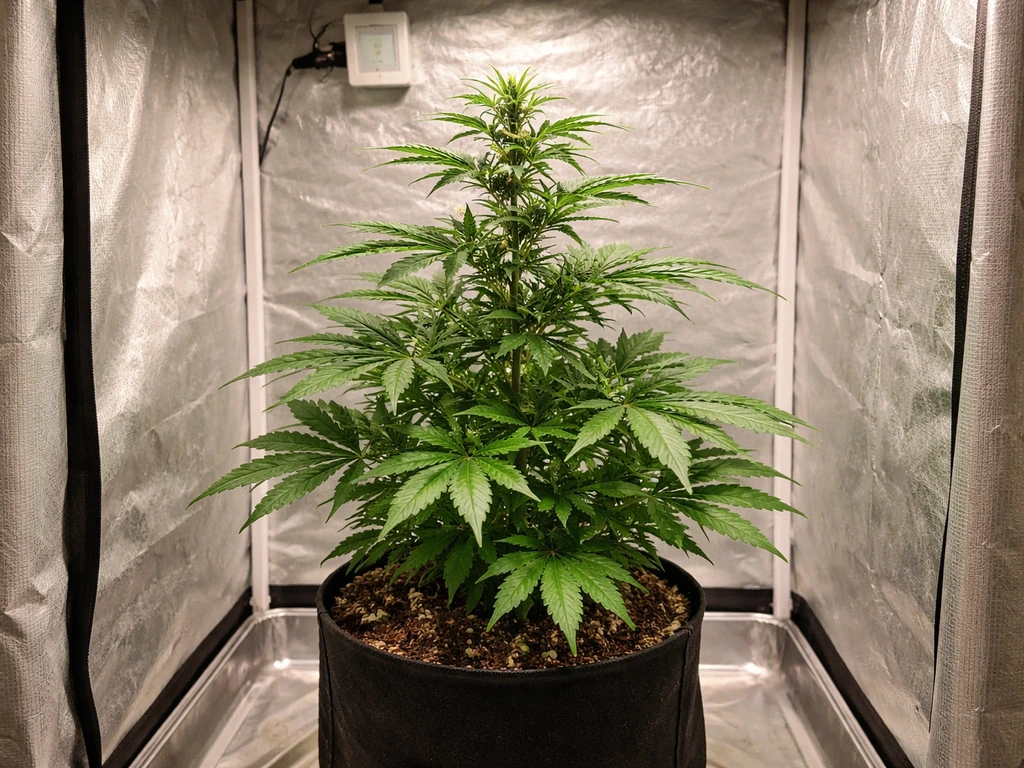
Indoor vs outdoor growing: adjusting for your environment
Indoors, you control everything, which is both the advantage and the responsibility. You set the light schedule, dial in temperature and humidity, and choose your medium. Autos are genuinely excellent for indoor growing because you never need separate rooms or tents for veg and flower, you can run multiple cycles back to back, and the predictable timeline makes planning straightforward. A 3x3 or 4x4 tent with a quality LED and a simple 18/6 schedule will take you a long way. Keep the carbon filter running from early flower onward if smell is a concern.
Outdoors, autoflowers shine because you're not dependent on the season changing to trigger flowering. You can start a run in spring, another in midsummer, and potentially a third in early fall in a temperate climate. The key constraint is fitting the strain's 8 to 12 week lifecycle into a window of reliably warm, frost-free weather. Outdoors, you still want to match the strain's seed-to-harvest timeline to your frost-free window and plan for weather swings how to grow autoflower outdoors. Plant when nighttime temperatures are consistently above 50°F and you have enough warm weeks ahead for the full cycle. A strain that takes 10 weeks planted in early July in a northern climate might run right into cold, wet September weather and not finish cleanly. When in doubt, choose a faster-finishing strain with a shorter lifecycle for outdoor grows with a tighter warm season.
Outdoors you also lose direct control over light intensity and humidity. On very hot days, temperatures can exceed the ideal range and stress the plant. In humid climates, late-season moisture raises bud rot risk significantly during flower. Good air circulation around the plants (not crowding them, strategic placement to catch a breeze) helps. Some outdoor growers use small greenhouses or polytunnels to extend the season and add humidity control toward the end of flower. Early light rain isn't usually a crisis for autos, but sustained wet, cool weather during peak flower is a real risk and worth planning around.
If you're considering hydroponics for your auto grow, the fundamentals are the same but the margin for error is smaller. If you are learning how to grow autoflower hydro, use these same pH and EC checks but monitor them even more frequently than you would in soil or coco pH and EC need to be dialed in tightly from the start. pH and EC need to be dialed in tightly from the start (pH 5.5 to 6.2, with EC monitored closely), and because there's no medium buffering, problems show up faster. The upside is faster growth and potentially bigger yields in a shorter timeframe. Growing autos in coco coir sits between soil and full hydro in terms of control and complexity, and it's worth looking into if you want that step up from soil without going full hydroponic.
Troubleshooting common autoflower problems
Because the lifecycle is short, problems that would be a minor setback in a photoperiod plant can have a bigger impact on an auto. The most important thing is to catch issues early and respond quickly but calmly. Most problems fit into a handful of categories.
- Stunted or slow growth in early weeks: The most likely causes are overwatering, too-cold temperatures, or compacted/airless medium. Check that the pot is drying out between waterings, verify temps are in the 70 to 80°F range, and make sure your medium isn't waterlogged. Avoid transplanting autos if possible as root disturbance at any stage sets them back.
- Yellowing leaves: A deficiency or pH problem is the first thing to check. Measure your runoff or solution pH before assuming you need to add more of any nutrient. If pH is on point, look at the pattern of yellowing. Lower, older leaves going yellow in mid-to-late flower is actually normal (the plant redirecting nitrogen to buds). Yellowing that spreads up toward new growth is more concerning.
- Nutrient burn (brown/crispy leaf tips): You're feeding too heavy. Flush with plain pH-adjusted water and drop your nutrient concentration by 25 to 30% on the next feed. Autos need lighter feeding than you think.
- Light stress and heat stress: If the top leaves are clawing, curling upward, or bleaching near the light, you're either too close or running too high intensity. Raise the light or dim it and check canopy temperature. Ideally the canopy itself should not exceed 85°F.
- Slow or stalled flowering: If your plant seems stuck in veg, give it time. Some slower-genetics autos take until week 5 or 6 to show flowers. Confirm you're not accidentally running 12/12 (which still works for autos but isn't optimal) and that the plant isn't under severe stress. Stress can slow the transition but rarely stops it entirely.
- Bud rot and mold in flower: High humidity combined with dense buds and poor airflow is the recipe. Keep humidity below 50% from mid-flower onward, ensure air is moving across and through the canopy, and inspect buds regularly especially after any wet or humid weather outdoors.
- Hermaphroditism: Stress causes this, including light leaks, temperature swings, nutrient issues, or physical damage. Keep your environment stable and, if growing indoors, make sure your light schedule is consistent with no interruptions during the dark period. This matters less for autos than photoperiod plants (since you're not running a dark period to trigger flower), but high-stress conditions can still cause pollen sacs to appear.
Knowing when to harvest, and what to do after
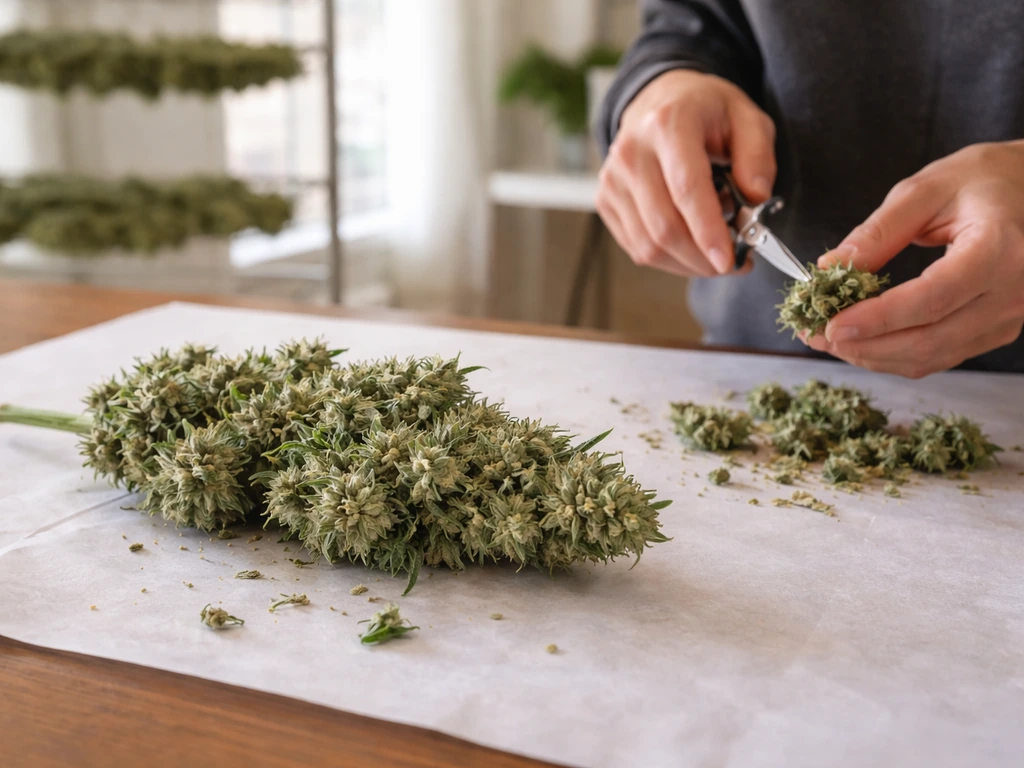
The breeder's estimated seed-to-harvest date is a starting point, not a finish line. The actual signal to harvest comes from the plant itself, and the most reliable way to read it is with a jeweler's loupe or digital microscope at 60x to 100x magnification, which lets you see the trichomes clearly. In early flower, trichomes are clear and watery. As harvest approaches, they turn milky or cloudy. When 50 to 70% of trichomes are cloudy and around 70% or more of the white pistils (hairs) on the buds have darkened to orange or reddish-brown, you're in the harvest window. If you let it go until most trichomes are amber, the effect profile shifts toward heavier, more sedative characteristics as THC converts to CBN. Harvest to your preference, but cloudy-dominant with some early amber is a common sweet spot.
Once you've cut the plant, trimming can be wet (right away) or dry (after drying). Hang the whole plant or individual branches in a dark space with temperatures around 60 to 70°F and relative humidity around 55 to 65%. Good airflow without blowing directly on the buds is key. Drying typically takes 7 to 14 days. The buds are ready to move to jars when the smaller stems snap rather than bend and the outside of the bud feels dry but not crumbly.
Curing in airtight glass jars for a minimum of 2 to 4 weeks significantly improves the flavor, aroma, and smoothness of the final product. For the first 1 to 2 weeks of curing, open the jars once or twice a day for a few minutes to let moisture escape (this is called burping). After that, once-daily or every-other-day burping is enough. The difference between freshly dried and properly cured cannabis is noticeable, and it's worth the patience especially after the work you've put into the grow.
Your autoflower grow checklist
- Choose a strain with a lifecycle that fits your environment and season (8 to 12 weeks from seed to harvest).
- Select your medium: soil for beginners, coco for faster/more controlled growth, hydro for maximum speed and yield.
- Germinate with the paper towel method at 75 to 80°F; transplant as little as possible, ideally direct into the final pot.
- Set your light schedule at 18/6 from day one and maintain it through harvest. Step up intensity from seedling (300 to 400 µmol/m²/s) through veg (400 to 600) to flower (600 to 900+).
- Keep seedling temps at 70 to 80°F and humidity at 65 to 80% for the first two weeks, then step humidity down as the plant matures.
- Water in small amounts on a lift-test schedule; never let the medium stay waterlogged.
- Start nutrients at half strength; adjust EC up gradually from 0.4 to 0.8 in seedling/early veg toward 1.2 to 1.8 in flower.
- Maintain pH at 6.0 to 7.0 in soil, 5.8 to 6.3 in coco, 5.5 to 6.2 in hydro.
- Keep airflow moving across the canopy and step humidity down to 40 to 50% during peak flower.
- Check trichomes with a loupe starting around week 7 to 8. Harvest when 50 to 70% are cloudy and pistils are mostly darkened.
- Dry in a dark, ventilated space at 60 to 70°F for 7 to 14 days, then cure in sealed glass jars for at least 2 to 4 weeks.
Autoflowers are genuinely beginner-friendly once you understand the core rule: the clock is always running, so give the plant what it needs from day one and try not to stress it. Dial in your environment before the seed goes in, keep your pH honest, feed lightly, and let the plant do what it's bred to do. Once you know how to grow an auto flower seed, the rest of the checklist is really about keeping conditions steady and avoiding overcorrection autoflower seed. If you want a full walkthrough, focus on how to grow autoflower weed seeds from germination through harvest Once you know how to grow an auto flower seed, the rest of the checklist is really about keeping conditions steady and avoiding overcorrection. Most problems come from overcomplication. Get the basics right and a healthy auto will carry itself to harvest in under 90 days.
FAQ
When should I start counting the autoflower’s 60 to 90 day timeline?
Count from germination or, more practically, from when the seedling shows above the medium. If you pop seeds and one batch takes longer to crack, the “day count” can drift by several days, which is why harvesting based on trichomes is more reliable than the calendar.
Can I use a different light schedule, like 12/12, with autoflowers?
You can, but you generally will not get the same results as an 18/6 or 20/4 approach. A long dark period can slow early growth and increase stress, especially for sensitive phenotypes. If you want to experiment, change one variable at a time and expect potential differences in height and final timing.
Should I top or train my autoflower (LST, topping, supercropping)?
Avoid topping in most cases because it can permanently set the plant back during a fixed lifecycle. LST is usually safer since it redirects growth without cutting major tissue. If you do any training, stop once the plant enters pre-flower (around the switch period) so you do not keep it from stacking buds.
What happens if I transplant an autoflower after it has started growing?
Transplanting can cause a root setback that autos often cannot “pause,” leading to a smaller plant and sometimes delayed flowering. If you must transplant, handle the plug gently, keep the disturbance minimal, and use a smooth, high-moisture establishment step so roots can recover quickly.
How do I tell the difference between nutrient deficiency and overwatering early on?
Early nutrient issues often show as leaf color changes or uniform weakness, while overwatering typically comes with droop plus consistently wet medium (and sometimes fungal smell). Use the lift-test and check medium moisture first. If the pot is still heavy, pause feeding and water less, because autos can’t outgrow root oxygen problems.
What’s the safest way to adjust feeding during a short auto lifecycle?
Make small changes and wait to see a response. A common approach is reducing the next dose by 25 to 50% if tips burn, then watching new growth for 3 to 5 days. Avoid large swings, since symptoms from autos can lag behind the cause.
Do I need to flush my autoflowers in soil or coco?
Flushing is not mandatory for every grow, but if you see consistent nutrient buildup signs (repeated tip burn, persistent salt buildup, or EC drifting high), a short flush with properly pH’d water near the end can help reset the root zone. Plan a flush late in flower, typically the final 1 to 2 weeks, and keep it pH-correct to avoid creating a different problem.
How often should I check pH and EC for coco or hydro grows?
Check more frequently than you think you need, especially in the first half of the cycle. In coco and hydro, feed solutions do not buffer like soil, so a drift can show up fast. A practical routine is checking at every mixing and also verifying runoff if you are doing drain-to-waste or periodic runoff tests.
What should I do if humidity is too high during early or late flower?
If humidity is high, act on airflow and dehumidification before changing nutrients. In late flower, bud rot risk rises quickly, so aim for the lower end of the target range and ensure air moves across but does not blast buds directly. Remove standing water sources (wet floors, overly wet medium surfaces) that keep microclimates damp.
Can I grow autoflowers in a small container, and how does that affect watering and yield?
Yes, but the smaller the container, the less buffer the plant has, and the faster the medium dries out. That usually means more frequent watering and lighter nutrient dosing to avoid sudden swings. For many indoor autos, 3 to 5 gallons is a common balance between root space and manageable drying.
When exactly should I harvest an autoflower?
Harvest when trichomes show mostly cloudy (with some early amber if you like heavier effects) and a majority of pistils have darkened. If most trichomes are still clear, you will likely sacrifice potency and terpene maturity. Use a loupe or microscope at consistent times of day to confirm.
Why did my autoflower finish early even though the timeline suggested more time?
Common causes include root damage, transplant shock, severe overwatering, very high heat, light stress from being too close, or nutrient burn that forces the plant to “rush.” Autos can also finish early if they experienced major stress during weeks 2 to 4, when recovery options are limited.
How long should drying and curing take for the best result?
Dry 7 to 14 days depending on conditions, then cure at least 2 to 4 weeks in airtight jars. The key practical marker is small stem snap (not just surface dryness) before jarring, and in curing, consistent burping early on to keep moisture from trapped pockets that can cause off smells.
Next Article
How to Grow One Weed Plant: Beginner Step-by-Step
Step-by-step guide to grow one cannabis plant: setup, germination, light, feeding, troubleshooting, harvest and curing.