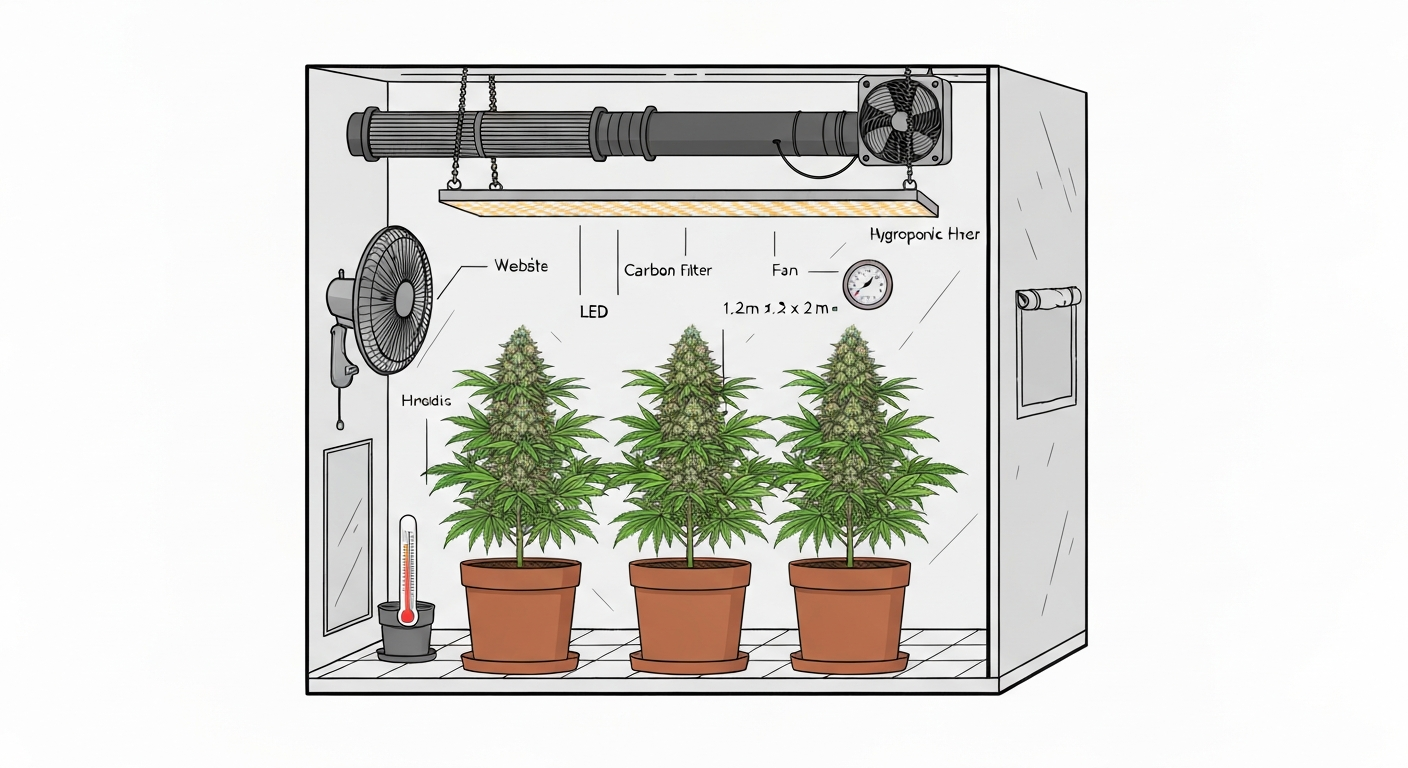
Growing exotic weed indoors is absolutely doable for a home grower, even a first-timer, as long as you start with stable genetics, nail your environment, and respect the learning curve. "Exotic" strains like Wedding Cake, Trainwreck, or a highly sought-after White Widow pheno demand slightly more attention than a basic bag-seed run, but the payoff in flavor, potency, and personal satisfaction is real. This guide walks you through every step: legal groundwork, choosing and sourcing genetics, setting up your space, managing the grow from seedling through harvest, and curing the final product so those hard-won terpenes actually survive. If you're wondering how do you grow exotic weed, this step-by-step guide covers it from seed selection through harvest and curing.
How to Grow Exotic Weed Indoors: Complete Guide for Home Growers

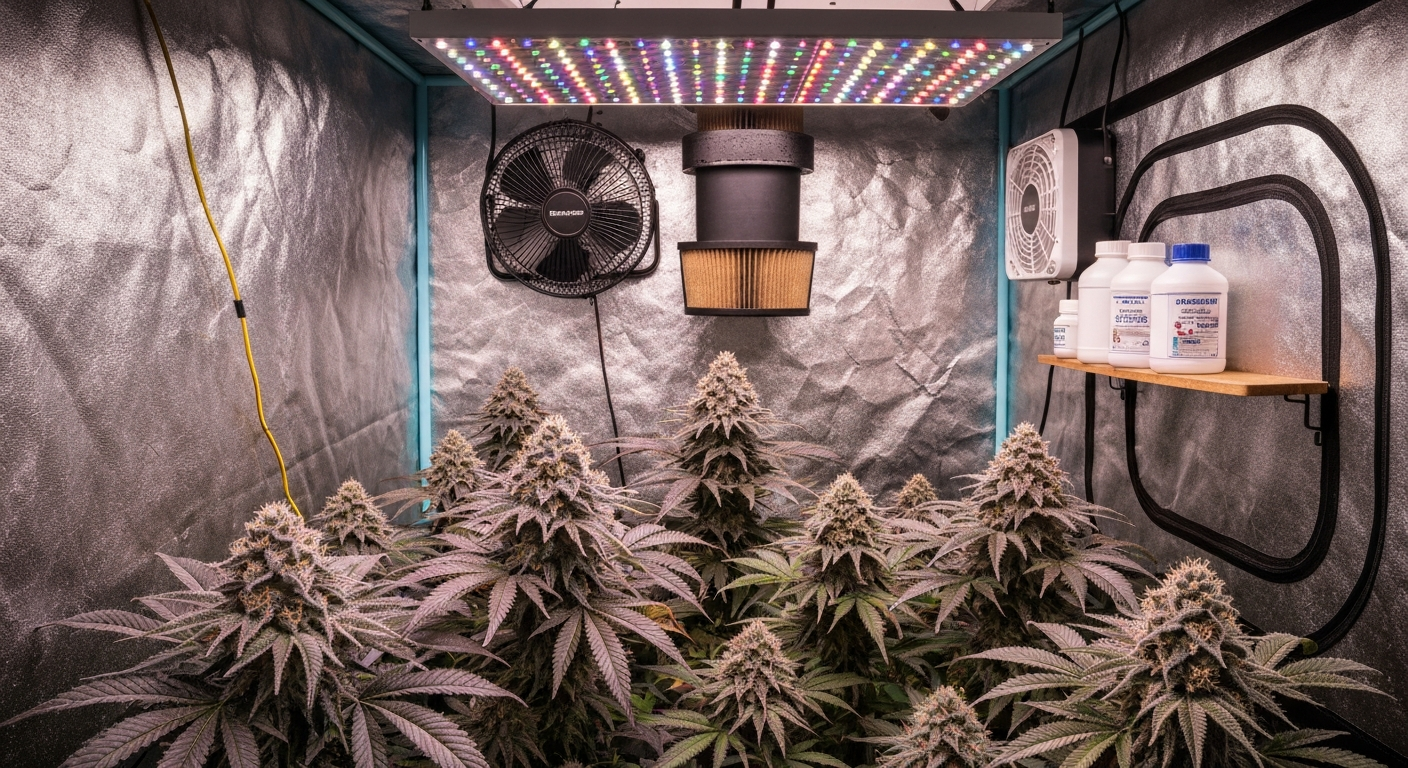
Before you plant a single seed: legal and safety checklist
I cannot stress this enough: get your legal situation locked in before you spend a cent on equipment. Cannabis law is a patchwork and it changes fast. At the U.S. federal level, cannabis remains a Schedule I controlled substance under the Controlled Substances Act, meaning federal law does not protect home growers regardless of state policy. State and local rules are where the real permissions (and restrictions) live. California, for example, allows adults 21 and older to cultivate up to six plants per residence for personal use, but any commercial activity requires a DCC cultivation license and local land-use approval. In Canada, the federal Cannabis Act permits adults to grow up to four plants per dwelling, though certain provinces and municipalities layer on additional restrictions. Always check your specific municipal code too: many jurisdictions add odor-detection rules (making any detectable cannabis smell outside your property a violation) and hard plant-count limits on top of state or provincial law.
Beyond the law, indoor cannabis growing introduces real physical hazards. High-wattage lighting, high-draw fans, humidifiers, and dehumidifiers all compete for circuit capacity. Overloaded circuits are one of the most common causes of grow-room fires. Run dedicated circuits where possible, use UL-, DLC-, or ETL-listed equipment (the UL 8800 horticultural lighting standard exists specifically for this), and never daisy-chain power strips. See UL 8750 | UL Standards & Engagement for UL guidance on LED electrical safety relevant to horticultural lighting UL 8750 | UL Standards & Engagement (UL standards site reference to horticultural lighting outlines). Keep ballasts and drivers off the floor where standing water can reach them, and fit GFCI outlets in any space that uses water.
- Confirm local plant-count limits and any odor/visibility ordinances at the municipal level, not just state or provincial law
- Verify your age and residency eligibility under applicable law before purchasing seeds or clones
- Inspect home wiring capacity before adding high-draw horticultural equipment; consult a licensed electrician if uncertain
- Install GFCI outlets anywhere water and electricity coexist in the grow space
- Use only UL/DLC/ETL/CE-listed fixtures, ballasts, and timers to meet electrical safety standards
- Fit a working smoke detector and keep a dry-powder fire extinguisher within reach of the grow room
- Plan odor control (carbon filtration) before planting, not after neighbors complain
- Keep grow space locked and inaccessible to minors and pets at all times
- Store nutrients, pesticides, and supplements in labeled, child-resistant containers
- Document your plant count and keep copies of any applicable home-grow permits or registrations
What "exotic" actually means and why expectations matter
The word "exotic" gets thrown around loosely in cannabis culture, so let's pin it down. In practical terms, an exotic strain is typically one that offers an unusual or highly refined combination of terpene profile, visual appeal (dense purple or multicolored buds, heavy trichome coverage), and potency that sets it apart from commodity genetics. Think Wedding Cake with its doughy vanilla-pepper nose, or a well-selected Trainwreck pheno with that sharp lemon-pine-spice punch. White Widow, one of the most celebrated Dutch genetics, might seem mainstream by now, but a properly grown, phenotype-selected cut still delivers something distinctly different from generic high-THC hybrids.
Here is where I want to manage expectations honestly: exotic strains are not magically easier to grow, and many of them are more sensitive to environmental swings than stabilized commercial varieties. A Wedding Cake plant that is stressed by inconsistent humidity during late flower may develop mold instead of producing the dense, sticky buds you see in grow journals. Exotic genetics reward attention to detail. They do not reward neglect just because the genetics cost more. Go in knowing that your first run with a new phenotype-specific strain is a learning run. You are dialing in the environment as much as the plant.
Choosing the right genetics for your grow
Phenotype stability is the single most important factor to look for when selecting exotic cannabis genetics. A stable strain means that a high percentage of seeds from that cross will express similar structure, potency, and terpene profile. Unstable genetics produce wildly different plants from the same pack, which wastes time and resources when you are trying to identify a keeper pheno. Look for breeders who publish their breeding methodology: F1 hybrids from stable IBL (inbred line) parents tend to be more consistent than random poly-hybrid crosses sold under a flashy name.
Lineage matters too. Understanding whether a strain leans indica or sativa in its growth structure affects how you plan canopy space and flowering time. A Trainwreck-dominant plant, which carries sativa heritage, can stretch significantly in early flower and needs more vertical room than a compact indica-leaning Wedding Cake cut. For growers looking specifically at outdoor cultivation, see a focused guide on how to grow Trainwreck outdoors for strain-specific sunlight, spacing, and pest strategies. For a detailed, step-by-step walkthrough on this variety, see our guide on how to grow Trainwreck indoors. When you review a strain's claimed terpene profile, cross-reference it against available Certificate of Analysis (COA) data from reputable testing labs. Companies like SC Labs publish COA data including HPLC cannabinoid testing and terpene analysis (by GC-MS), giving you actual batch-level chemistry rather than marketing language. Tools like the Phylos Galaxy database let you explore genetic relationships between strains, which is genuinely useful for identifying mislabeled or counterfeit genetics before you invest a full grow cycle.
- Prioritize breeders who publish F1 or stabilized IBL lineage information rather than vague "proprietary cross" claims
- Request or look up COA data showing actual cannabinoid and terpene percentages for the specific batch or pheno
- Check flowering time claims against independent grow reports: many exotic strains are slow finishers (9 to 11 weeks)
- Consider your grow-space height before choosing a sativa-heavy strain with significant stretch potential
- For your first exotic run, choose a strain with documented mold resistance if your environmental control is not yet dialed in
How to source seeds and clones safely and legally
In jurisdictions where home cultivation is legal, licensed seed banks and registered clone dispensaries are your safest sourcing options. In Canada, federally licensed producers (LPs) are permitted to sell seeds directly to adults for home cultivation. In the U.S., several states allow licensed cannabis retailers to sell seeds and clones to adults for personal home grows. Always purchase from a source that operates under a valid license in your jurisdiction: this is not just about legal compliance, it is about genetic integrity. Licensed dispensaries and reputable seed banks have accountability structures that random online sellers do not.
For seeds specifically, established breeders like Seed Junky Genetics (Wedding Cake), Barney's Farm, Dutch Passion, and similar operations publish lab-verified genetic and germination-rate information and have track records in the community. When ordering internationally, understand that importing cannabis seeds may violate federal law even if your state or province permits home cultivation: the seeds cross a federal border under federal jurisdiction. I am not encouraging anyone to break federal law, and I strongly recommend sourcing domestically through licensed channels wherever that option exists.
Clones sourced from a licensed dispensary or a trusted grower in a legal jurisdiction remove the germination variable and give you a genetic copy of a verified phenotype. The risk with clones is that they can carry pests or disease (most commonly spider mites, fungus gnats, or powdery mildew) into a clean room. Always quarantine new clones for at least one to two weeks in a separate space before introducing them to your main garden.
Seed vs clone: which path is right for you
Both approaches work well at home, and the right choice depends on your situation more than any universal rule. Here is how they compare across the factors that matter most to a home grower.
| Factor | Seeds | Clones |
|---|---|---|
| Starting availability | Available online or in-store in many legal jurisdictions | Require a licensed dispensary or trusted grower source |
| Genetic consistency | Variable between seeds (phenotype hunting needed) | Exact genetic copy of the mother plant |
| Pest/disease risk | Very low — seeds carry almost no pathogens | Higher — clones can import mites, mildew, or gnats |
| Time to harvest | Adds 1–2 weeks for germination and seedling stage | Faster start; skips germination entirely |
| Cost | Typically lower per plant for seed packs | Single-unit price can be higher; no germination loss |
| Legal complexity | Seed importation may conflict with federal law | Must be sourced from a licensed local provider |
| Best for | Phenotype hunters, first-time growers building from scratch | Growers who already know the pheno and want exact replication |
My personal recommendation: if you are new to exotic strains and working in a jurisdiction with licensed seed retailers, start with seeds from a reputable breeder. The germination process teaches you the plant's early signals, and if you find a pheno you love, you can take clones from it to preserve that genetic expression indefinitely. If you already have access to a verified, clean clone of a strain you know you want, and your room is established, take the clone route and save the time.
Quick decision flowchart
- Is a licensed clone source available in your area? If yes, go to step 2. If no, use seeds.
- Do you already know and trust the specific phenotype being offered? If yes, buy the clone. If no, consider seeds to phenotype-hunt first.
- Is your grow room currently free of pests and disease? If yes, proceed with either. If no, use seeds only and clean your room before starting.
- Are you trying to replicate a specific flavor or structure you already love from a previous harvest? If yes, take clones from your mother plant rather than starting from seed again.
Step-by-step seed workflow: germination through early veg
Germination is simpler than most beginners expect, and I wasted time on complicated methods before settling on the paper-towel approach as the most reliable for exotic seeds. Place your seeds between two damp (not soaking) paper towels on a plate, cover with a second plate, and keep at 70 to 77°F (21 to 25°C). Check every 12 hours. Most quality seeds crack and show a white taproot within 24 to 72 hours. Once the taproot is 0.25 to 0.5 inches (6 to 12 mm) long, transplant taproot-down into your starter medium at about 0.25 to 0.5 inches deep.
- Soak seeds in plain pH-adjusted water (6.0 to 6.5) for 12 to 24 hours before paper-towel germination to soften the shell
- Keep germination environment dark, warm (70 to 77°F / 21 to 25°C), and consistently moist but never waterlogged
- Once taproot appears, transfer to a small starter cell or solo cup filled with lightly pre-moistened seedling mix
- Water with a gentle spray of plain pH-adjusted water for the first week — no nutrients yet, seedlings are sensitive
- Provide 18 hours of light and 6 hours of darkness from day one under a low-intensity source: a T5 or LED panel at 200 to 300 PPFD is ideal at this stage
- Maintain relative humidity (RH) at 65 to 70% during the seedling stage to reduce transpiration stress
- Keep temperatures at 72 to 78°F (22 to 26°C) in the canopy zone
- Look for the first true node pair as the signal that your seedling has established: usually 7 to 14 days after germination
- Transplant from the starter cell to your main vegetative container once roots start circling the bottom of the cup (avoid letting plants become root-bound)
During early veg (weeks 2 through 4 from germination), the goal is building root mass and a strong vegetative structure. Introduce a diluted vegetative nutrient solution at roughly 25 to 50% of the manufacturer's recommended dose and increase gradually as the plant fills out. Watch your leaves: pale new growth often signals a nitrogen or pH issue, while dark, clawing tips usually mean nitrogen toxicity. Dial nutrients based on what the plant shows you, not just the calendar.
Step-by-step clone workflow: cuttings, rooting, and mother plant care
Taking your own clones from a plant you love is one of the most satisfying parts of home cultivation. It lets you preserve a specific exotic phenotype indefinitely and eliminates seed costs for future runs. The mother plant is kept permanently in vegetative growth under 18 to 24 hours of light and never flipped to flower.
- Select a healthy mother plant that has been in veg for at least 6 weeks and shows no signs of pest, disease, or nutrient stress
- Use sterilized scissors or a razor blade (wipe with isopropyl alcohol between cuts) to take cuttings from lower, younger branches
- Cut at a 45-degree angle just below a node, leaving the cutting 4 to 6 inches (10 to 15 cm) long with two to three nodes
- Remove all but the top two sets of fan leaves from each cutting to reduce transpiration while roots develop
- Dip the freshly cut stem immediately into a rooting gel or powder (products containing IBA — indole-3-butyric acid — are standard)
- Place cuttings into a rockwool cube, rapid rooter plug, or perlite/coco mix in a humidity dome
- Maintain RH at 80 to 90% inside the dome and keep temperatures at 72 to 77°F (22 to 25°C) — this reduces transpiration stress before roots form
- Provide gentle light at 150 to 250 PPFD; do not blast new cuttings with high-intensity light
- Mist the inside of the dome (not the cuttings directly) twice daily to maintain humidity
- Most cuttings show visible root development at 7 to 14 days; do not disturb or tug on them until roots are clearly visible through the plug
- Once roots are 0.5 to 1 inch long, acclimate clones to your main grow environment by gradually reducing dome humidity over 3 to 5 days before transplanting
Mother plant care is straightforward but consistent: keep her fed on a light-to-moderate vegetative nutrient schedule, prune her regularly to maintain an open canopy and encourage new growth sites, and never let her get root-bound. A well-maintained mother can supply clones for years. I keep my mother plants in 5-gallon fabric pots in a dedicated veg space running 20 hours of light, which gives me a steady supply of rooted clones on a roughly 3-week cycle.
Setting up your indoor grow space
Your grow space determines your yield ceiling more than almost any other factor. Choosing the right size and configuration upfront saves you from expensive retrofits later. Grow tents are the most practical option for most home growers: they are light-proof, reflective on the interior (usually mylar at 90 to 95% reflectivity), modular, and portable. Dedicated rooms or converted closets work too, but require more effort to achieve light-tightness and proper airflow.
| Setup | Footprint | Recommended Plants | Suggested Lighting | Notes |
|---|---|---|---|---|
| 2x2 tent | 4 sq ft | 1 to 2 plants | 200 to 250W LED | Good for personal use, tight SOG runs, or mother/clone space |
| 2x4 tent | 8 sq ft | 2 to 4 plants | 400 to 500W LED | Popular beginner setup; fits 2 plants comfortably with LST or topping |
| 3x3 tent | 9 sq ft | 2 to 4 plants | 400 to 600W LED | Efficient square footprint; good SCROG candidate |
| 4x4 tent | 16 sq ft | 4 to 6 plants | 600 to 800W LED | Most common home grower size; versatile for most training styles |
| 5x5 tent | 25 sq ft | 4 to 8 plants | 800 to 1000W LED | Bridges home and semi-commercial; requires dedicated ventilation planning |
| Dedicated room (8x8) | 64 sq ft | 6 to 12 plants | 1600 to 2000W+ LED | Maximum home flexibility; requires HVAC assessment and electrical planning |
When planning your layout, account for more than just plant canopy. You need clearance above the canopy for the light fixture (most LEDs need 12 to 24 inches between the fixture and canopy at recommended PPFD levels), space for a carbon filter and fan typically hung at the top of the tent, and enough room to move around the plant for training, watering, and inspection. In a 4x4 tent, four medium-trained plants in 3-gallon containers is a comfortable, manageable setup. Six plants in the same space is possible but leaves little room to work and increases the risk of canopy crowding.
Lighting: matching PPFD to your stage and strain
Light is the single biggest lever on yield and potency in an indoor grow. Research published in Frontiers in Plant Science (2021) confirmed that cannabis yield and potency respond to increasing light levels, with near-linear yield gains as canopy PPFD rises. Controlled experiments (PLOS ONE, 2021) found decreasing blue photon fraction increased dry-flower yield, though overall fixture efficacy is often the most important factor for cost-effective cannabinoid production Controlled experiments (PLOS ONE, 2021) found decreasing blue photon fraction increased dry-flower yield and noted fixture efficacy is often the key economic factor.. For vegetative growth, target 400 to 600 PPFD. For flowering, aim for 800 to 1000 PPFD at the canopy for most strains. High-demand exotic strains with dense bud structure can benefit from up to 1200 PPFD in peak flower if your CO2 levels are elevated, but pushing PPFD without adequate CO2 and temperature management causes stress rather than gains.
Modern full-spectrum LEDs from reputable manufacturers like Gavita or Fluence publish detailed PPFD maps and spec sheets for their fixtures, telling you exactly what light intensity you can expect at various mounting heights and coverage areas. Use those maps, not just wattage numbers, to plan your setup. A Gavita Pro 1700e, for example, publishes photometric data specifying PPF output and canopy PPFD at defined mounting heights for a 4x4 and 5x5 footprint. Always prioritize fixtures that carry a recognized safety certification (UL 8800 or equivalent) for horticultural use.
Ventilation and odor control
A properly sized inline fan and carbon filter are non-negotiable for exotic strain grows. Dense, terpene-rich flowers like Wedding Cake and Trainwreck produce powerful odors that can easily breach property boundaries and create legal exposure under municipal odor ordinances. Size your inline fan to exchange the full air volume of your grow space at least once per minute during lights-on periods. For a 4x4x7 tent (roughly 112 cubic feet), a fan rated at 150 to 200 CFM handles the load while still providing headroom for filter static pressure loss. Use the manufacturer's static pressure curves (not just rated CFM) to account for the resistance added by the carbon filter and ductwork.
Match your carbon filter size to the fan: undersized filters saturate quickly and lose effectiveness within weeks. Carbon filter manufacturers specify CFM ratings and expected media life in hours. Pair your ventilation system with an oscillating fan inside the tent to create gentle stem movement, which strengthens cell walls and dramatically improves air circulation at canopy level, reducing the still-air pockets where mold and mildew establish.
Grow media: soil, coco coir, and hydro compared
All three primary growing media work well for exotic strains indoors. Your choice should be based on your experience level, the time you can dedicate to daily management, and your comfort with nutrient chemistry. I made the mistake early on of jumping straight to hydro because I thought it would be faster, only to lose a run of White Widow seedlings to a pH crash I did not catch in time. Media choice is not about prestige. It is about matching the system to your actual routine.
| Media | Buffering Capacity | Watering Frequency | Nutrient Control | Beginner Friendliness | Best Use Case |
|---|---|---|---|---|---|
| Quality potting soil (amended) | High | Every 2 to 4 days | Moderate — soil buffers mistakes | High | First-time growers, organic grows, forgiving environment |
| Coco coir (inert) | Low | Daily or twice daily | High — full nutrient control required | Moderate | Experienced beginners wanting faster growth than soil |
| Deep Water Culture (DWC) hydro | Very low | Continuous (reservoir management) | Very high — precise dosing essential | Low to moderate | Experienced growers chasing maximum yield and growth speed |
For most home growers attempting their first exotic strain, a high-quality amended potting mix (look for products specifically formulated for cannabis with mycorrhizal inoculants and perlite for drainage) is the most forgiving and rewarding starting point. Coco coir is a strong second choice if you can commit to daily watering and are comfortable managing nutrient solutions. Hydro delivers the fastest growth and highest potential yields, but it punishes inattention: a pH swing or pump failure in a DWC system can damage roots in hours.
Vegetative and flowering environment targets
Exotic strains are not dramatically different from other cannabis in their environmental needs, but their tendency toward dense bud structure makes late-flower humidity management especially important. Here are the targets I work toward at each stage, grounded in what actually moves the dial on quality.
| Stage | Temperature (Day) | Temperature (Night) | Relative Humidity | CO2 (ppm) | Light Schedule |
|---|---|---|---|---|---|
| Seedling (weeks 1 to 2) | 72 to 78°F / 22 to 26°C | 68 to 72°F / 20 to 22°C | 65 to 70% | Ambient (400 to 500) | 18/6 |
| Early veg (weeks 2 to 5) | 75 to 82°F / 24 to 28°C | 68 to 74°F / 20 to 23°C | 55 to 65% | Ambient to 800 | 18/6 |
| Late veg / pre-flower | 75 to 82°F / 24 to 28°C | 68 to 74°F / 20 to 23°C | 50 to 60% | 800 to 1000 | 18/6 transitioning to 12/12 |
| Early flower (weeks 1 to 4) | 72 to 78°F / 22 to 26°C | 65 to 70°F / 18 to 21°C | 45 to 55% | 800 to 1000 | 12/12 |
| Mid to late flower (weeks 5 to harvest) | 68 to 75°F / 20 to 24°C | 62 to 68°F / 17 to 20°C | 40 to 50% | 800 to 1000 | 12/12 |
| Flush / final week | 65 to 72°F / 18 to 22°C | 58 to 64°F / 14 to 18°C | 35 to 45% | Ambient | 12/12 |
A slightly cooler night temperature in late flower (a 10°F or 5 to 6°C day-to-night differential) is one of the most reliable ways to encourage anthocyanin expression in purple-leaning exotic strains and to stress-harden trichome density. CO2 supplementation above ambient (around 400 ppm) makes a real difference only if your other inputs (light intensity, nutrient levels, temperature) are already dialed in. Do not invest in CO2 enrichment for a first run: fix the fundamentals first.
Nutrient and feeding protocols for exotic strains
Cannabis nutrient needs shift significantly across growth stages. Veg calls for higher nitrogen (N) relative to phosphorus (P) and potassium (K). As flowering begins, you reduce N and increase P and K to support bud development. Exotic strains, particularly indica-heavy varieties like Wedding Cake, can be more sensitive to nutrient excess than their hybrid cousins. I have seen gorgeous Wedding Cake runs go to tip burn because a grower pushed cal-mag and potassium too hard in week 6 of flower.
- Veg stage: target an N:P:K ratio roughly in the range of 3:1:2; start at 25 to 50% of manufacturer's dose and observe for 3 to 5 days before increasing
- Early flower (weeks 1 to 3): begin transitioning to a bloom formula; reduce N slightly, increase P and K; maintain calcium and magnesium supplementation (5 to 10 mL/gallon of a standard cal-mag product in RO or soft water)
- Peak flower (weeks 4 to 6): use a high-P, high-K bloom booster; most quality brands provide specific week-by-week feeding charts — follow them loosely and adjust based on plant response
- pH management is non-negotiable: maintain 6.0 to 7.0 for soil, 5.8 to 6.2 for coco or hydro; pH outside these ranges locks out key nutrients regardless of how much product you add
- EC (electrical conductivity) targets: seedlings 0.4 to 0.8 mS/cm, veg 1.2 to 1.8 mS/cm, flower 1.8 to 2.4 mS/cm; measure runoff EC to catch salt buildup early
- Final 1 to 2 weeks: flush with plain pH-adjusted water (soil) or a flushing product (coco/hydro) to clear residual nutrients before harvest
For organic soil grows, many of these numbers become less critical because the soil microbial community buffers and mediates nutrient availability. But pH still matters in organic grows: soil pH below 6.0 suppresses bacterial activity and can cause nutrient lockout even in rich amended soil. Test your runoff pH at least weekly regardless of your growing medium.
Training techniques to maximize your canopy
Training is where home growers leave the most yield on the table. Untrained plants produce a main cola with smaller, under-lit lower buds. Training distributes light across more bud sites and dramatically increases total harvest from the same wattage. The three methods most relevant to exotic home grows are topping, low-stress training (LST), and SCROG (screen of green).
Topping
Topping means cutting the main growing tip (apical meristem) just above a node, which causes the plant to redirect energy to two main colas instead of one. You can top once or multiple times (called FIMing on the second or third top) to build a wide, even canopy. Top during early to mid-veg when the plant has 4 to 6 nodes and is growing vigorously. Avoid topping within two weeks of flipping to flower: the plant needs recovery time. Exotic strains with high vigor (Trainwreck is a great example) respond especially well to aggressive topping.
Low-stress training (LST)
LST involves bending and tying branches down rather than cutting them, keeping the canopy flat and even without the recovery time that topping requires. Use soft plant ties or pipe cleaners to gently bend the main stem outward and tie it to the pot rim or a trellis stake. As the plant grows, continue tying new growth down and outward. This is my go-to method for any strain I am running for the first time: it is reversible, low-stress for the plant, and teaches you exactly how a specific exotic strain branches and grows.
SCROG and SOG
A screen of green (SCROG) uses a horizontal net or screen above the canopy. You weave growing branches through the net during veg to create an even, flat canopy just below the screen, then flip to flower once the screen is 60 to 70% filled. This is the single most effective technique for maximizing yield per watt in a fixed-footprint tent. A sea of green (SOG) takes the opposite approach: many small plants (often clones) flipped to flower very early, with each plant producing one main cola. SOG works best with stable clone genetics and is particularly effective for indica-dominant exotic varieties with short, compact structures.
Strain-specific tips: White Widow, Trainwreck, and Wedding Cake
These three strains represent different growth challenges and rewards. Knowing their specific tendencies before your first run saves you from surprises mid-flower. If you want a deeper dive into any of these individually, there are dedicated guides on growing White Widow indoors and growing Trainwreck indoors on this site that go into much greater strain-specific detail.
| Strain | Growth Structure | Flower Time | Key Terpenes | Main Challenges | Training Recommendation |
|---|---|---|---|---|---|
| White Widow | Medium height, moderate stretch, dense bud structure | 8 to 9 weeks | Myrcene, caryophyllene, limonene | Susceptible to bud rot in high humidity; trichomes can be damaged by rough handling | Top once at node 4 to 5, then LST; benefits from defoliation at week 3 of flower |
| Trainwreck | Tall, sativa-dominant stretch (can double in height at flip), open bud structure | 9 to 11 weeks | Terpinolene, myrcene, ocimene | Height management critical; watch for late-flower nutrient sensitivity and mold in dense phenos | Aggressive topping and SCROG essential; top 2 to 3 times in veg; flip only when screen is 50% full |
| Wedding Cake | Medium, bushy, very dense and heavy colas | 8 to 10 weeks | Limonene, caryophyllene, myrcene | Highly susceptible to botrytis (bud rot) at RH above 50% in late flower; heavy colas need support stakes | LST plus defoliation at stretch; use SCROG for even light penetration; late-flower RH must stay under 45% |
Growing the Wedding Cake strain is a particularly rewarding but high-attention exercise. Its dense bud structure is beautiful but it creates the exact microclimate that gray mold loves. I keep a targeted defoliation schedule for Wedding Cake: a significant defoliation at the beginning of week 3 of flower (removing fan leaves that block bud sites and air circulation) and a light tuck-and-remove at week 6. If you want a thorough walkthrough specific to that variety, a dedicated guide on growing the Wedding Cake strain covers the full schedule.
Harvest timing: reading your plant, not just the calendar
Harvest timing has more impact on the final effect and terpene profile of an exotic strain than almost any other late-stage decision. The calendar is a rough guide, not a rule. Breeder-stated flowering times are averages under ideal conditions. Your actual environment, training style, and plant's genetics can move that window by one to two weeks in either direction.
The most reliable harvest indicator is trichome color, examined under a jeweler's loupe (30x to 60x) or a digital microscope. Clear trichomes indicate THC is still developing: too early. Cloudy (milky white) trichomes indicate peak THC accumulation. Amber trichomes indicate THC is converting to CBN: a more sedative, body-heavy effect. For most exotic strains aimed at a balanced effect, I harvest when roughly 70 to 80% of trichomes are cloudy with 10 to 20% amber. For a more cerebral, high-energy effect, harvest at mostly cloudy with minimal amber. For a heavier, couch-lock effect, wait for 30 to 40% amber.
- Watch for pistil color change: when 70 to 90% of white pistils have darkened and curled inward, begin checking trichomes daily
- Examine trichomes on the bud itself, not the sugar leaves — sugar leaf trichomes mature faster and will skew your reading amber
- Stop all nutrients at least 7 to 14 days before your target harvest date and flush with pH-adjusted water
- Reduce light intensity in the final few days (a "dark period" of 24 to 48 hours before harvest is sometimes used to stress-boost terpenes, though evidence is anecdotal)
Drying and curing: where terpenes are made or lost
The dry and cure is where I see the most preventable quality loss in home grows, including my own early runs. Rushed drying destroys terpenes. Improper curing allows mold to ruin what the grow produced. Getting this right is what separates a good harvest from a great one.
After harvest, hang whole branches or individual buds in a dark space at 60 to 65°F (15 to 18°C) with RH held at 55 to 60%. Airflow should be gentle and indirect: do not point a fan directly at drying buds. This slow dry, targeting 7 to 14 days depending on bud density and ambient conditions, preserves far more terpene content than a 3-day fast dry. The target is buds that feel dry on the outside but still have a slight give at the core when gently squeezed, with small stems that snap rather than bend.
Once dry, trim (if you did not wet-trim at harvest) and pack loosely into glass mason jars filled to about 75% capacity. For the first 2 weeks, open the jars twice daily for 5 to 15 minutes (called "burping") to release moisture and CO2. If you smell ammonia when you open a jar, the buds were not dry enough: spread them out immediately to dry further before resealing. After two weeks of active burping, move to once-daily, then every few days. Most exotic strains reach their best flavor and smoothness at 4 to 8 weeks of cure. Boveda or Integra Boost 58 or 62% humidity packs help maintain target RH inside sealed jars during long-term cure and storage.
Troubleshooting the most common problems
Nutrient deficiencies and toxicities
Most apparent deficiencies in well-fed plants are actually pH lockout issues. Before adjusting nutrients, check and correct your root-zone pH. Yellowing of lower leaves starting at tips = likely nitrogen deficiency or flush/lockout. Interveinal yellowing on new growth = likely iron or magnesium deficiency (check pH first). Dark green, clawed leaves = nitrogen toxicity (ease up on veg nutrients). Burnt, crispy tips = nutrient salt buildup or excess potassium (flush and recheck EC). Use a visual deficiency chart from a reputable source to cross-reference symptoms before adding anything new to your reservoir or feed.
Pests: spider mites, fungus gnats, and aphids
Spider mites are the most damaging common indoor pest for exotic strains. They thrive in hot, dry, stagnant conditions and can devastate a late-flower plant quickly because chemical options are limited that close to harvest. Prevention is everything: maintain proper airflow and RH, keep your room clean, and inspect the undersides of leaves weekly. For early-stage infestations, neem oil or insecticidal soap (applied before the flowering stage) is effective. Spinosad is a widely used organic option that handles fungus gnats and some mite species. Beneficial predatory insects like Phytoseiulus persimilis (a predatory mite) are highly effective in enclosed grow environments and leave no chemical residue.
Mold and botrytis
Botrytis (gray mold) is the most feared late-flower disease for dense exotic strains, especially Wedding Cake. It attacks from the inside of dense buds outward and is often not visible until significant damage has occurred. Prevent it by keeping late-flower RH below 50% (ideally 40 to 45%), maintaining strong airflow through the canopy, and defoliating to remove leaves that trap moisture. If you find gray mold, remove the infected material immediately with sterilized scissors and place it directly in a sealed bag. Do not shake or disturb infected buds: botrytis spores spread through air movement.
Testing, storage, and what comes after harvest
For home growers, formal potency testing is optional but genuinely interesting. In the U.S., accredited cannabis testing laboratories operating under ISO/IEC 17025 accreditation (or national equivalents like A2LA accreditation) can test samples for cannabinoid and terpene content. Some states allow private individuals to submit samples; others restrict testing to licensed producers. Check what is available in your jurisdiction. If you can get a COA done on your cured flower, the HPLC cannabinoid data gives you real numbers rather than estimates, and terpene analysis by GC-MS tells you exactly what is driving your strain's flavor and effect.
For long-term storage, cured flower keeps best in glass mason jars with humidity packs at 55 to 62% RH, stored in a cool (55 to 65°F / 13 to 18°C), dark location. Avoid refrigerating cannabis: temperature cycling causes condensation that degrades trichomes and promotes mold. A dedicated wine cooler set to 60°F works well for long-term storage of multiple jars. Properly dried, cured, and sealed exotic flower retains good potency and terpene quality for 6 to 12 months. Beyond that, cannabinoid degradation accelerates and terpenes fade noticeably.
Once you have completed a full grow cycle, the next decisions are about scaling, refining, or expanding strain variety. Many growers who successfully complete their first exotic strain run immediately want to phenotype-hunt a second variety or expand to a second tent for a perpetual harvest cycle. Before scaling, revisit your local legal limits on plant count and ensure your setup remains compliant at the new scale. Responsible home cultivation means staying within the rules that protect both you and the broader community of legal home growers.
FAQ
What legal and safety information should be included before instructing readers how to grow exotic cannabis indoors?
Start with a clear legal checklist: federal status (e.g., U.S. federal Schedule I baseline), national laws (Canada’s Cannabis Act limits), and state/provincial/municipal rules (plant counts, age limits, licensing, odor/nuisance ordinances). Advise readers to verify local building, electrical and rental/HOA rules, and to secure proper ventilation and fire-safe electrical installations (use listed fixtures, GFCIs, correct wiring). Cite government sources (Justice/Health Canada, state cannabis regulators) and recommend consulting an attorney or local regulator if unsure.
Which authoritative sources help verify legal/regulatory obligations and lab testing requirements?
Primary sources: national statutes and regulator guidance (e.g., Cannabis Act — Justice Laws, Health Canada grow guidance, U.S. state cannabis control boards). For testing: ISO/IEC 17025 accreditation bodies (A2LA) and state lab program rules; commercial accredited labs’ guidance (e.g., SC Labs) for sampling and COA requirements. Use those documents to explain required analytes (potency, pesticides, heavy metals, microbials, moisture, residual solvents) and labeling rules.
What guidance should I provide for choosing and sourcing genetics for exotic strains?
Explain how to evaluate breeders and seedbanks (reputation, reviews, third-party COAs), and the choice between feminized, regular, and auto seeds. Recommend genetic verification resources (e.g., Phylos Galaxy) and buying from licensed/established vendors to reduce risk of mislabeling. Discuss phenotype variability in exotic strains and the value of stable, well-documented crosses or clones for phenotype-specific goals.
What indoor grow setups and equipment recommendations are authoritative and practical?
Cover a range by scale: small tent (2x2–4x4 ft) to dedicated rooms. Recommend listed horticultural lights (LED/HPS) and using manufacturer PPFD maps (Fluence, Gavita) for fixture count and mounting heights. Stress electrical safety and UL/DLC/ETL-listed gear. For HVAC/ventilation sizing reference ASHRAE guidance and fan/carbon-scrubber manufacturer CFM/static pressure curves to size air-changes, heat removal and odor control. Include inline fans, ducting, carbon filters, oscillating fans, and environmental controllers.
Which grow media and irrigation systems should the article compare?
Compare: living soil (microbial focus, slow-release organics), soilless mixes (coco coir — fast, responsive), and hydroponics (DWC, RDWC, drip, NFT — high control/rapid growth). For each, list pros/cons: nutrient control, pH stability, setup/maintenance complexity, and recommended monitoring (EC/TDS, pH, runoff tests). Cite general horticultural best practices and manufacturer media specs.
How should the article present seed vs clone workflows?
Provide side-by-side workflows: seed—germination, seedling care, sexing/selection; clone—mother plant maintenance, cloning methods (cloning station, rooting hormone, humidity domes), sanitation to avoid disease. Emphasize biosecurity: sanitized tools, quarantine new genetics, and proper labeling/tracking of phenotypes. Note legal restrictions on movement and commercial sourcing.
How to Grow White Widow Indoors: Complete Step‑by‑Step Guide
Step-by-step indoor guide to grow White Widow: setup, veg/flower schedules, autoflower tips, harvest & troubleshooting