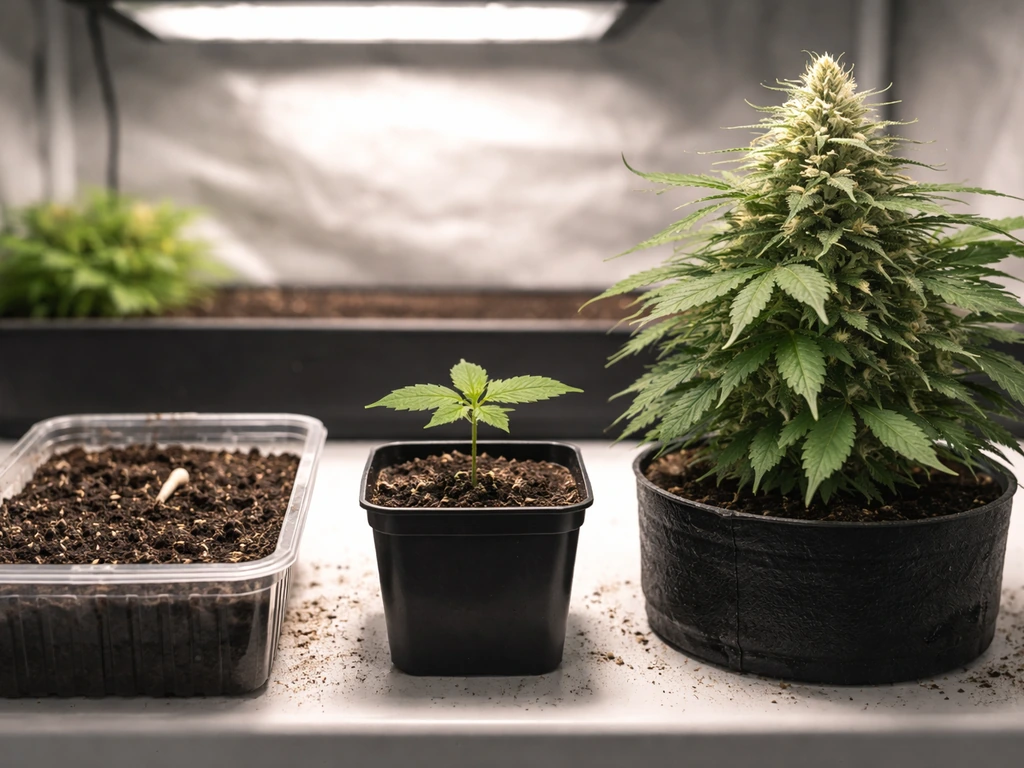
White Widow is one of the most forgiving, rewarding strains you can grow indoors. Set your tent up correctly, keep your environment dialed in, and you can run a photoperiod White Widow from seed to dried bud in roughly 14 to 18 weeks, or finish an autoflower version in as little as 10 to 12 weeks from seed. This guide walks you through every stage: legal basics, seed selection, gear setup, veg and flower protocols, training techniques, and harvest through curing. Whether this is your first grow or your fifth, there is something here to tighten up your process. See our detailed guide on how to grow White Widow for a focused, step-by-step walkthrough.
How to Grow White Widow Indoors: Complete Step‑by‑Step Guide

Marcus Holbrook
17 Jul 2026
Before you start: legal reminders and responsible growing
I always put this section first because it matters more than any technique. Cannabis cultivation law varies enormously depending on where you live, and getting it wrong has real consequences. Before you order seeds or build a single thing, spend thirty minutes researching your local rules.
In the United States, several states permit adults aged 21 and older to cultivate cannabis at home for personal use. California, for example, allows up to six living plants per residence under Proposition 64 and SB-94, though local governments can layer on additional restrictions. Critically, U.S. federal law still classifies cannabis cultivation as a controlled substance production offense under the Controlled Substances Act, regardless of what state law says. That federal-state conflict is real and ongoing, and growers should understand the risk they accept.
Canada's Cannabis Act (Bill C-45) set a federal baseline of up to four plants per residence for personal non-medical cultivation, but provinces and territories can impose stricter limits or outright prohibitions. Always check your province's current rules, not just the federal baseline. In the United Kingdom, cultivating cannabis without a licence is a criminal offence under the Misuse of Drugs Act 1971, full stop. Medical cannabis in the UK is tightly prescribed and does not permit home growing.
Beyond legality, responsible indoor growing means thinking about privacy, fire safety, and electrical load. Use surge-protected outlets or a proper breaker setup for your lights and fans. Keep your grow area secure, dry, and well-ventilated to prevent mold that could spread beyond the grow space. Dispose of waste responsibly. Growing at home is a privilege where it is legal, and doing it carefully protects both you and that privilege.
White Widow: what makes this strain a great indoor pick
White Widow was developed in the Netherlands in the early 1990s, with Green House Seed Co. among the breeders most associated with its rise. It is broadly classified as a balanced hybrid, roughly 50 percent sativa and 50 percent indica in character, which shows up in its growth pattern: medium height, moderate branching, and a manageable canopy that does not stretch wildly like a pure sativa but also does not stay as compact as a heavy indica.
Photoperiod White Widow typically finishes flowering in about 8 to 9 weeks under 12/12 lighting. That is a comfortable flowering window, short enough to keep total grow times reasonable but long enough for resin to develop properly. The strain is widely noted for resin production and a dense, frosty bud structure. It also handles minor grower mistakes reasonably well, which is part of why it has stayed so popular for decades. If you are newer to growing, that resilience gives you some room to learn without immediately ruining a crop.
Photoperiod vs autoflower White Widow: picking the right seed
This is the first real decision you need to make, and it changes almost everything downstream. Photoperiod White Widow requires a shift in light schedule to trigger flowering: you run 18 hours of light per day during veg, then flip to 12 hours on and 12 hours off when you are ready for the plant to flower. The plant flowers in response to those long, uninterrupted dark periods. This gives you complete control over how long you keep the plant in vegetative growth, which directly controls plant size and structure.
Autoflower White Widow works differently at the genetic level. Autoflowering cannabis has a day-neutral flowering pathway controlled by specific genetic loci, meaning the plant transitions to flowering based on age rather than light schedule changes. Genetic and genomic studies identify photoperiod insensitivity (“autoflower”) in Cannabis sativa as a heritable, often recessive trait introgressed from high‑latitude/ruderalis‑type germplasm; researchers have mapped major ‘Autoflower1’ loci and shown day‑neutral flowering is genetically distinct from photoperiod‑sensitive flowering pathways Comparative genomics of flowering behavior in Cannabis sativa (Frontiers in Plant Science, 2023). Autoflower White Widow varieties from major seedbanks typically go from seed to harvest in around 10 to 12 weeks total, running on an 18/6 or even 20/4 light schedule throughout. You never change the schedule.
The catch with autoflowers is timing. Because they have a fixed, genetically programmed lifecycle, they cannot be held in vegetative growth while you wait to train them or recover from stress. Heavy high-stress training methods like topping work poorly on autos because the recovery time eats into a lifecycle that is already short. More on training below, but that constraint shapes your entire grow plan.
Within both categories, you will also choose between feminized seeds (almost guaranteed female, easier for beginners), regular seeds (roughly 50/50 male-female split, used mainly for breeding), or autoflower feminized (most auto seeds sold are already feminized). For home growers focused on producing flower rather than breeding, feminized seeds are the practical default. Stick with reputable breeders and established seedbanks that publish their expected flowering windows and seed-to-harvest timelines.
| Feature | Photoperiod White Widow | Autoflower White Widow |
|---|---|---|
| Flowering trigger | Light schedule change (12/12) | Age-based (no schedule change needed) |
| Typical seed-to-harvest | 14–18 weeks total (varies by veg length) | 10–12 weeks from seed |
| Veg length control | Fully grower-controlled | Fixed by genetics (~3–4 weeks veg) |
| Flowering duration | ~8–9 weeks | ~5–7 weeks (varies by line) |
| High-stress training (topping) | Works well with recovery time | Not recommended — too little time to recover |
| Low-stress training (LST) | Excellent results | Works well if started early |
| Light schedule during grow | 18/6 veg, then 12/12 flower | 18/6 or 20/4 throughout |
| Best for | Growers wanting size/yield control | Fast turnaround, smaller spaces, beginners wanting simplicity |
Planning your grow: timelines and deciding how long to veg
One of the most common planning mistakes I see is growers not thinking about the total timeline before they start. Your veg duration is the main variable you control with photoperiod plants, and it directly sets your final plant size. A rough rule: photoperiod cannabis roughly doubles in height during the first two weeks of flowering (this is called the stretch). If your tent is 2 meters tall and you want to keep canopy well below your lights, plan your veg length with that stretch in mind.
For a standard 1.2m x 1.2m tent with a 2m ceiling, most photoperiod White Widow growers veg for 4 to 6 weeks from transplant, then flip. For smaller spaces or SCROG setups, you might veg longer and fill the screen before flipping. For autoflowers, you simply plant and run. The timeline from seed is fixed at roughly 10 to 12 weeks depending on the specific genetic line.
| Stage | Photoperiod White Widow | Autoflower White Widow |
|---|---|---|
| Germination | Days 1–5 | Days 1–5 |
| Seedling | Week 1–2 | Week 1–2 |
| Vegetative | Weeks 3–8 (grower-set, typically 4–6 weeks) | Weeks 2–4 (fixed by genetics) |
| Flowering | Weeks 9–17 (8–9 weeks after 12/12 flip) | Weeks 5–11 (5–7 weeks, age-triggered) |
| Flush / final week | Final 1–2 weeks of flower | Final 1 week |
| Total seed to harvest | Approximately 14–18 weeks | Approximately 10–12 weeks |
| Drying and curing | 2–4 weeks post-harvest | 2–4 weeks post-harvest |
Setting up your indoor grow space
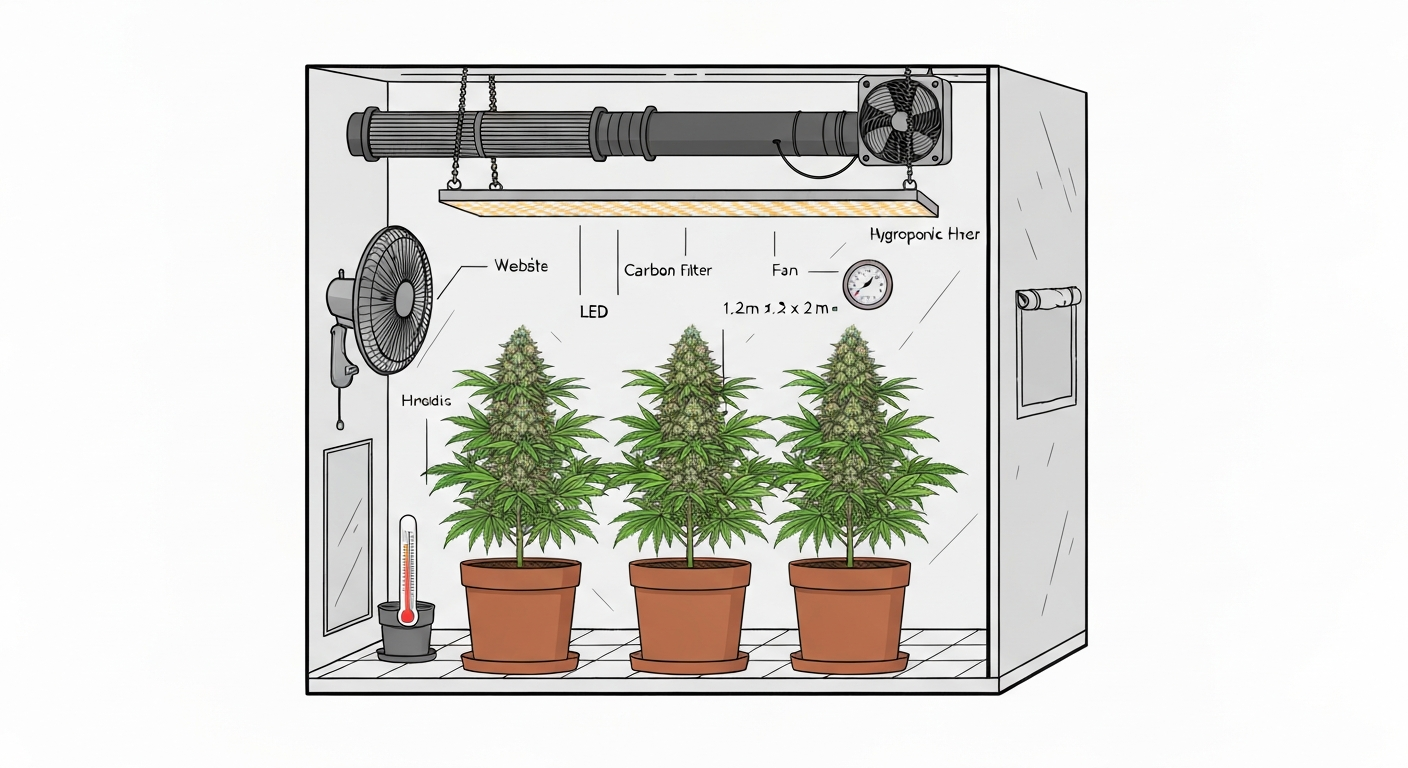
You have two main options: a dedicated grow tent or converting a room or closet. Tents are almost always the better starting point. They are light-tight, reflective on the inside, come with duct ports in standard positions, and can be broken down and stored. The most common beginner tent size is 1.2m x 1.2m x 2m (roughly 4ft x 4ft x 7ft), which comfortably fits two to four photoperiod plants in 11–15L pots or four to six autoflowers in smaller containers. Smaller 0.6m x 0.6m or 0.8m x 0.8m tents work for one or two plants and reduce upfront cost.
Whatever space you use, it needs to be light-tight during the dark period (critical for photoperiod plants), have at least one intake point low and one exhaust point high, and be accessible enough that you can comfortably water and inspect plants without disturbing them constantly. Measure your space before buying anything else. Your light fixture hangs from the center of the ceiling or tent bar, and you need at least 30 to 60cm of clearance between the light and your canopy at peak stretch.
- Grow tent or light-proofed room sized to your plant count and pot sizes
- Hanging bars or ratchet hangers for lights and carbon filter
- Reflective interior walls (tents already have this; rooms may need Mylar or flat white paint)
- Waterproof tray or flood tray under pots to catch runoff
- Thermometer and hygrometer at canopy height (not at the wall)
- Electrical outlet access with appropriate load capacity for lights, fans, and timers
- Timers: one for lights, one if using automated watering
- Lockable door or panel if security or child safety is a concern
Lighting: LED vs HPS vs CFL and what targets to aim for
Lighting is the single biggest driver of yield indoors, and it is also the area where beginners overspend on the wrong things or underestimate what their plants actually need. The key metric is PPFD (photosynthetic photon flux density), measured in micromoles per square meter per second (µmol·m⁻²·s⁻¹). Wattage is a secondary metric. What matters is how much usable photon energy is hitting your canopy.
Research on cannabis photosynthesis shows yield increases proportionally with higher PPFD up to a point, with diminishing returns beyond roughly 1,000 µmol·m⁻²·s⁻¹ unless CO2 is supplemented. A PLOS One (2021) study, "Cannabis lighting: Decreasing blue photon fraction increases yield but efficacy is more important for cost effective production of cannabinoids (PLOS One, 2021)", found decreasing the blue photon fraction increased yield while light efficacy (µmol per joule) mattered more for cost‑effective cannabinoid production. For most home growers without CO2 enrichment, practical targets are: seedlings 100 to 300 µmol·m⁻²·s⁻¹, vegetative stage 300 to 600 µmol·m⁻²·s⁻¹, and flowering stage 600 to 900 µmol·m⁻²·s⁻¹. A PAR/PPFD meter is the most honest way to know what your canopy is actually receiving.
| Light Type | Efficiency (µmol/J) | Heat Output | Upfront Cost | Running Cost | Best Use Case |
|---|---|---|---|---|---|
| Full-spectrum LED (quality) | 2.0–3.0+ | Low to moderate | High | Low | Best all-around for tents, low heat in small spaces |
| HPS (High Pressure Sodium) | 1.0–1.7 | High | Low to moderate | Moderate–high | Larger rooms with good ventilation, proven flowering results |
| CFL (Compact Fluorescent) | 0.6–1.0 | Low | Very low | Moderate | Seedlings, clones, very small spaces — not ideal for full cycle |
Modern quantum-board LEDs from reputable manufacturers typically deliver 2.0 to 3.0+ µmol per joule of electricity, which makes them far more efficient than HPS in a small tent. HPS still works well, especially in larger spaces with good air exchange to handle the heat, and it is significantly cheaper upfront. CFL is fine for seedlings and clones but struggles to deliver the PPFD a flowering canopy needs without hanging lights uncomfortably close. I started with HPS and moved to LED. Both produced good results, but the LED made climate control dramatically easier.
Rather than choosing a light by wattage alone, look at the manufacturer's PPFD map for your specific tent size. A quality 240W LED designed for a 1.2m x 1.2m footprint will typically hit 600 to 900 µmol·m⁻²·s⁻¹ at the canopy when hung at the recommended height. Always cross-reference the datasheet with a PAR meter reading if you can.
Ventilation, air exchange, and managing odor
Cannabis plants smell. White Widow especially so during late flowering. Proper ventilation serves two purposes: keeping your environment dialed in (temperature, humidity, CO2 replenishment) and managing that odor so it does not leave your grow space. These are non-negotiable parts of an indoor setup.
The baseline sizing rule for an exhaust fan is roughly 1 CFM (cubic feet per minute) per cubic foot of grow space, targeting a full air exchange every one to three minutes. A standard 1.2m x 1.2m x 2m tent is about 101 cubic feet. A 4-inch inline fan rated at 200 CFM handles that comfortably, with headroom for a carbon filter and duct bends. Add 20 to 30 percent capacity to your base calculation whenever you are running a carbon filter, because the filter creates static pressure that reduces effective airflow. Running your exhaust fan at 70 to 80 percent speed rather than full blast is quieter and extends the fan's life.
Your carbon filter is the odor solution. A properly sized activated-carbon filter on the exhaust line scrubs VOCs and terpenes before air leaves the space. Size the filter to match or exceed your fan's CFM rating. Hang the filter inside the tent at the top (heat rises, odor rises with it), connect it directly to the fan with ducting, then run the ducted exhaust out of the tent. Replace the carbon bed every 12 to 18 months depending on use.
- Inline exhaust fan sized to ~1 CFM per cubic foot of grow space, plus 20–30% buffer for filter resistance
- Activated carbon filter matched to fan CFM, hung at the top of the tent
- Ducting connecting filter to fan and fan to exhaust point
- Passive or active intake low on the opposite side of the tent from the exhaust
- Oscillating circulation fan(s) inside the tent to prevent hot/humid pockets and strengthen stems
- Speed controller for the inline fan to manage climate in different seasons
- Temperature and humidity controller (e.g., an inkbird or similar) to automate fan speed based on readings
Temperature and humidity targets by stage
Get these wrong and you will fight problems all grow. Too high RH in flowering invites botrytis (bud rot). Too high temperature reduces resin quality and stresses plants. Too low humidity in seedling stage stresses young plants before their root systems establish. These are the bands I aim for.
| Growth Stage | Temperature (Day) | Relative Humidity | VPD Target |
|---|---|---|---|
| Seedling / clone | 22–26°C (72–79°F) | 65–75% | ~0.8–1.0 kPa |
| Vegetative | 20–26°C (68–79°F) | 40–70% | ~1.0–1.2 kPa |
| Flowering (early) | 20–26°C (68–79°F) | 45–55% | ~1.2–1.5 kPa |
| Flowering (late) | 18–24°C (65–75°F) | 40–50% | ~1.2–1.5 kPa |
| Drying room | 15–21°C (60–70°F) | 50–65% | N/A — passive drying conditions |
Vapor pressure deficit (VPD) combines temperature and humidity into a single metric that describes the drying power of the air around your leaves. It is a more precise way to manage plant transpiration than RH alone. The targets in the table above are widely used in controlled-environment horticulture. If you have a decent thermometer-hygrometer at canopy height and a VPD chart, you can dial this in without expensive sensors.
Growing mediums: soil, coco, soilless, and hydroponics compared
The medium you grow in determines how you water, how you feed, what pH you target, and how much control you need to exercise daily. None of the options below are wrong. Each suits different growers, schedules, and experience levels.
Soil
Soil is the most beginner-friendly medium. A quality cannabis-specific or general potting mix with good drainage (perlite added at 20 to 30 percent by volume if needed) buffers nutrient swings and pH changes better than any other medium. Soil microbiology also supports plant health in ways synthetic-only grows do not naturally replicate. Water when the top inch or two of soil dries out and the pot feels noticeably lighter. Target a soil pH of 6.0 to 7.0, with 6.2 to 6.8 being the sweet spot for nutrient availability. Feed frequency depends on whether you use amended soil (less feeding needed) or inert potting mixes (more supplemental feeding required).
Coco coir
Coco coir is a coconut fiber byproduct that behaves like a hydroponic medium even though it looks and feels like soil. It holds moisture and air well, drains fast, and lets you feed every watering with precise nutrient solutions. Coco is my personal preference for growing White Widow because it gives you faster growth than soil and more control than a full recirculating hydro system. The key adjustments compared to soil: target pH of 5.8 to 6.2 (not soil pH), water and feed more frequently (often daily in peak flower), and always supplement calcium and magnesium because coco naturally chelates these. Buffering your coco before use with a CalMag solution prevents deficiencies from the start.
Soilless mixes (peat-based)
Soilless mixes like Promix or similar peat-based blends fall between soil and coco in behavior. They have no native nutrients, so you feed from the beginning like coco, but they hold more moisture than pure coco and have slightly more buffering capacity. Target pH is 5.8 to 6.2. These work well for growers who want the responsiveness of a near-hydro medium without committing to a full hydro system. The watering frequency sits between soil and coco.
Hydroponics (DWC, NFT, flood and drain)
Hydroponic systems deliver nutrient solution directly to bare roots, which can produce fast vegetative growth and impressive flowering results when dialed in. Deep water culture (DWC), where roots sit in an oxygenated nutrient reservoir, is the most common home hydro setup for cannabis. Target solution pH of 5.5 to 6.0. The tradeoff: hydro is less forgiving. A pump failure, pH drift, or reservoir temperature spike can damage or kill plants quickly. I would not recommend starting your first White Widow grow in DWC, but if you have some soil or coco grows under your belt, hydro is a logical next step and worth exploring.
| Medium | pH Target | Watering Frequency | Buffering Capacity | Beginner Friendliness | Best For |
|---|---|---|---|---|---|
| Soil (quality mix) | 6.2–6.8 | Every 2–4 days | High | Excellent | First grows, organic methods, relaxed schedule |
| Coco coir | 5.8–6.2 | Daily in peak growth | Low | Moderate | Fast growth, precise feeding, intermediate growers |
| Soilless / peat mix | 5.8–6.2 | Every 1–3 days | Moderate | Good | Growers wanting near-hydro control with more buffer |
| DWC hydroponics | 5.5–6.0 | Continuous (reservoir) | Very low | Challenging | Experienced growers, maximum growth speed |
Germination and the seedling stage
The paper towel method is reliable and simple: place your seeds between two moist (not soaking) paper towels on a plate, cover with another plate, and keep in a warm spot around 22 to 25°C. Most White Widow seeds will show a tap root within 24 to 72 hours. Once the tap root is 5 to 10mm long, plant it tap-root-down about 5mm deep in your chosen medium. A small solo cup or seedling pot works well for the first 10 to 14 days before transplanting.
During the seedling stage, keep light intensity low (100 to 200 µmol·m⁻²·s⁻¹ at canopy or raise your lights high), humidity up around 65 to 75 percent, and temperature in the 22 to 26°C range. Do not over-water. A seedling in a small cup of moist medium just needs the moisture already in the medium for the first several days. Overwatering here is the most common early mistake.
Vegetative stage protocol (photoperiod White Widow)
Run your lights on an 18-hour-on, 6-hour-off schedule throughout veg. White Widow in veg responds well to increasing light intensity as it establishes. Start at the lower end of your PPFD targets and ramp up toward 500 to 600 µmol·m⁻²·s⁻¹ as the plant develops its third or fourth node. Feed at roughly one-quarter to one-half of the manufacturer's recommended dose during the first two weeks, then work up to full vegetative rates by weeks three to four.
Vegetative nutrients lean nitrogen-heavy. A balanced N-P-K like a 3-1-2 ratio is typical for veg. If you are in soil, a quality amended mix may need little or no supplemental nitrogen for the first few weeks. In coco or soilless, start nutrients from the first true feeding. A practical vegetative target in parts per million (PPM, 500 scale) is roughly 400 to 600 PPM for early veg, rising to 600 to 900 PPM in full veg. Always pH your water after mixing nutrients. In soil, target 6.2 to 6.8. In coco or soilless, target 5.8 to 6.2.
Training techniques in veg: LST, topping, and SCROG
Training during veg is how you maximize the space and light you have. White Widow responds well to all common training methods on photoperiod plants. Low-stress training (LST) involves gently bending main stems and tying them down to encourage lateral branching and a flatter canopy. Start LST as early as the third to fourth node. Topping means cutting the main growing tip above a node, which splits the single main cola into two. This is high-stress training and requires a few days of recovery time, so do it early enough in veg that the plant has time to recover before flower.
A SCROG (Screen of Green) takes LST further by weaving branches through a horizontal net stretched across the tent, creating an even canopy where every bud site receives roughly equal light. SCROG works particularly well for White Widow in a 1.2m x 1.2m tent with two to four plants. You flip to 12/12 once the screen is about 70 percent filled. This approach maximizes the efficiency of your light fixture and can substantially increase yield per watt.
Flowering stage protocol (photoperiod White Widow)
Flip your lights to 12 hours on and 12 hours off to trigger flowering. The dark period must be truly dark for photoperiod plants. Even a brief light leak during the dark period can cause stress or hermaphroditism in sensitive plants. White Widow is reasonably robust, but do not take chances. Check your tent seams with a headlamp during the dark period.
In the first two weeks after the flip (often called the transition or pre-flower stage), the plant will stretch significantly. Keep training with LST to tuck stretching branches under the SCROG or tie them down. Feeding transitions during this period: gradually shift from a veg N-heavy formula toward a bloom formula higher in phosphorus and potassium. A phosphorus-to-nitrogen ratio shift around week two of flower is standard. PPM targets typically climb from 800 to 1,100 PPM during mid-flower and then taper back toward 700 to 900 PPM in late flower before a final flush.
White Widow flowers for roughly 8 to 9 weeks. By weeks three to four you should see clear bud formation and significant resin development. From weeks five onward, the buds swell and density increases. Lower humidity to 40 to 50 percent RH to reduce botrytis risk as bud density increases. Increase air circulation. In the final one to two weeks, many growers perform a plain-water flush to clear any residual nutrient salts from the medium before harvest, though the evidence on whether flushing improves taste in all growing mediums is mixed. It causes no harm.
Sample week-by-week schedule: photoperiod White Widow
| Week | Stage | Light Schedule | PPM (500 scale) | Key Actions |
|---|---|---|---|---|
| 1 | Germination / seedling | 18/6 | Plain water / 100–200 PPM | Germinate, plant in seedling pot, keep humidity 65–75% |
| 2 | Seedling | 18/6 | 150–250 PPM | First true leaves; very light feeding if in coco or soilless |
| 3 | Early veg | 18/6 | 400–500 PPM | Transplant to final pot if roots circle bottom; begin LST |
| 4 | Veg | 18/6 | 500–700 PPM | Continue LST; consider topping above node 4–5 |
| 5 | Veg | 18/6 | 600–800 PPM | Train recovery from topping; spread canopy |
| 6 | Veg | 18/6 | 700–900 PPM | Fill SCROG net to ~70%; prepare to flip |
| 7 (Flip week) | Transition / pre-flower | 12/12 | 700–900 PPM (N-P-K balanced) | Flip to 12/12; tuck stretch into net; monitor for sex confirmation |
| 8 | Pre-flower / stretch | 12/12 | 800–1,000 PPM | Continue tucking; begin transitioning to bloom nutrients |
| 9 | Early flower | 12/12 | 900–1,100 PPM (bloom) | Bud sites forming; lower RH to 50–55% |
| 10 | Mid flower | 12/12 | 900–1,100 PPM | Bud swell; defoliate lightly for airflow |
| 11 | Mid flower | 12/12 | 900–1,000 PPM | Resin development; check for pests and mold daily |
| 12 | Late flower | 12/12 | 700–800 PPM (tapering) | Lower RH to 40–50%; reduce nitrogen |
| 13 | Late flower / ripening | 12/12 | 500–700 PPM or plain water | Check trichomes with loupe; flush or reduce feed |
| 14–15 | Final flush / harvest window | 12/12 | Plain pH'd water | Trichomes mostly cloudy/some amber; harvest when ready |
Growing autoflower White Widow: key adjustments
Autoflowers run on a completely different schedule, and trying to treat them like a photoperiod plant is the fastest way to get disappointing results. Here is what changes and why.
Light schedule: run 18 to 20 hours of light from seed to harvest. The extra light hours give autoflowers maximum photosynthetic time since they cannot use extended dark periods to trigger flowering. Many growers run 20/4. Some run 24/0. I prefer 18/6 to give the plant a slight rest cycle, but all three approaches produce good results.
Training: because autoflowers have a fixed vegetative period of roughly three to four weeks before they begin flowering, high-stress training like topping or heavy defoliation can noticeably reduce yield if recovery time is inadequate. LST starting at week two to three is the recommended approach. Gently bend and tie, start early, and do not stress the plant right as it begins its flower transition. A simple four-way LST spreading the canopy flat works very well for autoflowers.
Pot size: autoflowers generally do well in 7 to 12 liter pots. Many growers plant directly into the final pot to avoid any transplant stress, which matters more when the plant has a short, fixed vegetative window. Germinate in the pot you plan to harvest from.
Sample week-by-week schedule: autoflower White Widow
| Week | Stage | Light Schedule | PPM (500 scale) | Key Actions |
|---|---|---|---|---|
| 1 | Germination / seedling | 18/6 or 20/4 | Plain water / 100–200 PPM | Germinate directly into final pot; keep humidity high |
| 2 | Seedling | 18/6 or 20/4 | 150–300 PPM | Begin very light LST from day 14–16 if 3–4 nodes visible |
| 3 | Early veg | 18/6 or 20/4 | 400–600 PPM | Gentle LST; no topping; spread canopy low |
| 4 | Late veg / pre-flower | 18/6 or 20/4 | 600–800 PPM | First pistils may appear; continue light LST |
| 5 | Early flower | 18/6 or 20/4 | 800–1,000 PPM (bloom) | Bud sites forming; stop major training adjustments |
| 6 | Mid flower | 18/6 or 20/4 | 900–1,000 PPM | Resin building; lower RH to 45–50% |
| 7 | Mid-late flower | 18/6 or 20/4 | 800–900 PPM | Bud swell; monitor closely for pest and mold |
| 8 | Late flower | 18/6 or 20/4 | 600–700 PPM or tapering | Reduce feed; check trichomes |
| 9 | Ripening / harvest window | 18/6 or 20/4 | Plain pH'd water | Trichomes cloudy with amber; harvest at preferred ripeness |
| 10–12 | Harvest and dry/cure | N/A | N/A | Harvest, dry 10–14 days, then cure in jars 2–4+ weeks |
Watering and pH management
pH is the single most misunderstood aspect of indoor growing for beginners, and it is probably the most important. Even perfect nutrient formulas become unavailable to your plants if pH is out of range. This is because different nutrients become soluble and absorbable by roots only within specific pH windows. A deficiency that looks like a calcium problem might actually be a pH lockout problem.
Always measure and adjust pH after mixing all nutrients into your water, not before. Use a calibrated digital pH pen (analog pens are inconsistent). Calibrate it with buffer solution before each grow if you want accurate readings. In soil, aim for 6.2 to 6.8. In coco and soilless, aim for 5.8 to 6.2. In hydro, aim for 5.5 to 6.0. Water only when needed. The lift-the-pot method works well in soil: a pot that feels noticeably lighter than when fully watered is ready to water. In coco, watering to 10 to 20 percent runoff daily or every other day in late flower is standard.
Knowing when to harvest
The most accurate way to judge harvest timing is trichome inspection with a jeweler's loupe (30 to 60x) or a digital microscope. Trichomes progress through three stages: clear and translucent (under-ripe, harvest too early and you sacrifice potency), cloudy white (peak THC development, most growers' preferred harvest window or early in it), and amber (THC degrading to CBN, produces more sedative effects). For White Widow, most growers aim for a mix of mostly cloudy with 10 to 30 percent amber for a balanced effect. Harvesting earlier in the cloudy window gives a more cerebral, energetic result. Waiting for more amber gives a heavier, more relaxing effect.
Additionally, watch the pistils (the small hair-like structures on buds). Buds that still show a majority of white pistils are usually not ready. When 70 to 80 percent of pistils have darkened and curled in, you are typically in the harvest window. Pistil color is a rough guide; trichome inspection is the precise one.
Drying and curing your White Widow harvest
Drying and curing are where a lot of growers give back quality they worked hard to build. Rushing either step degrades terpenes and can leave a harsh, grassy taste in the final product.
After harvest, hang your whole plants or individual branches upside down in a dark room or tent at 15 to 21°C with 50 to 65 percent RH. Gentle air circulation (not blowing directly on buds) helps prevent mold. Drying slowly over 10 to 14 days is ideal. Fast drying at high temperatures destroys terpenes. The buds are ready to trim and jar when the small stems snap rather than bend, and the outside of the buds feels dry to the touch but the interior still has some moisture.
Curing in glass mason jars is the standard method. Pack jars to about 75 percent full. For the first two weeks, open the jars once or twice a day for 5 to 10 minutes to release moisture and gas (this process is called burping). If buds feel wet or you smell ammonia, leave the lids off for a few hours and check for mold. After two weeks, reduce burping to every few days. A minimum cure of four weeks improves flavor and smoothness noticeably. Many growers continue curing for two to three months for peak quality.
Troubleshooting: pests, nutrient issues, and common bud problems
Nutrient deficiencies and toxicities
Yellow lower leaves in early veg often signal nitrogen deficiency, especially in coco or soilless mixes where nutrients deplete faster than soil. Increase nitrogen and check pH first. Yellow edges or tips can signal nutrient burn (too high PPM) or calcium/magnesium deficiency, which looks similar. If you are in coco and have not been supplementing CalMag, start there. Brown spots with yellow halos mid-leaf often indicate calcium deficiency. Purple stems alone are not necessarily a deficiency sign in White Widow, as some phenotypes express this genetically.
Before adjusting nutrient doses, check pH. The majority of apparent deficiencies in home grows are pH lockout, not actual nutrient absence. Flush the medium with properly pH'd water, let it recover for a day or two, then reassess.
Common pests
Spider mites appear as tiny dots on leaves with fine webbing underneath; they thrive in hot, dry conditions. Lower temperature, raise humidity slightly, and treat with neem oil or a registered insecticidal soap during veg (stop any oil-based sprays once flowering begins as they can affect terpene profiles and coat buds). Fungus gnats lay eggs in moist top soil; their larvae damage roots. Let the top inch of soil dry out between waterings, use yellow sticky traps, and consider beneficial nematodes for persistent infestations. Aphids appear as clusters of small green or black insects on new growth; insecticidal soap handles most infestations during veg.
Botrytis (bud rot) and powdery mildew
Botrytis (grey mold) is the most devastating late-flower problem. It starts as brown or grey discoloration inside dense buds and spreads rapidly in high-humidity, low-airflow conditions. Prevention is everything: keep RH below 50 percent in late flowering, run internal circulation fans, and defoliate around dense bud sites to improve airflow. If you find infected bud, remove it immediately with clean scissors and sterilize tools between cuts. Do not compost infected material.
Powdery mildew looks like white powder or flour on leaf surfaces. It spreads in moderate temperatures with high humidity and poor air exchange. Increase airflow, reduce humidity, and treat affected areas with a diluted potassium bicarbonate or hydrogen peroxide solution during veg. Once in dense flower, your options narrow significantly, so prevention is critical.
Foxtailing and light bleaching
Foxtailing (buds growing elongated, spiky new calyxes late in flower) can be genetic in White Widow phenotypes, but it can also signal light stress or heat stress at the canopy. If the tops of your plants closest to the light are foxtailing and the rest are not, raise your light or reduce intensity at the canopy. Light bleaching appears as white or pale discoloration at bud tops and is caused by excessive PPFD or heat too close to the fixture. Again, raise the light and check your canopy temperature, which should ideally stay below 28°C.
Indoor setup checklist before your first plant goes in
- Confirm local legal compliance, plant count limits, and any local restrictions before purchasing anything
- Choose and set up grow tent or grow room with verified light-tight seals
- Install and test lighting fixture at correct hanging height; verify PPFD at canopy with a meter or manufacturer chart
- Install inline fan, carbon filter, and ducting; confirm adequate CFM with a 20–30% buffer for filter resistance
- Install internal circulation fan(s); position to move air across canopy without direct blast on plants
- Set up and test timer for lights (and pump if using hydro or drip)
- Place thermometer-hygrometer at canopy height; not at wall or floor level
- Confirm pH pen is calibrated; have pH up and down solutions on hand
- Prepare growing medium and pots or containers with appropriate drainage
- Source nutrients appropriate for your medium (soil-specific, coco/soilless, or hydro formulas)
- Have PPM/EC meter on hand if feeding nutrient solutions
- Run the space empty for 24 hours and confirm temperature and humidity hit target ranges before plants go in
Where to go from here
White Widow is an excellent strain to learn on, and once you have run it through a full cycle you will understand the fundamental rhythms of indoor growing in a way that applies to almost any other strain. If you are curious about how White Widow compares across indoor and outdoor environments, the full strain guide covers outdoor-specific considerations including regional climate timing and pest pressures that differ from a controlled indoor setup. For techniques on cultivating more unusual varieties indoors, see our guide on how to grow exotic weed indoors. Growers interested in other high-resin, beginner-to-intermediate strains might find Trainwreck an interesting comparison, as it leans more sativa in structure and has distinct training considerations compared to White Widow's balanced hybrid growth pattern. For a step-by-step primer on outdoor cultivation, see how to grow Trainwreck outdoors. For a step-by-step grow guide to a comparable high-resin hybrid, see how to grow Wedding Cake strain. For a step-by-step walkthrough on growing Trainwreck indoors, including sativa-leaning training techniques and timeline adjustments, see our guide on how to grow Trainwreck indoors. If you are drawn to the novelty end of the spectrum, there is a broader conversation around exotic strains and what that term actually means in terms of genetics and grow complexity.
The most important thing is to take notes every grow. Record your inputs, dates, and observations. Every problem you encounter and solve builds knowledge that makes the next grow faster, cheaper, and more rewarding. White Widow does not demand perfection. Give it reasonable light, clean water at the right pH, decent airflow, and it will do most of the work for you.
FAQ
What is White Widow and what should I know before attempting an indoor grow?
White Widow is a widely distributed balanced hybrid cannabis variety developed in the Netherlands in the early 1990s. Typical photoperiod flowering time from reputable breeders is about 8–9 weeks; autoflower variants exist and generally finish faster (commonly ~10–12 weeks seed-to-harvest). Before growing: confirm local laws and limits for personal cultivation, choose a reputable seed source, and plan a grow space, light, ventilation and nutrient strategy appropriate for your experience level.
What legal and safety reminders should I follow when growing at home?
Always verify federal, state/provincial and local laws before cultivating. Limits and permissions vary widely (for example, some U.S. states allow a small number of plants for adults, while federal law still prohibits unauthorized cultivation; Canada has different federal/provincial rules; the UK prohibits unlicensed cultivation). Keep grows discreet and secure, avoid supplying minors, follow electrical safety for lights and fans, and comply with local odor/ventilation rules. Document local rules and any neighborhood/lease restrictions.
How do I choose between photoperiod and autoflower White Widow seeds?
- Photoperiod: Flowering is triggered by changing light schedule (short nights). Allows extended vegetative growth for training and larger canopy control. Best when you need flexibility and larger yields. - Autoflower: Day‑neutral; flowers by age, typically finishes faster (seed-to-harvest ~10–12 weeks for many autos). Cannot be kept in veg indefinitely; vegetative time is short so heavy topping and prolonged recovery training are risky. - Choose feminized seeds to avoid male plants if you want only sinsemilla. For breeding or seed production use regular seeds. Pick reputable breeders for predictable traits and listed timelines.
How does my seed choice change scheduling and training?
- Photoperiod: You can veg as long as needed, apply training (LST, topping, FIM, heavy SCROG) and then switch to 12/12 to induce flowering. Training windows are long. - Autoflower: Limited vegetative window—training must be early and low‑stress. Favor LST and light canopy steering over topping. Expect fixed timelines; switching light schedules won’t delay flowering. Plan container size and nutrient ramp accordingly.
What does a complete indoor setup checklist look like?
Grow space: tent or dedicated room, reflective interior, lightproof. Lights: LED full‑spectrum or HPS with appropriate PPF for canopy size; PAR/PPFD meter recommended. Ventilation: exhaust fan sized to tent volume (rule of thumb ~1 CFM per cubic foot), intake or passive vents, oscillating clip fan(s), carbon filter if odor control needed. Medium options: coco coir, high‑quality potting soil, or soilless mixes; consider hydroponics if experienced. Pots: 3–20+ L depending on target plant size (3–5 L for autos, 7–20 L for photo plants aiming for larger yields). Environmental control: thermostat, hygrometer, humidifier/dehumidifier, heater as needed. Nutrients: base NPK feeds plus PK bloom supplement, cal-mag. Water: pH meter, EC/PPM meter. Tools: trellis/net, plant ties, pruner, magnifier, labels, drying racks. Safety: GFCI outlets, cable management, fire extinguisher.
What environmental targets should I aim for by stage (temp, RH, pH, VPD)?
Seedlings/clones: temp 20–25°C (68–77°F), RH 65–75%, target VPD ~0.8–1.0 kPa, substrate pH: soil 6.0–6.8, coco/hydro 5.6–6.2. Vegetative: temp 20–26°C (68–78°F), RH 45–70% (aim midpoint 50–65), VPD ~1.0–1.2 kPa. Flowering: temp 20–26°C daytime (slightly cooler nights), RH 40–50% to reduce bud rot risk, VPD ~1.2–1.5 kPa. Drying: temp 15–21°C (60–70°F), RH 50–65%, dark. Keep runoff pH in the same target bands and monitor EC/PPM per feed schedule.
Next Article
How to Grow White Widow Seeds: Seed to Harvest Guide
Seed-to-harvest guide for White Widow: germination, veg and flower care, nutrients, timing, and troubleshooting indoors