White Widow is one of the most forgiving, rewarding strains you can grow at home. If you're wondering how to grow White Widow indoors, focus on a stable light schedule, careful humidity control, and a clean, nutrient-ready setup forgiving, rewarding strains. Start with feminized seeds from a reputable breeder, germinate using the paper towel method at 70–85°F, transplant into your chosen medium, veg under 18/6 light, flip to 12/12 after 4–6 weeks, and expect harvest around 55–65 days into flower. The whole cycle from sprout to dried bud typically runs 3.5 to 4.5 months indoors, a little longer outdoors. This guide walks you through every stage so you're not guessing.
How to Grow White Widow Seeds: Seed to Harvest Guide

Marcus Holbrook
12 Jun 2026
Before anything else: check the cannabis cultivation laws in your area. If you're wondering how do you grow exotic weed, start by making sure it's legal where you live and then build the same strong setup and controls check the cannabis cultivation laws in your area. Home growing is legal in some places, regulated in others, and prohibited in some jurisdictions entirely. This guide is written for growers in regions where home cultivation is legally permitted. Always stay within the plant count limits, security requirements, and licensing rules that apply to you.
Choosing White Widow seeds and verifying quality
White Widow has a long history and many breeders carry their own version. The original lineage traces back to a Brazilian sativa and South Indian indica cross, and reputable seed companies like Paradise Seeds offer their "Original White Widow IBL" as a direct homage using preserved White Widow genetics. Royal Queen Seeds, ILGM, Seedsman, and others each sell feminized versions that are well-documented and widely grown. For a first run, stick to feminized seeds. You eliminate the risk of male plants entirely, which simplifies the whole process significantly.
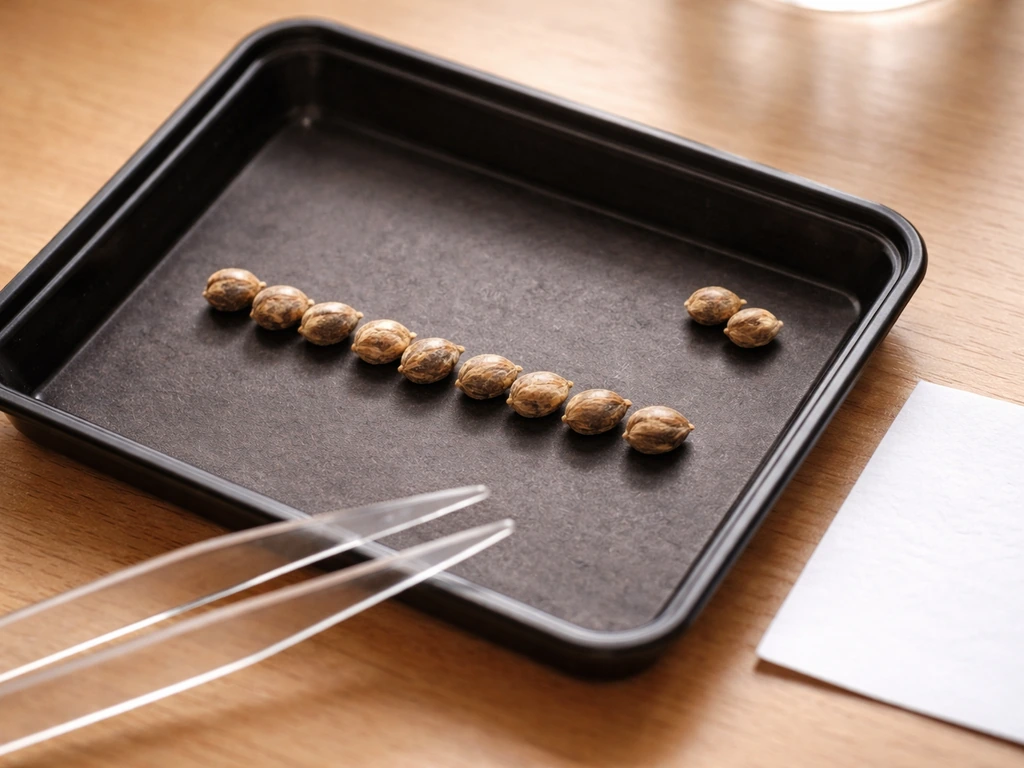
When you receive seeds, check them before you germinate. Healthy, viable White Widow seeds are dark brown to dark grey, often with tiger-stripe patterns or mottling. They feel firm when you apply gentle pressure between two fingers. Pale, green, or white seeds are immature and unlikely to germinate well. Soft or cracked seeds are typically duds. A simple float test (drop seeds in a glass of room-temperature water for 1–2 hours) can help: sinkers are usually viable, floaters may be hollow, though this isn't 100% reliable so don't leave them soaking for more than a couple of hours.
Buy from established breeders or licensed seed banks that publish germination guarantees. ILGM, for example, ships replacement seeds when germination failure exceeds their published threshold. That policy matters because even good seeds from reputable sources occasionally disappoint, and having a fallback protects your investment before you even plant.
Germination and early seedling setup
The paper towel method is the most controlled approach for beginners and the one I'd recommend for White Widow. Moisten two sheets of kitchen paper until damp but not dripping. Place your seeds between them, then put the whole thing on a plate and cover it with another plate or plastic wrap to trap humidity. Keep the setup somewhere warm: 70–85°F (21–29°C) is the target range, with 70–80°F being the sweet spot. A heat mat set on low underneath works great. Seeds typically crack and show a taproot in 24–72 hours, and most will be ready to plant within 3–5 days. Direct-in-soil germination also works and skips a transplant step, but you have less control over moisture at the seed level, which can lower success rates.
Once the taproot is 3–10mm long, plant the seed taproot-down about 5–10mm deep in a small starter pot filled with a sterile, light seed-starting mix. Water gently. Use a clear humidity dome over the pot for the first 5–7 days to maintain 65–70% relative humidity and reduce transplant shock. If you use a dome, you only need to water every 2–3 days since moisture stays trapped inside.
Seedling temperatures should sit around 72–78°F with lights on, and you don't want them dropping below 65°F when lights are off. Aim for 70–80% RH in the first two weeks, then back it down to 60–70% in weeks 3–4. Good air circulation matters even at this stage: a gentle fan prevents damping-off, which is a fungal problem that collapses seedling stems at the soil line. Always use sterile media, avoid overwatering, and make sure your container has drainage. I've lost seedlings to soggy soil more times than I'd like to admit.
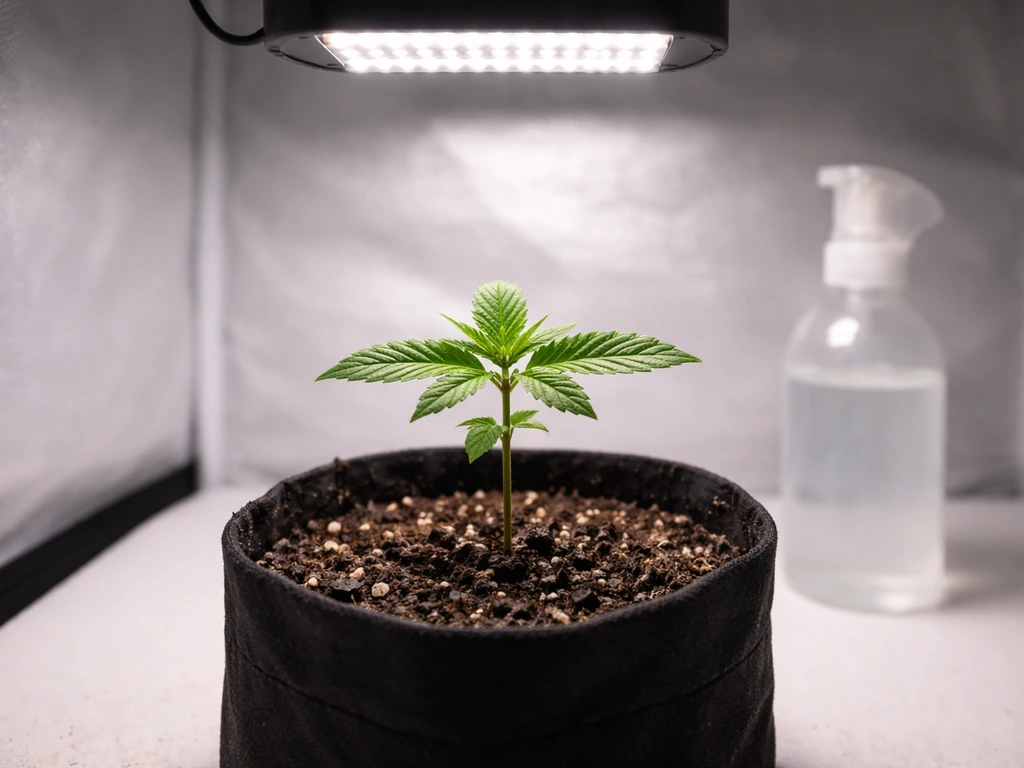
Indoor grow: light, temperature, humidity, and airflow

White Widow grows to about 1 meter indoors under controlled conditions, which makes it manageable in a standard 1.2x1.2m or 1.2x2.4m tent. During vegetative growth, run an 18/6 light schedule (18 hours on, 6 hours off). LED panels are the go-to right now for efficiency; position them around 18–24 inches above the canopy during veg and adjust as your plants grow and the light spec requires.
Temperature and humidity targets shift as the plant matures. Here's a practical stage-by-stage breakdown:
| Growth Stage | Temperature (°F) | Relative Humidity | VPD Target |
|---|---|---|---|
| Seedling (weeks 1–2) | 72–78°F lights on / 65°F+ lights off | 70–80% | 0.4–0.8 kPa |
| Early veg (weeks 3–4) | 70–78°F | 60–70% | 0.8–1.1 kPa |
| Late veg (weeks 5–6) | 70–78°F | 55–65% | 0.8–1.1 kPa |
| Early flower (weeks 1–4 of 12/12) | 68–77°F | 50–60% | 1.0–1.3 kPa |
| Late flower (weeks 5–harvest) | 65–75°F | 40–50% | 1.2–1.5 kPa |
VPD (vapor pressure deficit) is the relationship between temperature and humidity. Getting VPD right means your plants are transpiring efficiently and nutrient uptake is optimal. You don't have to chase exact numbers, but keeping VPD in the 0.8–1.1 kPa range during veg and 1.0–1.5 kPa during flower will keep things running smoothly. A cheap thermometer/hygrometer in your tent is all you need to track this.
Airflow is non-negotiable. A small oscillating fan inside the tent strengthens stems and prevents hot/humid pockets from forming. Your exhaust fan should exchange the tent's air volume at least once per minute. White Widow is notably susceptible to powdery mildew when humidity climbs above 55% during late flower, so solid airflow and humidity control in that window are critical, not optional.
Outdoor grow: site conditions, seasonal timing, and weatherproofing
White Widow is a capable outdoor plant, reaching up to 2 meters in a full season and delivering solid yields when the conditions cooperate. Choose a site that gets at least 6–8 hours of direct sunlight daily. South-facing locations in the northern hemisphere (or north-facing in the southern hemisphere) maximize light exposure. Good drainage is essential whether you're planting in ground or in containers; waterlogged roots cause root rot fast.
Timing your outdoor season matters. In northern latitudes (northern Europe, northern US, Canada), White Widow is typically started indoors in March or April, transplanted outside after last frost (usually May), and harvested in late September to mid-October. Growers in Germany and similar climates often target a late September to mid-October harvest window. In warmer southern climates with longer seasons, you have more flexibility, but the general rule is to be done and harvested before consistent autumn rains set in.
Weatherproofing is where outdoor White Widow growers earn their harvest. White Widow's dense buds and susceptibility to powdery mildew and bud rot mean you need a plan for extended rain. A simple low-tunnel greenhouse covering or a portable pop-up canopy can protect plants during multi-day rain events. If consecutive rainy days are forecast within two weeks of your expected harvest, seriously consider harvesting early rather than risking mold. A partially mature harvest beats a fully moldy one every time. Shake water off buds after rain, increase airflow around plants by pruning inner foliage, and check buds closely every couple of days in late season. If you're wondering how to grow Trainwreck outdoors, use the same core approach: pick a sunny, well-draining spot, manage humidity and rain exposure, and time harvest before mold risk spikes.
Nutrient schedule and feeding guide from veg to flower
Cannabis nutrient feeding follows a predictable arc: nitrogen-heavy in veg, then a transition to phosphorus and potassium dominance through flower, and finally a flush phase in the last week or two before harvest. White Widow doesn't need aggressive feeding. It's a moderate feeder and responds well to a methodical schedule rather than heavy doses.
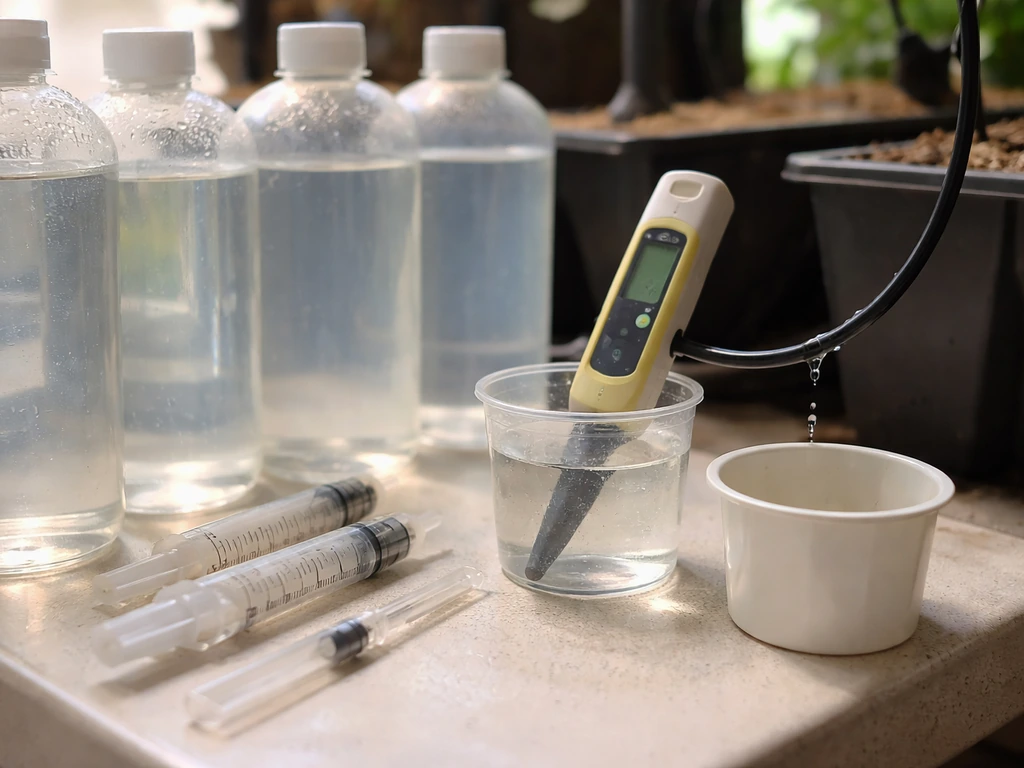
Keep your pH dialed in first, because everything else depends on it. In soil, target 6.0–7.0 pH in your root zone. In coco coir or hydro, aim for 5.5–6.5. Nutrient lockout (where plants can't absorb what you're feeding them even if it's present) is almost always a pH problem. Always pH your water and nutrient solution after mixing, not before.
Here's a simple feeding outline by stage:
| Stage | Duration | Nutrient Focus | Notes |
|---|---|---|---|
| Seedling | Weeks 1–2 | Plain pH-adjusted water or very dilute starter | Seeds carry enough energy; overfeeding burns seedlings |
| Early veg | Weeks 3–5 | Nitrogen-forward (N-P-K ~3-1-2) | Ramp up gradually; watch for tip burn |
| Late veg / pre-flower | Weeks 6–8 | Balanced to transitioning (~2-2-2) | Start reducing N, introduce P/K bloom base |
| Early flower | Weeks 1–4 of 12/12 | Bloom-focused (~1-3-2) | Phosphorus and potassium drive bud development |
| Late flower | Weeks 5–7 of 12/12 | Low N, elevated K | Watch for potassium deficiency in last push |
| Pre-harvest flush | Final 7–14 days | Plain pH-adjusted water only | Helps clear salts; some coco growers skip this |
If you're using EC meters (which I'd recommend for coco or hydro), start seedlings at 0.4–0.6 EC and work up to 1.2–1.8 EC in peak veg, then 1.4–2.0 EC in flower depending on your specific nutrients and how your plants respond. Adjust based on what you see in the plants, not just the bottle label. Clawing, dark green leaves signal nitrogen toxicity. Yellowing between veins (while leaf edges stay green) is often a magnesium deficiency. Yellow lower leaves in late flower is usually normal senescence, not a problem.
Training and pruning: shaping White Widow and managing stretch
White Widow responds well to training. Royal Queen Seeds specifically recommends topping early in veg, combined with low stress training (LST) and selective defoliation, to create more bud sites and an open, airy canopy. These aren't mandatory, but they meaningfully improve yield and airflow, which matters especially given the strain's powdery mildew sensitivity.
Topping means cutting the main stem above the third or fourth node during early veg (around 3–4 weeks in), which splits the plant into two main colas and triggers a bushier structure. LST involves bending and tying down branches with soft ties or clips so the canopy spreads wide and low rather than tall and narrow. It's low-stress and beginner-friendly because there are no cuts, no recovery downtime, and you can keep adjusting as the plant grows. Defoliation (removing fan leaves that block light from bud sites) is most useful in late veg and the first 3 weeks of flower. Don't go crazy with it: remove 20–30% of leaves at a time and give the plant a few days to recover before doing more.
Stretch is the rapid height increase that happens in the first 2–3 weeks after you flip to 12/12. White Widow is moderate in stretch, but indoors with a 1-meter target you should still plan for it. If you flip when the plant is 40–50cm tall, you'll likely end the stretch around 70–90cm, which keeps you comfortably under most tent heights. If you flip too late or the plant is already tall, raise your lights and consider tieing or super-cropping (gentle stem crushing to fold tall branches horizontal) to keep everything in your light footprint.
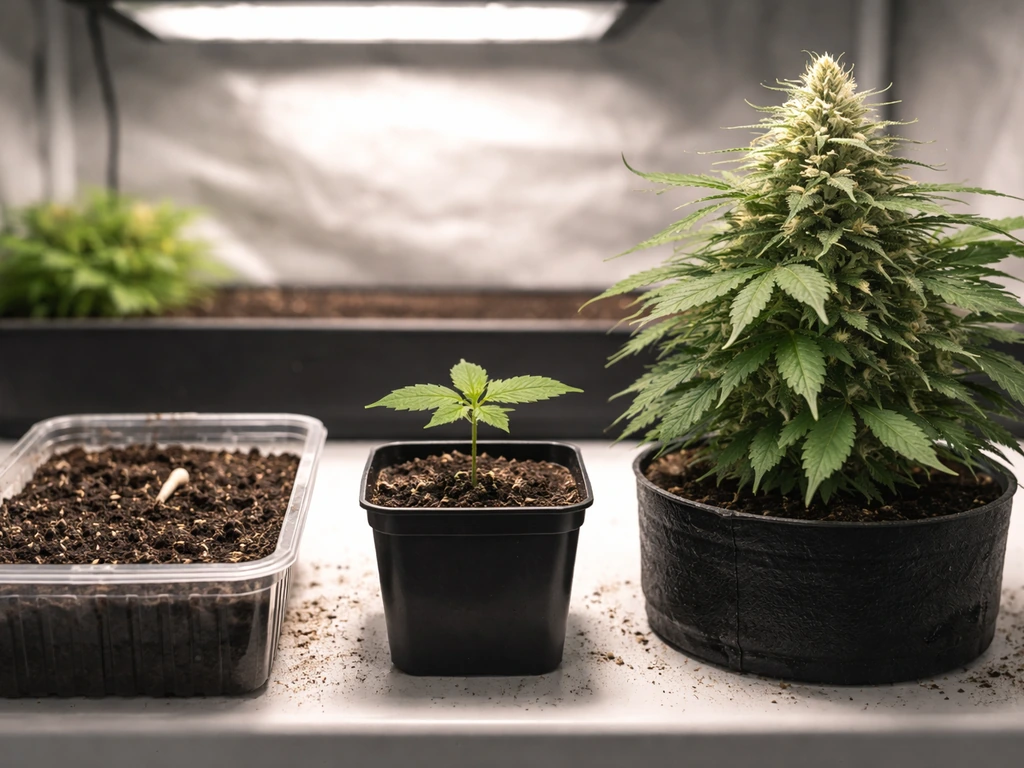
Flowering timeline and harvest prep for White Widow
Once you flip indoor plants to 12/12, White Widow's flowering time runs 55–65 days. That's roughly 8–9 weeks. Outdoors, the plant finishes on its own photoperiod trigger as days shorten in late summer, with most harvests falling in late September to mid-October depending on your latitude.
Week-by-week, here's what to expect after flipping:
- Weeks 1–2: Stretch begins. Pre-flowers appear. Focus on letting the plant establish its structure and resist the urge to defoliate heavily right now.
- Weeks 3–4: Bud sites stack and small calyxes form. White pistils (hairs) are prominent. Trichome production starts. Stretch slows.
- Weeks 5–6: Buds fatten noticeably. Resin glands become visible to the naked eye. White pistils still dominate.
- Weeks 7–8: Pistils begin changing from white to orange/amber. Buds dense up. Trichomes are milky white under magnification.
- Weeks 8–9: Most pistils are orange/amber. Trichomes shift from milky to amber depending on your preferred effect. Harvest window opens.
The most reliable harvest timing tool is a jeweler's loupe or handheld microscope (30–60x magnification). Look at trichomes on the bud itself, not the sugar leaves, which amber faster. Milky/cloudy trichomes with minimal amber mean peak THC, typically a more energetic, cerebral effect. As amber percentage increases (20–30%), the effect becomes heavier and more sedating as THC converts to CBN. Harvest to match your preference. Pistil color is a useful secondary indicator: when 70–90% of pistils have changed color, you're in the harvest window.
Before harvest, run a flush phase of 7–14 days with plain pH-adjusted water. This helps clear residual nutrient salts from the growing medium and is widely practiced in soil and coco grows. Then harvest, trim, and hang dry in a dark room at 60–70°F with 55–60% RH for 7–14 days until smaller stems snap rather than bend. Cure in sealed glass jars at 60–65% RH, burping daily for the first two weeks, then weekly for the following month. Good cure transforms the smell, smoothness, and overall quality of your final product. If you also want to grow a wedding-cake style crop, use the same careful timing and feeding approach to support consistent bud development final product.
Troubleshooting common problems
Even a beginner-friendly strain like White Widow throws curveballs. Here are the most common issues and how to handle them:
- Nutrient deficiency vs. toxicity: Yellow lower leaves in late veg often mean nitrogen deficiency; increase N slightly and check pH first. Dark green claw-like leaves point to nitrogen toxicity; reduce feeding and flush lightly. Yellowing between veins with green edges is usually magnesium deficiency; add a Cal-Mag supplement. Always adjust pH before assuming it's a nutrient issue.
- pH lockout: If leaves are showing multiple deficiency symptoms simultaneously and you're feeding correctly, check your root zone pH. Soil should sit 6.0–7.0, coco/hydro 5.5–6.5. A large flush with pH-correct water usually resets things.
- Powdery mildew (PM): White Widow is genuinely susceptible above 55% RH in flower. White powdery spots on leaves are the first sign. Increase airflow, lower humidity immediately, and treat with diluted hydrogen peroxide spray (3% food-grade, 1:10 dilution) or a potassium bicarbonate solution. Remove and bag heavily affected leaves without shaking spores across the canopy.
- Spider mites: Tiny dots on leaf surfaces and webbing on undersides are the tell. Treat with insecticidal soap or neem oil applied directly to leaf undersides every 3 days for 2 weeks to break the egg cycle. Don't use neem oil within 2–3 weeks of harvest.
- Hermaphroditism: Stress causes photoperiod plants to produce both male pollen sacs and female flowers. The most common triggers are light leaks into the tent during the dark period, timer failures, or power outages that interrupt the 12/12 cycle. Inspect your tent for light leaks before flipping. If you find banana-shaped pollen sacs (nanners) on a plant in flower, remove them with tweezers immediately. If the problem is widespread, consider harvesting early to protect the rest.
- Damping-off in seedlings: Seedling stems collapse at the soil line due to fungal overgrowth. Prevention is everything: use sterile seed-starting mix, avoid overwatering, and keep gentle air circulation moving across seedlings from day one.
- Heat stress: Leaves curl upward at the edges (taco-leaf) in hot conditions. Keep temperatures below 82°F during lights-on and improve airflow. Hot spots directly under lights are the usual culprit; raise the fixture or add a circulation fan.
Your next-steps checklist before you start
Use this list to confirm you're set up and ready before your seeds go into the paper towel:
- Confirm home cultivation is legal in your jurisdiction and that you're within your permitted plant count.
- Source feminized White Widow seeds from a reputable breeder. Inspect seeds for dark color, firmness, and intact shell before germinating.
- Set up your germination station: damp paper towels, a warm spot at 70–85°F, and a plate cover to trap humidity.
- Prepare your growing space: tent or outdoor site, lights (LED recommended indoors), fans, and a thermometer/hygrometer.
- Have your medium and containers ready: sterile seed-starting mix for germination, then your main medium (soil pH 6.0–7.0; coco 5.5–6.5).
- Get a pH meter (and EC meter if using coco or hydro). pH errors are the number one cause of unexplained plant problems.
- Plan your veg and flower nutrient line: a basic 3-part or 2-part system is plenty. No need for 10-bottle stacks as a beginner.
- For indoor growers: check your tent for light leaks before flipping to 12/12. Set your timer and test it before the flip.
- For outdoor growers: identify your last frost date, plan transplant timing, and have a rain shelter option ready for late-season wet weather.
- Have a jeweler's loupe or USB microscope on hand for checking trichomes in the final weeks of flower.
- Set up a drying space before harvest: dark, 60–70°F, 55–60% RH, with airflow but no direct fan on buds.
- Stock glass mason jars and a hygrometer for the cure phase.
White Widow is genuinely one of the best strains to learn on. It's stable, it's been grown by millions of people, and the margin for error is wider than with more temperamental genetics. If you're also exploring other classic or exotic strains, many of the environmental and nutrient principles here apply directly across varieties, though strains with different structures and flowering times (like Trainwreck or Wedding Cake, for example) will have their own specific timing and training considerations. Follow the same indoor fundamentals and adjust light schedules, temperature, and humidity to suit the specific exotic strain you choose how to grow exotic weed indoors. For now, get your White Widow seeds popped and focus on nailing the basics: stable environment, correct pH, and consistent light cycles. Everything else follows from those three.
FAQ
How do I know when my White Widow plant is ready to switch from 18/6 veg to 12/12 flower?
If you flip to 12/12 too early, before the plant has enough veg growth, the buds will be smaller and the stretch can become less predictable. A practical rule is to let the plant complete 4 to 6 weeks of veg like the guide suggests, then verify nodes and overall size before changing the light schedule, especially if you started from a very small seedling.
Can I run a different light schedule than 18/6 and still grow White Widow successfully indoors?
Yes, but only if your system is consistent. White Widow is sensitive to late-flower powdery mildew, so if you run lights at night and have temperature swings during the off period, humidity can spike when lights go out. If you must use a different schedule, keep your temperature and RH targets similar to the light-on and light-off periods rather than copying the same clock times.
What’s the best watering approach for White Widow once it’s in the seed-starting mix under a humidity dome?
Avoid soaking seedlings in water or letting the starter mix stay continuously saturated. If your dome is working, you should water lightly only when the top layer of mix starts to dry, and you should still ensure the pot has drainage holes so any runoff does not sit at the bottom.
What should I do if my White Widow seedlings start to collapse or turn dark at the base?
If you see sudden wilting, yellow leaves, or a sour smell from the soil, check for overwatering first, then check drainage and pH. Damping-off often looks like a stem that darkens at the soil line, the fix is prevention (sterile mix, airflow, correct watering), and by the time you notice collapse it is usually too late to save that seedling.
Do the nutrient and pH targets change if I grow White Widow in soil versus coco or hydro?
You can, but you need a safer drying and humidity control plan because there is less forgiveness with coco/hydro. In coco/hydro, nutrient and pH management has to be tighter since lockout happens fast, so if you choose coco, start at the lower end of the EC range and watch leaf color and growth rate rather than increasing EC on a fixed calendar.
Should I pH my water before mixing nutrients, or after, for White Widow?
Yes, especially with pH adjustments. If you pH after mixing, the final solution pH is what matters for uptake, not the pH of the water alone. Also, measure runoff pH occasionally in coco or soil to confirm the root zone is staying near your target, since deficiencies can persist if the medium drifts.
When is the safest time to top, LST, or do defoliation on White Widow?
Train it when it can recover without stress stacking. Topping around weeks 3 to 4 is usually safer than topping late, and LST works best once stems are flexible (early to mid-veg). In early flower, make only small adjustments, because aggressive bending after the first couple of weeks of 12/12 can slow bud development.
What’s the best way to prevent White Widow from growing too tall for my tent?
If you want to reduce stretch without changing lights, flip based on plant height relative to your tent. The guide suggests flipping around 40 to 50 cm indoors; if you overshoot, raising light height and using gentle stem training can help, but changing the flip date is the most reliable lever.
Should I check trichomes on sugar leaves or bud sites to decide my White Widow harvest date?
Not exactly. Trichomes amber faster on sugar leaves, which is why the guide recommends checking bud trichomes. For a more reliable call, focus on the buds you’ll harvest first, and take multiple samples across the canopy, since the top flowers often mature a few days earlier than lower sites.
What if my pistils are changing color but my trichomes still look mostly milky?
Typically not. If only a small portion of trichomes are amber while most are still milky and pistils are mostly white, harvesting early can reduce body effect and leave a sharper, less mature taste. If most trichomes are cloudy with a gradual amber rise and many pistils have darkened, you are usually in a better window.
How long should I flush White Widow before harvest, and what if leaves are already fading?
Flushing is not meant to starve the plant completely overnight. A practical approach is to start 7 to 14 days of plain pH-adjusted water, and keep an eye on leaf fade, since excessive flushing in already hungry plants can increase yellowing beyond what you want. After the flush, harvest promptly rather than extending it indefinitely.
Is it okay to dry White Widow faster than 7 to 14 days, or will it ruin the cure?
Yes, but aim for a stable environment. For drying, if RH is too high you risk mold and bud rot, and if RH is too low you can lock in harshness. Use the smaller stems snap test and consider adjusting airflow and dehumidification in the drying room rather than relying only on time.
How often should I burp curing jars for White Widow, and what should I watch for?
If you burp jars too aggressively in the first two weeks, humidity can drop too quickly and you may undo part of the cure smoothness. Open jars daily briefly, then gradually reduce frequency later, and if you live in a very dry climate you may need longer in the jar to avoid overdrying.
What’s the most effective way to prevent powdery mildew during late flower on White Widow?
White Widow is generally forgiving, but late-flower powdery mildew can be brutal on dense buds. Your best prevention is keeping late-flower humidity under control and maintaining strong airflow, plus using preventive checks every couple of days near the final weeks. If you see early signs, act immediately by removing affected leaves and improving airflow, since spreading is fast in dense canopies.
What’s a good outdoor rain plan for White Widow if late-season storms are likely?
Yes, if you plan for rain protection early enough. For outdoor plants, a simple cover helps with multi-day storms, but ventilation under the cover matters too, because trapped humidity can worsen mildew. Time your protective setup around the forecasted rain period, not after buds are already heavily developed.
Should I use feminized seeds every time, or can I switch to regular seeds later for more variety?
It depends on your tolerance and legal framework, but ecologically it also affects performance. If you swap to feminized seeds every time, you keep growth consistent and reduce variability in timing. Also, keep track of which breeder and batch you used, since even within White Widow variants, maturity and stretch can differ slightly.
Next Article
How to Grow One Weed Plant: Beginner Step-by-Step
Step-by-step guide to grow one cannabis plant: setup, germination, light, feeding, troubleshooting, harvest and curing.