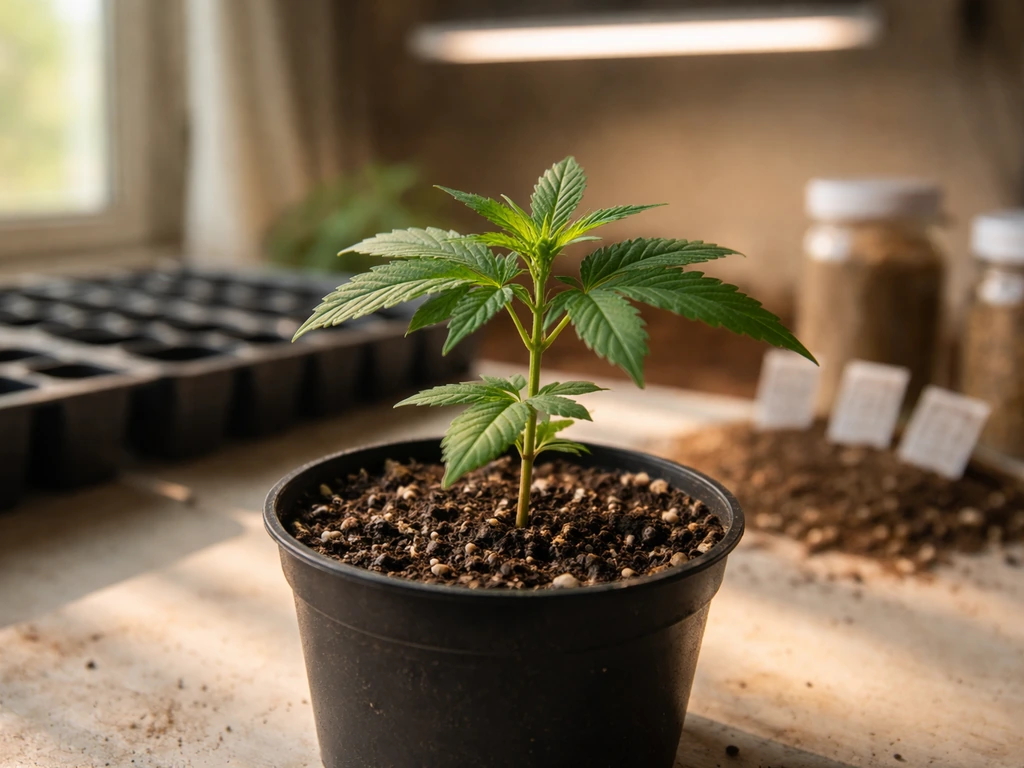
You can grow a compact cannabis plant that stays under 60cm (about 24 inches) tall by combining the right strain choice, tight light distance, small containers, and early training techniques like low-stress training (LST) or topping. None of these steps are complicated on their own, but skipping even one of them is usually what turns a planned small plant into a sprawling mess. This guide walks you through every lever you can pull, from picking a seed to knowing when to chop.
How to Grow a Small Weed Plant: Compact Step-by-Step Guide

Marcus Holbrook
27 May 2026
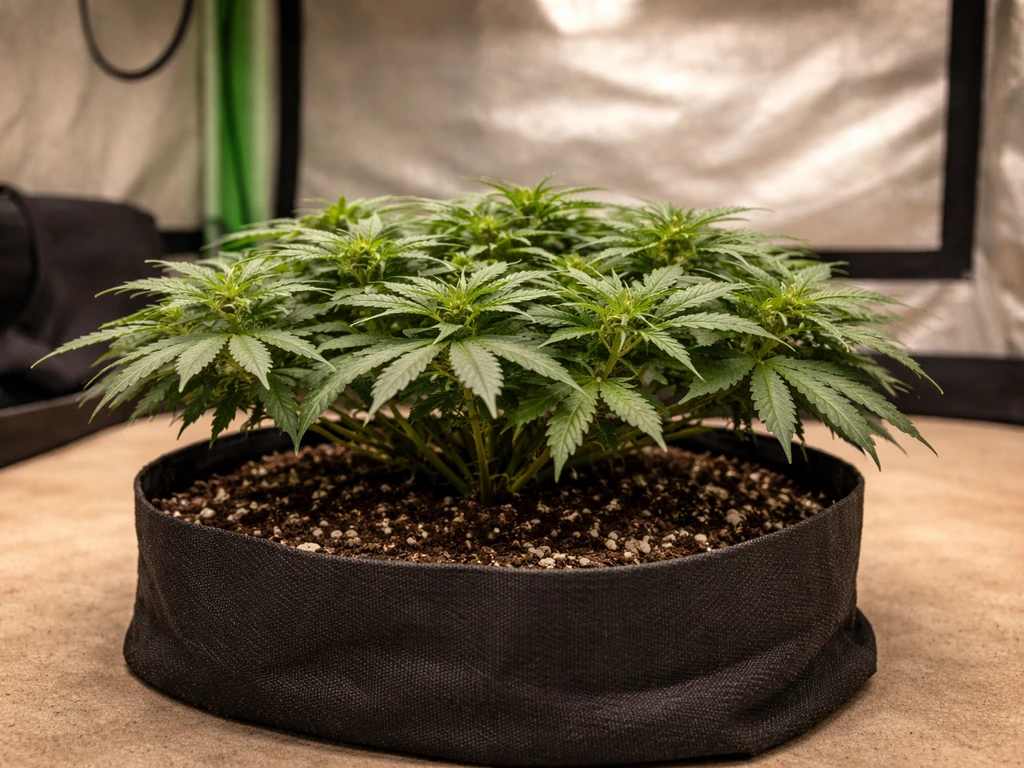
Before diving in, a quick note: growing cannabis at home is legal in some places and restricted or prohibited in others. Always check your local laws and plant-count limits before you start. Everything here is written for legal home cultivation.
What 'small' actually means in growing terms
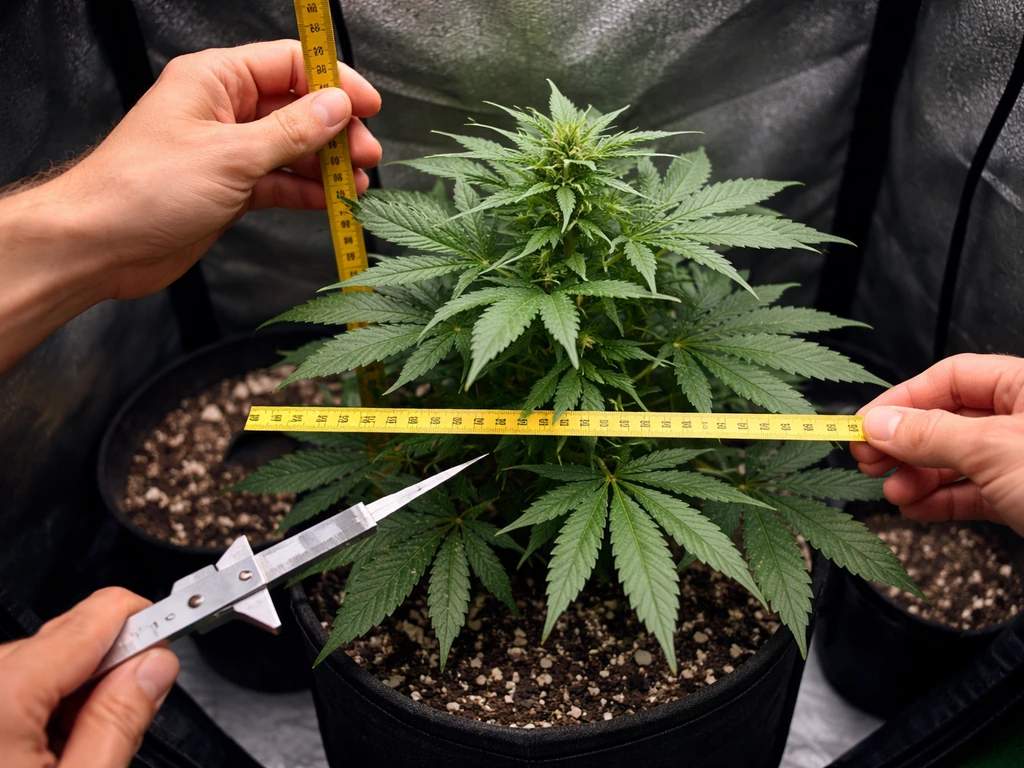
When growers talk about keeping a plant small, they usually mean three things: overall height, canopy width, and internode spacing. Internode spacing is the distance between each pair of leaf nodes along the main stem. Tight internodes mean a short, bushy plant. Stretched internodes mean a tall, lanky one. Aiming for internodes under 3–4cm during veg is a good practical target. In terms of finished height, a realistic 'small' benchmark for indoor grows is 40–75cm (16–30 inches) at harvest. Outdoors or in hydro, plants can be kept in the same range if you start training early. Canopy width matters too, especially in small tents, so think of the whole footprint, not just height.
Choose the right strain and plan before you germinate
Strain genetics set your ceiling. Autoflowering varieties are the easiest win here because they finish in roughly 65–85 days from seed and rarely exceed 60–80cm without any training at all. If you want a simple path for how grow a weed plant while keeping the plant short, autoflowering varieties are usually the easiest win because they finish quickly and can stay compact without much training. Compact indica-dominant photoperiod strains can also stay small, but they need you to flip the light to 12/12 on purpose, which gives you timing control. Sativa-leaning strains and most sativa-dominant autos are trickier to keep short because they're genetically wired to stretch, especially in early flower.
When you're browsing seed banks, look for strains explicitly marketed as 'compact,' 'dwarf,' or with breeder-listed heights under 80cm. For autos, most good breeders publish expected height ranges. Pick a strain at the shorter end and you're already halfway there before the seed even sprouts. If you're curious about other aspects of getting started, the broader question of what you actually need to grow a weed plant is worth reading alongside this, since strain choice connects directly to equipment decisions. If you’re wondering can you grow your own weed plant at home, the next step is matching your chosen strain to the space, light, and container size you’ll use can i grow my own weed plant.
Germination, early veg, and stopping stretch before it starts
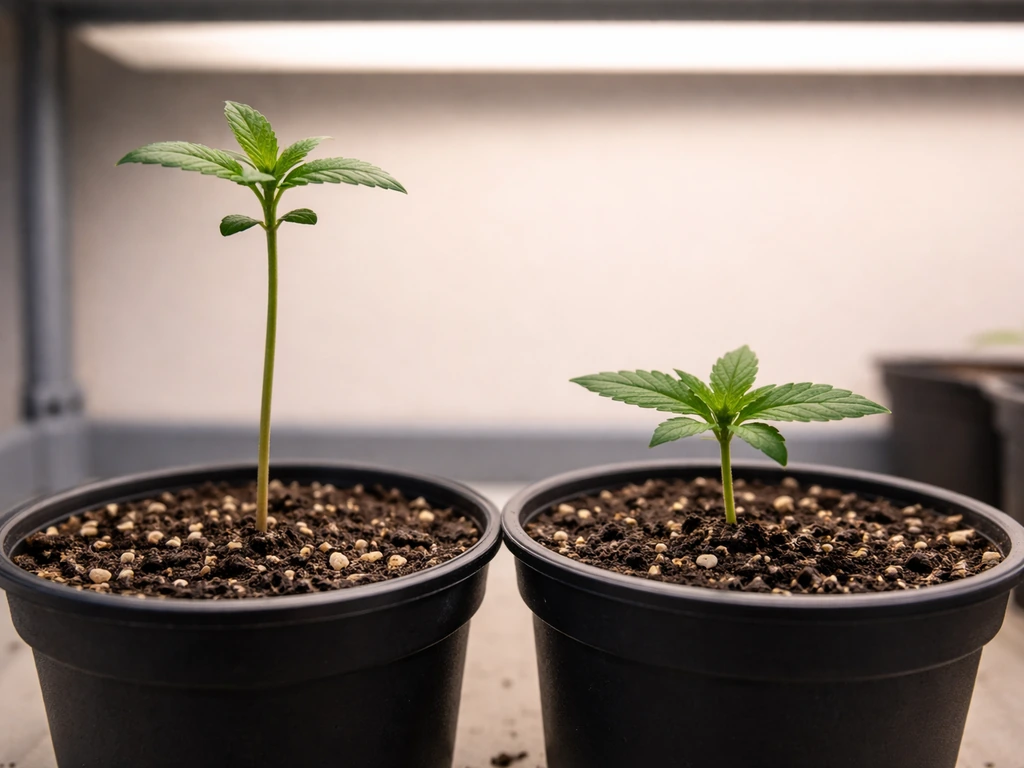
Stretch happens fastest in the seedling stage, and most beginners don't realize the plant is already building bad habits in week one. The single biggest cause of leggy seedlings is not enough light. When a seedling doesn't get enough light intensity, it literally grows taller trying to reach more light. That's not what you want.
Target around 200–400 µmol/m²/s PPFD (a measurement of the actual photon density hitting the plant surface) for seedlings. PPFD is measured with a quantum PAR meter, which isn't expensive and is genuinely worth owning if you grow indoors. Most quality LED panels have a manufacturer chart showing PPFD at different hanging heights. Start your light closer than you think you need to, check the PPFD reading, and adjust. Seedlings showing correct light intensity should have noticeably tighter new growth within 3–5 days of correction.
For germination itself, the paper towel method or direct planting in a small propagation plug both work well. Keep the germination environment warm (24–27°C) and humid (70–80% RH) until the taproot appears. Once you pot up and the seedling emerges, bring your light to the correct height immediately. Don't wait. Every day of insufficient light in week one adds visible stretch you'll be fighting for the rest of the grow.
Photoperiod schedules for early veg
For photoperiod strains, run 18 hours of light and 6 hours of dark (18/6) during veg. Some growers push to 20/4 to accelerate early growth, which is fine, but don't go to 24/0 if you want to keep internode spacing tight. A consistent dark period seems to produce slightly more compact growth for most genetics. For autos, 18/6 or 20/4 throughout the entire lifecycle works well.
Light setup, environment, and container choices
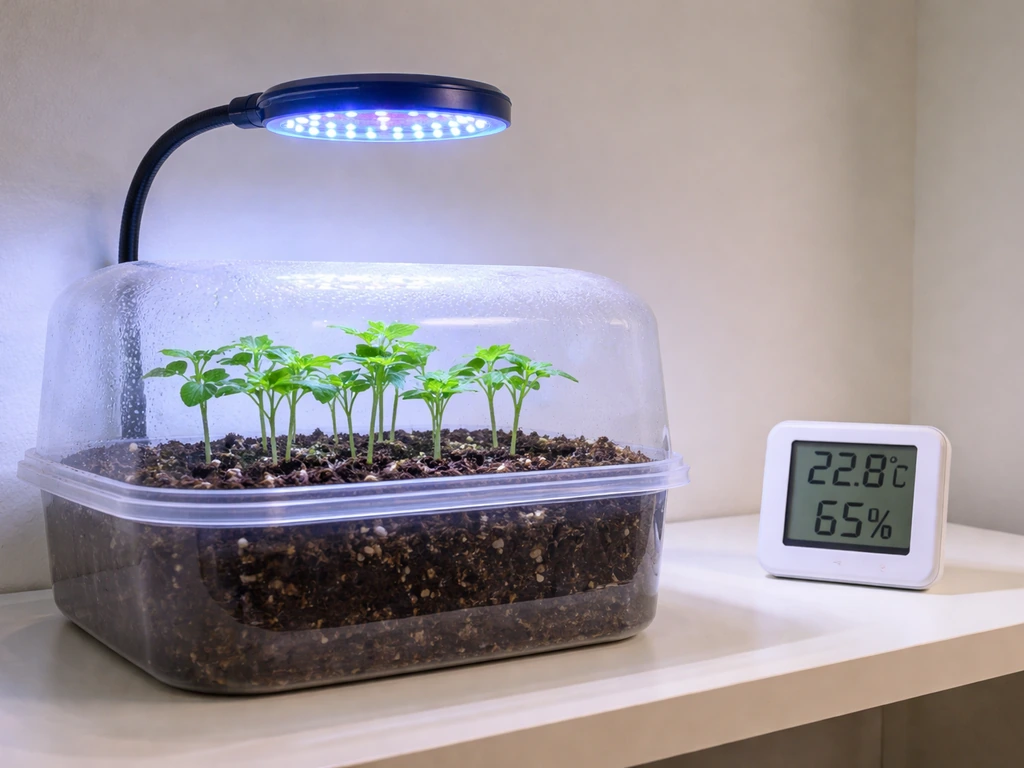
Light quality affects plant structure in a measurable way. Blue-spectrum light (roughly 400–500nm wavelength) tends to keep internodes shorter and growth more compact. Red-heavy or far-red-heavy spectrums can trigger elongation. Good quality full-spectrum LEDs already have a solid blue component, so if you're running a modern quantum board or strip LED, you're in decent shape. During veg especially, make sure your light isn't skewed heavily toward red. Some fixtures have a veg/bloom switch; use the veg setting during early growth.
Temperature also plays a role most people overlook. High temperatures, especially combined with low light intensity, cause stretch. Keep day temps between 22–26°C and night temps within about 4–6°C of that. A big day-to-night temperature differential (called DIF) can trigger stretch, so don't let your grow space get too cold at night relative to day temps. Airflow matters too: a gentle oscillating fan creates mild stem stress (called thigmomorphogenesis) that actually stimulates thicker, shorter stems. Run a low-speed fan so leaves are moving gently but not thrashing.
Container size for compact plants
Container size directly influences plant size. Roots drive canopy growth, so a smaller pot means a smaller plant. For a target plant under 60cm, a 3–5 litre container is a practical sweet spot for soil grows. For hydro setups, you can control plant size more through nutrient delivery and photoperiod, so container size is less of a ceiling, but starting in a smaller net pot or system still helps. Fabric pots are worth using in any method because they air-prune roots, preventing the roots from circling and becoming rootbound while still naturally limiting excessive root mass.
Avoid transplanting into a very large final container (10+ litres) if you want a compact plant. The plant will use all that root space and reward you with a large canopy. Staying in a 3–7 litre container from early veg to harvest is a legitimate strategy for keeping size down, not a mistake.
Indoor vs outdoor vs hydro: how compact strategies differ
| Method | Main size lever | Key compact tactic | Biggest stretch risk |
|---|---|---|---|
| Indoor soil | Light intensity and distance | Dial PPFD, small pots, LST/topping | Light too far away in seedling stage |
| Indoor hydro | Nutrients and photoperiod | Lower nitrogen in veg, flip 12/12 early | Overfeeding nitrogen causes explosive stretch |
| Outdoor | Natural photoperiod timing | Plant later in season or use autos | Long summer days delay flower, plants get huge |
Outdoor growers have less control over light but can use autos (which ignore photoperiod) or time photoperiod plants to go into the ground later in the season when natural daylight is already shortening. If you're growing outdoors and want a genuinely small plant, autoflowers are almost always the easier path.
Training techniques that actually keep plants short
Training is how you physically reshape the plant to spread the canopy horizontally instead of letting it reach vertically. The good news is you don't need to master every technique. Pick one or two and do them consistently.
Low-stress training (LST)
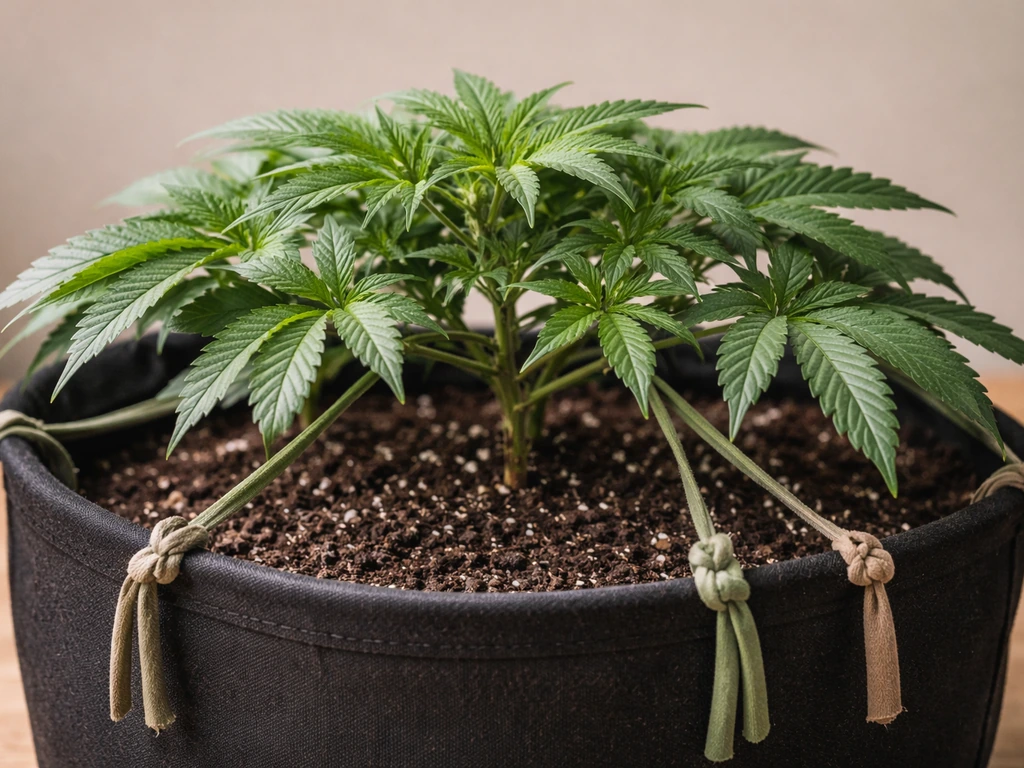
LST is the most beginner-friendly technique and the one I'd recommend starting with. You bend the main stem and side branches outward and downward, securing them with soft ties or clips to the container rim or a trellis. This breaks apical dominance (the tendency of the plant to grow one main tall cola) and encourages lower bud sites to grow upward, creating a flatter, wider canopy. You can start LST as early as week 2 from seed, as soon as the plant has a few nodes and a flexible stem. Revisit and adjust your ties every 2–3 days as the plant grows back toward the light. Stop major adjustments once flowers begin setting (roughly week 2–3 of flower) to avoid stressing buds.
Topping
Topping means cutting off the main growing tip, which forces the plant to produce two main colas instead of one. This keeps the plant lower and bushier. The right time to top is at the 3–5 node stage, which for most plants is somewhere between day 14 and day 28 from seed. Do not top autoflowers unless you have experience with them, since autos have a limited veg window and topping too late can stunt them badly. For photoperiod strains, topping once or twice during veg is very effective for compact results.
ScrOG (screen of green)
A ScrOG screen is a horizontal mesh or trellis placed above the plants, usually 20–30cm above the container. You tuck growing branches under and through the screen as they reach it, spreading growth horizontally. This is excellent for keeping a flat, even canopy and maximizing light penetration to lower sites. It's more of an intermediate technique since it requires you to leave the plant in veg long enough to fill the screen, but it's extremely effective if you want a short, dense, high-yielding plant in a small tent.
Feeding and nutrients for compact, healthy growth
Overfeeding nitrogen is one of the fastest ways to accidentally create a stretchy, overgrown plant. Nitrogen drives vegetative growth, so too much of it during veg pushes rapid, leggy expansion. You want steady, controlled growth, not explosive growth.
For soil grows, start with a quality cannabis-specific potting mix that already has some nutrients in it. In the first 2–3 weeks, most mixes have enough to feed a seedling without any added nutrients. When you start feeding, target a low to moderate nitrogen input during veg (an NPK ratio something like 3-1-2 or similar), then shift toward lower nitrogen and higher phosphorus and potassium as you transition to flower. EC (electrical conductivity, a measure of nutrient solution strength) targets for a compact veg plant in soil are roughly 0.8–1.4 mS/cm. In hydro, you have tighter control: 0.8–1.2 mS/cm in early veg, 1.2–1.8 mS/cm in mid-to-late veg, and 1.4–2.0 mS/cm in early flower is a reasonable progression for most strains.
pH matters enormously and it's the variable most beginners ignore until something goes wrong. In soil, keep root zone pH between 6.0–7.0, with 6.2–6.8 being ideal. In hydro or coco, the target is narrower: 5.5–6.2. Out-of-range pH locks out nutrients even if they're present in the medium, which leads to deficiency symptoms that look like you're underfeeding but actually indicate a pH problem. Always pH your water and nutrient solutions before feeding.
Week-by-week feeding outline
| Stage | Approx. timing | EC target (soil) | EC target (hydro/coco) | Focus |
|---|---|---|---|---|
| Seedling | Days 1–14 | Plain water or 0.4–0.6 | 0.4–0.8 | No heavy feeding; let medium do the work |
| Early veg | Days 15–28 | 0.8–1.2 | 0.8–1.2 | Light balanced feed; low nitrogen start |
| Mid veg | Days 29–42 | 1.2–1.4 | 1.2–1.6 | Moderate nitrogen; watch internode spacing |
| Flower transition | Weeks 5–6 | 1.2–1.6 | 1.4–1.8 | Reduce N, increase P and K |
| Mid flower | Weeks 7–9 | 1.4–1.8 | 1.6–2.0 | P/K dominant feed; stop growth boosters |
| Late flower / flush | Final 1–2 weeks | Plain water or 0.0–0.4 | Plain water or 0.0–0.4 | Flush or reduce feed; improve taste/quality |
Troubleshooting the most common small-plant problems
Stretching during veg
If your plant is stretching fast with wide internode gaps, the most likely cause is insufficient light intensity. Check your PPFD reading at canopy level and move your light closer (while staying within safe distance to avoid light burn). A secondary cause is high temperature combined with low light. Drop temp to 22–24°C and increase airflow. Corrected conditions should show tighter new growth within 3–5 days. If you're using LST, re-tie the plant to keep the stretching growth horizontal rather than vertical.
Nutrient deficiencies causing weakness or lanky growth
Yellow lower leaves usually indicate nitrogen deficiency (common in late flower and fine then, but a problem in veg). Pale new growth or interveinal yellowing on young leaves often points to iron or magnesium issues, both of which are frequently caused by pH being off rather than a missing nutrient. Check and correct pH first before adding more nutrients. Purple or reddish stems in seedlings can be genetic, cold temps, or phosphorus lockout from low pH. Don't chase every symptom with a new product until you've ruled out pH.
Root problems: rootbound vs too-small container
A plant that wilts quickly after watering, stops growing, or has roots circling out of drain holes is rootbound. If you deliberately chose a small pot to limit plant size, watch for this. Some rootbound stress is acceptable late in flower when growth has naturally slowed, but in veg it will stunt the plant badly. Signs include very fast water runoff (roots have displaced most of the medium), drooping even with proper watering, and yellow tips from salt buildup. If you hit this before flower, move up one container size (don't jump more than one size). Fabric pots reduce the risk significantly by air-pruning roots before they circle.
Pests and mold in dense canopies
Dense, compact plants are great for yield but can trap humidity and restrict airflow to lower canopy, which invites powdery mildew and botrytis (grey mold). Keep relative humidity below 50% once you're in flower, ideally 40–45% in late flower. Defoliate selectively to open up the lower canopy and improve airflow between branches. Spider mites and fungus gnats are common small-plant pests. Spider mites love hot, dry environments; fungus gnats love overwatered, wet topsoil. Both are manageable with early intervention: neem oil spray, yellow sticky traps for gnats, and consistent environmental control.
Knowing when to harvest and what to do right now
Harvest timing is where a lot of growers leave quality on the table by chopping too early. The most reliable method is checking trichome color under a jeweler's loupe or digital microscope. Clear trichomes mean the plant isn't ready. Milky white (cloudy) trichomes indicate peak THC. Amber trichomes indicate THC is degrading into CBN, which produces a more sedative effect. A good general target for most growers is a mix of mostly milky with 10–20% amber, which suggests you're at or just past peak potency. Pistil color (the little hairs on buds) is a secondary indicator: mostly orange or red pistils suggest ripeness, but pistils can change color early due to stress, so always verify with trichomes.
For autoflowers specifically, most varieties finish in 65–85 days from seed, though some slower genetics push to 90 days. Don't harvest based on the calendar alone; use your trichomes. A plant at day 70 might be ready or might need another 2 weeks depending on the strain and your environment.
Next steps based on where you are right now
- Haven't started yet: Choose a compact autoflower strain, source a 3–5 litre fabric pot, and plan your light setup targeting 200–400 µmol/m²/s PPFD at seedling height before you germinate.
- Week 1–2 (seedling): Check your PPFD reading now. If you don't have a PAR meter, move your light to the manufacturer's recommended seedling distance and watch for tight new growth. Set up a gentle fan.
- Week 3–4 (early veg): Start LST now if you haven't. Tie the main stem outward, check ties every 2–3 days. For photoperiod plants, consider topping at 4–5 nodes. Check your pH every watering.
- Week 5–7 (mid-to-late veg): Evaluate internode spacing. If it looks tight and bushy, your environment is working. Begin tapering nitrogen and introducing a bloom-focused feed as you approach the flip (photoperiod) or as the plant shows pre-flowers (autos).
- Early flower: Stop major training. Keep humidity below 50%. Defoliate lightly to open airflow. Dial in your P/K-heavy feed.
- Mid-to-late flower: Get your loupe or microscope ready. Start checking trichomes weekly from around week 6 of flower. Flush or reduce feeding in the final 1–2 weeks.
- Harvest window: Trichomes mostly milky with some amber, pistils mostly orange, buds feel firm and dense. Chop, trim, and move into a 10–14 day dry at 15–21°C and 55–65% RH before curing.
If you're exploring growing more broadly alongside this, related topics worth looking into include what you need to grow a weed plant from scratch and how to grow a weed plant naturally, both of which pair well with the compact-growth strategies covered here. The fundamentals of feeding, environment, and timing all connect across these topics, so building on each piece makes the whole system click faster. If you have dried bud, you may be wondering whether it can be used to grow a new plant, but the process depends on whether the seeds inside are viable grow weed from dried bud.
FAQ
Can I grow a small weed plant if my room is tall and I cannot lower the light easily?
Yes, but only if you keep the seedling from stretching immediately. Make sure your light is close enough to hit roughly the seedling PPFD range, and avoid raising the fixture during the first week. If your space is too tall to hang low, use a smaller distance between light and canopy or consider a lower-profile setup (seedling on a stand under the main light) so internodes still tighten.
When should I top so my plant stays small, and what if topping recovery makes it stretch?
Don’t top until you can confirm the plant is actually at the right node stage, and for photoperiods don’t rush the flip. If you top too early you may delay canopy build, and if you top too late you may not recover before flowering, causing taller-than-planned growth. A practical rule is to top at the 3 to 5 node stage, then keep LST going so you spread the regrowth horizontally rather than letting it shoot back up.
If my humidity is high, will that directly cause my plant to stretch more?
No, not exactly. High humidity in flower can increase disease pressure, but stretch is mostly driven by light and temperature balance, plus training timing. You can have moderate humidity and still end up leggy if PPFD is low or if night temps drop too far below day temps. Use humidity targets for mold prevention, but diagnose stretch first with light intensity and DIF (day to night temperature difference).
My lower leaves are yellow. Should I just add more nitrogen?
If you are seeing yellowing mainly on older lower leaves, nitrogen deficiency in late veg or early flower is possible, but it can also be nutrient lock due to pH. Check runoff or solution pH before adding more feed, and verify the medium is not staying too wet. The fastest decision aid is, correct pH first, then adjust nutrients after 2 to 3 days based on whether new growth improves.
What if I start in a very small pot and my plant starts to slow down, should I upsize?
For compact growth, starting in a small container is helpful, but you still need enough room to avoid severe rootbound stalling. Fabric pots are a good safety net because air-pruning reduces circling, yet you can still run out of space if you keep the pot too small for too long. If growth slows in veg and water drains extremely fast, go up one container size, ideally before the plant becomes visibly root-stressed.
How do I tell whether wilting is from overwatering, underwatering, or rootbound stress?
It depends on the direction of the issue. Overwatering can lead to wilt and nutrient uptake problems, but underwatering usually shows dry, drooping leaves that perk up after watering. Rootbound plants also can wilt fast because there is less medium to hold water, and you may see water run straight through. If you see frequent dry spots or circling roots from the bottom, treat it as a container-size or root health problem, not just a watering-schedule problem.
Should I keep changing my light height daily to prevent stretching?
Don’t. In general, if you overcorrect and repeatedly lift or lower the light, you create stress that can also widen internodes. Use your PPFD meter or LED chart to set the fixture, then make small adjustments and wait a few days to judge results. If you must move the light, move gradually and monitor for leaf-edge stress (too close) versus renewed stretching (still too far).
Can I top an autoflower to keep it shorter, or is that always a bad idea?
Autoflowers can tolerate low-stress training, but topping is risky because it can cut into their limited growth window. If you want compactness with autos, prioritize LST early (around week 2 once stems are flexible) and only do light, reversible training adjustments. If you do any heavy training, expect the plant to take longer to recover and possibly finish with less canopy than planned.
Purple stems and red petioles, does that always mean phosphorus deficiency?
They can, especially when the plant is already stressed or when nutrients become unavailable from pH drift. But color changes do not always mean a deficiency, genetic trait, or lighting effect. A safe workflow is, verify pH first (soil 6.0 to 7.0, hydro or coco 5.5 to 6.2), then check whether the issue is paired with slowed growth or consistent leaf symptoms on multiple nodes before you add anything.
How much defoliation is safe if I’m trying to keep airflow in a small tent?
Yes, but do it in a targeted way. If you remove too many leaves late in veg or early flower, you can reduce the plant’s energy capture, which can temporarily stall growth and affect bud development. The compact approach is selective defoliation to open airflow under the canopy, then reassess after a few days. Aim to reduce humidity pockets, not to strip the plant down to bare branches.
If I’m using a pre-fertilized soil, when should I start nutrients and how do I avoid a stretchy veg?
Start feeding conservatively and align it with the veg to flower shift. If your plant is in a cannabis potting mix with initial nutrients, skip heavy feeding in the first 2 to 3 weeks. When you do feed, use low to moderate nitrogen for compact veg, then transition to lower nitrogen and higher phosphorus and potassium in flower. Overdoing nitrogen early is a common cause of a taller, looser plant even if training is good.
My pistils are mostly orange, can I harvest without checking trichomes?
A plant can look “almost ready” by pistil color, but pistils alone can be misleading when the plant was stressed or grown under suboptimal conditions. Use pistome or microscope checks as the primary signal, and treat pistil color as secondary. If trichomes are still mostly clear, wait even if pistils look mostly orange or red.
Can I keep my plant short outdoors using the same strategies as indoor growth?
Yes. You can keep a small footprint outdoors by using compact genetics plus early training, and by timing the grow so flowering happens during cooler, stable weather rather than heat waves that can encourage stretch or stress. If you want the easiest path to a small plant outdoors with fewer variables, autoflowers are usually more predictable because you control the timeline rather than relying on seasonal light changes.
Citations
“Compact” cannabis structure is strongly associated with shorter internodes (shorter distance between consecutive nodes); growers use internode spacing (and resulting plant height/width) as a measurable proxy for whether the plant is stretching or staying bushy.
https://www.growbarato.net/blog/en/nodes-and-internodes-in-cannabis-essential-guide-for-growers/
Insufficient light intensity (and related spectrum/heat/airflow issues) is a common cause of lanky/leggy seedlings; Plantation Premium Seeds specifically recommends targeting about 200–400 µmol/m²/s PPFD and notes that corrected conditions should produce more compact new growth within ~3–5 days.
https://www.plantationpremiumseeds.com/en/articles/leggy-stretching-cannabis-seedlings
Blue light tends to decrease internode length (i.e., more compact morphology), while low red/far-red ratios can be associated with elongated growth; a 2019 academic paper notes blue light decreases internode length and discusses how light quantity/quality affects growth.
https://file.scirp.org/pdf/AJPS_2019061713561499.pdf
Some growers begin LST early—DSS Genetics states training can begin as early as week 2 from seed and continued through early flower (with repeated adjustments every 2–3 days).
https://dssgenetics.com/guides/training-techniques
A common practical “start training” trigger is around the 3–5 node stage / early veg; WeedSeedsexpress’ training guide says to start training around the 3–5 node stage (with an approximate day 14–21 window for autos) and to stop major adjustments once flowers set to avoid slowing bud development.
https://weedseedsexpress.com/blog/cannabis-plant-training
Training/topping creates canopy leveling by breaking apical dominance; DSS Genetics’ training overview emphasizes that training lets growers control plant height—critical for limited tent vertical space.
https://dssgenetics.com/guides/training-techniques
For harvest readiness, Ed Rosenthal (trichome-based method) emphasizes trichome color as a chemical readiness indicator (clear vs milky vs amber), and also notes pistils can darken earlier and therefore aren’t as reliable as trichomes alone.
https://www.edrosenthal.com/ask-ed-blog/harvesting-cannabis-by-trichome-maturity
A typical harvest heuristic many growers use is “mostly milky with some amber”; Homegrown Cannabis Co. states an optimal time when ~70–90% of pistils are amber and ~70–90% of trichomes are milky white (while noting pistils can change prematurely).
https://homegrowncannabis.com/grow-your-own/article/when-harvest-cannabis/
Autoflower lifecycle timing: Plantation Premium Seeds says most autoflowers finish in ~65–85 days from seed to harvest (with some up to ~90 days depending on variety).
https://www.plantationpremiumseeds.com/en/articles/autoflowering-cannabis-growing-guide
Light intensity measurement standard: PPFD is the go-to metric for grow light “intensity,” measured in µmol/m²/s; Growers Network explains quantum sensors measure PPFD and it’s commonly used for cultivation lighting performance.
https://growersnetwork.org/cultivation/measure-horticultural-lighting-performance-part-two/
Next Article
How to Grow a Weed Plant Naturally: Step-by-Step Guide
Step-by-step natural cannabis growing from seed to harvest, with indoor and outdoor care, organic nutrients, and pest fi