One cannabis seed, grown into one healthy plant indoors under a decent LED, can realistically produce anywhere from 50 to 250 grams (about 2 to 9 ounces) of dried flower. Outdoors, that same seed has the potential to hit 500 grams or more under ideal conditions. Those are wide ranges on purpose, because the honest answer is that genetics, light, space, grow method, and your skill level all pull that number up or down dramatically. What I can tell you is that a beginner who chooses the right strain, keeps the environment dialed in, and avoids the most common mistakes can consistently land in the 100–150 gram range from a single indoor plant, and that's a genuinely solid result.
How Much Weed Can One Seed Grow and How to Maximize It

Marcus Holbrook
14 Jun 2026
What 'yield from one seed' actually means
When people ask how much weed one seed can grow, they usually mean one seed planted, grown into one plant, harvested once. That's the clearest version of the question and what this guide focuses on. But there's a wrinkle worth knowing upfront: not every seed produces a usable plant. If you're working with regular (non-feminized) seeds, you're looking at roughly a 50/50 chance that your single seed grows into a male plant, which produces no smokable flower and needs to be removed before it pollinates your females. Feminized seeds solve this by producing female plants around 99% of the time, though that's a population average, not a hard guarantee for every individual seed.
For anyone growing just one seed, the practical takeaway is simple: use a feminized seed. Gambling your entire grow on a regular seed when you only have one plant in the ground is a real risk. If your one seed turns out male, you get zero yield. That one decision, feminized vs regular, might be the most important choice you make before you even touch soil.
There's also the question of growing one seed as a mother plant to take clones from later, which is a different goal entirely. If your real goal is learning how to grow a mother plant, you will keep a healthy photoperiod plant in vegetative growth and take clones from it instead of aiming for one harvest. If you're interested in that approach, it changes how you train and manage the plant significantly. For now, let's focus on growing one seed to one harvest.
Realistic yield ranges and what swings them
Here's a practical breakdown of what you can realistically expect from a single plant depending on your setup. These are dry weight figures after a proper cure.
| Setup | Realistic Yield (1 Plant) | Key Assumption |
|---|---|---|
| Indoor, beginner, small light (150–250W) | 30–80g | Basic environment, no training |
| Indoor, intermediate, 400–600W | 100–200g | Good light coverage, some training (LST/topping) |
| Indoor, advanced, 600W+ dialed-in | 200–400g | Full canopy, optimized VPD and feeding |
| Outdoor, beginner, good climate | 150–400g | Full season, decent sun exposure |
| Outdoor, optimal (long season, full sun) | 500g+ | Large container or ground planted, trained |
| Hydroponic (DWC/coco), intermediate | 150–300g | Faster veg, optimized nutrients and pH |
A widely used planning benchmark is the 'gram per watt' rule: divide your total harvested dry grams by your light's wattage, and a solid indoor result lands around 1 g/W. In practice, well-run setups with modern LEDs report yields between 0.9 and 1.6 g/W depending on cultivar and technique. A 400W setup hitting 1 g/W produces 400g, but that typically assumes multiple plants filling the canopy. With just one plant, your yield per watt often comes down unless you train aggressively to spread the canopy. Space-based planning is another useful tool: indoor LED grows can realistically produce about 0.5 to 1.0 oz per square foot of canopy. A 2x2 tent (4 sq ft) run well could yield 2 to 4 oz from one trained plant.
The variables that move these numbers the most are, in rough order of impact: genetics and strain choice, light intensity and coverage, container size, growing method, training and canopy management, environmental control (temperature, humidity, airflow), and nutrition. Nail all of them and you'll hit the top of the range. Fumble two or three and you'll land at the bottom. That's not a failure, it's just how growing works, especially early on.
Indoor, outdoor, or hydroponic: how the method changes your result
Each growing method has its own ceiling, floor, and skill curve. None of them is objectively better. They just demand different things from you.
Growing indoors
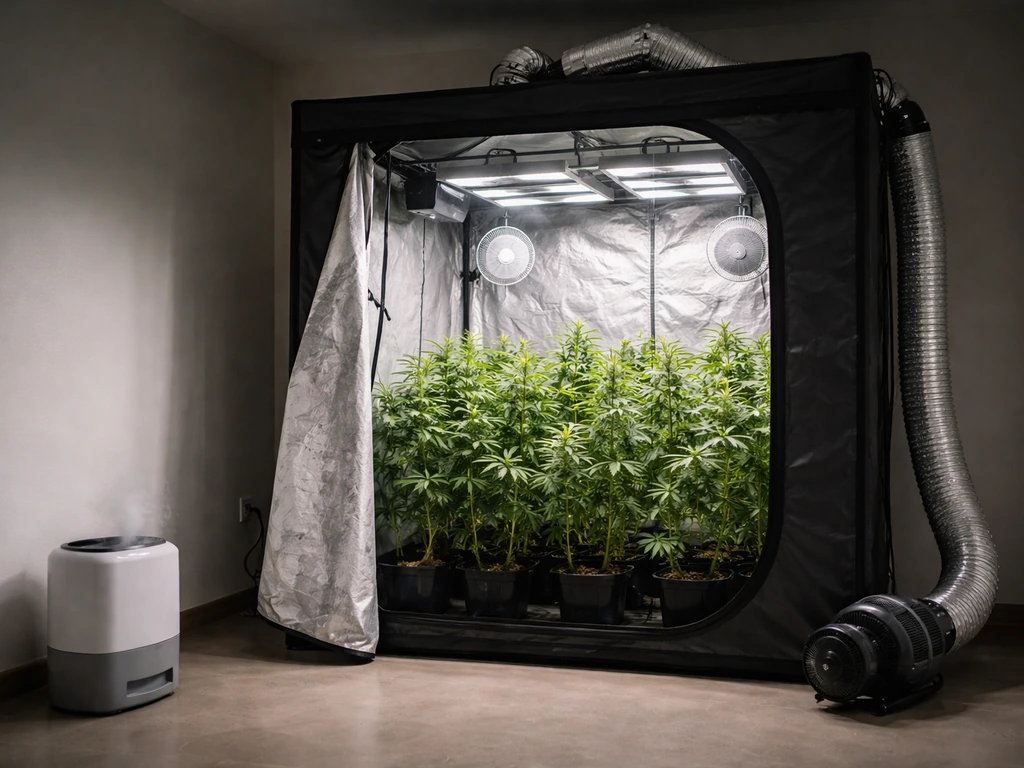
Indoors, you control everything: light cycle, temperature, humidity, CO2, nutrients. That control is exactly why indoor yields can be very consistent once you learn the environment. The downside is cost (lights, tents, fans, electricity) and the physical limit of your space. A single plant in a 2x2 or 3x3 tent is a great starting point. Without supplemental CO2, you're looking at roughly 1.25 to 1.75 oz per square foot as a practical ceiling for a well-run canopy. With CO2 enrichment, that ceiling rises, but that's an advanced step. For one seed, keep it simple: a 2x2 or 3x3 tent, a quality LED rated for that footprint, and good airflow will get you consistently good results without overcomplicating things.
Growing outdoors
Outdoors, the sun does the heavy lifting and plants can grow enormous given a full season. A single outdoor plant in a large container or planted directly in the ground can easily outproduce an indoor plant by two to three times, sometimes more. The trade-off is that you can't control rain, pests, temperature swings, or neighbors' lines of sight. Climate matters a lot: cannabis needs a long, warm growing season to reach its potential. If you're in a region with a short summer or unpredictable weather, yields drop. Outdoors also means photoperiod strains flower based on natural light changes, so your harvest timing is dictated by the season, usually late September to November in the northern hemisphere.
Hydroponics and coco coir
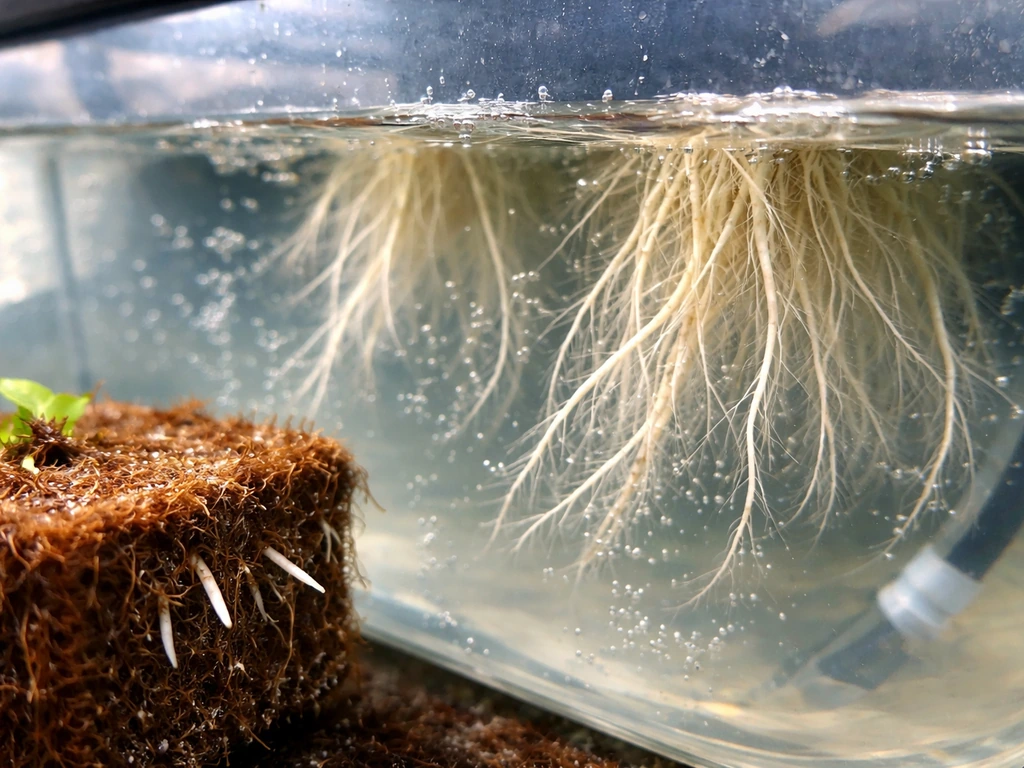
Hydroponic systems, particularly deep water culture (DWC) and coco coir grows, are known for faster vegetative growth because the roots have constant access to oxygen and nutrients. Coco's porous structure improves root-zone oxygenation compared to dense soils, and DWC keeps roots submerged in an aerated nutrient solution. The result is plants that often veg faster and can pack on size more quickly than soil grows. The catch is that hydro is less forgiving. pH and EC (nutrient concentration) swings that a soil buffer might soften will hit a hydro plant immediately and hard. If you're new to growing and want to do just one seed, I'd honestly recommend starting in soil or coco before jumping into DWC, unless you're comfortable monitoring and adjusting your solution daily.
How to actually maximize yield from one plant
Choose the right strain
Strain choice is probably the single biggest lever you have as a grower. High-yielding cultivars exist across indica, sativa, and hybrid categories, and seed banks publish rough yield expectations per plant. For indoor beginners, look for strains described as 'beginner-friendly,' 'high-yielding,' or specifically bred for indoor performance in smaller spaces. Autoflowering strains are worth considering if you want a shorter cycle (roughly 70 to 90 days seed to harvest) and don't want to manage light schedules, but they typically yield less than well-grown photoperiod plants and are harder to train because of their fixed timelines.
Get your light dialed in
Light is the engine of yield. For vegetative growth, aim for a PPFD (the measure of usable light intensity) of around 400 to 600 µmol/m²/s. During flowering, push that to 600 to 900 µmol/m²/s, or higher if you're providing CO2. Use your light manufacturer's hanging height recommendations as a starting point and invest in a cheap PAR meter or use your phone with a PAR app to check actual canopy readings. The 18/6 light schedule (18 hours on, 6 off) is standard for veg indoors. Switching to 12/12 triggers flowering in photoperiod strains.
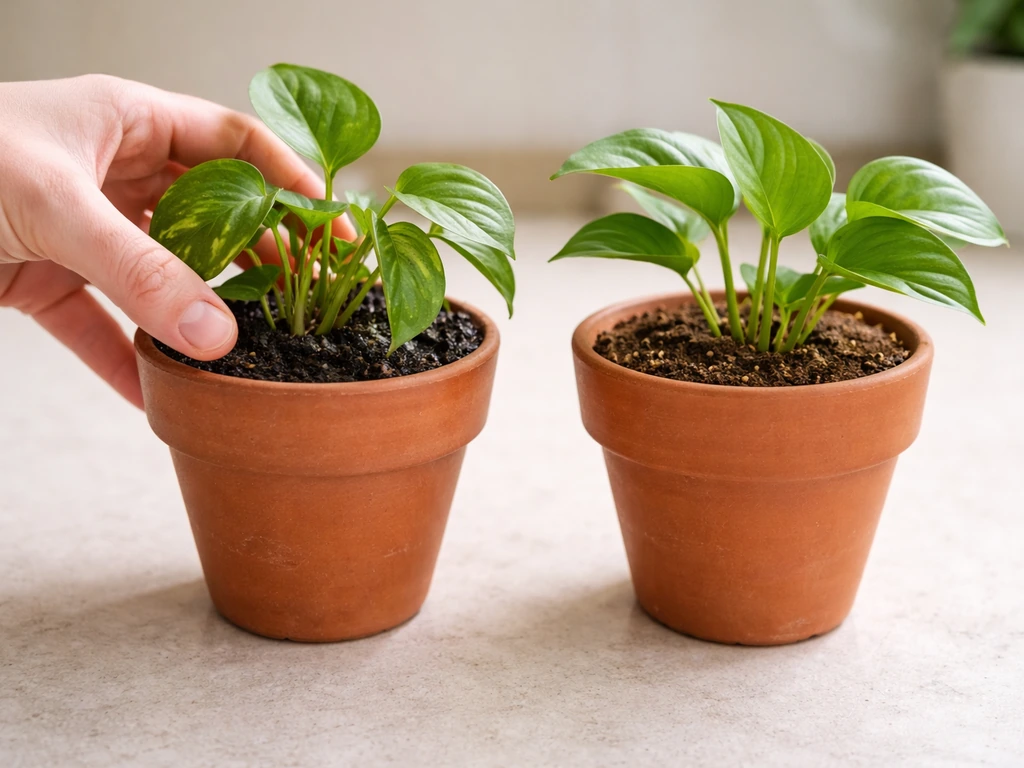
Use the right container size
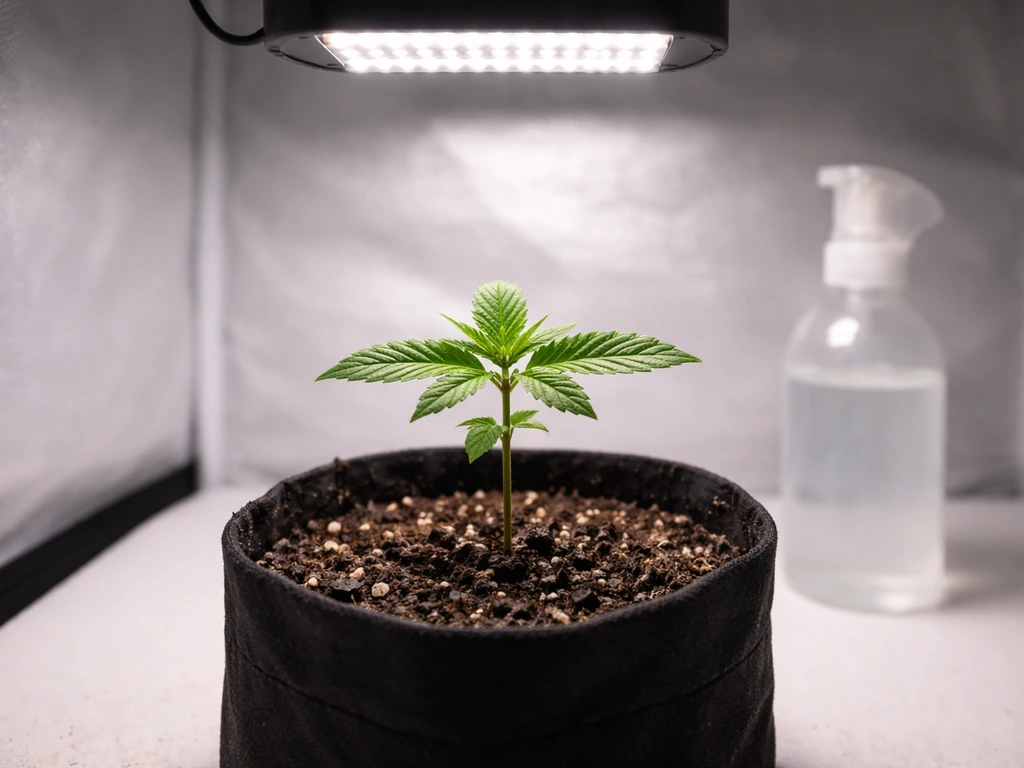
Container size directly caps plant size and yield. For one plant grown to full size indoors, a 5-gallon pot is the common minimum recommendation, with 7 to 10 gallons giving roots more room to develop in longer veg periods. One important mistake I see often: starting a seedling in a giant pot. Seedlings in oversized containers are prone to overwatering because the roots aren't yet large enough to absorb the moisture, and soggy soil around young roots causes all kinds of problems. Start in a small cup or a 1-gallon pot and transplant up as the plant grows.
Train your plant to fill the canopy
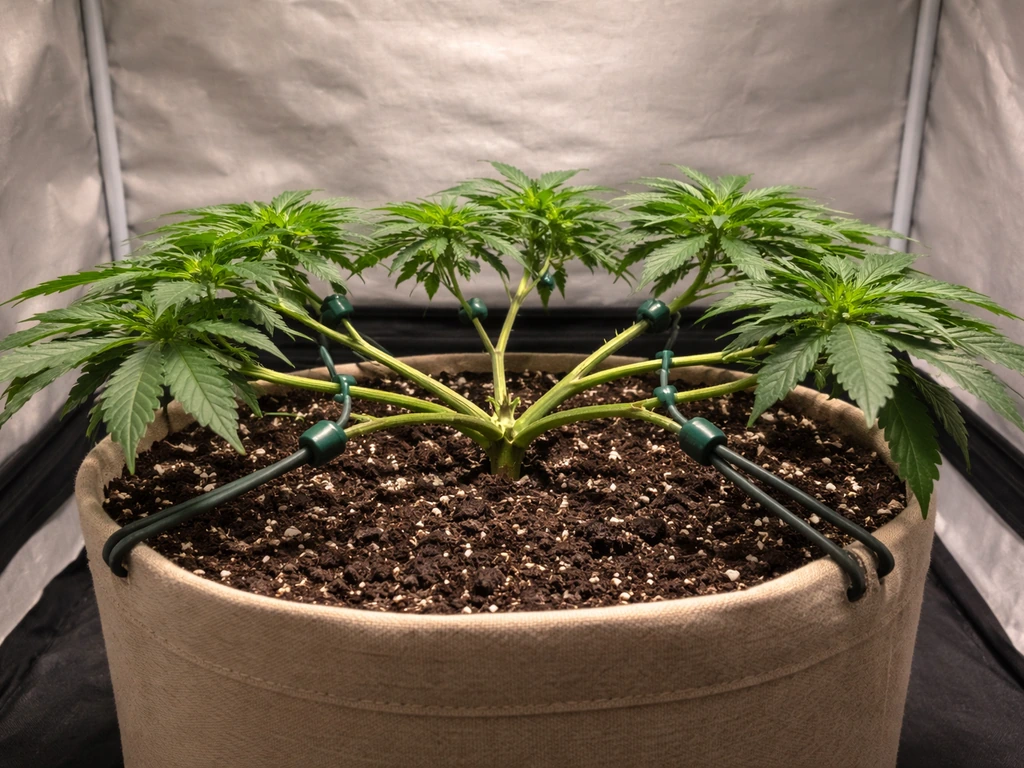
Training is how you turn one plant into a canopy that captures as much light as possible. The two most accessible techniques for beginners are LST (low-stress training, which involves bending and tying branches outward) and topping (cutting the main stem tip to create two main colas instead of one). Both techniques, used together, can dramatically increase the number of bud sites your plant develops and how evenly light reaches them. Topping should be done early in veg when the plant has at least 4 to 5 nodes, and LST can start around the same time. If you're growing an autoflower, be cautious with topping since they don't have long to recover. For photoperiod plants, top early and train throughout veg, then let the plant stretch into flower.
Environment and feeding from seedling to harvest
Getting the environment right at each stage is what separates a good harvest from a great one. Here's how to think about it stage by stage.
Seedling stage (days 1 to 14)
Seedlings are delicate and need gentle conditions. Keep temperatures between 68 and 77°F (20 to 25°C) and relative humidity around 65 to 70%. VPD (vapor pressure deficit) targets at this stage are around 0.4 kPa, which basically means a warm, humid environment. Light intensity should be low, roughly 200 to 300 µmol/m²/s, placed at a comfortable distance above the canopy. Don't feed nutrients yet if you're in a pre-amended soil. Water lightly and only when the top inch of medium is dry.
Vegetative stage (weeks 2 to 8, depending on desired size)
Veg is when you build the frame for your harvest. Temperatures of 70 to 82°F (21 to 28°C) and humidity around 50 to 60% work well. PPFD can ramp up to 400 to 600 µmol/m²/s. Start feeding a nitrogen-forward nutrient formula once the plant has its first few sets of true leaves. pH your water and nutrient solution to 6.2 to 6.8 for soil, 5.8 to 6.2 for coco, and 5.5 to 6.1 for hydro. These ranges ensure your plant can actually absorb the nutrients you're giving it. EC (electrical conductivity) in veg can run around 1.0 to 1.6 mS/cm depending on the product line you're using.
Flowering stage (weeks 8 to 16+, strain dependent)
Flip to 12/12 light when your plant is roughly half the final height you want, since most strains double or triple in size during the flowering stretch. Temperature targets stay similar to veg, though many growers drop night temps slightly (by 5 to 10°F) toward late flower to encourage resin development. Critically, humidity must come down during flowering, dropping from around 50% in early flower to 40 to 45% in mid-flower and ideally below 40% in the final two weeks to prevent bud rot. This is the most dangerous mold window in the entire grow. Nutrient focus shifts from nitrogen to phosphorus and potassium during bloom. Mid-to-late flower EC can push to around 1.8 to 2.4 mS/cm. VPD targets rise through flower, reaching up to around 1.2 to 1.6 kPa in peak and late flower.
Harvest timing
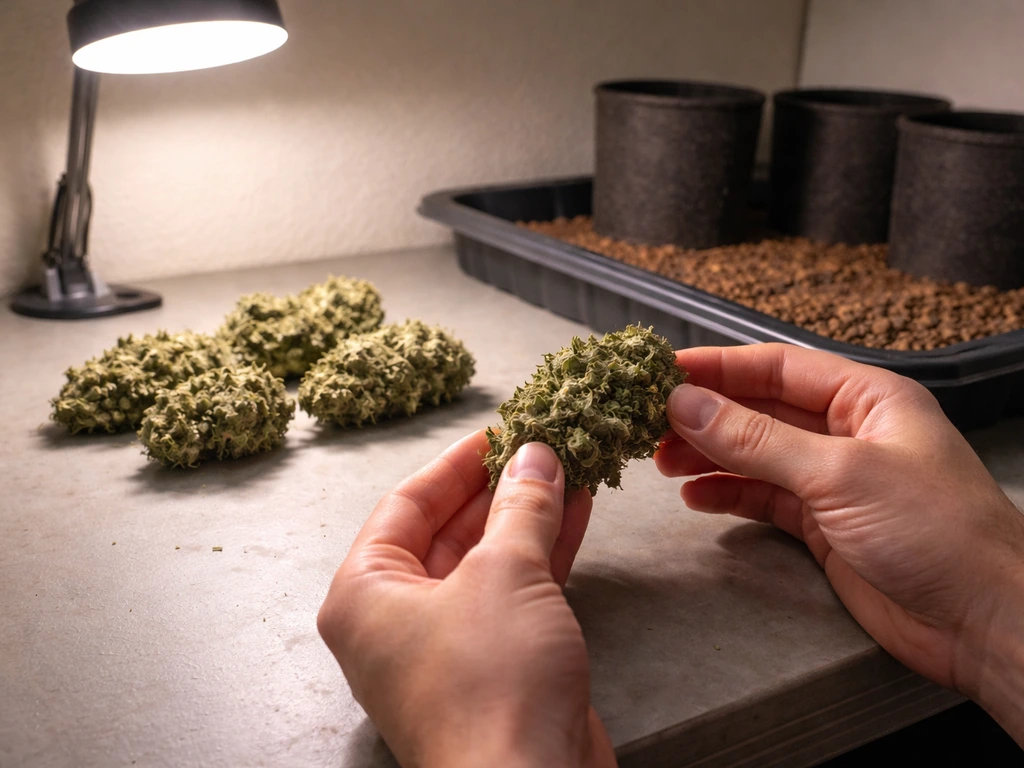
Harvest timing is often overlooked but it directly affects both yield weight and potency. The clearest indicator is trichome color: clear trichomes mean too early, milky white means peak THC, and amber trichomes indicate THC is converting to CBN (a more sedating effect). Most growers aim for a mix of milky and amber, roughly 10 to 30% amber depending on the effect they want. Get a cheap jeweler's loupe or a digital microscope, it's one of the best investments for a home grow.
The things that silently kill your yield
I've personally made most of these mistakes, and they all cost grams at harvest. Here's a troubleshooting checklist to keep handy:
- Overwatering: the most common beginner mistake. Lift your pot before and after watering to feel the weight difference. Water only when the medium is significantly lighter and the top inch is dry.
- Wrong pH: if your plant looks nutrient-deficient but you're feeding well, check pH first. Nutrient lockout from pH drift mimics deficiency almost perfectly.
- Pot too large for seedling: seedling roots in a huge pot means the medium stays wet for too long, causing root stress that looks like overfeeding or disease.
- Light too far or too close: too far means low PPFD and airy buds; too close means light stress and bleached tops. Check your canopy reading with a PAR meter.
- Humidity too high in late flower: bud rot can destroy weeks of work in 48 hours. If you see any suspicious gray or brown spots on buds in the last few weeks, inspect carefully and improve airflow immediately.
- Stress-induced hermaphroditism: light leaks during dark periods, physical damage, and temperature shocks can cause female plants to develop male pollen sacs. Even one missed pollen sac can seed your entire crop.
- Harvesting too early: clear or mostly milky trichomes mean you're leaving significant yield and potency on the table. Give it more time than you think you need.
- Nutrient toxicity: more is not better. Follow manufacturer guidelines and watch for clawed leaves (nitrogen toxicity) or dark, shiny leaves as signs you're overfeeding.
- Stunted vegetative growth: if your plant isn't growing after two weeks in veg, check root health, pot size, and whether it's rootbound. A rootbound plant in a small container will stall.
How to estimate your own expected harvest right now
You don't need a calculator to get a reasonable estimate. Here's a simple process you can work through today to set realistic expectations for your grow.
- Identify your grow space square footage. Measure your tent or area (length x width). A 2x2 is 4 sq ft, a 3x3 is 9 sq ft, a 4x4 is 16 sq ft.
- Apply the space-based yield estimate. For a well-run indoor LED setup, plan for 0.5 to 1.0 oz per square foot for one plant filling the canopy. A 3x3 tent with one trained plant, done well, could produce roughly 4.5 to 9 oz (roughly 130 to 250 grams).
- Apply the gram-per-watt check. Take your light's actual wattage draw and multiply by 0.5 to 1.0 for a conservative to optimistic range. A 300W LED drawing 300W could yield 150 to 300 grams from a well-filled canopy.
- Adjust down for your experience level. Be honest. First grow? Knock 30 to 40% off your optimistic number. Second or third? You're probably closer to the mid-range.
- Factor in strain. Check the seed bank's yield rating for your specific strain. A strain listed as 'low yielding' or 'moderate' will underperform a 'high yield' cultivar even in identical conditions.
- Plan your veg time deliberately. The longer you veg (within reason), the larger the plant and the more sites it has to flower. A plant vegged for 6 to 8 weeks will generally outproduce one vegged for 3 to 4 weeks, assuming space allows.
- Set a harvest date estimate. Add your strain's flowering time (listed by seed banks, usually 8 to 11 weeks for photoperiod) to your planned flip date, then add 2 weeks of buffer for harvest prep and flushing if you choose to flush.
As a next step, take that estimated yield number and work backward into your setup decisions. If 50 grams meets your needs, a small, simple setup with one autoflower is plenty. If you're aiming for 200 grams or more, you need to plan for a larger light footprint, a bigger container, proper training, and a longer veg period. The guide on growing one weed plant well covers those decisions in much more detail and is worth reading alongside this one. If you want to go deeper into the specifics, the guide on growing one weed plant well covers how to set up your lighting, container, and training for better results.
A quick note on legal compliance
Cannabis cultivation laws vary dramatically by country, state, and local jurisdiction. Before germinating that seed, take 20 minutes to look up the specific rules for your location: how many plants you're allowed, whether you need to keep them out of public view, and whether home cultivation is permitted at all. Many places that allow recreational or medical use still restrict how many plants you can grow and require them to be secured from minors. Growing legally and responsibly is the foundation of every piece of advice on this site. It also means you can ask questions, share your grow, and learn openly without risk.
One seed, one plant, one harvest: it's one of the most satisfying projects you can take on as a home grower. The yield range is wide, but so is the room to improve. Start with a feminized seed from a reputable breeder, match your light to your space, keep humidity under control in late flower, and train your plant to fill the canopy. Start with a feminized seed and then follow a step-by-step routine for lighting, watering, and training to learn how to grow one weed plant. If you want to dial everything in for one plant from a single seed, follow the step-by-step guidance on how to grow weed with one seed. Do those four things consistently and you'll be in a very good position to hit the upper end of what a single plant can produce. If you want to target how to grow 1 pound per plant, you need to push every yield driver, especially light coverage, canopy filling, and flowering conditions hit the upper end of what a single plant can produce.
FAQ
If I use regular seeds instead of feminized, can I still get reliable yield from “one seed” ?
You can, but it is not reliable. With regular seeds, about half the time you will end up with a male plant, so “one seed equals one harvest” fails unless you plan extra seeds or accept the risk of zero flower. A practical workaround is starting multiple seeds and then keeping only the females, even if you still intend to run one flowering plant.
When people say one seed can grow X grams, is that per plant or per seed?
In most casual discussions it is effectively per plant that successfully makes it through the whole cycle. A true “per seed” estimate depends on the probability the seed becomes a female (if regular) and survives seedling stage, so yields are typically higher on paper when calculated per successful plant.
How much yield should I expect if I only have a tiny tent, like 1x1 or 2x2, and one plant?
Your floor becomes canopy coverage, not just light power. In very small tents, plants often cannot spread enough to convert watts into grams unless you train early and keep the plant height tight. As a practical rule, use training and light height tuning to keep the canopy uniformly lit, otherwise you will get “wasted” light falling on empty space.
Will starting in a 1-gallon pot and transplanting hurt yield compared with starting in a 5-gallon pot?
It usually helps. Starting small reduces overwatering risk and encourages roots to occupy the container efficiently, which improves early growth. The cost is a potential transplant stress period, so the key is transplant timing, do it before the plant is root-bound, and avoid letting the medium fully dry out during the transition.
Does LST or topping increase total grams, or does it sometimes reduce yield if done wrong?
Both can be true. Done correctly, training increases bud sites and improves light distribution, which supports higher yield. Done too late, too aggressively, or with poor recovery (especially for autos), it can stall growth and reduce total grams. For autos, stick closer to gentle LST and avoid topping unless you have experience.
What’s the most common reason a grow ends up at the low end of the yield range?
Uneven light across the canopy is a top culprit. Even if your PPFD numbers look good near the brightest spot, if large portions of the plant are underlit, you get smaller buds and a lower final dry weight. Using a PAR meter or at least checking consistency across multiple points under the light can prevent that mistake.
How do I estimate yield for one plant without guessing too much?
Use grams per watt as a reality check, then sanity-check it with area coverage. Start with your light wattage and a conservative indoor expectation (since one plant usually does not fill a whole canopy), then confirm your canopy can cover most of the tent floor using training. If your plant can’t realistically fill the footprint, reduce expectations rather than buying bigger lights.
How much does container size matter for one seed?
It matters because it sets the ceiling for root volume and how long you can push vegetative growth. Going from 1 to 5 gallons often changes how stable moisture and feeding are, and that stability affects flower size later. The bigger the container, the more important it is to manage watering carefully so you do not drown roots early.
Should I aim for higher EC and PPFD to chase bigger yields, or can that backfire?
It can backfire. Overfeeding raises stress and can lock out nutrients, and pushing PPFD too high without matching plant health, temperature, and airflow can reduce performance. A safer approach is to start at a reasonable target, observe leaf response (color, clawing, tacoing), and then adjust gradually rather than jumping to the maximum values.
Is it worth running CO2 for one seed in a 2x2 or 3x3 tent?
Usually only if you already have strong control of temperature, ventilation, and lighting. CO2 enrichment increases potential yield, but it does not fix weak canopy coverage or poor flowering humidity management. If you do not already measure and manage canopy conditions, the added complexity often does not translate into reliable extra grams.
Does harvest timing affect grams or just potency?
Both. Picking too early can reduce mature flower density and final dry weight, while waiting too long can increase amber content and change the desired effect, sometimes also affecting overall structure. Use a loupe or microscope to target your trichome mix, and do not rely on calendar dates alone because different phenotypes mature at different speeds.
How do I prevent bud rot if humidity drops too slowly in late flower?
The practical move is to reduce humidity early enough that the plant has time to transition, especially mid-flower and the final two weeks. Also increase airflow around the canopy, do not let leaves stay wet, and remove any visibly compromised material immediately. Even if your average humidity looks fine, localized pockets inside dense buds are where rot forms.
Citations
UNODC’s “Recommended methods” document notes that yields from indoor- and outdoor-grown cannabis are highly variable (so minimum/average yield benchmarks are used rather than expecting a single predictable number).
UNODC – Recommended Methods for the Identification and Analysis of Cannabis and Cannabis Products - https://www.unodc.org/documents/scientific/Recommended_methods_for_the_Identification_and_Analysis_of_Cannabis_and_Cannabis_products.pdf
A widely cited benchmark for estimating indoor yield is “1 gram per watt” (dry yield efficiency); an academic review of plant photobiology for cannabis reports g/W varies by cultivar/setup, with reported yield data spanning roughly 0.9–1.6 g/W depending on lighting/cultivar.
An Update on Plant Photobiology and Implications for Cannabis Production (review) - https://pmc.ncbi.nlm.nih.gov/articles/PMC6455078/
Illustrative “home grow” per-plant yield figures commonly quoted by seed/cultivation sites include ~100–250 g per indoor plant under “ideal conditions” (and emphasis that space/light/grower skill matter).
PlanaCan – Cannabis Yields Per Plant - https://www.planacan.io/cannabis-yields-per-plant
Another yield-direction benchmark used in some beginner-facing guides: indoors average yields often fall in the “low hundreds of grams,” with a common community estimate of ~0.5–1.0 g per watt.
Weedth – Average Yield of a Cannabis Plant - https://weedth.com/average-yield-of-a-cannabis-plant/
Commercially marketed feminized seeds are commonly claimed to produce ~99% (or 99.9%) female plants; however, even those claims are “population average” style promises rather than a mathematical certainty for every single seed.
DSS Genetics – Feminized vs Regular Cannabis Seeds: Beginner's Guide - https://dssgenetics.com/blog/seeds/buying-seeds/feminized-vs-regular-cannabis-seeds-beginners-guide
Seed company/seed support pages often state regular seeds should be assumed ~50:50 female:male (so from “one seed,” the expected probability of a usable female is ~50%).
Sensi Seeds – What percentage of regular seeds will be female? - https://service.sensiseeds.com/hc/en-us/articles/360002349360-What-percentage-of-regular-seeds-will-be-female
Outdoor/indoor variability is emphasized by cultivation/industry resources, including how some sources give per-area maximums without CO2—e.g., ~1.25–1.75 oz/ft² (~13–18 oz/m²) cited as a maximum-ish yield proxy without supplemental CO₂, implying strong dependence on achieving full canopy/light matching.
Coco For Cannabis – Grow Tents and Harvest Sizes - https://www.cocoforcannabis.com/grow-tents-and-harvest-sizes/
Some “plant-count math” writeups link yield to light efficiency categories (beginner/intermediate/dialed-in) and illustrate that yield per plant changes drastically with correct canopy coverage relative to fixture wattage.
Green Avenue Seeds – Best Cannabis Seeds for 2×2, 3×3, and 4×4 Tents (Plant Counts & Yield Math) - https://www.greenavengerseeds.com/best-cannabis-seeds-for-2x2-3x3-and-4x4-tents-plant-counts-yield-math/
Root-zone oxygenation is repeatedly cited as a differentiator between media: coco’s porous structure is often described as improving oxygen availability vs waterlogged soil, which can support healthier roots and (with good feeding) higher performance.
Rx Green Technologies – Why Cannabis Plants Grow Better in Coco Coir - https://www.rxgreentechnologies.com/blog/why-cannabis-plants-grow-better-in-coco-coir/
Hydroponic systems (e.g., DWC) are described by seed/industry references as keeping roots in oxygenated nutrient solution, with faster vegetative growth than soil often claimed in beginner materials.
Royal King Seeds (Glossary) – DWC vs Coco - https://royalkingseeds.us/glossary/dwc-vs-coco
A stage-based VPD target reference for cannabis lists VPD stepping upward across growth stages (e.g., ~0.4 kPa around seedlings; up to ~1.6 kPa in late flower, with an associated temp/RH guidance table).
Azarius – VPD for Cannabis: Targets by Growth Stage - https://www.azarius.com/wiki/cultivation/cannabis/vpd-for-cannabis
Another lighting-science guidance source provides cannabis PPFD ranges by stage (seedlings/clones, veg, flowering) and explicitly ties PPFD/DLI to performance, recommending higher PPFD during flower than veg.
GrowPilot.guide – Calculate and apply PPFD correctly - https://growpilot.guide/seo/growing-guide/634-calculate-and-apply-ppfd-correctly
One grow-light coverage calculator reference gives cannabis-specific target PPFD ranges by stage (veg ~400–600 µmol/m²/s; flowering ~600–900 µmol/m²/s) and frames the need to hit DLI targets with correct intensity over 12/12 vs longer veg photoperiods.
HydroBuilder (Learn) – Grow Light Coverage Calculator - https://learn.hydrobuilder.com/grow-light-coverage-calculator/
A separate light measurement/education resource notes cannabis flowering (reproductive stage) commonly targets PPFD roughly ~600–1000 (and higher with CO₂), while vegetative can be lower (~250–600), reinforcing how much PPFD intensity change affects yield potential.
Overgrow (PDF) – H I G H P P F D (recommended PPFD ranges table) - https://overgrow.com/uploads/short-url/55vcFmDvOqxlVupYJGObgD3PQLX.pdf
Root-zone pH targets differ by medium in many cultivation references: roughly 6.2–6.8 for soil, 5.8–6.2 for coco coir, and 5.5–6.1 for hydroponics.
Azarius – Cannabis pH Targets Per Medium: Soil, Coco & Hydro - https://www.azarius.com/wiki/cultivation/cannabis/cannabis-ph-targets-per-medium
Many references also provide EC guidance by growth stage; for example, Toledo Indoor Garden’s nutrient management guide shows mid-late flower EC around ~1.8–2.4 (with stated conversion ranges), and pH in hydro/coco around ~5.5–6.5.
Toledo Indoor Garden – pH & EC Management Guide - https://toledoindoorgarden.com/guides/ph-ec-nutrient-management
Grow Weed Easy’s troubleshooting content notes overwatering risk—e.g., using too-large pots can cause overwatering because roots aren’t drinking yet; it also points to symptoms such as nutrient-like discoloration that can be caused by overwatering + pot size.
Grow Weed Easy – Common Cannabis Seedling Problems & Mistakes - https://www.growweedeasy.com/seedling-problems
For hermaphrodites/intersex risk, a cultivation guide (ILGM) describes stress-related causes including light issues (too much or too little), physical damage, and cold shocks as stressors that can contribute to mixed-sex expression.
ILGM – Why Cannabis Plants Turn Hermaphrodite and What to Do - https://ilgm.com/resources/guides/why-cannabis-plants-turn-hermaphrodite-and-what-to-do
Bud rot/mold prevention guidance from cannabis cultivation resources emphasizes humidity and airflow in late flower; one guide recommends stage-specific RH and calls out mid-to-late flowering as the most dangerous window for bud rot risk.
DSS Genetics – Cannabis Mold Prevention: Humidity & Airflow Guide - https://dssgenetics.com/blog/cannabis-mold-prevention-humidity-airflow-guide
Grow Weed Easy’s flowering nutrient/pH troubleshooting notes that low pH is a common pH problem and that overwatering can cause issues that look like nutrient deficiencies (important for interpreting symptoms).
Grow Weed Easy – How to Stop Flowering Stage Nutrient Deficiencies - https://www.growweedeasy.com/what-causes-flowering-stage-nutrient-deficiencies
Beginner yield estimation often uses “grams per watt” and explains the arithmetic of g/W (e.g., total grams harvested divided by total light watts), including a “1 gram per watt” heuristic widely used in planning.
Cannabiz Credit Association – Cannabis Yield Calculator - https://www.cannabizcredit.com/blog/cannabis-yield-calculator
Some yield planning calculators provide a space-based conversion: they cite indoor LED harvest rates roughly ~0.5–1.0 oz/ft² (and higher for HPS) to support turning a tent’s square footage into estimated dry weight.
Royal King Seeds USA – Cannabis Yield Calculator (Watts/Area to yield) - https://royalkingseeds.us/yield-calculator
Next Article
How to Grow One Weed Plant: Beginner Step-by-Step
Step-by-step guide to grow one cannabis plant: setup, germination, light, feeding, troubleshooting, harvest and curing.