Growing one cannabis plant is genuinely manageable, even if you've never grown anything before. You pick a setup (indoor, outdoor, or hydroponic), germinate your seed, run about 4–8 weeks of vegetative growth under 18 hours of light, flip to 12/12 to trigger flowering, feed appropriately for your medium, and harvest when trichomes are mostly milky with a touch of amber. If you want the simplest, one-seed approach, focus on getting germination right and choosing a beginner-friendly setup and schedule how to grow weed with one seed. The whole process from seed to cured bud typically takes 3–5 months depending on strain. This guide walks you through every step in order.
How to Grow 1 Weed Plant: Beginner Step-by-Step Guide

Marcus Holbrook
17 May 2026
Check the law before you grow anything
Home cultivation laws vary enormously depending on where you live, so check your local rules before you buy a seed. In Canada, federal law under the Cannabis Act allows adults to grow up to 4 plants per household (not per person), though some provinces have added their own restrictions. It also helps to understand how plant count and seed growth potential affect what you can harvest from a single seed grow up to 4 plants per household.
In Germany, adults who have resided in the country for at least 6 months can cultivate up to 3 plants simultaneously at their home for personal use under the Cannabis Act (KCanG). [In Ohio, adults can cultivate at their primary residence as long as plants are kept in a secured, locked, enclosed area that prevents access by minors and is not visible from public areas.
](https://codes. ohio. gov/ohio-revised-code/section-3796. 04) Many US states allow 2–6 plants per household, while others still prohibit home growing entirely.
The common threads across most legal frameworks: grow in a secured, private space, keep plants away from children and pets, and store your harvest in a locked container. Health Canada specifically recommends a strong childproof lock and advises taking steps so that others don't know you're growing. Good security isn't just a legal requirement in many places, it's practical protection for you and everyone in your home. Growing one plant is well within legal limits almost everywhere home cultivation is allowed, and it keeps your operation simple, quiet, and easy to manage.
Pick your setup: indoor, outdoor, or hydroponic
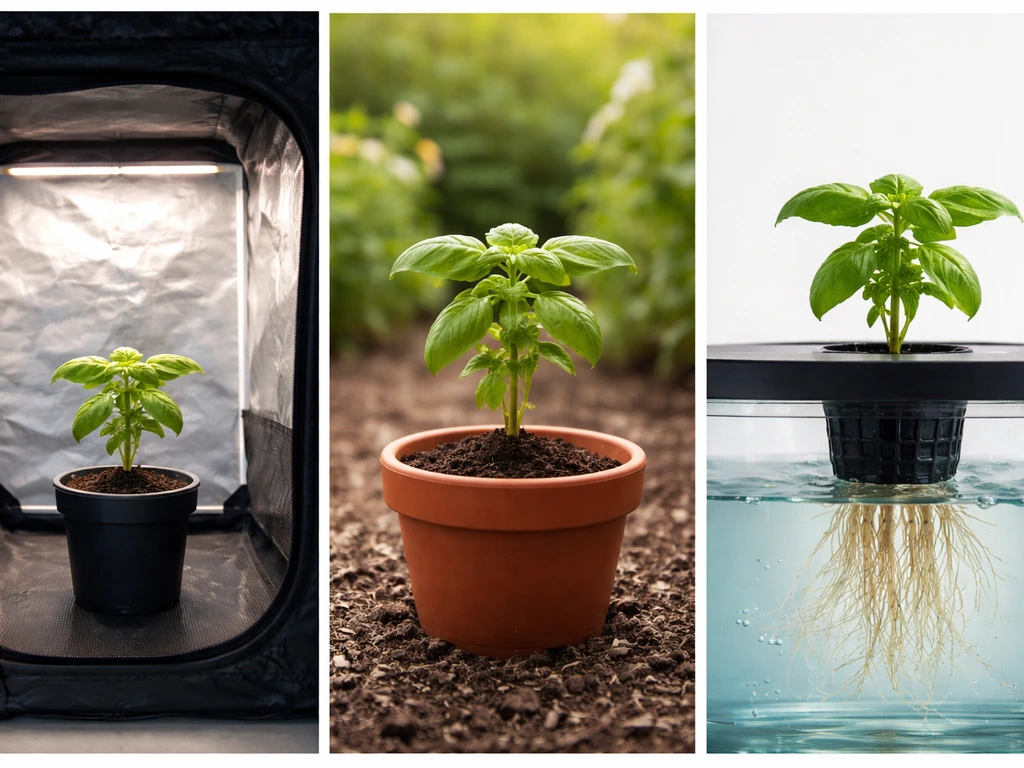
One of the first decisions you'll make is where and how to grow. Each method has real advantages and tradeoffs, and none of them is the "best" option for everyone. It depends on your space, budget, and how much time you want to spend.
Indoor growing
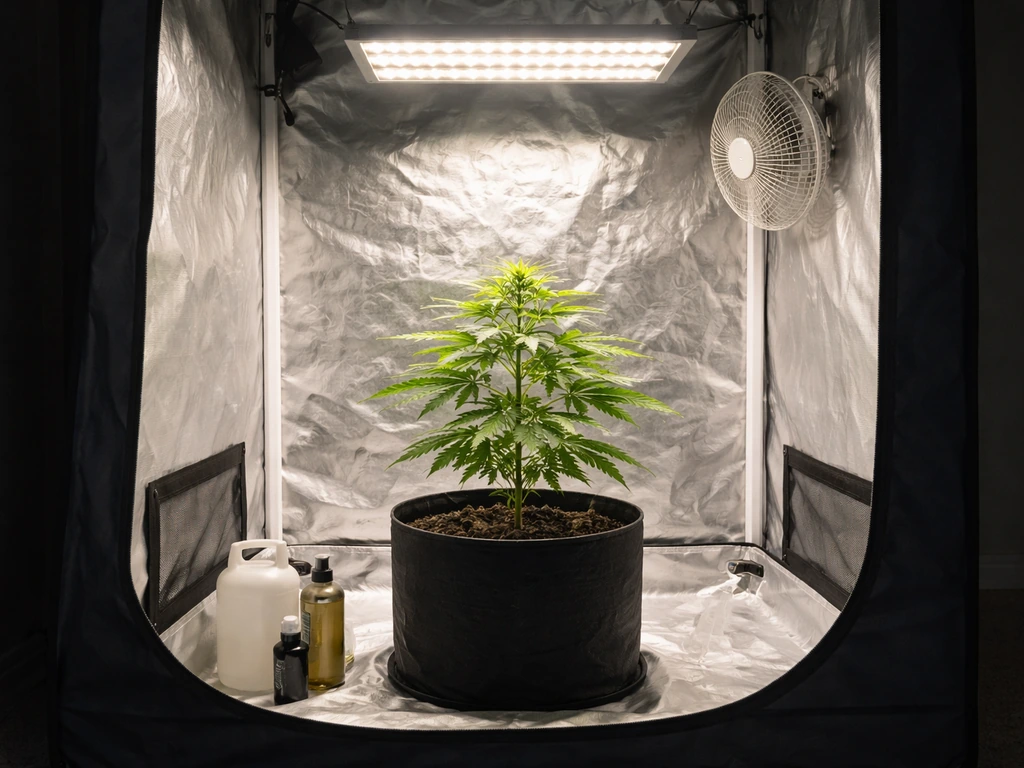
Indoor growing gives you complete control over light, temperature, and humidity, which means you can grow year-round and dial in your environment precisely. For a single plant, you don't need much: a 2x2 or 2x4 foot grow tent, a small LED light (200–300W actual draw is plenty for one plant), a small fan, and basic ventilation. You'll run an 18/6 light schedule during veg and switch to 12/12 to trigger flowering. Indoor grows typically take 3–5 months total, and a well-managed single plant in a 2x2 tent can yield 1–3 ounces depending on strain, training, and light quality.
Outdoor growing
Outdoor growing is the lowest-cost option by a wide margin. You're using free sunlight, and the plant has room to grow naturally large. The trade-off is that you're working with your local climate and seasonal light cycle, so flowering is triggered naturally as days shorten in late summer. In most temperate climates, you'd start seeds indoors in March or April and transplant outside after your last frost.
A single outdoor plant with a full season can produce significantly more than an indoor plant, sometimes several ounces to over a pound, but it's also exposed to pests, weather, and prying eyes. If your goal is how to grow 1 pound per plant, focus on dialing in genetics, environment, and training so the plant can reach its full potential. A greenhouse or secured enclosure helps with all three.
Hydroponic growing
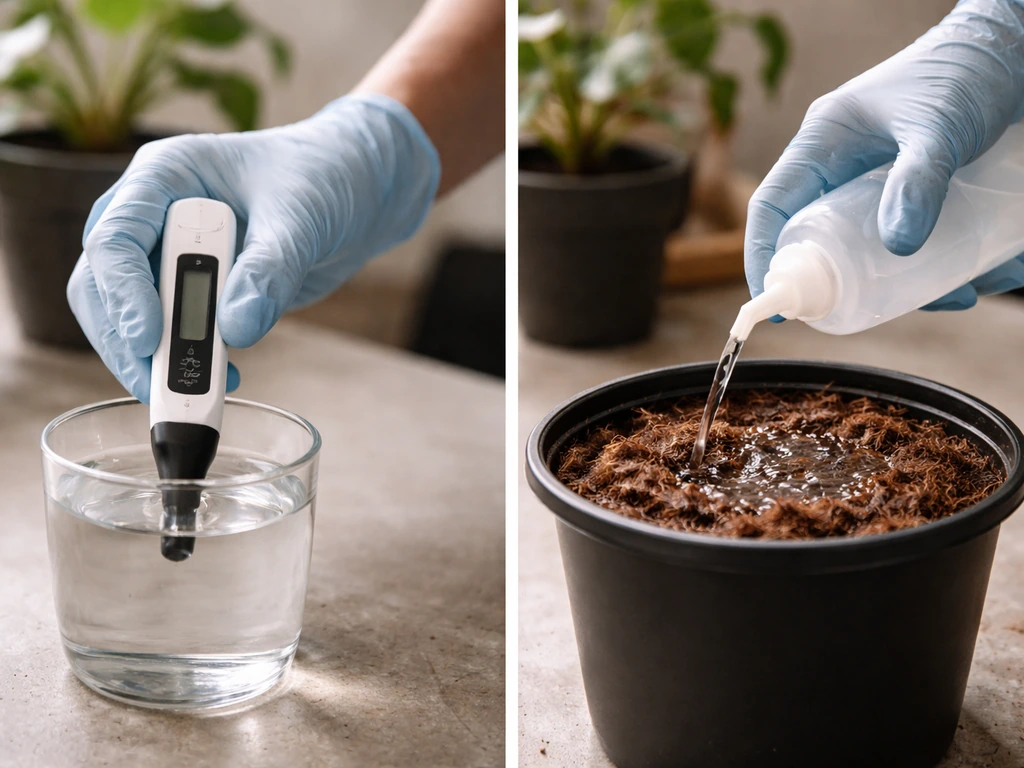
Hydroponics means growing without soil, feeding your plant a nutrient solution directly to the roots. Systems like Deep Water Culture (DWC), where roots hang in oxygenated water, or simple drip setups work well for a single plant and can produce faster growth and bigger yields than soil. The catch is that there's less margin for error: pH and nutrient concentration need to be monitored regularly, and root health depends on things like dissolved oxygen. For a single hydroponic plant, target a nutrient solution pH of 5.8–6.2 and an EC of roughly 0.8–2.4 mS/cm depending on growth stage. It's a great method, but if you're a complete beginner, starting in soil or coco is often easier.
| Setup | Cost to Start | Yield Potential | Difficulty | Best For |
|---|---|---|---|---|
| Indoor (soil/tent) | Medium ($150–400) | 1–3 oz per plant | Beginner-friendly | Year-round, full control |
| Outdoor (ground/pot) | Low ($20–80) | 3 oz to 1+ lb | Easy (weather-dependent) | Warm climates, budget grows |
| Hydroponic (DWC/drip) | Medium-High ($200–500) | 2–5+ oz per plant | Intermediate | Speed, efficiency, max yield |
Picking your strain and getting germination right
For a single plant, strain choice matters more than most beginners realize. If you're growing indoors with limited vertical space, a compact indica-dominant or autoflowering strain will stay manageable without aggressive training. Autoflowering strains are worth serious consideration for first-timers: they switch from veg to flower automatically based on age rather than light cycle, typically finishing in 7–13 weeks from seed, and they stay small by nature. Photoperiod strains give you more control over timing and usually yield more per plant, but require the light schedule change to trigger flowering.
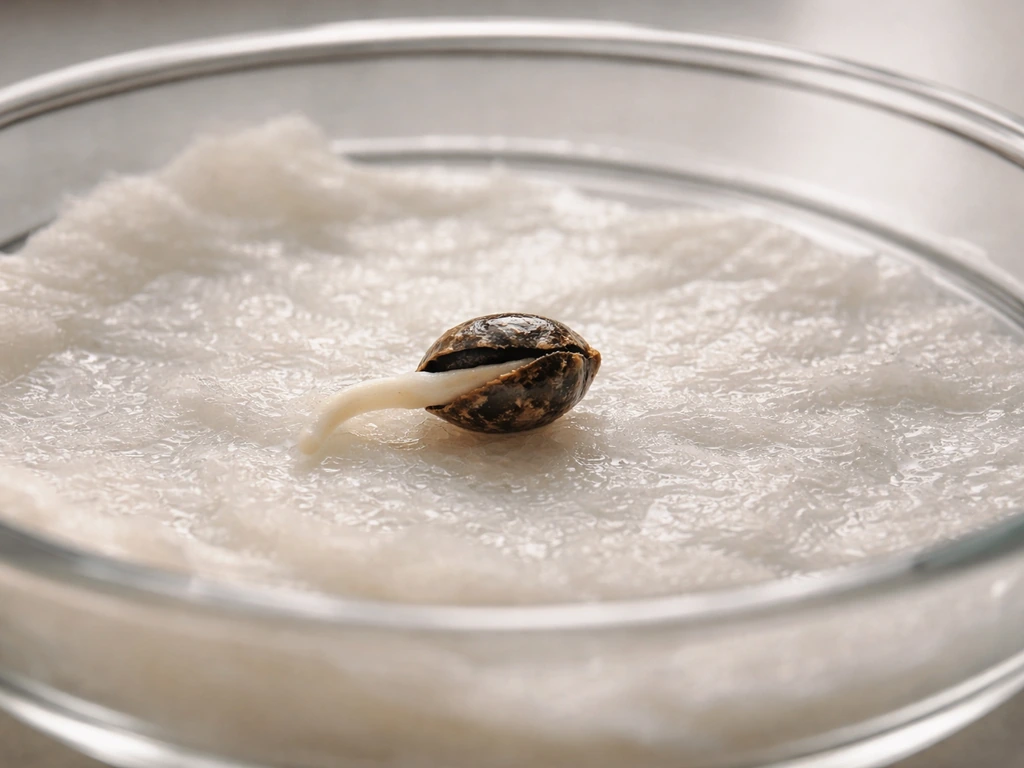
To germinate, the paper towel method is simple and reliable: place your seed between two damp (not soaking) paper towels on a plate, cover with another plate to retain moisture, and keep it in a warm spot around 70–80°F. Most seeds crack open and show a taproot within 24–72 hours. Once the taproot is about half an inch long, plant it root-down in your medium about a quarter to half an inch deep. If you're starting in soil, use a small seedling cup or 1-gallon pot first, then transplant later.
The biggest seedling killer in my experience is damping-off, a fungal problem caused by water molds like Pythium that thrives in cool, overly wet conditions. Prevention is straightforward: use a sterile seed-starting mix, avoid overwatering, and remove any humidity dome as soon as the seed sprouts. Once that seedling is up, err on the side of letting the top layer of medium dry out slightly between waterings.
Vegetative growth: light, schedule, training, and topping
The vegetative stage is where your plant builds the structure it'll use to support buds later. For photoperiod strains indoors, run an 18-hours-on, 6-hours-off light schedule. Seedlings and young plants do well with lower light intensity: target a PPFD of roughly 200–400 micromoles per square meter per second in the seedling stage, stepping up to 400–600 during active veg. Keep your light at the manufacturer-recommended hanging height to avoid light stress and heat damage at the canopy.
Temperature during veg should stay between 70–85°F with relative humidity around 50–70%. VPD (vapor pressure deficit) is a useful combined measure of temperature and humidity that tells you how much evaporative stress your plant is under. Beginners don't need to obsess over VPD numbers right away, but keeping temps and humidity in those ranges puts you in a good zone naturally.
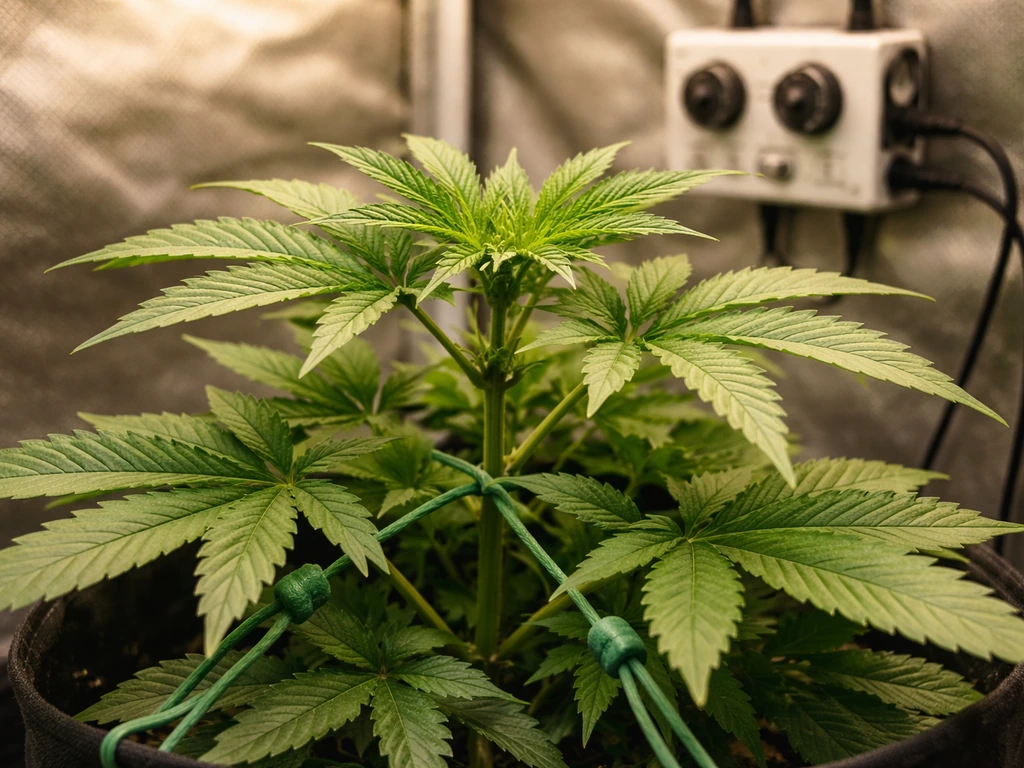
Since you're growing one plant, training is your best tool for maximizing yield in a limited space. Low-stress training (LST) is the gentlest approach: you gently bend the main stem and secure it horizontally using soft ties or pipe cleaners, which encourages the plant to grow outward and develop multiple tops instead of one. Topping is more aggressive but very effective: you cut the main growing tip cleanly just above a node, which causes the plant to split into two main colas. The ideal time to top is when the plant has just developed its 5th or 6th node and is growing vigorously. Don't top a stressed plant, one that's been recently transplanted, or one showing nutrient deficiency signs.
For a single plant in a 2x2 or 2x4 tent, a combination of topping once early and then LST-ing the resulting branches into a flat, even canopy is a very effective approach. You're essentially spreading the plant wide rather than letting it go tall, which makes better use of your light and can significantly increase your final yield. Growing one plant well and maximizing it with training is a different challenge than growing multiple plants, and it's a satisfying one.
Flowering: triggering it, managing bud development, and what to expect
For photoperiod cannabis, flowering is triggered by reducing the daily light period to 12 hours on, 12 hours off. Outdoors, this happens naturally as summer days shorten past a threshold in late summer (typically around the fall equinox depending on latitude). Indoors, you control the flip: when your plant has the structure you want, typically after 4–8 weeks of veg, switch your timer to 12/12. Within 1–2 weeks you'll see white hairs (pistils) appearing at bud sites, confirming the plant has entered flower.
Autoflowering strains skip this entirely. They begin flowering on their own schedule regardless of light hours, which makes them simpler to manage but means you have less control over how big the plant gets before it starts making buds. You can still do gentle LST with autos, but avoid heavy training like topping unless the plant is young and growing very fast, since autos don't have much recovery time.
During flower, raise PPFD to the 600–900+ range if your light can deliver it. Humidity should come down to 40–50% to reduce mold risk, especially as buds fatten up in the last few weeks. Temperature can drop slightly: 65–80°F is a good target. Flowering typically lasts 8–12 weeks for most photoperiod strains. Your light bill goes up slightly since you're running 12 hours instead of 18, but the plant's energy now goes entirely into bud production. Stop heavy training once flowering starts to avoid overstressing the plant.
Realistic yield expectations for a single indoor photoperiod plant in a 2x2 tent with basic training: 1–3 dry ounces is achievable for most beginners. With dialed-in lights, proper training, and a full veg period, you can push that toward 3–5 ounces. Outdoor plants have far more potential given full sun and a long season. If pushing maximum yield from a single plant is your main goal, that's a deeper topic worth exploring separately.
Nutrients and watering for your medium
How you water and feed your plant depends almost entirely on what it's growing in. Soil, coco coir, and hydroponics each have different behaviors and needs.
Soil
Soil is the most forgiving medium for beginners. A high-quality cannabis-specific potting mix (often called "super soil" or "living soil") comes pre-loaded with nutrients that can feed your plant for the first 4–6 weeks with little or no added fertilizer. Aim for a soil pH between 6.0 and 7.0 for optimal nutrient availability. Water when the top inch or two of soil is dry, and always water to runoff (about 10–20% of the pot volume draining out the bottom) to prevent salt buildup. In veg, a basic nitrogen-forward fertilizer works well. In flower, shift to phosphorus and potassium-heavy nutrients. Start at half the recommended dose and adjust based on how the plant responds.
Coco coir
Coco coir is a coconut fiber-based medium that behaves somewhere between soil and hydroponics. It has almost no native nutrients, so you feed every watering from early on. Coco has less buffering capacity than soil, so pH control matters more: target your nutrient solution at 5.8–6.3 when watering into coco. Most experienced coco growers water daily or even twice daily in the late veg and flower stages, keeping the medium consistently moist rather than letting it dry out. Coco can produce faster growth than soil and is still relatively forgiving if you stay on top of pH.
Hydroponics
In a hydroponic system, your plant roots sit directly in or are regularly bathed by a nutrient solution. pH should stay in the 5.8–6.2 range, and EC (electrical conductivity, a measure of nutrient concentration) typically runs from about 0.8 mS/cm for seedlings up to 2.0–2.4 mS/cm in peak flower. Check pH and EC daily, especially in a DWC (Deep Water Culture) setup where conditions can shift quickly. Dissolved oxygen is also critical in DWC: keep an air stone running constantly and make sure your reservoir temp stays below 70°F to reduce the risk of root rot. Hydro rewards attention, and if you keep up with the monitoring, it's one of the most efficient ways to grow a single plant.
Troubleshooting common problems
Almost every beginner runs into at least one of these issues. The good news is that cannabis is resilient, and most problems caught early are fixable.
Overwatering and root problems
Overwatering is the number one beginner mistake. Drooping leaves that look heavy and waterlogged (rather than limp and thin) usually point to overwatering. Let your medium dry out more between waterings. In soil, pick the pot up: if it feels light, it's time to water. In hydro, root rot shows up as brown, slimy roots and a foul smell. Fix it by adding beneficial bacteria, replacing some of the reservoir water, and reducing temperature.
Nutrient deficiencies and toxicity
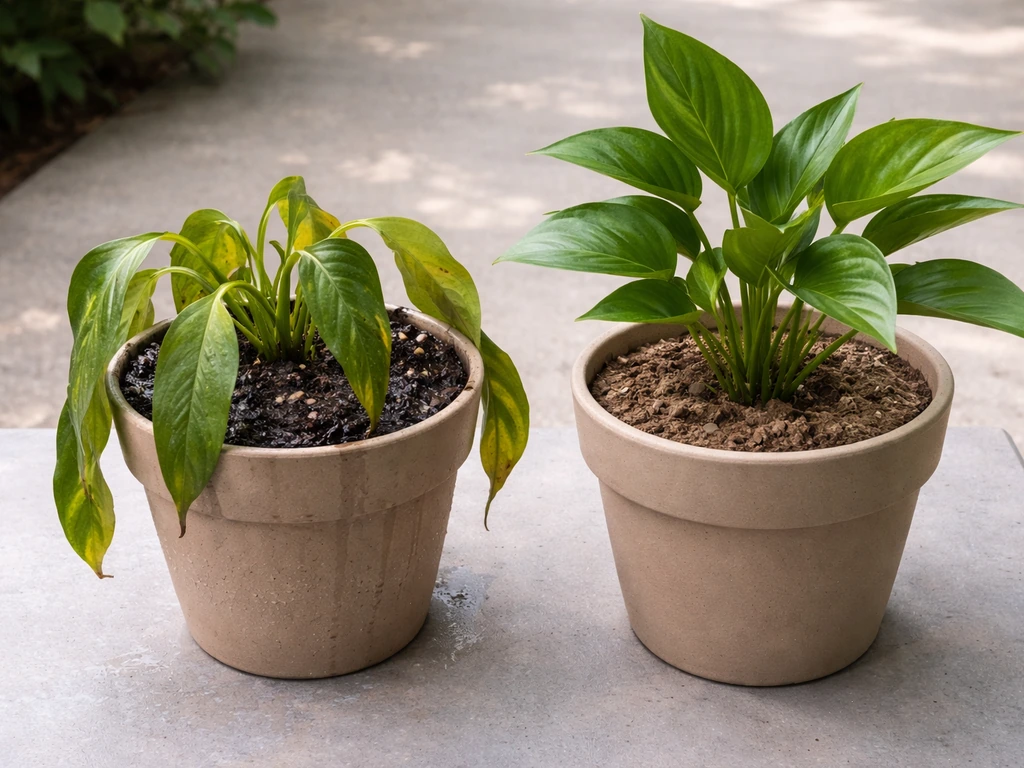
Yellowing lower leaves during late flower is normal, but yellowing that spreads upward quickly during veg usually signals a nitrogen deficiency. Burnt, crispy leaf tips are more often a sign of nutrient excess (nutrient burn), especially if you've been feeding at full recommended doses. Back off the nutrients, flush with plain pH-adjusted water, and restart at half strength. Many apparent deficiencies in soil are actually pH problems: if your medium is outside the optimal pH range, the plant can't absorb nutrients even if they're present.
Light stress and heat
If leaves near the top of your plant look bleached, tacoed (curling up), or crispy at the tips while lower leaves look fine, your light is probably too close or too intense. Move it up a few inches. Canopy temps above 85°F can slow growth and stress the plant. A small oscillating fan improves both temperature and air circulation, which also reduces mold risk.
Pests and mold

Spider mites, fungus gnats, and aphids are the most common pest problems for indoor growers. Spider mites leave tiny stippled dots on leaves and fine webbing. Fungus gnats usually indicate overwatering, as their larvae thrive in moist topsoil. Yellow sticky traps help monitor for both. Powdery mildew appears as white, powdery spots on leaves and thrives in high humidity and poor airflow. Keeping humidity below 50% in flower and running a fan are your best defenses. Bud rot (botrytis) is more serious and usually appears as gray, fuzzy growth inside dense buds during high-humidity conditions. Remove affected material immediately and improve airflow.
Knowing when to harvest
The most reliable harvest signal is trichome color. Get a jeweler's loupe (30–60x) or a small digital microscope and look at the trichomes on your buds. Clear trichomes mean too early. Milky white (cloudy) trichomes indicate peak THC. Amber trichomes signal THC is degrading into CBN, which produces a more sedating effect. For most balanced harvests, aim for roughly 80–90% milky trichomes with about 5–15% amber. Some growers prefer all milky for a more energetic effect; others wait for more amber for body-heavy results. The pistils (hairs) give a rough signal too: when 70–90% have darkened and curled in, you're getting close, but trichomes are the real tell.
Harvesting, drying, curing, and storing your single plant
Harvest day is satisfying, but what you do after cutting the plant down determines whether your bud smokes smooth and smells great or comes out harsh and grassy. Don't rush this part.
Harvesting
Cut the plant at the base or harvest individual branches. Trim away the large fan leaves immediately (wet trimming). Some growers prefer to dry the whole plant first and trim afterward (dry trimming), which tends to preserve more terpenes but takes up more hanging space. For a single plant, either approach works. Use clean, sharp scissors and work in a clean space.
Drying
Hang your branches upside down in a dark space with good airflow, a temperature of 60–70°F, and relative humidity between 55–60%. A small fan circulating air in the room (not blowing directly on buds) helps prevent mold without overdrying. Drying typically takes 7–10 days. You'll know the buds are ready when smaller stems snap cleanly instead of bending without breaking. Don't rush drying by cranking up heat, it preserves far more aroma and smoothness if you slow-dry in those conditions.
Curing
Once dry, trim any remaining sugar leaves and place buds loosely in wide-mouth glass mason jars. Fill jars to about 70–75% full so there's some air. For the first week, open the jars once or twice a day for about 15 minutes to let moisture escape and fresh air in, a process called "burping. " Keep jars in a dark, cool location and aim for an RH inside the jar of 58–62%.
Humidity packs (like Boveda 62%) are excellent for maintaining this range passively, especially for smaller batches from a single plant. After 2 weeks the taste improves noticeably; after 4–6 weeks most strains reach their best quality. Curing can't fix an early harvest, but it makes properly timed buds significantly smoother and more flavorful.
Storage
For a small single-plant harvest, proper jar storage at 58–62% RH in a cool, dark location keeps bud fresh for 6–12 months. Keep jars away from light and heat, both degrade cannabinoids and terpenes. As required by law in most jurisdictions with home grow rules, store in a locked container that's out of reach of children and pets. A simple lockbox or locked drawer works fine for a small stash.
Your next steps from here
Growing one plant from seed to harvest is a complete education in cannabis cultivation. You'll understand light cycles, how roots work, what nutrient deficiency actually looks like, and how to read your plant's signals. That knowledge carries forward to every grow after this one. If you're starting from a single seed, the early germination and seedling process deserves careful attention since that's where most beginners lose their plant before it ever gets going.
As you get more comfortable with one plant, you'll naturally start thinking about strain selection more strategically, whether to keep a mother plant for clones, or how to push yield further with more advanced training. If you want to take things further, learning how to grow a mother plant weed can help you produce consistent clones for future harvests.
Each of those is its own deep topic, but none of it is out of reach once you've completed your first successful grow. If you want to keep producing from cuttings, learning how to grow a good mother plant is the next step after your first successful cycle.
FAQ
How long should germination take when I’m trying to grow 1 weed plant from seed?
If your seed does not sprout after 72 hours, confirm it is still viable by checking for a firm, intact seed with no mold smell. Keep it warm (around 70 to 80°F), damp but not soaking, and give it a bit more time. If nothing cracks by about 5 to 7 days, it is usually not viable and it is better to start another seed than keep it in wet paper towels.
Can I grow multiple harvests from the same 1-plant setup, or do rules treat each grow differently?
Yes, unless the law where you live specifies otherwise, you can generally harvest one plant and keep reusing the plant count for future grows. Legally, many places restrict the number of plants at any time, not the number of harvests you do. Still, rules can differ on possession and plant counts per household versus per person, so re-check your local limits before planning multiple runs.
If I follow the light schedule, do I still need to manage temperature and humidity for 1 plant?
For the easiest control in a tent, aim for temperature and humidity targets, not just a “timer” schedule. A practical approach is to keep veg around 70 to 85°F and roughly 50 to 70% RH, then in flower reduce humidity to about 40 to 50% RH. If you only change the light cycle but ignore humidity, mold risk in dense buds can rise quickly.
When should I start LST or topping on a single plant, and when should I wait?
Deciding where to start training depends on how stable your seedling is. For photoperiod plants, LST is safest once the plant is actively growing and has enough flexibility, and topping is typically timed around when the plant has 5th or 6th node (and is not stressed). If you transplant recently or notice deficiency signs, delay training so you do not slow recovery and stunt the canopy.
What’s the most common feeding mistake when growing just one plant, and how should I avoid it?
If you are growing in soil, do not follow a strict “feed every week” plan. Use a half-dose approach early, then adjust based on leaf color and growth rate. For coco, remember you usually feed every watering since coco has little nutrient buffering, so letting coco go too dry or too long between feedings can create swings that look like deficiencies.
How do I tell the difference between overwatering and underwatering on a single-plant grow?
Overwatering often looks like the plant is thirsty, but the pot feels heavy. A good rule for soil is to water only when the top inch or two is dry, and water to runoff so salts can flush through. For hydro and DWC, the “fix” is different, because you must address root-zone conditions like dissolved oxygen, reservoir temperature, and whether pH is drifting.
My leaves look stressed, how can I quickly troubleshoot whether it’s light intensity or nutrient issues?
If your light is too close or too intense, you will often see tip burn or a clawing/tacoing shape on newer leaves, and canopy heat can spike. Measure canopy temperature if possible, and raise the light a few inches, then re-check leaf response over 2 to 3 days. In small tents, a tiny adjustment matters because heat and light intensity concentrate quickly.
What happens if I accidentally interrupt the dark period during the 12/12 flowering flip?
Yes, but do it deliberately. If you miss your 12/12 flip timing for photoperiod strains, flowering can be delayed because the plant needs a consistent dark period to interpret the day length. Give the correct 12 hours on and 12 hours off, avoid interruptions during the dark cycle, and expect to see pistils after about 1 to 2 weeks if the flip was consistent.
Should I wet-trim or dry-trim when I’m growing 1 plant, and how do I choose?
For a beginner single-plant grow, the simplest workflow is wet trimming if you want it faster, dry trimming if you want to preserve maximum terpene aroma. Wet trimming reduces hanging-space needs, dry trimming often keeps more smell on the bud. If you try dry trimming, plan your drying space ahead of time because you need room to hang the full plant or branches.
How do I know when to start curing, and what should I do if my jar RH is too high?
If buds feel “dry” on the outside but smaller stems do not snap yet, curing will not start properly and the plant can hold excess moisture. For beginners, use the small-stem snap test after drying, then jar at about 70 to 75% full. If jar humidity climbs above the target (around 58 to 62% RH), increase burping frequency briefly, but do not leave jars open long enough to overdry.
If different parts of the plant mature at different times, should I harvest all at once?
Yes, and it can happen fast in dense flowers. Use a jeweler’s loupe to check multiple bud sites, especially the main cola and a couple of surrounding tops. Trichomes can mature at slightly different rates, so if only one section is amber while others are milky, you may need a compromise harvest window or careful section timing.
What’s the best way to manage odor for a single indoor plant during grow and drying?
For one plant, the biggest odor-control win is managing airflow and filtration from early veg through drying. During drying, keep the room dark and ventilated, but do not rely only on a fan, add filtration if smell is an issue. Also, avoid overdrying, since very dry buds can lose aroma quickly even if the cure later is correct.
Next Article
How to Grow Weed With One Seed: Step-by-Step Guide
Step-by-step how to grow weed from one seed to harvest, with germination, indoor setup, care, training, troubleshooting