You can grow one cannabis plant successfully from seed to harvest in roughly 3 to 5 months, depending on strain and method, with a basic setup that costs less than $200 indoors or almost nothing outdoors. The key is keeping things simple: one plant, one container, consistent light and water, and a little attention every day. This guide walks you through every stage, with real targets and a checklist at the end so you know exactly what to do this week.
How to Grow One Weed Plant: Beginner Step-by-Step

Marcus Holbrook
18 May 2026
Check the law first, then pick the right strain
Before you buy a seed, spend ten minutes confirming what your jurisdiction actually allows. Laws vary wildly by state, county, and even city. California and New York both allow adults 21 and older to grow up to 6 plants at home for personal use, but local municipalities in both states can layer on additional rules, like requiring indoor-only grows or permits. New York specifically limits home cultivation to a single site and caps households at 12 plants total (6 mature, 6 immature). If your city has banned home cultivation outright, you need to know that before you start. Grow legally, grow confidently.
Once you know you're in the clear, the strain decision matters more when you only have one plant because there's no backup. For beginners growing a single plant, an autoflowering strain is almost always the right call. Autos flower based on age rather than light schedule, so you don't need to worry about triggering flowering manually or protecting a dark period from light leaks. They stay compact (typically 2 to 4 feet tall), finish in 70 to 90 days from seed, and are more forgiving of beginner mistakes. Popular beginner autos include Northern Lights Auto, Blue Dream Auto, and Gorilla Glue Auto.
If you want to go with a photoperiod strain (the kind that requires a manual light-schedule switch to flower), choose a feminized seed. Regular seeds have a 50% chance of being male, and a male plant won't produce the buds you're after. With just one plant, getting a male means starting over. Feminized photoperiod strains give you control over plant size by letting you veg as long as you want before flipping to flower, which is useful if you're optimizing for yield from a single plant.
Indoor, outdoor, or simple hydro: pick your grow method
Growing one plant is genuinely flexible. You're not committing to a full tent build or a massive outdoor plot. Here's how each option looks at single-plant scale.
Indoor growing
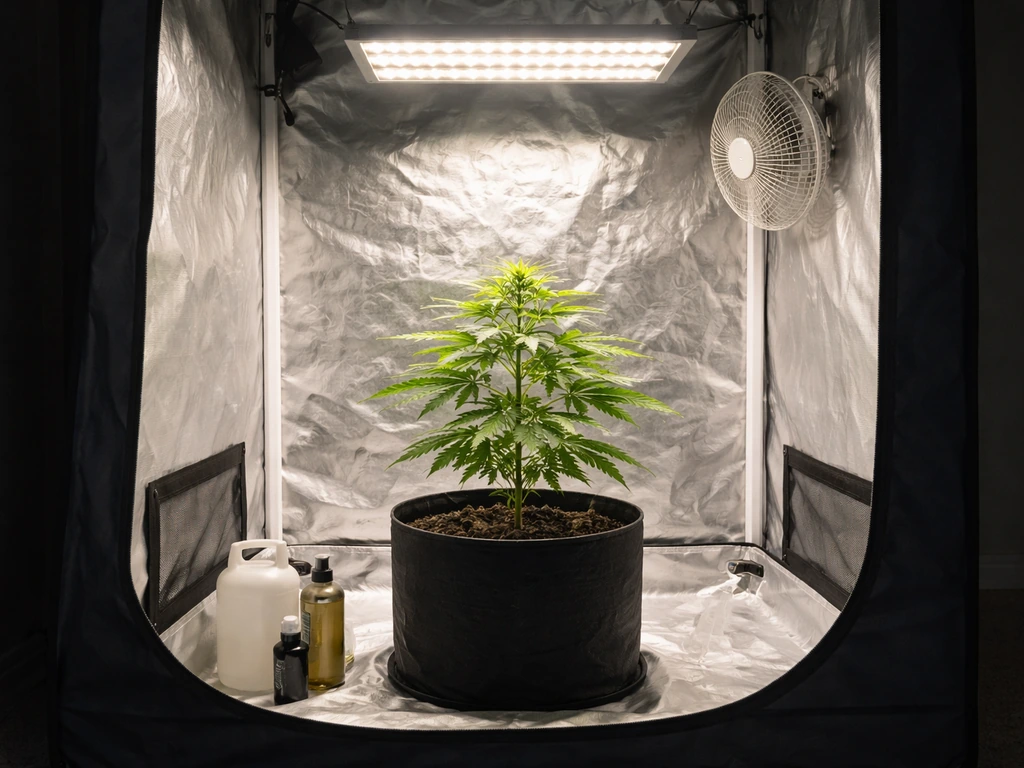
A small grow tent (2x2 feet is plenty for one plant) with a 100 to 200-watt LED panel is the most controllable setup. You manage the light, temperature, and humidity completely, which means you can grow year-round and dial in your environment. Expect to spend $100 to $200 getting started. You'll need the tent, a light, a small fan, a basic timer, and a carbon filter if odor matters. This is the most popular route for first-time single-plant growers because it's private, controllable, and consistent.
Outdoor growing
If you have a sunny backyard, balcony, or patio and you're in a legal jurisdiction, outdoor growing is the cheapest option. A single plant in a large container (15 to 25 gallons) placed in a spot that gets 6 or more hours of direct sunlight daily can produce impressive yields with almost zero equipment cost. Photoperiod plants outdoors follow the natural seasons, flowering automatically as days shorten in late summer. The tradeoff is less control over pests, weather, and nosy neighbors.
Simple hydro setup
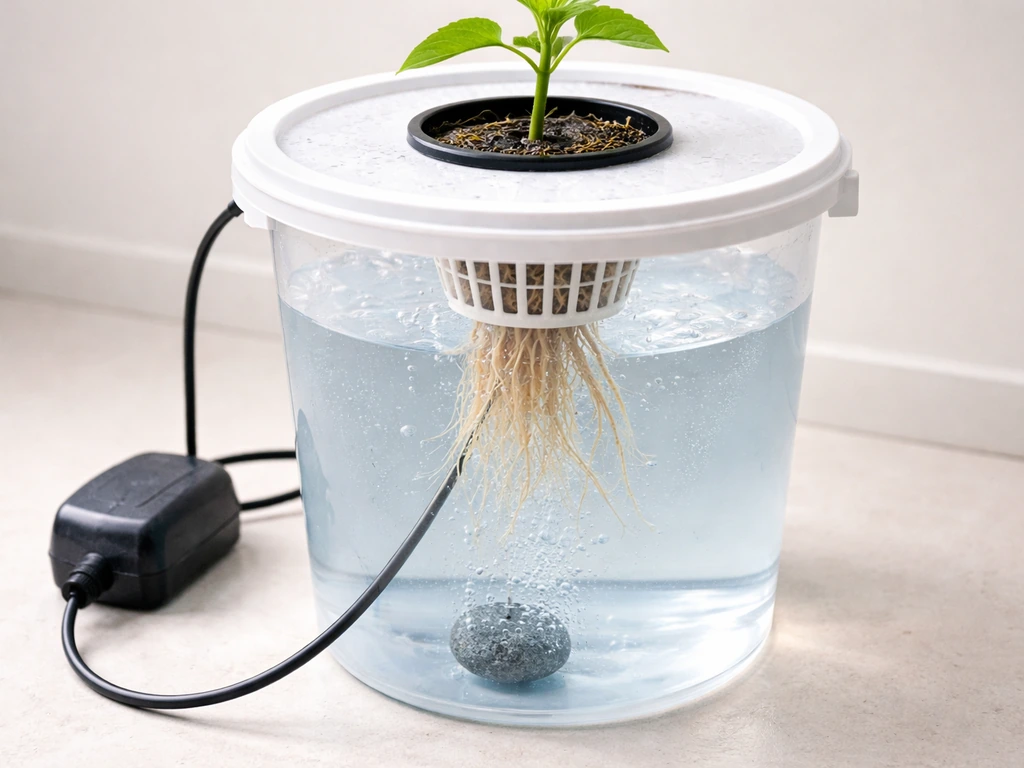
A single-bucket deep water culture (DWC) system is the simplest hydro option for one plant. You suspend the plant's roots in an oxygenated nutrient solution using a small air pump and air stone. Plants in DWC typically grow faster than in soil because the roots access nutrients directly. The setup costs $30 to $60 for a basic single-bucket kit. The learning curve involves managing pH (target 5.5 to 6.5 for hydro) and nutrient concentration (measured in EC or PPM), which adds a little complexity but becomes routine quickly.
| Method | Cost to Start | Difficulty | Control | Best For |
|---|---|---|---|---|
| Indoor tent + LED | $100–$200 | Beginner-friendly | High | Year-round, private grows |
| Outdoor container | Under $30 | Easiest | Low | Warm climates, budget growers |
| DWC hydro (single bucket) | $30–$60 (+ light if indoor) | Moderate | High | Fast growth, experienced beginners |
Germination and getting your seedling started
The most reliable germination method for one seed is the paper towel method. Dampen (not soaking wet) two paper towels, place your seed between them, fold them over, and set the whole thing on a plate inside a dark, warm spot like the top of a refrigerator or inside a cabinet near a heat source. You're aiming for 70 to 85°F (21 to 29°C). Most seeds crack and show a taproot within 24 to 72 hours. If your seed is stubborn, a 12 to 18 hour presoak in room-temperature water before the paper towel step can help.
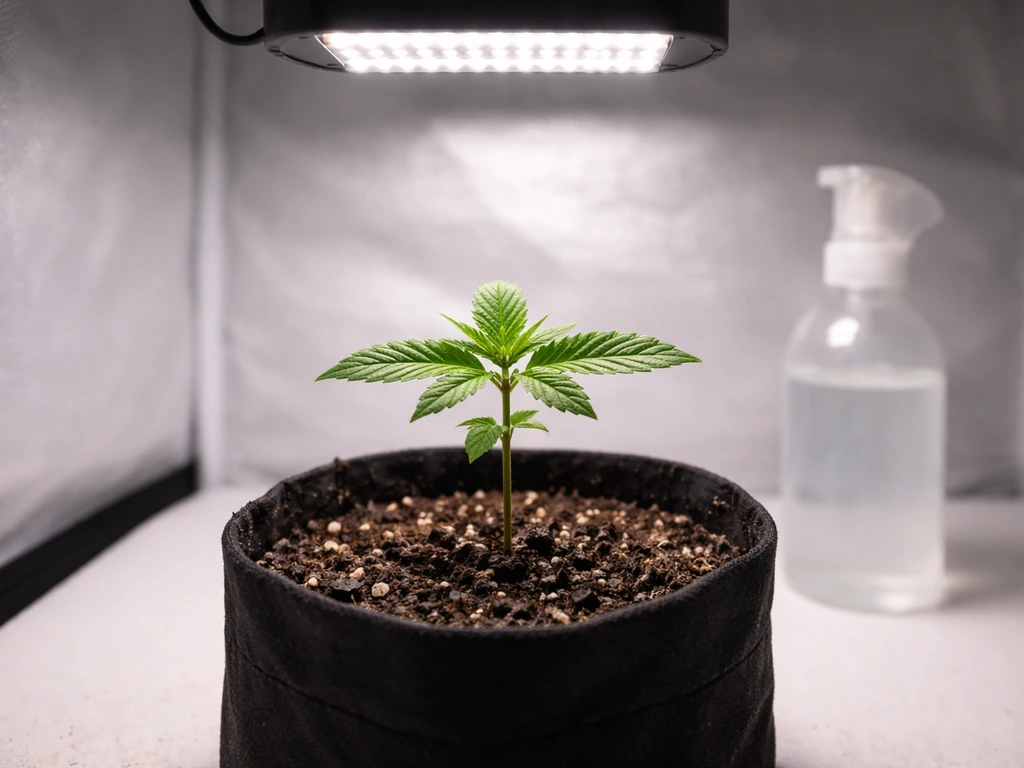
Once the taproot is about a quarter to half an inch long, it's time to plant. Handle the seed gently with tweezers and place it root-down about half an inch to one inch deep (1. Grow Weed Easy recommends planting germinated seeds with an emerged root only about 1/2 to 1 inch deep and warning that letting them dry out after the shell cracks can kill the seedling only about 1/2 to 1 inch (1.3–2.5 cm) deep. 3 to 2.5 cm) in a small starter container, like a solo cup, filled with lightly moistened soil or coco coir. The biggest mistake at this stage is letting the growing medium dry out completely before the seedling breaks the surface. Keep it consistently moist but never waterlogged. You should see the seedling emerge in 1 to 3 days after planting.
Start in a small container (solo cup or similar) rather than transplanting directly into a large final pot. Small containers allow the root zone to get established and dry out at the right rate. Once the plant has 3 to 4 sets of true leaves and roots start circling the bottom of the cup (usually 2 to 3 weeks in), transplant into your final container. For a single plant grown in soil, a 3 to 7 gallon pot is a good range for autos; photoperiod plants benefit from 5 to 10 gallons if you plan to veg them longer. Transplanting stresses the plant, so do it gently and water lightly right after.
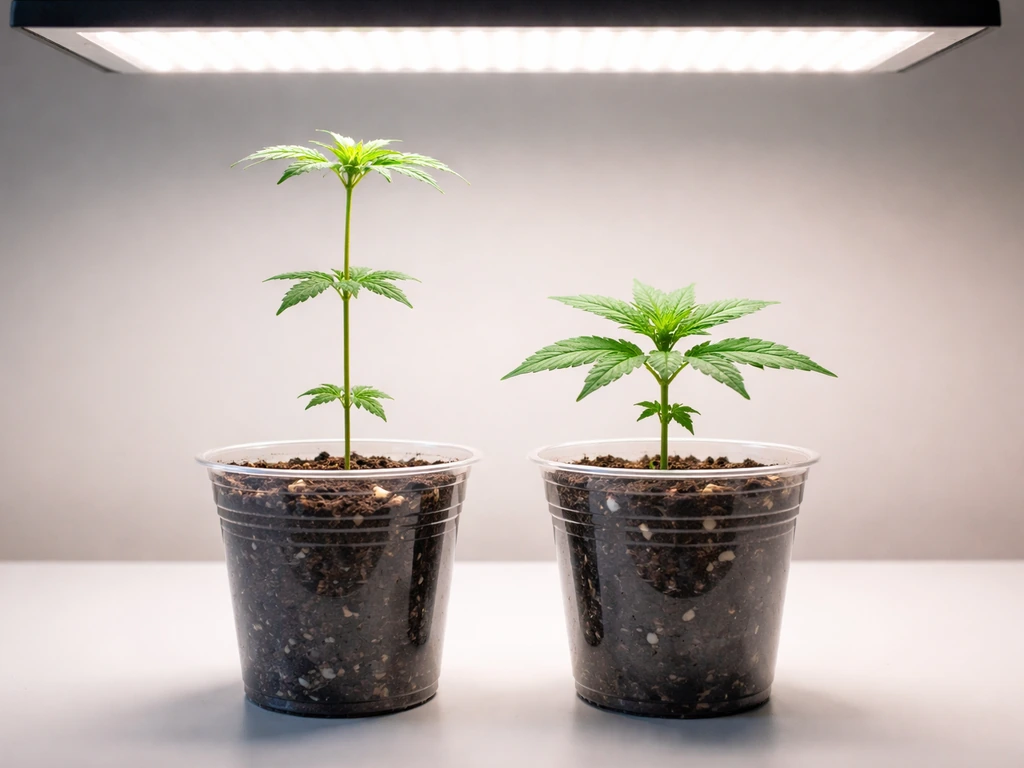
Vegetative growth: light, environment, training, and watering
During veg, your plant is focused on building roots, stems, and leaves. For indoor photoperiod plants, run your lights 18 hours on and 6 hours off. Autos are happy at 18/6 or even 20/4 throughout their whole life. The vegetative stage for photoperiods typically lasts 4 to 8 weeks, depending on how big you want the plant to get before flipping to flower. Autos transition automatically at 3 to 5 weeks regardless of light schedule.
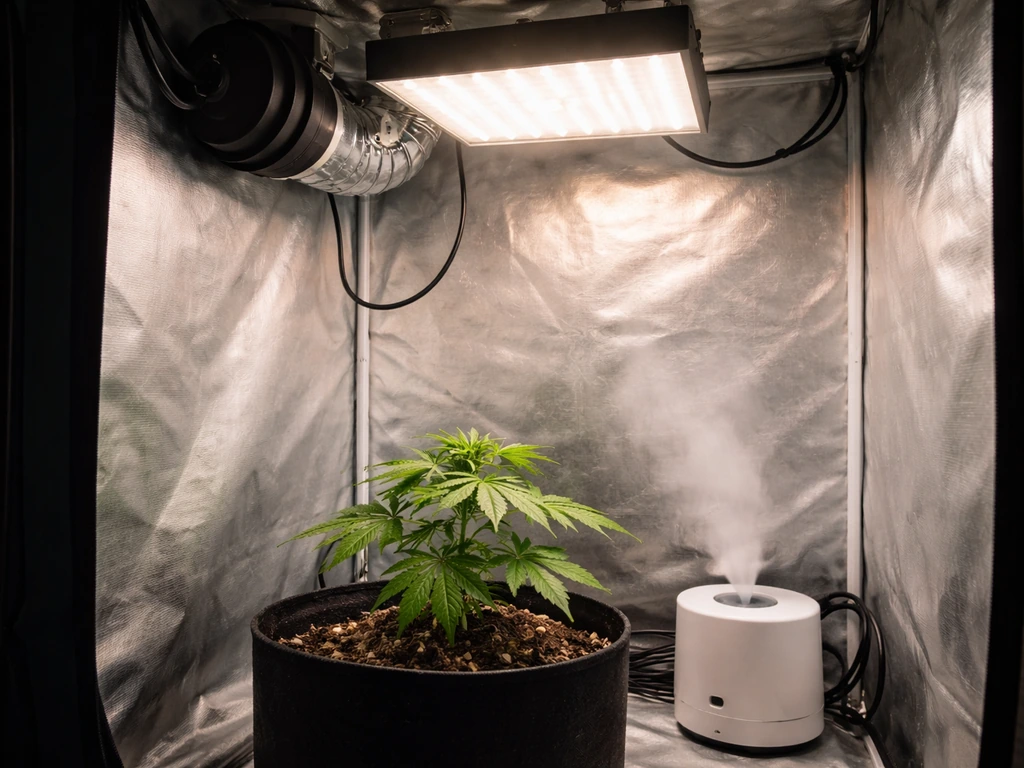
Keep temperatures between 70 and 85°F (21 to 29°C) during lights-on and aim for relative humidity around 55 to 70% during veg. A VPD (vapor pressure deficit) target of 0.8 to 1.2 kPa works well for the vegetative stage, which roughly maps to those temperature and humidity ranges. Good airflow is essential: a small oscillating fan blowing gently across the canopy prevents hot spots and strengthens stems. If you're growing indoors with odor concerns, a carbon filter attached to an inline fan exhausting air out of your tent handles smell effectively.
Training a single plant is one of the best ways to maximize what you get from it. Low-stress training (LST) involves gently bending the main stem and tying it down to keep the plant flat and encourage multiple colas instead of one main top. This is especially rewarding with photoperiod plants because you can veg longer and train more aggressively. With autos, keep training minimal and low-stress since they have less time to recover from heavy stress. Topping (cutting the main growing tip) works well on photoperiod plants during early veg but should generally be avoided with autos.
Water when the top inch of soil feels dry, not on a fixed daily schedule. Lift the pot: a dry pot feels noticeably lighter than a freshly watered one. When you water, pour until you get about 10 to 20% runoff from the bottom of the pot. This ensures the whole root zone gets moisture and prevents salt buildup. Overwatering is the number one mistake new growers make. Droopy leaves with a downward curl, almost like the plant is praying to the ground, is the classic overwatering sign.
Triggering and managing the flowering stage
For photoperiod plants, you trigger flowering by switching your light timer to 12 hours of light and 12 hours of total, uninterrupted darkness. Any light leak during that dark period, even a small one from a phone or a gap in your tent zipper, can cause problems including hermaphroditism. Check your tent carefully before flipping. Autos don't need any light schedule change; they'll start showing pre-flowers on their own at 3 to 5 weeks.
The first 2 to 3 weeks of flower are called the stretch, and it's dramatic. Photoperiod plants can double or even triple in height during this period. If you're growing in a tent, account for this before you flip: a plant that's 18 inches tall at flip could hit 36 to 54 inches by week 3. Keep your light panel far enough above the canopy to avoid light burn (follow the manufacturer's recommended distance) and use LST or low netting (a SCROG net) to keep the canopy even and manageable during stretch.
As the stretch slows down and buds start forming (weeks 3 to 5 of flower), lower humidity to around 40 to 50% to reduce mold risk as buds fatten. Temperature can drop a few degrees compared to veg. In the last 2 weeks before harvest, many growers drop humidity further to 35 to 45% and back off nutrients entirely, flushing the medium with plain pH-corrected water to clear any remaining salts.
Feeding and medium care for one plant
With a single plant, you don't need a complicated nutrient program. A good quality pre-amended potting soil (like Fox Farm Ocean Forest or similar) often carries seedlings and young veg plants for 4 to 6 weeks without any added nutrients. Once the plant starts showing lighter green color or you notice slow growth, it's time to start feeding.
A simple three-part nutrient system with a grow formula (high nitrogen) for veg, a bloom formula (high phosphorus and potassium) for flower, and a cal-mag supplement covers 95% of what a single plant needs. Start at half the recommended dose on the label and watch how the plant responds before increasing. One plant is actually easier to monitor than a room full because you can give it your full attention.
pH is the single most important number to get right. When growing in soil, keep your feeding water and runoff between 6.0 and 7.0 pH. For coco coir or hydro, target 5.5 to 6.5 pH. Out-of-range pH locks out nutrients even if they're physically present in the medium, which causes deficiency symptoms that confuse a lot of first-timers. A basic digital pH pen costs $15 to $30 and is worth every cent.
Nitrogen is the main nutrient during veg. If your lower, older leaves start turning uniformly pale or yellow, especially from the tips inward, that's a nitrogen deficiency signal. In flower, some yellowing of the lowest fan leaves is normal as the plant redirects nitrogen to bud production, but widespread yellowing spreading up the plant mid-flower usually means you need to increase your bloom feed or check pH.
Troubleshooting common one-plant problems
Having only one plant means every problem gets your full attention, which is actually an advantage. Here are the issues you're most likely to face and how to handle them.
Overwatering
Drooping, heavy-looking leaves that curl downward and a persistently wet medium mean you're overwatering. Let the pot dry out more between waterings. The fix is simple: water less often, not less at a time. Every watering should still be a thorough one followed by a proper dry-out period.
Spider mites
Tiny white or yellow speckling on leaves and fine webbing under leaves are spider mite signs. Treat immediately with insecticidal soap spray, covering the undersides of all leaves thoroughly. Re-treat every 2 to 3 days for at least two more rounds to catch eggs that hatch between treatments. Keep humidity up and airflow moving to make conditions less hospitable for mites.
Powdery mildew
White, flour-like circular patches on leaves are powdery mildew. It thrives in stagnant air and high humidity. Adding or repositioning a fan to improve airflow prevents most PM issues before they start. If you already see it, remove affected leaves, improve ventilation, and drop humidity below 50%. Potassium bicarbonate spray is an effective organic treatment.
Stretching and light problems
A tall, spindly seedling with big gaps between nodes is stretching for light. Move your light closer (while staying within the safe distance for your specific fixture) or increase intensity. During flower stretch, use LST or a SCROG net to keep the canopy even and prevent lower bud sites from being shaded out.
Hermaphrodites and stress signals
A feminized seed grown without major stress rarely goes hermaphrodite, but light leaks during flower, heat stress, or severe root damage can trigger it. A hermaphrodite plant develops both female flowers (pistils) and male pollen sacs. If you spot small banana-shaped growths or round sacs near bud sites, remove them carefully with tweezers or consider harvesting early if they're widespread. Prevention is the real answer: protect your dark period, keep temperatures stable, and avoid any major stressors during flower.
Harvest, drying, curing, and your one-plant timeline
Harvest timing makes an enormous difference to the quality of what you end up with. The most accurate way to judge readiness is checking trichomes with a jeweler's loupe or USB microscope. Mostly cloudy trichomes mean peak THC. When about 10 to 20% of trichomes turn amber alongside mostly cloudy ones, you're in the sweet spot for a balanced, potent effect. Harvesting too early leaves significant potency on the table. A secondary indicator is pistils: when 70 to 90% have turned from white to orange or red, the plant is getting close.
After harvest, hang whole branches or individual buds upside down in a dark space with good airflow. Target 60 to 68°F (15 to 20°C) and 55 to 65% relative humidity with gentle indirect airflow. Drying too fast (low humidity, high heat, direct fan blast) gives you harsh, poorly flavored buds. A slow dry over 7 to 14 days preserves terpenes and makes curing much more effective. Buds are ready to move to curing jars when small stems snap cleanly rather than bending.
Curing is where one-plant grows really shine because you can dedicate a few mason jars and give them proper attention. Pack your jars about 75% full, seal them, and store in a cool, dark place. Open the jars (burp them) once or twice daily for the first week to release moisture and fresh air, then taper to once weekly for the following 3 to 4 weeks. A minimum 4-week cure dramatically improves smoothness and flavor. Some growers cure for 2 to 3 months for exceptional results.
Realistic one-plant timeline
| Stage | Autoflower Duration | Photoperiod Duration | Key Milestones |
|---|---|---|---|
| Germination | Days 1–3 | Days 1–3 | Taproot visible, seed planted |
| Seedling | Weeks 1–2 | Weeks 1–2 | First true leaves, cotyledons open |
| Vegetative | Weeks 3–5 | Weeks 3–10 (your choice) | Training, transplant to final pot |
| Pre-flower / Stretch | Weeks 5–7 | Weeks 1–3 of 12/12 | Rapid height increase, first pistils |
| Full flower / Bud development | Weeks 7–10 | Weeks 3–8 of 12/12 | Bud fattening, trichome check |
| Harvest | Day 70–90 | 8–12 weeks after flip | Trichomes mostly cloudy/amber |
| Dry | 7–14 days | 7–14 days | Stems snap cleanly |
| Cure | 4+ weeks | 4+ weeks | Jar burping, flavor development |
Your first-week checklist
- Confirm home cultivation is legal in your jurisdiction and check for any local restrictions beyond state law.
- Choose a feminized autoflowering strain for the easiest first grow.
- Set up your grow space: tent, light, fan, and timer if growing indoors, or identify your outdoor spot with 6+ hours of direct sun.
- Germinate your seed using the paper towel method at 70–85°F; check for a taproot within 24–72 hours.
- Plant the germinated seed half an inch deep in a moist solo cup of soil or coco coir.
- Set your light schedule: 18 hours on / 6 hours off for the seedling stage.
- Get a pH pen and a basic digital thermometer/hygrometer so you can monitor from day one.
What to monitor daily
- Temperature (target 70–85°F / 21–29°C during lights-on)
- Relative humidity (55–70% in veg, 40–50% in flower)
- Soil moisture: lift the pot and check before watering
- Leaf color and posture: yellowing or drooping signals a problem
- Any unusual spots, webbing, or white powder on leaves
- Light distance from canopy: adjust as the plant grows
Growing one plant is genuinely one of the best ways to learn cannabis cultivation because you're focused entirely on a single organism and can observe every change without being overwhelmed. If you want to push your single plant to maximum yield potential, training techniques and dialing in your nutrient schedule are the levers to pull. If you’re aiming for how to grow 1 pound per plant, the key is dialing in light, training, and nutrition while staying consistent from veg through flower. And if you find yourself thinking about keeping a mother plant for future clones, or pushing for a pound from a single plant, those are natural next steps once you've got your first grow under your belt. If you want to do that, the next step is learning how to grow a good mother plant and keep it healthy for repeat harvests mother plant for future clones. If you want to grow a mother plant weed for steady clones, you’ll need to keep a healthy photoperiod plant in long veg and manage light, feeding, and pruning so it stays stable. If you are curious about how much weed can one seed grow, your yield will mainly depend on strain, grow method, and how well you manage light and nutrients.
FAQ
Do I need to start from seed, or can I use a clone for a one-plant grow?
You can use a clone, it skips germination and short seedling time, but you should still treat it like a sensitive transplant. Keep it under lower light intensity at first, maintain higher humidity for a few days, and avoid major training until you see new growth restart.
What’s the easiest way to avoid overwatering when I only have one plant to manage?
Use the pot-weight method every time, lift the container after you water, and compare it later. Also ensure your container has drainage holes and that any runoff tray is emptied, so the roots never sit in standing water.
If I choose an autoflower, do I still need to worry about light leaks during its whole life?
Autos are less sensitive to schedule changes than photoperiod plants, but light leaks during the “dark” period can still stress seedlings and can interfere with how uniformly they develop. If you are using any rest period, keep it consistent and minimize stray light during early growth.
How do I know whether my seedling is underlit versus overwatered?
Underlit seedlings usually look taller and stretched with smaller, darker-green leaves. Overwatered seedlings tend to look heavy and limp with medium staying wet longer, sometimes with slowed growth. Check the medium moisture and the distance to the light before changing fertilizer.
Can I grow one plant in a 1-gallon pot, or is bigger always better?
A very small final pot can work for short, compact plants, but yields usually drop because the root zone dries out fast and is harder to buffer. For beginners, staying closer to the recommended pot size range helps prevent rapid dry-out and nutrient swings.
Should I transplant my seedling into the final container even if I’m growing a photoperiod?
It’s usually better to transplant once after the root system fills the starter cup, not immediately into the final pot. A too-large container early increases the chance of prolonged wetness and root issues because the medium stays damp longer.
What VPD target should I use if I’m not able to measure temperature and humidity precisely?
If you cannot measure VPD, aim for the practical ranges already given, and prioritize stability over chasing exact numbers. A cheap hygrometer plus a consistent light schedule is enough for most beginners, avoid extreme swings, and use airflow without blasting the canopy.
How much airflow does a small single-plant tent actually need?
You want gentle, constant movement across the canopy, not a hurricane. One oscillating fan at canopy height plus passive or active exhaust is typically enough. If leaves are constantly fluttering or drying fast at the edges, dial the fan down or redirect airflow.
What do I do if my plant shows nutrient burn early but I only fed lightly?
First, check pH and runoff. If the runoff pH is far from target or you’re salting the medium, flush with pH-corrected water, then pause feeding for a cycle. Also verify you are using a pre-amended soil and not overloading with additional fertilizer from multiple products.
How do I troubleshoot yellow leaves that start at the bottom, during veg versus flower?
Bottom-leaf yellowing in mid to late flower can be normal as nutrients shift to buds. In veg, widespread yellowing and slow growth usually points to nitrogen deficiency or pH lockout. Compare new growth color, and confirm pH before assuming it is only a missing nutrient.
Is flushing for the last two weeks required for better results?
It is not strictly required, but it can help if your runoff shows salt buildup or drifting pH. If your plant is already healthy and runoff is stable, consider using plain pH-corrected water gradually and stop nutrients when the label schedule would usually end, rather than doing a harsh one-time flush.
How can I prevent bud mold in a single-plant grow when I live in a humid area?
Use a lower late-flower humidity target, improve airflow, and avoid dense, unmanaged canopies. If leaves cover buds tightly, LST or light defoliation (removing only what blocks airflow) can reduce microclimates where mold starts.
Should I harvest based on trichome color or pistil color if they conflict?
Trichomes are usually the more reliable indicator. Pistils can brown early due to stress or lighting changes. If most trichomes are still milky with only a small amber fraction, you may have time, but if trichomes are already mostly amber, delaying further can reduce the potency profile.
What’s the safest way to adjust drying if I accidentally dry too fast?
If stems are snapping too quickly, your humidity is likely too low or air is too strong. Slow it down by increasing humidity slightly, reduce direct fan blast on the buds, and improve indirect airflow. If buds are already overdried, rehabbing by rehydrating is hit-or-miss and often damages quality.
Can I start curing immediately after the dry, or do I need to wait longer?
Move to curing jars as soon as small stems snap cleanly, not when they are still flexible. Too-moist buds in the jar can mold, and too-dry buds will not rehydrate evenly. If you’re unsure, wait an extra day and recheck stem snap.
Do I need multiple plants to clone later, or can I keep one plant for future cycles?
You can keep one photoperiod mother plant, and that can produce clones repeatedly. The key requirement is staying in long veg under a stable light schedule, and managing growth through pruning so the mother stays productive and not overly stressed.
Next Article
How to Grow 1 Weed Plant: Beginner Step-by-Step Guide
Step-by-step indoor, outdoor, or hydroponic guide to grow one cannabis plant, including lights, nutrients, flowering, an