You can absolutely grow one healthy cannabis plant indoors, even in a small space, without a ton of expensive equipment. The full process from seed to harvest typically takes between 16 and 22 weeks for a photoperiod plant, or as few as 10 to 14 weeks with an autoflower. This guide walks you through every stage, from picking your spot and setting up your light to harvesting and troubleshooting the problems that trip up most beginners. If you are growing just one plant, you actually have a real advantage: fewer variables to manage, less equipment to buy, and more attention to give the plant that matters.
How to Grow Weed Inside One Small Plant Guide

Marcus Holbrook
18 Apr 2026
Check the law before you set up anything
Home cannabis cultivation laws vary a lot depending on where you live, and getting this wrong has real consequences. In Canada, federal law under the Cannabis Act allows adults to grow up to four plants per household for personal use, though some provinces have added their own restrictions.
Under Canada’s Cannabis Act, cultivation is prohibited where two or more adults ordinarily reside in the same dwelling-house if it would result in more than four cannabis plants being cultivated, propagated, or harvested at any one time in that dwelling-house, unless authorized under the Act [four plants per household for personal use](https://laws-lois. justice. gc. ca/eng/acts/C-24.
5/FullText. html? txthl=coordinating). [In Germany, adults who have resided there for at least six months may grow up to three plants simultaneously at their residence for personal consumption.
](https://www. bundesgesundheitsministerium. de/themen/cannabis/faq-cannabisgesetz/seite) In the US, rules are entirely state-by-state: Massachusetts, for example, allows up to six plants per adult at home, with a household maximum of twelve if more than one person over 21 wants to grow. Many US states still prohibit home cultivation entirely.
Before you buy a single piece of equipment, look up the specific rules for your city, state or province, and country. Even where growing is legal federally or at the state level, local ordinances can add restrictions around odor control, plant visibility, or security. Grow within your legal limit, keep plants out of public view, and make sure any minors in the home cannot access the grow space. Responsible growing means staying compliant and discreet, not just producing good bud.
Planning your grow room or grow space
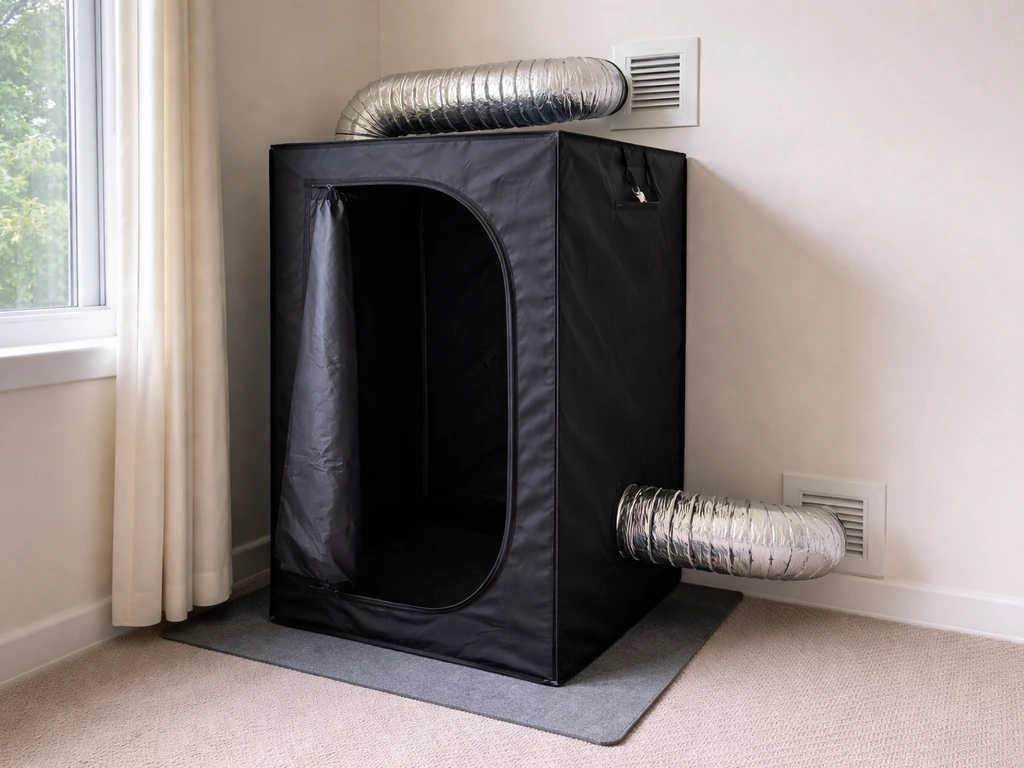
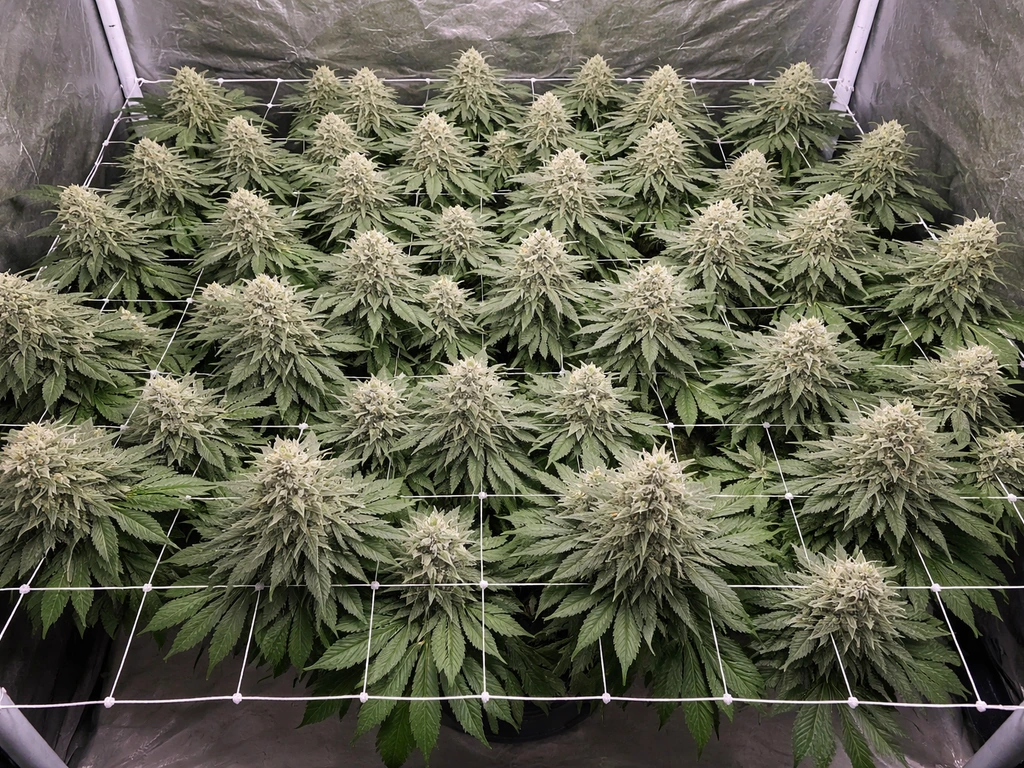
For one plant, you do not need a dedicated room. A 2x2 ft (60x60 cm) grow tent is genuinely enough space to take a single plant from seedling to harvest. A 2x4 ft tent gives you a bit more room to work and lets the plant spread out if you plan to do any low-stress training. Grow tents are the easiest option for beginners because they are lightproof, lined with reflective mylar to maximize your light, and come with ports already built in for ventilation ducting. If a tent is not an option, a closet, cabinet, or spare bathroom corner can work, but you will need to seal out external light completely during the dark period.
Think through the basics before you start: Where will the air come in and go out? How will you control smell? Where does the power come from, and can the circuit handle the load? A small LED and an inline fan will not tax a standard home circuit, but it is worth knowing your setup before you run cables. Odor control is worth planning early, especially if you live in an apartment or share walls with neighbors. A small carbon filter paired with your inline fan handles the vast majority of cannabis odor during flowering and is considered essential for any indoor grow where smell is a concern.
The minimal gear list for one plant
You do not need to spend a fortune. Here is what you actually need to get started with one indoor plant:
- A 2x2 ft or 2x4 ft grow tent (or a lightproofed enclosed space of similar size)
- A quality LED grow light sized for the space (more on this below)
- A 4-inch inline fan with speed controller and carbon filter for odor control
- Flexible ducting to connect the fan, filter, and tent exhaust port
- A 3 to 5 gallon fabric pot for the final container
- Quality potting mix (a cannabis-specific or peat-based mix with good drainage)
- Basic nutrients: a beginner-friendly 3-part or all-in-one formula
- A pH meter and pH up/down solution
- A digital thermometer and hygrometer to monitor temperature and humidity
- A timer for your lights
- Small oscillating or clip fan for internal air circulation
Choosing the right light

For a 2x2 ft space, a 100 to 200W full-spectrum LED is the sweet spot. Modern quantum board LEDs (like those from Spider Farmer, Mars Hydro, or similar brands) are efficient, run cooler than older HID lights, and produce excellent results for beginners. For a 2x4 ft tent with one plant that you plan to train wide, a 200 to 300W LED gives you better canopy coverage. Avoid cheap blurple LED panels, which often underdeliver on actual usable light despite their marketing claims.
Getting light distance right is one of the most commonly messed-up variables for new growers. A general guideline: lights under 100W should be kept 10 to 14 inches from the canopy, while 100 to 300W LEDs typically perform best at 14 to 24 inches. Start at the higher end of that range and move the light closer gradually if you are not seeing signs of light stress. If leaves are tacoing (curling up at the edges), pale, or bleaching at the tops, the light is likely too close.
Growing one plant from seed to harvest, step by step
The lifecycle has four main stages: germination, seedling, vegetative, and flowering. Each stage has different needs for light, water, and nutrients. Here is exactly what to do at each point.
Germination (days 1 to 7)
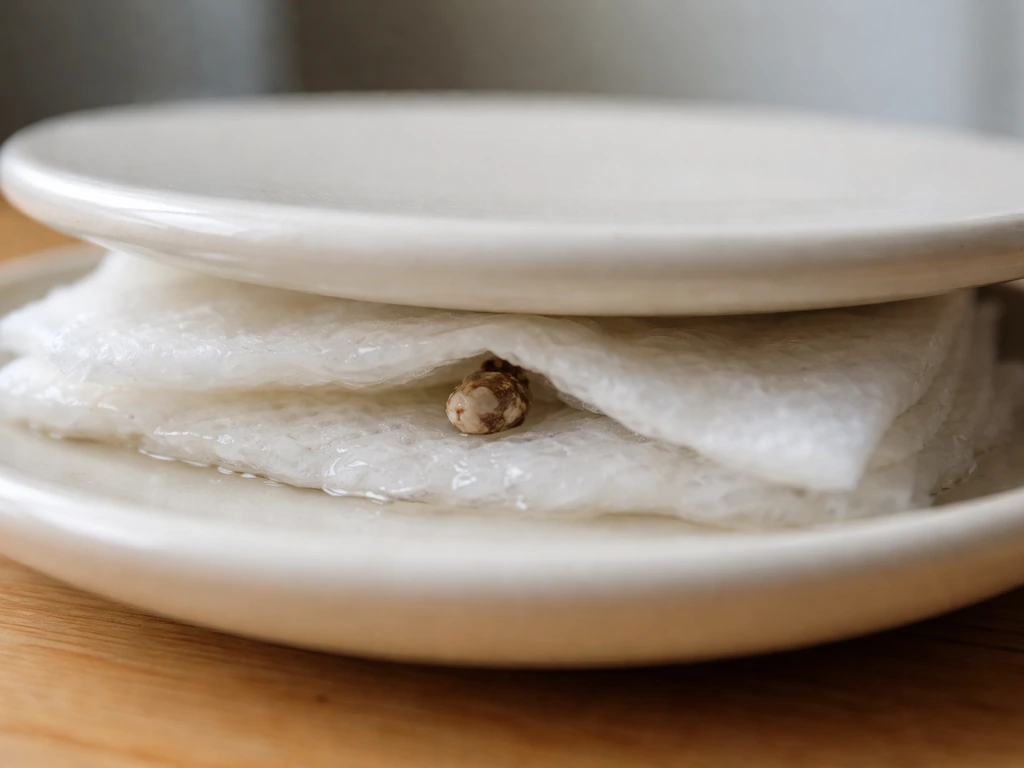
The simplest method: place your seed between two damp (not soaking wet) paper towels, put them on a plate, and cover with another plate to keep moisture in. If you want to start from a stem cutting instead of a seed, you will need a different approach to rooting and early humidity control indoors. Keep it somewhere warm, around 70 to 77°F (21 to 25°C). Most seeds will pop a taproot within 24 to 72 hours.
Once the taproot is about a quarter to half an inch long, plant it taproot-down about a quarter inch deep in a small starter container (a solo cup or 4-inch pot works well). Keep the soil lightly moist. You should see the seedling break the surface within 2 to 5 days. If you want to skip a step, you can also germinate directly in a moistened starter mix.
Seedling stage (weeks 1 to 3)
Once the seedling is above soil with its first round leaves (cotyledons) open, keep your light at the upper end of the recommended distance range and on an 18/6 schedule (18 hours of light, 6 hours of dark). Seedlings need light moisture, not heavy watering. Overwatering is the most common seedling killer, so water in a small circle around the stem and let the top inch of soil dry out before watering again. Do not add nutrients yet during the first 2 to 3 weeks. The starter mix has enough to sustain a seedling. Roots grow faster when they have to search for water, so resist the urge to keep the medium constantly wet.
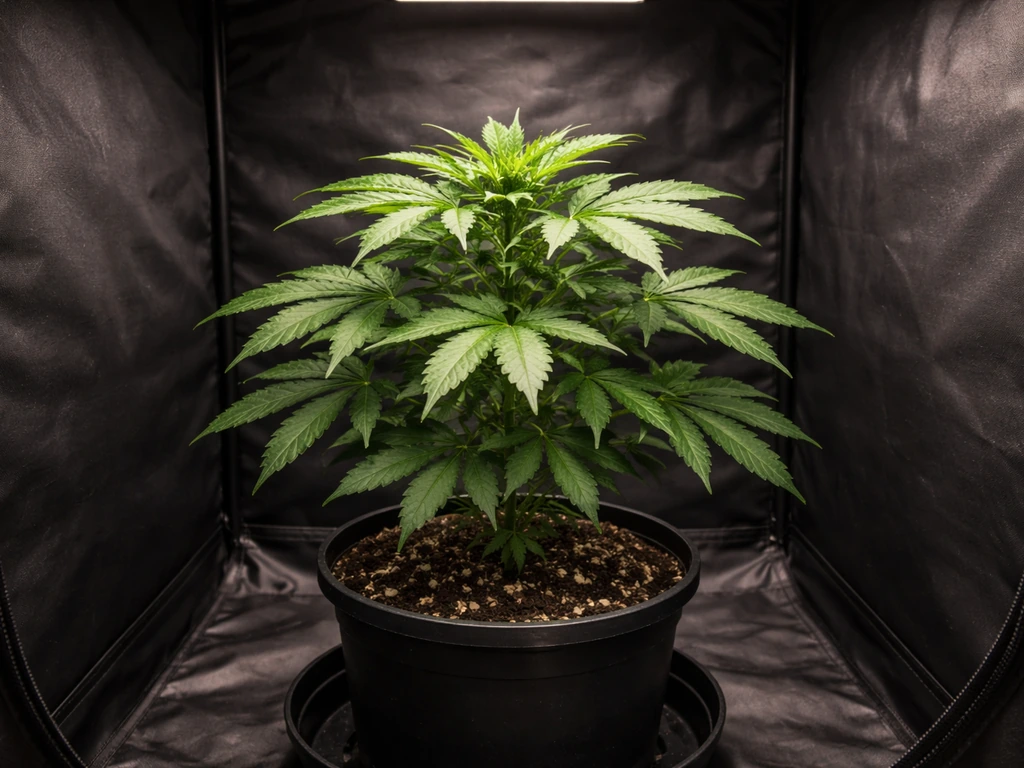
Vegetative stage (weeks 3 to 8, roughly)
Once your plant has developed 3 to 4 nodes (sets of leaves), it is in true vegetative growth. Transplant into your final 3 to 5 gallon pot at this stage if you have not already. Keep the light on an 18/6 schedule. This is when the plant builds structure, root mass, and the branching that will eventually hold your buds.
Water when the top inch or two of soil feels dry, and start introducing nutrients at half the recommended dose, increasing gradually. This is also the stage where you will apply any training techniques (covered below). How long you keep a photoperiod plant in veg is up to you. For one small plant in a 2x2 ft tent, 4 to 6 weeks of veg is usually plenty before flipping to flower.
Flowering stage (weeks 8 to 18, roughly)
To trigger flowering in a photoperiod plant, switch your timer to a 12/12 schedule: 12 hours of light and 12 hours of complete, uninterrupted darkness. Even brief light leaks during the dark period can confuse the plant and cause issues, so check your tent for any light leaks before you flip. After the switch, expect the plant to double in size during the first 2 to 3 weeks (called the flowering stretch) before it settles into bud development.
From the flip, most photoperiod strains take 8 to 10 weeks to reach harvest readiness. Total seed-to-harvest time for a photoperiod plant is typically 16 to 22 weeks depending on how long you ran veg. Autoflowers skip the light-cycle trigger and typically finish in 10 to 14 weeks total from seed, which makes them a good fit for beginners who want a faster, simpler first grow.
Harvest
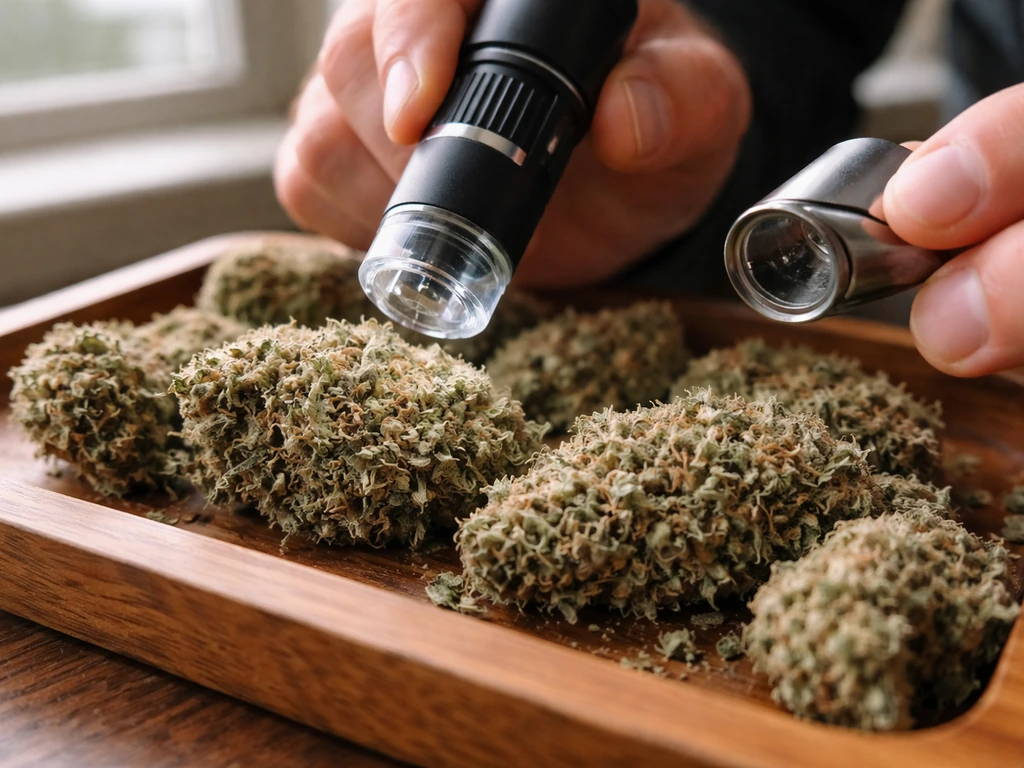
The most reliable way to know when to harvest is to look at the trichomes (the tiny resin glands on your buds) with a jeweler's loupe or digital microscope. Clear trichomes mean the plant is not ready. Cloudy/milky white trichomes indicate peak THC. Amber trichomes mean THC is starting to degrade into CBN, giving a more sedative effect.
Most growers aim for a mix of mostly cloudy with 10 to 30 percent amber, depending on the effect they want. Other signs of ripeness include the pistils (hairs) turning orange or red and the calyxes swelling. Harvest, then dry your buds slowly in a dark space at around 60 to 65°F and 55 to 62% relative humidity for 7 to 14 days, followed by a cure in sealed glass jars for at least 2 to 4 weeks.
Indoor environment targets: the numbers that actually matter
Getting your environment dialed in is what separates a mediocre harvest from a great one. Cannabis is not especially fragile, but it does have clear preferences that change with each growth stage. Here are the targets to hit:
| Parameter | Seedling / Early Veg | Late Veg | Flowering |
|---|---|---|---|
| Temperature (lights on) | 70–77°F (21–25°C) | 72–82°F (22–28°C) | 68–79°F (20–26°C) |
| Temperature (lights off) | Keep within 10°F of lights-on temp | Keep within 10°F of lights-on temp | Keep within 10°F of lights-on temp |
| Relative Humidity | 65–70% | 50–70% | 40–50% (drop to 40–45% late flower) |
| VPD Target | 0.4–0.8 kPa | 0.8–1.2 kPa | 1.1–1.5 kPa |
| Airflow | Light breeze (gentle stem movement) | Moderate breeze | Moderate breeze, avoid blowing directly on buds |
VPD (vapor pressure deficit) is the relationship between temperature and humidity that determines how efficiently your plant transpires and takes up nutrients. You do not have to obsess over it as a beginner, but keeping VPD in the 0.8 to 1.2 kPa range during veg and 1.1 to 1.5 kPa during flower gives your plant ideal conditions to grow. A VPD calculator app or chart makes this straightforward to check once you know your temperature and humidity readings.
For airflow, your inline fan should exchange the air volume in your tent every 1 to 3 minutes. A 4-inch inline fan rated at 190 to 200 CFM is more than adequate for a 2x2 or 2x4 tent with one plant. Run it continuously on low-to-medium speed. Your small internal clip fan should create a gentle, continuous breeze across the canopy to strengthen stems and prevent humid dead zones where mold can develop. CO2 supplementation is not necessary for a small one-plant grow using standard ventilation. It only becomes worthwhile when your light, environment, and nutrients are already dialed in perfectly, which is not a beginner priority.
Feeding a single indoor plant: keep it simple
For one plant in soil, a straightforward 3-part nutrient line (Grow, Bloom, Micro or similar) works well and gives you control over each stage. If that feels like too much, an all-in-one cannabis nutrient formula that you adjust by growth stage is even easier. The golden rule for beginners: start at half the manufacturer's recommended dose and increase only if the plant shows signs of deficiency. More nutrients is not better. Nutrient burn (tips turning brown and curling) is extremely common in first grows and is almost always caused by overfeeding.
A simple feeding schedule by stage
- Weeks 1 to 3 (seedling): Plain pH-adjusted water only. No nutrients. The starter mix has enough.
- Weeks 3 to 8 (veg): Introduce a nitrogen-heavy grow formula at 25 to 50% of the recommended dose. Increase gradually if the plant is healthy and dark green.
- Weeks 8 to 10 (early flower / transition): Reduce nitrogen, begin introducing a bloom formula higher in phosphorus and potassium. Many growers do a 50/50 mix at this transition.
- Weeks 10 to 17 (mid to late flower): Run bloom formula at full or near-full dose. Reduce or eliminate nitrogen entirely.
- Final 1 to 2 weeks before harvest: Flush with plain pH-adjusted water to clear any nutrient buildup from the medium.
pH is the variable most beginners underestimate. If your water or nutrient solution is out of range, the plant cannot absorb nutrients no matter how much you feed it. For soil grows, keep your feed water pH between 6.0 and 7.0, ideally around 6.5. For coco coir or hydroponic setups, the target is narrower: 5.5 to 6.5, ideally around 5.8 to 6.0. Check the pH of your water every time you feed, and periodically check the runoff pH from the bottom of your pot. If runoff pH is drifting below 6.0 or above 7.0 in soil, flush with properly pH-adjusted water to reset the medium.
Keeping the plant small and manageable
One plant in a small tent can still get unruly if you let it grow unchecked. Two beginner-friendly techniques, low-stress training (LST) and light topping, give you a lot of control without risking the plant's health.
Low-stress training (LST)
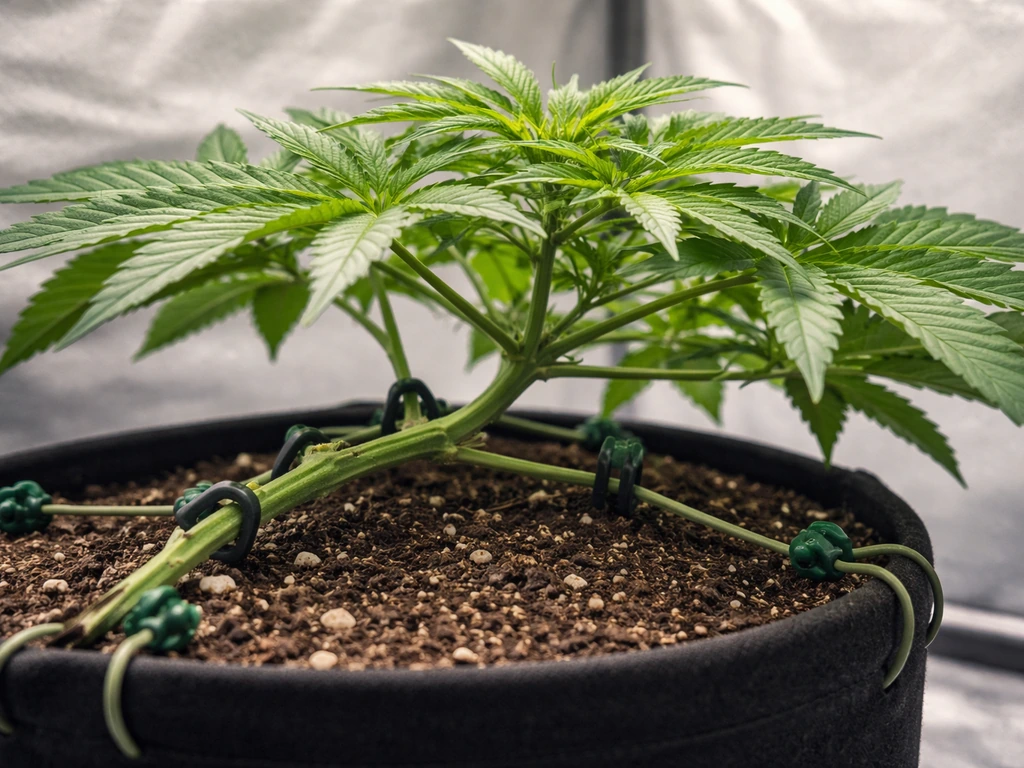
LST involves gently bending the main stem and tying it down (using soft plant ties or LST clips) to keep the canopy flat and spread out horizontally. This exposes lower bud sites to direct light and encourages the plant to produce multiple top colas instead of one tall main stem. Start LST once your plant has 3 to 4 nodes, during the vegetative stage. Bend the main stem gently toward the edge of the pot at about a 45-degree angle and secure it. As new growth reaches upward, continue bending and tying new branches outward. Done consistently through veg, LST alone can dramatically increase your yield from one plant without adding any complexity.
Topping
Topping means cutting off the very tip (apical meristem) of the main stem once the plant has at least 4 to 5 nodes. This removes the single dominant growing tip and causes the plant to grow two new main colas from the nodes just below the cut. Topping combined with LST is one of the most effective ways to keep a plant wide, bushy, and short rather than tall and spindly.
Top only during vegetative growth, at least 2 weeks before you plan to switch to 12/12. Give the plant a few days to recover before continuing LST work. Do not top autoflowers: their short lifecycle means they do not have time to recover, and topping usually reduces rather than increases yield on autos.
If you want an even simpler approach for keeping things compact, consider growing your photoperiod plant on a 12/12 light schedule from seed. This limits vegetative growth significantly and keeps the plant small from the start, though it reduces total yield. It is a legitimate strategy for very tight spaces. Autoflowers are another option covered more deeply in related guides on this site, and they are naturally compact and fast, which makes them well suited to small rooms and one-plant goals. Autoflowers are especially handy when you are learning how to grow a weed plant in my room because they finish faster and are less dependent on precise light schedules small rooms and one-plant goals.
Defoliation basics
Removing large fan leaves that block light from reaching lower bud sites (a practice called defoliation) can help maximize your light penetration and airflow. Do this selectively and conservatively, especially as a beginner. Remove only leaves that are clearly blocking bud sites, and do it in the first few weeks of flower, not late into bud development. Removing too many leaves at once stresses the plant and can slow growth.
Fixing the most common problems in a one-plant indoor grow
Stretching (plant growing very tall and spindly)
Stretching usually means the plant is not getting enough light intensity, so it is reaching for the source. Move your light closer to the canopy (within the safe distance range for your wattage), or increase intensity if your light has a dimmer. Stretching during the first 2 to 3 weeks of flower is normal and expected, but excessive stretch in veg almost always points to insufficient light. Make sure your light is not too far away before adding more equipment.
Nutrient deficiencies or toxicity
Yellow leaves, brown tips, and spotting are the most common visual cues that something is off with your feeding. Before adding more nutrients, always check your pH first. Most apparent deficiencies in soil grows are actually pH-related lockout, not a lack of nutrients in the medium. If pH is correct and the problem persists, compare your symptoms to a deficiency chart (nitrogen deficiency shows as yellowing from the bottom up, calcium/magnesium deficiency shows as spots and interveinal yellowing). Adjust your nutrient mix accordingly, but do it gradually.
Overwatering
Droopy, heavy-looking leaves that stay droopy even during lights-on are a classic sign of overwatering. The fix is simple: let the medium dry out more between waterings. Lift the pot when dry and when wet to get a feel for the difference. Water only when the pot feels noticeably lighter and the top inch or two of soil is dry. Fabric pots help a lot here because they allow the medium to dry more evenly and prevent waterlogging.
Mold and bud rot
Gray fuzzy patches on buds (botrytis/bud rot) or white powdery coating on leaves (powdery mildew) are serious and need immediate action. Bud rot: remove affected material immediately, lower humidity below 50% in flower, and improve airflow. Powdery mildew in veg: reduce humidity, increase airflow, and treat with a diluted hydrogen peroxide spray or a potassium bicarbonate solution. Do not let humidity sit above 50% during late flowering, especially if your buds are dense. Prevention is much easier than treatment.
Pests (fungus gnats, spider mites, thrips)
Fungus gnats are the most common pest in soil grows and are almost always caused by consistently wet topsoil. Let the top inch of soil dry out between waterings to break their lifecycle. Yellow sticky traps placed near the soil surface help catch adults. For spider mites (tiny dots on leaves, fine webbing underneath), isolate the plant immediately and treat with neem oil or insecticidal soap, applied during lights-off. Check the undersides of leaves regularly as a prevention habit.
Light stress (light burn or bleaching)
If the tops of your buds or leaves directly under the light are turning white or pale yellow while the rest of the plant looks healthy, your light is too close or too intense. Raise the light, reduce the dimmer setting, or both. This is more common with powerful LEDs in small tents where there is not much vertical space to work with. The plant cannot be moved down once it is in a large pot, so adjusting the light upward is usually your only option. Check that you are within the recommended distance range for your light's wattage class.
Humidity swings
If your humidity swings wildly between lights-on and lights-off periods, the main fix is consistent airflow: run your inline fan at a steady speed 24 hours a day. In dry climates or during winter, a small ultrasonic humidifier inside or just outside the tent inlet helps raise humidity in seedling and veg. In humid climates, especially during flowering, a small dehumidifier in the room or a more powerful exhaust fan pulling more air through the tent will bring humidity down. Consistency matters more than hitting the exact target number every hour.
Growing indoors through winter introduces its own set of environmental challenges, from lower ambient humidity to colder intake air temperatures. Growing indoors through winter introduces its own set of challenges, so plan for colder intake air and lower ambient humidity as part of your setup. If you are setting up your grow during colder months, those conditions are worth planning around separately, as intake air temperature directly affects your tent environment even with a strong light running.
If you are starting from a single seed rather than a clone and have questions specific to that germination and early seedling process, the steps for successfully starting from seed deserve their own close attention, particularly around moisture management and early light exposure. The guides on this site cover that in more depth for growers who want to go deeper on any individual stage.
FAQ
How do I make sure there is truly no light leak during the 12/12 dark period?
Use a black-out check: after flipping to 12/12, walk into the dark period and use your phone camera or a flashlight pointed toward the tent seams, zipper, and ventilation ports. If you can see any glow from the outside, add extra flap coverage or a light-trap (for example, double-layer ducting or a baffle at the intake). Avoid opening the tent during dark hours, even briefly.
What temperature and humidity should I target if my tent is too hot from the LED?
If leaves are praying upward or the environment feels hot, prioritize moving air first. Increase exhaust or fan speed, reduce light intensity (use the dimmer rather than pushing the light farther away), and ensure intake air is coming from the coolest practical area in your home. Keep humidity targets consistent for each stage, but never let humidity become high just to chase a number if heat is the real problem.
Can I grow in a small tent without a carbon filter if odor is not a major concern?
If odor is truly acceptable, you can often run exhaust without a filter, but remember cannabis smell spikes during flowering. Many growers underestimate how strong it is near lights-out and when the tent exhaust is turned on at night, especially in apartments. If there is any chance neighbors can detect it, buy the carbon filter early and set it up once, because retrofitting later often requires repositioning fans and ducting.
Do I need to measure runoff pH every time, and what if I cannot?
You do not need to measure runoff every feeding, but you should check occasionally to confirm the medium is stable (for example, every 2 to 4 weeks or after you make a significant feed adjustment). If runoff testing is not practical, treat pH measurement of your feed water as the priority, then watch for classic lockout signs (slow growth, multi-color spotting, new growth issues) before increasing nutrients.
How do I avoid nutrient buildup in a small pot for a one-plant grow?
Small containers build up salts faster. A simple approach is to flush occasionally with properly pH-adjusted water (for example, after a few heavy-feed cycles or when you see persistent tip burn or crust on the soil surface). In soil, do not overdo flushes, because you can temporarily remove needed nutrition. Let the medium dry between feedings so the plant is not constantly reacting to salt concentration.
What is the safest way to correct overwatering in a one-plant setup?
First, stop watering and let the top inch or two of soil dry, then wait until the pot feels noticeably lighter before the next watering. If you already have a waterlogged pot, increase airflow and consider moving the tent air intake to a slightly drier room if possible. If the soil stays soggy for multiple days and the plant is weakening, consider re-potting into a more aerated mix rather than repeatedly watering to “fix” it.
Should I use tap water for pH and nutrients, and what if my tap water pH is off?
Tap water can be used, but you must pH-adjust your solution to the range your medium needs. If your tap water has very high chlorine or strong alkalinity, the runoff can drift and cause lockout even when your pH is correct at mixing. If runoff pH consistently trends out of range, test your water parameters and adjust your approach, such as using filtered water or changing nutrient strategy.
How do I know whether yellow leaves are from nitrogen deficiency or from pH issues?
Look at timing and pattern. pH-related lockout often shows more mixed symptoms, and new growth can look affected when conditions are unstable, whereas nitrogen deficiency usually shows a more gradual yellowing pattern, commonly starting lower leaves. If you correct pH immediately and the yellowing pattern slows or stabilizes, that points toward root access rather than true lack of nitrogen.
What should I do if my light is causing bleaching only on the top leaves?
Raise the light within the safe distance range for your wattage class, and reduce intensity if your fixture has a dimmer. If bleaching happened during early flowering, avoid chasing it by major watering or nutrient changes, focus on the light first. As a longer-term fix, use gentle LST so the plant canopy is flatter, reducing “hot spots” directly under the LED.
Are there signs that my watering schedule is wrong besides droop?
Yes. In addition to droop that does not rebound after lights-on, watch for persistent canoeing or curling, fungus gnat activity, and a constantly damp surface. Another practical check is the weight test, lift the pot after watering and again before the next watering, so you can keep a consistent dry-down cycle rather than guessing by surface dryness alone.
Can I grow from a cutting indoors in a small tent without complicated humidity gear?
It is possible, but it is harder than seed because cuttings need stable humidity and moisture contact to root. If you do not have a clear humidity dome or propagation setup, success rates drop, especially with typical indoor airflow. If you want simpler reliability, start from seed for your first small tent run, then only try cuttings once you already control airflow and humidity consistently.
How can I prevent bud rot if my humidity is sometimes above 50% during late flower?
Keep the airflow strong and constant, and avoid over-dense canopies that trap moisture. Remove only clearly blocking leaves early in flower, not late. If you cannot reliably keep humidity down, harvest promptly when trichomes hit the target rather than stretching for “perfect” amber, and be extra selective about removing any suspect material at the first sign of rot.
What should I do with a fungus problem that starts early, do I treat or remove the plant?
For isolated mildew or small early clusters, immediate removal of affected parts and aggressive environmental correction (humidity down, airflow up) can work, especially in veg or early flower. If the issue spreads quickly, or you see multiple areas of bud rot, it is safer to remove the affected plant material from the grow space to protect the rest of the environment. Clean tools and avoid moving from infected areas to healthy areas without changing gloves or washing hands.
How often should I change my inline fan speed during the grow?
Use stage-based settings rather than constantly micromanaging. Keep the fan running continuously, then adjust speed to maintain airflow volume and prevent humidity buildup, especially at the transition into flowering when transpiration changes. If humidity swings wildly, do not just raise humidity control, confirm airflow consistency first by checking ducting restrictions and fan function.
Next Article
How to Grow 1 Pound Per Plant: Yield Guide for Beginners
Step-by-step plan to grow ~1 lb per plant using strain choice, light, training, feeding, and troubleshooting for beginne