Growing weed at home is absolutely doable for a beginner, and you don't need a fancy setup or years of experience to pull off a successful harvest. What you do need is a clear plan, the right environmental targets, and a basic understanding of what the plant needs at each stage of its life. This guide walks you through the entire process from seed to cured flower, covering indoor, outdoor, and hydroponic methods so you can choose the path that fits your space and budget. If you want more detail than this overview, see our full guide on how to grow cannabis at home. If you want a more detailed step-by-step, you can use this guide to learn how to grow cannabis at home from start to finish.
How to Grow Weed at Home Step by Step for Beginners
Marcus Holbrook
21 Apr 2026
Before you start: legality, safety, and local rules
The very first thing to do before you buy a single seed is confirm whether home cultivation is legal where you live. Laws vary dramatically by state and locality. Colorado, for example, allows adults over 21 to grow up to six plants per resident, with no more than three flowering at once, but Denver adds its own cap of 12 plants per household. California's Proposition 64 allows up to six living plants per residence (not per person), with no state license required for indoor grows in a private home you own, though local public health ordinances can still restrict you. New York permits home cultivation but specifically requires you to take reasonable measures to prevent cannabis odor from becoming a nuisance to neighbors. States like Washington have published updated research briefs in 2026 reviewing household plant limits and regulatory considerations. The NCSL maintains a regularly updated state-by-state database of cannabis laws including home cultivation rules, and it's worth checking before you start. Always verify your city and county rules too, since local restrictions often layer on top of state law.
Safety matters just as much as legality. Cannabis cultivation involves electrical equipment operating in humid environments, which is a real fire and shock hazard. The CDC and NIOSH specifically flag electrical safety and fire or explosion risks as key hazard categories for cannabis cultivation. Keep your wiring tidy, never use damaged extension cords, and follow OSHA guidance that warns against exposing cord connectors to moisture. Mold is another major safety concern: OSHA notes that mold commonly develops when excess moisture accumulates and the underlying problem isn't fixed. Mold on your plants or in your grow space isn't just a crop problem, it's a health problem, and as New York's Office of Cannabis Management points out, moldy cannabis is not safe to consume. If you use any pesticides, follow the product label exactly, wear the PPE it specifies (protective eyewear, respirators, chemical aprons where required), and never bring contaminated clothing into the rest of your home.
Selecting strains and planning your grow space
Your strain choice and your grow method need to match each other and your available space. There's no universally best option here. Indoor growing gives you complete control over light cycles, temperature, and humidity, and it works year-round regardless of your climate. Outdoor growing is lower cost and produces large plants, but you're dependent on your local season and climate. Hydroponics (growing in a nutrient solution rather than soil) can produce faster growth and higher yields, but it has a steeper learning curve and less margin for error on pH and nutrients. All three methods are legitimate paths to a great harvest.
Picking the right strain for your setup
For beginners, autoflowering strains are one of the best starting points. They flower based on age rather than light schedule changes, they stay compact (typically under 90 cm), and they complete their cycle in around 70 to 90 days from seed. Photoperiod strains give you more control over plant size since you can extend the vegetative stage as long as you want, but they require a deliberate light schedule change to 12 hours on/12 hours off to trigger flowering. If you're growing indoors in a small tent (say, a 60x60 cm or 2x2 ft space), stick to compact indica-dominant or autoflowering varieties. Outdoors, you have room for sativa-dominant or larger photoperiod plants. For hydroponics, look for strains that are described as vigorous and resilient, since hydro amplifies both good and bad conditions.
Sizing your space and choosing a method

| Method | Startup Cost | Control Level | Typical Yield | Best For |
|---|---|---|---|---|
| Indoor (soil in tent) | Low to Medium | High | 1–3 oz per plant (small setup) | Beginners, year-round, discreet grows |
| Outdoor (soil in ground/pot) | Low | Low (weather-dependent) | 3–10+ oz per plant | Warm climates, larger harvests, lower cost |
| Hydroponic (indoor) | Medium to High | Very High | 2–5 oz per plant | Faster cycles, maximizing yield per square foot |
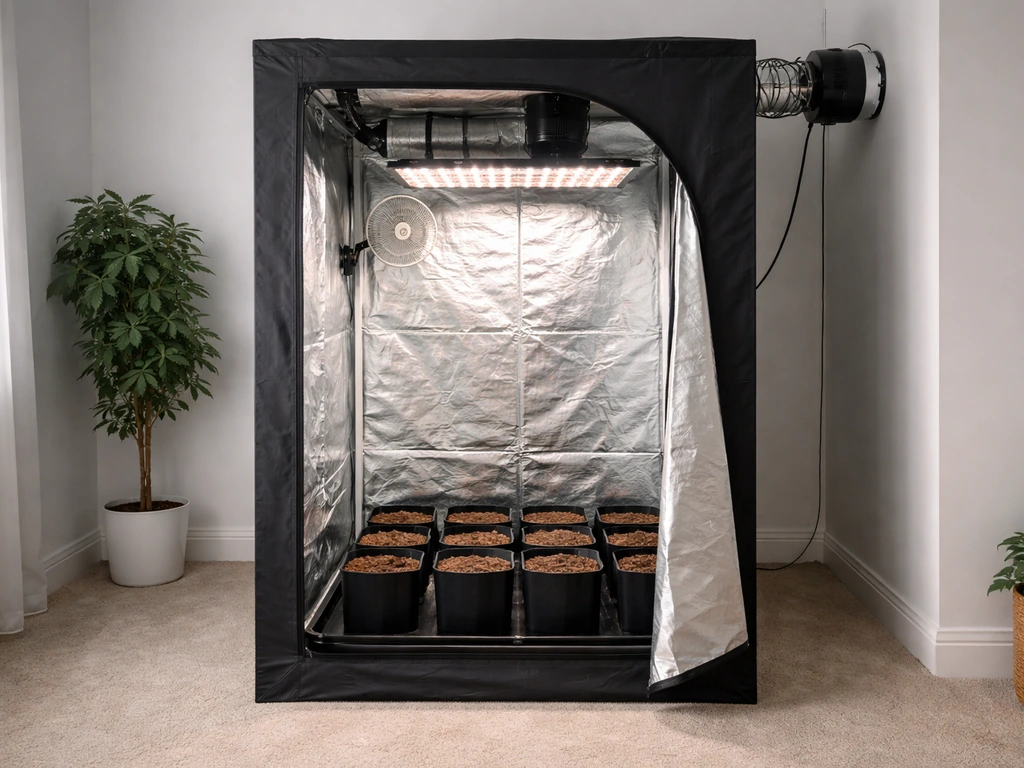
For most first-time growers, a 60x60 cm or 80x80 cm grow tent with a soil setup is the most forgiving starting point. It keeps your grow contained, helps manage odor (especially important for maintaining good neighbor relations), and gives you a controlled environment without the full complexity of hydroponics. If you want to explore growing from seed specifically, or if you want to do it with minimal equipment, those approaches have their own considerations worth looking into separately. If you want to grow without equipment, focus on simple seed germination plus basic containers, soil, and careful light and watering minimal equipment.
Step-by-step from seed or clone to harvest
Stage 1: Germination (Days 1–7)
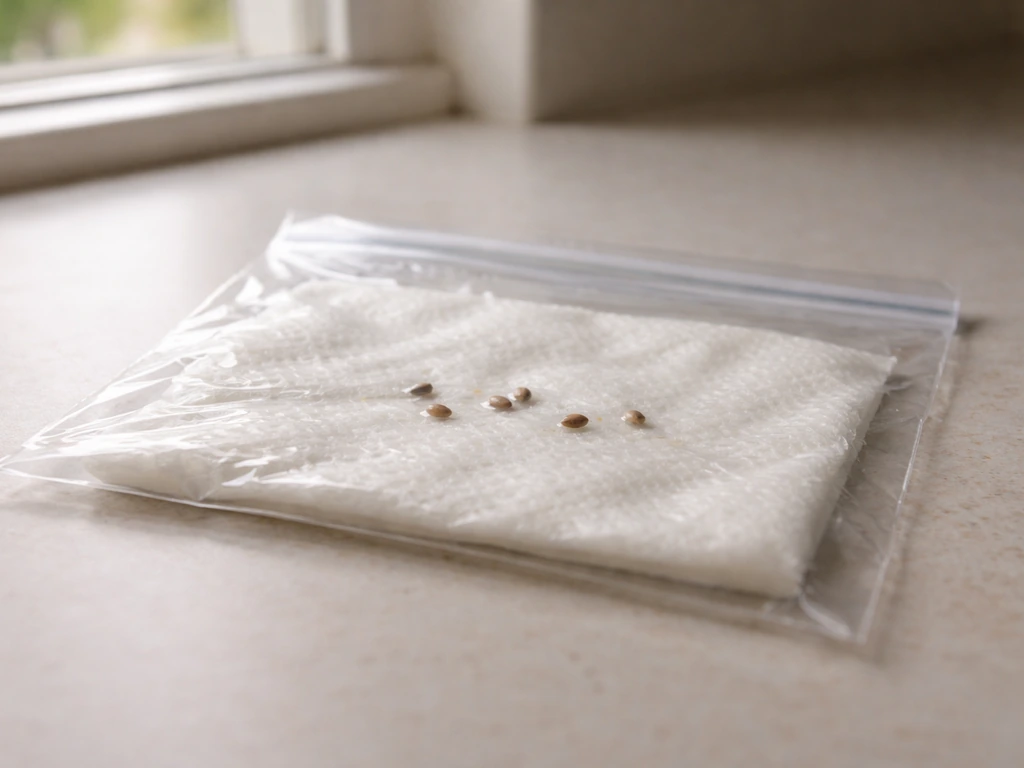
The easiest germination method for beginners is the paper towel method. Place seeds between two damp (not soaking) paper towels, put them on a plate, and cover with another plate to keep moisture in. Keep them in a warm spot around 22–25°C (72–77°F). Within 24 to 72 hours, you'll see a small white taproot emerge. Once the taproot is 0.5–1 cm long, carefully transfer the seed, taproot down, into a small pot of pre-moistened growing medium about 1 cm deep. You can also germinate directly in the medium by poking a small hole, dropping the seed in, and keeping it moist and warm. Seedlings typically break the surface within 3 to 7 days.
Stage 2: Seedling (Days 7–21)
Once the seedling emerges, it needs gentle light (18 hours on if growing indoors), warmth, and careful watering. This is the stage where overwatering kills more plants than anything else. Water only when the top inch of soil feels dry, and water in a small circle around the stem rather than flooding the whole pot. The seedling is fragile, its root system is tiny, and it cannot process large volumes of water yet. Use no nutrients at all for the first two weeks if you're in a pre-amended or quality potting mix. Keep humidity around 60–70% and temperatures between 22–26°C (72–79°F).
Stage 3: Vegetative growth (Weeks 3–8+)
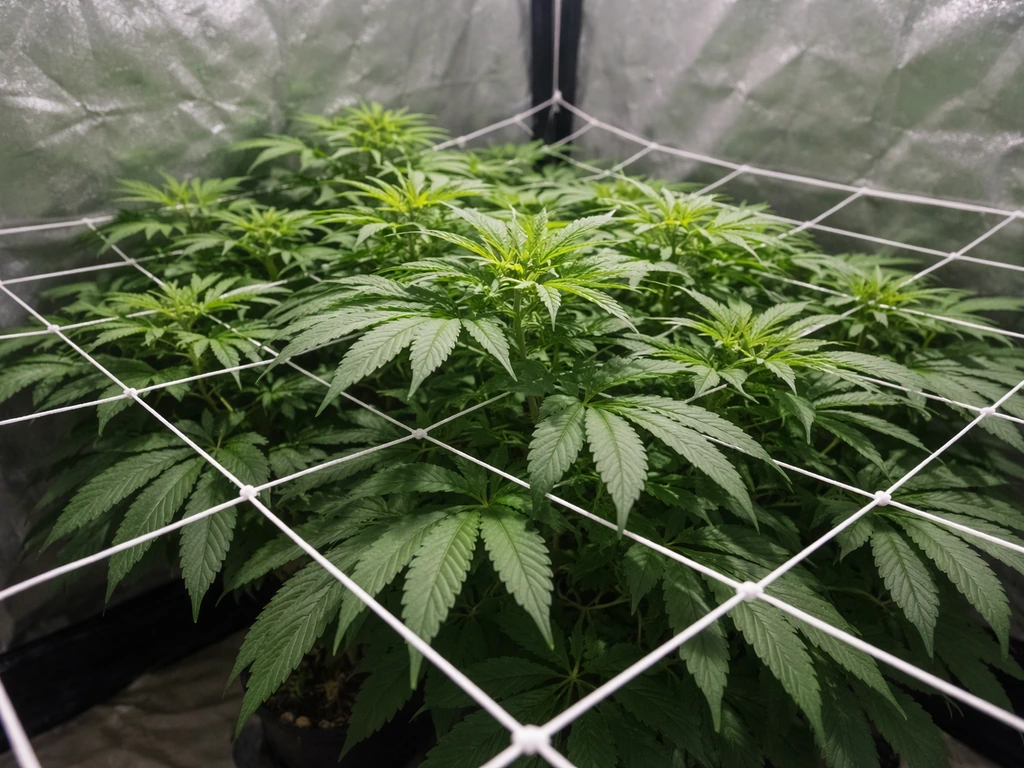
During the vegetative stage, the plant focuses entirely on building roots, stems, and leaves. For indoor photoperiod plants, keep lights on 18 hours per day. The plant can stay in veg as long as you want, but 4 to 8 weeks is typical for most home growers. This is the time to train your plant if you want to maximize yield from a small space. Low-stress training (LST) involves gently bending and tying branches outward to create a flat, even canopy rather than one tall main cola. It's low risk and genuinely effective. Start feeding nitrogen-dominant nutrients once the plant has 4 to 5 node sets, following your specific nutrient product's recommended schedule at half the suggested dose first, then adjust upward based on how the plant responds.
Stage 4: Flowering (Weeks 8–20, depending on strain)
For photoperiod strains, trigger flowering by switching your light schedule to 12 hours on and 12 hours off. Autoflowering plants will start flowering on their own at around 3 to 4 weeks old regardless of light schedule. In the first two weeks of flowering (the pre-flower or transition phase), you'll see rapid vertical growth (sometimes called the 'stretch') and the first formation of pistils (tiny white hairs). Shift your nutrients from nitrogen-heavy to phosphorus and potassium-dominant (bloom nutrients) at this point. Buds develop over the next 6 to 10 weeks depending on the strain. In the final 1 to 2 weeks before harvest, most growers do a 'flush' by feeding only plain pH-adjusted water to clear any residual nutrient salts from the medium.
Using clones instead of seeds
If you have access to clones from a dispensary or a friend's plant, you skip germination entirely and start with a genetically identical copy of the mother plant. Take cuttings from healthy vegetative growth, dip the cut end in rooting gel or powder, and place in a rooting medium (rapid rooters or rockwool cubes work well) under a humidity dome with indirect light. Roots typically appear in 7 to 14 days. Clones skip the seedling stage and are ready to move into veg once rooted, saving you 2 to 3 weeks compared to starting from seed.
Getting your environment right: light, temperature, humidity, and airflow
Environment is where most home grows succeed or fail. Get these numbers dialed in and your plant will do most of the work for you. Ignore them and you'll fight problems all the way to harvest.
Light
For indoor growing, LED is now the clear recommendation for most home growers. Modern full-spectrum quantum board LEDs are energy-efficient, run cooler than HPS lights, and produce excellent results across all growth stages. A good rule of thumb is 200 to 250 watts of actual draw (not equivalent watts) per square meter of canopy. Keep lights at the manufacturer's recommended hanging height for your wattage, and adjust as the plant grows. Light intensity is measured in PPFD (micromoles per square meter per second): seedlings do well at 200–400 PPFD, veg plants at 400–600 PPFD, and flowering plants at 600–900 PPFD. Outdoors, plants need at least 6 to 8 hours of direct sunlight daily, and south-facing exposure (in the northern hemisphere) is ideal.
Temperature and humidity targets by stage
| Growth Stage | Temp (Day) | Temp (Night) | Relative Humidity |
|---|---|---|---|
| Seedling | 22–26°C (72–79°F) | 18–22°C (64–72°F) | 60–70% |
| Vegetative | 22–28°C (72–82°F) | 18–24°C (64–75°F) | 50–70% |
| Early Flower | 20–26°C (68–79°F) | 18–22°C (64–72°F) | 40–50% |
| Late Flower | 18–24°C (65–75°F) | 15–20°C (59–68°F) | 35–45% |
| Drying/Curing | 15–21°C (60–70°F) | Same | 45–55% |
Humidity control is critical in late flower. High humidity above 50% during the last few weeks dramatically increases the risk of bud rot (botrytis), which can destroy an entire crop in days. A decent hygrometer and a small dehumidifier go a long way. Temperature swings of more than 10°C between day and night can stress plants and slow growth, so try to keep the lights-off drop moderate.
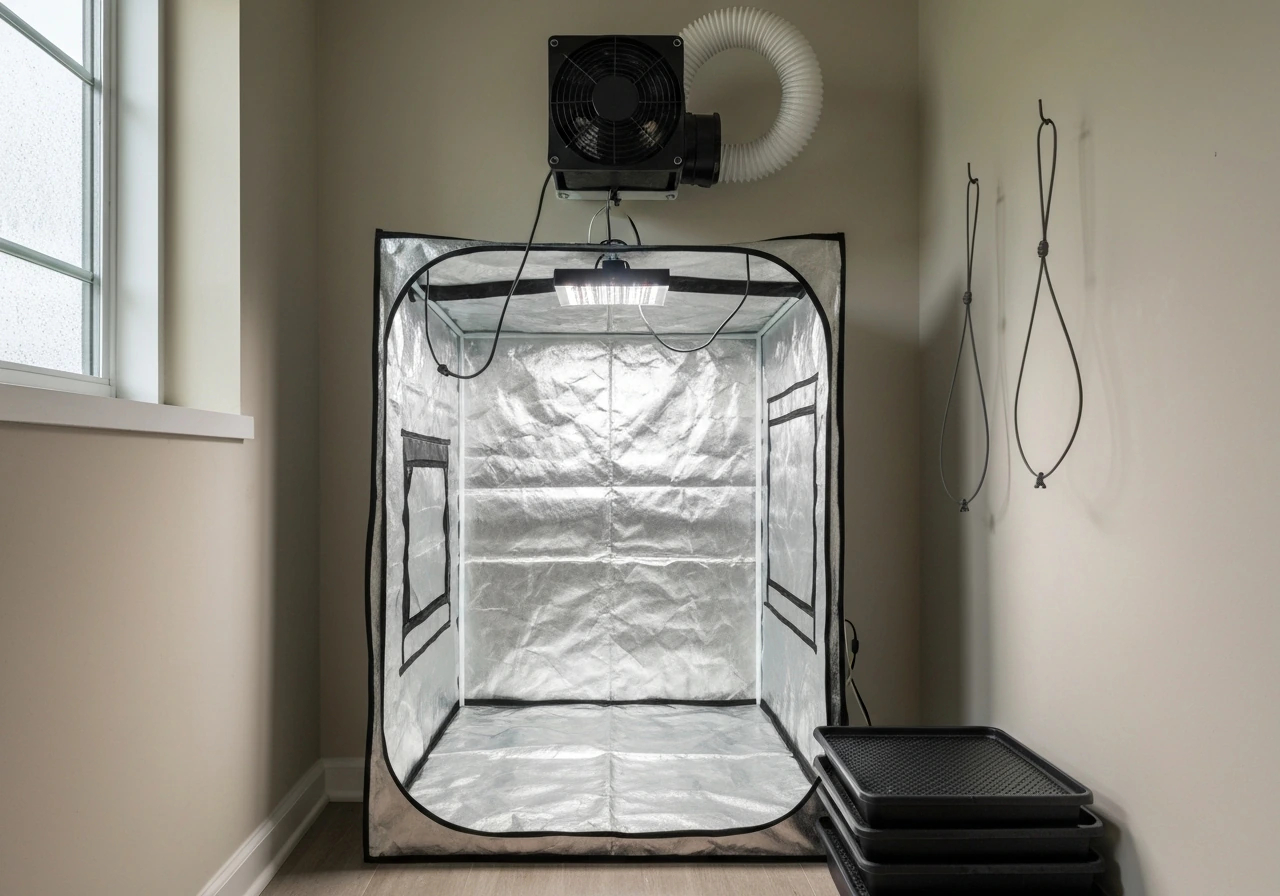
Airflow and odor control

Good airflow serves two purposes: it strengthens stems (gentle oscillating fans simulate outdoor breeze and develop thicker stalks) and prevents hot spots, moisture buildup, and mold. For an enclosed grow tent, you need an inline fan pulling air out through a carbon filter, and passive intake vents or a second fan pushing fresh air in. Size your inline fan to exchange the full air volume of the tent at least once per minute. A carbon filter attached to your exhaust fan is the most effective tool for managing cannabis odor, which is relevant both for discretion and for being a considerate neighbor as required by laws in places like New York. Change or replace your carbon filter at least once a grow cycle for consistent odor control.
Nutrients and watering: soil vs. coco/hydro
Cannabis needs three primary macronutrients: nitrogen (N), phosphorus (P), and potassium (K), plus secondary nutrients like calcium and magnesium, and a range of micronutrients. What changes between growing methods is how you deliver them and how tightly you need to monitor pH.
Soil
A quality pre-amended potting mix (something designed for cannabis or a quality brand like Fox Farm Ocean Forest) contains enough nutrients to carry your plant through most of the seedling and early veg stages without any added feeding. Start supplementing with a cannabis-specific nutrient line around week 3 to 4 of veg, starting at 50% of the recommended dose. Target a pH of 6.0 to 7.0 in soil, with 6.2 to 6.8 being the sweet spot for nutrient availability. Measure and adjust the pH of your water before every feeding. Water when the top inch of soil is dry, and water until you get about 10 to 20% runoff from the bottom of the pot. Then don't water again until the medium is mostly dry. I watered on a schedule when I first started and consistently overwatered; going by feel and soil weight is much more accurate.
Coco coir
Coco coir is an inert medium, meaning it has zero nutrients of its own. You must provide all nutrients from day one, including calcium and magnesium (Cal-Mag), which coco is notorious for locking up. Target a pH of 5.8 to 6.2 for coco. The advantage is that coco drains fast and holds more oxygen around roots, which accelerates growth. Most coco growers water daily or even twice daily in late stages, always with nutrient solution. This is more hands-on than soil but rewards you with faster growth and bigger yields.
Hydroponics
In hydro (DWC, NFT, or ebb and flow systems), roots sit in or are periodically flooded with nutrient solution. Target pH of 5.5 to 6.1, and check it at least once daily since it drifts constantly. Nutrient strength is measured in EC (electrical conductivity) or PPM (parts per million): seedlings do well at 0.4 to 0.8 EC, veg plants at 1.2 to 2.0 EC, and flowering plants at 1.6 to 2.4 EC. Hydro plants grow faster than soil or coco because nutrients are always instantly available to roots, but a pump failure, pH spike, or nutrient imbalance can damage or kill plants within 24 to 48 hours. It rewards growers who check in daily and keep detailed logs.
A simple feeding schedule framework
- Seedling (weeks 1–2): Plain pH-adjusted water only, no nutrients
- Early veg (weeks 3–4): 50% dose of a veg/grow formula, high N
- Mid-to-late veg (weeks 5–8): Full dose veg nutrients, add Cal-Mag if on coco/hydro
- Transition/early flower (weeks 1–2 of flower): Reduce N, increase P and K, use a transition or 'bloom booster' formula
- Mid-flower (weeks 3–6 of flower): Full bloom nutrients, continue Cal-Mag
- Late flower (weeks 7 to harvest minus 1–2 weeks): Reduce overall dose, focus on PK and micronutrients
- Final flush (last 1–2 weeks): Plain pH-adjusted water only
Troubleshooting problems at each stage
Problems will show up. I've had nutrient lockout, spider mites, heat stress, and bud rot across different grows, and every one of those problems had a clear cause and a fix. The key is catching issues early by looking at your plants daily.
Seedling and early veg problems
- Damping off (stem collapses at soil line): Caused by overwatering or fungal infection. Reduce watering frequency, improve airflow, and ensure the medium drains well.
- Yellowing leaves on seedlings: Usually overwatering or, rarely, a nitrogen deficiency if you've already started nutrients too early. Back off on watering first.
- Stretchy, tall seedlings with wide spacing between nodes: Not enough light. Lower your light or increase intensity, keeping within the manufacturer's safe distance.
- Wilting despite moist soil: Root rot (especially in hydro/coco) or overwatering in soil. Check roots for brown slime. In hydro, add a beneficial bacteria product and increase aeration.
Vegetative stage problems
- Yellow leaves starting from the bottom: Nitrogen deficiency. Increase N in your feeding, check pH is in range so the plant can actually absorb it.
- Brown leaf edges and tips: Nutrient burn from overfeeding. Flush with plain water and drop your nutrient concentration by 25 to 30%.
- Interveinal yellowing (green veins, yellow between them): Magnesium or iron deficiency. For magnesium, add Cal-Mag. For iron, check pH, as iron lockout usually means pH is too high.
- Curling leaf edges upward (taco leaves): Heat or light stress. Check canopy temperature and raise your light if needed.
- Spots, webbing, or tiny bugs on undersides of leaves: Spider mites. Treat immediately with neem oil or insecticidal soap, following pesticide label directions and wearing appropriate PPE.
Flowering stage problems
- Bud rot (grey mold in the middle of dense buds): Caused by high humidity and poor airflow. Remove all affected material immediately, reduce humidity below 45%, and increase air circulation. Do not consume moldy cannabis.
- Foxtailing (buds growing spiky, airy extensions): Often caused by heat stress or light intensity that's too high late in flower. Lower temps and raise lights.
- Light leaks during dark period (for photoperiod plants): Any light during the 12-hour dark cycle can stress the plant into hermaphroditism, producing both male and female flowers. Check your tent for any light leaks and seal them.
- Male pollen sacs: If you're growing from regular (non-feminized) seeds, watch for round grape-like clusters rather than pistil hairs. Remove any male plants immediately before they open and pollinate females.
- Slow bud development: Could be incorrect light schedule, too-low phosphorus, or temperatures that are too warm at night. Check all three.
Harvesting, drying, curing, and storing your crop
When to harvest
Harvest timing is one of the most impactful decisions you'll make, and it's often rushed. The most accurate way to judge maturity is by examining trichomes (the tiny crystal-like resin glands on buds) with a jeweler's loupe (30x) or a digital microscope. When trichomes are mostly clear, the plant is not ready. When they turn milky white (cloudy), THC is at its peak. When they begin to turn amber, THC is converting to CBN, which produces a more relaxing or sedative effect. Most growers harvest when 70 to 90% of trichomes are cloudy with around 10 to 20% amber, depending on their preference. A secondary indicator is pistil color: when 70 to 90% of the white pistils have darkened to orange, red, or brown, the plant is typically approaching harvest readiness.
Harvesting
Cut plants at the main stem at soil level, or harvest branch by branch. Remove large fan leaves immediately. Then trim the sugar leaves (smaller leaves covered in trichomes) away from the buds. You can trim wet (right after harvest) or dry (after drying the whole branch). Wet trimming is faster; dry trimming is gentler on trichomes. Use clean, sharp scissors or pruning shears and wear nitrile gloves to keep resin off your hands.
Drying
Hang trimmed branches or whole plants upside down in a dark space with good airflow and temperature around 15 to 21°C (60 to 70°F) and humidity between 45 and 55%. A slow dry over 7 to 14 days preserves terpenes and produces smoother, better-tasting flower. Rushing the dry (with high heat or low humidity) degrades quality significantly. Buds are ready to move to curing jars when the smaller stems snap cleanly rather than bending, and the outside of the bud feels dry to the touch but isn't crumbly.
Curing
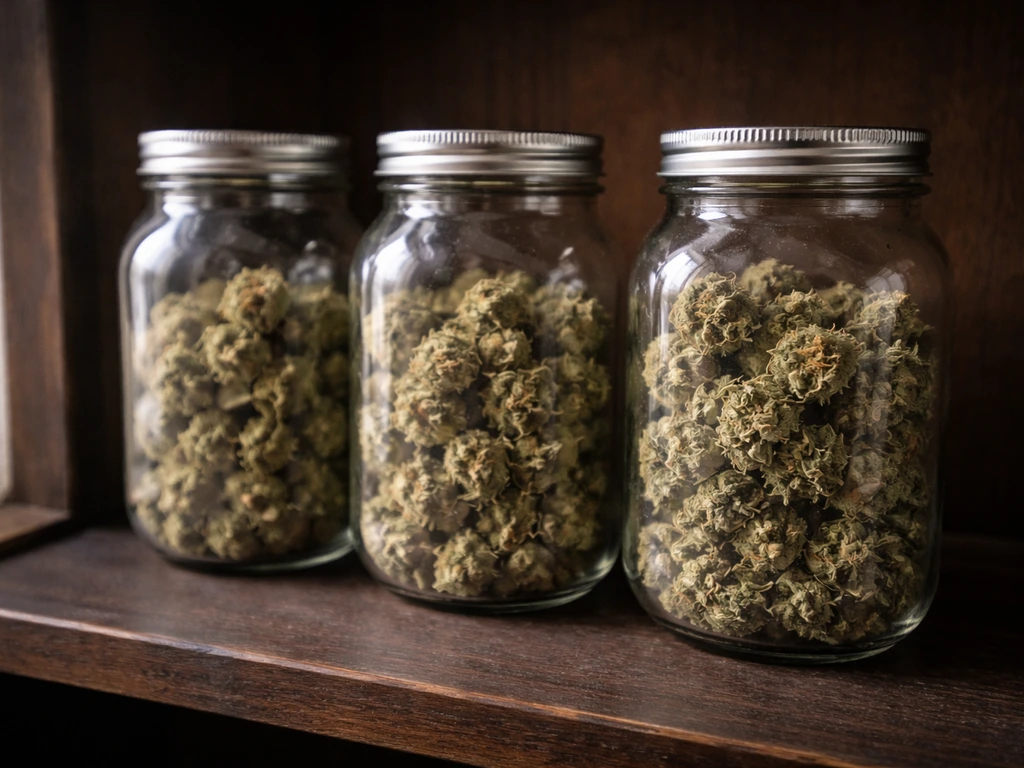
Curing is where the real quality improvement happens, and it's the step most beginners skip too quickly. Place dried buds loosely in wide-mouth glass mason jars, filling them about 75% full. For the first week, open the jars (this is called 'burping') for 15 to 30 minutes once or twice daily to release moisture and bring in fresh air. After the first week, burp once every 2 to 3 days. Keep jars in a cool, dark location. A minimum cure of 2 weeks makes a noticeable difference in smoothness and flavor. Four to eight weeks produces significantly better results. Six months or more is possible for strains that age well, similar to wine. Use a small hygrometer inside the jar to target 58 to 62% relative humidity during the cure.
Storage
Once cured, cannabis stores best in airtight glass jars kept in a cool, dark, and dry location. UV light degrades cannabinoids and terpenes quickly, so avoid clear jars in bright areas or use UV-blocking containers. Properly cured and stored cannabis retains good quality for 6 to 12 months and can remain usable for up to 2 years, though potency gradually declines over time. Avoid storing in plastic bags long-term, as static can pull trichomes off and the seal is never truly airtight. Keep storage temperatures below 25°C (77°F) and away from heat sources.
That's the full loop: from checking your local laws and picking a strain, through germination, veg, flower, and all the way to a properly cured jar of your own home-grown cannabis. The first grow is always the biggest learning curve, but if you hit your environmental targets, don't overwater, and watch your plants daily, you'll get there. Each successive grow gets faster and more intuitive. The fundamentals covered here apply whether you're growing in soil, coco, or a hydroponic system, and whether you start from seed or clone.
FAQ
My state allows home cultivation, but what if my city, landlord, or HOA has stricter rules?
If your state allows cultivation but your city or building has extra rules, local restrictions can still limit the number of plants, ban “visible” outdoor grows, or require odor control measures beyond what the state specifies. Before you buy gear, check both your city/county and your housing contract (landlord or HOA), because enforcement often happens through local code or nuisance complaints rather than state licensing.
Can I grow weed at home if my law only mentions “adults” or “residents” and I live with roommates?
Yes, but only if your law treats it as a private, non-commercial activity and you stay within plant and residence limits. Also plan for security and odor, because neighbors may report smells even when plants are legal. If a dispensary gives rules about counts per person versus per household, follow the stricter interpretation.
What’s the most common reason beginner grows fail after they set up light and humidity correctly?
Start with less fertilizer, not more. A common beginner mistake is following the full nutrient schedule too early or guessing the water amount. If you see slow growth plus drooping, check watering first (soil too wet or too dry), then confirm pH, and only then adjust nutrients.
How do I know when to water without overwatering my seedlings or early veg plants?
Most beginners should not use a strict daily watering schedule. The guide emphasizes watering based on soil dryness, because overwatering is the fastest way to kill fragile seedlings. For a practical check, lift the pot, feel the weight after watering, then only water again when it feels significantly lighter and the top inch is dry.
If my plant looks unhealthy, what should I troubleshoot first: nutrients, pH, or light?
Don’t try to “save” a sick plant by changing multiple variables at once. A safer approach is one change at a time, with measurements. For example, if leaves are yellowing, verify pH first, then inspect runoff pH and EC (if you can), and adjust nutrients gradually rather than switching products or doubling doses.
My seedling is stretching. What should I do first?
If your seedling is stretching, the usual causes are insufficient light intensity or being too far from the light source. Raise light closer within manufacturer limits, confirm the photoperiod schedule for the stage, and keep temperature stable, because “stretch plus droop” can also be overwatering or cold roots.
If I start with clones, do I still need to follow the same schedule as seed growers?
You can use a cloned plant, but it changes timing and expectations. Clones skip germination, yet they still require a full adjustment period to new light conditions and nutrients once rooted. Avoid immediately flipping clones to flowering, instead let them recover and build nodes before training.
How do I prevent strong odor leaks in a small indoor tent?
In small tents, odor can spike when plants are in active flower and leaf surfaces are most aromatic. A carbon filter helps, but only if airflow is balanced. Make sure your inline fan is sized to exchange the tent air volume about once per minute, and verify the fan speed keeps slight negative pressure rather than letting air leak out elsewhere.
Why does bud rot happen even when my average humidity looks okay?
For flowering, bud rot risk rises sharply when humidity stays above roughly 50% for sustained periods. The practical edge case is late-flower nighttime humidity, where temperatures drop and RH climbs. Track humidity when lights are off, and consider dehumidifying only during those hours if that’s when spikes happen.
What happens if I accidentally miss the light schedule during flowering?
Yes, but you must account for timing, because photo plants and autoflowers respond differently to light changes. If you accidentally interrupt the 12 hours on/12 hours off cycle during flowering, photoperiod plants can herm or stall depending on stress. Autoflowers are more forgiving about schedule changes, but still need consistent environment.
Are pistils a reliable way to decide harvest timing, or should I ignore them?
Your harvest target should be based on trichome color, not pistil color alone. Pistils can darken due to stress or genetics even when trichomes are still mostly clear. Use trichome inspection as the primary indicator, and pistils as a supporting clue.
How can I tell if my drying step was too fast?
Drying too fast and curing too quickly are the two biggest quality killers for beginners. If the buds feel dry on the outside but the inside is still damp, they can degrade during curing. Aim for a slow dry (about 7 to 14 days) until smaller stems snap, then cure with jar RH control.
Can I reuse mason jars for curing, and how do I avoid contaminating the cure?
Yes, reuse of the same jars is fine, but cleanliness matters. Before curing, wash and fully dry jars so you do not trap old odors or residues, and use a hygrometer to avoid over-drying (RH too low) or mold risk (RH too high). If jars smell harsh or “wet,” RH may be off and burping timing should be adjusted.
What storage mistake reduces potency fastest at home?
General storage guidance in the article assumes normal home conditions, but UV exposure and heat are the biggest accelerators of potency and terpene loss. Keep jars away from windows, avoid hot rooms like near stoves, and do not store in clear containers in bright areas, even for short periods.
Next Article
How to Grow Cannabis at Home: Step-by-Step Guide
Step-by-step home cannabis grow plan: legality, setup, seeds to harvest, feeding, training, troubleshooting, drying and