Growing medicinal cannabis at home is completely achievable for a beginner, but it requires three things upfront: legal authorization in your state, a basic understanding of the plant's lifecycle, and a consistent environment. Get those three right, and you can produce quality medicine from seed to harvest in roughly 3 to 5 months depending on your strain and method.
How to Grow Medicinal Marijuana: Step-by-Step Guide

Marcus Holbrook
14 May 2026
Legality and responsible growing basics
Before you buy a single seed, look up your state's home cultivation rules. If you want the fastest route to doing it legally, start by understanding your state's specific home-cultivation rules before you buy seeds how to legally grow pot. Laws vary dramatically and change frequently. Some states grant medical patients the explicit right to grow at home; others prohibit it entirely even with a valid medical card. Getting this wrong isn't a technicality, it's a serious legal risk.
Missouri, for example, allows qualified medical marijuana patients and caregivers to cultivate up to 6 flowering plants, up to 6 nonflowering plants 14 inches or taller, and up to 6 nonflowering plants under 14 inches, all within a single enclosed, locked facility at your primary residence. To get practical, step-by-step details, see our guide on how to grow medical marijuanas in Missouri. Plants must not be visible to the unaided eye from any public space. Nevada has similar language: plants must be grown in an enclosed area equipped with a lock or other security device, not visible from a public place, with a limit of 6 plants per person and a maximum of 12 per household.
Texas sits at the opposite end of the spectrum. The state's Compassionate Use Program (TCUP) only allows low-THC cannabis to be dispensed through [licensed dispensing organizations](https://www. dps. texas.
gov/section/compassionate-use-program/faq/law-enforcement-faqs), administered by the Texas Department of Public Safety. Home cultivation is not a legal option in Texas right now, only state-licensed cultivators can grow. Florida's situation is actively evolving: a 2026 bill (SB 776) proposes allowing qualified patients aged 21 and older to purchase medical marijuana seeds and grow up to six flowering plants for personal use, but as of today that bill is still a proposal, not law.
Florida's situation is actively evolving: a 2026 bill (SB 776) proposes allowing qualified patients aged 21 and older to purchase medical marijuana seeds and grow up to six flowering plants for personal use, but as of today that bill is still a proposal, not law 2026 bill (SB 776) proposes allowing qualified patients to grow up to six flowering plants.
In Florida, stay alert to changes to the medical marijuana home cultivation rules before you start any seeds home cultivation rules in Florida (medical marijuana).
The universal rules across states that do allow home cultivation are pretty consistent: enclosed and locked space, not visible from public areas, plant count limits, and cultivation only at your registered primary residence. Some states also require you to tag or label your plants. When in doubt, check your state's department of health or cannabis regulatory board directly, not a forum post from three years ago.
- Confirm your state allows home cultivation for medical patients before purchasing anything
- Get your medical card or patient registration before you start
- Know your plant count limits — flowering vs. nonflowering counts are often tracked separately
- Secure your grow space with a lock — this is both a legal requirement and a safety measure
- Keep your grow invisible from any public-facing windows or outdoor sightlines
- Stay current — state laws update often, and what was true last year may not be true today
Choosing seeds, strains, and planning your setup
Strain choice matters a lot when you're growing for medicinal purposes. Most people gravitating toward medicinal cannabis are looking for specific effects: pain relief, anxiety reduction, sleep support, or appetite stimulation. The cannabinoid and terpene profile of a strain drives most of those effects. You're generally choosing between high-THC strains, high-CBD strains, or balanced THC:CBD ratios. High-CBD strains like Charlotte's Web, ACDC, and Cannatonic are popular for patients who want therapeutic benefits without intense psychoactivity. Balanced strains like Harlequin or Penelope (roughly 1:1 THC:CBD) are versatile. If you're a patient comfortable with THC, indica-dominant strains are often recommended for nighttime use and body-focused relief, while sativa-dominant strains lean more toward daytime, uplifting effects.
When it comes to seed types, you have three main options: regular seeds (can be male or female), feminized seeds (nearly always female, the ones that produce buds), and autoflowering seeds (flower based on age, not light cycle). For beginners growing medicinal cannabis, feminized seeds are the smartest starting point. You eliminate the risk of accidentally growing male plants that pollinate your whole crop. Autoflowering feminized seeds go one step further, they're faster (seed to harvest in 8 to 10 weeks for many strains), more forgiving about lighting schedules, and compact enough for small indoor spaces.
Buy seeds from a reputable, established seed bank that provides third-party tested genetics with documented cannabinoid profiles. Cheap seeds from unknown sources often produce inconsistent plants, hermaphrodites, or undisclosed genetics. This is your medicine, treat seed quality like you'd treat any medication source.
For your grow setup, start by answering these questions honestly: How much space do I have? What's my budget? Do I need to be discreet? How much time can I realistically give this each week? A closet grow with a 2x4 tent and a 200W LED is a perfectly legitimate starting point. You don't need a dedicated room or a large investment to get quality results. In general, the difficulty of growing pot depends on your state’s rules, the strain you choose, and whether you can keep a stable indoor environment grow pot.
Indoor vs. outdoor vs. hydroponics: pick your method
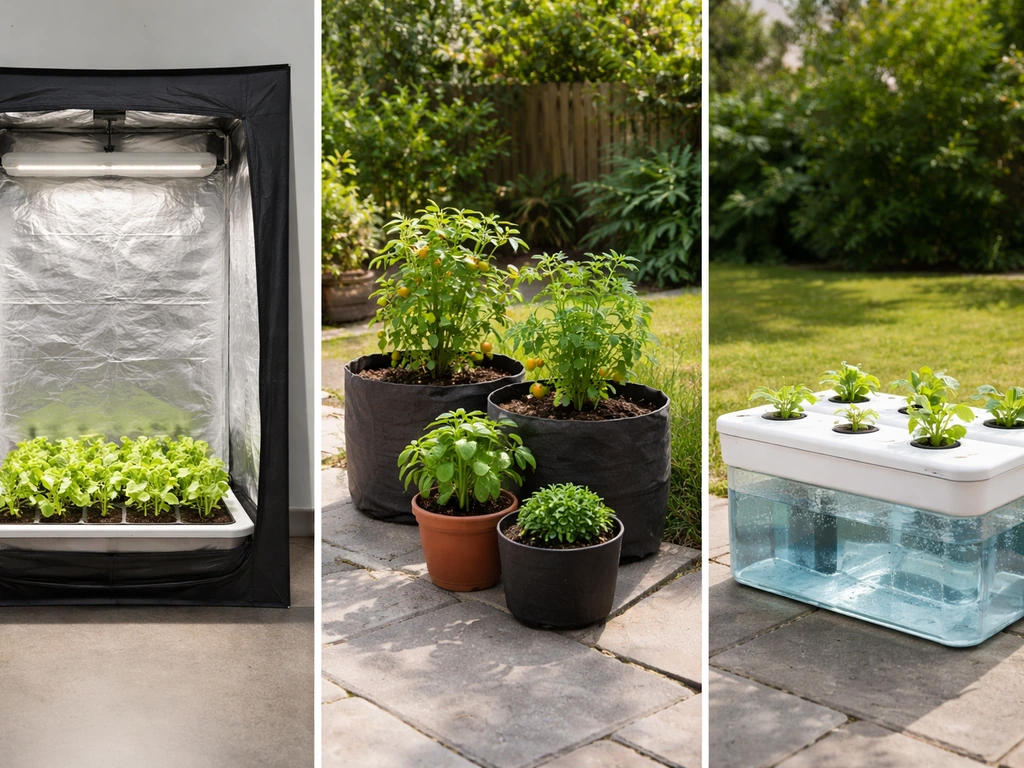
Each growing method has real advantages and real trade-offs. None of them is objectively better, the right one is the one that fits your situation, your state's regulations, and your goals.
| Method | Cost to Start | Control Level | Yield Potential | Best For |
|---|---|---|---|---|
| Indoor (soil/containers) | Moderate ($200–$600 basic setup) | High | Moderate to high with dialing in | Year-round grows, discreet setups, most climates |
| Outdoor (soil/ground or containers) | Low ($50–$150) | Low — weather dependent | Very high if climate cooperates | Warm climates, legal visibility requirements met, larger plants |
| Hydroponic (indoor) | Higher ($400–$1,000+ to start) | Very high | High to very high | Experienced growers, faster growth cycles, controlled spaces |
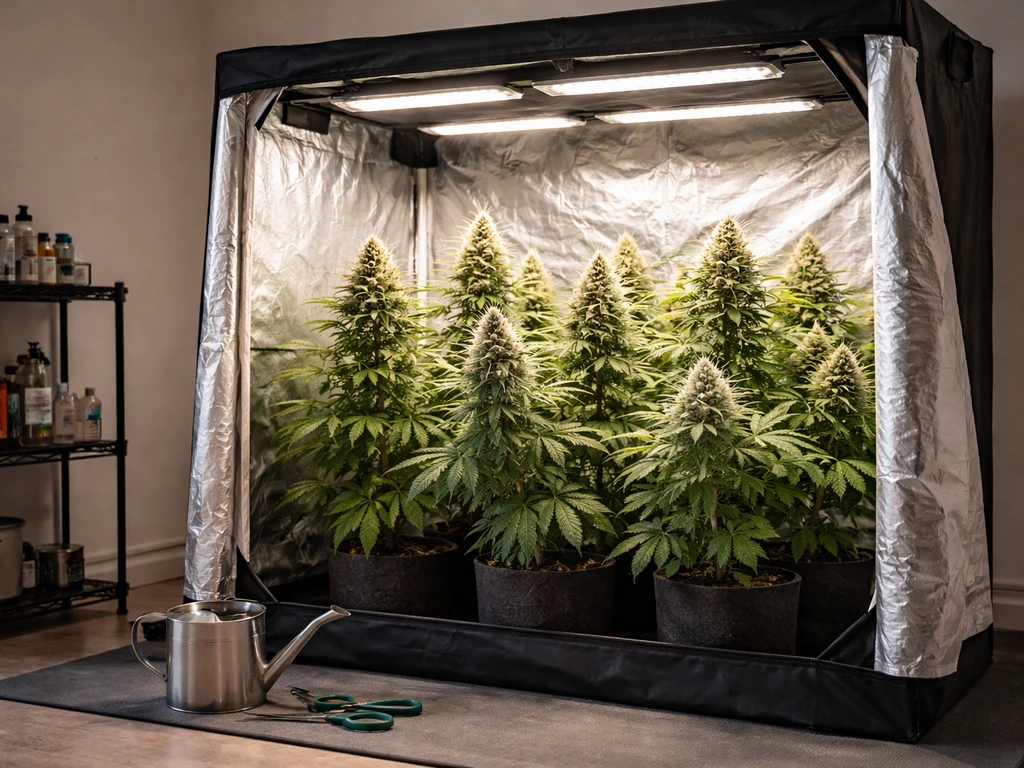
Indoor growing in soil or a quality potting mix is where most beginners should start. You control every variable, light, temperature, humidity, watering. A 4x4 grow tent with a 400W to 600W LED panel, a small inline fan, carbon filter, and basic soil bags will handle 4 to 6 plants comfortably. The upfront cost is higher than outdoor, but you grow year-round and stay fully compliant with the 'enclosed, locked facility' requirements that most states mandate.
Outdoor growing is the lowest-cost option and can produce enormous yields, a healthy outdoor plant in the right climate can deliver 400 to 800 grams or more. But you're at the mercy of weather, pests, and your local environment. You also need to ensure your outdoor grow area meets any visibility and security requirements in your state. If you're in a warm, sunny climate with a private, enclosed yard and your state permits outdoor cultivation, this is a genuinely great option.
Hydroponics delivers faster growth and higher yields per plant because roots access nutrients directly in water rather than hunting through soil. But there's a steeper learning curve: pH management becomes critical (slightly off and plants can't absorb nutrients), and system failures (pump outages, reservoir contamination) can damage or kill plants quickly. I'd recommend getting one successful soil grow under your belt before moving to hydro.
Seed-to-harvest: the full growing timeline
Here's the honest lifecycle of a cannabis plant from seed to smokeable, cured medicine. Times are approximate and vary by strain, method, and environment.
Germination (Days 1–7)
Germinate seeds using the paper towel method or directly in a small starter plug (Rapid Rooters or Jiffy plugs work well). For the paper towel method: place seeds between two damp (not soaking) paper towels on a plate, cover with another plate to trap moisture, and keep them at 70 to 85°F. Most healthy seeds crack and show a taproot within 24 to 72 hours. Once the taproot is about 1/4 to 1/2 inch long, transplant gently into a small starter pot (solo cup or 4-inch pot) with the taproot facing down. Keep the medium moist but not waterlogged.
Seedling stage (Days 7–21)
The seedling stage runs roughly two to three weeks. Your plant is small and vulnerable, it doesn't need heavy nutrients yet and is easily overwatered. Water only when the top inch of soil feels dry. Provide 18 hours of light per day for indoor grows. Keep temperatures between 70 and 80°F and relative humidity around 65 to 70%. A gentle breeze from a small fan helps strengthen the stem and prevents damping off (a fungal condition that collapses seedlings at the soil line).
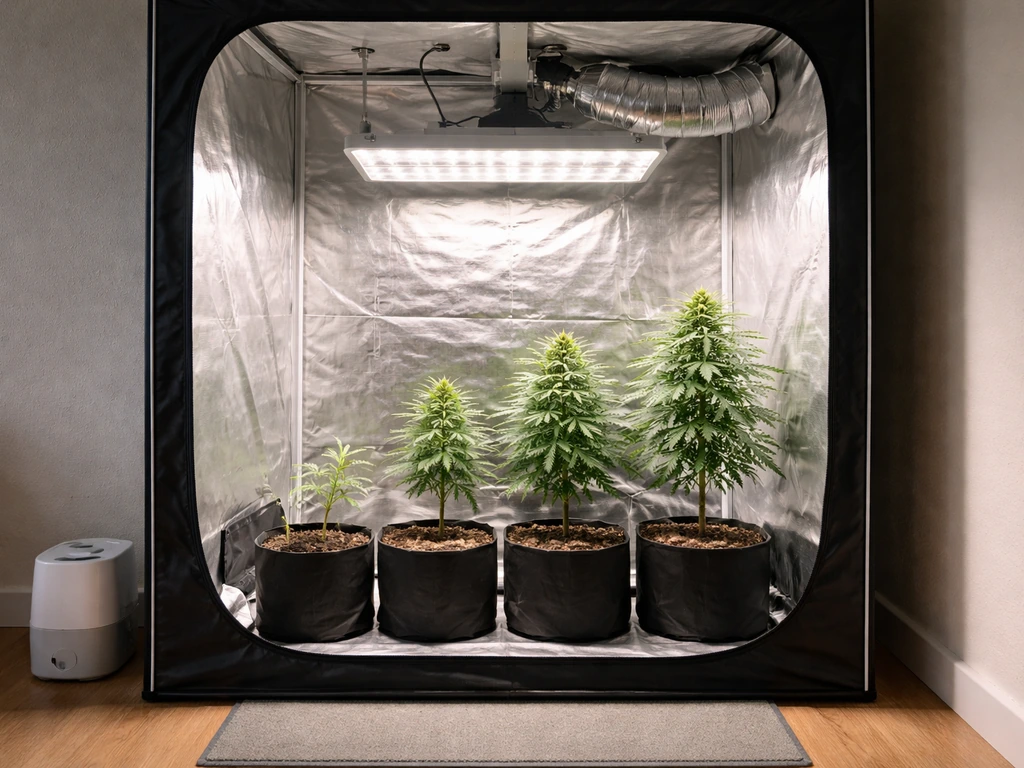
Vegetative stage (Weeks 3–8)
This is when your plant builds the structure it will use to produce buds. Photoperiod strains (those that flower based on light schedule) need 18 hours of light and 6 hours of darkness to stay in veg. Autoflowering strains don't care, they'll start flowering on their own schedule regardless of light. During veg, you can train your plant using low-stress training (LST): gently bending and tying down branches to create a wider, flatter canopy that allows more bud sites to receive light. This is one of the single best yield-improvement techniques a beginner can use with minimal risk. Veg runs 4 to 8 weeks depending on how big you want the plant before flipping to flower.
Flowering stage (Weeks 8–20)
For photoperiod strains, trigger flowering by switching your light schedule to 12 hours on, 12 hours off. The plant will show sex within 1 to 2 weeks, you want to see white pistils (hairs) emerging from the nodes, which confirms a female plant. Autoflowering strains start flowering on their own, typically around weeks 3 to 5. Flowering runs 7 to 12 weeks depending on strain.
As buds develop, reduce humidity to 40 to 50% to prevent mold. Watch your trichomes (the resin glands on the buds) to gauge harvest readiness, you'll need a jeweler's loupe or a digital microscope. Clear trichomes mean the plant isn't ready. Milky white trichomes indicate peak THC.
Amber trichomes signal THC degrading to CBN, which produces more sedating, body-heavy effects. For most medicinal users, harvesting at 70 to 80% milky and 20 to 30% amber is a good target.
Harvest, drying, and curing
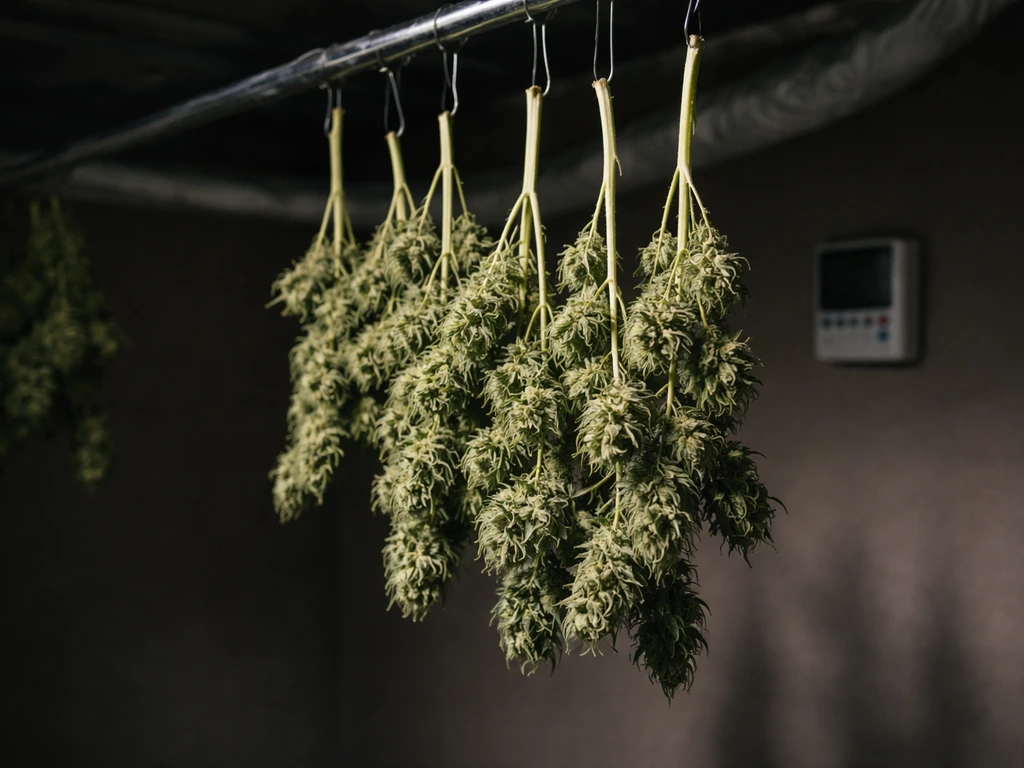
Cut the plant at the base or harvest individual branches. Trim large fan leaves immediately, then hang branches upside down in a dark, well-ventilated space at 60 to 70°F with 50 to 60% humidity. Drying takes 7 to 14 days. Buds are ready to jar when small stems snap cleanly rather than bending.
Curing is non-negotiable for medicinal quality, it's what separates harsh, chlorophyll-heavy smoke from smooth, aromatic, potent medicine. Place dried buds in glass mason jars filled about 75% full. Open the jars for 15 to 20 minutes once or twice daily for the first two weeks (called 'burping') to release moisture and gases. After two weeks, burp every few days.
A minimum cure of 4 weeks is the standard; 6 to 8 weeks produces noticeably better results for flavor, smoothness, and potency stability.
Controlling your environment: light, temperature, humidity, and airflow
Environment is where most beginner grows either succeed or quietly fail. I've seen growers with great genetics produce mediocre results because their tent was too hot, too humid, or poorly ventilated. Here's what you need to stay within range.
| Stage | Temperature (°F) | Relative Humidity | Light Hours (Indoor) |
|---|---|---|---|
| Seedling | 70–80°F | 65–70% | 18 hours on / 6 off |
| Vegetative | 70–85°F | 50–70% | 18 hours on / 6 off |
| Flowering (early) | 65–80°F | 40–50% | 12 hours on / 12 off (photoperiod) |
| Flowering (late) | 65–78°F | 35–45% | 12 hours on / 12 off (photoperiod) |
| Drying/Curing | 60–70°F | 50–60% | Darkness |
For lighting, modern LED panels are the best starting point for home indoor grows. Look for full-spectrum LEDs with a PPFD (photosynthetic photon flux density) rating appropriate for your space, roughly 400 to 600 µmol/m²/s during veg, and 600 to 900 µmol/m²/s during flowering. Hang height matters: most LEDs should be 18 to 24 inches above the canopy during veg and 12 to 18 inches during flower. Watch for light burn (bleaching at bud tips) and light stress (leaf edges curling upward) if lights are too close.
Airflow is critical and underrated. Your grow space needs fresh air exchanged at least once per minute, use an inline fan and carbon filter sized to your tent volume (measured in CFM, cubic feet per minute). A small oscillating fan inside the tent creating gentle movement across the canopy strengthens stems and prevents hot spots and stagnant humid pockets where mold thrives. A good rule: if leaves aren't gently moving, you don't have enough airflow.
Temperature control matters most during flowering. Temperatures above 85°F during flower slow bud development, reduce terpene content, and stress the plant. Below 60°F slows growth significantly and can trigger nutrient uptake problems. Use a quality thermometer/hygrometer combo (about $15 to $30) placed at canopy level, not at the ceiling of your tent.
Feeding your plants: nutrients, schedules, and deficiency signs
Cannabis needs three primary macronutrients: nitrogen (N), phosphorus (P), and potassium (K). During veg, plants are hungry for nitrogen to build leaves and stems. During flowering, they need less nitrogen and more phosphorus and potassium to support bud development. This is why nutrient lines are usually labeled 'Grow,' 'Bloom,' and sometimes a 'Micro' or 'Base' formula.
If you're using a quality cannabis-specific potting mix (like Fox Farm Ocean Forest or similar), you typically won't need to add any nutrients for the first 3 to 4 weeks of growth, the soil is already amended. After that, start feeding at half the manufacturer's recommended dose and increase gradually. Overfeeding is far more common and damaging than underfeeding. Nutrient burn (brown, crispy leaf tips) is the classic sign of too much fertilizer.
pH is the most important number you'll track. Cannabis in soil absorbs nutrients best at a pH of 6.0 to 7.0, with the sweet spot at 6.2 to 6.8. In hydroponic systems, the range is tighter: 5.5 to 6.5, ideally 5.8 to 6.2. When pH drifts outside these ranges, the plant cannot uptake certain nutrients even when they're present in the medium, this is called nutrient lockout, and it looks exactly like a deficiency even though you've been feeding regularly. Invest in a decent pH meter (not just strips) and calibrate it monthly.
Spotting common deficiencies and toxicities
- Nitrogen deficiency: Yellowing starts on lower, older leaves and works upward. Leaves look pale overall. Fix: increase nitrogen input, check pH first
- Phosphorus deficiency: Purple or dark green discoloration on leaves, stems turn reddish-purple. Often appears in cool temperatures or at low pH. Fix: raise temperature, correct pH, add bloom-phase nutrients
- Potassium deficiency: Brown, scorched edges and tips on leaves, usually mid-canopy. Fix: check pH, supplement with potassium
- Calcium/Magnesium deficiency (Cal-Mag): Brown spots on leaves, yellowing between veins (interveinal chlorosis), weak stems. Very common in RO water grows and coco coir. Fix: add Cal-Mag supplement
- Nutrient burn (toxicity): Tips and edges of leaves turn brown and curl down. Caused by overfeeding. Fix: flush medium with pH-corrected water, reduce nutrient dose by 25 to 50%
- Nutrient lockout: Looks like deficiency but plants have been regularly fed. Caused by pH being out of range. Fix: flush with pH-correct water and recalibrate your feed pH
Always diagnose pH before adding more nutrients. I can't tell you how many times I've seen growers add more fertilizer to fix a problem that was caused by pH, making the lockout worse. Test and correct pH first, wait a week, then reassess.
Troubleshooting real problems: pests, disease, mold, and poor yields
Pests
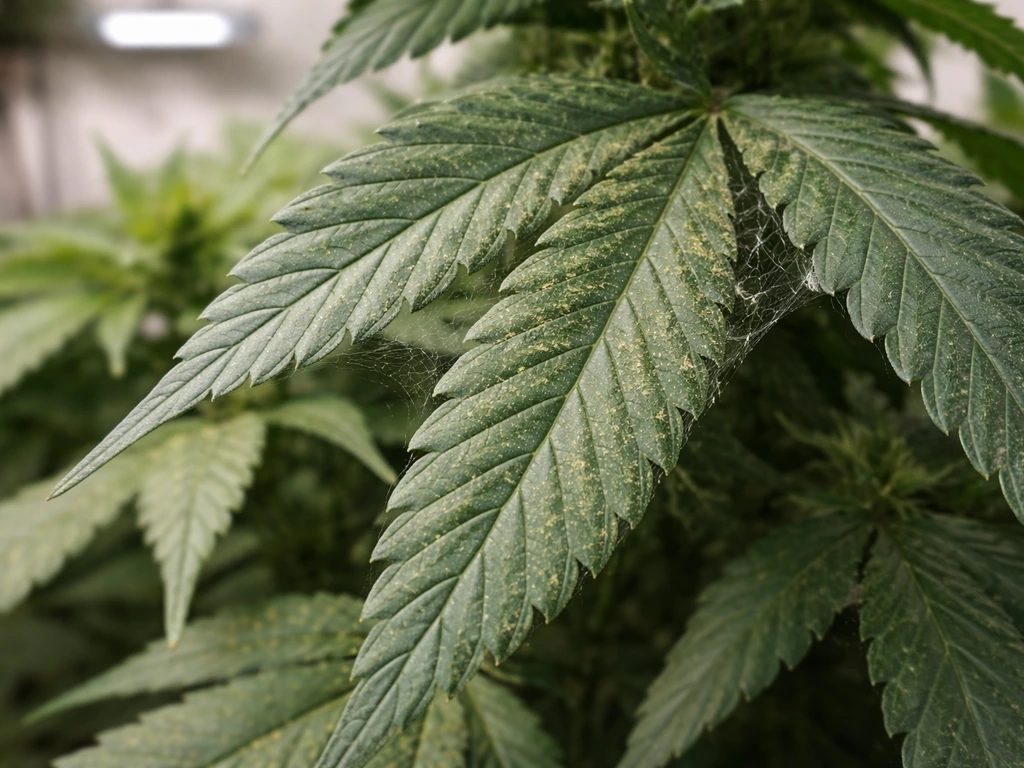
The most common cannabis pests in home grows are spider mites, fungus gnats, aphids, and thrips. Spider mites leave tiny yellow speckling on leaves and fine webbing under the canopy, caught early, they're controllable with neem oil spray or insecticidal soap applied every 3 days for 2 to 3 weeks. Fungus gnats are more of a nuisance in vegetative stage, their larvae damage roots and the adult flies are annoying. They thrive in wet soil.
Fix: let the top 2 inches of soil dry out between waterings, use yellow sticky traps, and apply Bacillus thuringiensis israelensis (Bti) products like Gnatrol to the soil. Never spray neem oil on flowering buds, it leaves a residue that affects taste and can be harmful when smoked or vaped.
Mold and powdery mildew
Botrytis (gray mold) is the nightmare of late-stage flowering grows. It looks like gray, fuzzy growth inside dense buds and spreads rapidly. It's almost always caused by high humidity combined with poor airflow in late flower. Prevention is everything here: keep late-flower humidity at 40 to 45%, keep airflow moving through the canopy, and prune interior fan leaves and lower bud sites during the first two weeks of flower to open up airflow.
If you spot botrytis, cut out the affected bud section immediately with sterile scissors and dispose of it in a sealed bag, do not let it touch other buds. Powdery mildew looks like white powder on leaf surfaces. It's a fungal issue often triggered by temperature swings and poor ventilation.
Remove affected leaves, improve airflow, and if caught early, a diluted hydrogen peroxide spray (3% H2O2, 1 part to 3 parts water) can help manage it on leaves (not on late-stage buds).
Poor flowering and low yield
If your plant isn't flowering properly or yield is disappointing, there are a few likely culprits. First, light penetration: if your light isn't strong enough or the canopy is too dense, lower bud sites get nothing and produce airy, loose buds. Open up the canopy during early flower and make sure your light intensity is in range.
Second, light leaks: for photoperiod plants, any light during the dark period, even a small LED from a fan controller, can stress the plant and cause it to re-veg or hermaphrodite. Seal your grow space completely. Third, harvest timing: cutting too early is one of the most common beginner mistakes. Those final two weeks of flowering are when buds pack on 25 to 40% of their final weight.
Use a loupe to check trichomes rather than guessing by calendar.
Hermaphrodites and stress
A hermaphrodite plant grows both male pollen sacs and female buds. It can self-pollinate your whole crop, producing seedy, lower-quality buds. Hermaphroditism is usually caused by genetics (cheap or unstable seeds), light stress (light leaks during dark period), extreme temperature stress, or severe nutrient issues. Inspect plants weekly for any small, round, banana-shaped pollen sacs forming among bud sites. If you find them, remove that plant from your grow space immediately or remove the pollen sacs carefully before they open. This is another reason quality genetics from reputable seed banks matter.
A quick checklist before your first grow
- Confirm home cultivation is legal for medical patients in your state and get your authorization in order
- Choose feminized or autoflowering feminized seeds from a reputable seed bank with documented genetics
- Select your grow method: indoor soil for most beginners, outdoor if your climate and space allow, hydro only after you have one successful grow completed
- Set up your enclosed, locked grow space with appropriate lighting for your plant count and space size
- Get a quality pH meter, thermometer/hygrometer, and calibration solution before planting
- Start with a cannabis-specific potting mix so you don't need to add nutrients for the first few weeks
- Germinate using the paper towel or plug method and transplant once the taproot reaches 1/4 to 1/2 inch
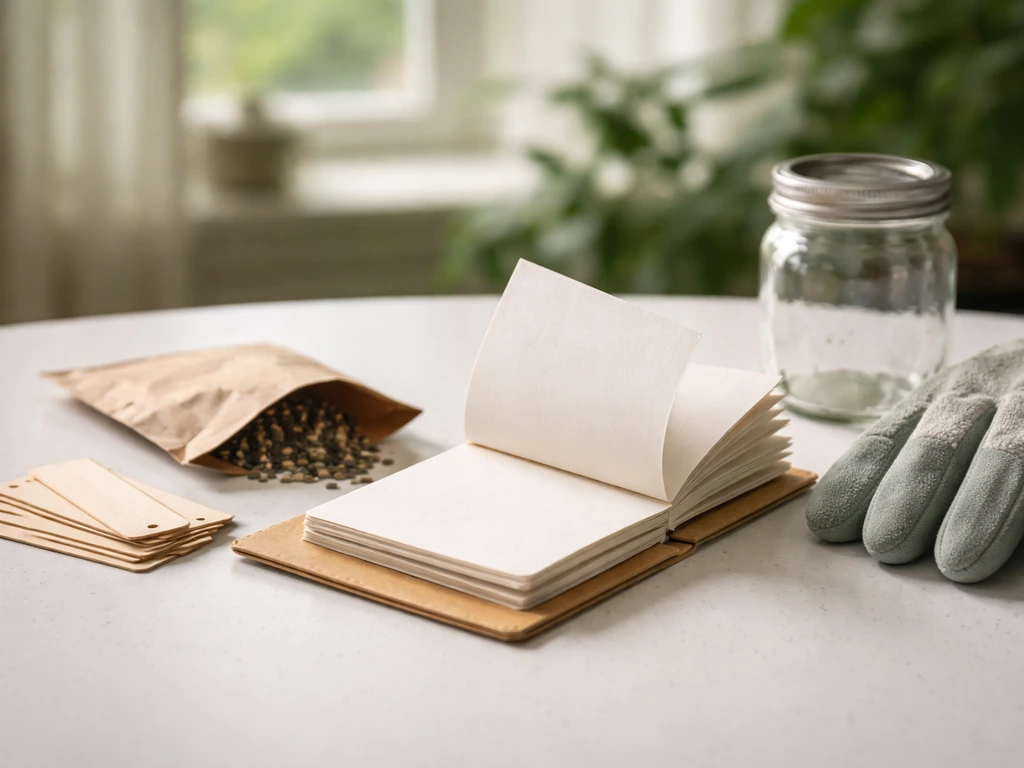
- Monitor environment daily during the first few weeks and keep a simple grow journal noting any changes
- Set up proper airflow with an inline fan, carbon filter, and oscillating fan inside the space
- Plan for drying and curing space before harvest — this is often forgotten until the last minute
Growing medicinal cannabis at home is genuinely one of the more rewarding projects you can take on as a patient, but it rewards patience and consistency more than any single technique. If you are looking for a practical starting point, follow these steps on how to grow pot safely and within your local rules growing medicinal cannabis at home. The growers I've seen produce the best results aren't necessarily the most experienced, they're the ones who pay attention, keep notes, and don't panic when something looks off. If you're in a specific state with unique rules, it's worth going deeper on your local regulations, the rules in Missouri, Nevada, Texas, and Florida each have meaningful differences that affect what you can legally grow and how.
FAQ
What’s the safest way to confirm my state allows home cultivation for medical patients before I buy seeds?
Check your state’s current statute or regulator guidance, then verify the exact conditions that apply to your patient status (patient vs caregiver, plant limits, and where cultivation must occur). Also confirm whether “non-visible from public space” has a specific definition in your state, since window placement, ventilation ducting, and fencing requirements can change compliance even if the plant count is within limits.
Can I germinate seeds if home cultivation is technically allowed, but I don’t have my final grow setup ready yet?
You usually should not start before you have a secure, enclosed area that meets your state’s requirements. Germination setups (plates, cups, heat mats) are often exposed and not locked or concealed, which can create legal and practical risk. Consider germinating only after the location is ready so seedlings never sit unattended in an unsecured space.
How do I know whether to choose photoperiod or autoflowering for medicinal use?
Choose photoperiod if you want maximum control over growth size and timing (for example, to match symptoms to a harvest schedule). Choose autoflowering if you want a simpler, more predictable timeline and generally more forgiving behavior with light schedule mistakes. If discretion and consistency are your top priorities, autoflowering often reduces the number of variables that can go wrong.
What’s the difference between “high CBD” and “high THC” in day-to-day effects and medication planning?
High-CBD strains typically produce less intoxication, but they may still cause fatigue or interact with how other medications feel. If you plan to avoid psychoactivity, consider starting with balanced or predominantly CBD genetics and track dose timing (especially if you have morning vs nighttime symptom goals).
How can I prevent growing male plants if I’m using regular seeds?
If you must use regular seeds, plan for early sex identification and removal. Look for pollen sacs as soon as the plant shows sex, usually within 1 to 2 weeks after inducing flowering for photoperiod plants. Remove male plants immediately to avoid pollinating females, even one missed male can seed the whole crop.
Is it normal if my plant shows stress during the switch to flowering (12/12) or as an autoflower starts?
Mild stretching or minor leaf changes can happen, but persistent problems usually point to an underlying cause, commonly light intensity changes, temperature swings during lights-off, or nutrient imbalance. Don’t automatically add more fertilizer right after the flip. First confirm temperature, airflow, and pH are stable, then reassess over several days.
How often should I check pH, and when should I adjust it?
In soil, pH matters but it’s less “live” than in hydro; you should check pH at least whenever you change water source or nutrients and before major troubleshooting. In hydro, check more frequently, and only adjust when you measure, not on a schedule. If you correct pH, give the plant time to respond before changing anything else, since over-correcting can worsen lockout.
What’s the most common mistake with watering that leads to problems later?
Watering too frequently or keeping the root zone consistently wet, which promotes fungus gnats and can stunt roots. Use the dry-down approach, measure soil dryness at the same depth each time, and avoid “top-off” watering that never fully lets the medium breathe.
If I see pale leaves or “deficiency” symptoms, should I always add nutrients?
No. In many cases, deficiency-like symptoms are actually nutrient lockout from pH drift. Diagnose by testing pH first, then review whether the medium is draining properly and whether you recently overfed. If you add nutrients to a pH problem, you can intensify burn and lockout at the same time.
How do I reduce the risk of mold in late flowering beyond humidity control?
Humidity targets help, but dense canopies still trap stagnant air. Keep airflow moving through the canopy, avoid overcrowding plants relative to your tent size, and remove interior leaves early in flower to reduce microclimates. Also be careful with watering schedules, water runoff, and late-stage spraying, since wet surfaces can accelerate gray mold.
What should I do if I suspect light leaks during the dark period for photoperiod plants?
Treat it like an emergency troubleshooting item. Confirm all lights are fully off during the dark cycle, cover any indicator LEDs, and ensure your automation timers do not “glitch” during power fluctuations. If you suspect leaks, pause adjustments for a few days and watch for hermaphrodite signs (banana-shaped pollen sacs) forming among buds.
When should I start looking at trichomes, and what tool accuracy issues should I watch for?
Start checking late in flowering, then increase inspection frequency as harvest window approaches. For best decision-making, use consistent magnification and lighting, and sample multiple bud sites since maturity can differ across the canopy. If your images are blurry, replace batteries or reposition the loupe, since misreading clears vs milky trichomes is a common harvest-timing mistake.
How do I avoid ruining potency and flavor during drying and curing?
Rushing drying or over-drying can lock in harshness, plus weak ventilation can cause uneven moisture and mold risk. Aim for buds where small stems snap cleanly, then cure at the correct jar fill level and follow a consistent burping cadence. If jars smell sour or overly pungent, check humidity and airflow consistency before making additional changes.
Can I store jars long-term, and what’s the safest handling routine?
Yes, but long-term quality depends on minimizing oxygen exposure and heat swings. Keep jars cool and dark, ensure seals are intact, and avoid repeatedly opening them for long periods. If you notice condensation inside jars, it usually means the cure/dry level is off and needs immediate attention.
Next Article
How to Grow Medical Weed at Home: Step-by-Step Guide
Step-by-step guide to grow medical weed at home, from legal setup and strains to germination, nutrients, and harvest cur