Growing medical cannabis at home is completely doable for a beginner, but it works best when you treat it as two parallel projects running at the same time: one legal, one horticultural. Get your paperwork and setup right first, then focus on the plants. Most people who struggle their first grow skipped one of those two tracks. This guide walks you through both, start to finish, in plain language.
How to Grow Medical Weed at Home: Step-by-Step Guide

Marcus Holbrook
12 May 2026
Legal and medical basics before you grow
Before you buy a single seed, you need to know exactly what your state allows. Home cultivation rights for medical patients vary enormously. Some states let registered patients grow a set number of plants at home with no additional permit. Others require a separate cultivation certificate or caregiver registration. A few states with medical programs still prohibit home growing entirely, and some have very recent changes, so always check current state law rather than relying on what you read a year ago.
Ohio is a good example of how specific these rules can get. Under Ohio's home-grow statute, effective March 20, 2026, cultivation must happen inside a secured closet, room, greenhouse, or other enclosed area. The space must prevent access by anyone under 21, and the plants cannot be visible from public spaces by normal unaided vision.
Ohio's administrative code also draws a clear line between what a patient may possess versus what a caregiver may possess, for instance capping caregiver possession at 2. 5 ounces of plant material and 15,000 mg THC. Rhode Island takes it further: home-grow certificate holders are required to control odor so strongly that cannabis smells cannot significantly alter the environmental odor outside the grow location.
Rhode Island also verifies your registry identification card, and if you are growing as a caregiver, it verifies the cards of every patient you are authorized to grow for.
State-specific rules like those in Florida, Missouri, Texas, and Nevada each have their own plant counts, caregiver structures, and security requirements. If you are in Texas, start by confirming the specific rules for licensed medical patients, including plant limits and security requirements. If you are wondering how to grow weed legally in Florida, focus first on the state’s specific plant limits and security rules for home cultivation.
If your state is one of those, dig into your state's medical cannabis board rules directly, because a single detail like 'plants must be in a locked space' can change whether you are compliant or not. For Missouri medical patients, make sure you follow the current Missouri medical cannabis program rules on plant counts, security, and licensing requirements.
On the medical side, it helps to go into this with realistic expectations about what cannabis can and cannot do for you. Research from the National Academies and NCCIH shows solid evidence for cannabis-based medicines in areas like chronic neuropathic pain, chemotherapy-induced nausea, multiple sclerosis spasticity symptoms, and certain epilepsy syndromes. [A 2018 review found low- to moderate-quality evidence that cannabis-based medicines outperform placebo for neuropathic pain. ](https://www.
nccih. nih. gov/health/cannabis-marijuana-and-cannabinoids-what-you-need-to-know) A systematic review and meta-analysis reported that [pooled cannabis-based medicines were better than placebo for reducing pain intensity](https://pmc. ncbi.
nlm. nih. gov/articles/PMC6494210/), sleep problems, and psychological distress, though evidence quality ranged from very low to moderate. FDA-approved cannabidiol (Epidiolex) has a specific dosing framework for seizure conditions.
But the evidence strength depends heavily on the specific condition and the specific cannabinoid preparation. That is exactly why you should keep your prescribing clinician in the loop about your home-grow project. They can help you set realistic targets for cannabinoid profiles and, critically, guide you on dosing, which is not something a plant can tell you.
Before your first seed goes in the ground, build a simple compliance record. Keep your patient or caregiver registration, any cultivation permit, and a running log of plant count, dates, and any purchases or transfers. This is not just bureaucratic caution. If you are ever asked to demonstrate legal compliance, a clear paper trail is your best protection.
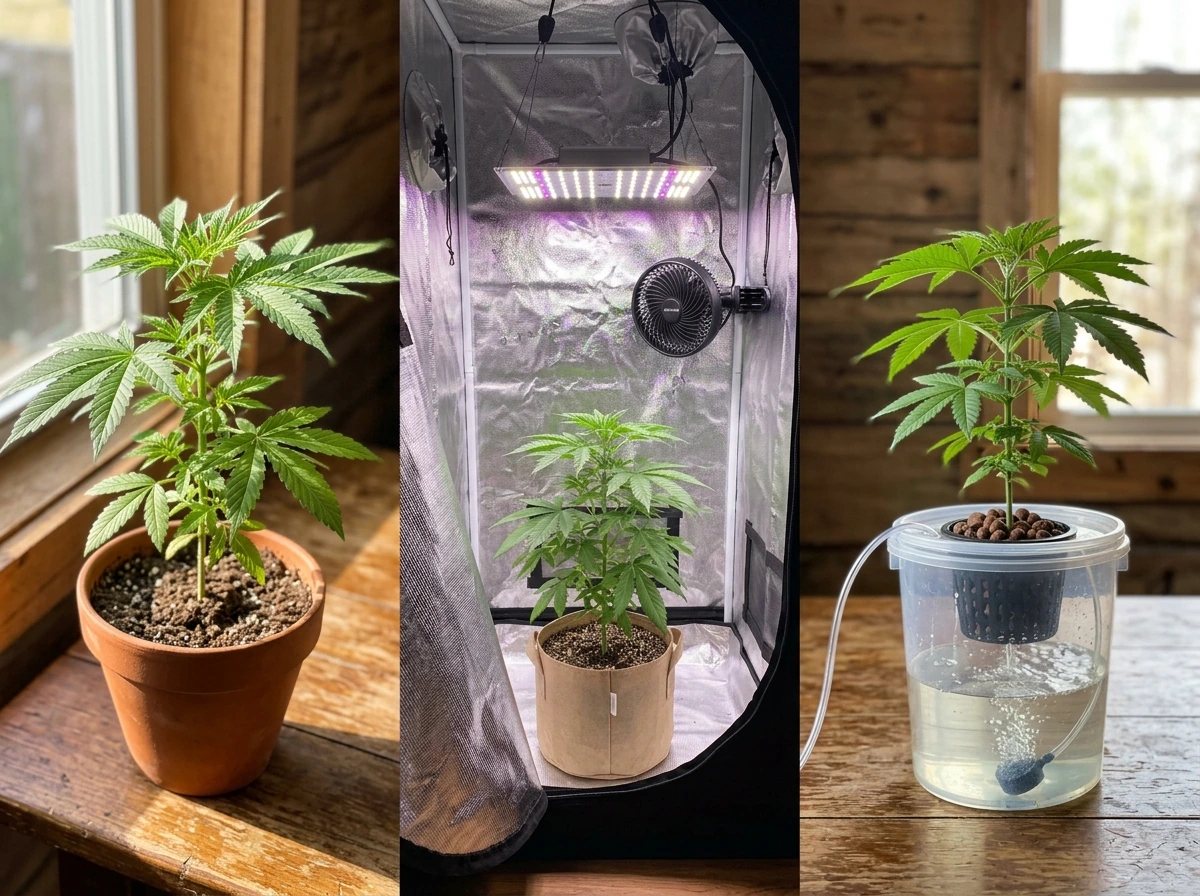
Choose your growing setup: indoor, outdoor, or hydro
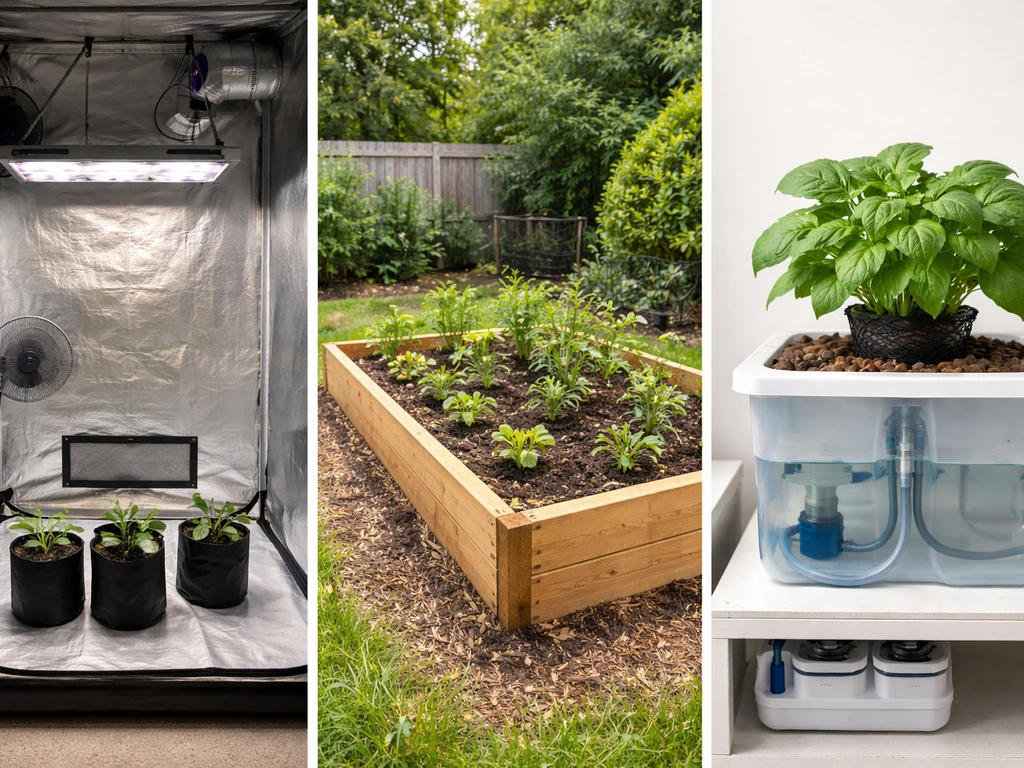
No single setup is right for every grower. Indoor, outdoor, and hydroponic methods each have real strengths, and the best one for you depends on your space, budget, climate, and how much hands-on attention you want to give. Here is an honest breakdown.
| Setup | Cost to start | Control level | Yield potential | Best for |
|---|---|---|---|---|
| Indoor (soil or coco) | Medium ($300–$800 basic) | High | 2–5 oz per plant typical beginner harvest | Year-round growing, privacy, strain flexibility |
| Outdoor (in-ground or containers) | Low ($50–$200) | Low (weather-dependent) | Up to several oz to pounds per plant in good climate | Lower cost, natural light, larger plants |
| Hydroponic (DWC, coco, NFT) | Medium-High ($400–$1,200+) | Very high | Often 20–30% faster growth than soil | Experienced beginners wanting speed and precision |
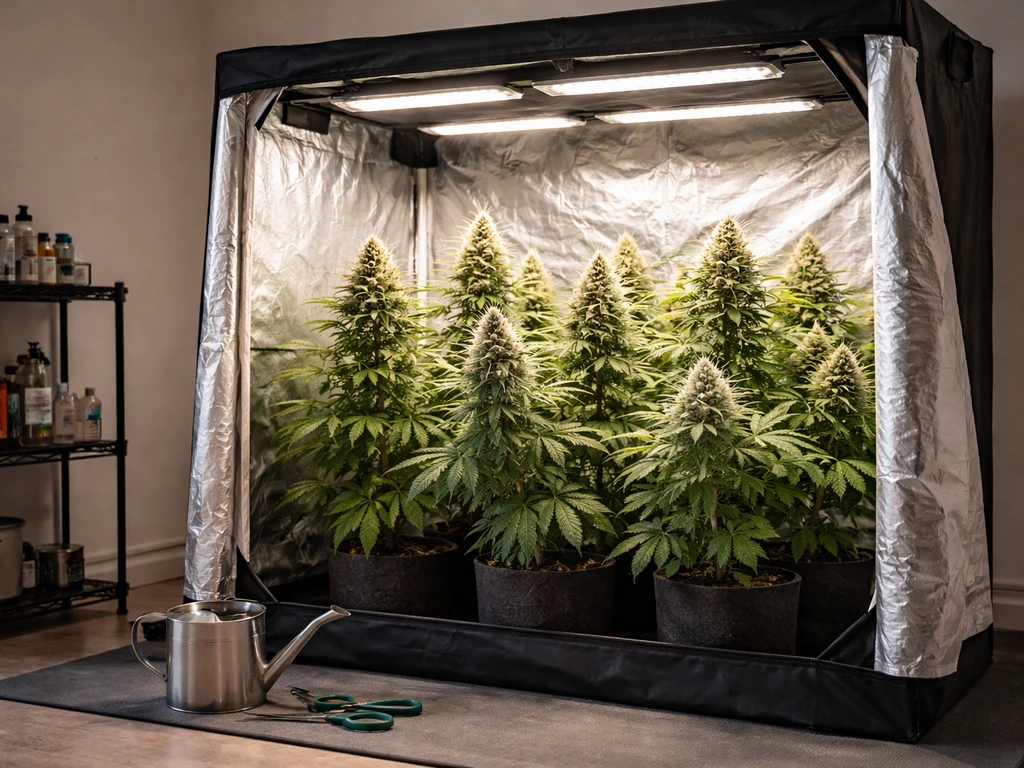
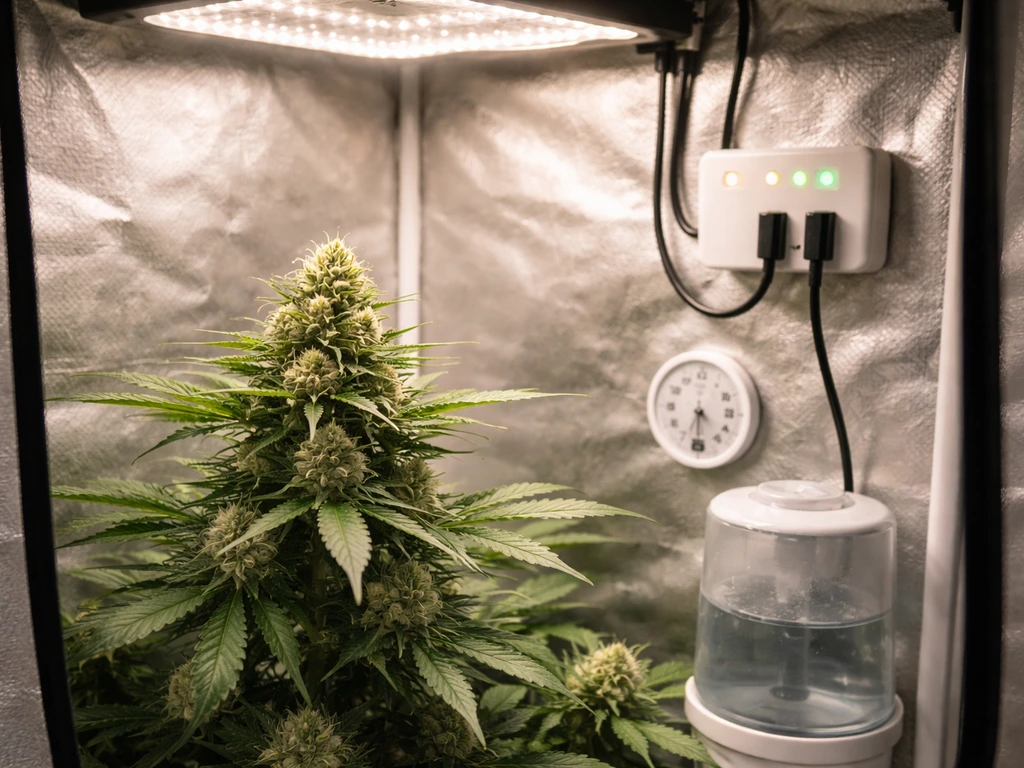
Indoor growing in a grow tent is the most practical starting point for most medical home growers. A 2x4 foot tent fits two to four plants comfortably, keeps your grow contained and secure (which helps with legal security requirements), and lets you control every environmental variable. You will need a quality LED light, an exhaust fan with carbon filter, a small oscillating fan, and a thermometer-hygrometer. For a basic indoor setup, budget around $400 to $600 to do it properly.
Outdoor growing is the lowest-cost option and produces the largest plants, but you are at the mercy of your local climate. Cannabis needs at least 6 hours of direct sunlight daily, warm temperatures (ideally 70 to 85 degrees Fahrenheit during the day), and low humidity at flowering time to avoid mold. If you live somewhere with a hot, dry late summer and early fall, outdoor growing can be excellent. If your area is humid in August and September, outdoor growing gets risky during the flowering window.
Hydroponics gives you faster growth and higher precision, but the margin for error is smaller. pH swings hit harder in hydro than in soil because there is no growing medium to buffer them. I would recommend getting one or two soil grows under your belt before moving to deep water culture or nutrient film technique, unless you are genuinely excited about learning the system from the start.
Environmental targets to aim for
- Vegetative stage temperature: 70 to 85°F (21 to 29°C)
- Flowering stage temperature: 65 to 80°F (18 to 26°C), slightly cooler nights help resin development
- Vegetative humidity: 50 to 70% relative humidity (RH)
- Flowering humidity: 40 to 50% RH (drop toward 40% in the last two weeks to reduce mold risk)
- Airflow: gentle breeze across all leaves at all times; one oscillating fan plus exhaust fan is minimum
- CO2: ambient (around 400 ppm) is fine for most home grows without supplementation
- pH for soil: 6.0 to 7.0 (6.2 to 6.8 is the sweet spot)
- pH for hydroponics/coco: 5.5 to 6.5 (5.8 to 6.2 is optimal)
Picking strains for medical goals
Strain selection for medical purposes is more nuanced than just picking something with a high THC percentage. The cannabinoid and terpene profile matters, and so does your specific condition. That said, there are practical patterns worth knowing when you are choosing seeds or clones.
If your primary goal is pain relief or sleep support, high-THC indica-dominant or balanced THC:CBD strains are commonly used. For anxiety reduction, inflammation, or seizure conditions, high-CBD strains (with CBD:THC ratios of 1:1 up to 20:1) are more appropriate and will not produce strong psychoactive effects. For nausea, appetite stimulation, or daytime use where you need to stay functional, moderate-THC sativa-dominant or balanced hybrids are worth exploring. These are generalizations, and your clinician is the right person to help you nail down which direction fits your condition.
For beginners, autoflowering strains are worth serious consideration. They flower automatically based on age rather than light schedule, finish in 70 to 90 days from seed, stay compact (usually 1 to 3 feet tall), and are more forgiving of beginner mistakes. The trade-off is that yields are typically lower than photoperiod plants and you cannot clone them. Feminized seeds, which produce only female plants (the ones that produce buds), eliminate the work of identifying and removing male plants. Most beginner home growers should use feminized autoflowering or feminized photoperiod seeds.
Seed banks now label cannabinoid percentages, but treat those numbers as ballpark targets. A strain listed at 18% THC grown under ideal conditions by a skilled cultivator might produce 12% THC in your first indoor tent. That is normal. Your growing skill and environment will always influence the final cannabinoid content, which is one more reason to work with a clinician on dosing rather than assuming a number on the seed packet translates directly to your medicine.
Strain types and medical goal alignment
| Medical goal | Cannabinoid target | Strain type to look for | Example considerations |
|---|---|---|---|
| Chronic pain relief | Moderate to high THC, some CBD | Indica-dominant or balanced hybrid | Evening or nighttime use; sedating effect likely |
| Anxiety / stress reduction | High CBD, low THC (10:1 or higher CBD:THC) | High-CBD hemp-type or balanced | Minimal psychoactive effect; daytime-friendly |
| Nausea / appetite stimulation | Moderate to high THC | Sativa-dominant or hybrid | Daytime use; uplifting effect |
| Sleep disturbance | High THC, some CBN (present in aged/cured flower) | Indica-dominant, high myrcene terpene profile | Best taken 1 to 2 hours before bed |
| Seizure / epilepsy support | High CBD, very low THC | CBD-dominant cultivar | Always in coordination with neurologist; Epidiolex exists as FDA-approved option |
Starting from seed or clone, and moving into veg
Seeds are the easiest starting point for most home growers because they are widely available, legal to purchase in many places, and do not carry pests or disease like clones sometimes do. Clones (cuttings taken from a mother plant) are faster to establish and genetically identical to the parent, but sourcing clean, pest-free clones requires a trustworthy dispensary or grower.
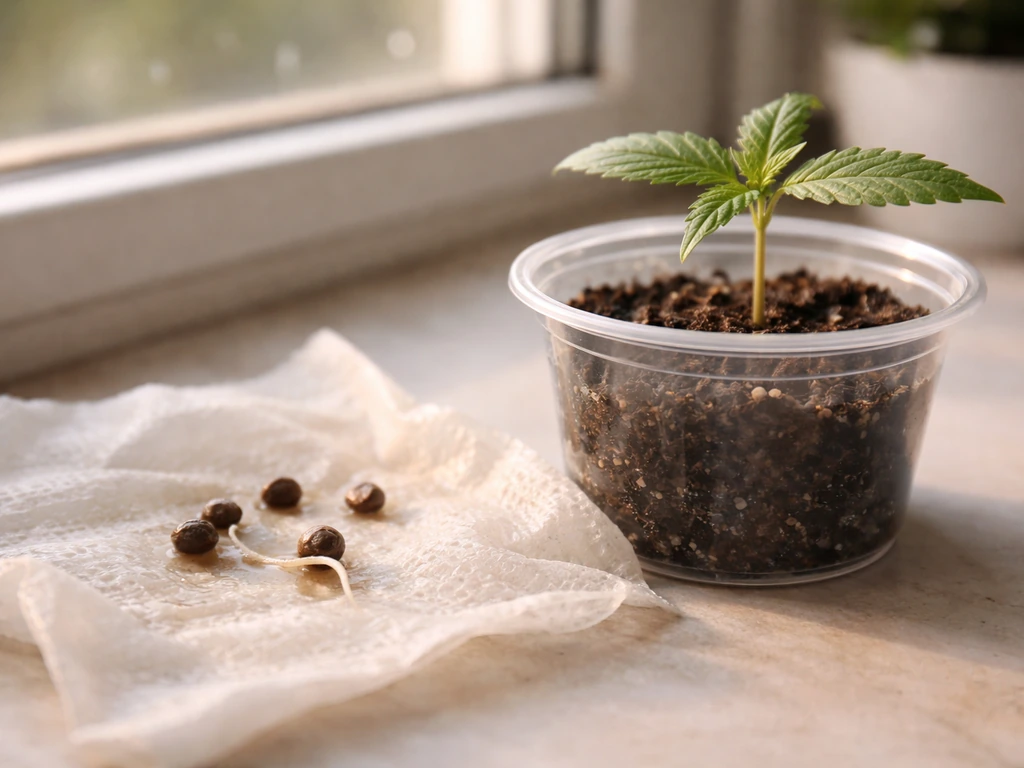
Germination step by step
- Soak seeds in a glass of room-temperature water for 12 to 24 hours until you see a small tap root emerge or the seed sinks.
- Transfer to a folded, damp (not soaking wet) paper towel, place it on a plate, and cover with another plate or a dome to retain moisture.
- Keep the paper towel at 70 to 78°F. Most seeds will show a tap root of 0.5 to 1 inch within 24 to 72 hours.
- Plant the germinated seed tap root down, about 0.5 inches deep in a small starter container (2-inch or solo cup) filled with lightly moistened seedling mix or coco.
- Cover loosely with plastic wrap or a humidity dome and keep under a low-intensity light (a T5 fluorescent or LED at 24 inches) for 18 to 24 hours of light per day.
- Remove the dome once the seedling breaks the surface, usually within 2 to 5 days.
Seedlings are more fragile than people expect. The most common early mistakes are overwatering, which causes damping off (where the stem collapses at the soil line) and is caused by waterlogged soil rather than dry conditions, and planting into large containers too early. Start small, water lightly, and only water again when the top half inch of soil feels dry. Seedlings do not need nutrients for the first 10 to 14 days if you are using a quality seedling mix.
Transplanting and the vegetative stage
Transplant from a solo cup or small starter pot to a 1-gallon pot once the roots start circling the bottom or you see roots poking out the drainage holes. From a 1-gallon pot, transplant again to your final container (typically 3 to 7 gallons for indoor, 5 to 15 gallons for outdoor) when the canopy of the plant spreads to the edges of the pot. Each transplant is a minor stress event, so do it gently, keep the root ball intact, and water with plain pH-adjusted water (no nutrients) for the first day or two after transplanting.
During vegetative growth, photoperiod plants need 18 hours of light and 6 hours of darkness per day. Autoflowering plants can run on 18 to 20 hours of light throughout their entire life. Veg is the growth phase where you build the plant structure that will support your future buds. Aim to keep the plant healthy and growing steadily rather than pushing it hard. You want deep green leaves, vigorous new growth every day, and no signs of stress. A healthy veg plant will double or triple in size once it flips to flower, so plan your canopy height accordingly.
Nutrient feeding during veg is focused on nitrogen (N) with supporting phosphorus (P) and potassium (K). A simple NPK ratio of 3-1-2 is a reasonable target for veg. Start at half the manufacturer's recommended dose and work up. Always pH your nutrient solution before watering: 6.2 to 6.8 for soil, 5.8 to 6.2 for coco or hydro. Measure your runoff pH too. If your runoff is drifting outside range, flush with plain pH-adjusted water and recalibrate.
Flowering: light, environment, nutrients, and training
For photoperiod strains, flowering is triggered by switching the light cycle to 12 hours on and 12 hours off. This mimics the shorter days of late summer. Make the switch when your plant is about half the final height you want, because most strains will stretch 50 to 100% taller during the first two to three weeks of flower (called the pre-flower stretch). Autoflowering strains start flowering on their own at 3 to 5 weeks old regardless of light schedule.
Dialing in the flowering environment
Drop temperature slightly during flower (65 to 80°F during lights-on, 60 to 70°F during lights-off). More importantly, drop humidity. Target 40 to 50% RH from the start of flower, and pull it down to 35 to 45% in the final two weeks before harvest. High humidity during late flower is the single biggest driver of bud rot (Botrytis), which can destroy an entire harvest and produce unsafe medicine. If your space runs humid, get a dehumidifier or move smaller batches to a drier area for late flower.
Flowering nutrients
Flip your nutrient profile when you flip to flower. Reduce nitrogen and increase phosphorus and potassium to support bud development. A common NPK target for flowering is 1-3-2 or similar. At weeks 5 to 7 of flower (in an 8 to 10 week strain), many growers do a 'flush,' running plain pH-adjusted water for the last 1 to 2 weeks before harvest. The science on flushing is debated, but anecdotally it seems to improve the taste of the final product, particularly if you have been running heavy synthetic nutrients. In coco and hydro, flushing is more commonly skipped in favor of a 'finishing formula' low in nitrogen.
Common nutrient deficiencies in flower include calcium and magnesium deficiency (yellowing between leaf veins, spotting), which is corrected with a Cal-Mag supplement at 1 to 5 ml per gallon depending on the product. Potassium deficiency shows as brown leaf tips and edges. Phosphorus deficiency shows as dark purpling of stems and leaves. Always check pH first before assuming a deficiency, because nutrient lockout (the inability of roots to absorb nutrients at incorrect pH) looks identical to a true deficiency.
Training techniques to increase yield
Training is optional but rewarding. Low-stress training (LST) involves gently bending stems and tying them down to create a flat, even canopy that exposes more bud sites to light. Topping, which means cutting the main stem above a node to create two main colas instead of one, increases overall yield but is a slightly higher-stress technique. Both methods are safe for beginners to try. Avoid heavy defoliation or high-stress training in the last two weeks of veg or during flower, as the plant needs its energy for bud production.
Pest, disease, and mold prevention
For medical-use growers specifically, pest and contamination prevention is not just about yield protection. It is about producing safe medicine. Maine's medical cannabis cultivation guidance explicitly calls out the need to avoid products that can promote mold or adulterate the crop.
Massachusetts' Cannabis Control Commission requires cultivators to follow best practices limiting contamination from mold, fungal disease, bacterial disease, rot, and pests, and restricts the use of certain pesticides on cannabis because some standard agricultural chemicals are not permitted for use on cannabis intended for human consumption. That applies to you as a home grower too: just because a pesticide is available at your garden center does not mean it is safe to apply to cannabis you will inhale or consume.
The CDC defines integrated pest management (IPM) as a science-based approach that combines multiple control measures rather than relying on any single method. For home cannabis growers, IPM means building an environment where pests struggle to establish, catching problems early through regular inspection, and reaching for the least toxic effective solution first.
Prevention first
- Keep your grow space clean: wipe down tent walls, remove dead leaves immediately, sanitize tools between plants
- Control humidity rigorously, especially in flower (target 40 to 50% RH, drop to 35 to 45% in week 6 onward)
- Maintain strong airflow with an oscillating fan across the canopy at all times
- Never let water pool on leaves or sit on top of soil for extended periods
- Quarantine any new clones for 1 to 2 weeks before introducing them to your main grow space
- Change clothes and wash hands before handling plants if you have been outdoors or near other plants
- Use only approved, cannabis-safe inputs: neem oil (early veg only, not in flower), insecticidal soap, diatomaceous earth, beneficial insects like predatory mites (Phytoseiidae) for spider mites, or Spinosad for caterpillars and thrips
Common pests and what to do
| Pest / Problem | What it looks like | Treatment |
|---|---|---|
| Spider mites | Tiny dots on leaves, fine webbing under leaves | Insecticidal soap or neem oil spray (veg only); predatory mites in flower |
| Fungus gnats | Tiny flies around soil; larvae damage roots | Let soil dry between waterings; yellow sticky traps; Bacillus thuringiensis israelensis (BTi) soil drench |
| Aphids | Clusters of soft insects on new growth, sticky residue | Neem oil or insecticidal soap spray; ladybugs as beneficial predators |
| Thrips | Silver streaking on leaves; tiny fast-moving insects | Spinosad spray; predatory mites; blue sticky traps |
| Botrytis (bud rot) | Grey fuzzy mold inside dense buds; starts as mushy brown spot | Remove and bag affected material immediately; drop humidity; increase airflow; no chemical cure once established |
| Powdery mildew | White powdery coating on leaf surfaces | Remove affected leaves; spray with diluted hydrogen peroxide (3%) or potassium bicarbonate; improve airflow and reduce humidity |
Botrytis (grey mold) and Penicillium species are the most dangerous post-harvest threats. Research on cannabis diseases confirms that several fungi can cause post-harvest rot during harvest, trimming, drying, and curing. This matters especially for medical patients: the CDC notes that mold in damp environments poses increased risk for immune-compromised individuals. If you are growing for a patient who is immunocompromised, post-harvest hygiene is as important as the grow itself. Any bud showing mold during drying or curing should be discarded, not consumed.
Harvesting, curing, and storing your medicine
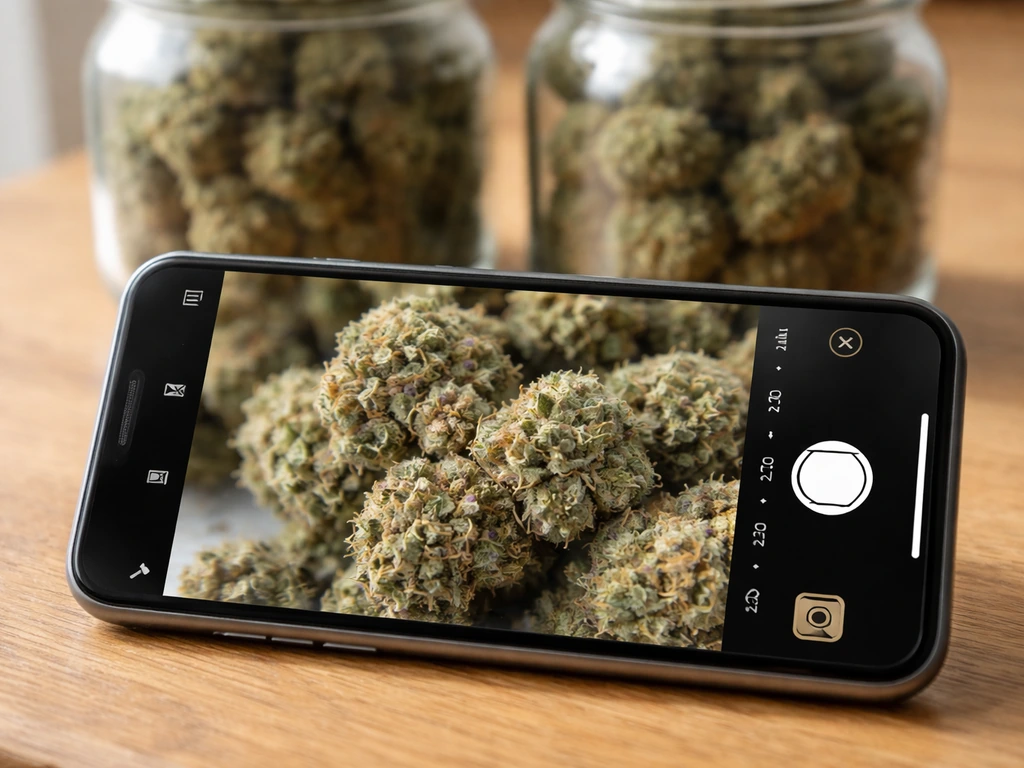
Harvesting too early is the most common mistake, and it matters more for medical growers than recreational ones because cannabinoid development is not complete until the plant signals full maturity. The most reliable harvest indicator is trichome color, checked under a jeweler's loupe (30x to 60x magnification) or a digital microscope.
Harvest timing by trichome color
- Clear trichomes: not ready, THC is still developing
- Cloudy/milky white trichomes: THC is at peak, more uplifting, energetic effect
- Amber trichomes: THC is degrading to CBN, more sedating, body-heavy effect
- For most medical goals, harvest when 70 to 90% of trichomes are milky with 10 to 30% amber, adjusting toward more amber for sleep-focused medicine
Secondary indicators include pistil color (most pistils should be orange or red rather than white) and overall bud swelling and density. Leaves will also start to yellow and die off naturally, which is normal in late flower and a sign the plant is directing all energy into the buds.
Drying properly
Hang whole branches or individual buds upside down in a dark, well-ventilated space at 60 to 70°F and 50 to 60% RH. Slow drying over 7 to 14 days produces much better-tasting, smoother medicine than a fast dry. You will know drying is complete when the smaller stems snap rather than bend and the outside of the buds feels dry to the touch but not crispy. Do not rush this. Fast-dried cannabis loses terpenes, produces harsh smoke, and is more prone to mold in jars.
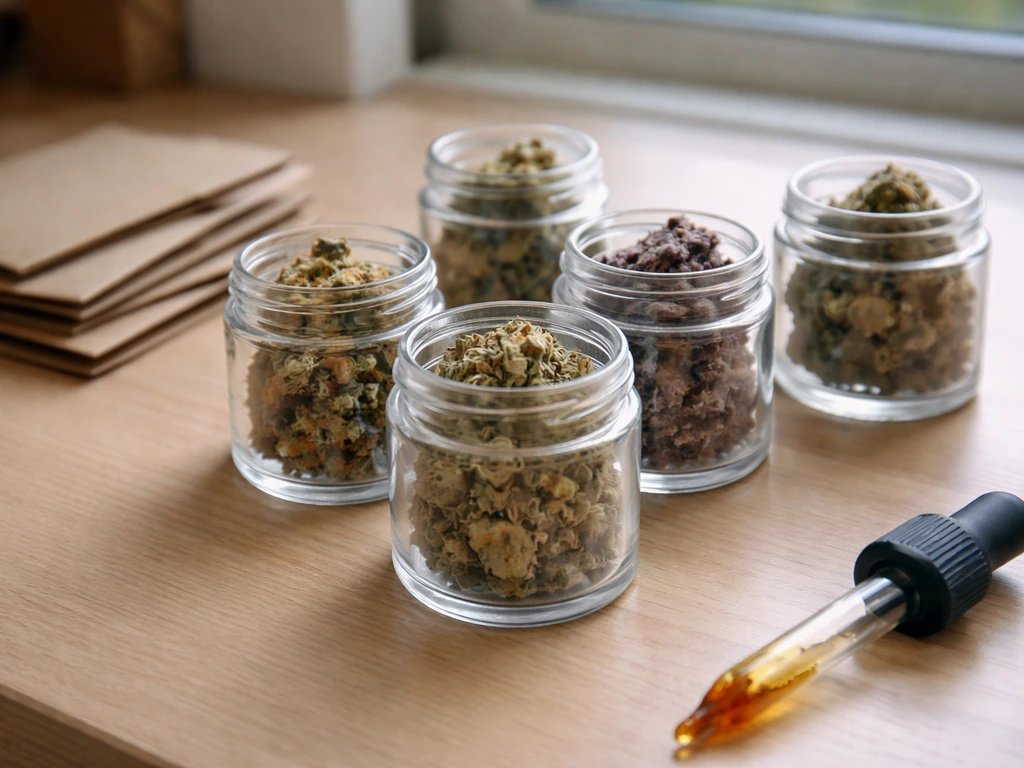
Curing and storage
Place dried buds loosely in airtight glass mason jars. For the first two weeks, open the jars for 15 to 30 minutes once or twice daily, a process called 'burping.' This releases built-up humidity and gases, continues the curing process, and dramatically improves the final flavor and smoothness. Target 55 to 62% RH inside the jars during curing. Humidity packs (like Boveda 58 or 62) are excellent for maintaining this range. If jars go above 65% RH, leave lids off longer. If they drop below 55%, use a slightly higher humidity pack or add a small piece of fresh stem as a temporary moisture source.
For long-term storage, keep sealed jars in a cool, dark location (a drawer or cabinet away from heat and light). UV light degrades cannabinoids over time. Properly cured and stored cannabis maintains potency and terpene profile for 6 to 12 months or longer. Never store in plastic bags long-term as plastic generates static, degrades trichomes, and can leach compounds into the flower.
Your next-step checklist before you start
This is the starting plan I would hand someone on day one. Work through it in order, and you will avoid most of the pitfalls that derail first-time medical home growers.
- Confirm your state's home-grow rules: plant count limits, security and visibility requirements, registration or permit needs, and possession limits for patients versus caregivers
- Get (or renew) your medical cannabis patient or caregiver registration and any required cultivation certificate
- Talk to your prescribing clinician about cannabinoid targets (THC level, CBD: THC ratio) appropriate for your condition before selecting strains
- Choose your setup: a 2x4 tent with LED lighting and exhaust fan is the most practical starting point for indoor medical growing
- Buy a pH meter and calibration solution, a thermometer-hygrometer, and a jeweler's loupe or digital microscope before anything else
- Select feminized autoflowering or feminized photoperiod seeds with a cannabinoid profile matching your medical goal
- Germinate in a paper towel, plant in seedling mix in a small container, and avoid overwatering from day one
- Veg under 18 hours of light with nitrogen-forward nutrients at pH 6.2 to 6.8 in soil (5.8 to 6.2 in coco/hydro)
- Flip to 12/12 light schedule for photoperiod plants when plant is at half target height; drop humidity to 40 to 50% RH in flower
- Inspect plants top to bottom three times per week during flower; catch mold and pests early
- Harvest by trichome color (70 to 90% milky, 10 to 30% amber for most medical goals), dry for 7 to 14 days at 60 to 70°F and 50 to 60% RH
- Cure in sealed glass jars at 55 to 62% RH for a minimum of 2 weeks, burping daily
- Keep a cultivation log: dates, plant count, inputs used, and any observations, as this supports legal compliance and helps you improve with each grow
Your first grow will not be perfect, and that is fine. The learning curve is real but manageable. If you are wondering how hard it is to grow pot, the biggest factors are legal requirements, your setup, and how closely you follow basic grow fundamentals like lighting, humidity, and airflow. Most beginner mistakes (overwatering, pH drift, harvesting too early, not enough airflow) are fixable in your second run once you know what to look for.
The state-specific details, like exactly how to legally grow in Florida, Missouri, Texas, Nevada, or wherever you are, will shape some of the specifics around plant counts and security requirements, but the growing fundamentals here apply everywhere. If you need a clear, step-by-step way to grow pot at home, follow the sections above for legality, setup, and cultivation basics how to grow pot.
Start legal, start small, stay consistent with your environment, and you will produce genuine medicine you can trust.
FAQ
Can I start with clones instead of seeds if I want consistent cannabinoid results for medical use?
Yes, but only if you can source clean, pest-free cuttings from a reputable source. Clones give faster establishment and match the mother plant’s genetics, yet they can also carry hidden issues into your grow. For medical patients, quarantine new clones for at least 1 to 2 weeks in a separate space or area, and inspect twice daily for early signs of mites, fungus gnats, or leaf spotting before mixing them into your main room.
What’s the safest way to handle medical dosing if I’m growing at home and the plant can vary?
Use your clinician’s dosing guidance as the primary target, not the seed label. A practical approach is to standardize your medicine by making measured batches (same strain, same harvest window, same dry and cure process) and track output by weight. Then use patient-specific dosing based on consumption form (oil, capsules, flower) because potency per gram changes after extraction and decarboxylation.
How do I avoid accidentally growing the wrong plant (male plants or off-types) in a legal medical setup?
For photoperiod grows, begin with feminized seeds to reduce risk, then confirm sex early by checking pre-flowers under magnification. Remove any males immediately if they appear, because even small pollen release can ruin cannabinoid and terpene targets. If your local rules restrict plants by count, keep a compliance log that records what you intended to grow and what you removed (date, reason) in case you ever need documentation.
What should I do if my pH readings drift even though I calibrate my meters?
First, confirm the water source and measurement method. Municipal water and some well water can differ in alkalinity day to day. Buffering and runoff clues help: if runoff pH repeatedly lands outside range, adjust the nutrient solution with pH targets, not by repeatedly “chasing” the number during one watering. If you’re in soil, consider that overwatering can also cause apparent pH swings by limiting oxygen at the roots.
Is it okay to use a general garden pesticide if I see pests in my grow tent?
Do not assume garden-center products are safe for cannabis intended for inhalation or consumption. Many pesticides have residue and label restrictions that can be incompatible with human-use crops, and some are not permitted for cannabis under state medical rules. Use integrated pest management instead, start with least-toxic controls (sticky traps, targeted biological or mechanical removal), and only consider any treatment after you confirm it is permitted for cannabis and applied in a way that won’t contaminate buds.
How can I tell the difference between nutrient deficiency and nutrient lockout?
Check pH first, then look for pattern differences. Lockout often appears when nutrient uptake is blocked, causing multiple symptoms at once that do not match the typical “single element” pattern. If you adjust pH, correct feeding strength, and the problem does not improve within several days, reassess with leaf-by-leaf inspection and runoff data. Also note that environmental stress like low humidity and root oxygen deprivation can mimic nutrient issues.
When I’m harvesting for medical use, what’s the best practical way to decide “ready” vs “too early”?
Use trichome inspection as the main indicator, but take multiple checks across the plant and even across bud positions. Trichomes can mature unevenly, and lower buds may lag. If most of the sample looks mature but a portion is still clear, consider waiting a few days rather than harvesting the entire plant at the first “almost” point, because early harvest can reduce the intended cannabinoid profile.
How do I prevent mold during drying and curing, especially if my room humidity is high?
Control both temperature and airflow, then slow the process. Aim for 50 to 60% RH during drying and keep the space well ventilated, not stagnant. If your drying room commonly exceeds that range, consider drying in smaller batches or using a dehumidifier. During curing, “burp” on schedule, and discard any buds that develop visible mold rather than trying to salvage them.
What do I do if my jars are above 65% RH after I start curing?
Act quickly. Leave lids off longer during burping, and verify your curing room conditions (temperature and ambient humidity), because jar humidity often reflects the storage environment. If you repeatedly struggle to get below 65% RH, you may have dried too wet or too slowly at first, or you may be packing jars too tightly. Loosen packing next time and dry until small stems snap reliably.
Can I reuse soil or grow media for a second run in a home medical setup?
You can, but it must be done in a way that avoids contamination and pest carryover. Reusing can also concentrate salts, which can cause pH and nutrient problems. For medical grows, most home growers choose fresh media for seedlings and at least sterilized or properly treated media for subsequent runs. If you do reuse, run thorough cleaning, remove debris, and check moisture behavior and runoff characteristics before planting again.
Next Article
How Hard Is It to Grow Pot? Indoor vs Outdoor Guide
Compare indoor vs outdoor vs hydroponic cannabis growing difficulty, costs, timelines, and common beginner troubleshooti