You can grow OG Kush indoors from seed or clone to harvest in roughly 16 to 20 weeks, depending on how long you run your vegetative phase. If you want the full step-by-step answer to how do you grow kush, follow the week-by-week plan from seed (or clone) through harvest. It flowers in 8 to 9 weeks, prefers temperatures between 70 and 80°F (21 to 27°C), and needs serious humidity control in late flower to avoid the mold problems this strain is genuinely prone to. Get your environment dialed before you pop seeds, keep your plant count within your local legal limit, and you'll be drying dense, resinous buds before the end of the season.
How to Grow OG Kush Indoors Step by Step from Seed

Marcus Holbrook
11 Jun 2026
Check the law first, then build your setup
Before you buy a single seed, check the rules in your jurisdiction. Home cultivation laws vary a lot. In Canada, federal law permits up to four plants per household (not per person) for personal use, though provincial rules add their own layer. Ontario, for example, follows the four-plant household limit and also requires growers to minimize cannabis odor from their grow space. In New York, adult-use home cultivation is permitted for qualifying adults, again with plant limits and an expectation that you control odor using sealed exhaust systems with carbon filtration. Some US states, like Illinois, ban home cultivation entirely for most residents. Do not assume your state or province allows it. Spend 10 minutes on your official government health or cannabis regulatory site before you build anything.
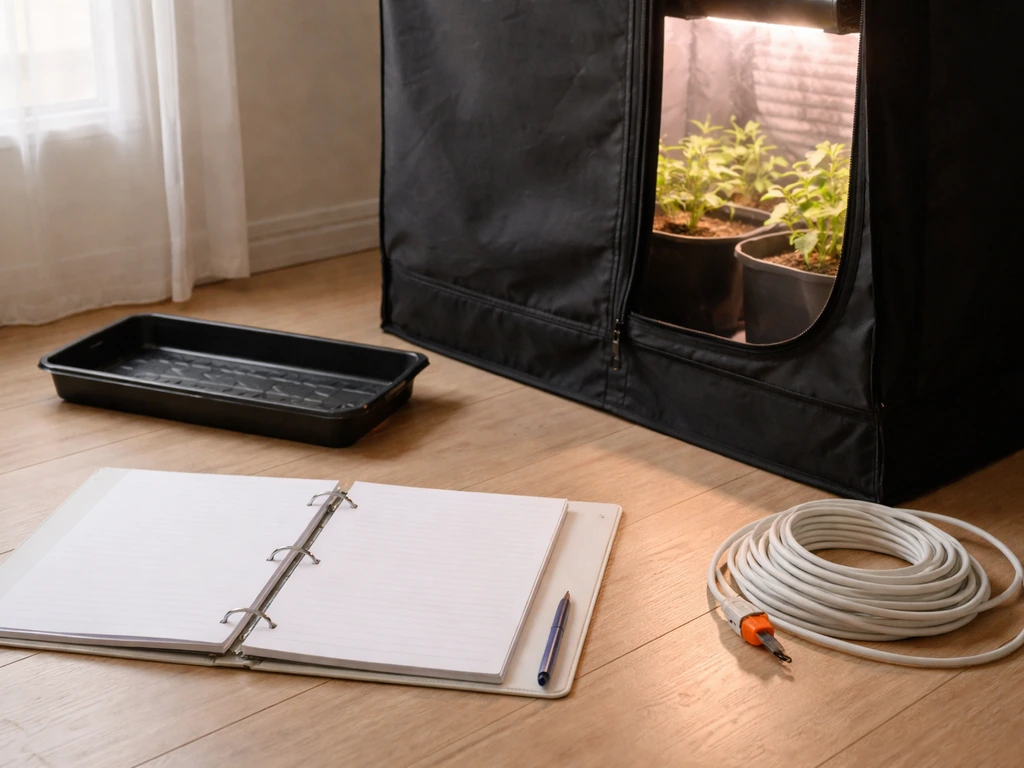
Once you know you're clear legally, the safest and most controllable indoor setup for a beginner is a grow tent. A 4x4 foot tent handles two to four plants comfortably, keeps your environment contained, and works naturally with inline fans and carbon filter systems for odor control. If you're limited to four plants, a 3x3 or 4x4 tent is almost exactly right for the job. For electrical safety, choose components that are rated for enclosed humid environments. Many cheap grow products are not UL-listed for residential enclosed use, and moisture near power distribution is a real fire risk. Use a timer for your lights, keep all electrical connections off the floor, and run your ducting so condensation drains away from outlets and power strips.
For ventilation, the standard hobby setup is an inline exhaust fan pulling air through an activated carbon filter, with passive intake holes at the bottom of the tent bringing in fresh air. The exhaust fan creates negative pressure inside the tent, which means air is always flowing out through the filter rather than leaking around tent zippers and seams. This is what controls smell. Run the fan on a speed controller so you can dial it back during lights-off without shutting it off entirely. Add a small oscillating fan inside the tent to move air across the canopy. That internal circulation strengthens stems, keeps leaf surfaces dry, and reduces mold risk substantially.
What OG Kush actually does when you grow it
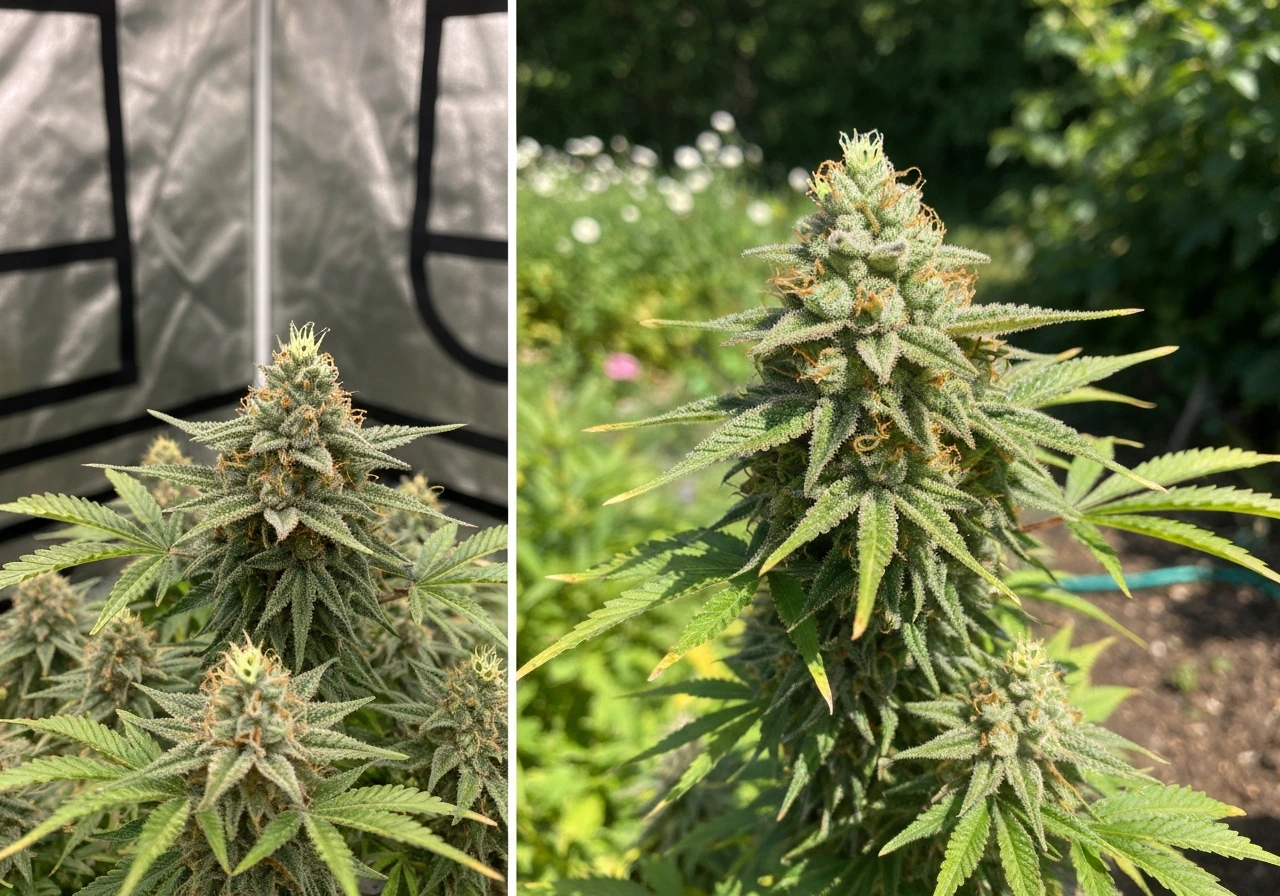
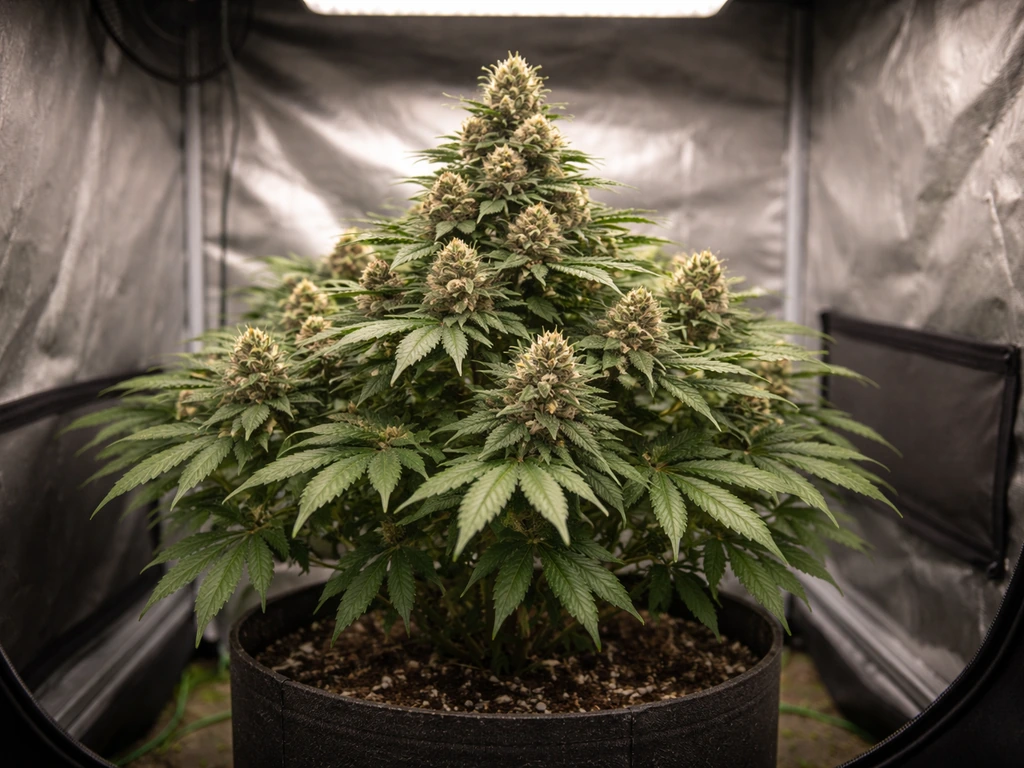
OG Kush is an indica-dominant hybrid with a reputation that's fully earned, both for its effects and for being a slightly picky plant to grow. It typically stays compact indoors, stretching to around 3 to 4 feet at maturity depending on how long you veg it and whether you train it. Expect dense, tightly packed bud sites, wide indica-style fan leaves, and a stretch of around 50 to 75% of its vegetative height once you flip to 12/12 light. So if your plant is 18 inches tall when you flip, budget for it to reach 27 to 31 inches before stretch stops, usually around week 3 of flower.
The bud density that makes OG Kush so desirable is also what makes it mold-prone. Those tight colas trap moisture if airflow is poor or humidity climbs in late flower. It's also sensitive to overfeeding, especially nitrogen in late vegetative and early flower stages. You'll see symptoms quickly: dark, almost black-green leaves in veg, or clawing leaf tips in flower. OG Kush rewards growers who follow a "less is more" approach to nutrients and a "more is more" approach to airflow. Indoor yield from a well-managed plant typically comes in between 400 and 500 grams per square meter, though first-time growers should expect the lower end of that range.
If you're comparing OG Kush to other Kush varieties, it sits in a middle ground for difficulty. If you want rainbow kush specifically, focus on dialing the same core targets for humidity control, airflow, and feeding, then adjust based on how your plants respond during veg and early flower comparing OG Kush to other Kush varieties. Growing OG Kush outdoors is also viable and tends to reduce the mold challenge because natural wind helps keep buds dry, though the outdoor timeline is dictated by season. Growing OG Kush hydroponically speeds up growth and can push yields higher, but it tightens the margin for error on feeding and pH. For a first indoor run, soil or coco is more forgiving. If you're specifically looking for how to grow kosher kush, the best next step is to dial your environment and feeding around its traits so you can keep buds dense without increasing mold risk.
Environmental targets for every stage
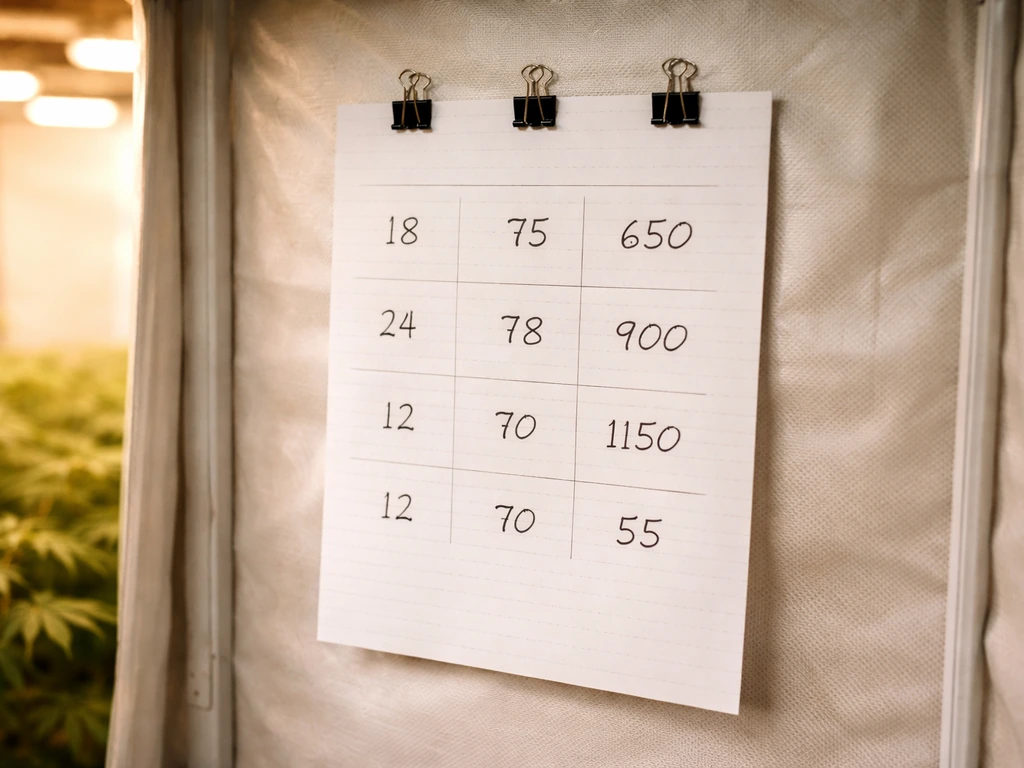
Get these numbers on a sticky note and put them on your tent. Environment is what separates a mediocre grow from a great one, especially with OG Kush.
| Stage | Temperature (°F / °C) | Relative Humidity | Light (PPFD) |
|---|---|---|---|
| Seedling (days 1–14) | 75–80°F / 24–27°C | 65–75% | 200–400 µmol/m²/s |
| Clone rooting | 75–80°F / 24–27°C | 70–80% | 100–250 µmol/m²/s |
| Vegetative | 70–80°F / 21–27°C | 50–65% | 400–600 µmol/m²/s |
| Early flower (wks 1–3) | 68–78°F / 20–26°C | 50–60% | 600–900 µmol/m²/s |
| Mid flower (wks 4–6) | 65–76°F / 18–24°C | 45–55% | 800–1,000 µmol/m²/s |
| Late flower (wks 7–9) | 64–75°F / 18–24°C | Below 40% | 800–1,000 µmol/m²/s |
For light intensity, the flowering DLI (daily light integral) target is roughly 30 to 45 mol/m²/day. Under a 12-hour photoperiod that works out to an average canopy PPFD of about 700 to 1,042 µmol/m²/s. A modern quantum board LED in a 4x4 tent will hit that range comfortably. Keep the light at the manufacturer's recommended height and dial it up gradually as plants mature rather than blasting them at full power from the start.
CO2 is optional for most home growers, but if your room gets above 1,000 ppm naturally you're already ahead. If you add supplemental CO2 and push toward 1,200 to 1,500 ppm, your plants can handle higher light intensity and temperatures, which can improve yield. For most beginners, focus on nailing temperature and humidity first. CO2 supplementation only pays off when the rest of your environment is already optimized.
Late flower humidity is where most new OG Kush growers get burned (literally, with botrytis). Drop RH below 40% from week 6 onward. Bring in a small dehumidifier if your tent pulls humidity up during lights-off. OG Kush's dense buds will develop gray mold at the core before you see it on the surface, so prevention is the only real strategy here.
From seed (or clone) to harvest: week by week
Germination and seedling (weeks 1–2)
Germinate seeds using the paper towel method or drop them directly into a small peat pellet or starter cube. Keep them at 77°F (25°C) and under gentle light (18/6 photoperiod) until the taproot appears, usually within 24 to 72 hours. Once the seedling has its first set of true leaves, transplant it into a small container (a 1-gallon pot works well) with lightly moistened, airy growing medium. Don't feed at this stage. Seedlings get everything they need from the medium for the first 10 to 14 days.
Vegetative stage (weeks 3–7 or longer)
Run 18 hours of light and 6 hours of dark. OG Kush responds well to training during veg (covered in detail below), and this is the time to build the plant structure you want. Transplant up to a 3 to 5 gallon final container once roots start circling the bottom of the smaller pot. Begin feeding at low doses once the plant has 3 to 4 sets of true leaves. Veg for as long as you need to fill your canopy, but remember the 50 to 75% stretch rule when you're deciding when to flip. Most indoor growers veg OG Kush for 4 to 6 weeks.
Flowering stage (weeks 8–17 from flip)
Flip to 12/12 light to trigger flower. OG Kush shows sex (pistils for females, pollen sacs for males) within 7 to 14 days of the flip. If you're growing from feminized seeds you can skip the sex check anxiety, but it's still worth monitoring for hermaphrodite plants, which can be triggered by light leaks, heat stress, or other environmental stressors. Any light getting into the tent during the 12-hour dark period can stress the plant and potentially cause it to produce pollen sacs alongside female flowers.
During weeks 1 to 3 of flower, keep nitrogen moderate and start increasing phosphorus and potassium as bud sites form. From week 4 onward, taper nitrogen down significantly. Weeks 6 to 8 are peak bud development. Drop nitrogen close to zero and focus on potassium and phosphorus. In the final 10 to 14 days before harvest, most growers do a flush (running plain water through the medium) to clear residual nutrients from the root zone and the plant tissue, which is said to improve the final taste of the dried and cured flower.
Starting from clones instead of seeds
If you're starting from a clone rather than a seed, keep cuttings at 75 to 80°F with 70 to 80% RH until roots emerge, which usually takes 7 to 14 days depending on the rooting medium and method. Use a rooting hormone and a humidity dome. Once roots are established and the clone is showing new growth, lower humidity gradually toward vegetative targets and begin a light feeding schedule. Clones skip the seedling stage and get you to harvest faster, but they're only as good as the mother plant they came from, so source them from a reputable, healthy plant if possible.
Nutrients, feeding schedules, and watering
OG Kush is a moderate feeder that leans toward sensitivity, especially with nitrogen. I've overcooked it more than once. Start at half the recommended dose on any nutrient line and work up only if you see signs of deficiency (yellowing between leaf veins, pale new growth). Dark, almost black-green leaves or clawing leaf tips are your signal to back off.
Soil growing
In quality potting mix (something with perlite for drainage, ideally 20 to 30% perlite by volume), you can often skip or minimize feeding for the first 3 to 4 weeks because the soil already contains nutrients. After that, introduce a grow formula (higher N) during veg and switch to a bloom formula (higher P and K, lower N) when you flip to flower. pH your water and nutrient solution to 6.0 to 7.0 for soil, ideally 6.2 to 6.8. Out of that range, certain nutrients lock out even if they're physically present in the medium. Water only when the top inch or two of soil is dry, or when the pot feels noticeably lighter. OG Kush does not like soggy roots.
Coco coir
Coco coir is my favorite medium for OG Kush indoors. It's faster than soil, more forgiving than full hydro, and drains well, which suits OG Kush's preference for dry-wet cycles. In coco, you need to feed every watering because coco has no nutrient reserve of its own. pH your solution to 5.8 to 6.2. Use a complete nutrient formula including cal-mag, because coco naturally binds calcium and magnesium. Water to 10 to 20% runoff each time to prevent salt buildup. Check EC (electrical conductivity) of your runoff periodically to watch for buildup; if runoff EC climbs significantly above your input EC, flush with plain pH'd water.
Hydroponic systems
If you want to try growing OG Kush hydroponically, the faster growth and higher yield potential are real, but so is the tighter margin for error. If you want the full step-by-step, including hydro details, see how to grow OG Kush for a complete walkthrough hydroponically. Hydroponics also makes pH and nutrient balance even more important, so dial your feed and monitoring routines early growing OG Kush hydroponically. Target pH of 5.5 to 6.0 in the reservoir, and monitor EC closely. For a beginner hydro run, a simple deep water culture (DWC) bucket is the easiest entry point. Keep reservoir temperature below 72°F to prevent root rot, which is a common killer in DWC systems. The full details of hydro-specific OG Kush growing are worth exploring separately if that method interests you.
Training your OG Kush for a better canopy
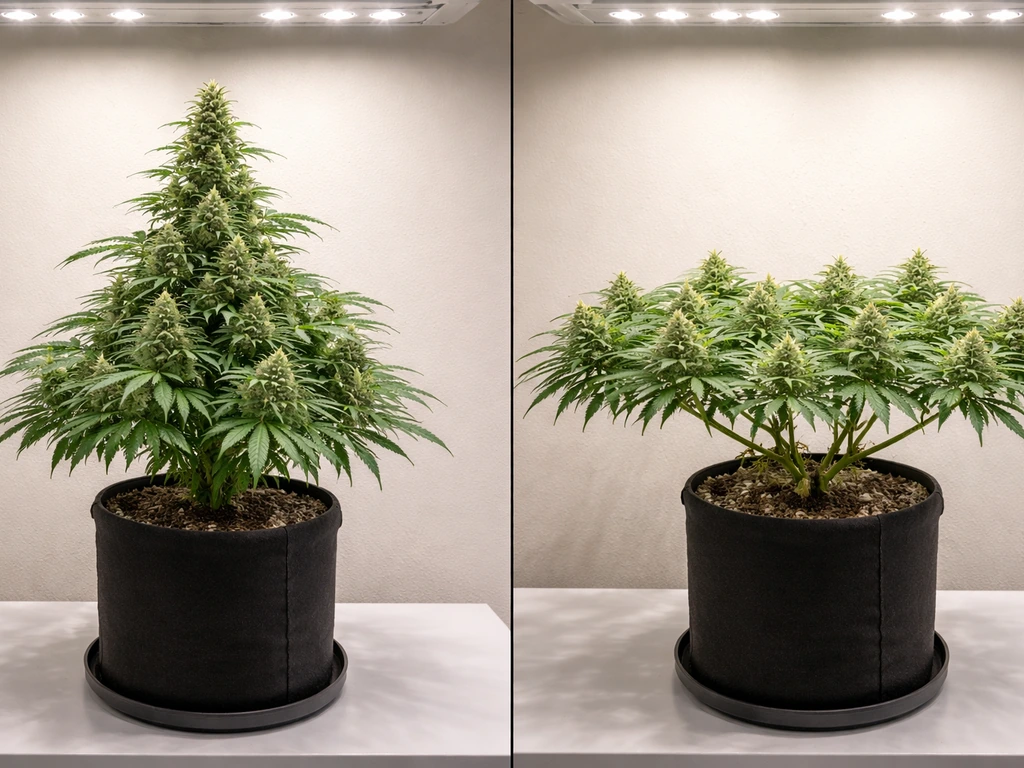
Training makes a real difference with OG Kush. Left untrained, the plant grows in a Christmas tree shape with one dominant cola and a lot of smaller, shadowed bud sites below. Good training turns that into a flat, even canopy where every bud site gets equal light, which increases both yield and quality across the whole plant.
Low-stress training (LST)
LST is the most beginner-friendly approach and involves bending branches and tying them down to create a horizontal canopy rather than a vertical one. Start LST once the plant has 4 to 6 nodes (internodal sections). Use soft plant ties or pipe cleaners to gently bend the main stem outward and downward, anchoring it to the rim of the pot or a trellis net. As new growth reaches upward, continue bending and tying. LST causes minimal stress and plants recover almost immediately, so it doesn't add meaningful time to your grow.
Topping
Topping means cutting off the main growing tip, which forces the plant to develop two main colas instead of one. Do this once the plant has at least 5 to 6 nodes, cutting above the 4th or 5th node. OG Kush handles topping well but give it 5 to 7 days to recover before applying any additional stress. You can top multiple times in veg to create 4, 8, or more main colas, but keep an eye on your timeline and tent height. More tops mean more development time needed before the flip.
Defoliation and lollipopping
OG Kush's wide fan leaves can block airflow and light penetration into the lower canopy. Remove fan leaves that are directly blocking bud sites or covering lower nodes during veg and in the first two to three weeks of flower. Don't strip the plant bare. You want to thin the canopy, not eliminate it. Around week 3 of flower, do a more deliberate defoliation pass, removing leaves that are blocking airflow into the lower and inner canopy. This is specifically important for OG Kush to reduce mold risk in late flower. Lollipopping (removing all lower growth below the main canopy) is optional but helps the plant focus energy on top colas rather than small, larfy lower buds.
Troubleshooting the most common indoor problems
Nutrient problems
The most common issues I see with OG Kush are nitrogen toxicity (dark leaves, clawing tips) from overfeeding in early flower, and calcium or magnesium deficiency (brown spots, yellowing between veins) especially in coco or hydro. Nitrogen toxicity: cut your nitrogen dose by 30 to 50% and water with plain pH'd water once to flush the excess. Cal-mag deficiency: add a dedicated cal-mag supplement at 1 to 2 ml/L. Phosphorus deficiency (dark purple stems, slow bud development in flower) usually means your pH is out of range rather than that the nutrient is missing. Check and correct your pH before buying more nutrients.
Watering mistakes
Overwatering is the number one beginner mistake, and OG Kush is especially punishing about it. Symptoms look like a nutrient deficiency: drooping, yellowing, slow growth. The tell is that overwatered plants droop even when the medium is wet, while underwatered plants droop only when dry and perk up quickly after watering. Lift the pot before and after watering so you learn what dry versus wet feels like. Let the medium cycle between moist and nearly dry between waterings. In soil, the top 1 to 2 inches should be dry before you water again.
Pests
The most common indoor pests for OG Kush are fungus gnats (from overwatering and moist topsoil), spider mites (from hot, dry conditions), and thrips. Fungus gnats: let topsoil dry out more between waterings, and use yellow sticky traps at soil level to monitor. Spider mites: fine webbing on leaves and tiny moving dots on the undersides are your signs. Increase humidity slightly, improve airflow, and treat with neem oil or insecticidal soap spray (not during flower). Thrips: silvery streaking on leaves. Treat early with spinosad-based spray. Introduce beneficial insects like predatory mites if pests become persistent.
Mold and powdery mildew
Botrytis (gray mold) is the OG Kush grower's biggest fear. It starts inside dense buds where you can't see it until a bud appears gray and mushy from the inside. Prevention is everything: keep late-flower RH below 40%, run oscillating fans continuously, defoliate for airflow around week 3 of flower, and inspect buds every few days in late flower. If you find botrytis, remove the affected bud immediately (bag it before pulling it out to avoid spreading spores), clean your scissors, and evaluate whether adjacent buds are affected. Powdery mildew (white powdery coating on leaf surfaces) is different and usually appears in veg or early flower. It's driven by high humidity and poor airflow. Treat with a diluted hydrogen peroxide spray (3% food grade, diluted 1:3 with water) or potassium bicarbonate spray, and improve your airflow immediately.
Heat and light stress
If your canopy temperature is above 85°F (29°C) consistently, you'll see bleached or curled leaf margins and slow growth. Move your light further from the canopy first, then address room temperature with better exhaust or air conditioning. Light bleaching (white or yellow at the very tops of buds closest to the light) means the light is too close or intensity is too high. Back the light up or dim it. Conversely, if growth is slow and plants are stretching toward the light with long internodal gaps, the light is too far away or the intensity is too low.
Harvest timing, drying, and curing
Knowing when to harvest
OG Kush finishes in 8 to 9 weeks of flower. Don't rely on the calendar alone. The most reliable harvest indicator is trichome color. Use a jeweler's loupe (30 to 60x) or a digital microscope to examine trichomes on the buds themselves (not the sugar leaves). Clear trichomes mean not ready. Cloudy (milky white) trichomes mean peak THC. Amber trichomes mean THC is degrading into CBN, which produces a more sedative effect. Most OG Kush growers harvest at 10 to 20% amber trichomes with the rest cloudy, which gives the classic heavy, relaxing OG effect. Also watch the pistil color: when 70 to 90% of white hairs have turned orange or red and retracted into the calyx, you're close to harvest window.
Drying your harvest
Cut branches and hang them upside down in a dark room at 60 to 70°F (15 to 21°C) with 55 to 60% relative humidity for 7 to 14 days. Good airflow in the drying space is important but don't blow fans directly onto the buds, as that dries them too fast and degrades terpenes. Drying is done when small stems snap clean rather than bending. Large stems should still bend slightly but feel dry rather than moist. Rushing this step by drying hot and fast is one of the most common quality-destroying mistakes. Slow drying preserves terpene profiles and sets up the cure correctly.
Curing for quality
After drying, trim your buds if you haven't already, and place them in wide-mouth glass mason jars. Fill jars to about 75% full to allow some air. Seal the jars and store them in a cool, dark location. For the first 1 to 2 weeks, open the jars once daily for 5 to 10 minutes to release moisture and allow fresh air in (this is called burping). If you open a jar and the humidity inside reads above 70% on a small hygrometer, leave the jar open for 30 minutes and check again before resealing. Target internal jar RH of 58 to 62% during the cure. After 2 weeks of daily burping, drop to burping every 2 to 3 days for another 2 to 4 weeks. A full cure of 4 to 8 weeks dramatically improves taste and smoothness compared to freshly dried flower. Boveda 62% humidity packs inside the jars help maintain perfect conditions and simplify the process.
Yield expectations for your first indoor OG Kush run: aim for 1 to 1.5 oz per plant as a conservative target if you're learning. An experienced grower with trained plants under good lights in a 4x4 tent can pull 400 to 500 grams per square meter. Don't measure your first grow against those numbers. Measure it against your last grow, and you'll keep improving. Every grow teaches you something that the next one benefits from.
FAQ
Can I grow OG Kush indoors successfully with only one plant in a small tent?
Yes, but tune airflow and light for the canopy size. With a single plant you can run the light closer to the target PPFD and use the same RH targets, but you still need oscillating circulation and negative pressure so dense bud sites stay dry, especially after week 3 of flower.
What’s the safest way to prevent light leaks during the 12-hour dark period?
Treat the dark period like a blackout window. Add a timer that you cannot accidentally bump, use an opaque tent liner if your tent lets light through seams, and avoid opening the tent during “lights off.” Even small flashes can trigger pollen sacs under stress.
How low should I drop nitrogen in OG Kush, and how do I tell if I went too far?
After the flip, keep nitrogen moderate early, then taper significantly starting around mid flower. If you over-taper, leaves can start to yellow broadly and new growth may look pale and slowed, not just “less dark.” If that happens, correct pH first, then slightly increase N rather than jumping to full veg strength.
Should I flush OG Kush even if I’m growing in coco or hydro?
You can do a final plain-water period, but avoid long, nutrient-free starvation in coco or DWC/hydro. A shorter “last stage” adjustment is usually safer than a hard flush for many days, because coco and hydro depend on frequent feeding for minerals. If you flush, keep pH in-range and watch plant response rather than following a fixed number of days.
How do I calibrate my humidity readings so I don’t misjudge late-flower risk?
Place your hygrometer inside the tent at canopy height, not near the exhaust or directly on the floor. Compare it to your room humidity to sanity check, and if readings swing wildly when lights change, consider using a second sensor to confirm trends before you add dehumidification.
What’s the difference between nutrient deficiency symptoms and overwatering symptoms on OG Kush?
Overwatering typically causes drooping plus slow growth even when the medium still feels wet, and yellowing can look general. True deficiency often shows more progressive changes, like pale new growth for mobile nutrients or specific spots for calcium or magnesium. The fastest decision aid is the pot weight test (wet vs dry) and checking runoff only when you are sure watering is controlled.
Do I need cal-mag every time for OG Kush, or only in coco/hydro?
Cal-mag becomes much more important in coco and hydro because those systems remove the “nutrient reserve” buffer you get from soil. In soil, you may supplement only if you see between-vein yellowing or brown spotting. In coco, using a complete nutrient with cal-mag and maintaining correct runoff helps prevent recurring deficiencies.
How can I tell whether purple stems in flower are pH-related or a real phosphorus issue?
In OG Kush, purple stems during flower are more commonly linked to pH being out of the effective range than to missing phosphorus. The practical fix is to measure pH of your input, then adjust and observe after a couple waterings. If pH is correct and bud development stalls while growth keeps looking deficient, then consider a targeted change.
What should I do if I see clawing leaf tips early in flower?
First assume nitrogen and or heat or root-zone stress. Cut nitrogen by roughly 30 to 50% as described in the routine, confirm your watering schedule so roots are not staying too wet, and verify canopy temperature stays within the 70 to 80°F comfort band. Recheck pH before adding more nutrients.
When is it actually okay to remove fan leaves on OG Kush without hurting yield?
Thin selectively, focus on leaves blocking airflow to bud sites, and avoid stripping too aggressively in early flower. A useful rule is to remove what you can justify by airflow, not just because a leaf looks “unnecessary.” Do a deeper pass around week 3 of flower when mold prevention becomes critical, but keep some leaf mass to support bud development.
How often should I inspect buds for botrytis in late flower?
In the last 3 to 4 weeks, check every few days, not just once a week. Use good lighting and inspect the inner parts of dense colas, because botrytis often starts in the core before it looks obvious on the surface. If you find one affected bud, remove and bag it immediately and clean tools before continuing.
What’s the best way to handle spider mites if I catch them during flower?
Act early and use options that won’t leave residues where you are close to harvest. The article notes avoiding neem during flower, and that means you should prioritize mechanical control (thorough leaf underside coverage, vacuuming if appropriate) and insecticidal soap for early outbreaks. If infestations persist, consider a treatment plan that fits your stage, not a “one-size-fits-all” spray.
How do I know my drying environment is correct before I start curing?
Drying is done when small stems snap clean and large stems feel dry but still bend slightly. If buds are drying too fast, jars will later struggle to reach the 58 to 62% cure RH because the interior moisture profile is off. Avoid direct airflow from fans onto buds, and keep the room in the 60 to 70°F range.
Is it normal if my jars smell “hay-like” during the early burp period?
A mild hay odor can happen early, but it should not keep worsening. If odor becomes sour or the buds feel overly damp, re-evaluate RH management and consider leaving jars open briefly as you would when humidity reads above 70%. The goal is stable internal RH, not just a good smell on day one.
What’s a realistic yield target for OG Kush indoors if I’m not training or not dialed in yet?
Use conservative expectations for your first run, aim low, and evaluate progress by quality and consistency. If you’re not training and you have uneven canopy light, yield will usually land below the high end of the 400 to 500 g/m² benchmark. Your next target should be improving airflow and late-flower RH control rather than forcing higher nutrient strength.
Next Article
How to Grow OG Kush Step by Step Indoor and Outdoor Tips
Step-by-step OG Kush grow guide: indoor or outdoor setup, lighting, nutrients, pH targets, training, troubleshooting, ha