If you're a registered qualifying medical cannabis patient in Illinois, you can legally grow up to 5 plants at home, outdoors, in an enclosed and locked space on your residential property. That's the starting point for everything else in this guide. If you're an adult-use consumer without a medical card, Illinois law currently does not permit home cultivation, so you'll want to sort that out before you buy a single seed.
How to Grow Weed in Illinois Outdoors Step by Step

Marcus Holbrook
23 Jun 2026
Legal basics and choosing a compliant Illinois setup
Illinois legalized adult-use cannabis in 2020 under the Cannabis Regulation and Tax Act (410 ILCS 705), but home cultivation rights were not extended to adult-use consumers. Only registered qualifying medical cannabis patients (under the Illinois Department of Public Health's program) may grow at home, and even then the rules are specific: a maximum of 5 plants per household that are more than 5 inches tall, on residential property, in an enclosed, locked space. That last part matters more than people expect.
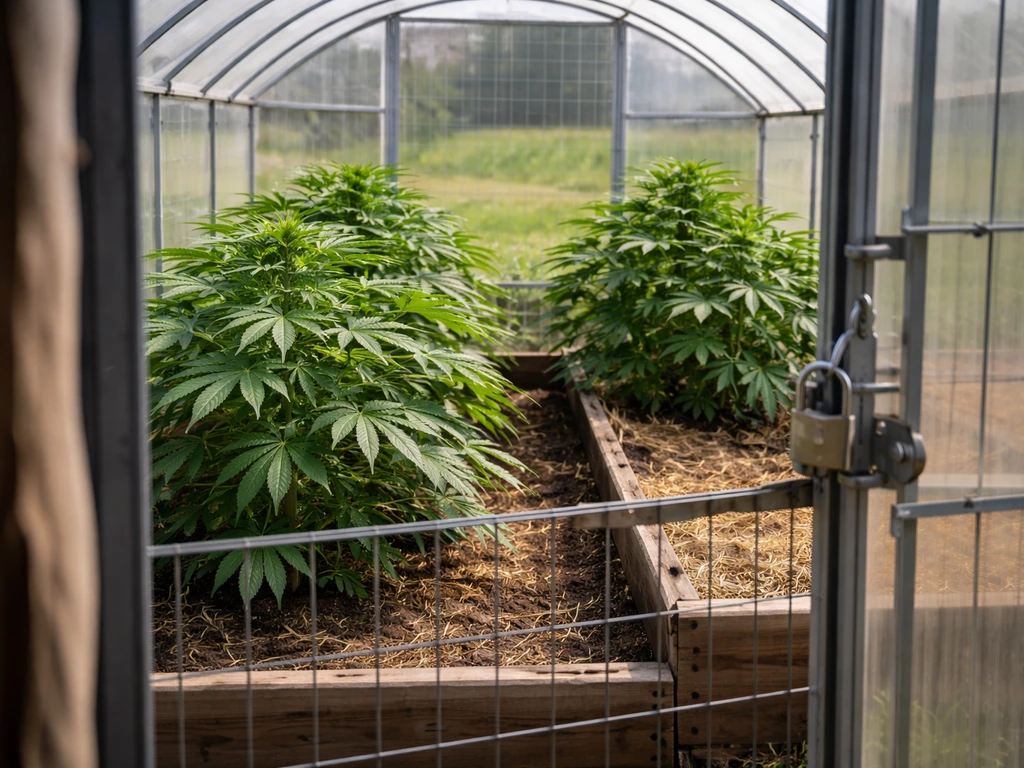
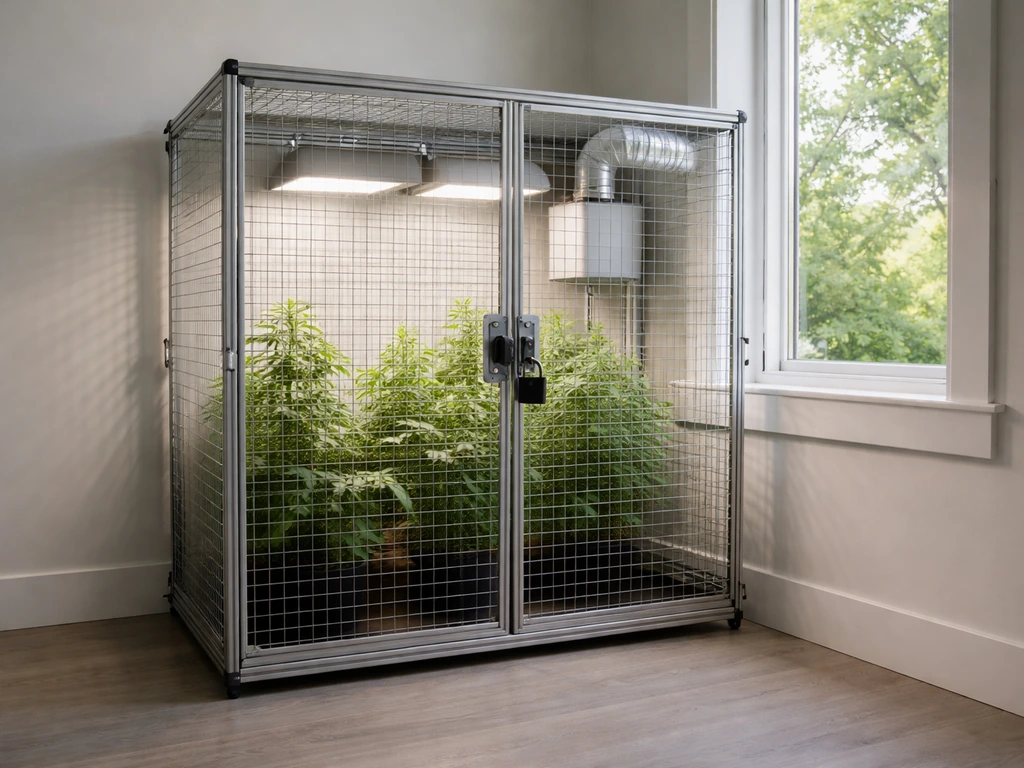
An 'enclosed, locked space' doesn't have to mean a room inside your house. Outdoors, this can reasonably be interpreted as a locked greenhouse, a secured shed with opaque walls, or a fenced grow area with a locking gate that prevents public view and unauthorized access. The goal of the law is to keep your plants out of sight and inaccessible to non-residents and minors. A raised bed sitting open in your backyard probably doesn't cut it.
A locked wooden enclosure or greenhouse that blocks line-of-sight from outside your property? That's the direction you want to go. If you also want to produce industrial hemp in Illinois, you'll need to follow additional federal and state requirements that differ from typical cannabis cultivation.
Cannabis laws are evolving fast, and local municipalities in Illinois can add their own restrictions on top of state law. Before you put a single plant in the ground, confirm the current rules with the IDPH and check your municipality's ordinances. The rules I've outlined here reflect the law as of mid-2026, but that can change. Consider it a solid baseline, not a substitute for checking the current text yourself.
- Confirm your IDPH medical cannabis patient registration is current and active
- Verify your municipality has no additional local restrictions on home cultivation
- Build or purchase an enclosed, locking grow space: a mini greenhouse with a padlock, a wooden grow box, or a secure shed all work
- Make plants completely invisible from public spaces and neighboring properties
- Keep your patient registration paperwork accessible at the grow site
It's also worth noting that if industrial hemp cultivation is your interest rather than medical cannabis, Illinois has a separate licensing framework for that. Industrial hemp uses a different legal and licensing process than medical cannabis, so review Illinois’s hemp-specific requirements before you start planning industrial hemp cultivation. Those rules are different from the home cultivation setup described here.
Illinois outdoor timing and climate planning
Illinois sits mostly in USDA hardiness zones 5a through 6b, with Chicago and the northeast being colder and the southern tip near the Kentucky border being noticeably warmer. You're working with warm, humid summers (highs regularly hitting 85-95°F in July and August) and falls that can turn cold fast. The first frost in northern Illinois typically hits in mid-October, while southern Illinois often stays frost-free until late October or even early November. That window defines your entire grow season.
The most important calendar anchor for outdoor cannabis in Illinois is the last spring frost date. In Chicago and the northern suburbs, that's typically around mid-April to early May. In central Illinois (Springfield area), it's closer to mid-April. In southern Illinois, late March to early April. You don't want to transplant seedlings outdoors until nighttime temps are consistently staying above 50°F, and ideally above 55°F. A single cold snap below 40°F can shock young plants hard.
| Region | Last Spring Frost | Safe Outdoor Transplant | First Fall Frost | Effective Grow Window |
|---|---|---|---|---|
| Northern IL (Chicago area) | Late April / Early May | Mid-May | Mid-October | ~5 months |
| Central IL (Springfield) | Mid-April | Early to Mid-May | Mid-October | ~5 months |
| Southern IL (Carbondale area) | Late March / Early April | Late April | Late October / Early Nov | ~6 months |
Start your seeds or clones indoors 4 to 6 weeks before your planned outdoor transplant date. For most of Illinois, that means starting seeds indoors in late March or early April. By the time you move them outside in mid-May, they'll have a strong root system and 4 to 6 sets of leaves. This head start is crucial: it gives you more time in the vegetative phase and a bigger, more productive plant by harvest time.
Illinois summers are humid, which is both a blessing (plants love moisture) and a risk (mold loves it too). Plan around the humidity now. August and September are when bud rot (Botrytis) becomes a real threat, especially in dense canopies. Your strain selection and training methods are your best defenses, and we'll cover both below.
Strain selection plus seeds vs clones
Not every cannabis strain is built for Illinois weather. You want genetics that can handle high humidity, finish flowering before mid-October frosts hit, and hold up to the occasional late-August thunderstorm. If you're specifically looking for how to grow hemp in Rust, you will want a hemp-focused strain and a schedule matched to your local climate and frost dates. Skipping strain research is one of the most common beginner mistakes, and I made it myself my first grow by picking something bred for Mediterranean climates. It finished late and half the buds rotted. Learn from that.
Strains that work well in Illinois
Look for strains with these traits: early finishing (ready to harvest by late September or early October), mold resistance, and robust outdoor vigor. Indica-dominant and indica-leaning hybrid genetics tend to finish earlier than pure sativas. Autoflowering strains are an excellent option for Illinois beginners because they flower based on age rather than light cycle, often completing in 70 to 90 days from seed, which gives you more scheduling flexibility and means a faster harvest. Some solid categories to research:
- Early-finishing photoperiod hybrids: strains labeled 'Early' in the name or marketed for northern climates often finish in late September
- Autoflowering varieties: any reputable auto line from 70 to 90 days works extremely well for Illinois; you can even run two auto crops in a season in southern IL
- Mold-resistant genetics: look for strains with documented Botrytis resistance or with open, airy bud structure (less dense = less rot risk)
- Landrace-influenced genetics bred for cool, damp climates: some Dutch, Russian, and Canadian breeding lines shine in humid continental climates like Illinois
Seeds vs clones: what makes sense outdoors in Illinois
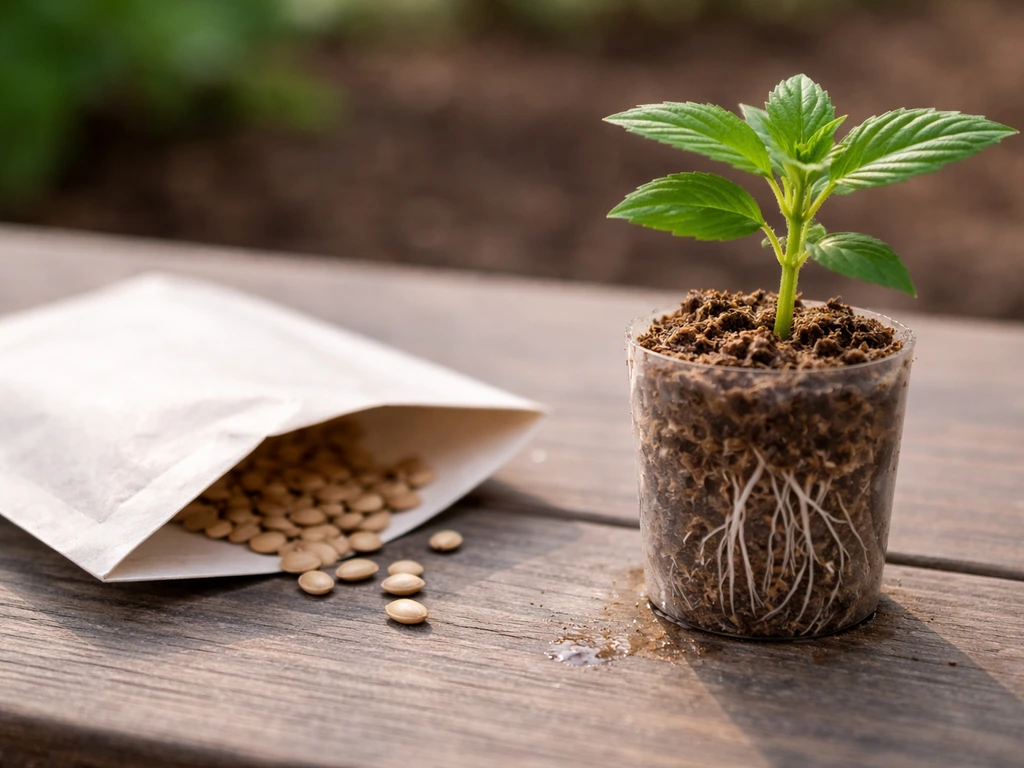
Seeds give you genetic diversity, easier sourcing (quality seed banks ship discreetly), and plants that develop a taproot for strong outdoor anchoring. They also give you more control over starting dates. The downside is that regular (non-feminized) seeds have roughly a 50% chance of being male, and males don't produce buds. Use feminized seeds outdoors to eliminate that uncertainty, since sexing and removing males later is a hassle and a mistake risk.
Clones are genetically identical copies of a known female plant, which is great for consistency. If you can source healthy, pest-free clones from a trusted Illinois dispensary or patient, they can be a strong choice. The risk is introducing pests or pathogens to your outdoor space, so always quarantine a clone for at least a week under close observation before it touches your main grow area. For most beginners, feminized seeds are the easier, lower-risk starting point.
Site and soil setup, containers, and transplanting
Choosing and preparing your outdoor site
Maximum sunlight is the single most important factor in site selection. Cannabis wants at least 6 hours of direct sun per day, but 8 to 10 hours produces dramatically better yields. A south-facing open area is ideal. Avoid spots shaded by trees or structures during peak sun hours (10am to 4pm). Also factor in airflow: gentle air circulation strengthens stems and reduces humidity in the canopy, which means less mold risk. A site with some natural breeze is great; a stagnant pocket between buildings is problematic.
Since your setup needs to be enclosed and locked per Illinois law, you're likely working with a greenhouse, shed, or secure grow box anyway. Make sure your enclosure allows adequate light in (clear polycarbonate or open-roof structures work) and has ventilation so heat doesn't build up to damaging levels (above 90°F stunts growth and stresses plants).
Soil: what to use and how to prepare it
Illinois native soil is variable. In many parts of the state you'll encounter heavy clay that drains poorly and compacts around roots. Sandy loam in some southern regions drains too fast and doesn't hold nutrients well. Rather than fighting your native soil, I'd recommend building a custom mix in containers or raised beds. A solid outdoor cannabis soil mix is roughly 40% quality compost, 30% perlite or pumice for drainage, 20% native garden soil or coco coir, and 10% worm castings for a slow-release nutrient base.
Target a soil pH of 6.0 to 7.0 for outdoor soil grows, with 6.3 to 6.8 being the sweet spot. Outside that range, plants can't properly absorb nutrients even if they're present. Pick up an inexpensive pH meter and test your mix before you plant. If you're using bagged soil like Fox Farm Ocean Forest or similar, you're likely already in range, but verify anyway.
Containers vs in-ground planting
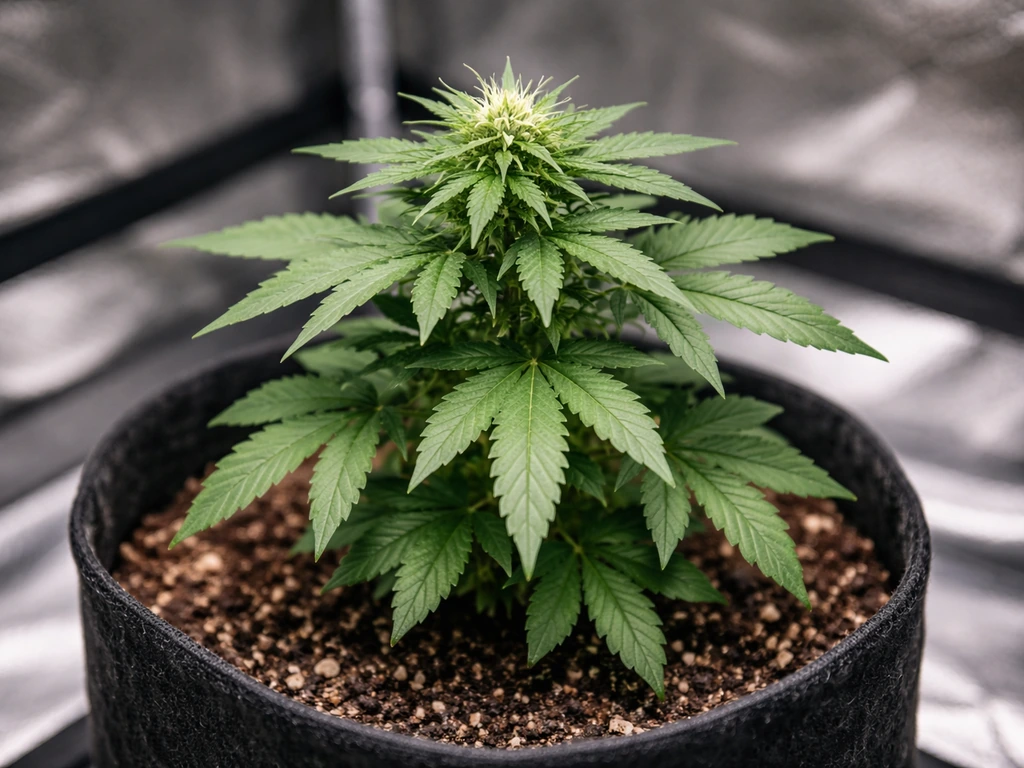
For most Illinois home growers working within an enclosed lockable structure, containers are the practical choice. They let you move plants if needed, control the exact soil environment, and prevent root interaction with potentially contaminated or clay-heavy native soil. For 5 plants, use at least 10-gallon containers, and 20-gallon fabric pots are even better for large outdoor plants that have a full season to grow. Fabric pots air-prune roots naturally, preventing root-bound plants and improving drainage.
Transplanting outdoors safely
Transplant shock is real and can set a plant back by 1 to 2 weeks if you rush it. Harden off your seedlings first: move them to a shaded outdoor spot for a few hours each day over 5 to 7 days, gradually increasing sun exposure. On transplant day, water your seedlings well a couple of hours before moving them, transplant in the evening or on a cloudy day to reduce heat stress, and water them in gently at the new site. Avoid disturbing the root ball as much as possible. If using peat pots, remove the bottom of the pot to let roots escape freely.
Outdoor care routine: light, watering, training, and spacing
Light and airflow
Outdoors in Illinois, your plants will naturally receive the right light cycle for vegetative growth in late spring and early summer (days are long, nights are short). As the season progresses past the summer solstice (around June 21), days begin shortening, and photoperiod strains will naturally transition toward flowering as nights approach 12 hours of darkness, typically in early to mid-August. You don't need to manage the light cycle manually outdoors; the sun does it for you. Your job is making sure nothing blocks that light during peak hours.
Watering
Outdoor plants in containers need watering more often than in-ground plants because container soil dries out faster, especially in July heat. A general rule: water when the top 2 inches of soil feel dry, and water thoroughly until runoff comes from the bottom of the pot. For large 20-gallon fabric pots in Illinois summer heat, that might mean watering every 2 to 3 days during peak heat and every 3 to 5 days in cooler weeks. In-ground plants in the same conditions can go 4 to 7 days between watering. Overwatering is the most common beginner mistake. If leaves droop but soil is still wet, you're overwatering, not underwatering.
Training methods for outdoor Illinois grows
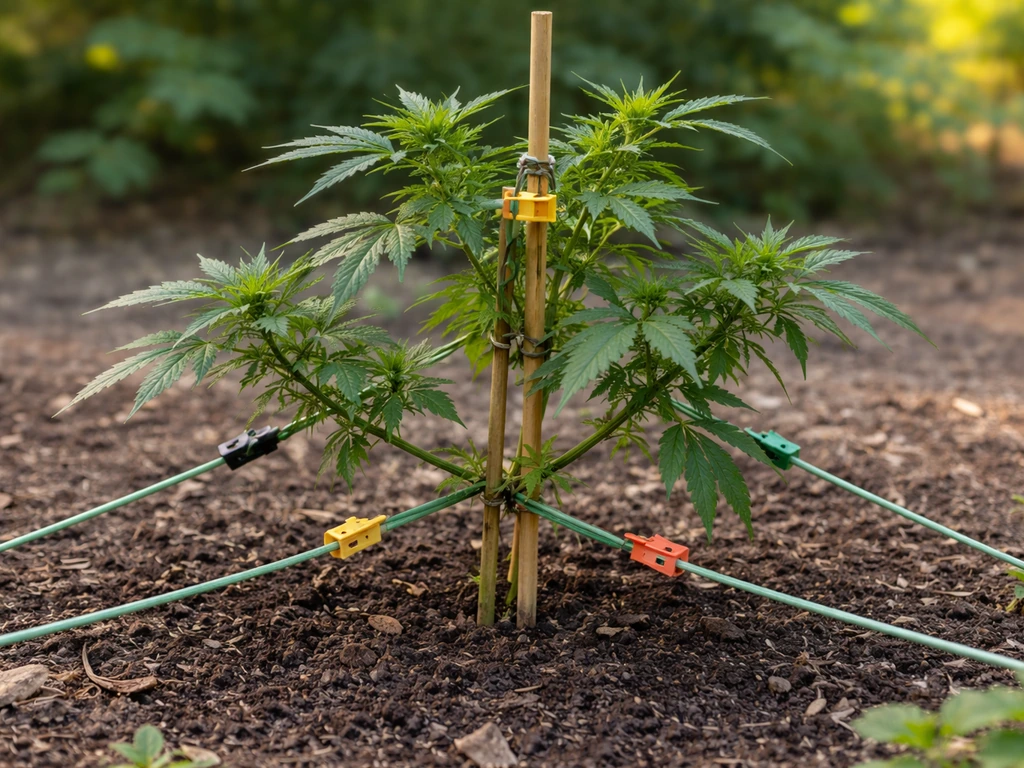
Training your plants is one of the highest-leverage things you can do for yield and mold prevention outdoors. Low-stress training (LST) involves gently bending and tying branches outward to open up the canopy, expose more bud sites to light, and increase airflow through the plant. Start LST when plants are 4 to 6 nodes tall by securing main branches outward with soft ties or wire. Do this progressively over several weeks during vegetative growth.
Topping, which means cutting the main growing tip above a node, forces the plant to develop two main colas instead of one and creates a bushier, more productive structure. Top once when the plant has 4 to 6 nodes, and again on each branch after they recover (called mainlining or manifolding if done systematically). Avoid aggressive training in the last 2 to 3 weeks before flowering kicks in, since plants need energy to transition. For autoflowering strains, skip topping entirely and stick to gentle LST only, as autos don't recover from high-stress training quickly enough.
Spacing
Give each plant at least 4 to 6 feet of space in all directions for a full-season photoperiod plant. Crowding plants together creates the exact humid, stagnant microclimate that invites mold and pest problems. With a 5-plant limit, you have the flexibility to give them room. If you're working in a smaller enclosed structure, prioritize airflow (use a fan if needed) and defoliate regularly to remove interior fan leaves that block light and trap moisture.
Nutrients and feeding schedule for outdoor grows
Cannabis has different nutrient needs across its life stages. During vegetative growth, plants are nitrogen-hungry (N is the primary driver of green leafy growth). During flowering, nitrogen demand drops sharply and phosphorus and potassium become more important (P drives bud development; K supports resin production, disease resistance, and overall plant health). Trying to push nitrogen through flowering is one of the most common nutrient mistakes, and it results in 'fox-tailing,' loose buds, and delayed maturation.
| Growth Stage | Timeline (Illinois) | Primary Nutrient Focus | Secondary Focus | Notes |
|---|---|---|---|---|
| Seedling | May (weeks 1-3 outdoors) | Very light feeding or none | None | Most soils have enough for seedlings; overfeeding burns them |
| Early Veg | Late May to mid-June | Nitrogen (N) heavy | Calcium, Magnesium | Begin quarter-strength base nutrient line, increase weekly |
| Late Veg | Mid-June to late July | Nitrogen (N) moderate-high | Phosphorus starts rising | Full feeding schedule; monitor for deficiencies |
| Early Flower | Early to mid-August | Reduce N, raise P and K | Sulfur, Calcium | Transition nutrients at first sign of pistils forming |
| Mid-Late Flower | Late August to late September | High P and K, low N | Micronutrients, silica | Avoid nitrogen; use a 'bloom booster' formula |
| Flush / Pre-Harvest | Last 1-2 weeks before harvest | Plain pH-adjusted water only | None | Flushes residual salts; improves flavor and smoothness |
For outdoor container grows, a simple organic approach works exceptionally well and is more forgiving for beginners. Top-dressing with worm castings, kelp meal, and bone meal at the start of flowering gives a slow, gradual nutrient release that more or less follows the plant's changing needs. If you prefer liquid nutrients, any reputable two-part or three-part base nutrient system (like Fox Farm's Trio or General Organics) gives you more precise control. Always start at half the manufacturer's recommended dose and increase only if plants show signs of deficiency (yellowing, discoloration, slow growth).
Supplement with CalMag (calcium and magnesium) throughout the grow if you're using filtered, reverse osmosis, or very soft tap water. Illinois municipal water tends to have moderate hardness, so check your water source before defaulting to CalMag supplementation. Overloading calcium can lock out other nutrients too.
Pest, mold, and disease prevention outdoors
Illinois's hot, humid summers create ideal conditions for a handful of persistent threats. Being proactive is far easier than reacting after an infestation or infection takes hold. I've lost plants to spider mites that I could have caught early and to Botrytis that started invisible and spread overnight in dense buds during a rainy week in September. Prevention is the whole game here.
The main threats in Illinois
- Spider mites: tiny, fast-reproducing pests that thrive in hot, dry conditions; look for fine webbing and stippled (dotted) yellowing on leaves
- Aphids: small soft-bodied insects clustering on new growth and undersides of leaves; attract ants and spread quickly
- Caterpillars and budworms: moth larvae that bore directly into buds and cause internal rot; often only detectable by finding frass (droppings) in bud sites
- Powdery mildew: white powdery coating on leaves; thrives in humid but not wet conditions with poor airflow
- Botrytis (bud rot): gray mold that starts inside dense buds during cool, humid weather; destroys buds from the inside out and spreads rapidly in late summer and fall in Illinois
- Root aphids: harder to detect than foliar aphids, they attack below the soil line and cause slow, unexplained decline
Your prevention toolkit
Inspect plants thoroughly at least twice per week: tops of leaves, undersides of leaves, inside bud sites, and at the soil surface. Catching problems early is everything. Beyond visual inspection, here's a basic prevention protocol that works well for Illinois outdoor grows:
- Spray plants weekly with diluted neem oil (2 tsp per gallon of water with a few drops of dish soap as an emulsifier) during vegetative growth to deter pests; stop neem applications 2 to 3 weeks before harvest to prevent residue on buds
- Apply Bacillus thuringiensis var. kurstaki (Bt-k) every 7 to 10 days once you see moths or butterflies near your plants; this biological control targets caterpillar larvae and is safe for humans and beneficial insects
- Use predatory insects like ladybugs or lacewings for aphid pressure; they work well in enclosed outdoor structures
- Maintain canopy airflow by defoliating large fan leaves blocking interior branches, especially as flowering begins
- Remove any dead, yellowing, or infected plant material immediately and dispose of it away from your grow space
- During the last 4 weeks of flowering, do a daily visual check of bud sites for any brown or gray discoloration, which can indicate early Botrytis; cut out affected areas immediately with sterilized scissors and allow extra airflow to slow spread
If you do find Botrytis, don't panic and don't ignore it. Cut out infected bud sections at least an inch past visible discoloration, seal the removed material in a bag immediately, and increase airflow to that part of the plant. A fan pointed at the plant during late afternoon (when dew begins forming) makes a real difference in September.
Harvest timing, drying, and curing (plus quick troubleshooting)
Knowing when to harvest
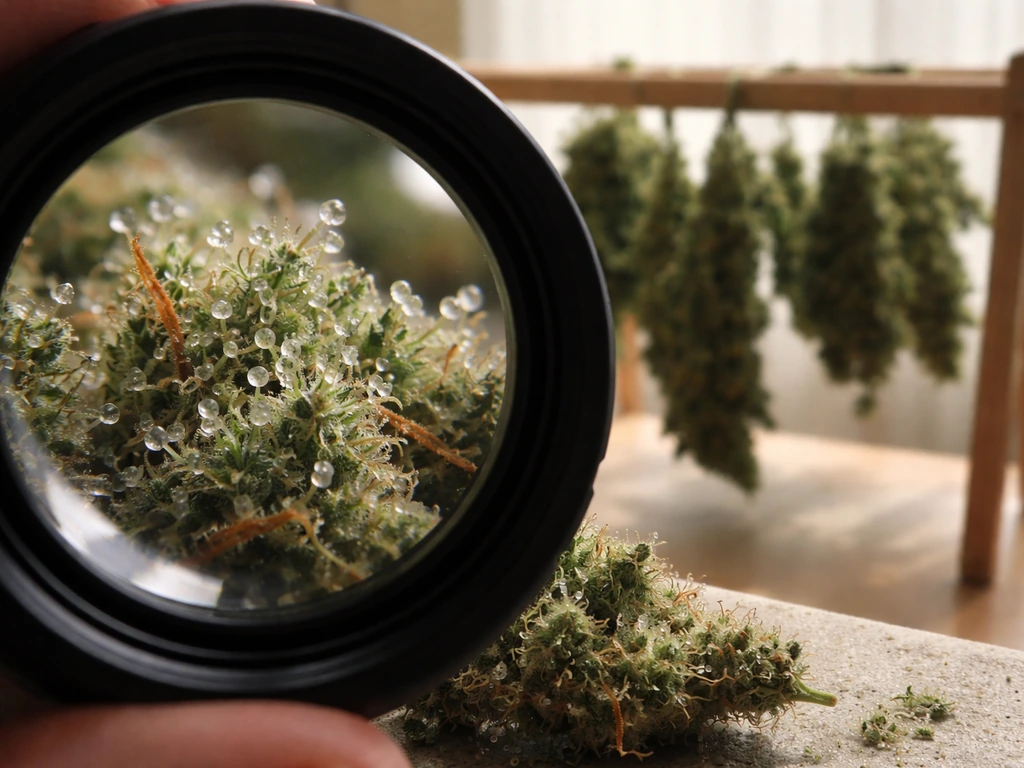
The most reliable way to time your harvest is a jeweler's loupe or a 60x to 100x pocket microscope to examine trichomes: the tiny crystal-like structures covering buds and surrounding leaves. In early flowering, trichomes are clear. As they mature, they turn cloudy (milky white). Then, as peak ripeness arrives, some begin to turn amber. Your target window depends on effect preference, but most growers aim for roughly 70 to 90% cloudy with 10 to 30% amber for a balanced potency profile. All clear means you harvested too early; mostly amber means peak potency has passed and a more sedative effect profile.
Secondary indicators are pistil (hair) color and calyx swelling. When 70 to 90% of the pistils have darkened from white to orange or red, and the calyxes (individual bud segments) are swollen and plump, harvest is usually close. Most outdoor Illinois photoperiod plants will hit their harvest window between late September and mid-October, depending on strain and weather. Autoflowering strains planted in late April can finish by mid-July, with a second run possible for southern Illinois growers.
Cutting and initial drying
Harvest on a dry morning after at least 2 dry days. Wet harvesting introduces moisture that accelerates mold. Cut main branches at the base and remove large fan leaves immediately. Hang branches upside down in a dark, dry space with good airflow and temperatures between 60 and 70°F and relative humidity between 45 and 55%. This is the ideal drying environment. In Illinois in October, your indoor conditions may be close to this already as heating season begins, but use a hygrometer to confirm. Drying takes 7 to 14 days at these conditions. Buds are ready for trimming and curing when small stems snap rather than bend.
Curing for quality
Curing is where flavor, aroma, and smoothness develop, and skipping it is a waste of a good harvest. Trim dried buds, place them in wide-mouth mason jars filled about 75% full (don't pack them tight), and store in a cool, dark place. For the first two weeks, 'burp' the jars daily: open each jar for 10 to 15 minutes to let fresh air in and moisture-laden air out. After two weeks, burp every few days. A minimum cure of 3 to 4 weeks produces noticeably better product than freshly dried bud. Six to eight weeks of curing produces excellent results with significantly improved flavor and smoother smoke.
Quick troubleshooting reference
| Problem | Most Likely Cause | Quick Fix |
|---|---|---|
| Yellowing lower leaves in veg | Nitrogen deficiency | Increase N feeding; check pH is in 6.3-6.8 range |
| Yellowing upper/new leaves | Iron or sulfur deficiency or pH lockout | Flush with pH-corrected water, check and adjust pH |
| Brown spots on leaves | Calcium deficiency or wind/heat burn | Add CalMag; check for heat stress above 90°F |
| Drooping leaves, wet soil | Overwatering | Let soil dry out; water less frequently |
| Drooping leaves, dry soil | Underwatering or heat stress | Water thoroughly; shade plant during peak afternoon heat |
| White powdery coating on leaves | Powdery mildew | Improve airflow; apply diluted hydrogen peroxide (3%) or potassium bicarbonate spray |
| Brown/gray mushy area inside buds | Botrytis (bud rot) | Remove affected section immediately; increase airflow; harvest affected colas early if late in flower |
| Tiny dots/stippling on leaves with fine webbing | Spider mites | Apply neem oil spray; introduce predatory mites for severe infestations |
| Plants not flowering by mid-August | Light pollution affecting dark cycle | Check for artificial light sources penetrating your enclosure at night |
| Buds smell like hay after drying | Dried too fast or too hot | Cure longer in jars; target slower drying at 60-70°F next time |
A successful Illinois outdoor grow comes down to a few non-negotiable things: staying legal with your medical patient registration and locked, enclosed setup; starting the right strains on the right timeline; keeping the canopy open for airflow; and staying on top of pests and mold before they spiral. For Oklahoma specifically, you'll also need to complete the state's licensing and comply with hemp cultivation requirements before you start growing how to get license to grow hemp in oklahoma. Get those foundations right and the plants will do most of the work themselves. Illinois summers give you more than enough heat and light to grow excellent cannabis. The main job is not getting in your plants' way.
FAQ
What if I already have an enclosed backyard area, but it is not completely opaque or blocks sightlines inconsistently?
Treat “enclosed, locked space” as a visibility and access requirement, not just a fence. If neighbors or the public can see the plants when the sun angle changes, or if the gate can be opened without a lock, you should upgrade to opaque panels and a locking gate/latch before planting. Also make sure the enclosure prevents unsupervised access, not just “limited access.”
Can I start seedlings outdoors earlier to get a head start in Illinois?
You can, but the risk is a cold snap below about 40°F, which can seriously stunt young plants. A safer compromise is starting seeds indoors as described, or keeping outdoor starters under row cover/mini-tunnel until nights consistently stay above your target temperature. If you use protection, still remove it during warm daytime periods to avoid overheating and humidity buildup.
How do I keep buds from getting mold in a humid Illinois summer if I am not sure my training will be enough?
Increase airflow in two ways: give plants more spacing inside the enclosure, and remove interior leaves that block light and trap moisture once the canopy fills in. Use a small fan that moves air across the plant rather than blasting one spot, and check bud sites after humid/rainy stretches. Bud rot often starts inside dense sections, so inspection must include inside-canopy areas, not just the outer leaves.
Is overwatering always obvious, or how can I tell if I should water less or change the drainage setup?
Drooping alone is not enough, check the soil with a finger or small probe at the 2 to 4 inch depth. If it feels wet or cool at that depth, wait, do not “top off.” If pots stay wet for many days, you likely need a faster-draining mix, better pot fabric size, or more drainage capacity, because repeated wet cycles drive root problems and later mold risk.
What is the best approach if I suspect nutrient lockout, not just a simple deficiency?
First confirm your water source, especially if using reverse osmosis or very soft water, since that can create calcium and magnesium gaps. Then check your pH after mixing nutrients (a pH meter helps), because off-target pH can mimic deficiency even when fertilizer is present. If you see continuing problems after correcting pH, flush with properly pH’d water in small increments, then restart at reduced strength rather than immediately increasing nitrogen.
When should I harvest in Illinois if the weather forecast is turning rainy right before my target date?
Use trichomes as the final decision, but prioritize drying conditions you can control. If extended rain threatens, you may harvest slightly earlier within your target window (when many trichomes are cloudy with some amber) to reduce time in high-moisture conditions. After harvest, be strict about dry-room humidity (about 45 to 55%) and ensure rapid drying to prevent mold during drying.
Can I grow photoperiod plants and autoflowers in the same enclosed setup?
It is possible, but plan it carefully because photoperiod plants rely on natural day length for flowering timing, while autos flower on age. Do not let taller plants shade the autos during critical late-season weeks, and keep spacing and airflow consistent across both. Many growers choose one category per season to simplify timing and reduce light and space conflicts.
What are common mistakes people make after starting with feminized seeds outdoors?
Two big ones are overcrowding and late aggressive training. Overcrowding creates a stagnant microclimate that encourages pests and mold, even when you trained at the start. Also avoid high-stress actions close to flowering transition, because plants need energy to switch phases and can stall. If you see recovery delays, stop further stress and focus on airflow and stable watering.
How can I quarantine clones effectively so I do not bring pests or diseases into my outdoor enclosure?
Keep clones physically separate from your main plants for at least a week and inspect them daily, including the undersides of leaves and the base of stems. Use clean tools for the quarantine area, do not move soil tools between zones, and avoid touching your main plants immediately after handling clones. If you notice any webbing, stippling, or suspicious spotting, extend quarantine and consider discarding the clone rather than “hoping it passes.”
Do I need a hygrometer during drying and curing, or can I rely on “feels dry enough” methods?
You should use at least one hygrometer for drying. Illinois October air can be deceptively variable, and “dry enough” by feel can still be too humid inside large buds, which increases mold risk. Aim for stable drying conditions around 60 to 70°F and 45 to 55% relative humidity, then confirm readiness by stem snap before moving to curing jars.
Next Article
How Much Weed Can One Seed Grow and How to Maximize It
Realistic yield from one cannabis seed, what limits it, and steps to maximize flower at home from seed to harvest.