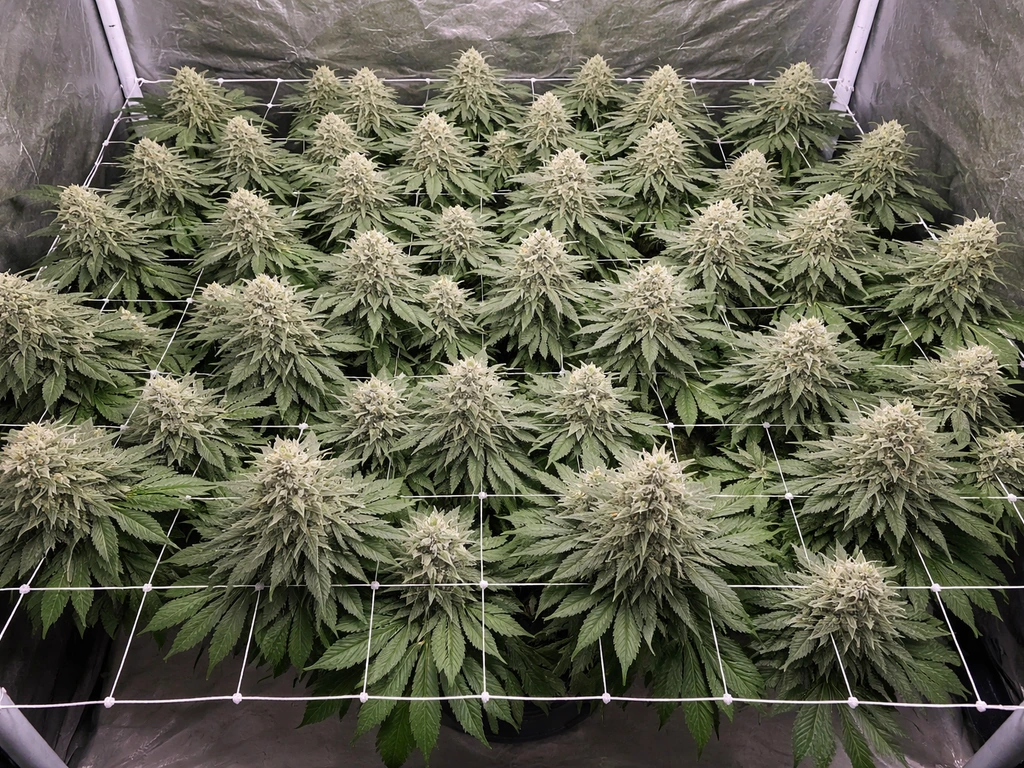
You can keep cannabis plants small at home by combining the right strain choice, a compact indoor setup, and training techniques like low-stress training (LST) or topping. Most beginners growing in a 2x2 or 3x3 tent can finish plants under 2 feet tall by picking an autoflowering or indica-dominant strain, flipping to flower early, and bending or topping during veg. It's more about planning and staying consistent than any one trick.
How to Grow Weed Plants Small at Home: Indoor Guide

Marcus Holbrook
31 May 2026
Before you start, check the laws in your area. If you want to learn the process safely, start by finding reputable local resources for home cannabis growing that match your legal situation check the laws in your area. Home cultivation is legal in some places and restricted or banned in others. If you’re wondering can i grow cannabis in my house, start by confirming the plant limits and indoor-only rules in your area grow cannabis in your house. Plant counts, possession limits, and indoor-only rules vary widely by jurisdiction, so know your local rules before you put a seed in soil. Everything in this guide assumes you're growing legally at home.
Picking the right strain and building your grow plan
Strain selection is the single biggest lever you have for controlling final plant size. Some genetics are just built to stay short. Others will triple in height during flower no matter what you do. Getting this right upfront saves a lot of frustration.
Autoflowering strains are the easiest starting point for small grows. They don't rely on a light schedule change to trigger flowering, they finish in 8 to 10 weeks from seed, and they're naturally compact, often topping out at 12 to 24 inches indoors. Indica-dominant photoperiod strains are also a solid choice since they tend to stay bushier and shorter than sativas. Strains specifically marketed as 'dwarf,' 'miniature,' or 'XXL in small spaces' have been bred for exactly what you're trying to do.
Plan your grow around the space you actually have, not the space you wish you had. For a 3x3 tent, 1 to 2 plants is a practical number. That gives you enough room to access the canopy for training, check the soil, and work around the plants without damaging them. Trying to squeeze in 4 or 6 plants sounds like more yield but it usually creates a crowded canopy, poor airflow, and mold problems.
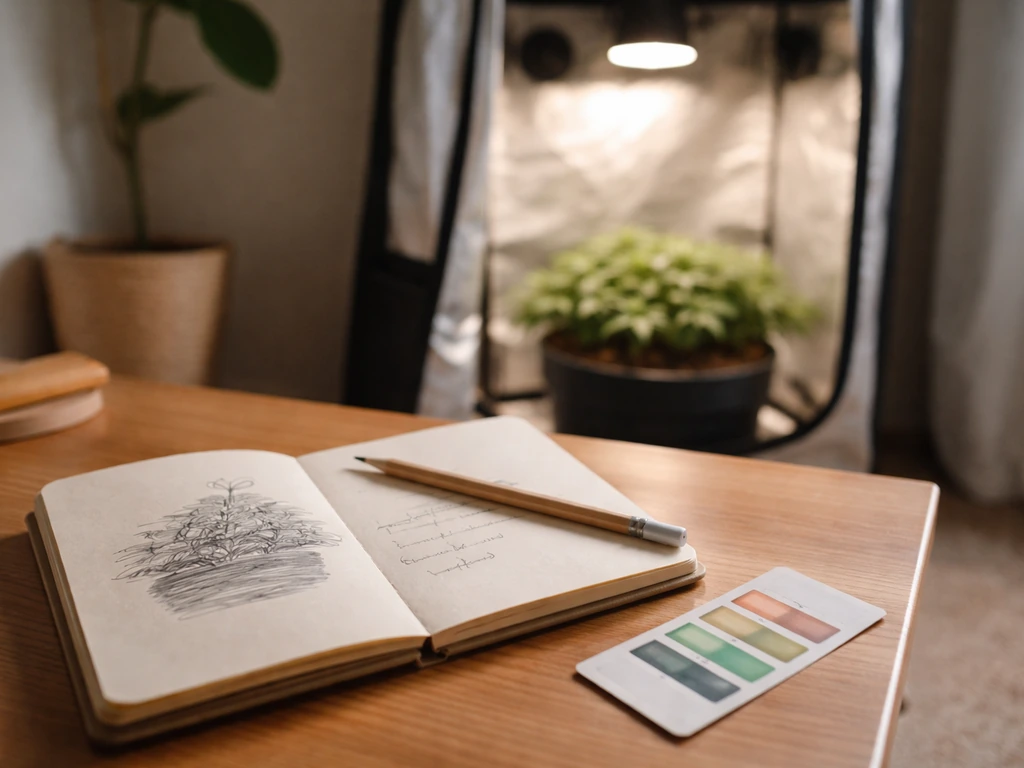
Write out a simple timeline before you pop a seed. Note when you plan to start veg training, when you want to flip to flower (for photoperiod plants), and your target harvest window. Having a rough calendar stops you from making reactive decisions that let plants get out of hand.
Setting up a small indoor grow space that actually works
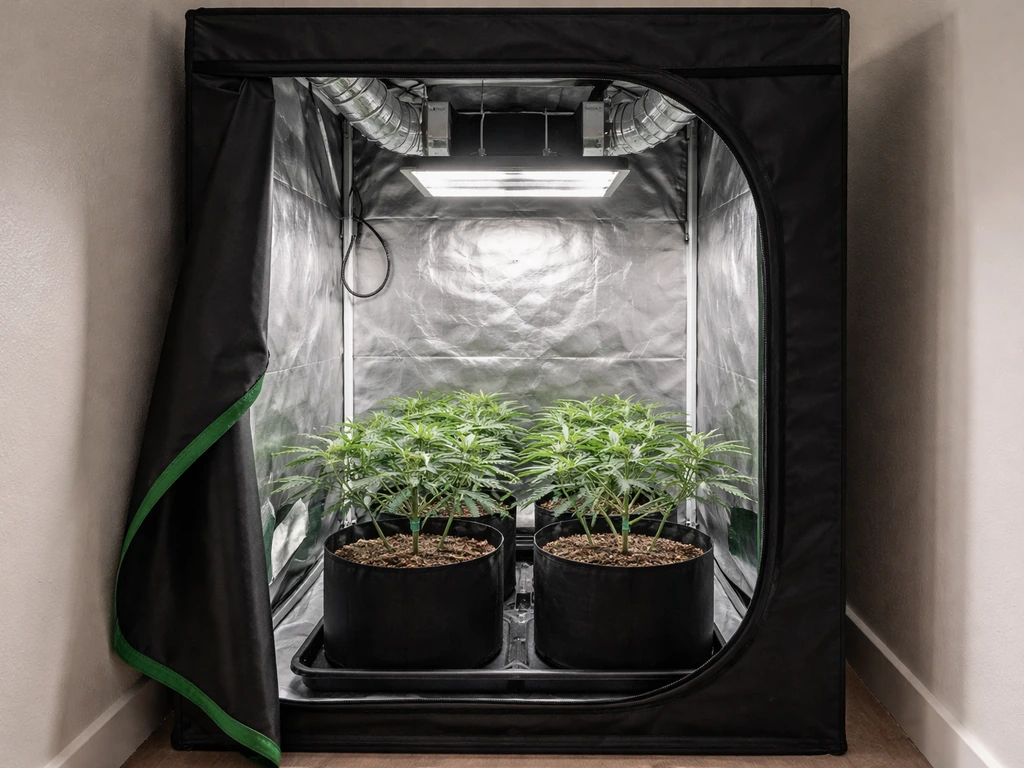
Your grow space doesn't need to be fancy, but it does need to hit the right environmental targets consistently. A grow tent is the most practical option for most home growers because it contains smell, reflects light back onto plants, and makes it easy to manage temperature and humidity.
Tent size and height
For a serious small grow, a 2x2 fits one plant comfortably and a 3x3 fits one to two. Even if you're keeping plants short, you still need vertical clearance for the pot (8 to 15 inches), the plant itself, and the distance between the canopy and the light (often 12 to 24 inches). A minimum interior tent height of around 6 feet is generally recommended for a full photoperiod grow to give yourself that clearance without constantly fighting the ceiling. Shorter tents can work with autoflowers and aggressive training but you'll be adjusting the light almost weekly.
Lighting
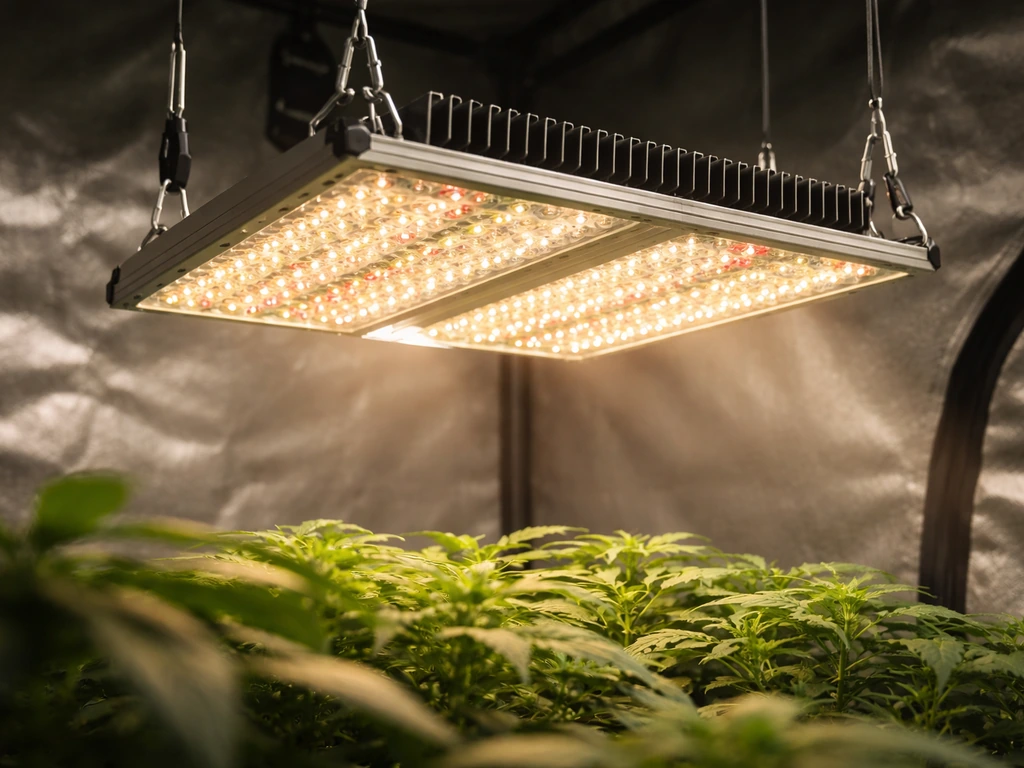
LED panels are the go-to for small home grows in 2025 and 2026. They run cooler than HPS, which helps you avoid heat stretch at the canopy, and modern quantum board LEDs are highly efficient. The PPFD (photosynthetic photon flux density) targets you want to hit vary by stage: seedlings do best at 100 to 300 µmol/m²/s, vegetative growth calls for 400 to 600, and flowering needs 600 to 1,000. You don't need to buy a meter right away, but knowing these numbers helps you understand why your seedlings shouldn't be blasted with full-power light. Most LEDs with a dimmer should be set to 25 to 50% during the seedling and pre-veg stage, both to avoid light stress and to reduce heat near the canopy.
Temperature, humidity, and airflow
During vegetative growth, keep temperature between 70 and 80°F (21 to 27°C) and relative humidity between 50 and 70%. During flower, drop humidity to the 40 to 50% range to reduce mold risk. Canopy temperatures above 82°F (28°C) are one of the primary causes of stretching and heat stress, so controlling heat isn't just comfort, it's a height-control strategy.
Airflow matters more than most beginners realize. A small clip fan oscillating directly in the canopy strengthens stems, reduces hot spots, and prevents the stagnant humid air that mold loves. An inline exhaust fan pulling air through a carbon filter handles both temperature and odor. Size the fan to your tent volume and run it continuously or on a controller.
Quick setup checklist
- 2x2 or 3x3 grow tent (minimum 6 feet tall for photoperiod grows)
- LED panel sized for your tent with dimmer capability
- Small oscillating clip fan for canopy airflow
- Inline exhaust fan paired with a carbon filter for odor control
- Digital thermometer/hygrometer to monitor temp and RH
- Timer for lights (smart outlet or dedicated light timer)
- pH meter and pH up/down solution
Germination and the early seedling stage
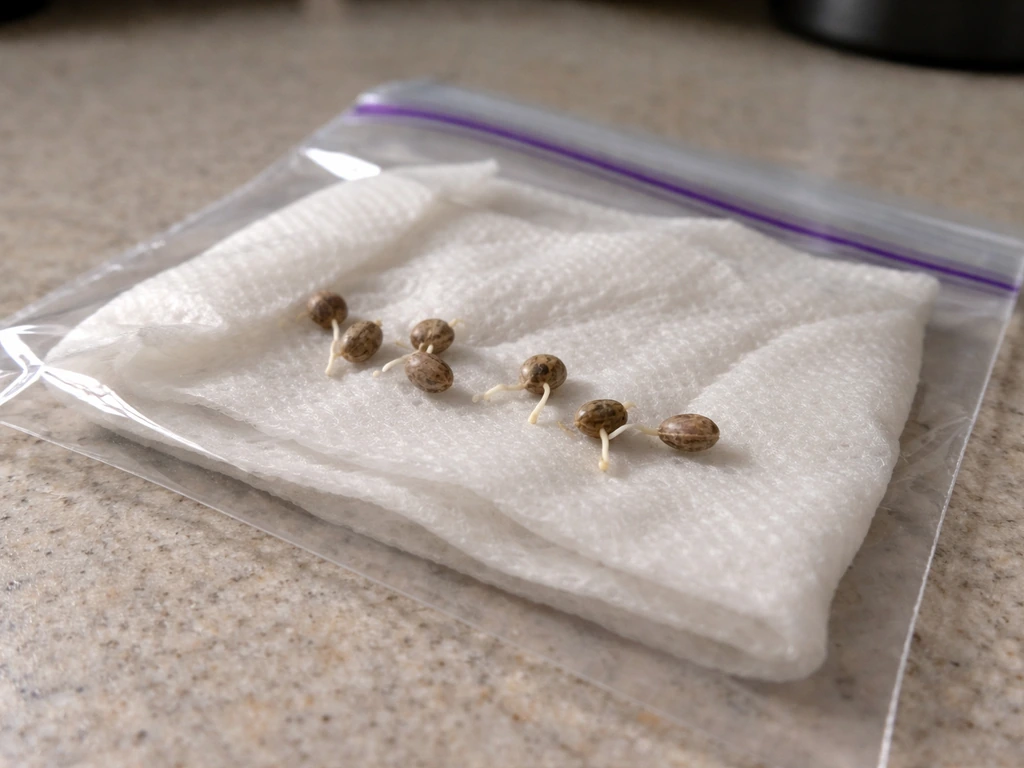
Germination is straightforward. The paper towel method works: dampen two sheets, place seeds between them, fold, put in a zip-lock bag or between two plates, and keep at around 70 to 77°F. Most seeds crack and show a taproot within 24 to 72 hours. Once you see a white taproot about a quarter inch long, plant it root-down in a small container, roughly 1 to 2 inches deep.
Start seedlings in small containers, like a Solo cup or a 1-liter pot, rather than dropping them straight into a 5-gallon bucket. Smaller soil volume dries out at a rate that matches a seedling's limited water uptake, which makes it much harder to overwater. Overwatering is the number one mistake I see beginners make, and it stunts early growth badly. Water in a small circle around the seedling rather than soaking the whole surface, encouraging roots to search outward.
Seedlings don't need intense light.) Keep your LED dimmed to 25 to 50% and position it higher during the first week or two. The goal is gentle, steady light that encourages compact node spacing, not aggressive growth. When seedlings stretch toward the light (long bare stem, leaves far apart), that's a sign they're not getting enough light intensity, so lower the light slightly or increase the dimmer setting.
Training and pruning to keep plants compact
Training is where the real height control happens. You're physically shaping the plant rather than just hoping genetics do the work. The main techniques that apply to small indoor grows are low-stress training (LST), topping, and the Screen of Green (ScrOG) method.
Low-stress training (LST)
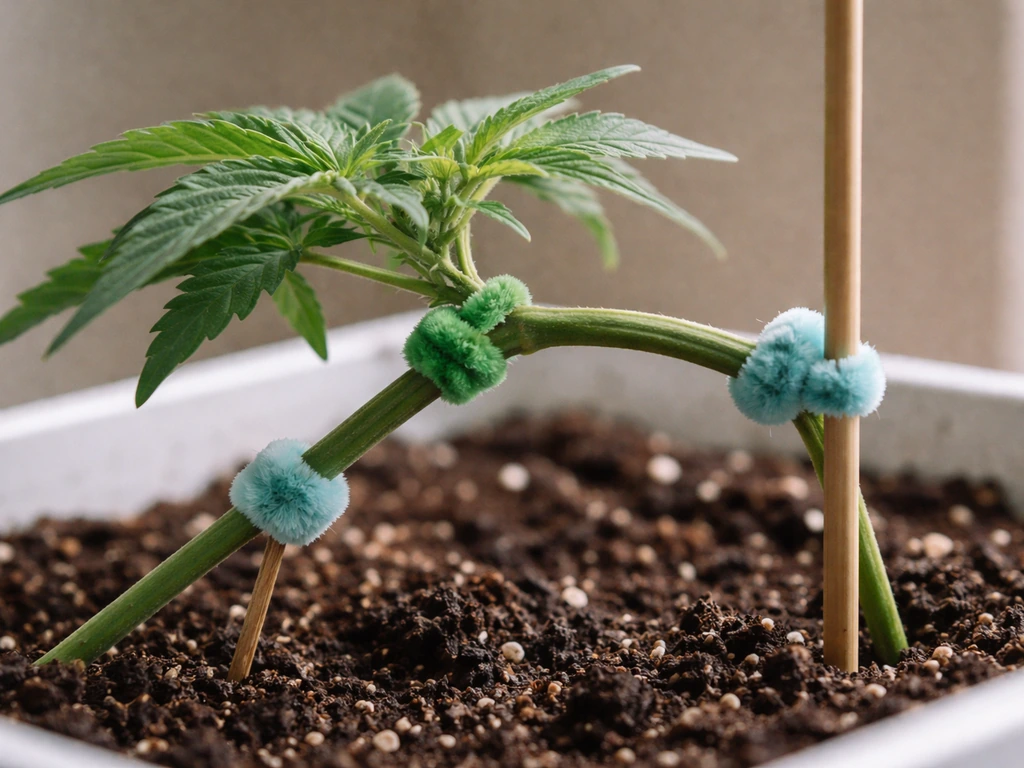
LST means bending the main stem and tying it down horizontally. You start when the plant has 4 to 5 nodes (usually 2 to 3 weeks into veg). Use soft plant ties or pipe cleaners and anchor them to the pot rim or stakes. Bending the top of the plant down and outward encourages the lower branches to grow upward, creating an even, flat canopy instead of one tall central cola. This spreads light across more bud sites without stressing the plant. You can keep adjusting ties every few days as new growth appears.
Topping
Topping means cutting off the main growing tip, which splits the plant into two main colas instead of one. Do this after the plant has developed at least 5 to 6 nodes. It slows vertical growth and spreads the canopy wider. The downside is a recovery period of about 5 to 7 days, so build that into your veg timeline. Don't top autoflowering plants; their short lifecycle means they don't recover in time and you'll lose more than you gain. Stick to LST for autos.
Screen of Green (ScrOG)
ScrOG uses a horizontal screen (a wire or netting grid) placed 8 to 12 inches above the pot. As the plant grows, you tuck branches under the screen and spread them out, training the plant to grow horizontally across the grid. This creates an extremely flat, even canopy that maximizes light penetration and keeps height under control. It's particularly well-suited to a 2x2 or 3x3 tent because the entire screen fills with productive bud sites without any single branch shooting up past the others.
Defoliation and lollipopping
Removing large fan leaves that block light from lower bud sites (defoliation) and stripping the lowest branches that won't receive enough light to produce quality buds (lollipopping) both help concentrate the plant's energy into the top canopy. Do this in moderation during late veg and early flower. Taking too many leaves at once stresses the plant; a good rule of thumb is removing no more than 20 to 30% of foliage in a single session.
Light schedule and managing stretch during flower
For photoperiod strains, the light schedule controls when the plant flowers. During veg, run 18 hours of light and 6 hours of dark. When you flip to 12/12, the plant reads this as the end of summer and begins flowering. Here's the height trap: most photoperiod strains stretch 50 to 100% (sometimes more) during the first 2 to 3 weeks of flower, a phase called the 'stretch.' If your plant is already 12 inches tall when you flip, expect it to hit 18 to 24 inches before stretch ends. Plan accordingly.
Flipping to flower earlier during veg is one of the most effective ways to keep final plant height manageable. If you want a plant under 20 inches at harvest, you may need to flip when it's only 8 to 10 inches tall, depending on the strain's stretch tendencies. This is where strain research pays off. Check the breeder's notes for indoor height and stretch behavior before you buy.
Autoflowering plants skip this complication. They typically run on an 18/6 or 20/4 light schedule throughout their entire life and flower automatically based on age, usually around week 3 to 4 from seed. This makes light schedule management much simpler for beginners and the stretch is typically much less dramatic.
Keeping canopy temperature below 82°F (28°C) during the stretch phase also reduces internodal elongation. Heat causes the plant to stretch between nodes, so a cool, well-ventilated tent is directly linked to keeping internodal spacing tight and plants compact.
Feeding and nutrients for small indoor plants
Nutrients for small plants follow the same principles as any indoor grow, just scaled down. Beginners almost universally overfeed. Less is more, especially in a small container where nutrient buildup has nowhere to go.
Soil vs. hydroponics for small grows
For beginners keeping plants small at home, a quality cannabis-specific potting mix in a 1 to 3-gallon fabric pot is the easiest starting point. A good pre-amended soil (like those with perlite mixed in at 20 to 30% for drainage) already contains enough nutrients to carry seedlings through the first 3 to 4 weeks without adding anything extra. Fabric pots also self-prune roots through air pruning, which naturally limits how large the root zone, and therefore the plant, can get. Hydroponic methods (like DWC or coco coir) are also excellent for control and speed, but they require more active management of EC (electrical conductivity) and pH, which adds complexity for a first-time grower.
Basic feeding schedule
Once your seedling has used the nutrients in its starter soil (around week 3 to 4), introduce a light veg nutrient at half the recommended dose. Cannabis nutrient lines generally include a grow formula (higher nitrogen), a bloom formula (higher phosphorus and potassium), and sometimes a micronutrient or cal-mag supplement. Transition to bloom nutrients when you flip to flower. Always water to 10 to 20% runoff to prevent salt buildup in the medium, and check that runoff pH falls between 6.0 and 7.0 for soil (5.5 to 6.5 for coco or hydro). If pH drifts outside that range, nutrient lockout happens even if you're feeding correctly.
For growers experimenting with coco or rockwool (as some irrigation-focused methods like those outlined by hydroponic grow guides use), managing EC and dry-back cycles becomes more important. The idea is that letting the medium dry back slightly between irrigation cycles keeps roots actively searching and helps control vegetative vigor, which indirectly manages node spacing and plant height. This is more advanced territory, but it's worth knowing that irrigation frequency itself influences plant structure.
Pot size and transplanting
Smaller pots produce smaller plants. For deliberately compact grows, finishing in a 1 to 3-gallon container is reasonable for autoflowers and small photoperiod plants. A 5-gallon pot allows more root expansion and can produce a larger plant than you want. Transplant only once (from seedling cup to final pot) to minimize stress. Start in a Solo cup, transplant when roots begin circling the bottom (usually around week 3), and move directly to the final container.
Troubleshooting the most common problems in small grows
Stretching and leggy plants
If your seedling or young plant is growing a long bare stem with leaves spread far apart, it's stretching for light. The fix is almost always to lower your light or increase its intensity slightly. Check that your PPFD is in the right range for the stage and that your light isn't so far away that the plant is reaching for it. Also check canopy temperature; anything above 82°F will push internode elongation. If a seedling has already become leggy, you can bury the stem deeper when you transplant, which stabilizes it and encourages rooting along the buried stem.
Nutrient deficiencies and toxicities
Yellow leaves are the most common symptom beginners panic about, but the cause matters. Yellow from the bottom up during late flower is mostly normal (nitrogen is being pulled from old leaves). Yellow new growth or yellowing that spreads fast from the top down points to a real deficiency, often a pH lockout issue or an actual missing nutrient. Check pH first, always, before adding more nutrients. A toxicity (too much nitrogen, for example) shows as very dark, clawing leaves. When in doubt, flush with plain pH-corrected water and feed lighter next time.
Mold and pests in small grow spaces
Small tents can develop high-humidity microclimates, especially when canopies are dense. Bud rot (botrytis) is devastating and shows up as gray fuzzy patches inside dense colas, often late in flower. Prevention is everything: keep flowering humidity under 50%, run your fan continuously, and defoliate enough to let air move through the canopy. Fungus gnats come from overwatering and soggy soil; let the top inch of soil dry out between waterings and use yellow sticky traps as an early warning system. Spider mites show as tiny pale dots on leaves with fine webbing under the leaves; treat early with neem oil or insecticidal soap and keep humidity up (mites hate above 60% RH).
Inconsistent or slow flowering
For photoperiod plants, any light leak during the dark period can interrupt flowering and cause re-vegging or hermaphroditism. Check your tent for light leaks by standing inside it in the dark. Seal any gaps with light-proof tape. If an autoflower seems slow to flower, it's usually just genetics; some autos take longer than advertised. Make sure temperature and light schedule are consistent and give it time. Stressing autos with heavy training or transplanting too late can also delay flowering.
Harvest timing and repeating your small grow
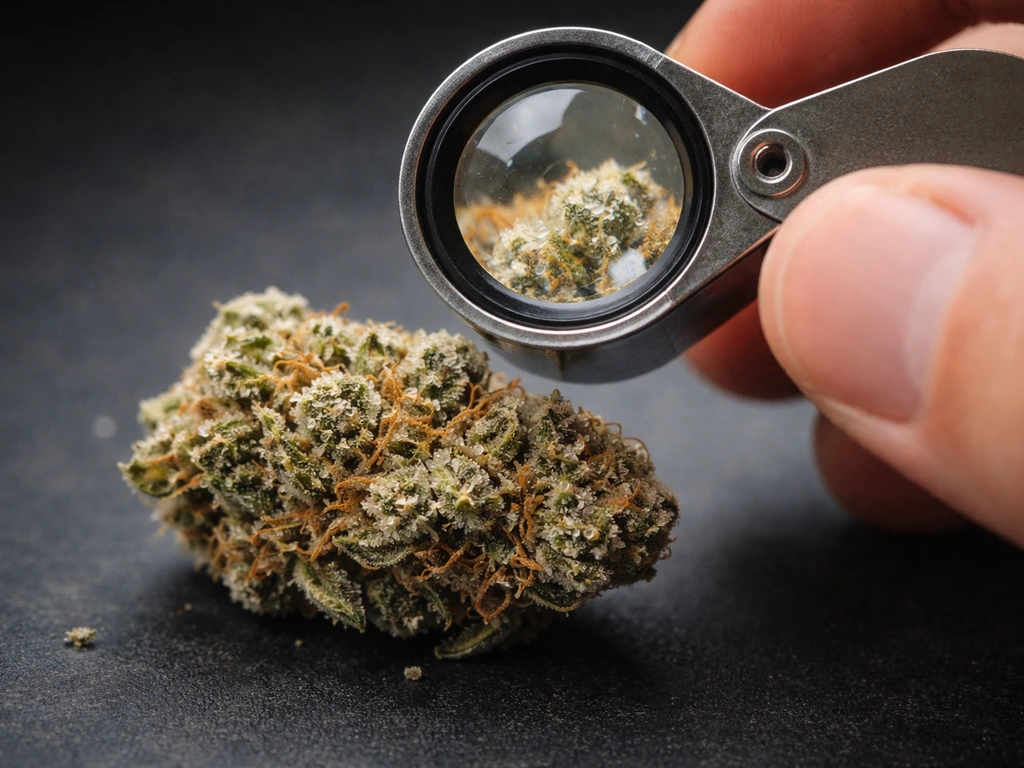
The most reliable way to know when to harvest is to check trichomes with a jeweler's loupe (30x to 60x) or a pocket microscope. Trichomes start clear, turn milky white (peak THC, most people's target), then amber (more sedative, degraded THC). Most growers harvest when trichomes are mostly cloudy with 10 to 20% amber. Pistil color change (from white to orange/red) is a secondary indicator, but trichomes don't lie.
After harvest, hang whole branches or individual colas in a dark space at 60 to 65°F and 55 to 62% RH for 7 to 14 days to dry slowly. Then cure in sealed glass jars, burping them daily for the first week. A proper slow dry and cure is what makes home-grown cannabis actually taste good. Rushing it is one of the biggest mistakes first-time growers make.
Repeating the cycle and improving
After your first harvest, you have real data. Note what height the plant hit, whether you ran out of vertical space, how the strain behaved during stretch, and what problems came up. Use that to adjust the next run: flip earlier if it got too tall, try topping next time if you only did LST, or switch strains if the genetics were unmanageable. Growing small cannabis consistently at home is a skill that compounds with each cycle.
Immediate next steps checklist
- Confirm your local laws on home cultivation, plant limits, and possession before buying anything
- Choose an autoflowering or indica-dominant strain with documented short indoor height
- Pick your tent size (2x2 for one plant, 3x3 for one to two) and confirm you have at least 6 feet of interior height for photoperiod grows
- Source a dimmable LED panel sized for your tent footprint
- Gather a clip fan, inline exhaust with carbon filter, digital thermometer/hygrometer, and pH meter
- Germinate using the paper towel method and plant into a small starter container once the taproot appears
- Start your light at 25 to 50% power and keep the seedling on an 18/6 schedule
- Begin LST at week 2 to 3 of veg once 4 to 5 nodes appear, or top after node 5 for photoperiod plants
- Flip to 12/12 while the plant is still short enough to accommodate post-flip stretch
- Check trichomes in the final 2 weeks before harvest and dry/cure properly before sampling
Growing small cannabis at home is genuinely doable in almost any living situation as long as you plan for it from the start. The growers who struggle are usually the ones who started with the wrong strain in a space that didn't fit, then tried to fix it mid-grow. Start with the checklist above, stay on top of your environment, and the plants will do the rest. Home growing success also depends on choosing compact strains and using simple height-control methods like LST or topping. If you want to go deeper on any of these steps, the same principles apply whether you're building a full homemade setup from scratch or figuring out whether home growing is even right for your situation. If you're specifically looking for how to grow weed at home with a homemade setup, focus on choosing the right compact genetics and matching your environment to the plants’ needs how to grow weed homemade.
FAQ
My plant is getting too tall, what should I do mid-grow to keep it small?
Aim for steady environment first, then adjust light and training. If your plant is already taller than planned, stop adding new training, keep canopy temperatures below 82°F (28°C), and finish the remaining stretch with minimal disturbance (continued gentle LST only). For photoperiods, flipping earlier is often more effective than trying to correct height after stretch begins.
How should I run my exhaust and fans in a small 2x2 or 3x3 tent?
For small tents, use the minimum fan speed that keeps air moving, then prioritize continuous airflow during flower. A common mistake is letting the inline fan cycle on and off, which creates humidity spikes inside dense canopies and increases mold risk.
What should I check if my seedlings look leggy even with the light dimmed?
If your light is dimmed correctly but seedlings still stretch, double-check two things: light distance and stage brightness. Raise the PPFD only gradually, and ensure seedlings are not sitting under the LED edge or blocked by reflective gaps in the tent.
Can I use topping or transplanting to control height on autoflowers?
With autoflowers, avoid topping and heavy “recovery” moves. If you need extra height control, LST and ScrOG are usually safer, and transplant stress should be minimized by moving directly from the starter cup into the final container on time.
How can I prevent light schedule mistakes that cause re-vegging in small indoor grows?
Yes, but only if you lock the timing and prevent accidental interruptions. Once you flip to 12/12 for photoperiods, avoid opening the tent during the dark period, and if you use smart timers, verify they do not drift or get reset during power events.
What are the most common nutrient mistakes that make small plants stall or look unhealthy?
When using nutrients, watch runoff and pH rather than chasing a “stronger feed.” If the medium stays wet too long in a small pot, salts accumulate quickly, making symptoms look like a nutrient problem but the real fix is correcting watering rhythm and runoff pH.
How often should I water a small pot to avoid fungus gnats and overwatering?
Run a single, consistent watering method and only increase frequency when the top inch of soil is dry. In small containers, “a little water every day” often keeps the root zone too wet, leading to fungus gnats and roots that cannot breathe.
Does pot size alone control plant height, or is it mostly genetics and training?
Plan canopy height targets before you choose a pot size. A 1 to 3-gallon final pot is usually for compact outcomes, while a 5-gallon pot can encourage more root volume and larger structure even with LST.
How do I know when defoliation is too aggressive for a small grow?
Defoliation helps, but timing matters more than the total number of leaves removed. Remove only what blocks light to lower bud sites, do it late veg and early flower, and stop well before full flower weeks if your plant seems to be recovering slowly.
What’s the fastest way to prevent bud rot in a small tent where airflow is limited?
If bud rot appears, remove affected material immediately and improve airflow and humidity control. You should also inspect surrounding branches and check that you are not over-dense in the center, since small tents can trap humid air inside colas.
How reliable is pistil color for harvest timing compared to checking trichomes?
Use trichomes as the primary guide, then pair it with a quick sensory check of pistil browning and overall fade. If many trichomes are still clear, harvesting early will usually feel harsher and more energetic than expected.
What curing adjustment should I make if my buds still seem too moist after drying?
For curing, keep jars filled but not overpacked, and do the first burp schedule for the first week more frequently if humidity is high. If the buds feel damp or the jar smells “wet,” continue drying longer or extend the initial burp period before settling into a daily or near-daily routine.
Next Article
How to Grow 1 Pound Per Plant: Yield Guide for Beginners
Step-by-step plan to grow ~1 lb per plant using strain choice, light, training, feeding, and troubleshooting for beginne