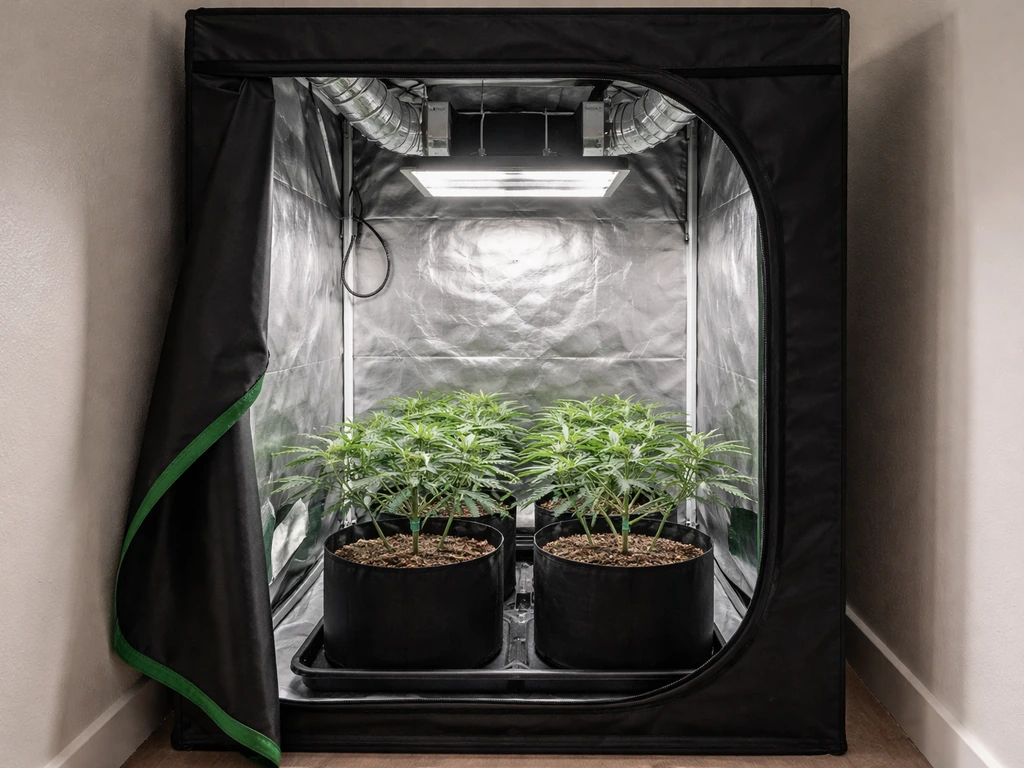
Yes, you can grow cannabis in your house in many places, but whether it is legal depends entirely on where you live, whether you rent or own, and how many plants you plan to grow. In the U.S., states like Colorado allow adults 21+ to grow up to six plants per person (no more than three flowering at once, household max of twelve), while New York allows up to three mature and three immature plants per adult with a household cap of six mature and six immature. Colorado Department of Public Health & Environment, Home Growing FAQ confirms Colorado adults 21 and older may cultivate up to six plants per person (no more than three flowering at a time), with a household maximum of twelve plants, and plants must be kept in an enclosed, locked space Colorado Department of Public Health & Environment — Home Growing FAQ. Canada sets a federal baseline of four plants per dwelling for non-medical adults, though provinces can tighten that further. A handful of states and some countries still ban home cultivation entirely. So the first thing you need to do, before buying a single seed, is confirm what the law actually says where you live.
Can I Grow Cannabis in My House: Legal Checklist & Home Guide

Home-Growing Legal Checklist
This is the part most people rush past, and it is the part that matters most. I have seen growers get several harvests in before realizing their lease had a cultivation clause or their city added a local ordinance on top of the state law. Go through each of these points before you set up anything.
Step 1: Check your state or province baseline
Start with your state's official cannabis authority website (Colorado's CDPHE, New York's Office of Cannabis Management, California's Department of Cannabis Control, etc.). Look specifically for 'home cultivation' or 'personal cultivation' rules. Note the per-person plant limit, the per-household plant limit, whether there is a distinction between mature/flowering and immature/seedling plants, and whether indoor vs. outdoor matters for your jurisdiction. In Canada, go to the Government of Canada's official cannabis page and then cross-check your specific provincial regulations, because several provinces have historically added restrictions on top of the federal four-plant rule.
Step 2: Check your city or county ordinances
State law sets the floor, but municipalities often add requirements on top. Common local additions include rules that plants must not be visible from a public place, that grows must be in a locked and secured location, and odor or nuisance provisions. Search your city or county code for 'cannabis cultivation' or 'marijuana cultivation.' If you can't find it easily, call your local planning or code enforcement office directly. It takes ten minutes and removes a lot of uncertainty.
Step 3: Read your lease and HOA covenants
This is where a lot of renters get caught out. Landlords in most U.S. states can legally prohibit cultivation or smoking by including a clause in the lease, even where home growing is otherwise state-legal. New York, for example, does limit landlords from refusing to rent solely because of lawful cannabis conduct, but still allows restrictions on smoking and growing activities. If you live in federally subsidized or public housing, cannabis cultivation is prohibited regardless of state law because federal law still classifies cannabis as a Schedule I controlled substance. If you own a condo or live in an HOA community, check your CC&Rs for language about drug use, cultivation, or activities that could affect neighboring units (moisture, odor, electrical load). Get written permission or a lease amendment if you are uncertain.
Step 4: Age limits and licensing
Every legal adult-use jurisdiction sets a minimum age, almost always 21 in U.S. states and 18 or 19 in Canadian provinces. Medical cultivation operates under a separate licensing framework in most places and often allows larger plant counts, but requires registration with the relevant health authority (Health Canada for federal medical authorization, for example). If you are growing under a medical authorization, confirm that you have the correct registration certificate and that it is current before you plant anything.
Step 5: Know the penalties and prohibited activities
Even in legal jurisdictions, exceeding plant counts, selling without a license, or growing where it is prohibited can result in civil fines or criminal charges depending on the scale and your jurisdiction. Transferring plants or harvested cannabis to others without a license is typically prohibited even if personal growing is allowed. Keep your grow within the legal limits and never sell or barter your harvest.
| Jurisdiction | Adults-only age | Plants per person | Household max | Key restriction |
|---|---|---|---|---|
| Colorado (U.S.) | 21+ | 6 (max 3 flowering) | 12 | Enclosed, locked space required |
| New York (U.S.) | 21+ | 3 mature + 3 immature | 6 mature + 6 immature | MRTA and OCM regulations apply |
| Canada (federal) | 18/19+ (by province) | 4 plants per dwelling | 4 plants per dwelling | Provinces may restrict further |
| California (U.S.) | 21+ | 6 plants | 6 plants per residence | Not visible from public; local ordinances vary |
| Illinois (U.S.) | 21+ | 5 plants per household | 5 plants per household | Must be in enclosed, locked space |
Is Home Growing Actually Right for You?
I will be honest with you: growing cannabis at home is rewarding, but it is not passive. Before you invest money in equipment or time in learning, it is worth being clear-eyed about what you are signing up for. Here is a practical checklist to work through.
- Cost: A minimal but functional indoor grow (tent, light, fan, nutrients, growing medium, seeds) starts at roughly $150 to $300 for a small setup. A well-kitted 2x4 foot tent with a quality LED will run $400 to $700 upfront. Outdoor growing is significantly cheaper if your climate and legal situation allow it.
- Time: Autoflowering strains finish in 60 to 90 days from seed. Photoperiod strains in a controlled indoor environment typically take 4 to 5 months from seed to harvest when you include vegetative time. Plan for 10 to 20 minutes of daily attention during routine care, more during training, transplanting, or troubleshooting.
- Smell and privacy: Cannabis in late flowering produces very strong odors. Without carbon filter and fan ventilation, the smell will travel through walls, vents, and hallways. If you share walls with neighbors or live in an apartment building, odor control is not optional. Think carefully about whether your living situation allows this.
- Your actual goals: If you use cannabis occasionally and the dispensary is nearby, the economics of growing may not make sense until you factor in the experience and control over what you are consuming. If you use regularly, prefer specific cultivars, or have medical needs, home growing often pays for itself within one or two harvests.
- Risk tolerance: Even in legal states, growing incorrectly (wrong plant counts, visible plants, lease violations) can have real consequences. Electrical risks from improper wiring are genuinely dangerous. Unpermitted electrical modifications are a documented cause of house fires in grow operations. If you are not comfortable adding a new circuit properly or hiring an electrician to do it, start with a very low-power setup.
- Skill and learning curve: Your first grow will teach you more than any article can. Expect to make mistakes. Expect the first harvest to be smaller than you hoped. That is normal and part of the process.
Choosing Your Genetics and Seeds
Choosing the right genetics is one of the highest-leverage decisions you make as a home grower. The wrong strain for your space or climate turns a fun project into a frustrating one. Here is what actually matters.
Photoperiod vs. autoflowering
Photoperiod strains flower when the light cycle drops to around 12 hours of light and 12 hours of darkness. Outdoors, this happens naturally in late summer. Indoors, you control it by changing your timer. This gives you total control over when the plant flowers and how large it gets before you flip it, but it requires managing two distinct lighting schedules. Autoflowering strains flower based on age rather than light schedule, typically starting to flower around 3 to 4 weeks after germination regardless of light hours. They finish faster (60 to 90 days from seed), stay smaller, and are generally more forgiving for beginners. The tradeoff is that autoflowers typically yield less per plant than a well-grown photoperiod, and you cannot clone them effectively.
Feminized vs. regular seeds
Regular seeds produce roughly 50% male and 50% female plants. Males do not produce consumable buds and can pollinate females, seeding your crop. Unless you are breeding, you want feminized seeds, which are bred to produce female plants almost exclusively (99%+ under normal conditions). For most home growers, feminized seeds are the practical choice. Regular seeds are useful if you want to run breeding projects or preserve genetics.
Compact and low-stretch strains for small spaces
If you are working in a closet, a 2x2 or 2x4 tent, or a small grow cabinet, strain selection becomes critical. Look for strains specifically described as 'compact,' 'low stretch,' 'indica-dominant,' or 'autoflowering.' Some well-regarded small-space options include Northern Lights (a classic compact indica photoperiod), Critical (fast-finishing, low stretch), White Widow Auto, Blueberry Auto, and smaller versions of Blue Dream. Many reputable seed banks now list expected finished height on the product page. For a 5-foot tent ceiling, aim for strains that breeders describe as finishing under 90 to 100 cm.
Where to Buy Seeds Legally and Safely
Seed sourcing is one of the murkiest areas for new growers because the rules vary so much by jurisdiction. Here is a practical breakdown of your options and what to watch for.
Local dispensaries
In states and provinces where adult-use cannabis is legal and retail-licensed, many dispensaries now sell seeds directly. This is typically the safest and most legally straightforward option. You know you are getting a tracked, tested product from a licensed source, and there are no shipping concerns. Stock can be limited depending on your area, and prices per seed are sometimes higher than online seed banks.
Online seed banks
Many established international seed banks (primarily based in the Netherlands, Spain, and the U.K.) ship to U.S. addresses. The legal status of importing seeds is technically complicated in the U.S. because cannabis seeds are federally controlled, though enforcement against individuals ordering small quantities for personal use has historically been rare. Customs seizure is possible and the seeds are considered 'collectible' or 'novelty items' by some banks, which is a legal fiction rather than an actual protection. If you order from an online seed bank, understand that you are operating in a legal gray area at the federal level even if your state permits growing. Check the bank's reputation through grower forums, look for stealth shipping options, and use a bank that has been operating reliably for several years.
What to check before ordering
- Does the bank clearly list genetics, THC/CBD estimates, expected height, and flowering time?
- Are seeds sold as feminized, regular, or autoflowering and does the listing clearly confirm which?
- Does the bank have a germination guarantee or replacement policy?
- Are there verifiable reviews from growers (not just the bank's own site)?
- Does shipping go to your country or state, and is discreet/stealth packaging offered?
- Is payment handled securely, and does the bank accept your preferred method without demanding risky financial transfers?
Seed to Harvest: The Full Growing Timeline
Here is a stage-by-stage walkthrough of a complete grow cycle. I have included typical timelines and the key decisions or checks at each stage. The times given are for a feminized photoperiod strain grown indoors; autoflowers compress the total timeline significantly.
Stage 1: Germination (Days 1 to 5)
The paper towel method is the most reliable for beginners: dampen two paper towels, place seeds between them on a plate, cover with another plate to hold humidity, and keep at around 22 to 25°C (72 to 77°F). Most viable seeds will crack and show a taproot within 24 to 72 hours. Once the taproot is 0.5 to 1 cm long, transplant into your growing medium with the taproot pointing down, about 1 cm deep. Keep the surface moist but not waterlogged. You can also germinate directly in a rapid rooter plug or a peat pellet if you prefer to avoid transplant stress.
Stage 2: Seedling (Days 5 to 21)
Once the seedling breaks the surface and opens its cotyledons (the first round leaves), it enters the seedling stage. At this point the plant is developing its initial root system and the first true serrated leaves. Keep temperatures at 20 to 25°C and relative humidity (RH) at 65 to 75%. Light intensity should be moderate, with 18 hours on and 6 hours off for photoperiod strains. Do not overwater at this stage: small plants in large containers stay wet for too long and invite root rot. Water in a small circle around the seedling to encourage outward root growth. No nutrients are needed until the plant has 3 to 4 sets of true leaves, and even then start at 25 to 50% of the recommended dose.
Stage 3: Vegetative Growth (Weeks 3 to 8 for photoperiod)
This is when the plant builds its structure. Maintain 22 to 28°C and 40 to 70% RH. Keep the 18/6 light schedule. You can begin low-stress training (LST) during this stage by gently tying branches outward to create a flatter canopy, which improves light distribution and increases eventual yield. Top the plant (removing the main growing tip) at week 4 to 5 if you want a bushier plant with multiple main colas rather than one dominant central stem. Increase nutrient dosing gradually, focusing on nitrogen-forward formulas during veg. Flip to 12/12 lighting when the plant is roughly half the final height you have room for, because most strains will stretch 50 to 100% during the first two to three weeks of flower.
Stage 4: Transition (Weeks 1 to 3 of 12/12)
The transition or 'pre-flower' period begins immediately after you flip to 12/12. You will see the stretch, white pistils forming at nodes, and the plant switching its energy from leaf production to bud development. Switch from vegetative (nitrogen-heavy) nutrients to a bloom formula (higher phosphorus and potassium, lower nitrogen). Watch for any male pollen sacs if you are using regular seeds and remove males immediately. By week 3 of 12/12, pre-flowers develop into recognizable bud sites.
Stage 5: Flowering (Weeks 4 to 10 of 12/12, strain-dependent)
This is the most critical and enjoyable stage. Buds develop and fatten from week 4 onward. Drop RH to 40 to 50% to reduce the risk of botrytis (bud rot), especially in dense colas. Keep temperatures at 20 to 26°C. In the final two to three weeks, some growers 'flush' the growing medium with plain water to clear residual nutrient salts, though this practice is debated. The clearest harvest indicators are trichome color (viewed with a loupe or jeweler's magnifier): mostly cloudy trichomes indicate peak THC, while amber trichomes suggest THC is converting to CBN for a more sedative effect. Also watch pistil color: 70 to 90% of pistils turning orange-red is a useful secondary indicator. Most photoperiod strains finish in 8 to 10 weeks of flower.
Stage 6: Harvest, Drying, and Curing
Cut branches and hang them upside down in a dark, ventilated space. Oregon State University extension guidance recommends drying at 18 to 21°C (64 to 70°F) and 50 to 60% RH, with airflow but not blowing directly on buds. The slow dry preserves terpenes and reduces harsh smoke. Most harvests are dry enough to trim (stems snap rather than bend) in 7 to 14 days. After trimming, cure in airtight glass jars at 18 to 21°C and 55 to 65% RH for at least two to four weeks, burping (opening) the jars daily for the first week to release moisture and CO2. Curing significantly improves flavor and smoothness.
| Stage | Duration | Temp (°C) | RH (%) | Light schedule | Key action |
|---|---|---|---|---|---|
| Germination | 1 to 5 days | 22 to 25 | 70 to 80 | None / covered | Taproot visible before transplanting |
| Seedling | ~2 weeks | 20 to 25 | 65 to 75 | 18/6 | Water minimally; no or low nutrients |
| Vegetative | 3 to 6 weeks | 22 to 28 | 40 to 70 | 18/6 | Training, topping, ramp up nutrients |
| Transition | 1 to 3 weeks | 22 to 28 | 40 to 60 | 12/12 | Switch to bloom nutrients |
| Flowering | 6 to 10 weeks | 20 to 26 | 40 to 50 | 12/12 | Monitor trichomes; reduce RH late flower |
| Drying | 7 to 14 days | 18 to 21 | 50 to 60 | Dark | Hang branches; airflow without direct wind |
| Curing | 2 to 4+ weeks | 18 to 21 | 55 to 65 | Dark | Burp jars daily first week |
Indoor vs. Outdoor vs. Greenhouse: Which Setup Fits Your Situation?
Each growing environment has genuine strengths and real drawbacks. None of them is universally better. The right choice depends on your legal situation, climate, space, budget, and privacy needs.
| Setup | Pros | Cons | Best for |
|---|---|---|---|
| Indoor (tent/room) | Year-round growing; full environmental control; high privacy; odor management possible | Electricity cost; equipment investment; fire/electrical risk if done carelessly | Most home growers; renters with space; privacy-conscious growers |
| Outdoor | Low cost; natural sunlight; larger yields possible; no electricity for lighting | Seasonal (one harvest per year in most climates); weather/pest exposure; visibility/security concerns; depends on legal visibility rules | Homeowners with private yard in legal jurisdiction; warm climates; budget-first growers |
| Greenhouse | Extended season; reduced lighting cost; more privacy than open outdoor; natural CO2 | Requires suitable outdoor space; initial build cost; temperature management in heat | Homeowners wanting outdoor scale with more environmental control |
My honest recommendation for most first-time home growers is a small indoor tent setup. It gives you control over every variable, which makes troubleshooting much easier when (not if) something goes wrong. Outdoor growing is cheaper and produces large yields, but a late-season rain event, pest pressure, or a nosy neighbor can undermine a whole season's work. Start small indoors, get one or two successful harvests under your belt, then consider expanding outdoors or into a greenhouse if that suits your space.
Small-Space Indoor Setups: Practical Plans for Tight Budgets
You do not need a dedicated room or a large budget to grow well indoors. Here are three common small-space approaches with practical build outlines, so you can assess which fits your situation before spending anything.
Option 1: Closet or Wardrobe Grow
A standard bedroom closet (roughly 60 x 90 cm to 90 x 120 cm floor space) can support one to two plants in fabric pots. Line the interior walls with Mylar emergency blankets or flat white paint to maximize light reflection. Cut two holes in the closet door or side panel: one low for passive or fan-driven intake, one high for exhaust. A 4-inch inline fan with a carbon filter handles both airflow and odor. A 100 to 200-watt LED panel is appropriate for this size. The total cost for a closet conversion can be kept under $200 if you already have the closet. The main downsides are managing heat in a small enclosed space in summer and the limited ability to walk around plants for inspection.
- 4-inch inline fan and carbon filter combo ($50 to $80)
- 100 to 200W full-spectrum LED panel ($60 to $150)
- 2 x 3-gallon fabric pots ($10)
- Quality potting mix or coco coir ($15 to $25)
- Basic nutrient starter kit ($20 to $40)
- Mylar emergency blankets or flat white paint ($5 to $15)
- Analog or digital timer for lights ($10 to $15)
- Thermometer and hygrometer combo ($10 to $20)
Option 2: Grow Tent Setup
A purpose-built grow tent is the most practical all-in-one solution for most beginners. Tents come pre-lined with reflective Mylar, have pre-cut ports for fans and ducting, and zip shut for darkness during the 12-hour dark period. A 60 x 60 cm (2x2 foot) tent suits one to two plants and fits in a bedroom corner. A 60 x 120 cm (2x4 foot) tent handles two to four plants and is probably the sweet spot for a first serious grow. The tent itself usually runs $40 to $80. Combined with a matching LED and ventilation, a complete 2x4 setup costs $300 to $500 and fits in a spare bedroom or garage corner without permanent modification to the space.
- 60x60 cm or 60x120 cm grow tent ($40 to $80)
- 150 to 300W LED (for 60x60) or 300 to 600W LED (for 60x120) ($80 to $250)
- 4-inch inline fan with speed controller ($40 to $70)
- 4-inch carbon filter ($35 to $60)
- 4-inch flexible ducting, 5 feet ($10)
- 2 to 4 fabric pots in 3 to 5 gallon sizes ($10 to $20)
- Growing medium (coco coir + perlite mix or quality potting soil) ($20 to $35)
- pH meter and pH up/down solution ($25 to $45)
- Nutrient starter kit for veg and flower ($30 to $60)
- Timer ($10 to $15)
Option 3: DIY Grow Box or Cabinet
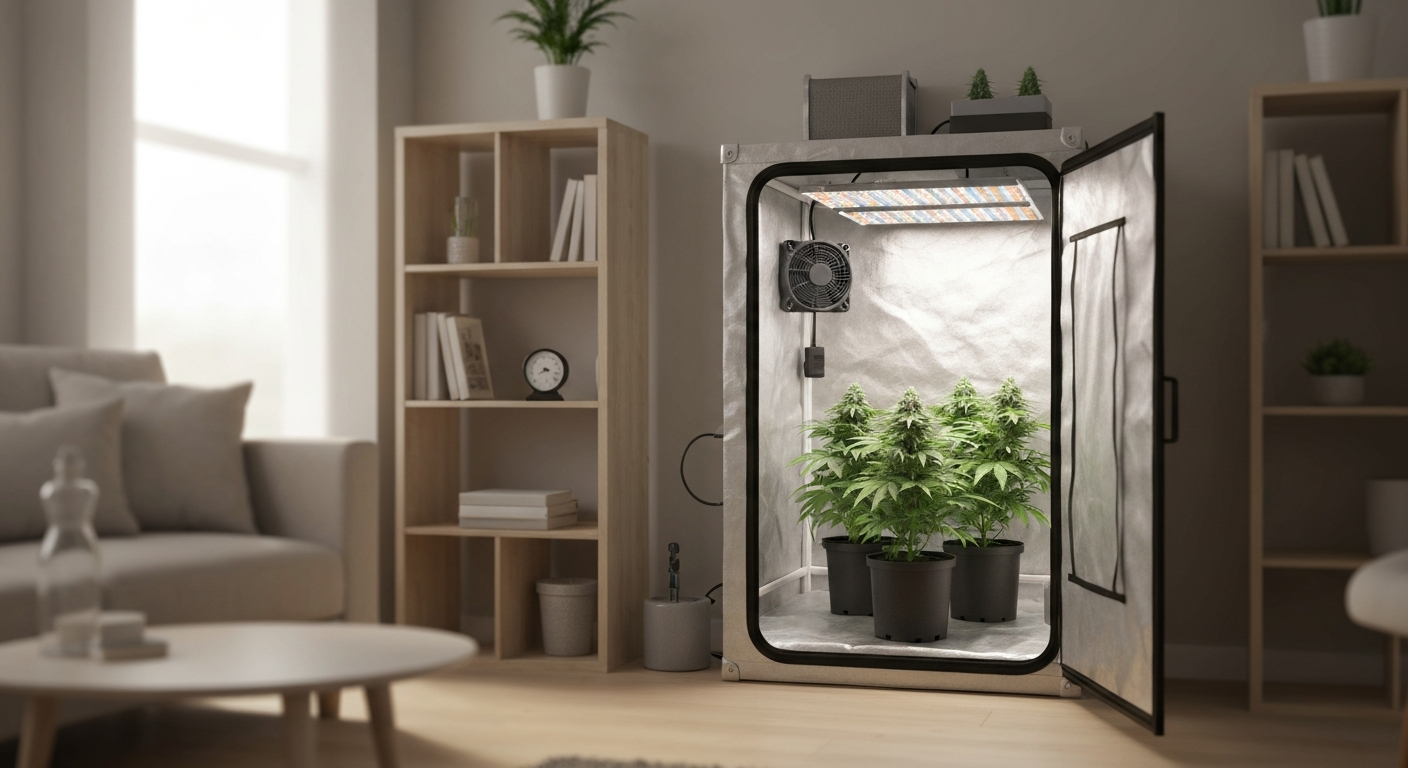
A grow box built from an old wardrobe, filing cabinet, or plywood box is a stealthy option that looks like furniture from the outside. The principles are the same as a tent: reflective interior, adequate lighting, a fan-and-filter ventilation loop, and light-proof construction. The main advantage over a tent is that it blends into a room aesthetically and is lockable, which is relevant both for security and for keeping children or pets away from plants. Build costs vary widely depending on whether you repurpose existing furniture ($50 to $100 for hardware plus electronics) or build from scratch ($150 to $250). Make sure any electrical components (fans, timers, lights) are properly connected and not overloaded on a single outlet. If you need a dedicated circuit, hire a licensed electrician rather than bypassing existing wiring. Unpermitted electrical modifications are a documented cause of fires in indoor grow operations and are not worth the risk. CalMatters reporting on unsafe/unpermitted cannabis grows and code enforcement (examples) documents repeated findings that unpermitted grows cause structural damage, high humidity/mold, pesticide contamination and electrical hazards that often require professional abatement.
Stealth and Ventilation Basics for All Small Setups
No matter which small-space option you choose, these ventilation basics apply. Your exhaust fan should move the full volume of air in the grow space at least once per minute, so size it accordingly (a 60x60x180 cm tent holds roughly 0.65 cubic meters; a 4-inch fan rated at 170+ CFM is sufficient). Always run exhaust air through a carbon filter before it leaves the space to neutralize odors. Position the fan to pull air through the filter and push it out through ducting, rather than pushing air through the filter (pull-through preserves filter life). Bring fresh air in from below (passive intake holes or a second smaller fan), and exhaust warm air out near the top of the space since heat rises. During flowering, check the exhaust air with your nose at the ducting exit point. If you can smell cannabis strongly, your filter may be undersized, bypassed, or near the end of its life (activated carbon filters typically last 12 to 18 months of regular use).
If you want to go further with your grow, including hands-on learning resources, nutrient scheduling, and detailed troubleshooting for common problems, there is a lot more to cover. If you’re asking where can I learn to grow cannabis, check our beginner-friendly learning resources for step-by-step courses, hands-on tutorials, and active grower forums that cover everything from setup to curing. For a step-by-step beginner's guide on how to home grow, see how to home grow. For a practical, step-by-step DIY guide to home cultivation techniques, see the how to grow weed homemade guide. For a step-by-step guide on how to grow weed plants small at home, consult a focused how-to resource. The growing journey from a first closet crop to a dialed-in tent with trained plants and a proper cure is one of the most satisfying learning curves you can go through. Start with a legal setup, choose forgiving genetics (a compact autoflower is ideal for your first run), keep your environment within the temperature and humidity ranges above, and do not overcomplicate it. The plants do most of the work once you have the basics right.
FAQ
Can I legally grow cannabis in my house?
It depends on where you live. Laws vary by country, state/province, and even municipality or HOA. Common limits in North America range from 2–6 plants per person or household for adults; medical programs may allow larger allotments. Many places also require plants to be in an enclosed, non‑visible, locked space and prohibit sale or distribution. Always check: (1) national/federal law, (2) state/provincial statute and agency rules, (3) city/county ordinances, and (4) lease/HOA covenants and public‑housing rules before starting.
What is a clear legal checklist I should follow before starting a home grow?
1. Confirm adult home‑cultivation is legal where you live and note plant limits (per person and household). 2. Check whether medical vs. recreational rules differ. 3. Verify indoor vs. outdoor or visibility restrictions. 4. Review landlord/lease, HOA/CC&Rs and public‑housing policy. 5. Determine whether local permits, odor/security rules, or waste/disposal requirements apply. 6. Understand sale/transfer prohibitions and home production recordkeeping if required. 7. Check building/electrical codes before modifying circuits or HVAC. 8. Keep copies of statutes/regulations and comply with privacy/security requirements.
What’s a simple step‑by‑step seed‑to‑harvest workflow for a beginner?
1. Legal check and plan space. 2. Choose strain and seeds (see guidance). 3. Germinate seeds (paper towel, 24–72 hrs) or take clones. 4. Start seedlings in small pots under gentle light for 1–3 weeks. 5. Vegetative stage: transplant to final containers, increase light and nutrients until ready to flower (2–8+ weeks). 6. Switch to flowering (photoperiod strains: 12/12 light cycle; autos: continue same light). 7. Flowering: monitor trichomes, control humidity/temperature, manage pests and nutrients (6–12 weeks depending on strain). 8. Flush (optional) 7–14 days before harvest. 9. Harvest when trichomes/ pistils indicate maturity. 10. Hang dry in controlled RH/temp, then cure in jars for 1–4+ weeks. 11. Dispose waste securely and legally; keep harvest/use within allowed limits.
How do I choose strains and seeds, including small and autoflower varieties?
Answer choice depends on space, experience and legal limits. For small spaces or stealth grows pick: - Autoflowering strains: compact, faster (8–12 weeks seed‑to‑harvest), no light‑cycle switch; good for beginners and discreet grows. - Low‑stretch indica or “dwarf” hybrid strains: naturally short and bushy for limited height. - Feminized seeds: reduce male‑plant risk and eliminate need to identify males. - Regular seeds: for breeders or hobbyists wanting males. Buy from reputable seed banks with germination guarantees and strain lab reports when possible. Prioritize strains with documented yields, terpene profiles and predictable flowering times. If limited by plant counts, choose high‑yielding compact strains or consider multiple staggered autos for continuous small harvests.
Indoor vs. outdoor vs. hydroponic — which setup is best for a house grower?
It depends on priorities: - Indoor (soil or coco): best for control, privacy, year‑round grows, and small spaces. Requires lights, ventilation and odor control. - Outdoor: lowest cost, uses natural sun, larger yields but less privacy, seasonal, and subject to weather/visibility rules. - Hydroponic/soilless: faster growth and higher yields in small footprints but requires more technical skill and monitoring. For most residential beginners, an indoor soil/coco grow in a closet/tent balances cost, simplicity and control. Advanced growers may adopt hydroponics for performance.
What are low‑cost DIY small‑space plans I can use?
1. Closet/wardrobe tent: use a 2×2–3×3 ft tent or DIY reflectant interior, small inline fan (exhaust), carbon filter for odor, LED grow light (100–300W equivalent), oscillating clip fan, 3–7 gallon pots, and basic nutrients. 2. Micro‑cabinet: build a sealed cabinet with reflective lining, small LED bar and passive intake vents; suitable for 1–2 plants. 3. Porch or balcony outdoor: use large pots, netting for visibility/odor control, and odor‑reducing companion plants. 4. Simple DWC (deep water culture) bucket: 3‑5 gallon bucket, air pump, stone, net pot and hydro media; good intro to hydro at low cost. Always add a thermometer/hygrometer and GFCI outlet protection for electrical safety.
How to Grow Weed Plants Small at Home: Indoor Guide
Step-by-step indoor guide to keep cannabis small: setup, germination, training, feeding, troubleshooting, and harvest wo