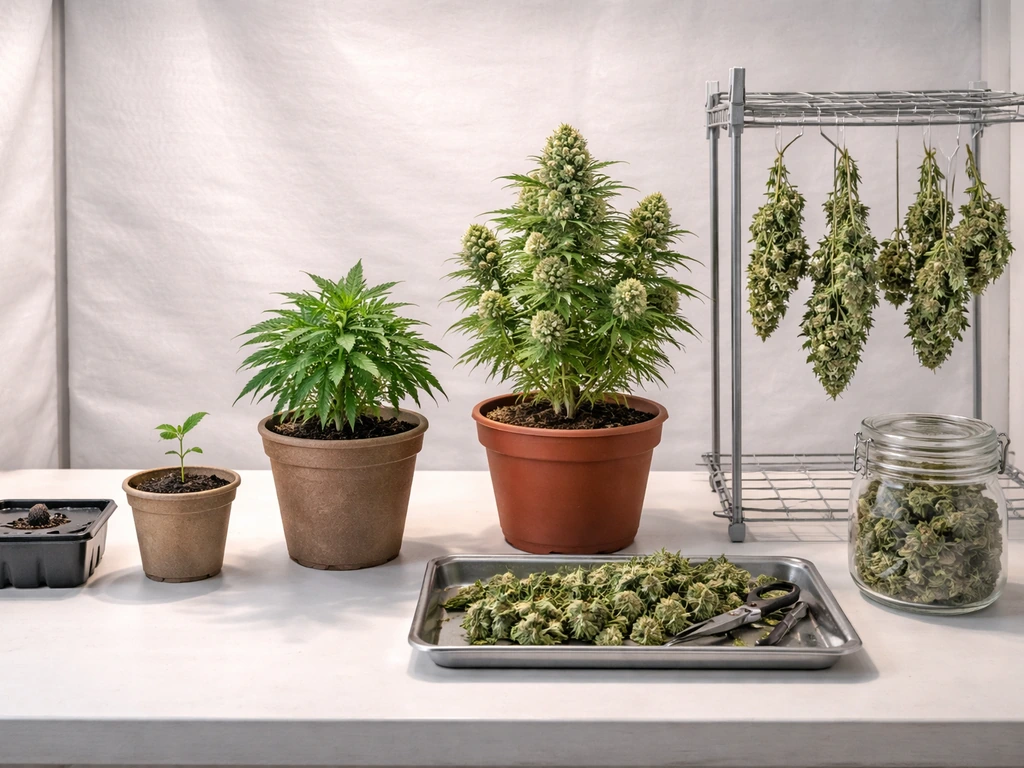
Growing giant cannabis plants is absolutely achievable at home, indoors, outdoors, or in a hydroponic setup, but it takes the right genetics, enough root space, dialed-in nutrition, and a clear understanding of your local plant-count limits before you ever drop a seed. Done right, a single well-trained outdoor sativa can exceed 3 meters and yield several hundred grams. An indoor plant trained with a SCROG net and strong lighting can fill a 1.2 m x 1.2 m tent on its own. This guide walks you through every stage of the process, from choosing seeds to drying your harvest, with the legal groundwork built in from the start.
How to Grow Giant Cannabis Plants: Complete Seed-to-Harvest Guide

Marcus Holbrook
10 Aug 2026
Before you start: scope, safety, and the legal reality
Cannabis cultivation laws vary enormously depending on where you live, and the rules around plant counts are specific and non-negotiable. In Canada, the federal Cannabis Act allows adults of legal age to grow a maximum of four cannabis plants per household (not per person, so two adults sharing a home still share that four-plant limit). Several provinces have imposed additional restrictions, and municipal bylaws can layer on top of those. In California, adults 21 and older may grow up to six living plants per private residence under Health and Safety Code §11362.2, but local ordinances in cities like Los Angeles frequently add requirements around locked spaces and visibility from public areas. Oregon mirrors Canada's federal limit at four plants per household. Colorado allows up to six plants per person, with a common household ceiling of twelve. Washington State has been working through legislative changes on home cultivation, it was effectively prohibited for recreational growers for years, and while bills in 2024 and 2025 proposed allowing four to six plants per adult, the rules were still subject to final enactment as of early 2026, so check the Washington State Liquor and Cannabis Board website before acting. And regardless of what your state or province permits, cannabis remains a Schedule I substance under the U.S. federal Controlled Substances Act, federal prohibition has not changed. Always verify your current local rules before you grow a single plant.
On the safety side: large indoor grows draw significant electrical power. DIY wiring for high-wattage lights is a genuine fire hazard, and Health Canada specifically flags electrical and fire risks in its home grow safety guidance. Use licensed electricians for any new circuits, follow manufacturer guidelines for your lighting equipment, and keep your grow space well ventilated. If you are in Canada, use seeds or seedlings sourced from a licensed supplier as required under the Cannabis Act.
What to expect: seed to harvest at a glance
A photoperiod sativa or large hybrid grown outdoors from seed typically follows this timeline: germination takes 3 to 7 days, seedling stage runs 2 to 3 weeks, vegetative growth from late spring through mid-summer can last 10 to 16 weeks (and this is where giant plants are made), with flowering triggered by shortening days in late summer and taking 9 to 14 weeks depending on genetics. Total time from seed to harvest for a full-season outdoor plant is commonly 6 to 7 months. Indoors you control the vegetative period yourself, most growers run 8 to 16 weeks of veg for a large plant, and then flip to a 12/12 light cycle to trigger flowering, which typically takes 8 to 12 weeks. Hydroponic grows tend to run slightly faster because nutrients are delivered directly to the root zone, but the timeline is otherwise similar. Yield expectations for a well-grown giant outdoor plant commonly fall in the range of 500 grams to well over 1 kilogram (dry), though genetics, climate, and your skill level all play a major role. Indoors, a single plant in a large container under strong light might realistically yield 150 to 400 grams dry with good technique.
Printable 7-step checklist
Use this checklist as a quick reference throughout your grow. You can print it or save it as a PDF from your browser for easy access in the garden or grow room. A more detailed step-by-step guide is also available as a companion resource on this site. For a focused checklist of supplies and minimal setup for a single plant, see our quick reference: what do I need to grow one cannabis plant (link to internal guide). A step-by-step companion is also available as a downloadable 7 steps to grow cannabis PDF for offline use and printing.
- Confirm your local plant-count rules and any zoning or licensing requirements before purchasing seeds or equipment.
- Choose your genetics: select a variety known for large stature (long internodes, strong stretch) appropriate for your growing environment and experience level.
- Set up your environment: finalize your site (indoor tent, outdoor plot, greenhouse, or hydroponic system), install lighting, ventilation, and irrigation before germination.
- Germinate and establish: sprout seeds, nurse seedlings under low-intensity light (18+ hours indoors), and transplant into a starter container once the first true leaves appear.
- Vegetate and train: grow under an 18/6 light schedule indoors (or natural long days outdoors), top or LST early, and transplant into progressively larger containers to match root growth.
- Flip and flower: switch to 12/12 light indoors (or allow natural day-length shortening outdoors), install support stakes or trellis, and dial in your flowering nutrient schedule.
- Harvest, dry, and cure: check trichomes with a loupe or microscope, harvest at peak ripeness, dry slowly in a controlled environment (60–70°F, 45–55% RH, 10–14 days), then cure in sealed jars for a minimum of 2 to 4 weeks.
Choosing genetics for giant plants
Genetics is probably the single biggest factor in whether a plant reaches 1 meter or 4 meters. You cannot train a naturally compact indica into a skyscraper, but you can absolutely work with genetics that want to grow big and help them reach their potential. Here is what you need to understand about the main categories.
Sativa vs indica vs hybrid
Sativa-leaning genotypes typically produce longer internodal spacing and a pronounced flowering stretch, the height surge that happens after you switch to a short-day photoperiod. Research published in Plants (MDPI, 2025) confirmed that internodal length and overall height in Cannabis sativa responds measurably to photoperiod changes. Indica-leaning genetics, by contrast, tend toward compact growth, shorter internodes, and a much more modest stretch. For step-by-step advice on how to grow indica outdoors, see our guide on how to grow indica outdoors. For specific growing tips for indica varieties, see canna indica how to grow. Modern varieties are heavily hybridized, so you cannot rely on the name alone, check the breeder's published phenotype data for expected height and stretch. Classic sativa landraces and sativa-dominant hybrids like Durban Poison, Amnesia Haze, and Haze-line varieties are commonly described by seedbanks as reaching 2 to 4-plus meters outdoors, though actual height varies by phenotype and growing conditions. If maximum size is your goal, prioritize sativa-dominant or large hybrid varieties with documented tall phenotypes. If you are growing indoors and want a more manageable giant, look for indica-dominant hybrids with moderate stretch that you can enhance through training.
Photoperiod vs autoflower
Photoperiod plants (the vast majority of named strains) will keep growing vegetatively as long as you give them long days or 18-plus hours of light. This is what allows giant plants, you control exactly when to flip. Autoflowers are bred to flower based on age rather than light cycle, which means you cannot extend vegetative growth indefinitely. Most autos top out at 60 to 120 cm regardless of what you do. For giant plants, stick with photoperiod genetics. Autoflowers are excellent for quick, discreet, or low-maintenance grows, but they are not the path to a 3-meter plant.
High-stretch varieties worth considering
- Durban Poison (pure sativa landrace): extremely stretchy, can reach 3 meters-plus outdoors, long flowering period (9–11 weeks)
- Amnesia Haze (sativa-dominant hybrid): significant stretch, performs well outdoors in warm climates, 10–12 week flower
- Haze-line varieties (e.g., Super Silver Haze, Neville's Haze): legendary for height and stretch, best suited to warm long-season outdoor climates
- Jack Herer (sativa-dominant hybrid): tall with strong branching, more manageable than pure sativas but still impressively large
- Large sativa-dominant hybrids from established breeders: look for stated outdoor heights above 200 cm in the breeder's spec sheet
Understanding legal limits and how to stay compliant
I want to spend some real time on this because I have seen growers assume that "legal" in their state or province means anything goes. It does not, and the consequences of being over your plant limit are serious even in jurisdictions where home cultivation is otherwise permitted.
How to research your local rules
- Start at the federal or national level: in Canada, read the Cannabis Act on the Justice Laws website; in the U.S., note that federal law prohibits cultivation entirely under the Controlled Substances Act regardless of state rules.
- Check your state or provincial law directly: use the official government or liquor/cannabis control board website, not a third-party summary.
- Check your municipality or county: many cities add restrictions (visibility rules, locked-space requirements, outright bans even where state law permits cultivation).
- If you are in an HOA or renting, check your lease or HOA rules: even where cultivation is legal, private agreements may prohibit it.
- Set a calendar reminder to recheck annually: laws change, and what was true when you read this may have been updated.
Plant-count rules by jurisdiction (reference table)
| Jurisdiction | Adult plant limit | Key condition | Notes |
|---|---|---|---|
| Canada (federal) | 4 per household | Cannabis Act; two+ adults in same home still share the 4-plant limit | Provinces/territories may add stricter rules; seeds from licensed suppliers required |
| California | 6 per private residence | 21+; plants/excess cannabis must be in locked space, not visible from public areas | Municipal ordinances commonly add requirements; consult your city |
| Oregon | 4 per household | 21+ | OLCC enforces household cap |
| Colorado | 6 per person (up to 12 per household) | 21+; no more than 3 flowering per person at a time common interpretation | Local governments may enact specific rules |
| Washington State | Status evolving 2024–2026 | Bills proposed 4–6 plants per adult with per-unit ceilings | Check current WSLCB page before acting; historically prohibited |
| United States (federal) | Prohibited | Schedule I under Controlled Substances Act | State legalization does not change federal prohibition |
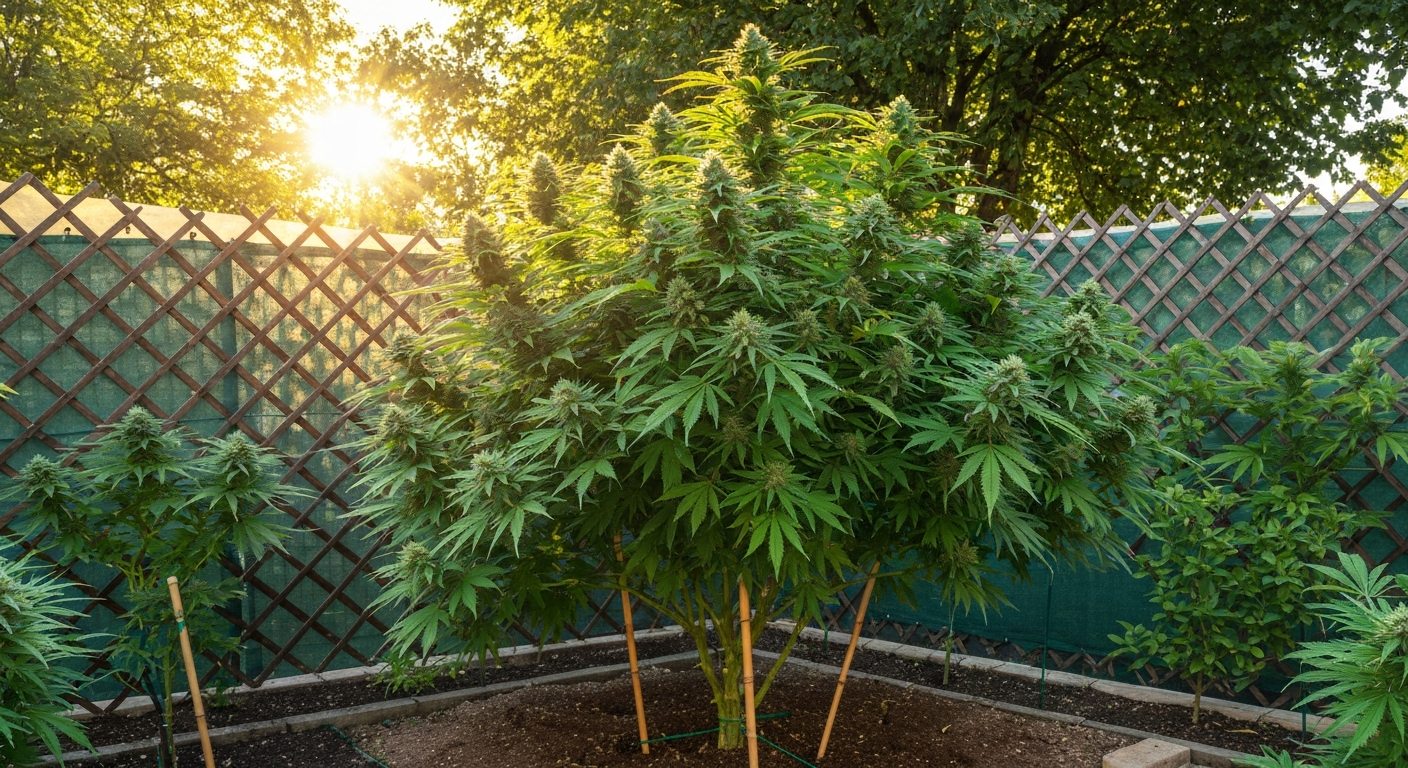
Privacy considerations matter too. Even where cultivation is legal, most jurisdictions require that plants not be visible from public areas, this is written directly into California's statute, for example. Tall outdoor sativas can be seen from a significant distance. Fencing, privacy screens, or greenhouse growing are practical solutions that also happen to keep you compliant with visibility rules.
Site selection: indoor, outdoor, greenhouse, and hydroponic
Each growing environment has genuine advantages and real limitations. None of them is inherently superior, they just suit different goals, climates, and budgets. Here is how to think through each option for giant-plant growing specifically.
Indoor
Indoor growing gives you total control over light schedule, temperature, humidity, and CO2, which means you can run a long vegetative period to build a massive plant structure before flipping to flower. The limitation is ceiling height, a plant that wants to stretch 3 meters outdoors needs to be trained aggressively indoors to stay in the light footprint. Rooms with ceilings of 2.5 meters or more give you real options for large plants. High-output LED or double-ended HPS fixtures can deliver the 600 to 1,200 µmol/m²/s PPFD levels that research links to high inflorescence yields. Peer‑reviewed canopy‑level PPFD experiments reported that cannabis inflorescence yield and photosynthetic responses increased with higher light intensity across broad ranges (approximately 120 to >1,500 µmol·m⁻²·s⁻¹), with morphological and quality tradeoffs at extreme photon fluxes blank" rel="noopener noreferrer">Cannabis yield, potency, and leaf photosynthesis respond differently to increasing light levels in an indoor environment — PLoS / PMC (peer‑reviewed). Commercial LED systems like Fluence's SPYDR series are designed specifically to hit these PPFD ranges across a wide canopy. The Fluence SPYDRx PLUS, product specification (manufacturer / horticultural LED) lists PPF and recommended canopy PPFD ranges that manufacturers use for commercial layout and fixture selection blank" rel="noopener noreferrer">Fluence SPYDRx PLUS — product specification (manufacturer / horticultural LED). The cost of electricity is the main ongoing expense. Indoor grows also require careful attention to fire safety and electrical load, this is not an area to cut corners.
Outdoor
Outdoors is where cannabis genuinely becomes giant. A sativa planted directly in the ground in a warm, long-season climate with full sun all day has essentially no ceiling. The sun delivers free, full-spectrum light at PPFD levels that would be prohibitively expensive to replicate indoors. The tradeoffs are that you are dependent on your local climate, your growing season is fixed by the calendar, and you have much less control over temperature swings, humidity, and pests. Privacy and visibility compliance are also a real concern for tall outdoor plants. Regions with warm summers and a long growing season (think Mediterranean-style climates, Southern California, parts of British Columbia, much of Australia) are ideal for giant sativas. Cooler or shorter-season climates may require starting plants indoors in late winter to get enough vegetative time before outdoor transplant.
Greenhouse
A greenhouse is genuinely the best of both worlds for giant plants. You get natural sunlight (which is free and hard to beat for raw intensity), protection from rain and wind that can damage tall plants, and the ability to use light deprivation techniques to trigger early flowering if you want to avoid the full outdoor season. Greenhouses also address the visibility compliance issue that tall outdoor plants present. The investment in a proper structure is higher upfront, but the running costs are far lower than a comparable indoor setup.
Hydroponic
Hydroponics delivers nutrients directly to the root zone in water, which typically accelerates vegetative growth and can result in larger plants in less time compared to soil. Deep water culture (DWC), nutrient film technique (NFT), and drain-to-waste systems are all used for large cannabis plants. The tradeoff is that hydro systems require more technical knowledge, more precise pH and EC monitoring, and the consequences of a system failure (pump dies, reservoir overheats) are faster and more severe than in soil. That said, some of the largest and fastest-growing cannabis plants I have seen were grown in DWC systems with large reservoirs.
| Environment | Max potential size | Control level | Cost to set up | Skill level needed | Best for |
|---|---|---|---|---|---|
| Indoor tent/room | Large with training (ceiling-limited) | Very high | Medium to high | Beginner to intermediate | Year-round, climate-limited regions |
| Outdoor in-ground | Potentially 3–4+ meters | Low (weather-dependent) | Low | Beginner | Warm long-season climates |
| Greenhouse | Very large (height-limited by structure) | Medium-high | Medium to high | Intermediate | Best overall for giant plants |
| Hydroponic | Large, fast growth | High | Medium to high | Intermediate to advanced | Fastest vegetative gains, indoor or greenhouse |
What you need at each scale
Your equipment list scales with your grow. Here are practical checklists for three scenarios: a single plant, a small multi-plant setup, and a larger grow. These are meant as starting points, your specific environment will shape the final list.
One plant (beginner setup)
- 1 seed from a licensed or legal source
- Small starter pot (7–10 cm) then final container (minimum 25–50 L for a large plant, more is better)
- Quality potting mix (peat/coco/perlite blend) or coco coir
- Basic pH meter and pH up/down solutions (target 6.0–7.0 for soil, 5.5–6.5 for coco/hydro)
- Nutrients: grow (high N), bloom (high P/K), and cal-mag supplement
- Light: minimum 200W true-power LED for seedling through veg; upgrade to 400–600W for flower
- Small oscillating fan for airflow and stem strengthening
- Timer for lights
- Thermometer and hygrometer
- Bamboo stakes or trellis netting for support
- Watering can or simple drip system
Small multi-plant setup (2–6 plants indoors)
- 1.2 m x 1.2 m or 2.4 m x 1.2 m grow tent
- 600W–1,000W LED or double-ended HPS (check local electrical capacity)
- Inline fan with carbon filter (for odor control — critical for privacy and compliance)
- Oscillating fans (2 minimum)
- Environmental controller or separate timer + thermostat
- pH meter, EC/TDS meter
- Nutrient system: 3-part base nutrients plus cal-mag, pH up/down
- Multiple containers (25–50 L minimum per plant for large growth)
- Quality growing medium
- Trellis netting or SCROG screen
- Plant stakes and soft ties
- Spray bottle for foliar work
- Jeweler's loupe or digital microscope for harvest timing
Larger grow or hydroponic system
- Dedicated grow room or large greenhouse (ceiling height 2.5 m minimum for indoor)
- High-output lighting: commercial LED arrays (e.g., Fluence SPYDR-class fixtures) targeting 800–1,200 µmol/m²/s at canopy; or full sun for outdoor/greenhouse
- CO2 supplementation system if running PPFD above 1,000 µmol/m²/s indoors
- Hydroponic reservoir (minimum 100–200 L for DWC with large plants), air pump, air stones, recirculating pump
- EC and pH dosing system (auto-dosers for larger systems)
- Reverse osmosis water filter (recommended for hydro and large soil grows)
- Multi-channel environmental controller (temperature, humidity, CO2, VPD)
- Heavy-gauge plant support (tomato cages, horizontal trellis layers, bamboo stakes minimum 1.8 m)
- Pest management supplies: HEPA air filtration, sticky traps, predatory insects for IPM
- Harvest equipment: trimming scissors, drying racks, sealed drying room with dehumidifier
- Properly rated electrical circuits installed by a licensed electrician
Container strategy, pot size, and why roots are everything
How cannabis roots grow and why root mass drives plant size
This is one of the things I got wrong early on: I consistently under-potted, then wondered why my plants plateaued. Cannabis roots grow in all directions from the base of the stem, branching into progressively finer lateral roots and root hairs that are responsible for the actual uptake of water and nutrients. The root system essentially mirrors the canopy, a plant that is going to reach 2 meters above ground needs an equivalent volume of healthy root structure below ground to support that biomass. When roots hit the wall of a container, they circle the pot (a phenomenon called root-binding or pot-bound), which stresses the plant and limits uptake. A healthy, extensive root mass means more surface area for nutrient and water absorption, better drought tolerance, stronger structural anchoring, and the ability to actually use the nutrients you are providing. In outdoor in-ground grows, cannabis can push roots more than 1 meter deep and equally wide, which is part of why in-ground giant plants dwarf potted ones. In containers, your job is to provide the largest practical volume of well-aerated growing medium. For a deeper explanation of root development and structure, see our internal guide on how do cannabis roots grow.
Matching pot volume to plant size
| Target plant size | Minimum pot volume | Recommended pot volume | Notes |
|---|---|---|---|
| Small (under 60 cm) | 11 L (3 gal) | 18 L (5 gal) | Good for autos or short indicas |
| Medium (60–120 cm) | 25 L (7 gal) | 38–50 L (10–13 gal) | Suitable for most indoor photoperiods |
| Large (120–200 cm) | 50 L (13 gal) | 75–100 L (20–26 gal) | Large indoor or short outdoor season |
| Giant (200 cm+) | 100 L (26 gal) | 200 L+ (55 gal+) or in-ground | Full-season outdoor or long-veg indoor |
Fabric pots vs hard pots
Fabric (smart) pots have genuinely changed how I approach container growing. The porous fabric allows air to reach the outer root zone, which causes air-pruning, when a root tip reaches the air at the edge of the pot, the tip desiccates and the root instead sends out multiple lateral branches. This produces a dense, branching root mass rather than circling roots, and it dramatically improves the root-to-pot-volume ratio. Fabric pots also drain more freely and are harder to overwater. The main downside is that they dry out faster (which can mean more frequent watering in hot weather) and they are harder to move when heavy. Hard plastic pots are cheaper and easier to move, but they benefit from being filled with a very airy mix (30–40% perlite) to compensate for the lack of air pruning. For giant plants, fabric pots in the 100- to 200-liter range are an excellent choice.
Transplant staging plan
Transplanting into progressively larger containers (rather than putting a seedling directly into a 100 L pot) is important because roots develop in proportion to the available space and oxygen. A seedling in a giant pot tends to stay wet in the root zone while roots are sparse, which encourages root rot. Stage your transplants like this: seedling in a 500 mL to 1 L cup, first transplant to an 8–11 L pot when roots reach the edges (usually 2–3 weeks), second transplant to 25–50 L when that container is well-rooted (another 3–5 weeks), and final transplant to your giant container (100 L+) before the major vegetative push. For outdoor giant plants, the final transplant ideally happens in early spring so roots can establish before the main growth surge.
Vegetative growth: building the giant frame
Vegetative growth is where you build the architecture that will support your yield. Indoors, this stage is entirely in your control, you maintain 18 hours of light and 6 hours of darkness (18/6) to keep plants growing without triggering flower. Outdoors, plants veg naturally while day length stays above roughly 14 to 16 hours, which in most mid-latitude locations means late spring through mid-summer. For a truly giant plant, a minimum of 8 weeks of active vegetative growth is typical, and 12 to 16 weeks is common for the largest plants.
Training techniques for maximum size and yield
Training does two things for giant plants: it increases the number of productive bud sites, and it keeps the canopy even so more surface area receives optimal light intensity. Here are the main techniques, in rough order of stress level:
| Technique | What it does | When to use | Skill level |
|---|---|---|---|
| LST (low-stress training) | Bends and ties branches outward to open canopy; no cutting | From week 2–3 of veg onward | Beginner |
| Topping | Removes the main growing tip; creates two main colas | Once plant has 4–6 nodes | Beginner |
| Main-lining (manifolding) | Creates a symmetrical structure with equal-length branches from a single node; maximizes even bud distribution | Week 3–5 of veg; requires several rounds of topping and tying | Intermediate |
| SCROG (screen of green) | Weaves branches through a horizontal net to fill a defined footprint with even canopy | Mid-veg; net added when canopy approaches screen height | Intermediate |
| Supercropping | Crushes and bends main stems to create a knuckle; allows horizontal positioning of tall branches without cutting | Mid-to-late veg; useful for managing height | Intermediate to advanced |
| Defoliation | Removes large fan leaves blocking light penetration; improves airflow | Selectively during late veg and early flower | Intermediate |
For maximum size outdoors, LST and topping early are the most impactful techniques. Bending the main stem and tying it down at a 90-degree angle when the plant is 30 to 40 cm tall encourages lateral branching and produces a wide, bushy structure with many top colas rather than one dominant central stem. Indoors, SCROG is often the highest-yielding approach because you can fill your entire light footprint with productive canopy. Main-lining is excellent if you want a tidy, symmetrical plant that is easy to support at scale.
Vegetative environment targets
| Parameter | Target range | Notes |
|---|---|---|
| Light (PPFD at canopy) | 200–600 µmol/m²/s | Lower end for seedlings; ramp up through veg |
| Photoperiod | 18 hours on / 6 hours off | Indoor; maintain until ready to flip |
| Temperature (lights on) | 22–28°C (72–82°F) | Aim for 24–26°C as sweet spot |
| Temperature (lights off) | 18–24°C (64–75°F) | Avoid cold drafts on roots |
| Relative humidity | 50–70% | Higher humidity supports faster growth; watch for mold as plants get dense |
| CO2 (ambient) | 400–700 ppm | Supplementation beneficial above ~600 µmol/m²/s PPFD |
| Airflow (VPD) | 0.6–1.0 kPa | Use a VPD chart combining temp and RH |
Flipping to flower: when and how
Indoors, you trigger flowering by switching the timer to 12 hours of light and 12 hours of complete darkness. Outdoors, the plant does this on its own as days shorten in late summer. The timing of the flip is a critical decision point. Remember that most sativa and sativa-dominant varieties will stretch 50 to 100 percent of their pre-flip height during the first 2 to 3 weeks of flower (the flowering stretch). A plant that is 80 cm tall when you flip might reach 150 to 160 cm by the time stretch ends. Plan accordingly for your ceiling height indoors. Outdoors, this is less of a concern, but knowing when your local day length drops below about 14 hours helps you predict when flowering will begin naturally. For indoor growers, a common rule of thumb is to flip when the plant is at roughly half the maximum height your space allows.
Flowering environment targets
| Parameter | Target range | Notes |
|---|---|---|
| Light (PPFD at canopy) | 600–1,200 µmol/m²/s | Higher end requires CO2 enrichment for efficiency; peer-reviewed data confirms yield scales with PPFD in this range |
| Photoperiod | 12 hours on / 12 hours off | Darkness must be complete indoors — any light leak can disrupt flowering |
| Temperature (lights on) | 20–26°C (68–79°F) | Slightly cooler than veg helps terpene retention |
| Temperature (lights off) | 16–22°C (61–72°F) | A day/night differential of 5–10°C is normal and healthy |
| Relative humidity | 40–50% (early flower); 35–45% (late flower) | Lower humidity in late flower reduces mold risk significantly |
| CO2 (with supplementation) | 1,000–1,500 ppm | Only beneficial at PPFD above ~800 µmol/m²/s |
| Airflow (VPD) | 1.0–1.5 kPa | Increase airflow as canopy density grows |
Supporting giant plants in flower
Heavy buds on a giant plant will pull branches down and can snap them at the base, I have lost entire colas this way. Install your support structure before flowering begins, not after. Horizontal trellis netting (SCROG-style) works excellently indoors, with the net holding branches in place throughout flower. Outdoors, bamboo stakes or rebar driven at least 30 cm into the ground, tied to main branches with soft plant ties, are the most practical solution. For very large outdoor plants, a tomato cage design scaled up with rebar and garden wire can support an entire 3-meter plant. Check supports weekly during the stretch phase as branches elongate rapidly.
Nutrients and watering: feeding a giant plant
Cannabis plants have different nutrient needs at each stage, and feeding a giant plant means managing these at scale. The two key metrics you need to understand are pH (which determines nutrient availability) and EC/PPM (which measures the concentration of dissolved nutrients in your feed water). Get these wrong and your plant cannot access what you are giving it, regardless of how expensive your nutrient line is.
pH targets by medium
- Soil: 6.0–7.0 (optimal around 6.2–6.8)
- Coco coir: 5.5–6.5 (optimal around 5.8–6.2)
- Hydroponic (DWC, NFT): 5.5–6.5 (optimal around 5.8–6.0)
- Check runoff pH and adjust feed solution accordingly — persistent runoff drift indicates a buffering issue or salt buildup
Feeding schedule template
| Growth stage | N-P-K emphasis | Target EC (mS/cm) | Target PPM (500 scale) | Key supplements |
|---|---|---|---|---|
| Seedling (weeks 1–2) | Minimal; rely on starter soil or very dilute feed | 0.4–0.8 | 200–400 | None; just pH'd water often sufficient |
| Early veg (weeks 3–5) | High N, moderate P, moderate K | 0.8–1.4 | 400–700 | Cal-mag (especially in coco/RO water) |
| Late veg (weeks 6–flip) | High N, moderate P, moderate K | 1.4–2.0 | 700–1,000 | Cal-mag; silica beneficial for stem strength |
| Early flower / stretch (weeks 1–3 of flower) | Transitioning: reduce N, increase P and K | 1.6–2.2 | 800–1,100 | Cal-mag; begin bloom booster |
| Mid flower (weeks 4–7) | Low N, high P, high K | 1.8–2.4 | 900–1,200 | PK booster; amino acids or fulvic acid |
| Late flower / ripening (weeks 8–harvest) | Very low N, moderate P, moderate K; taper off | 1.0–1.6 tapering to plain water | 500–800 tapering | Flush or taper nutrients in final 10–14 days |
Watering frequency scales with plant size, pot size, and temperature. The general rule: water when the top 2 to 5 cm of the growing medium is dry (for soil/coco in containers), or when the pot has lost about 30 percent of its weight (the lift-test method). Overwatering is the most common mistake at all experience levels. In hydro systems, the reservoir should be maintained at a consistent volume with fresh nutrient solution added daily or as consumed, with full reservoir changes every 7 to 10 days. Always pH-adjust after mixing nutrients, not before.
Pest and disease prevention
Giant plants represent a large investment of time and resources, which makes pest and disease prevention even more important than in a small grow. Integrated Pest Management (IPM) is the approach I recommend: prevent problems through environmental control first, monitor regularly for early signs, and only intervene with treatments when needed, starting with the least disruptive option.
Common problems and practical solutions
| Problem | Signs to watch for | Prevention | Treatment |
|---|---|---|---|
| Spider mites | Fine webbing; tiny dots on leaf undersides | Low humidity (<50%), good airflow, inspect new plants before introducing | Neem oil or insecticidal soap (veg); predatory mites (Phytoseiulus); remove heavily infested leaves |
| Fungus gnats | Small flies near soil; larvae damage roots | Allow soil surface to dry between waterings; use sticky yellow traps | Beneficial nematodes (Steinernema feltiae); hydrogen peroxide drench (3%); BTi (Bacillus thuringiensis israelensis) |
| Powdery mildew | White powdery patches on leaves and stems | Maintain RH below 50% in flower; strong airflow; prune dense interior | Remove affected growth; potassium bicarbonate or dilute hydrogen peroxide spray; improve airflow immediately |
| Botrytis (bud rot) | Grey mold inside dense buds; brown/slimy tissue | Keep flower-stage RH below 45%; strong airflow through canopy | Remove affected material immediately and completely; increase airflow; reduce RH |
| Root rot (hydro) | Brown slimy roots; wilting despite adequate water; foul smell from reservoir | Keep reservoir cool (<21°C); use hydroguard or beneficial bacteria; opaque reservoir | Full system clean; hydrogen peroxide reservoir flush; reintroduce beneficial bacteria |
| Nutrient lockout | Yellowing or discoloration despite feeding; pH usually off | Maintain correct pH range; flush periodically in soil/coco | Flush medium with pH'd water; correct pH; wait 48 hours before resuming feed |
Harvest timing and what to look for
Harvest timing has a bigger effect on the final quality of your buds than almost any other late-stage decision. The only reliable way to judge ripeness is by inspecting trichomes, the resin glands on the buds and sugar leaves, with a jeweler's loupe (30–60x) or a digital microscope. Trichomes progress from clear (immature, no peak potency) to cloudy/milky white (peak THC accumulation) to amber (THC degrading to CBN, more sedative effect). Most growers harvest when trichomes are predominantly cloudy with 10 to 30 percent amber, depending on the effect they prefer. The pistil color change (white to orange/red) is a rough indicator but not reliable enough to use alone. Calyx swelling and resin density are additional visual cues that ripeness is approaching.
Drying, curing, and yield expectations for giant plants
Drying and curing a giant plant presents a logistical challenge that smaller grows do not, you may have multiple kilograms of wet material to process at once. Plan your drying space in advance, because harvesting a 3-meter outdoor plant and having nowhere proper to dry it is a frustrating (and wasteful) situation I have seen happen more than once.
Drying protocol
Hang whole branches or trim into manageable sections and hang on drying racks in a dark room at 60 to 70°F (15 to 21°C) and 45 to 55 percent relative humidity. Good airflow around (not directly on) the buds is important. A slow dry of 10 to 14 days is ideal, faster drying at higher temperatures evaporates chlorophyll and terpenes before they can break down and off-gas properly, leaving a harsh product. Buds are ready to move to jars when the smaller stems snap cleanly rather than bending.
Curing protocol
Place dried buds loosely into sealed glass jars (Mason jars work well) and store in a cool, dark location. For the first 2 weeks, open the jars twice a day for 15 to 30 minutes (burping) to allow moisture and gases to escape. After 2 weeks, burp once daily, then every few days. A minimum cure of 2 weeks produces noticeably smoother, better-smelling cannabis than uncured product. A 4 to 8 week cure is where the quality difference becomes significant. Very long cures (3 to 6 months) can produce exceptionally smooth, complex-tasting cannabis from the right genetics. Humidity packs (62 percent Boveda or similar) inside the jars help maintain optimal storage humidity during long cures.
Yield expectations
Realistic yield ranges depend heavily on genetics, environment, and skill level, be skeptical of any source claiming guaranteed yields. As rough benchmarks: a single large indoor plant in a 100 L container under 600 to 1,000W of quality LED, with 12 to 16 weeks of veg and a full SCROG, might yield 150 to 400 grams dry. A full-season outdoor sativa in a warm climate, grown in-ground or in a 200 L container with strong nutrition, is commonly reported at 500 grams to well over 1 kilogram dry per plant. Hydroponic grows in ideal conditions can match or exceed soil yields in less time. These numbers assume no major pest or disease events and competent management throughout, which is exactly why the rest of this guide matters.
Putting it all together
Growing giant cannabis plants is a skill that compounds with each cycle. Your first large plant will teach you more than any guide can, including this one. The fundamentals that matter most: start with genetics that actually want to grow big, give roots the space and oxygen they need to match that ambition, keep your environment dialed in at each stage, and never skip the step of confirming your local plant-count rules before you start. Whether you are working with a single plant as a starting point, and there is genuinely a lot to learn from one well-grown plant, or scaling up to the legal maximum for your jurisdiction, the same principles apply. Build the plant, feed the roots, respect the law, and take your time on the cure. The results will follow.
FAQ
Is it legal for me to grow giant cannabis plants at home?
That depends on where you live. Some jurisdictions allow limited home cultivation (for example, Canada generally allows up to four plants per household; many U.S. states set per‑person or per‑household limits such as 4–6 plants or more). Federal law in some countries (e.g., the U.S.) may still prohibit cultivation even if state law permits it. Always check current federal, state/provincial, and municipal laws, follow plant‑count and visibility/locked‑area requirements, and keep records if required by local rules.
How do I choose genetics if my goal is very large plants and high yield?
Choose sativa‑dominant or landrace genetics for natural tallness and greater flowering stretch; indica‑dominant types tend to be shorter and bushier. Hybrids vary — review breeder phenotype notes, flowering stretch, and outdoor height ranges. For giants, prioritize vigorous vegetative growth, proven outdoor performance (if growing outside), and stable photosynthetic efficiency under your planned light and nutrient regime.
Should I grow indoors, outdoors, or hydroponically to maximize plant size?
Outdoors gives the most vertical space and natural light for very tall plants but is subject to seasonal limits, local visibility and theft risk, and zoning/plant‑count laws. Indoor grows give complete environmental control and year‑round production but require large height capacity, stronger lights, and more equipment to scale plants. Hydroponics can accelerate growth and root mass in controlled systems, often producing faster growth and higher yields in a given footprint, but it demands tighter monitoring and more technical knowledge.
What pot size and container strategy encourages massive root systems?
For giant plants use progressively larger containers during early growth or start in final large pots (e.g., 20–100+ liters/5–26+ gallons depending on final size). Air‑pruning containers (fabric pots, smart pots), LST‑friendly wide pots, and deep, well‑aerated media encourage root branching. Transplant carefully to avoid root shock, keep roots moist but not waterlogged, and avoid repeatedly constraining roots late in veg. Match container size to how long you plan to veg and the plant’s expected final volume.
How do cannabis roots grow and how can I encourage a massive root system?
Roots expand outward and downward seeking moisture, oxygen and nutrients. Encourage mass by: using airy, well‑draining media; providing consistent moisture cycles (allow partial dry‑down); using air‑pruning pots or adding perlite to media; maintaining rootzone temperature ~18–24°C (65–75°F); giving adequate calcium, magnesium and phosphorus during root establishment; employing beneficial microbes/mycorrhizae and humic substances; avoiding prolonged overwatering or compacted media.
When should I flip to flower if I want very tall plants?
Delay the switch until the plant has the desired vegetative structure and enough nodes to support multiple colas post‑stretch. For maximum height, many growers veg for several weeks to months (4–12+ weeks depending on genetics and space). Remember plants typically stretch after the photoperiod flip (often 25–50% or more height increase for many sativas); account for expected stretch to avoid hitting ceilings or lights.
Next Article
7 Steps to Grow Cannabis PDF: Seed to Harvest Guide
Seed-to-harvest 7-step cannabis grow guide with strain choice, setup, pests, drying and curing for home beginners.